
Latest & Greatest

Biscoff Cookie Butter Cinnamon Rolls Delightful Treat
Craving a warm, gooey treat? These Biscoff Cookie Butter Cinnamon Rolls are your answer! I’ll guide you through every step,
Read more…
Buffalo Cauliflower Bites Crispy and Flavorful Treat
Are you ready to enjoy a crispy and flavorful treat? Buffalo Cauliflower Bites are the perfect snack for any occasion.
Read more…
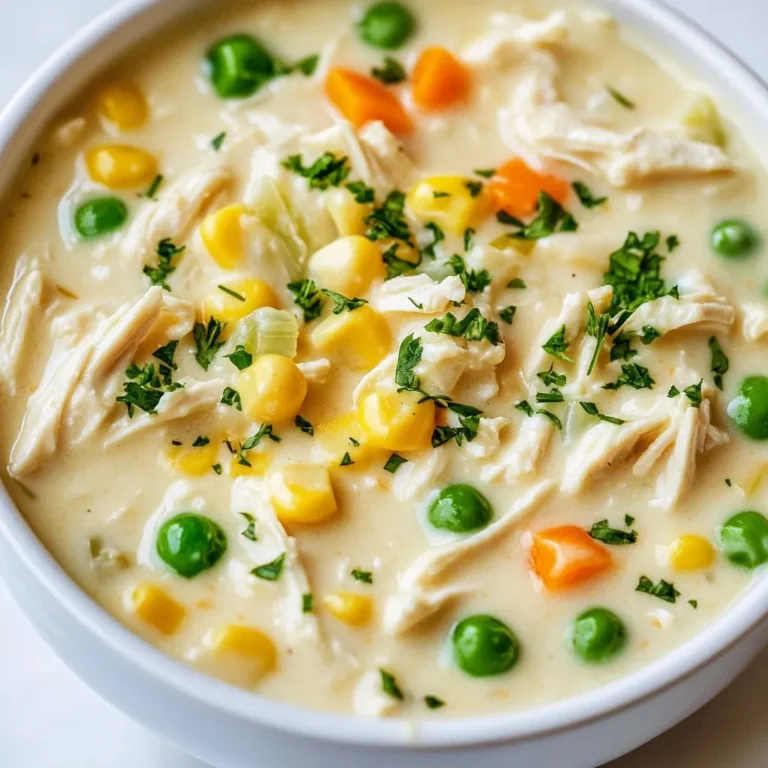
Savory Herb Roasted Chicken Flavorful Dinner Delight
Are you ready to impress your family with a meal they’ll rave about? My Savory Herb Roasted Chicken is the
Read more…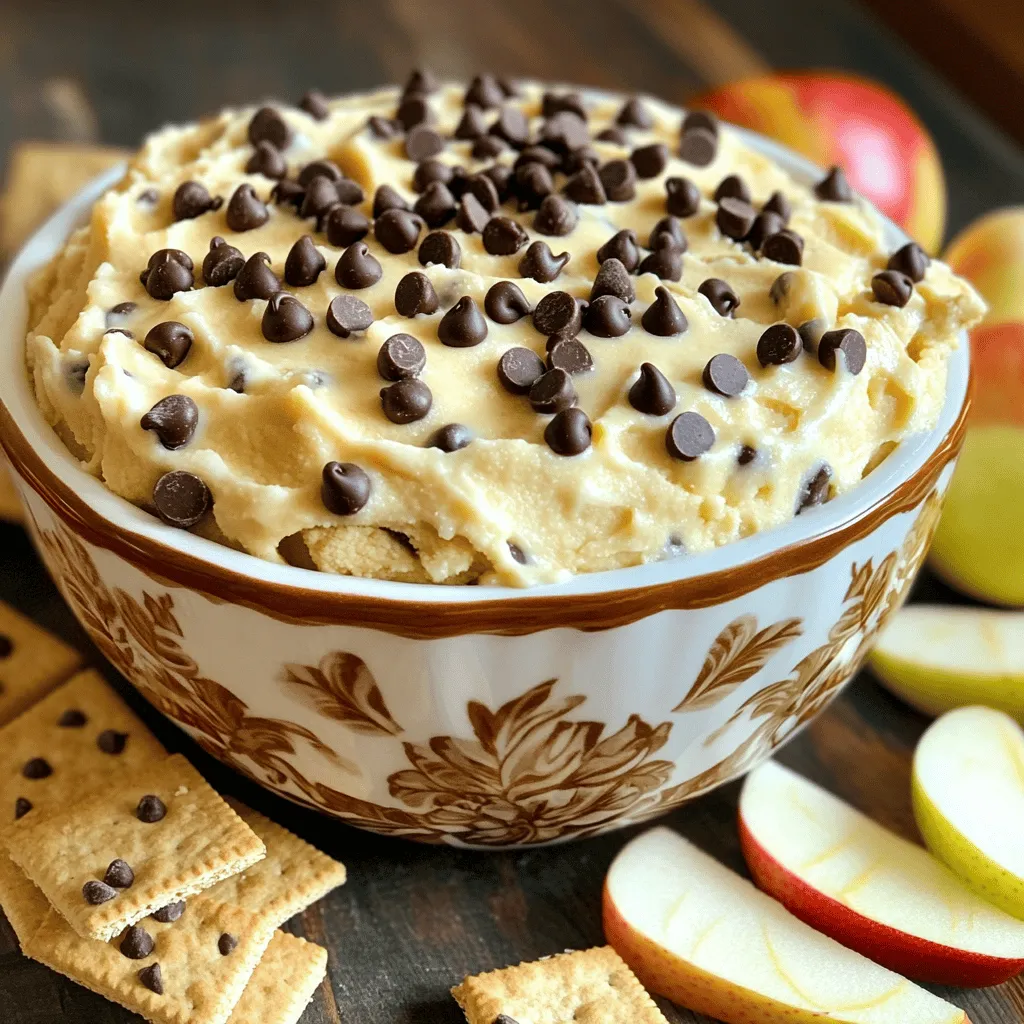
Chocolate Chip Cookie Dough Dip Easy and Delicious Treat
Looking for a sweet, easy treat that everyone will love? This Chocolate Chip Cookie Dough Dip is the answer! With
Read more…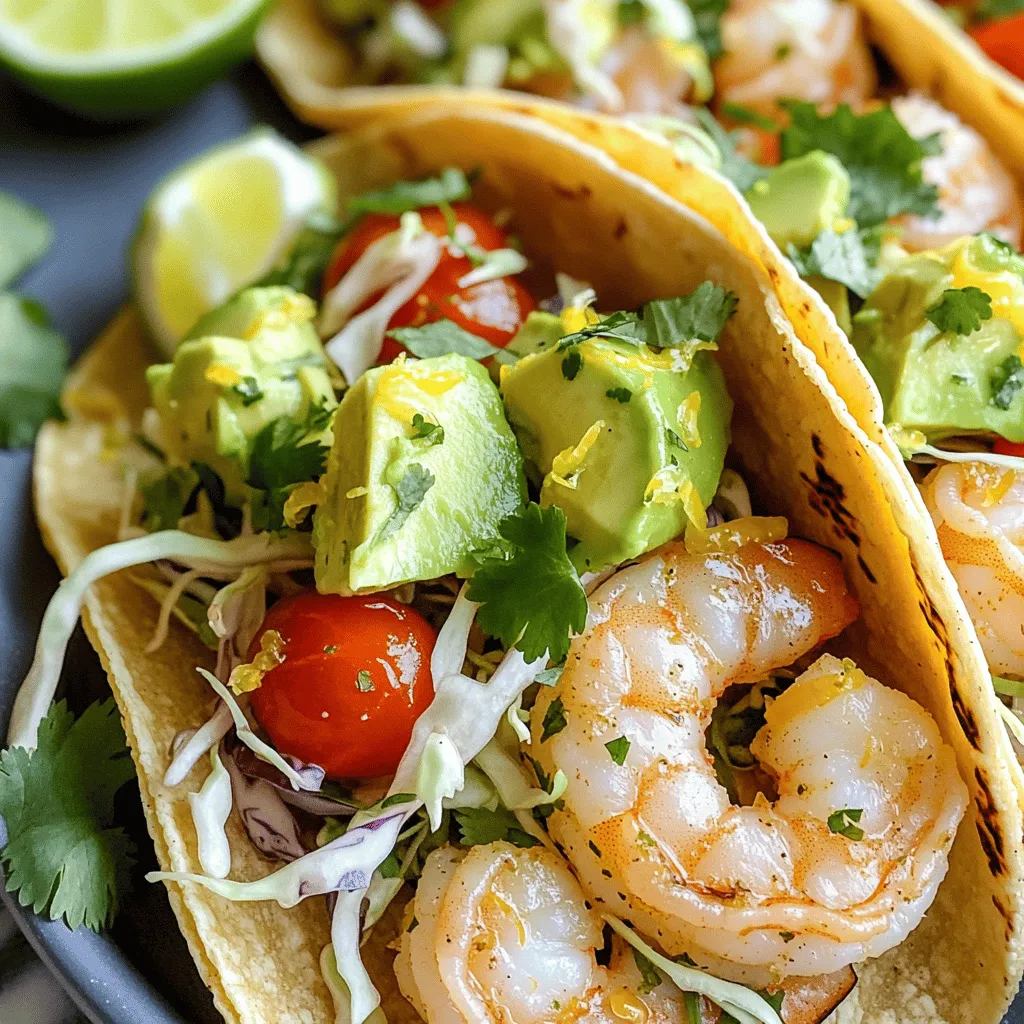
Zesty Lemon Garlic Shrimp Tacos Flavorful and Easy
Are you ready to elevate your taco night with a burst of flavor? These Zesty Lemon Garlic Shrimp Tacos are
Read more…
Easy Spinach Artichoke Dip Simple and Delicious Recipe
Craving a delicious dip that’s simple to make? Look no further! This Easy Spinach Artichoke Dip hits the spot with
Read more…
Loaded Potato Meatloaf Flavorful and Hearty Dish
If you’re craving a hearty and flavorful dinner, Loaded Potato Meatloaf is your answer! This dish combines tender ground beef,
Read more…
The Best Mac & Cheese Creamy and Delightful Recipe
Do you love creamy, delicious mac & cheese? If so, you’re in for a treat! In this article, I’ll share
Read more…browse recipes


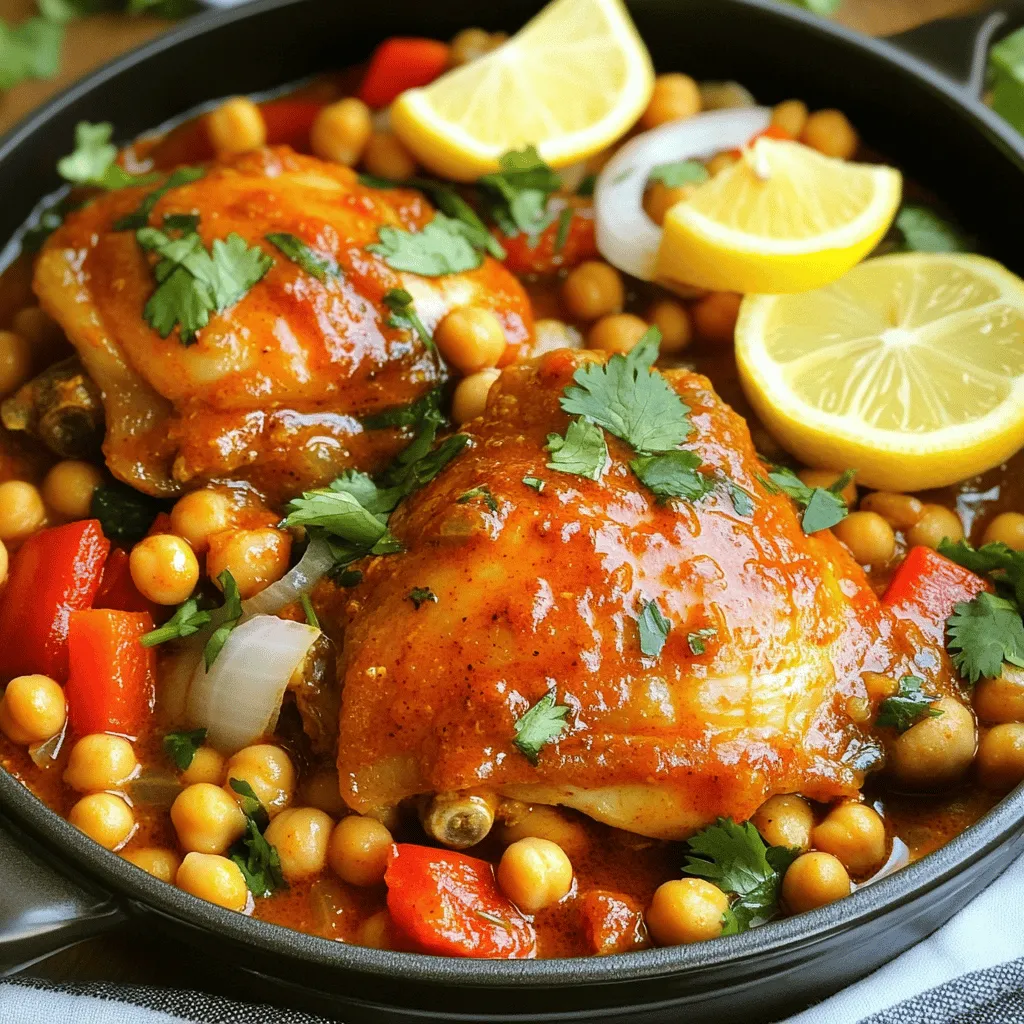
Harissa Chicken with Chickpeas Mouthwatering Meal Prep
Looking for a meal that’s both tasty and easy to prep? You’ve found it! Harissa Chicken with Chickpeas is packed with flavor and brings…
My Latest Desserts
My Latest Recipes

hey,
i’m !
I’m so happy you’re here!
My kitchen is filled with stories, flavors, and love and I’m so happy to share them with you. Here’s to dishes that feel like home.


. - First, prepare the marinade. In a small bowl, whisk together: - 2 tablespoons olive oil - Zest and juice of 1 lemon - 3 cloves garlic, minced - 1 teaspoon fresh dill, chopped - 1 teaspoon fresh parsley, chopped - 1 teaspoon fresh thyme, chopped - Salt and pepper to taste This mix adds a bright flavor to the fish. - Next, coat the salmon fillets in the marinade. Make sure to cover them well. Place the fillets in a shallow dish and pour the marinade over them. Cover the dish and refrigerate for at least 30 minutes. For more flavor, you can marinate them for up to 2 hours. - Now, it's time to preheat the grill. Set it to medium-high heat. This helps the salmon cook evenly. - Oil the grill grates to prevent sticking. You can use a paper towel soaked in oil or a grill spray. This step is key to keeping the salmon intact while grilling. - Once the grill is hot, carefully place the salmon fillets on the grill, skin-side down. This helps protect the fish while it cooks. - Grill the salmon for about 6 to 8 minutes. The cooking time depends on the thickness of the fillets. Check for doneness: the salmon should be opaque and flake easily with a fork. - Flip the salmon halfway through cooking for nice grill marks. This also ensures even cooking. - After grilling, remove the salmon from the grill. Let it rest for a couple of minutes. Resting allows the juices to settle, making the salmon more tender. Feel free to check out the Full Recipe for more details! Grilling salmon can be fun and simple. Here are some tips to make it perfect. - Ideal grill temperature: Set your grill to medium-high heat. This gives you nice grill marks and helps the salmon cook evenly. Aim for about 375°F to 400°F. - Timing for varying thicknesses: The cook time depends on how thick your salmon is. For fillets that are about one inch thick, grill for 6-8 minutes. Thicker fillets will need more time, around 10-12 minutes. Always check if the salmon flakes easily with a fork. To make your grilled salmon even better, try these ideas. - Adding other herbs or spices: You can mix in herbs like basil or cilantro for a twist. A pinch of paprika can also add a smoky taste. Experiment with what you like! - Suggestions for citrus variations: Lemon is great, but don’t stop there! Try lime or orange juice for a fresh flavor. Citrus adds brightness and pairs well with the fish. If grilling isn't an option, you can still enjoy this dish. - Oven-baking instructions: Preheat your oven to 400°F. Place the salmon on a lined baking sheet. Bake for about 12-15 minutes, or until it is cooked through and flakes easily. - Stovetop options: Heat a non-stick skillet over medium heat. Add a bit of oil and cook the salmon for about 4-5 minutes on each side. This method gives a nice sear and keeps the salmon moist. For the full recipe, check out the instructions above and enjoy! {{image_2}} You can change the flavor of your salmon with different marinades. One fun option is honey mustard. To make this, mix honey, Dijon mustard, and olive oil. This blend adds a sweet tang that pairs well with the fish. Another great choice is a spicy chipotle version. Just add chipotle in adobo sauce to your olive oil and lemon juice. This will give your salmon a nice kick. Both of these marinades are easy to prepare and will excite your taste buds. If you want to switch up the fish, you have many options. Try using trout or mackerel instead of salmon. Both have rich flavors and grill well. They can absorb the lemon herb marinade nicely, too. For a vegetarian option, consider using portobello mushrooms. Their meaty texture makes them a great stand-in for fish. Marinate them just like the salmon and grill until tender. You will enjoy the smoky, herb-infused flavor. Pair your grilled salmon with tasty side dishes. Roasted vegetables or a fresh salad work well. You can also serve it with rice or quinoa for a heartier meal. These sides will complement the bright flavors of the salmon. When it comes to drinks, consider a crisp white wine, like Sauvignon Blanc. Its acidity balances the richness of the salmon. For a non-alcoholic option, serve sparkling water with lemon. This keeps the meal refreshing and light. For the full recipe, check out the [Full Recipe]. To store leftover salmon, place it in a shallow dish. Cover it tightly with plastic wrap or foil. You can also use an airtight container for better freshness. Make sure to refrigerate the salmon within two hours of cooking. This keeps it safe and tasty. Leftover salmon lasts in the fridge for up to three days. You can freeze salmon both before and after cooking. If you freeze it raw, wrap each fillet in plastic wrap. Then, place them in a freezer bag. Be sure to remove as much air as possible. Frozen raw salmon can last up to three months. If you freeze cooked salmon, let it cool first. Wrap it tightly in foil or plastic wrap. Place it in a freezer-safe bag. Cooked salmon also stays good for about three months. When you're ready to eat frozen salmon, thaw it in the fridge overnight. This helps keep the texture nice and smooth. For quicker thawing, you can use cold water. Just put the salmon in a sealed bag and submerge it in cold water for an hour. To reheat grilled salmon, you have a few good options. You can use the oven, stovetop, or microwave. If using the oven, preheat it to 275°F (135°C). Place the salmon on a baking sheet. Cover it with foil to avoid drying out. Heat for about 15 minutes, or until warmed through. If you prefer the stovetop, use a skillet over low heat. Add a splash of water or broth to keep it moist. Heat for about 5 minutes, flipping halfway through. For the microwave, place the salmon on a microwave-safe plate. Cover it with a damp paper towel. Heat in short bursts of 30 seconds to avoid overcooking. No matter how you reheat, check for dryness. Keeping it moist is key to enjoying your leftover salmon. I recommend marinating the salmon for at least 30 minutes. This time allows the flavors to soak in. You can marinate it for up to 2 hours if you want a stronger taste. Just don't go over 2 hours, as the acid from the lemon can make the fish mushy. Grilled salmon should reach an internal temperature of 145°F. This ensures the fish is safe to eat and still moist. You can use a meat thermometer to check the temperature. When it flakes easily with a fork, it is likely ready. Yes, you can use frozen salmon. However, it is best to thaw it before grilling. Cooking frozen salmon directly can lead to uneven cooking. To thaw, place it in the refrigerator overnight. If you are short on time, you can run it under cold water for about 30 minutes. Make sure to pat it dry before marinating and grilling. You now know how to grill salmon perfectly. We covered key ingredients, marinade tips, and cooking methods. I shared ways to elevate your salmon's flavor and explore variations. You learned proper storage to keep leftovers tasty. With these steps, you can enjoy delicious grilled salmon any time. Enjoy experimenting with new flavors and techniques. Happy cooking!](https://southerndishes.com/wp-content/uploads/2025/04/e12d933a-18ad-43eb-a38a-a3a5e2ef9163-300x300.webp)

Caprese Stuffed Avocado Flavorful and Fresh Treat
If you’re looking for a fresh and tasty dish, try Caprese Stuffed Avocado. This delightful recipe combines creamy avocado, juicy tomatoes, and soft mozzarella…
. To make your Caprese stuffed avocado shine, serve it on a rustic wooden board. This adds charm and warmth to your dish. Garnish the avocados with extra fresh basil leaves. A drizzle of balsamic glaze on top creates an eye-catching finish. It makes your meal look just as good as it tastes. Want to take your dish to the next level? Try using flavored balsamic vinegar. It adds a unique twist that will surprise your taste buds. You can also experiment with other herbs like oregano or thyme. They can bring new layers of flavor to your Caprese stuffed avocado. Don't be afraid to mix things up and find your favorite combination! {{image_2}} You can easily change up the flavors here. For a twist, try using roasted red peppers instead of cherry tomatoes. Roasted red peppers offer a sweet and smoky taste. They pair well with the creamy avocado and fresh cheese. Another fun swap is using feta cheese in place of mozzarella. Feta brings a tangy and salty kick that enhances the dish's overall flavor. If you're looking to make a vegan version, simply skip the cheese. You can also use plant-based cheese for a similar taste. This keeps the dish light yet still tasty. For those who want more protein, grilled chicken is a great option. It makes the avocado even more filling and hearty. With these swaps, you can enjoy Caprese stuffed avocado in many different ways! You can store your stuffed avocados in an airtight container in the fridge. This keeps them fresh and tasty. The best time to eat them is within 1-2 days. After that, they may lose their flavor and texture. Keep an eye on them, and enjoy them quickly! Freezing avocados is not a good idea. When you freeze them, their texture changes. They become mushy and less enjoyable. If you want to keep your stuffed avocados fresh, stick to the fridge. Enjoy the flavors of this dish while they are at their best! For the full recipe, check out the Caprese Stuffed Avocado. Caprese Stuffed Avocado is a fresh dish that combines avocado with classic Caprese flavors. You start with ripe avocados, which are creamy and rich. Then, you fill them with juicy cherry tomatoes, soft mozzarella balls, and fragrant basil. A drizzle of balsamic glaze adds a sweet touch. It’s a simple yet delicious way to enjoy a healthy meal. This dish is quick to make! You need about 10 minutes to prep and 10 minutes to finish. So, in just 20 minutes, you can have a tasty meal ready. This makes it perfect for a quick lunch or a light dinner. Yes, you can prep some parts ahead of time. You can chop the tomatoes and basil or mix them with the mozzarella a few hours before. Just keep them in the fridge. Cut the avocados close to serving time to keep them fresh and green. This way, you save time during busy days. Caprese Stuffed Avocado pairs well with many sides. A simple green salad is a great choice. You can also serve it with crusty bread or grilled chicken for a heartier meal. For a fun twist, try it with a refreshing fruit salad. This adds a nice contrast to the savory flavors. Caprese stuffed avocados combine fresh flavors and simple preparation. The creamy avocado pairs well with cherry tomatoes, mozzarella, and basil. You learned how to prepare this colorful dish and keep it fresh. Feel free to experiment with swaps and variations. Enjoy the ease and taste this recipe brings to your meals. This nutritious dish is a delight for any table. Try it for lunch or dinner and impress your guests. Your taste buds will thank you for this easy win!](https://southerndishes.com/wp-content/uploads/2025/06/7957bcc2-8ecf-4b2b-963e-fbf86f94818a.webp)
