Latest & Greatest

browse recipes

- Chicken thighs - Coconut milk - Red curry paste - Fresh vegetables - Coconut oil - Fish sauce or soy sauce - Brown sugar - Cooked rice - Garnishes like cilantro Coconut curry chicken is a delight that brings warm, tropical flavors to your plate. Here are the key ingredients you’ll need for this simple, tasty dish. Main Ingredients 1. Chicken thighs: I prefer using chicken thighs because they stay juicy and tender during cooking. They absorb flavors well, making each bite delicious. 2. Coconut milk: This adds a rich and creamy texture. It enhances the curry and gives it a smooth, velvety feel. 3. Red curry paste: This blend of spices gives your dish heat and depth. It's a key flavor in this recipe. 4. Fresh vegetables: Use colorful options like bell peppers and snap peas. These add crunch and nutrients. Pantry Staples 1. Coconut oil: This helps to sauté your ingredients and adds a hint of coconut flavor. 2. Fish sauce or soy sauce: Both add umami. Fish sauce gives a deeper taste, while soy sauce is a great vegetarian choice. 3. Brown sugar: A little sweetness balances the heat from the curry paste. Serving Suggestions 1. Cooked rice: Serve your curry over fluffy rice. This soaks up the sauce and completes the dish. 2. Garnishes like cilantro: Fresh herbs like cilantro add brightness and a pop of color. For those looking for a complete guide on how to prepare this dish, check out the Full Recipe. - Start by chopping your vegetables. You will need to finely chop the onion and slice the red bell pepper. - Next, cut the chicken thighs into bite-sized pieces. This helps them cook evenly. - Heat the coconut oil in a large skillet or pot over medium heat. - Add the chopped onion and sauté it for about 5 minutes. It should become soft and clear. - Stir in the minced garlic and grated ginger. Cook for an extra minute until you smell the great aroma. - Now, add the chicken pieces to the skillet. Cook for 5-7 minutes. Stir often until the chicken is brown on all sides. - Mix in the red curry paste. Make sure the chicken is well coated. Sauté for another 2 minutes to bring out the flavors. - Pour in the coconut milk and chicken broth. Add the fish sauce and brown sugar. Stir well to combine everything. - Bring your mixture to a gentle simmer. Then, add the sliced bell pepper and snap peas or green beans. - Let it simmer for about 10 minutes. The veggies should be tender but still crisp, and the chicken cooked through. - Just before serving, stir in the baby spinach and let it wilt for a minute. - Taste the curry and adjust the seasoning. Add more fish sauce or sugar if you want. - Serve the curry hot over cooked rice. Don’t forget to garnish it with fresh cilantro for a beautiful finish. For the full recipe, check out the Tropical Coconut Curry Chicken section. - Proper heat management: Start on medium heat. This helps cook the chicken evenly. If the heat is too high, the chicken may burn. Adjust as needed during cooking. - Timing for adding vegetables: Add hearty veggies like bell peppers early. For quick-cooking greens, like spinach, add them last. This keeps them vibrant and fresh. - Recommended spices or extra ingredients: Try adding lime juice for brightness. You can also toss in a tablespoon of peanut butter for creaminess. These small changes can enhance the dish. - Balancing flavors with seasoning: Taste as you cook. If it's too sweet, add a dash of fish sauce. If it needs depth, extra curry paste works wonders. - Serving style: Serve the curry in deep bowls. This allows the vibrant colors to shine. Pair with white rice to create a beautiful contrast. - Garnishing ideas: Top with fresh cilantro and lime wedges. A sprinkle of sesame seeds adds crunch and looks great. {{image_2}} You can easily make this dish vegetarian or vegan. Simply swap the chicken for tofu or chickpeas. Tofu adds protein and absorbs the curry's flavor well. For chickpeas, use canned ones for quick cooking. Both options work great and make the dish filling. If you don't have coconut milk, you can use almond milk or oat milk. These alternatives will change the flavor slightly but still taste good. For vegetables, feel free to mix and match. Carrots, zucchini, or even broccoli can add color and crunch. Use what you have on hand for a personal touch. You can also try different styles of coconut curry. For a Thai-style curry, use basil and lime leaves for a fresh twist. Adding fish sauce gives it an authentic flavor. For an Indian-style coconut chicken curry, add cumin and coriander for spice. Each version brings a unique taste and flair to the dish. You can store coconut curry chicken in the fridge for up to 3 days. Make sure to cool it down first before placing it in an airtight container. This helps keep it fresh and tasty. To freeze coconut curry chicken, let it cool completely. Then, place it in a freezer-safe container or bag. Squeeze out as much air as you can. Label it with the date. It can be frozen for up to 3 months without losing flavor. When you’re ready to eat, thaw it overnight in the fridge. For reheating, you can use the microwave or stovetop. If using the stovetop, heat it over low heat. Stir often to keep it from sticking. You may want to add a splash of coconut milk or broth to keep it moist. These methods help keep the curry fresh and delicious. Coconut curry chicken is a warm and creamy dish. It features chicken cooked in coconut milk and red curry paste. The dish has rich flavors from garlic, ginger, and spices. You can add fresh veggies like bell peppers and spinach for color and crunch. This meal is perfect over rice, making it filling and delicious. To make coconut curry chicken less spicy, use less red curry paste. Start with just one tablespoon and taste the dish as you cook. You can also add more coconut milk to cool the heat. If you want, include extra veggies like carrots or peas to balance the spice. Yes, you can use frozen chicken. If you use frozen chicken, cook it for longer to ensure it's safe. Thawing the chicken overnight in the fridge is best. If in a hurry, you can cook chicken directly from frozen. Just add extra time to your cooking. Coconut curry chicken is great with cooked rice. The rice soaks up the tasty sauce. You can also serve it with naan bread, which is perfect for dipping. Steamed broccoli or a fresh salad can add color and freshness to your plate. To make coconut curry chicken gluten-free, use gluten-free soy sauce or skip it. Check that your red curry paste is gluten-free, as some brands may contain wheat. Coconut milk is naturally gluten-free, so you can use that without worry. Enjoy a tasty meal that fits your diet! This blog post covered the key ingredients for coconut curry chicken, including chicken thighs and coconut milk. You learned the cooking steps, tips for best practices, and how to serve. We explored variations for different diets, along with storage and reheating guidelines. Coconut curry chicken is simple, tasty, and versatile. With this knowledge, you can make your own delicious versions at home. Enjoy creating dishes that thrill your taste buds!

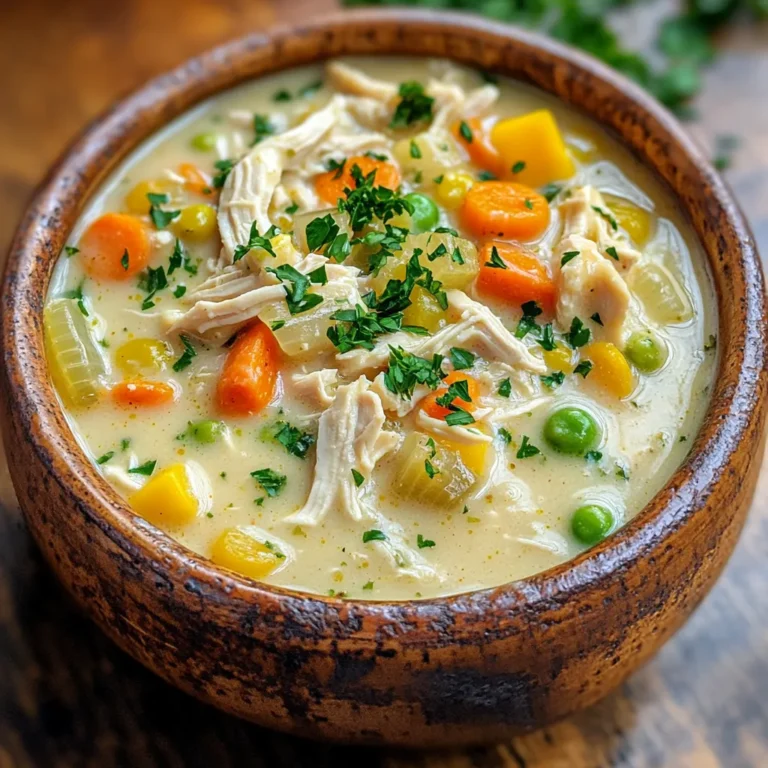
Coconut Curry Chicken Flavorful and Simple Recipe

Craving a warm, comforting dish? My Coconut Curry Chicken recipe is both flavorful and simple! With juicy chicken thighs, creamy coconut milk, and fresh…

My Latest Desserts

My Latest Recipes

hey,

i’m !

I’m so happy you’re here!

My kitchen is filled with stories, flavors, and love and I’m so happy to share them with you. Here’s to dishes that feel like home.

Garlic Butter Steak Bites Flavorful and Quick Meal

Looking for a dish that’s packed with flavor yet quick to whip up? Garlic Butter Steak Bites are your answer! With juicy sirloin cubes…

- 1 lb sirloin steak, cut into bite-sized cubes - 4 tablespoons unsalted butter - 5 cloves garlic, minced - 1 tablespoon fresh rosemary, chopped (or 1 teaspoon dried) - 1 tablespoon fresh thyme, chopped (or 1 teaspoon dried) - Salt and pepper to taste - 1 tablespoon olive oil - 1 tablespoon fresh parsley, chopped (for garnish) - Lemon wedges (for serving) When I make garlic butter steak bites, I love using fresh ingredients. The sirloin steak is key. It stays juicy and tender. For the butter, I prefer unsalted. This way, I control the salt. The minced garlic adds great flavor. Fresh herbs like rosemary and thyme elevate the dish. They bring out the steak's natural taste. If you don't have fresh herbs, dried ones work too. Just remember to use less. The olive oil is essential for cooking. It helps to sear the steak perfectly. The fresh parsley makes a lovely garnish. It adds a pop of color to the plate. Finally, serving lemon wedges gives a nice zing. The acidity cuts through the richness of the butter. This balance makes every bite enjoyable. For the full recipe, check the details above. First, you want to pat the steak cubes dry. This step helps achieve a great crust when cooking. Use paper towels to soak up any moisture. Next, season the steak cubes with salt and pepper. This simple seasoning enhances the meat's natural flavor. Start by heating your skillet. Add one tablespoon of olive oil and let it get hot. The oil should shimmer, showing it is ready. Cook the steak bites in batches. Place them in a single layer to avoid steaming. Sear for 2-3 minutes before flipping. Cook for another 2 minutes to reach medium-rare. Adjust the time for your preferred doneness. Once cooked, set the steak bites aside on a plate. In the same skillet, reduce the heat to medium. Add the butter and let it melt. Once melted, stir in the minced garlic, rosemary, and thyme. Cook for 1-2 minutes until fragrant. Be careful not to burn the garlic. After that, toss the steak bites in the garlic butter mixture. Coat them well for a delicious finish. Enjoy your Garlic Butter Steak Bites! For the complete preparation process, check the Full Recipe. To get steak bites just right, timing is key. Here are some tips for cooking: - Medium-Rare: Cook for 2-3 minutes on each side. - Medium: Cook for about 3-4 minutes on each side. - Well-Done: Cook for 4-5 minutes on each side. Make sure not to overcrowd the skillet. If you add too many steak bites at once, they will steam instead of sear. This will ruin that nice crust you want. Cook them in batches for the best result. To make your steak bites even tastier, try adding different herbs. Here are some great options: - Fresh basil - Oregano - A pinch of smoked paprika Be careful with the garlic. It burns easily. When you add it to the melted butter, keep an eye on it. Cook for just 1-2 minutes until fragrant. This adds a rich, savory flavor without the bitter taste of burnt garlic. How you serve your steak bites can impress your guests. Here are some ideas for stylish plating: - Use a large white plate for contrast. - Stack the steak bites for height. - Add a sprinkle of fresh parsley on top for color. For side dishes, consider these: - Creamy mashed potatoes - Roasted vegetables - A fresh green salad These sides balance the richness of the steak bites. They also add more color to your plate. Enjoy the full recipe to create a meal that looks as good as it tastes! {{image_2}} You can use different cuts of steak for this dish. Try ribeye or filet mignon. These cuts add rich flavor and tenderness. If you want to explore beyond beef, consider pork tenderloin. Chicken breast also works well. Just cut it into bite-sized pieces. Each meat brings its own taste and texture, making this dish versatile. To make your steak bites even better, add extra ingredients. Sautéed mushrooms add earthiness. Bell peppers bring a sweet crunch. Both pair well with garlic butter. You can also marinate the meat. Use soy sauce, Worcestershire sauce, or balsamic vinegar for a twist. Marinades add depth and can change the vibe of the dish. You can modify this recipe to fit your diet. For low-carb eaters, skip the bread and serve with salad. If you need gluten-free options, check sauces carefully. Many brands offer gluten-free soy sauce. For a vegan twist, use plant-based proteins like tempeh or mushrooms. The garlic butter can be replaced with vegan butter for a similar taste. To keep your garlic butter steak bites fresh, store them right after cooling. Place them in an airtight container. This helps lock in moisture and flavor. You can refrigerate them for up to three days. If you want to keep them longer, freezing is a great option. Use a freezer bag or airtight container for better protection. Label it with the date for easy tracking. Reheating steak bites can be tricky. You want them warm without overcooking. The best way is to use a skillet. Heat it on low and add a little butter or oil. Then, add the steak bites. Stir gently until they are warm. Avoid using the microwave, as it can dry them out. If you must use it, heat in short bursts. Check every 30 seconds to avoid cooking them further. Freezing garlic butter steak bites is simple. First, let them cool completely. Then, pack them in a freezer bag, removing as much air as you can. They can stay in the freezer for up to three months. To thaw, place them in the fridge overnight. For quick thawing, use the microwave on low. After thawing, you can reheat them in a skillet as mentioned above. This keeps the flavor and texture intact. For the full recipe, check out Sizzling Garlic Butter Steak Bites. Enjoy cooking! You can store garlic butter steak bites in the fridge for up to three days. To keep them fresh, place them in an airtight container. Make sure they cool down before sealing. When ready to eat, just reheat them gently. This helps keep their flavor and texture. Yes, you can use frozen steak! Just thaw it first in the fridge for at least 24 hours. When it's thawed, pat it dry before cooking. This helps get a good sear. If you cook it from frozen, the steak may not brown as well, and the cooking time will be longer. Garlic butter steak bites are great on their own, but you can serve them with sides. Try them with mashed potatoes or a fresh salad. You can also add a dipping sauce, like chimichurri or a garlic aioli. For a fun touch, serve them with lemon wedges for extra zest. For the full recipe, check out my detailed guide. Garlic butter steak bites are tasty and fun to make. We covered the key ingredients, cooking steps, and helpful tips. Remember to personalize the dish with your favorite herbs or sides. Don't shy away from experimenting with different meats or flavors. Store any leftovers correctly and enjoy them later. By following these steps, your steak bites will impress everyone. Now, roll up your sleeves and get cooking! Enjoy your delicious meal and the smiles it brings.