Latest & Greatest
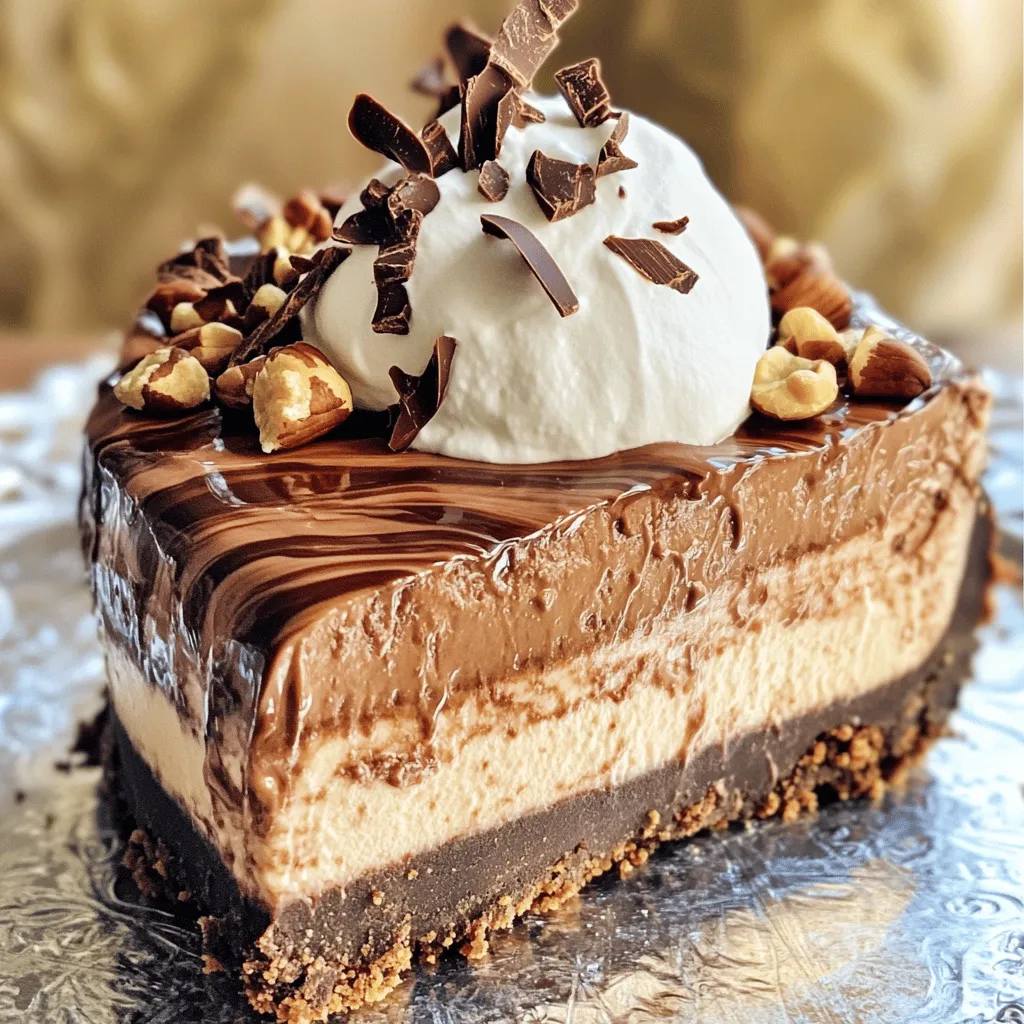
No-Bake Nutella Cheesecake Rich and Creamy Delight
If you love rich and creamy desserts, this No-Bake Nutella Cheesecake is for you! I’ll show you how to create
Read more…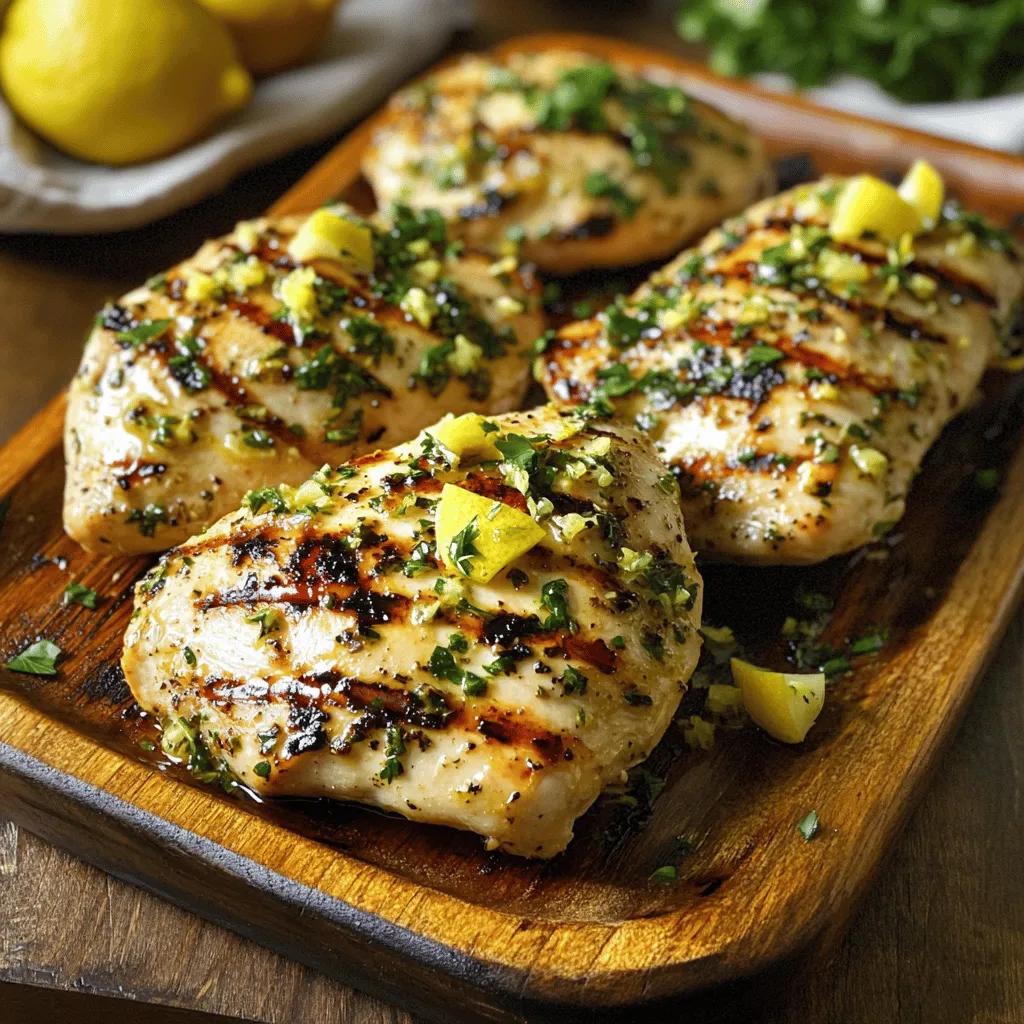
Lemon Garlic Herb Grilled Chicken Simple and Tasty
When you’re craving a juicy, flavorful meal, my Lemon Garlic Herb Grilled Chicken hits the spot. This simple recipe brings
Read more…
Chocolate Chip Cookie Dough Bites Tasty and Simple Treat
If you love the taste of chocolate chip cookie dough but want a safe and easy treat, you’ve come to
Read more…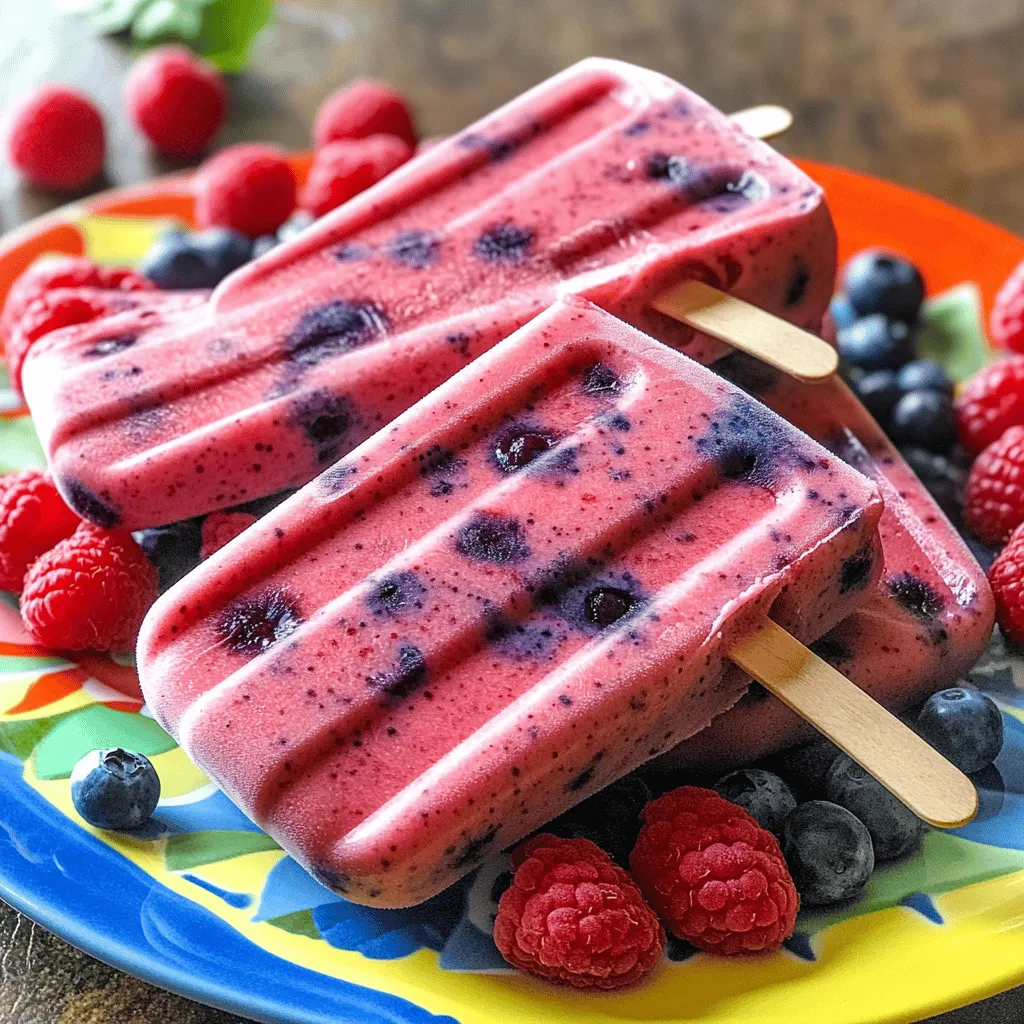
Berry Smoothie Popsicles Refreshing Summer Treat
Looking for a cool way to beat the summer heat? Try these Berry Smoothie Popsicles! Made with fresh fruit and
Read more…
Herbed Lemon Grilled Chicken Tasty Flavorful Delight
Are you ready to fire up the grill? Herbed Lemon Grilled Chicken is a tasty and simple dish that everyone
Read more…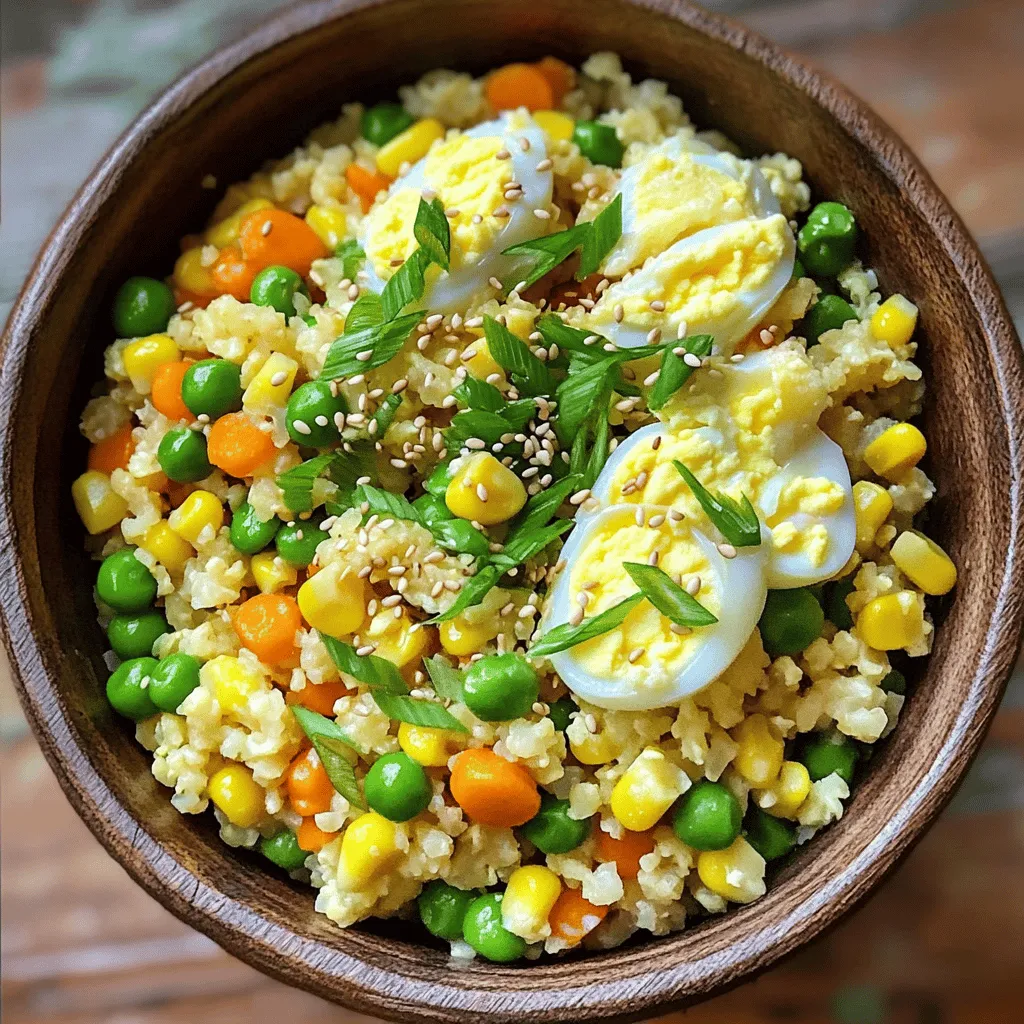
Cauliflower Fried Rice Flavorful and Healthy Dish
If you’re searching for a tasty, healthy dish, cauliflower fried rice is a winner! This flavorful meal swaps out white
Read more…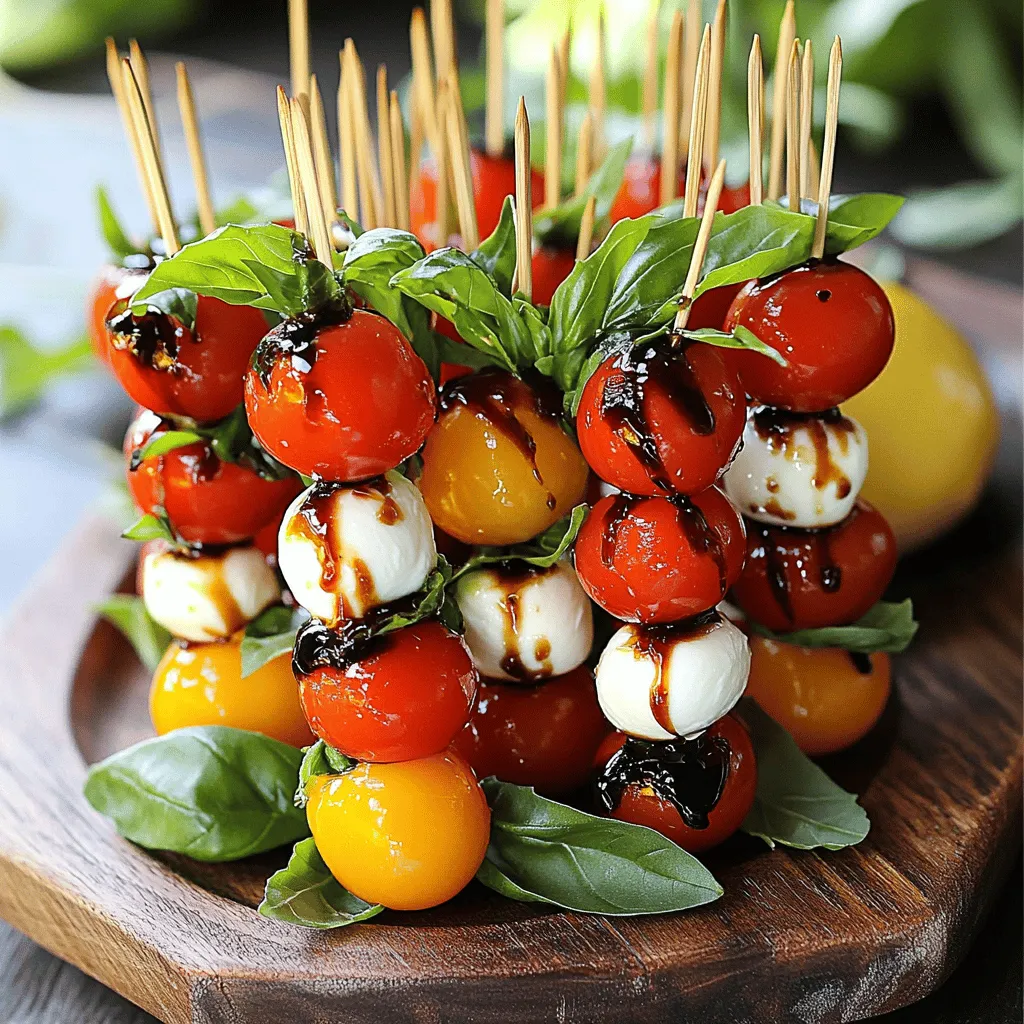
Caprese Salad Skewers Fresh and Tasty Appetizer
Looking for a fresh and tasty appetizer that impresses? You’ve come to the right place! Caprese Salad Skewers are easy
Read more…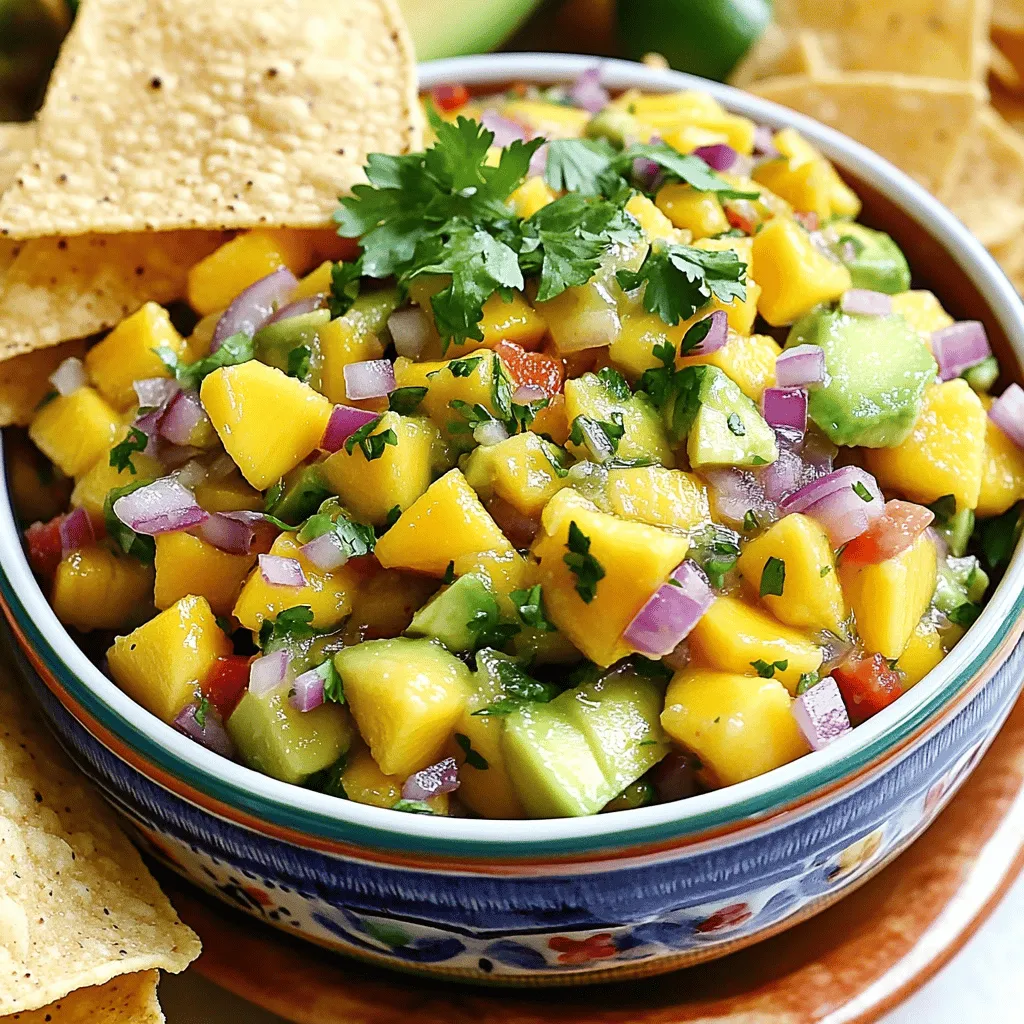
Mango Salsa with Avocado Tasty Fresh Delight
Ready to brighten your next meal? Mango Salsa with Avocado is a fresh and tasty delight that will wow your
Read more…browse recipes

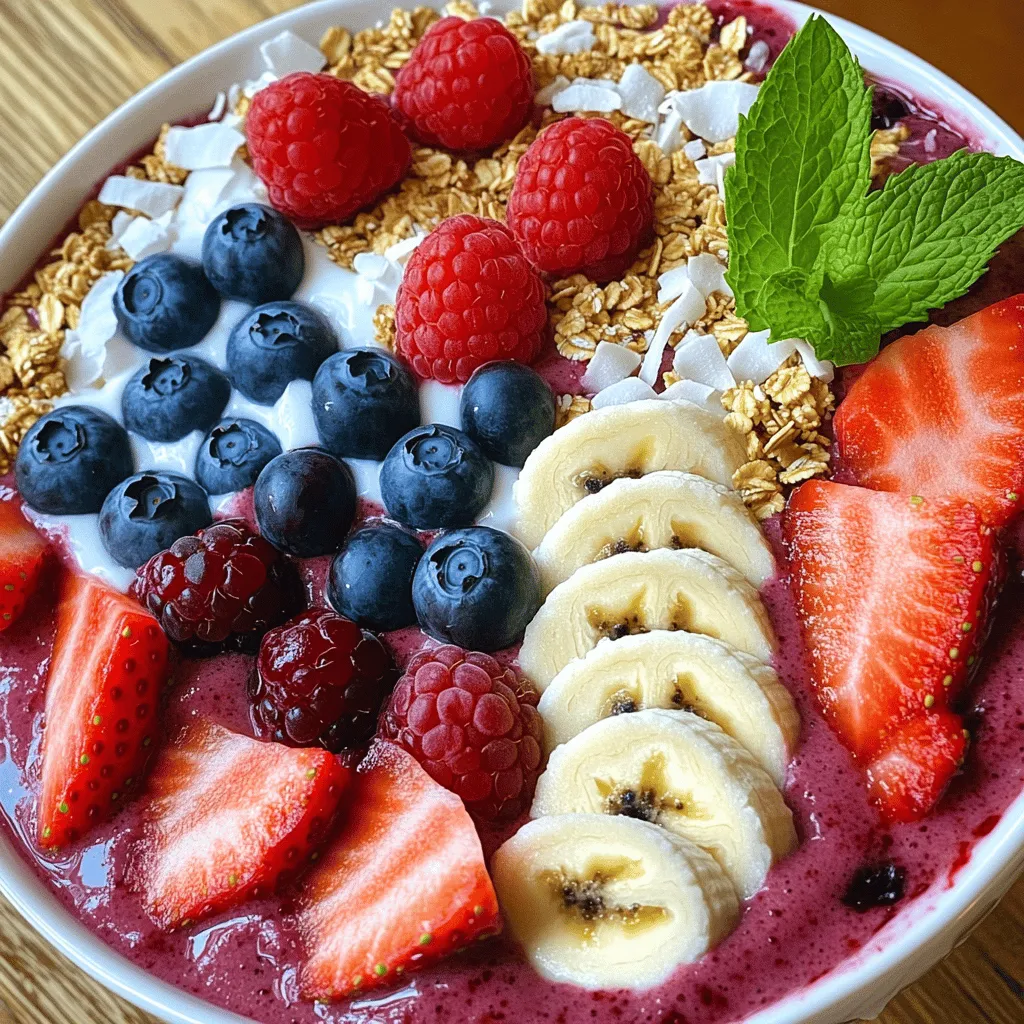
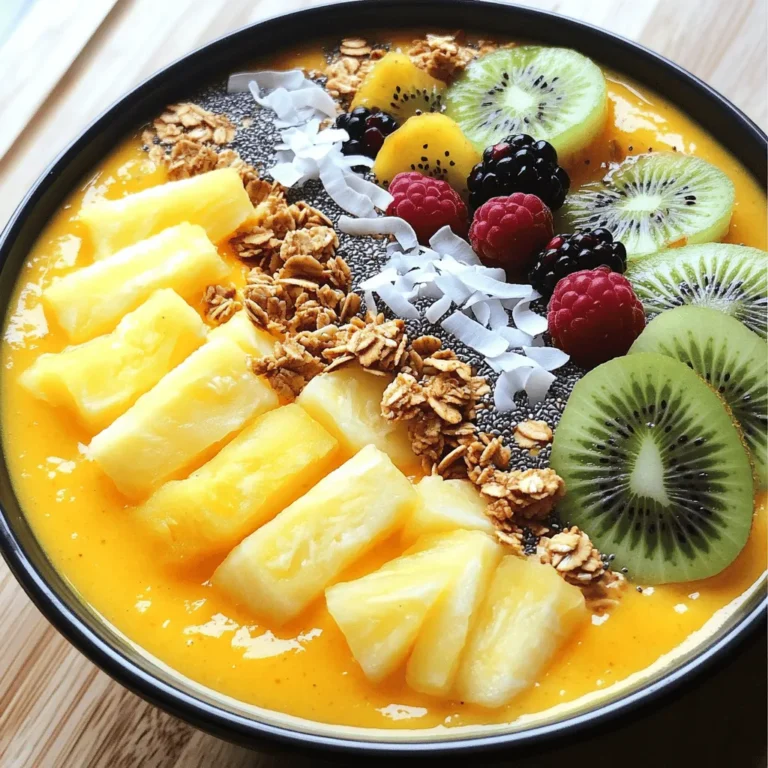
Berry Smoothie Bowl Flavorful and Nutritious Delight
Are you ready to whip up a berry smoothie bowl that’s both tasty and good for you? I’m excited to share how easy it…
My Latest Desserts
My Latest Recipes

hey,
i’m !
I’m so happy you’re here!
My kitchen is filled with stories, flavors, and love and I’m so happy to share them with you. Here’s to dishes that feel like home.
![To make these tasty blondies, gather the following ingredients: - 1 cup creamy peanut butter - 1/2 cup brown sugar - 1/4 cup granulated sugar - 1/2 cup coconut sugar (or more brown sugar) - 2 large eggs - 1 teaspoon vanilla extract - 1 teaspoon baking powder - 1/2 teaspoon baking soda - 1/4 teaspoon salt - 1 cup all-purpose flour - 1/2 cup chocolate chips (semisweet or dark) - Optional: 1/4 cup chopped nuts (like walnuts or peanuts) You can swap some ingredients if you need. Here are a few ideas: - Use almond butter instead of peanut butter for a nut-free treat. - Replace coconut sugar with more brown sugar for a sweeter taste. - If you want a vegan option, use flax eggs instead of regular eggs. - For gluten-free blondies, substitute all-purpose flour with almond flour or a gluten-free blend. - If you don't have chocolate chips, try using chopped chocolate bars or other mix-ins. Choosing quality ingredients can make your blondies even better. Here are some tips: - Use fresh peanut butter that is smooth and creamy. Avoid brands with added sugar or hydrogenated oils. - Choose brown sugar that feels moist. This keeps the blondies soft and chewy. - When picking chocolate chips, look for high-quality brands for the best flavor. - If using nuts, pick unsalted and fresh nuts to enhance the taste without extra salt. These ingredient tips help you create the best Peanut Butter Chocolate Chip Blondies. Check out the Full Recipe for detailed steps! To start, gather your ingredients. You need creamy peanut butter, brown sugar, granulated sugar, coconut sugar, eggs, vanilla extract, baking powder, baking soda, salt, all-purpose flour, and chocolate chips. If you want, add some chopped nuts too. 1. Preheat your oven to 350°F (175°C). Grease an 8x8 inch baking pan or use parchment paper. This makes it easier to lift the blondies out later. 2. In a large bowl, mix the peanut butter, brown sugar, granulated sugar, and coconut sugar. Stir until it’s smooth and well blended. 3. Add the eggs, one at a time. Mix well after each egg. Then stir in the vanilla extract until combined. In a separate bowl, whisk together the baking powder, baking soda, salt, and flour. This helps to mix the dry ingredients well. 1. Slowly add the dry mixture to the wet mixture. Stir gently until it’s just combined. Don’t overmix; a few lumps are okay. 2. Fold in the chocolate chips and nuts if you’re using them. Make sure they are spread out in the batter. 3. Pour the batter into your prepared pan. Smooth it out evenly with a spatula. Bake in your preheated oven for 20-25 minutes. The edges should turn lightly golden. A toothpick inserted in the center should come out mostly clean, with a few moist crumbs being just fine. After baking, let the blondies cool in the pan for about 10 minutes. Then, move them to a wire rack to cool completely. Once cool, slice them into squares. For a fun twist, serve them warm with a scoop of vanilla ice cream. Drizzle some melted chocolate on top for an extra treat. Enjoy your delicious peanut butter chocolate chip blondies! For the full recipe, check out the details above. Baking blondies seems simple, but small mistakes can ruin them. Here are common pitfalls to watch for: - Overmixing the batter: This can make your blondies tough. Mix just until the flour is combined. - Not measuring ingredients: Accurate measurements are key. Use measuring cups for wet and dry goods. - Skipping the cooling step: Letting blondies cool in the pan helps them set and makes slicing easier. To get that soft and chewy blondie texture, follow these tips: - Use creamy peanut butter: This helps create a smooth and rich batter. Avoid chunky peanut butter for this recipe. - Don’t overbake: Keep an eye on them. Remove the blondies when the edges are golden but the center is still soft. - Let them cool properly: Cooling allows the blondies to firm up. Don’t rush this step! Serving your blondies beautifully can impress anyone. Here are some ideas: - Warm with ice cream: Top each blondie with a scoop of vanilla ice cream. The warm and cold contrast is delightful. - Drizzle with chocolate: Melt some chocolate and drizzle over the blondies for a fancy touch. - Garnish with nuts: Sprinkle chopped nuts on top for added texture and flavor. For the complete recipe, check out the [Full Recipe]. {{image_2}} You can easily make vegan peanut butter blondies. Replace the eggs with flaxseed meal. Mix 1 tablespoon of flaxseed with 3 tablespoons of water. Let it sit for five minutes to thicken. This mix binds the ingredients just like eggs. Use maple syrup instead of granulated sugar for sweetness. This keeps the flavors rich and delicious. To make gluten-free blondies, swap all-purpose flour with almond flour or oat flour. These flours give a nutty taste and a moist texture. Check the labels to ensure no gluten is in your ingredients. You can also use a gluten-free flour blend. It often works well in baked goods. Spice up your blondies with cinnamon or nutmeg for warmth. Just add a teaspoon to your dry mix. You can also fold in a half-cup of mashed bananas or applesauce for extra moisture. For a fun twist, try adding white chocolate chips or chopped dried fruit. Each option brings new flavors to your blondies. For the full recipe, check out the earlier section! To keep your blondies fresh, store them in an airtight container. Place a piece of parchment paper between layers to prevent sticking. They can sit at room temperature for up to three days. If you want to keep them longer, move them to the fridge. They will last for about a week there. If you want to save some for later, freezing works great. First, let the blondies cool completely. Then, wrap each piece tightly in plastic wrap. Place them in a freezer-safe bag or container. They can stay in the freezer for up to three months. When you're ready to eat, just take out how many you need. To enjoy your blondies warm, you can quickly reheat them. Just pop a piece in the microwave for about 10-15 seconds. This will make them soft and gooey again. You can also warm them in the oven at 350°F (175°C) for about 5-10 minutes. Enjoy them with a scoop of ice cream or a drizzle of chocolate for an extra treat! You can tell if your blondies are done when the edges look golden. Insert a toothpick into the center. If it comes out with a few moist crumbs, they are ready! Overbaking will make them dry. Trust me, you want that soft, fudgy texture. Yes, you can use natural peanut butter! Just note that natural peanut butter can be more oily. This might change the texture a bit. If it seems too runny, add a little more flour. This will help keep your blondies firm. These blondies shine on their own, but serving them warm is extra nice. Try adding a scoop of vanilla ice cream on top! You can also drizzle melted chocolate over them for a sweet touch. Fresh fruit like strawberries can add a nice contrast too! You'll love how they taste together. For the full recipe, check out the complete instructions. Peanut Butter Chocolate Chip Blondies are fun to make and eat. You learned about key ingredients, baking steps, and expert tips. I shared tricks for perfect texture and storage info. With variations, you can customize to fit your taste. Remember, knowing when they’re done is key. Enjoy your baking journey and impress others with these treats!](https://southerndishes.com/wp-content/uploads/2025/05/3f57c6bc-d3f3-4928-adfa-123bd9454a21-300x300.webp)

. - Step 1: Combining salad base Start by taking a large bowl. Add 4 cups of chopped romaine lettuce. Next, toss in 1 cup of halved cherry tomatoes. This mix forms the fresh base of your salad. - Step 2: Adding proteins and cheese Now, add 1 cup of crumbled cooked turkey bacon to the bowl. This gives your salad a nice crunch. Then, sprinkle in 1/2 cup of shredded sharp cheddar cheese. This adds creaminess and flavor. - Step 3: Mixing the dressing In a small bowl, combine 1/4 cup of mayonnaise, 1 tablespoon of Dijon mustard, and 2 tablespoons of apple cider vinegar. Mix until smooth. This dressing brings all the flavors together nicely. - Step 4: Drizzling dressing Take the dressing you mixed and drizzle it over the salad. Be sure to coat everything evenly. This step is key for great taste. - Step 5: Tossing the salad Gently toss the salad with your hands or a spoon. Make sure all the ingredients are well-coated with the dressing. This ensures every bite is full of flavor. - Step 6: Garnishing with parsley Finally, sprinkle some fresh parsley over the top. This not only adds color but also a fresh taste. It makes your salad look beautiful. - Tips for crispy bacon Cook your turkey bacon in a skillet until it’s crispy. This adds crunch to your salad. - Ensuring the salad is well-dressed If your salad seems dry, add more dressing. A well-dressed salad is always more enjoyable. - Cooling ingredients before serving If you have time, chill the salad for a few minutes. This makes it refreshing, especially on hot days. For the complete recipe, check out the Full Recipe. To make your Classic BLT Salad shine, consider these tips: - Lightening the recipe: Swap out regular bacon for turkey bacon. This change keeps the flavor while cutting calories. You can also use Greek yogurt instead of mayonnaise for a tangy twist. - Adding extra crunch: Toss in some sliced cucumbers or crispy croutons. They add a nice texture and keep the salad lively. You can even add sunflower seeds for more crunch. - Balancing flavors with seasoning: Don’t be shy with salt and pepper. A sprinkle of each enhances the taste. You can add a pinch of garlic powder for extra flavor. Pair your salad with these ideas: - Ideal pairings with the salad: Serve it with grilled chicken or fish for a full meal. It also goes great with a bowl of soup on a chilly day. - Presentation tips for gatherings: Use a large, colorful platter. Layer the ingredients in sections for a beautiful display. Garnish with extra tomatoes or parsley for a pop of color. - Customizing portion sizes: Adjust the serving size based on your guests. For a small group, keep it simple. For larger gatherings, double the recipe to ensure everyone enjoys. Prepare your salad ahead of time with these tips: - Preparing ingredients in advance: Wash and chop your veggies the night before. This saves time and keeps everything fresh. - Best storage practices: Store salad ingredients in separate containers. Keep the dressing in a small jar. This helps maintain freshness until you're ready to eat. - Using leftovers for other dishes: If you have leftover salad, use it in a wrap or mix it into an omelet. This way, you waste nothing and create new meals with ease. For the full recipe, be sure to check out the details above! {{image_2}} You can switch up the proteins in your Classic BLT Salad to keep things fresh. Use different types of bacon, like crispy pork bacon or even flavored bacon, for a new twist. If you want something heartier, add grilled chicken or shrimp for extra protein. For a vegetarian option, try using tempeh bacon or smoked tofu. These choices still give that savory flavor without meat. The dressing can change the whole taste of your salad. You can try different dressings like ranch, blue cheese, or a tangy vinaigrette. Adding spices such as garlic powder, paprika, or even a pinch of cayenne can enhance the flavor. You can also create a creamy dressing with yogurt or buttermilk for a rich taste, or stick to a light vinaigrette for a fresh lift. You don’t have to stick with just lettuce. Incorporate grains like quinoa for added texture and nutrition. Including beans like chickpeas or black beans can boost protein too. For a fruity twist, add diced apples or berries. These changes make your salad not just tasty, but also unique and fun. If you want to dive deeper into the Classic BLT Salad, check out the [Full Recipe]. To keep your Classic BLT Salad fresh, store it in the fridge. Use an airtight container to seal in the flavors. This will help keep the lettuce crisp and the tomatoes juicy. I recommend using glass containers for easy cleaning and clarity. If you have any leftover dressing, store it separately. This keeps the salad from getting soggy. You may wonder, can you freeze a BLT salad? I do not recommend freezing this salad. The lettuce and tomatoes do not freeze well. They become mushy when thawed. However, you can freeze cooked turkey bacon. Just make sure to cool it first. Store it in a freezer bag to save space. How long does the salad stay fresh? In the fridge, your salad can last about 2 to 3 days. Keep an eye on it. Signs of spoilage include wilting lettuce or slimy tomatoes. If you see these signs, it is best to toss the salad. Enjoy it fresh for the best taste! For the full recipe, check the earlier section. What is the best type of lettuce for a BLT salad? I recommend using romaine lettuce. It stays crisp and adds a great crunch. You can also try iceberg for a lighter bite. Can I use regular bacon instead of turkey bacon? Yes, you can use regular bacon. It will add a richer flavor. Just cook it until crispy for the best texture. How can I make this salad vegan-friendly? To make it vegan, swap turkey bacon for tempeh or coconut bacon. Use a vegan mayo too. How to adjust serving sizes? To change the serving size, multiply or divide each ingredient. For two servings, cut each amount in half. Is the dressing gluten-free? Yes, the dressing is gluten-free. Mayonnaise and apple cider vinegar do not contain gluten. How to make the salad spicier? Add sliced jalapeños or a dash of hot sauce. You can also mix in some cayenne pepper for heat. What can I serve with this salad? This salad pairs well with grilled chicken or fish. You can also add crusty bread for a complete meal. How do I keep my salad fresh for longer? Store the salad in an airtight container. Keep the dressing separate until you serve it. Can I meal prep this salad for the week? Yes, you can prep the salad. Keep the ingredients separate, then mix before eating. This keeps everything fresh. For more detailed instructions, check the Full Recipe. The classic BLT salad combines fresh ingredients and bold flavors to delight every palate. You learned about tasty ingredient options, easy preparation steps, and storage tips to keep it fresh. Try out variations with proteins and dressings to add your twist. Remember, quality matters in every bite. With the right choices, you can elevate this salad for any occasion. Enjoy making this dish and share it with others for a fun meal experience.](https://southerndishes.com/wp-content/uploads/2025/06/9f043d04-88b5-4442-84a0-ee6070e7c3bf-300x300.webp)
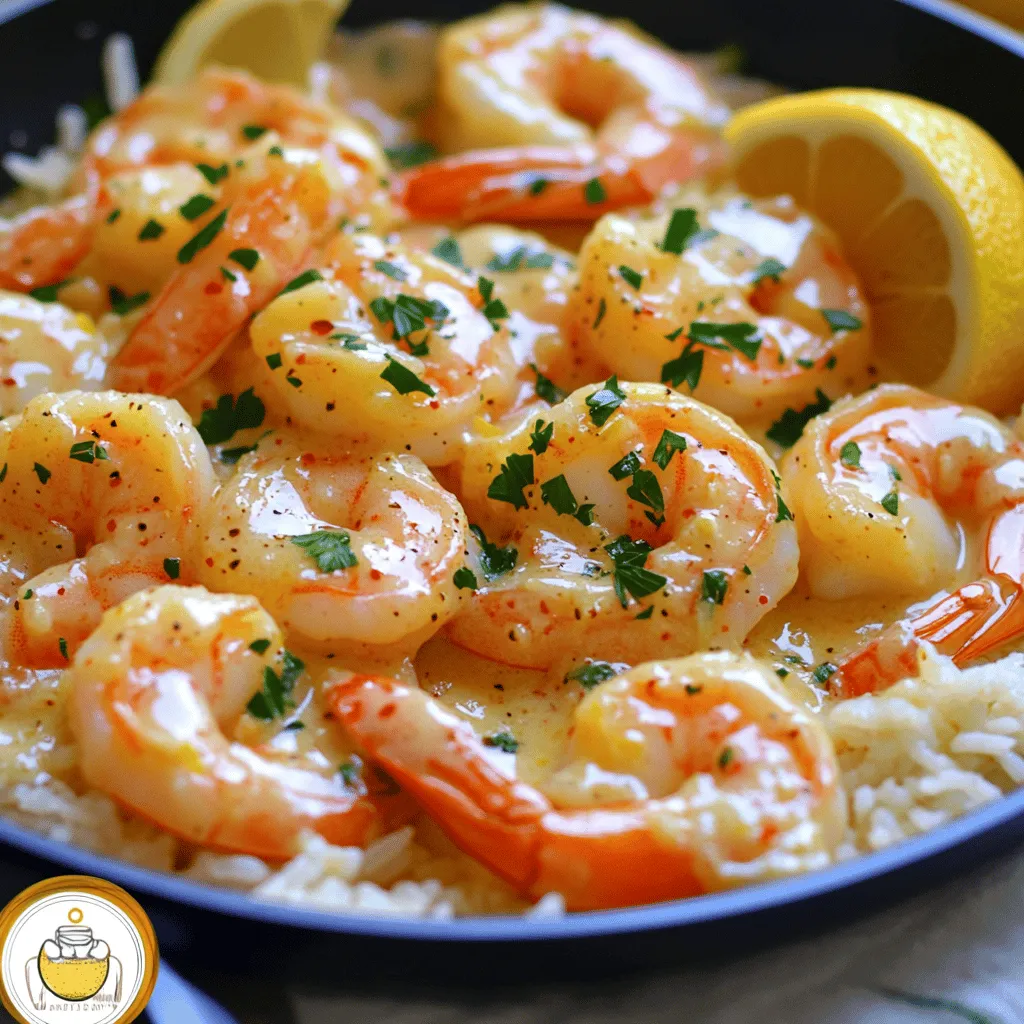
Lemon Garlic Butter Shrimp Skillet Savory Delight
Dive into the joy of making my Lemon Garlic Butter Shrimp Skillet! This dish is a quick, tasty delight that anyone can whip up.…