Latest & Greatest
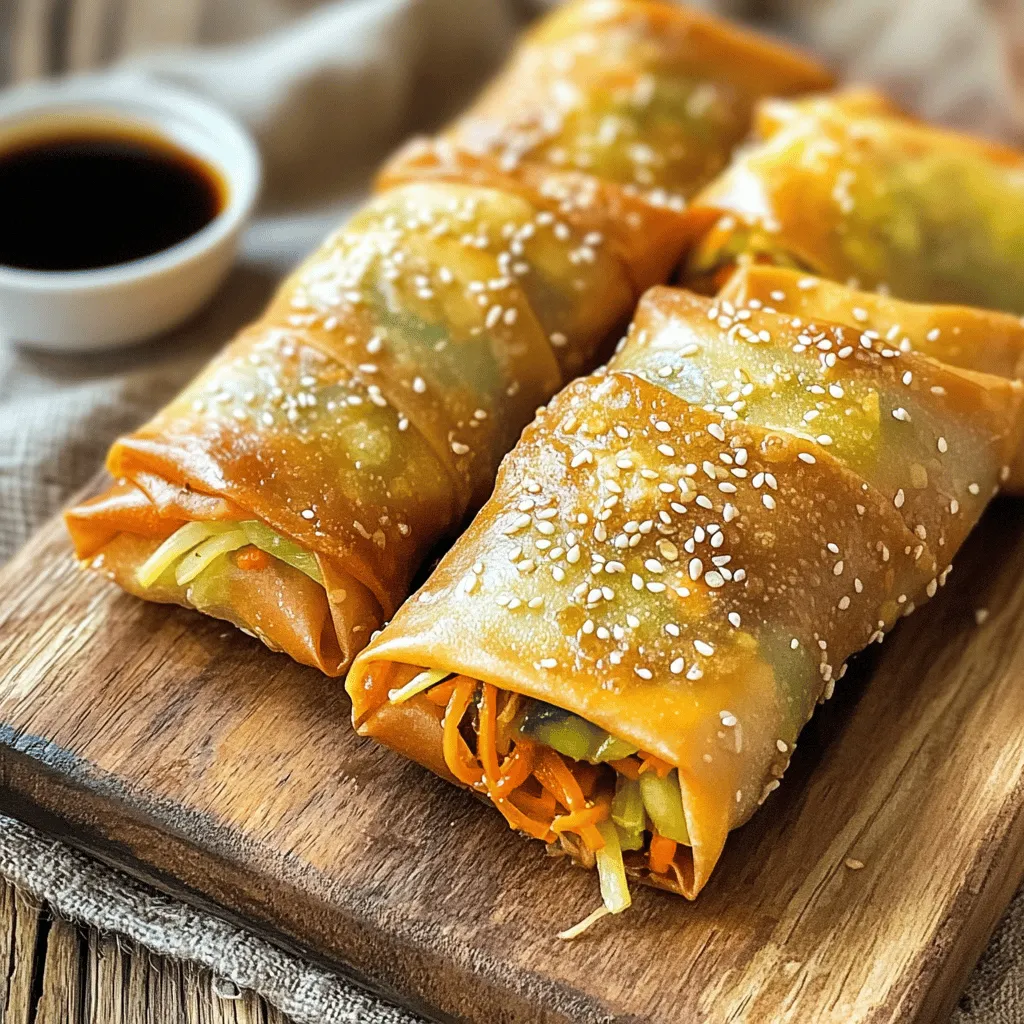
Air Fryer Veggie Spring Rolls Crispy and Delicious Snack
Are you craving a crunchy, flavorful snack that’s simple to make? Look no further! In this guide, I’ll show you
Read more…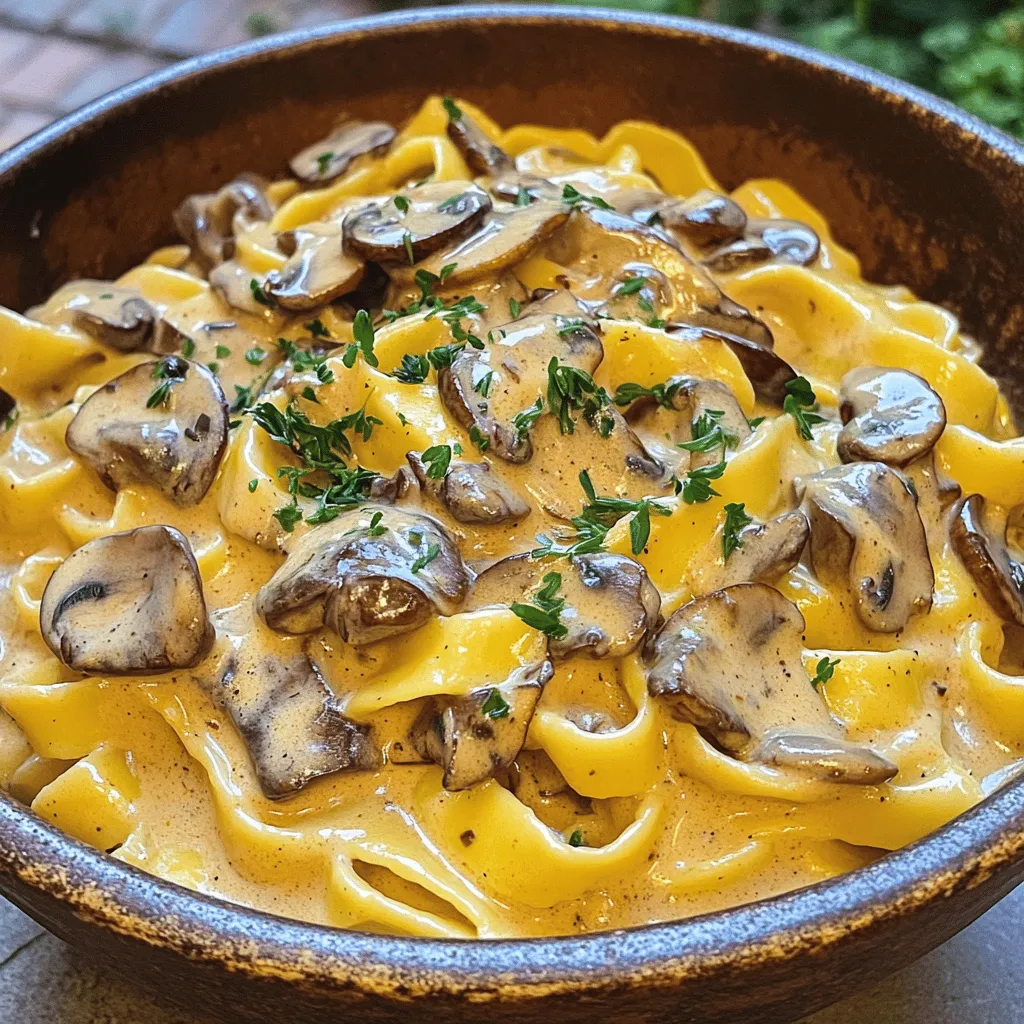
Vegan Mushroom Stroganoff Flavorful and Simple Recipe
Are you craving a rich, creamy dish without dairy? This Vegan Mushroom Stroganoff recipe is both tasty and easy! I’ll
Read more…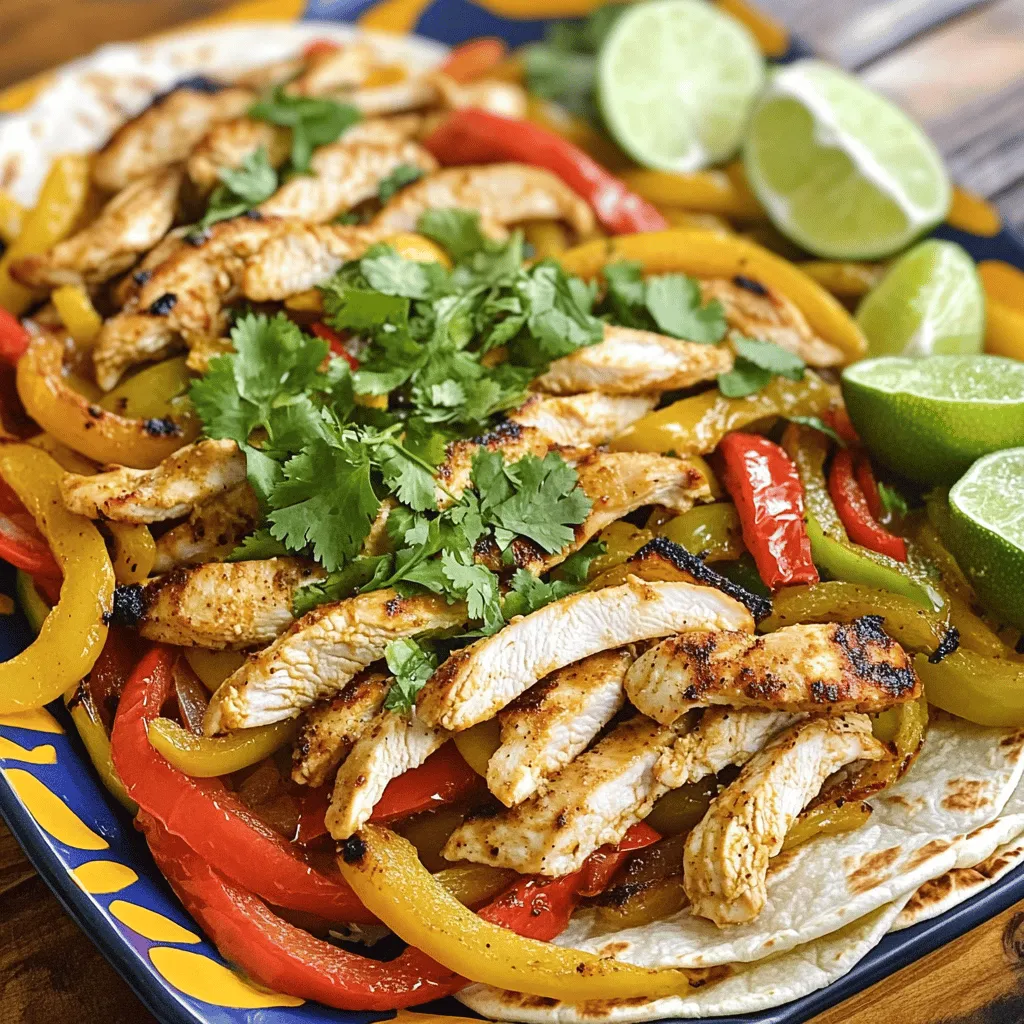
Easy Chicken Fajitas Flavorful and Quick Meal Recipe
Looking for a fast and tasty dinner? Try my Easy Chicken Fajitas! This simple recipe is packed with flavor and
Read more…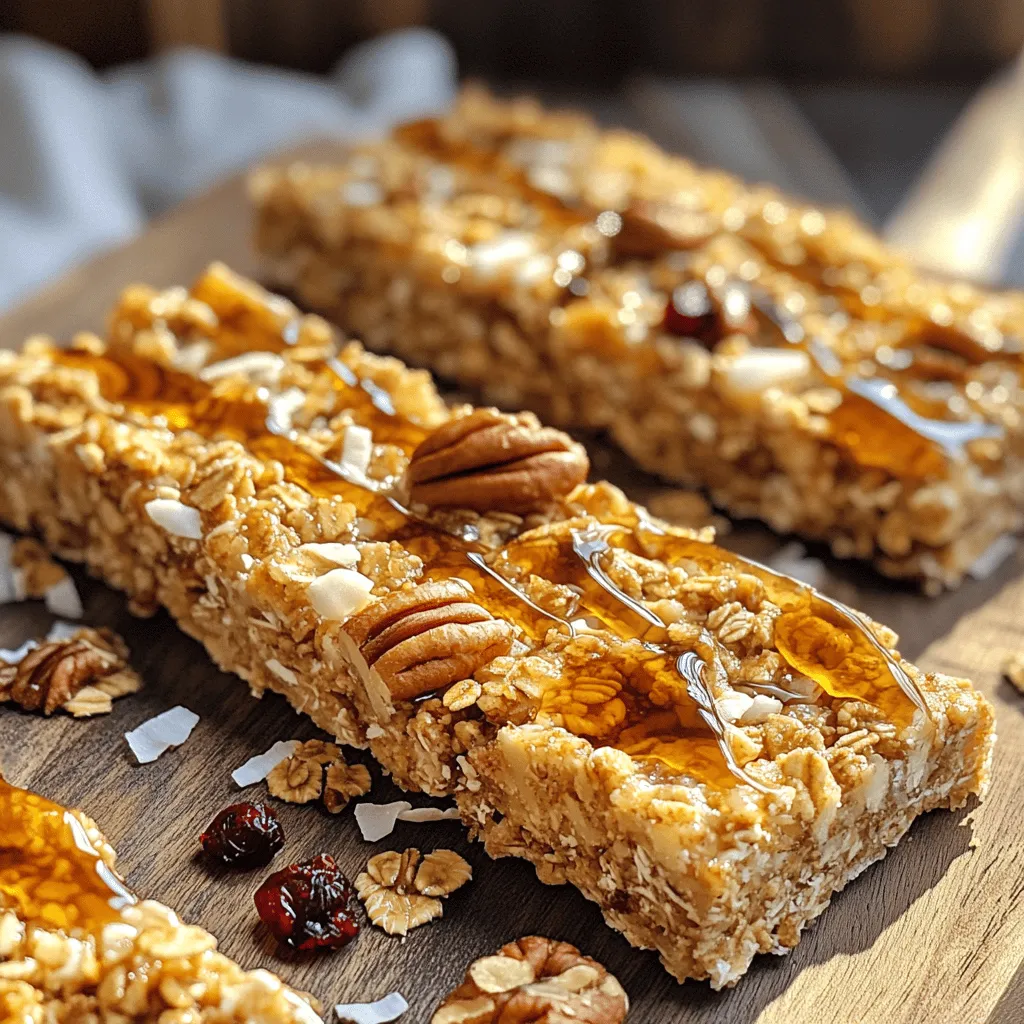
Maple Pecan Granola Bars Nutritious and Tasty Snack
Looking for a quick, satisfying snack? These Maple Pecan Granola Bars are not just tasty—they’re also packed with nutrition! With
Read more…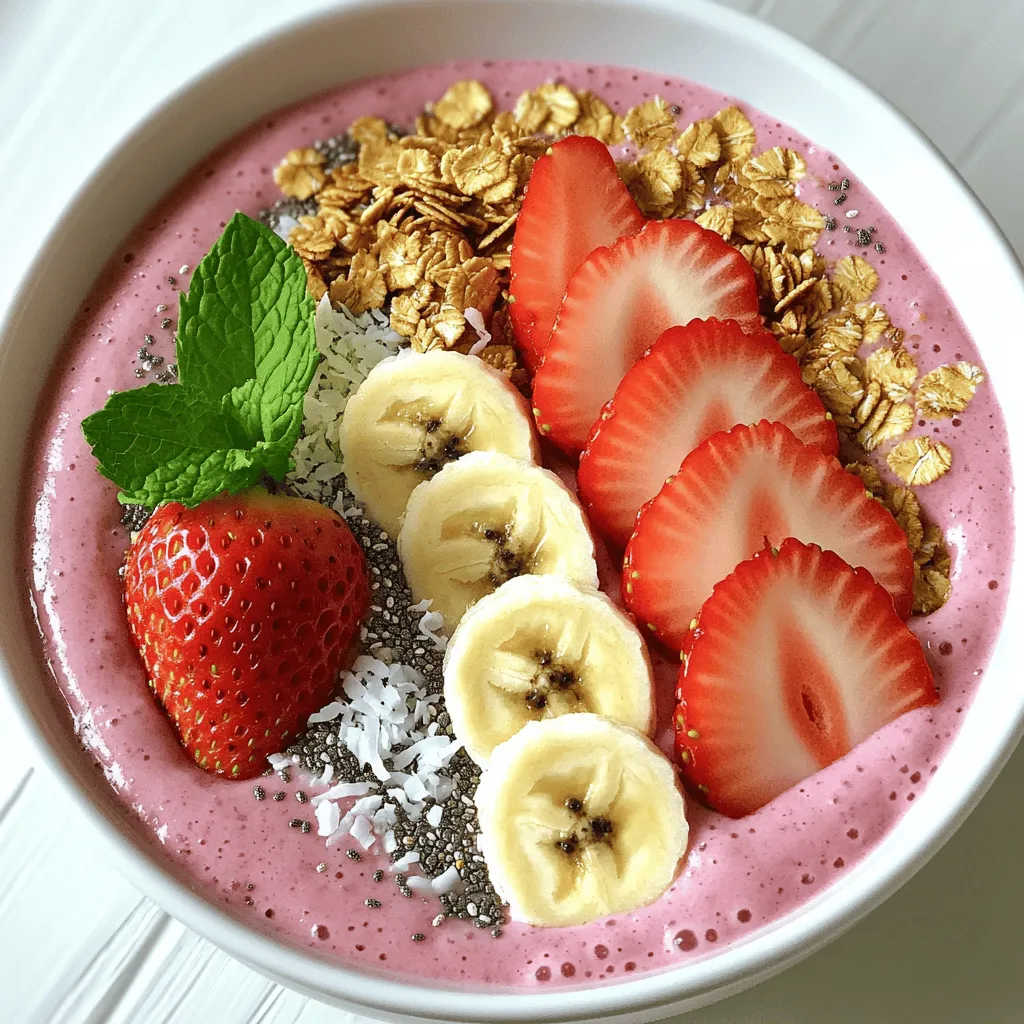
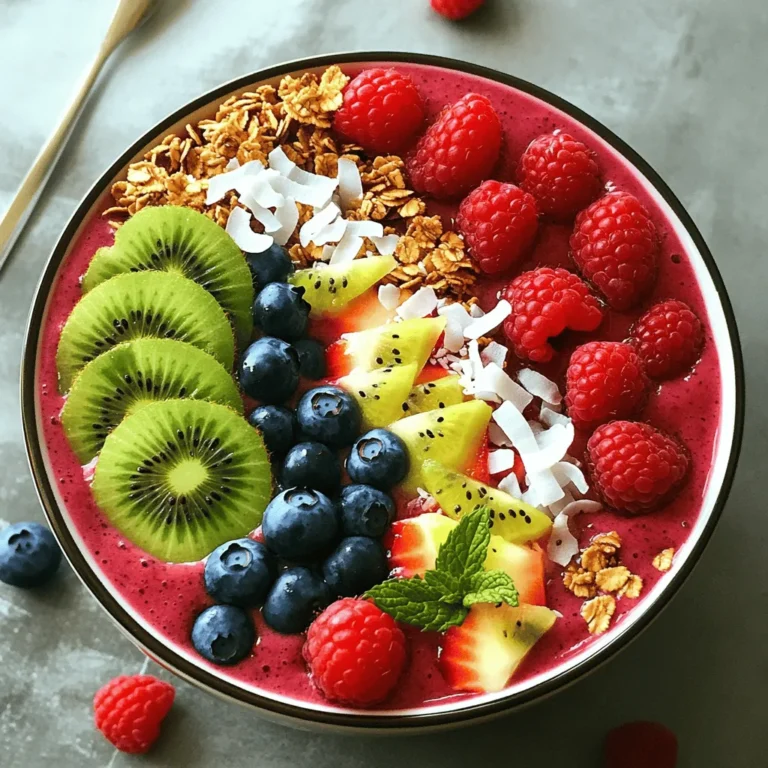
Strawberry Banana Smoothie Bowl Fresh and Tasty Recipe
Are you craving a fresh and tasty treat? Look no further! My Strawberry Banana Smoothie Bowl is a perfect mix
Read more…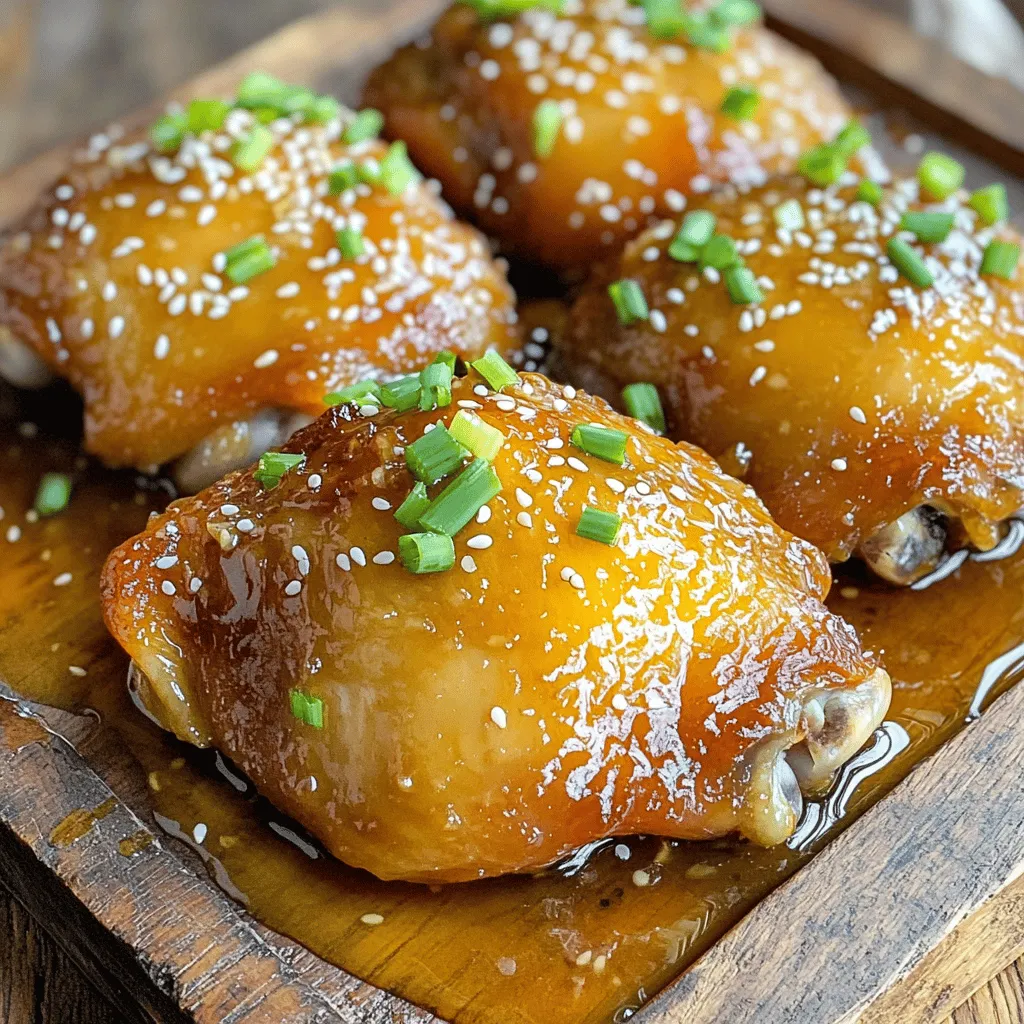
Honey Garlic Chicken Thighs Flavorful and Easy Recipe
If you’re looking for a dinner recipe that’s simple yet packed with flavor, you’ve found it! My Honey Garlic Chicken
Read more…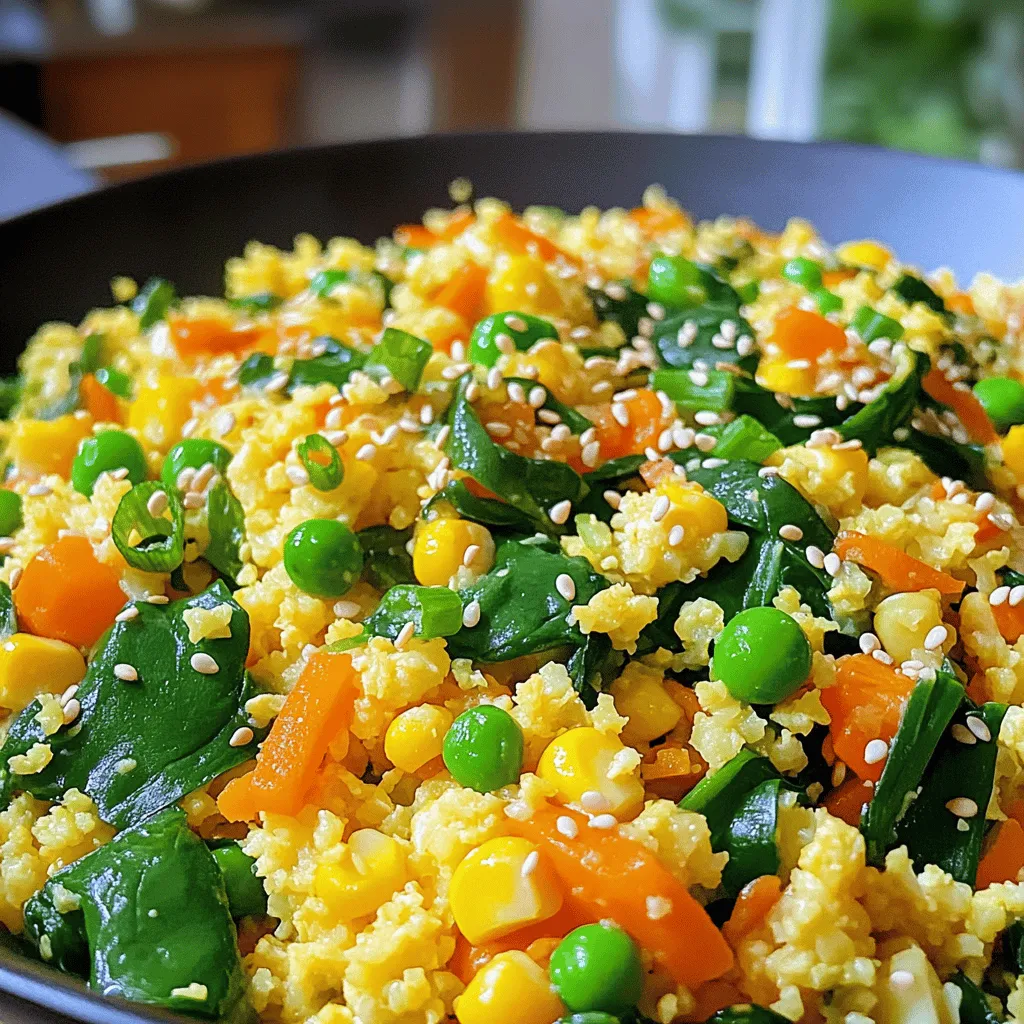
Cauliflower Fried Rice Simple and Tasty Meal Option
Looking for a quick and healthy meal? Cauliflower fried rice is your answer! This dish is simple to make and
Read more…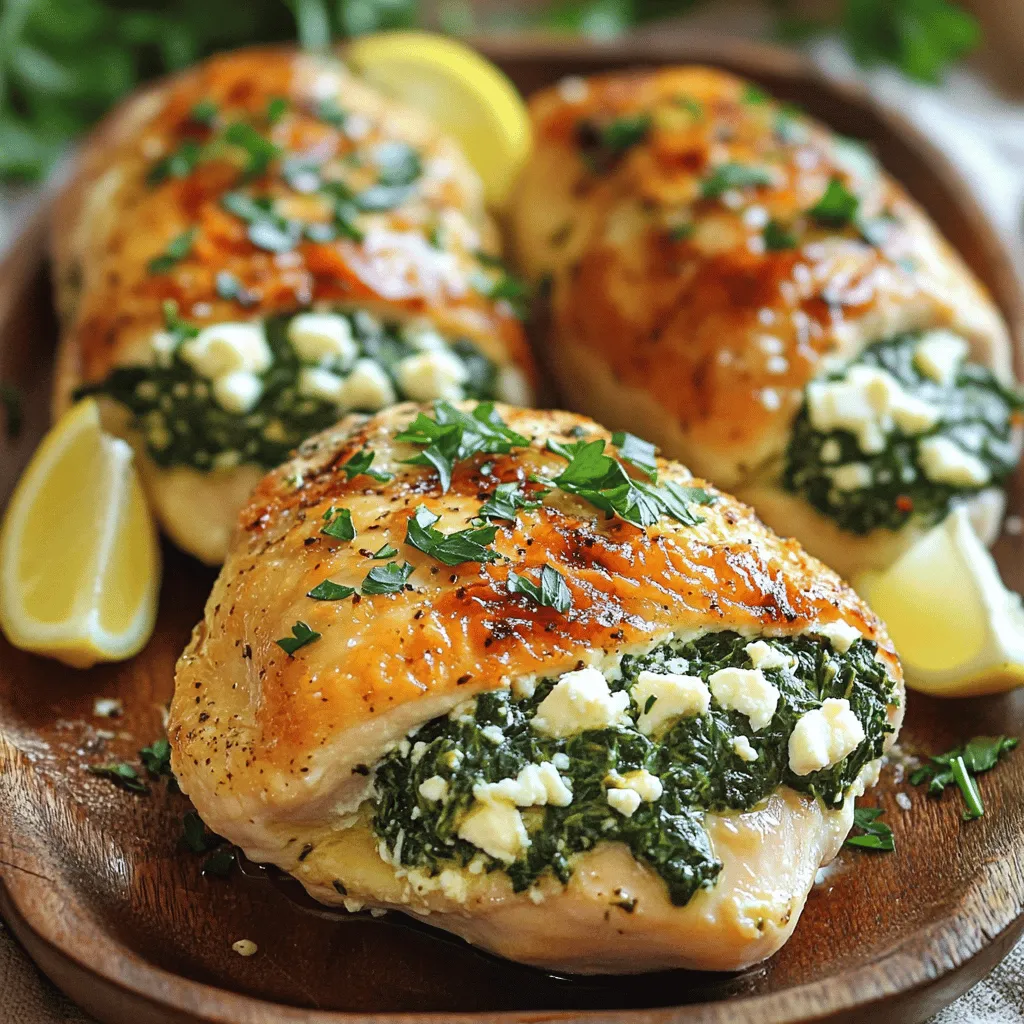
Spinach Feta Stuffed Chicken Breasts Flavorful Delight
Looking for a tasty and healthy dinner option? You’re in the right place! In this post, I’ll show you how
Read more…browse recipes


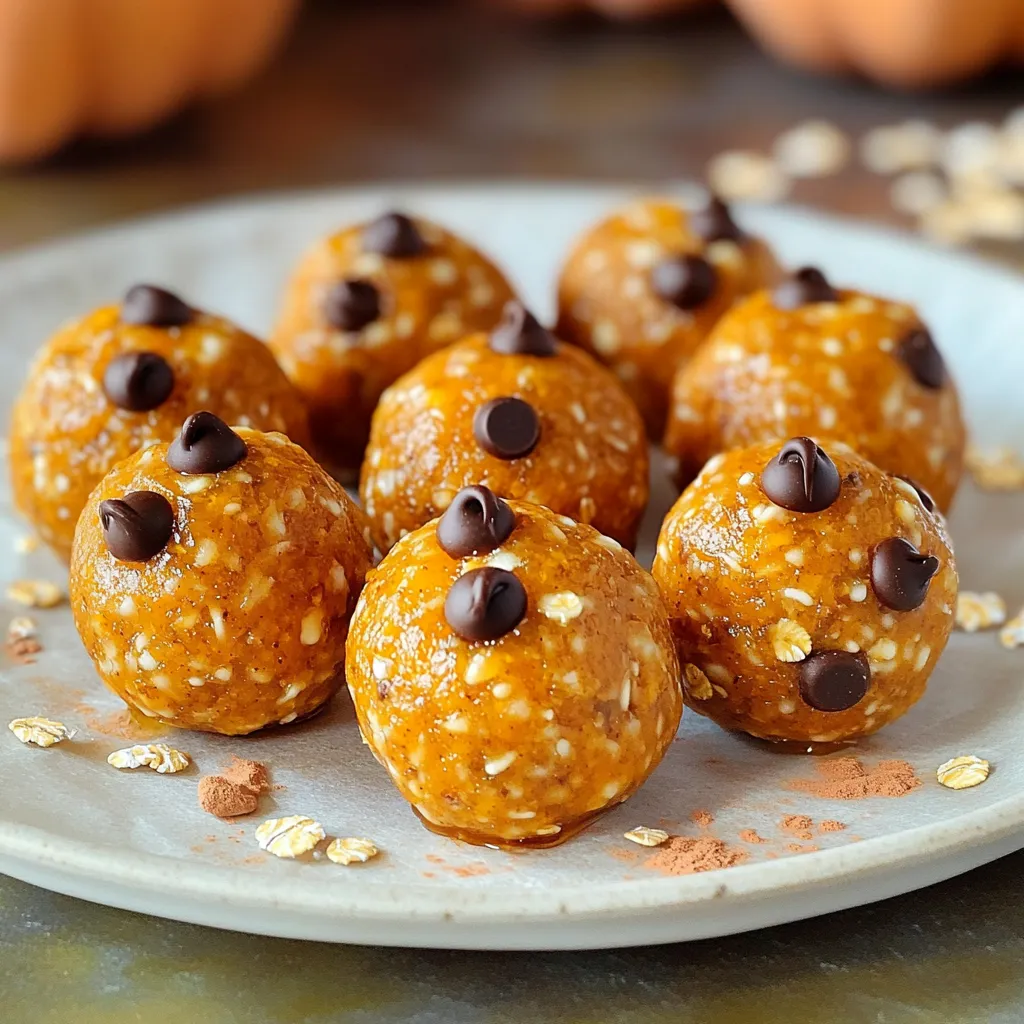
No-Bake Pumpkin Spice Energy Balls Easy Snack Recipe
Looking for a quick and healthy snack? These No-Bake Pumpkin Spice Energy Balls are just what you need! Packed with flavor and nutrients, they’re…
My Latest Desserts
My Latest Recipes

hey,
i’m !
I’m so happy you’re here!
My kitchen is filled with stories, flavors, and love and I’m so happy to share them with you. Here’s to dishes that feel like home.
![- 1 pound Brussels sprouts, trimmed and halved - 3 tablespoons olive oil - 3 tablespoons pure maple syrup - 2 tablespoons balsamic vinegar - 1 teaspoon garlic powder - 1/2 teaspoon salt - 1/4 teaspoon black pepper - 1/4 cup chopped pecans (optional) - Fresh parsley, chopped for garnish For this recipe, I love using fresh Brussels sprouts. They bring a nice crunch. The olive oil helps to crisp them up while roasting. Maple syrup adds a sweet touch that balances the earthy flavor of the sprouts. Balsamic vinegar gives a tangy kick that brightens the dish. Garlic powder adds depth without overpowering the natural taste. You can choose to add pecans for some extra crunch. They toast nicely in the oven. Fresh parsley is a must for garnish; it adds color and freshness. This mix of flavors makes these Maple Glazed Brussels Sprouts a hit at any meal. Try this recipe for a tasty side dish that everyone will love. For the full recipe, check out the detailed instructions above. - Preheat the oven to 400°F (200°C). - In a large bowl, mix the halved Brussels sprouts, olive oil, maple syrup, balsamic vinegar, garlic powder, salt, and black pepper. Toss well to coat the Brussels sprouts evenly. - Spread the Brussels sprouts in a single layer on a baking sheet. - Roast for 20 to 25 minutes. Stir them halfway through to ensure even cooking. - If you use pecans, add them to the baking sheet for the last 5 minutes. This will toast them and add nice crunch. - Once done, remove the baking sheet from the oven and let the Brussels sprouts cool for a minute. Transfer them to a serving platter. - Garnish with chopped fresh parsley. You can drizzle extra maple syrup on top for added flavor. For the complete recipe, check out the [Full Recipe]. - Cut Brussels sprouts into similar sizes. This helps them roast evenly. - Use a non-stick baking sheet. This makes cleanup easy after cooking. - Serve these sprouts with roasted meats. They also go well with a grain salad. - Drizzle more maple syrup on top. This adds extra sweetness to the dish. - Choose colorful serving dishes. They make your dish look more appealing. - Add a sprinkle of nuts and herbs. This gives extra depth and flavor to your meal. For a full recipe, check out the Maple Glazed Brussels Sprouts. {{image_2}} You can make this dish even more exciting! Here are a couple of ideas: - Add red pepper flakes for a spicy kick. Just a pinch adds warmth without overpowering the dish. - Experiment with citrus juices like lemon or orange. A splash can brighten the flavors and add a nice zing. If you want to switch things up, try these swaps: - Substitute maple syrup with honey. It gives a different sweetness but still tastes great. - Use sunflower seeds instead of pecans. This option is perfect if you want a nut-free dish. You can cook Brussels sprouts in different ways to suit your taste: - Try grilling them for a smoky flavor. This method adds a fun twist and a nice char. - Sauté in a skillet for a quicker version. It’s fast and still delivers great flavor. For the full recipe, check out the [Full Recipe]. After enjoying your maple glazed Brussels sprouts, let them cool down first. This step helps keep them fresh. Once cooled, place the sprouts in an airtight container. They will stay good for up to 3 days in the fridge. This way, you can enjoy them again without losing flavor. When it's time to reheat, the oven is your best friend. Preheat it to 350°F (175°C). Spread the Brussels sprouts on a baking sheet and warm them for about 10-15 minutes. This method keeps them crispy. If you're in a hurry, you can use the microwave. Just remember, they might lose some of their crunch. If you want to save your leftovers for later, freezing is a great choice. After cooking, let the Brussels sprouts cool completely. Then, place them in a freezer-safe bag or container. To enjoy them later, thaw them in the fridge overnight before reheating. For the best taste and texture, try to use them within 1 month. Look for a golden brown color and tenderness when pierced. This shows they cooked well. If they feel soft and have a nice caramelized look, you are good to go! Roasting brings out their natural sweetness, making them even tastier. Yes, prepare and roast them, then store in the fridge before serving. This makes it easy for meal prep. You can reheat them quickly when you're ready to eat. Just remember to keep them in an airtight container for freshness. They pair well with roasted meats, quinoa, or leafy salads. Try serving them alongside chicken or pork for a hearty meal. If you're looking for something light, a fresh salad with a tangy dressing complements these sprouts perfectly. For a grain option, quinoa adds great texture and flavor. Maple glazed Brussels sprouts are simple and tasty. You mix fresh sprouts with oil, maple syrup, and spices. Roasting brings out their natural sweetness. Remember to try different flavors and serving ideas. You can store leftovers for later enjoyment. This dish complements a variety of meals, making it versatile. Enjoy experimenting and sharing your creations. Happy cooking!](https://southerndishes.com/wp-content/uploads/2025/07/fe020906-99d8-434d-95b8-84fb550f6600-300x300.webp)

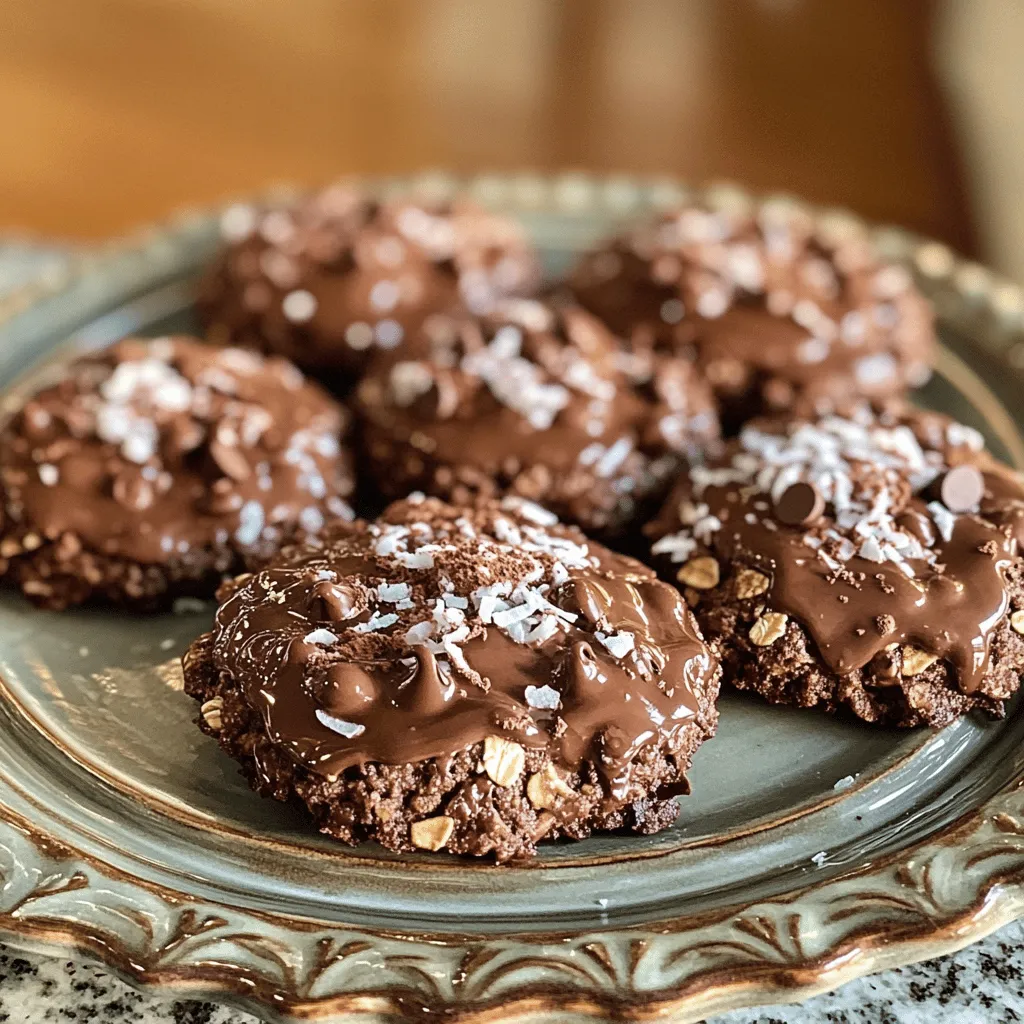
No-Bake Chocolate Oatmeal Cookies Simple Treat
Craving a tasty treat that’s quick to make? No-bake chocolate oatmeal cookies are your answer! With simple ingredients like oats, cocoa, and peanut butter,…