
Latest & Greatest
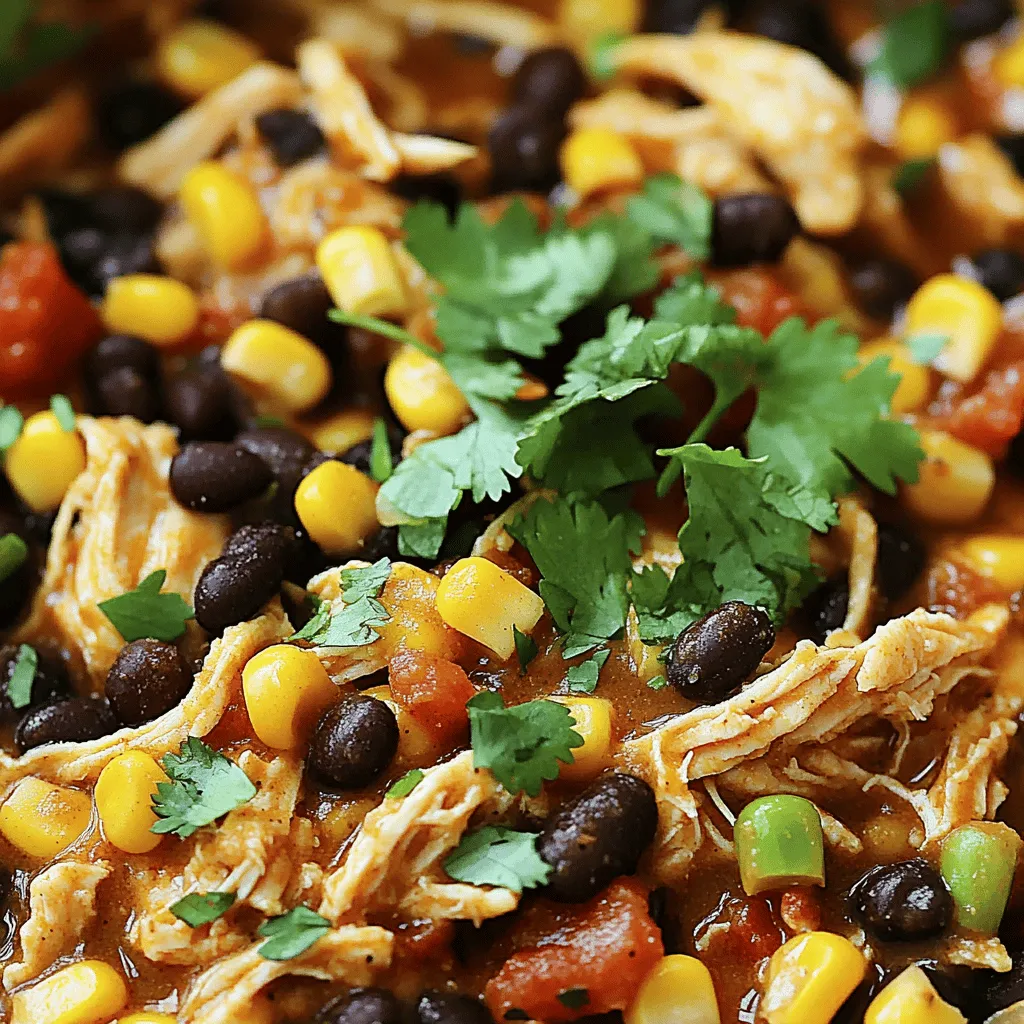
Crockpot Mexican Chicken Flavorful and Simple Recipe
Looking for a simple, tasty meal? You’re in the right place! This Crockpot Mexican Chicken is packed with bold flavors
Read more…
Spring Hash Brown Crust Quiche Delightful and Easy Recipe
Looking for a quick, tasty dish for spring? Try my Spring Hash Brown Crust Quiche! This recipe combines crispy hash
Read more…browse recipes


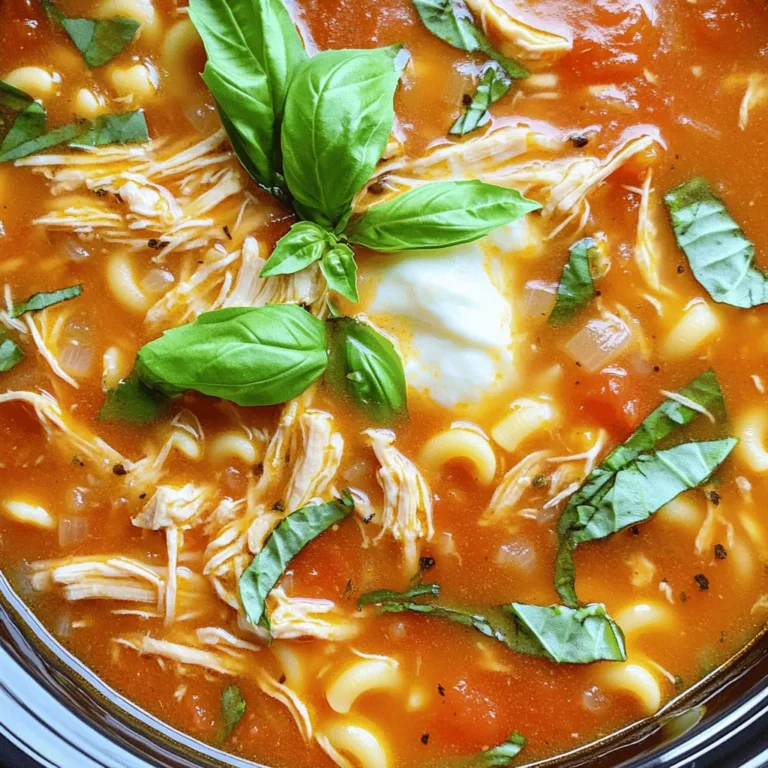
Instant Pot Chicken Noodle Soup Quick and Easy Meal
Are you craving a warm, comforting bowl of chicken noodle soup but short on time? Look no further! In this post, I’ll share my…
My Latest Desserts
My Latest Recipes

hey,
i’m !
I’m so happy you’re here!
My kitchen is filled with stories, flavors, and love and I’m so happy to share them with you. Here’s to dishes that feel like home.
![To make a Honey Almond Matcha Latte, gather these simple ingredients: - 1 teaspoon matcha green tea powder - 1 cup almond milk (unsweetened or sweetened) - 1 tablespoon honey (or maple syrup for vegan option) - 1/2 teaspoon vanilla extract - 1/4 teaspoon cinnamon (optional) - Ice cubes (for iced version) Matcha green tea powder is the star of this drink. It gives a rich green color and a unique flavor. Almond milk makes the latte creamy. You can choose unsweetened if you want less sugar. Honey adds sweetness, but use maple syrup if you prefer a vegan option. Vanilla extract brings warmth and depth. Cinnamon is great for a hint of spice. If you want an iced version, just add ice cubes after mixing. This drink is not only tasty but also healthy. Each ingredient works together to create a delightful experience. For the complete recipe, check the [Full Recipe]. Sifting the Matcha Powder Start by sifting 1 teaspoon of matcha green tea powder into a small bowl. This step helps remove lumps. It makes the matcha smoother for your latte. Preparing the Matcha Mixture Next, add a few tablespoons of hot water to the sifted matcha. Use a whisk or a matcha whisk (chasen) to mix. Whisk it well until you get a frothy mix. This is key for a good latte. Heating the Almond Milk For the warm version, pour 1 cup of almond milk into a small saucepan. Heat it over medium heat until it's warm. Make sure it does not boil. If you want an iced latte, skip this step. Combining Ingredients for Warm Latte Once the almond milk is warm, take it off the heat. Stir in 1 tablespoon of honey (or maple syrup), 1/2 teaspoon of vanilla extract, and 1/4 teaspoon of cinnamon (if you like). Mix until it's well blended. Creating an Iced Version If you prefer it cold, fill a glass with ice cubes. Pour the dissolved matcha over the ice. Then, add the sweetened almond milk mixture. Stir gently to combine. Garnishing Tips You can make your latte look pretty. For a garnish, sprinkle a little matcha powder on top or add a cinnamon stick. This adds a nice touch and extra flavor. Now you have a delicious Honey Almond Matcha Latte! For the complete details, check the Full Recipe. Choosing the Right Matcha Powder Select high-quality matcha for a bright color and rich taste. Look for matcha labeled "ceremonial grade" for the best flavor. A good matcha adds a smooth finish to your latte. Avoid lower grades, as they can taste bitter or grassy. Tips for Frothing Almond Milk Almond milk can be tricky to froth. To get good foam, use unsweetened almond milk. Heat it gently and whisk or use a frother. If you want more foam, try adding a pinch of sugar. This helps create a thicker texture. Adjusting Sweetness for Personal Preference Honey adds a nice touch, but you can change it to fit your taste. Use more or less honey based on your liking. If you want a vegan option, maple syrup works well. You can also skip sweeteners for a less sugary drink. {{image_2}} Vegan Substitutions If you want a vegan Honey Almond Matcha Latte, use maple syrup instead of honey. This swap keeps the drink sweet and tasty. You can also choose plant-based milk, like oat or soy milk. Both options create a creamy texture. Flavor Variations You can make your latte even more fun. Try adding chocolate syrup for a mocha twist. You can also experiment with different sweeteners, like agave or coconut sugar. Each option will change the taste and give you new flavors to enjoy. Different Milk Options Almond milk is great, but other types work too. Soy milk offers a thicker feel. Oat milk has a naturally sweet taste, while coconut milk adds a tropical twist. Each milk alters the taste, so pick the one you love best. For the complete recipe, check out the Full Recipe. Storing Matcha Powder To keep matcha fresh, store it in an airtight container. Light and air can spoil its flavor. Always place it in a cool, dark place. Avoid the fridge as moisture can harm the powder. Use within a month for the best taste. Keeping Almond Milk Fresh Store almond milk in the fridge. Always check the expiration date on the carton. If you open a container, use it within seven days. Shake it well before using to mix any settled parts. Pre-Making the Latte for Later Consumption You can make the Honey Almond Matcha Latte in advance. Prepare the matcha and sweetened almond milk separately. Store them in the fridge in sealed containers. When ready to drink, mix them again. For the best flavor, consume within two days. Enjoy your tasty latte anytime! Matcha offers many health benefits. It is high in antioxidants. These help fight free radicals. Matcha can boost your energy and focus. It also supports weight loss and metabolism. Plus, it can calm your mind without making you sleepy. Yes, you can skip the sweetener. The matcha and almond milk still taste great. If you want, add a pinch of salt. This will enhance the flavor without extra sweetness. You can find high-quality matcha in health stores or online. Look for brands that focus on organic products. Check for bright green color and fine texture. This shows it is fresh and pure. To find cafes near you, search online. Use terms like "Honey Almond Matcha Latte near me." Many local coffee shops offer this drink. You can also check out specialty tea shops for unique options. Yes, a blender works well too. It can mix the matcha and water well. Just be careful not to over-blend. You want the frothy texture, similar to whisking by hand. You now know how to make a Honey Almond Matcha Latte. We covered the best ingredients to use, step-by-step directions, and helpful tips to perfect your drink. I also shared storage advice and answered common questions about matcha. Feel free to get creative with flavors and variations. This drink can be your daily treat or an energizing boost. Remember, a good matcha latte is all about personal taste. Enjoy crafting your own version and share it with friends!](https://southerndishes.com/wp-content/uploads/2025/06/302c2597-5f37-48aa-9d93-a54674a8b380-300x300.webp)
![- 1 cup uncooked long-grain white rice - 2 cups broccoli florets (fresh or frozen) - 1 can (10.5 oz) cream of mushroom soup (or homemade) - 1 cup shredded cheddar cheese - 1 cup milk - 1 small onion, finely chopped - 2 cloves garlic, minced - 1 teaspoon garlic powder - 1 teaspoon onion powder - Salt and pepper to taste - 1 tablespoon olive oil - 1/2 cup breadcrumbs (optional, for topping) The key to a great Cheesy Broccoli Rice Casserole lies in the ingredients. First, the rice gives the dish its base. I always choose long-grain white rice. It cooks well and keeps a nice texture. The broccoli brings both color and nutrients. Fresh or frozen, either works nicely. Next, cream of mushroom soup adds a rich creaminess. You can make it homemade for a personal touch. Don't forget the cheddar cheese! It melts beautifully and gives a wonderful flavor. Milk helps to blend everything together. Now, let’s add some depth with the additional ingredients. Onions and garlic create a fragrant base. I finely chop the onion and mince the garlic for easy cooking. Garlic powder and onion powder give extra flavor. You can adjust salt and pepper to your taste. Finally, I often drizzle olive oil for a little richness. If you love a crunchy topping, breadcrumbs are a great option. They add a nice texture. Together, these ingredients create a comforting dish that warms the heart. For the full recipe, check [Full Recipe]. - Preheat oven to 350°F (175°C). - Cook rice in boiling water and prepare broccoli. Start by preheating your oven to 350°F. This ensures your casserole bakes evenly. Next, bring 2 cups of water to a boil in a large saucepan. Add 1 cup of uncooked rice. Cover the pot, reduce heat to low, and let it simmer. In about 18-20 minutes, the rice will be fluffy and ready. While the rice cooks, prepare 2 cups of broccoli florets. If you use fresh broccoli, blanch it in boiling water for 2 minutes. After that, plunge it into ice water. This stops the cooking process. If you are using frozen broccoli, just thaw and drain. - Combine cooked rice, sautéed onions, garlic, and other ingredients in a bowl. In a skillet, heat 1 tablespoon of olive oil over medium heat. Add 1 finely chopped onion and sauté it until soft. This takes about 5 minutes. Then, add 2 minced garlic cloves and stir for another minute. In a large bowl, mix the cooked rice, sautéed onions, garlic, and broccoli. Now, add 1 can of cream of mushroom soup, 1 cup of milk, and 1 cup of shredded cheddar cheese. Also, sprinkle in 1 teaspoon each of garlic powder and onion powder. Season with salt and pepper to your taste. Stir everything until well combined. - Transfer to greased baking dish, add toppings, and bake for 25-30 minutes. Pour the mixture into a greased 9x13-inch baking dish. For an extra crunch, sprinkle 1/2 cup of breadcrumbs and more cheese on top. This adds a nice texture to your dish. Bake in the preheated oven for 25-30 minutes. You want it to be hot and bubbly, with melted cheese on top. Once done, let it cool for a few minutes before serving. For the complete recipe, check the [Full Recipe]. To make sure your rice is fluffy and not sticky, follow these steps: - Use long-grain white rice. - Rinse it under cold water before cooking. - Use a 2:1 water-to-rice ratio. - Once boiling, reduce heat and cover. Let it simmer for 18-20 minutes. For perfect sautéing of onions and garlic: - Use medium heat to avoid burning. - Add olive oil to the pan first. - Sauté the onions until they turn translucent. This takes about 5 minutes. - Add garlic last, cooking for just one minute. This keeps the garlic fragrant. The right cheese makes this dish shine. Consider these options: - Cheddar cheese adds a sharp flavor. - Gruyère gives a creamy texture. - Mozzarella melts beautifully for a gooey effect. To achieve the perfect cheesy crust: - Sprinkle extra cheese on top before baking. - Add breadcrumbs if you like a bit of crunch. - Bake until the cheese is golden and bubbly. Adding herbs and spices can elevate your casserole: - Try thyme or rosemary for a fresh taste. - A pinch of red pepper flakes adds spice. - Consider a sprinkle of paprika for color and flavor. For extra veggies, think about: - Adding chopped bell peppers for sweetness. - Mixing in spinach for a healthy boost. - Throwing in peas for a pop of color and flavor. For the full recipe, check the Full Recipe section. {{image_2}} You can easily change the base of this dish. Instead of rice, try quinoa or another grain. Quinoa gives a nutty flavor and boosts protein. For the cream of mushroom soup, you can use a creamy cauliflower soup or a homemade version. This switch can make the dish lighter and just as tasty. To make a gluten-free version, use gluten-free breadcrumbs or skip them completely. You can also replace the cream of mushroom soup with a gluten-free version or a blend of cashews and vegetable broth for a creamy texture. If you want a vegetarian or vegan dish, swap the cheddar cheese for a plant-based cheese. Nutritional yeast is a great choice for added flavor. Using seasonal vegetables can enhance freshness. In spring, add asparagus or peas for a lovely crunch. In fall, try adding roasted butternut squash for sweetness. You can also mix different cheeses based on what you have. A blend of mozzarella, gouda, or pepper jack can change the flavor profile. These variations keep the casserole exciting and new every time you make it. For the full recipe, check out the section above! To keep your cheesy broccoli rice casserole fresh, place it in an airtight container. Make sure to let it cool down before sealing. This dish stays good in the fridge for about 3 to 5 days. If you plan to eat it later in the week, store it right after dinner. You can freeze the casserole for up to 3 months. Just wrap it tightly in plastic wrap and then in aluminum foil. This helps keep out air. When you’re ready to enjoy it, set it in the fridge overnight to thaw. For the best taste, reheat in the oven. Set it to 350°F (175°C) and bake for about 20 minutes. Cover it with foil to stop it from drying out. You can also use the microwave, but be careful. Stir it halfway through to heat evenly. Enjoy your cheesy goodness! How to make Cheesy Broccoli Rice Casserole ahead of time? You can prepare this casserole a day in advance. Cook the rice and mix all ingredients. Place the mixture in your baking dish. Cover it tightly and store it in the fridge. When you're ready to bake, add a few extra minutes to the cooking time. Can I use frozen broccoli instead of fresh? Yes, frozen broccoli works well here. It saves time and is easy to use. Just thaw it and drain any excess water before mixing it into your casserole. What can I serve with Cheesy Broccoli Rice Casserole? This dish pairs well with grilled chicken or roasted meats. You can also serve it with a side salad for freshness. It makes a great main or side dish for any meal. How do I know when the casserole is done baking? The casserole is done when it is hot and bubbly. The cheese on top should be melted and slightly golden. You can also check with a knife; it should come out clean. Can I add meat to the recipe? Absolutely! You can include cooked chicken, ham, or even ground beef. Just mix the meat in with the other ingredients before baking. What can I use instead of cream of mushroom soup? You can use cream of chicken soup or a homemade white sauce. If you want a dairy-free option, try a cashew cream or a thick vegetable broth. Are there any dairy-free options for this casserole? Yes, you can use dairy-free cheese and almond or oat milk. Make sure to check labels to ensure all ingredients fit your diet. This blog post shared a simple and tasty Cheesy Broccoli Rice Casserole recipe. We covered essential and extra ingredients, step-by-step instructions, and helpful tips. You can customize this dish to fit your taste and dietary needs. Feel free to mix in your favorite vegetables or cheeses. Remember, leftovers can be stored and reheated easily. Enjoy making this cheesy comfort food for your family today!](https://southerndishes.com/wp-content/uploads/2025/07/9792f75e-4f1d-4ac6-aec4-0bf8c855e545-300x300.webp)

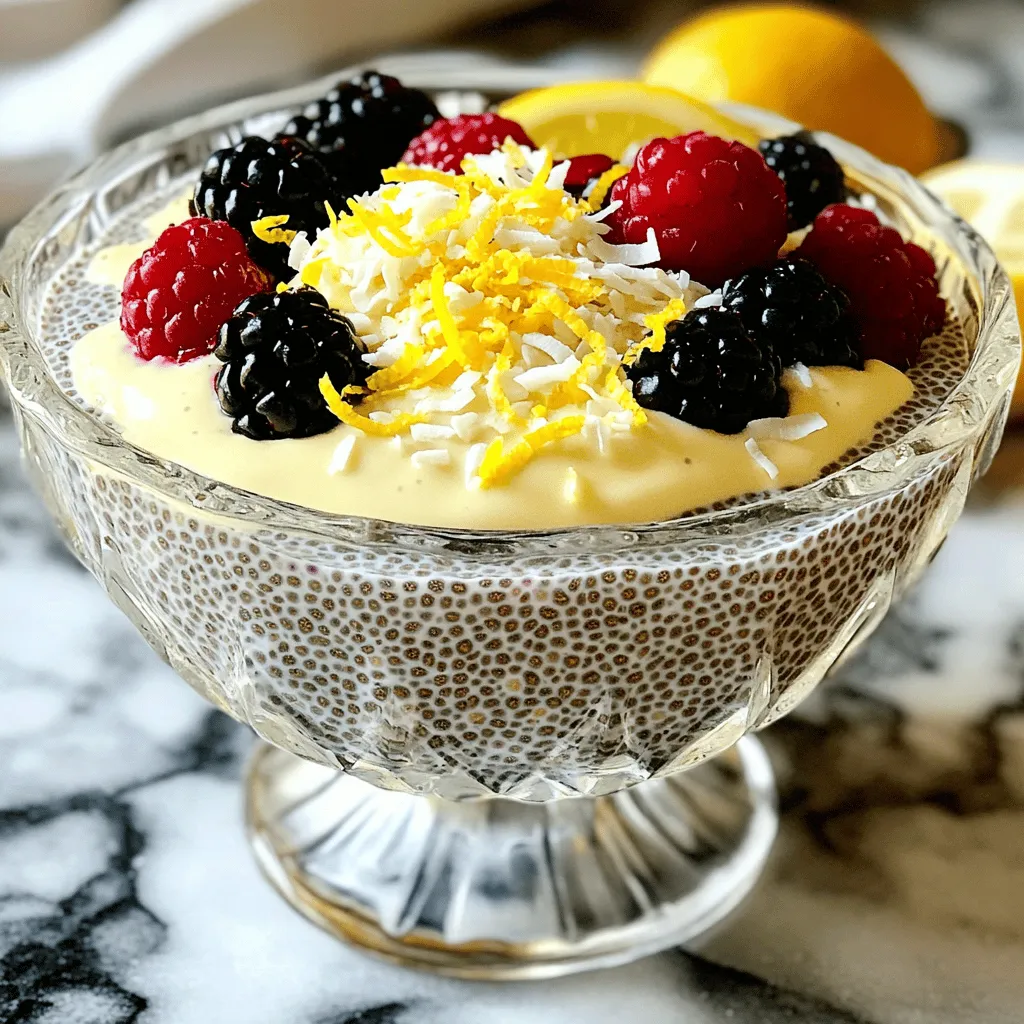
Lemon Cream Chia Pudding Refreshing Healthy Snack
Looking for a refreshing and healthy snack? You’ve come to the right place! My Lemon Cream Chia Pudding is a delightful treat that combines…