
Latest & Greatest

Chocolate Avocado Mousse Rich and Creamy Delight
Indulging in a rich and creamy dessert doesn’t have to mean guilt. With this Chocolate Avocado Mousse, you get both!
Read more…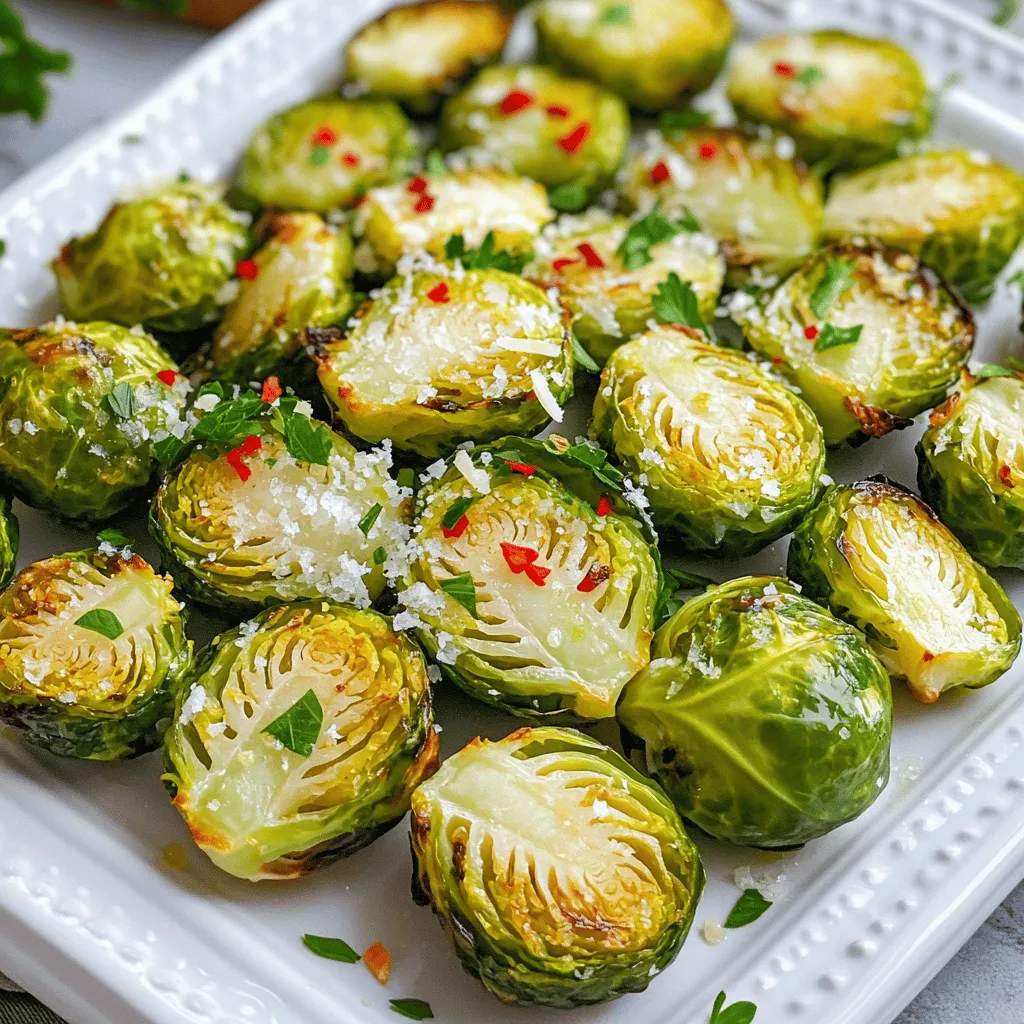
Lemon Garlic Roasted Brussels Sprouts Tasty Side Dish
Are you ready to elevate your dinner table with a vibrant side dish? Lemon Garlic Roasted Brussels Sprouts are the
Read more…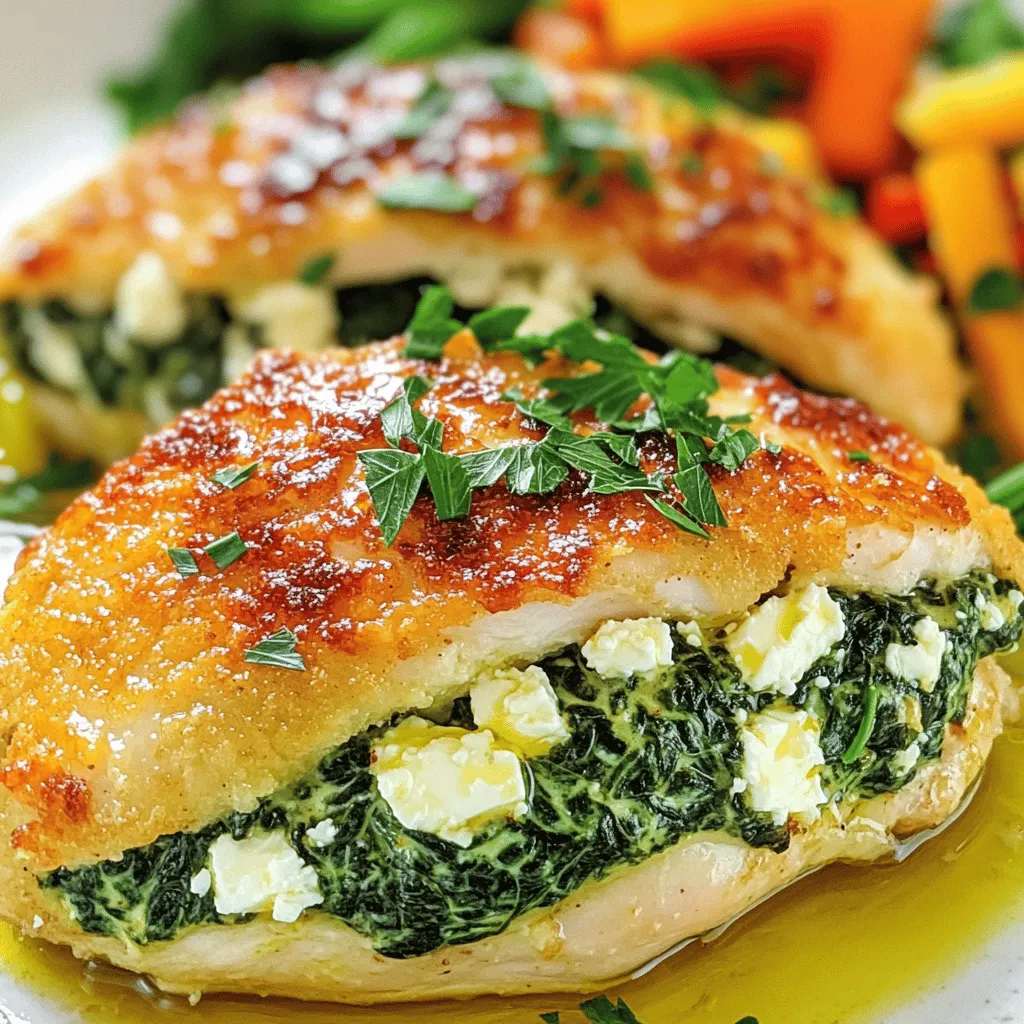
Spinach Feta Stuffed Chicken Breast Simple and Tasty
If you’re craving a meal that combines flavor and nutrition, look no further! My Spinach Feta Stuffed Chicken Breast is
Read more…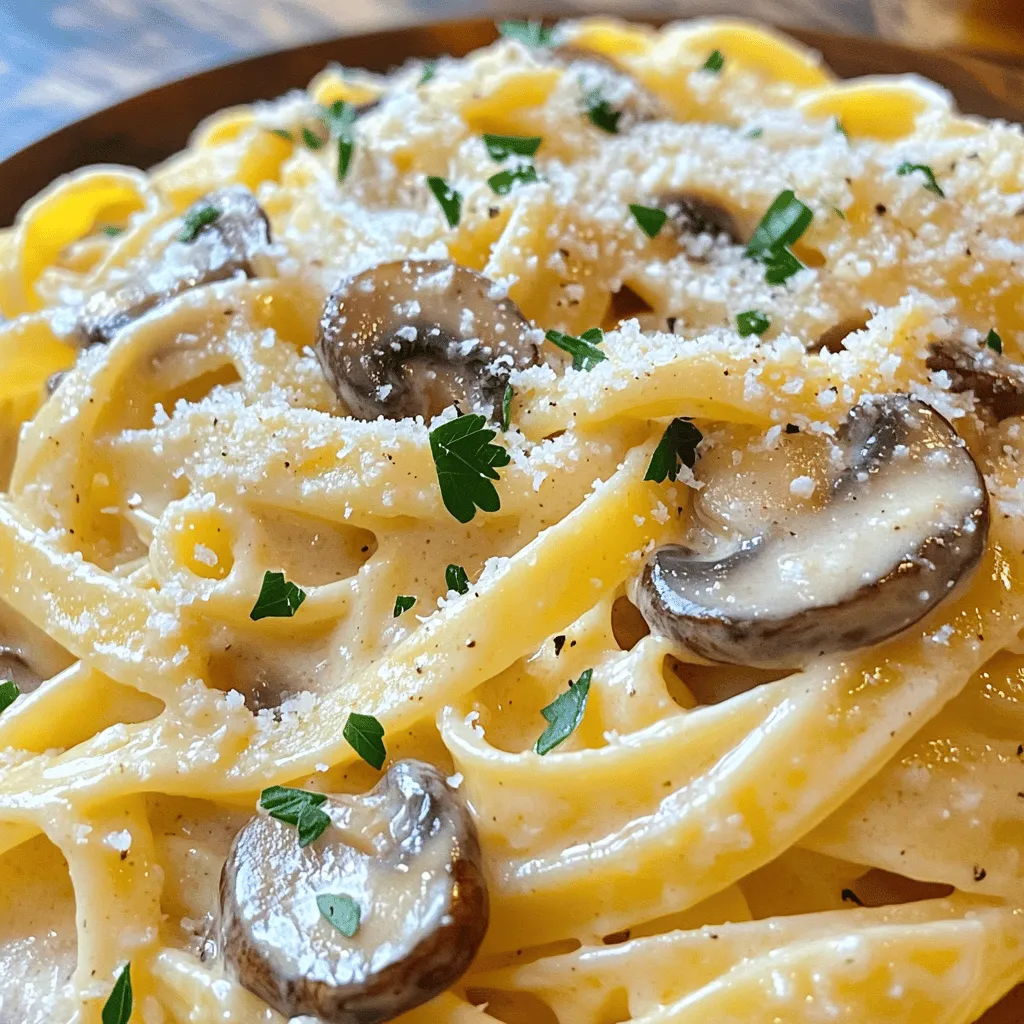
Creamy Garlic Mushroom Pasta Flavorful and Easy Meal
If you’re craving a dish that’s both simple and delicious, look no further! Creamy Garlic Mushroom Pasta is the answer
Read more…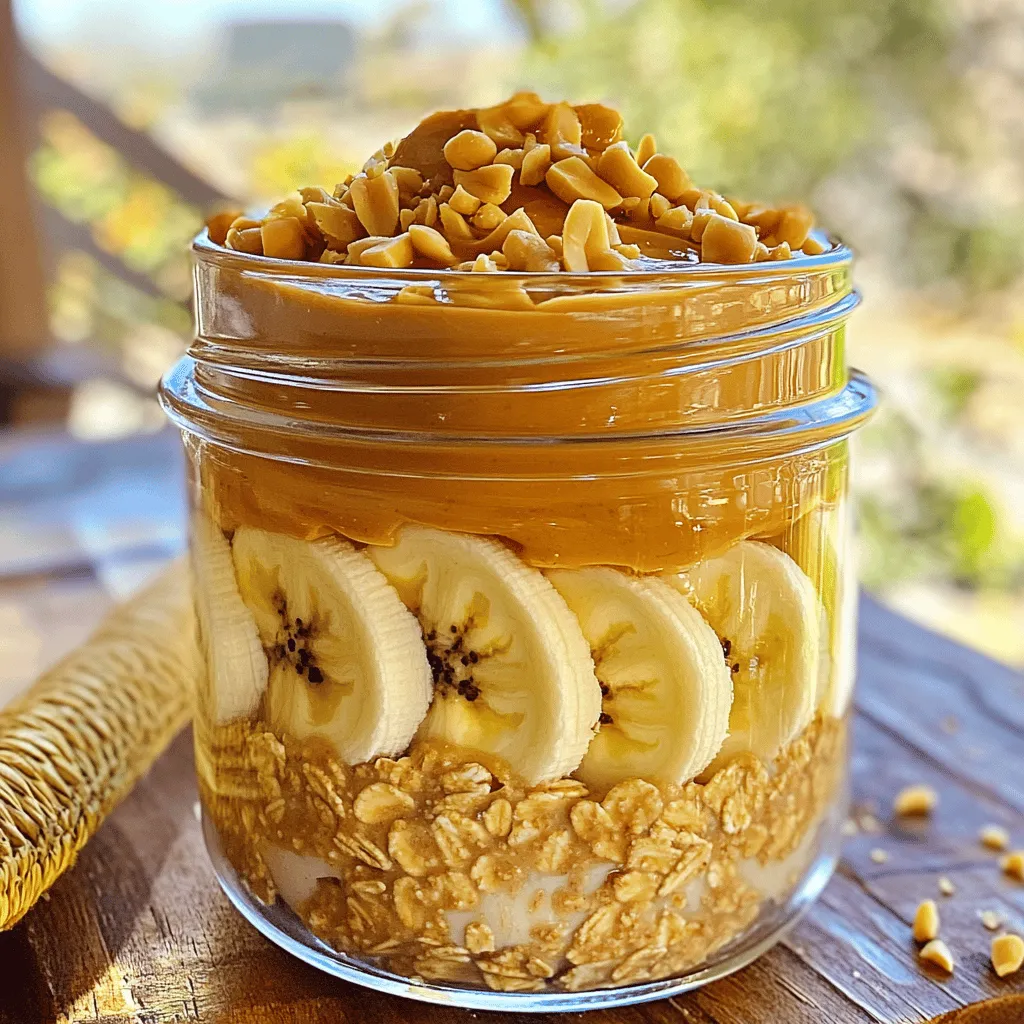
Peanut Butter Banana Overnight Oats Easy and Healthy
If you love a quick, tasty breakfast, Peanut Butter Banana Overnight Oats are perfect for you! They combine creamy peanut
Read more…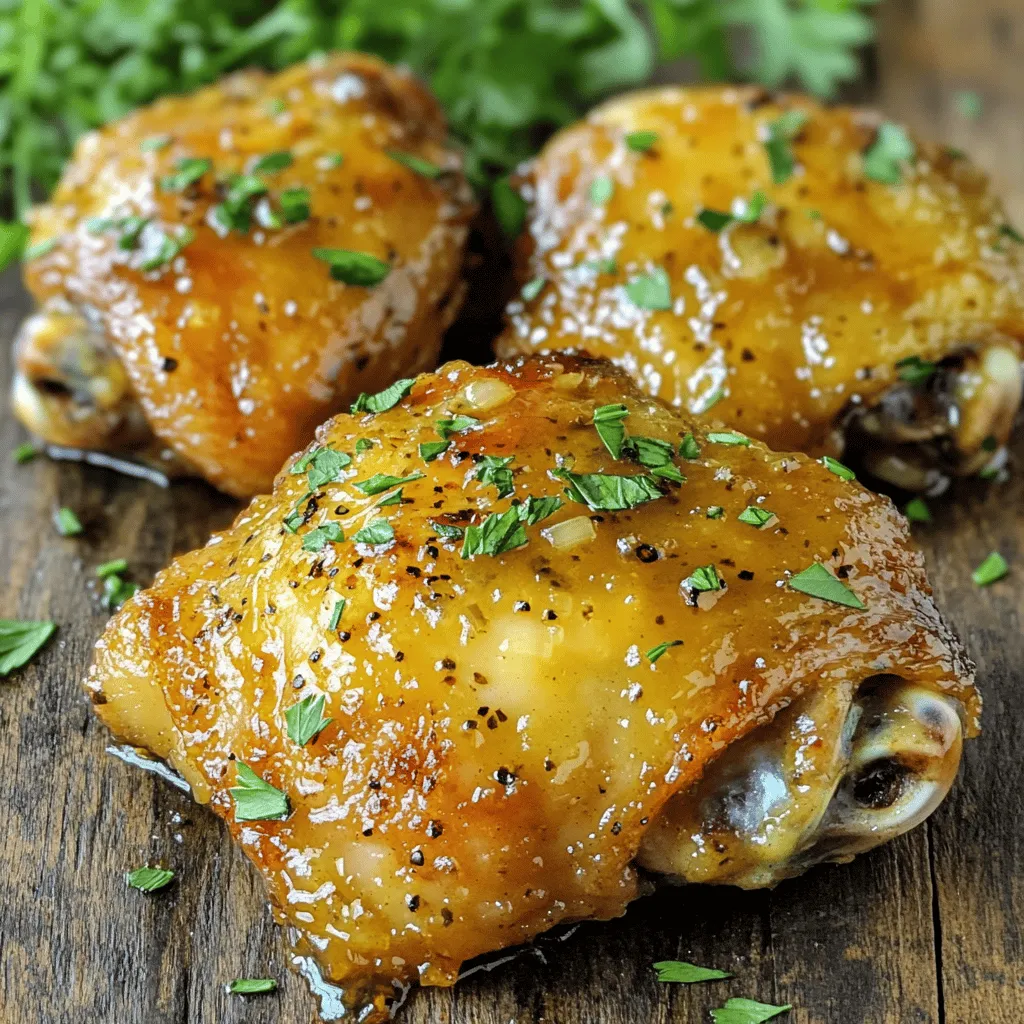
Honey Mustard Chicken Thighs Flavorful Dinner Recipe
Looking to spice up your dinner routine? This Honey Mustard Chicken Thighs recipe is your answer! Juicy chicken thighs coated
Read more…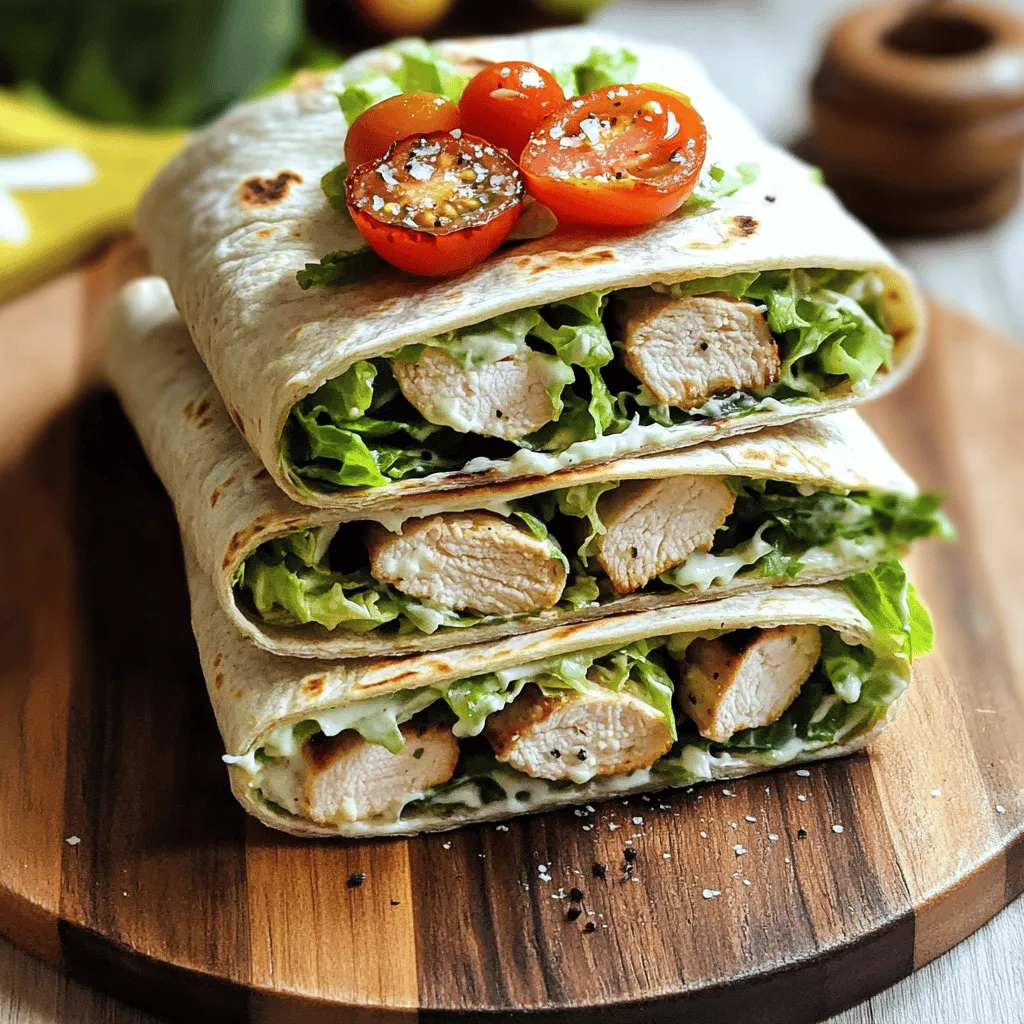
Grilled Chicken Caesar Wraps Tasty Meal for Everyone
Looking for a simple, tasty meal that everyone will love? I’ve got you covered with Grilled Chicken Caesar Wraps! This
Read more…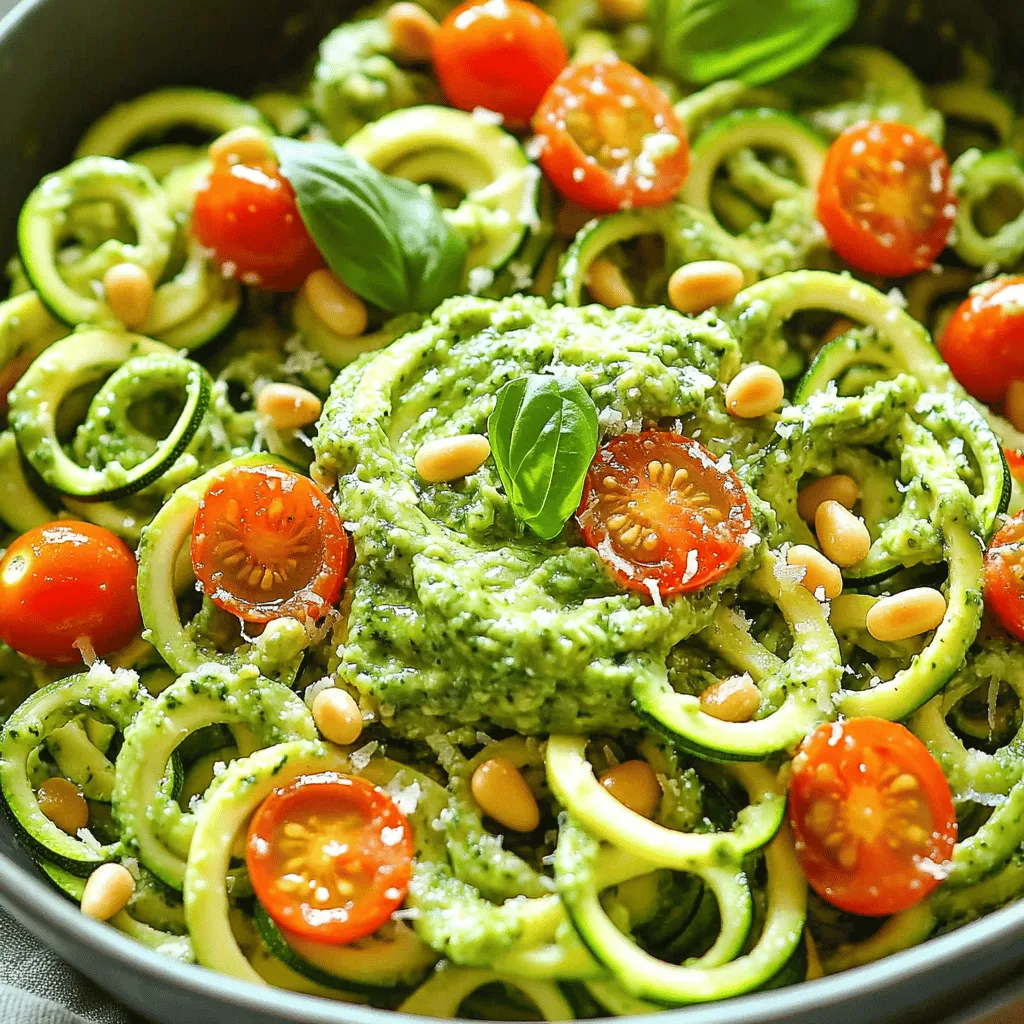
Zucchini Noodles with Pesto Flavorful and Fresh Dish
Looking for a fresh, tasty dish? Zucchini noodles with pesto are your answer! This colorful meal bursts with flavor and
Read more…browse recipes


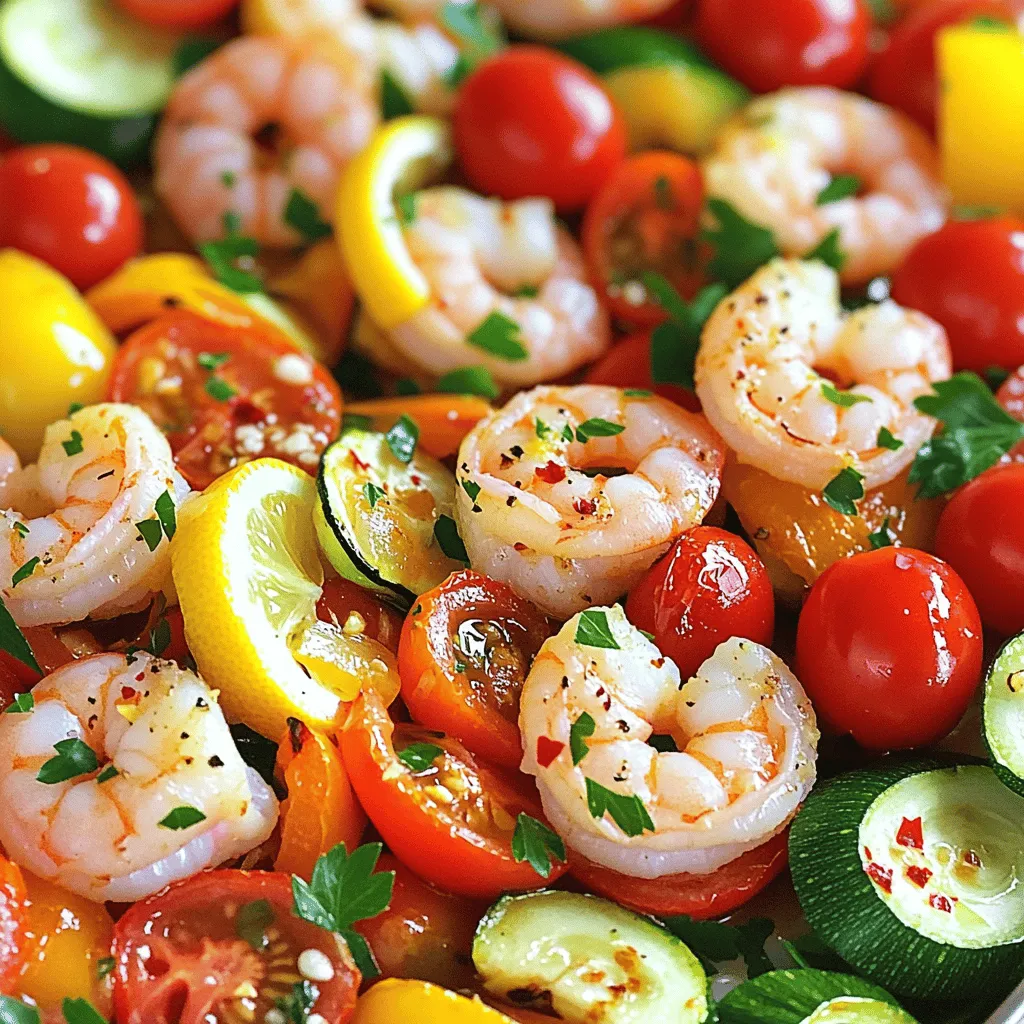
Sheet Pan Lemon Garlic Shrimp Quick and Simple Dish
Looking for a quick and simple meal that bursts with flavor? You’ll love this Sheet Pan Lemon Garlic Shrimp recipe! In just a few…
My Latest Desserts
My Latest Recipes

hey,
i’m !
I’m so happy you’re here!
My kitchen is filled with stories, flavors, and love and I’m so happy to share them with you. Here’s to dishes that feel like home.


![- 6 large eggs - 1 ripe avocado - 1 tablespoon lime juice - 2 tablespoons red onion - 1 small jalapeño - 1 tablespoon fresh cilantro - Salt and pepper - Garnish options: Sliced radishes, extra cilantro leaves You need just a few items for guacamole deviled eggs. Start with six large eggs. The eggs give a great base. Next, grab one ripe avocado. A ripe avocado makes the filling creamy and rich. You will also need one tablespoon of lime juice. This adds a fresh zing to the mix. For some crunch and flavor, use two tablespoons of red onion. The onion adds a nice touch. You will also want one small jalapeño. This gives a little heat, but you can leave it out if you prefer mild flavors. Don’t forget one tablespoon of fresh cilantro for a fresh taste. Finally, season with salt and pepper to your liking. For a nice finish, consider garnishing with sliced radishes or extra cilantro leaves. These add color and extra flavor. With these simple ingredients, you can create a dish that impresses everyone. Check the [Full Recipe] for more details on preparation. To start, we need perfect hard-boiled eggs. First, place your eggs in a saucepan. Cover them with cold water. Bring the water to a boil over medium heat. Once boiling, cover the pan and take it off the heat. Let the eggs sit for 12 minutes. This method helps the yolks cook evenly and keeps them bright yellow. Next, we cool the eggs using the ice bath technique. Fill a bowl with ice and water. After 12 minutes, move the eggs to the ice bath. Let them sit for 5 to 10 minutes. This cools them quickly and makes peeling easier. Now, we prepare the filling. Start by scooping out the yolks from the hard-boiled eggs. Place the yolks in a mixing bowl. Then, add the ripe avocado, lime juice, red onion, minced jalapeño, and chopped cilantro into the bowl. Season with salt and pepper. Mash the mixture with a fork until it is smooth. Taste it and adjust the seasoning. This filling combines creamy avocado with a kick from the jalapeño. It’s time to fill the egg whites! You can use a spoon or a piping bag for this step. If you want a neat look, I recommend using a piping bag with a star tip. It makes the filling look fancy. Once filled, we can add some fun garnishes. Top each egg with a slice of radish and an extra leaf of cilantro. This adds color and a fresh taste to your guacamole deviled eggs. For the full recipe, refer to the earlier section. How to choose ripe avocados To pick the best avocado, check the skin. It should be dark and slightly soft when you press it. A ripe avocado feels firm but gives a little under pressure. If it’s too soft, it may be overripe. You can also look for a stem. If it comes off easily and is green underneath, the avocado is ripe. Adjusting spice level with jalapeño If you want more heat, add more jalapeño. You can also keep some seeds for extra spice. If you prefer a milder taste, use less jalapeño. You can skip it altogether and use a pinch of paprika for flavor without heat. Pairing with chips or vegetables Guacamole deviled eggs taste great with tortilla chips or fresh veggies. Serve them with carrot sticks, cucumber slices, or bell pepper strips. The crunchy textures complement the creamy eggs nicely. Ideal occasions for serving These tasty treats are perfect for parties, picnics, or holidays. They impress guests at gatherings and are simple to make. Serve them at brunch or as a fun snack for game day. For the full recipe, check the guide above. {{image_2}} You can add different spices or herbs to boost flavor. Consider adding cumin for warmth or smoked paprika for a smoky touch. If you want a fresh note, add dill or chives. You can also swap ingredients to match diets. For a vegan twist, use silken tofu instead of eggs. If you're gluten-free, rest assured, this recipe is naturally gluten-free. Adjust the jalapeño for spice lovers or leave it out for a milder taste. Creative plating makes these eggs pop. Try arranging them on a colorful platter for a festive look. You can also use a piping bag to create fun shapes with the guacamole filling. For holidays, themed garnishes work well. Use mini flags for Fourth of July or edible flowers for a spring gathering. A sprinkle of paprika or a drizzle of balsamic glaze can add a fancy touch. For the full recipe, check out the complete details above. To keep your guacamole deviled eggs fresh, use an airtight container. This helps prevent air from spoiling them. Place a piece of plastic wrap directly on the eggs before sealing the container. This can help keep them moist. You can store them in the fridge for up to three days. After three days, they may lose their taste and texture. These eggs are best served cold, so reheating is not needed. If you must, use a microwave on low power. Heat them for just a few seconds to avoid cooking the eggs more. If the eggs smell bad or look off, it is best to discard them. Safety first! Guacamole deviled eggs can last about 2-3 days in the fridge. To keep them fresh, store them in an airtight container. Cover the eggs with plastic wrap if you can't find a container. This helps keep the eggs from drying out. Yes, you can! To prep in advance, hard-boil the eggs and store them in the fridge. Make the guacamole filling a day ahead, too. Just make sure to add lime juice to keep it from browning. When you are ready to serve, fill the egg whites with the guacamole mix. If you don’t have lime juice, you can use lemon juice. It adds a nice tang. Another option is apple cider vinegar. Just use a little less than the lime juice called for in the recipe. Both choices will work well in these guacamole deviled eggs. For the full recipe, check out the detailed instructions and ingredients. This post covered how to make guacamole deviled eggs. We started with the ingredients, like eggs, avocado, and lime juice. Then, I shared easy steps to hard-boil the eggs and prepare the filling. I also shared tips for serving and storing. These deviled eggs are fun to make and can fit any event. You can change the flavors or decorations to suit your needs. Enjoy this tasty twist on a classic!](https://southerndishes.com/wp-content/uploads/2025/05/f817671b-45af-4e16-a1f6-6955663795c2-300x300.webp)
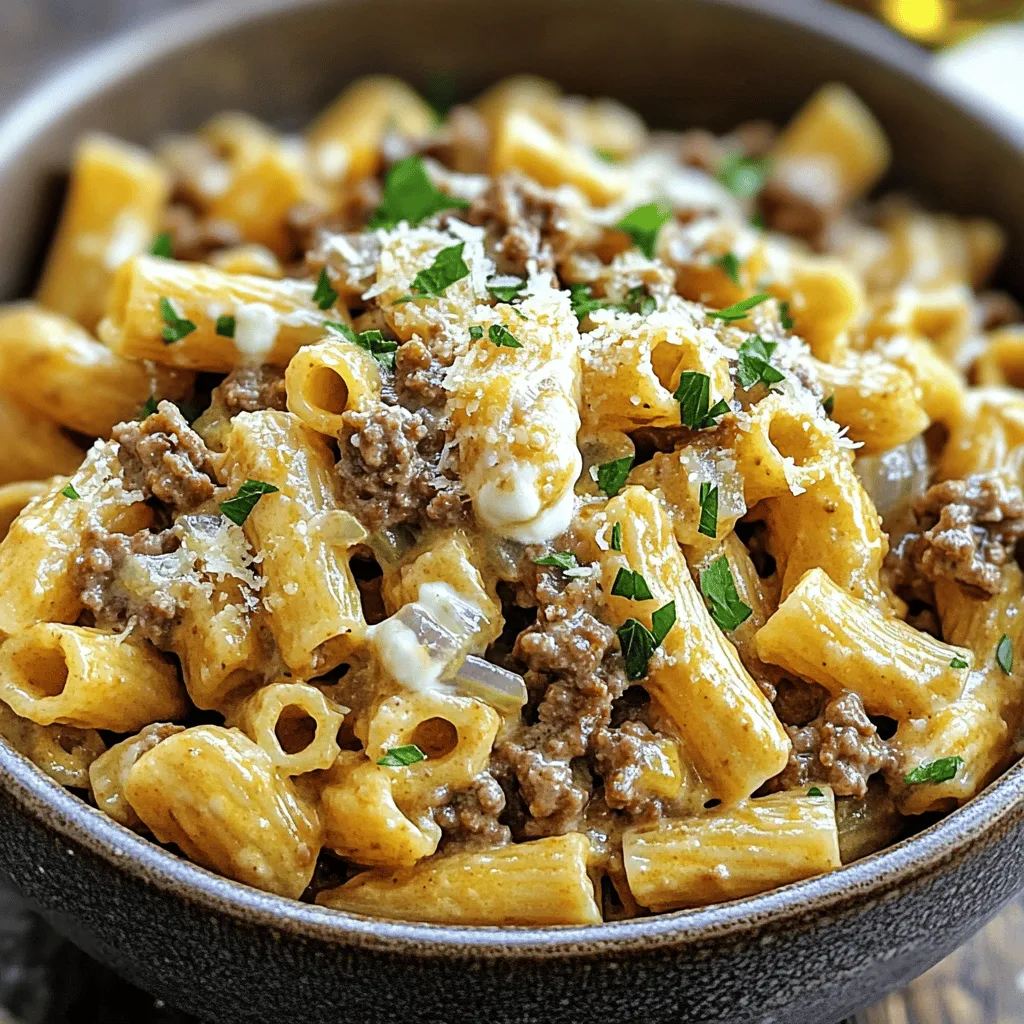
High-Protein Creamy Beef Pasta Quick and Easy Meal
If you’re looking for a meal that’s quick, satisfying, and packed with protein, you’re in the right place! This High-Protein Creamy Beef Pasta is…