


Latest & Greatest
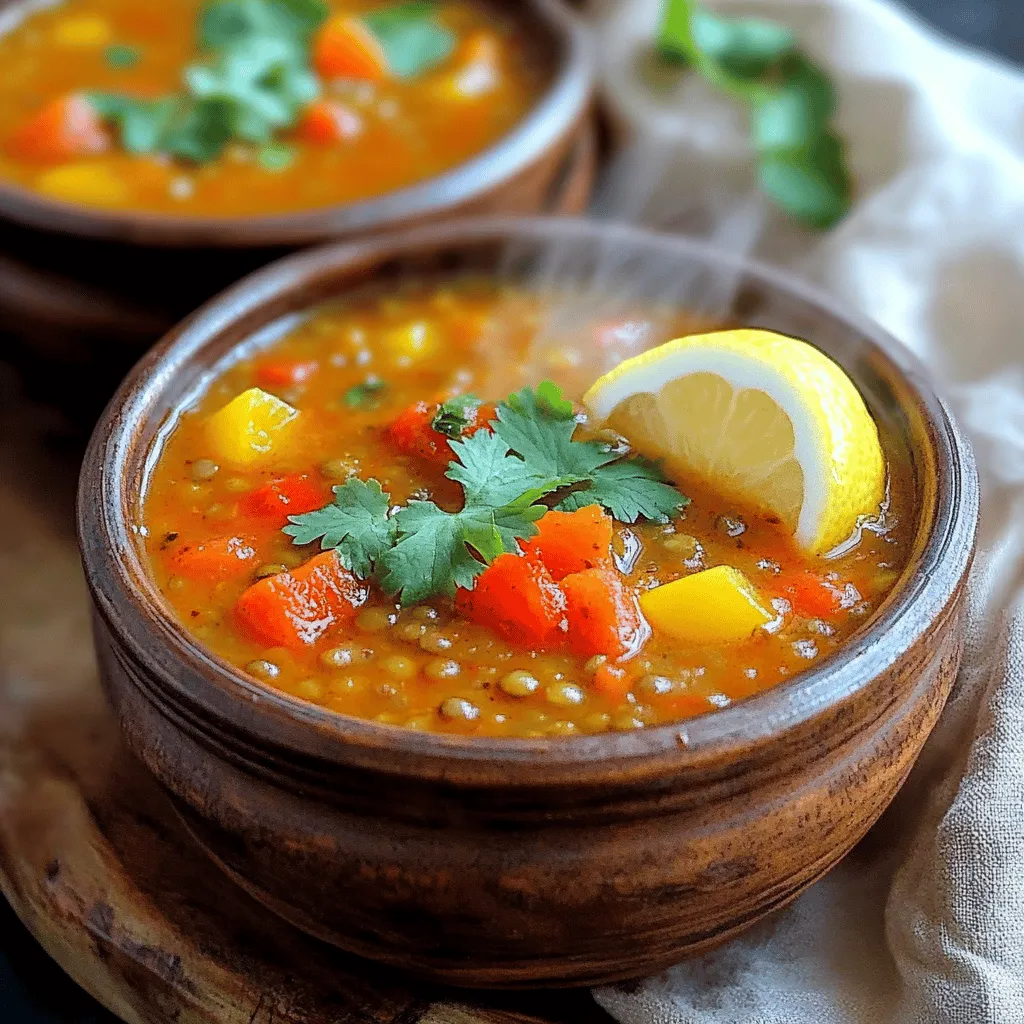
Spicy Lentil Soup Hearty and Flavorful Delight
Welcome to the world of Spicy Lentil Soup! This hearty dish packs a punch with robust flavors and fits any
Read more…
Garlic Herb Grilled Shrimp Flavorful Skewers Recipe
Welcome to your new favorite summer dish: Garlic Herb Grilled Shrimp! This easy recipe combines fresh shrimp with garlic, herbs,
Read more…
Cranberry Orange Muffins Fresh and Tasty Delight
Welcome to a delicious adventure with my Cranberry Orange Muffins! These muffins burst with fresh flavors that brighten any day.
Read more…
Zesty Lemon Bars Tangy and Refreshing Dessert Treat
Are you ready to brighten your day with a sweet and tangy treat? Zesty Lemon Bars are the perfect dessert
Read more…
Matcha Green Tea Muffins Nourishing and Flavorful Treat
Are you ready to brighten your mornings? These Matcha Green Tea Muffins are not only nourishing but also packed with
Read more…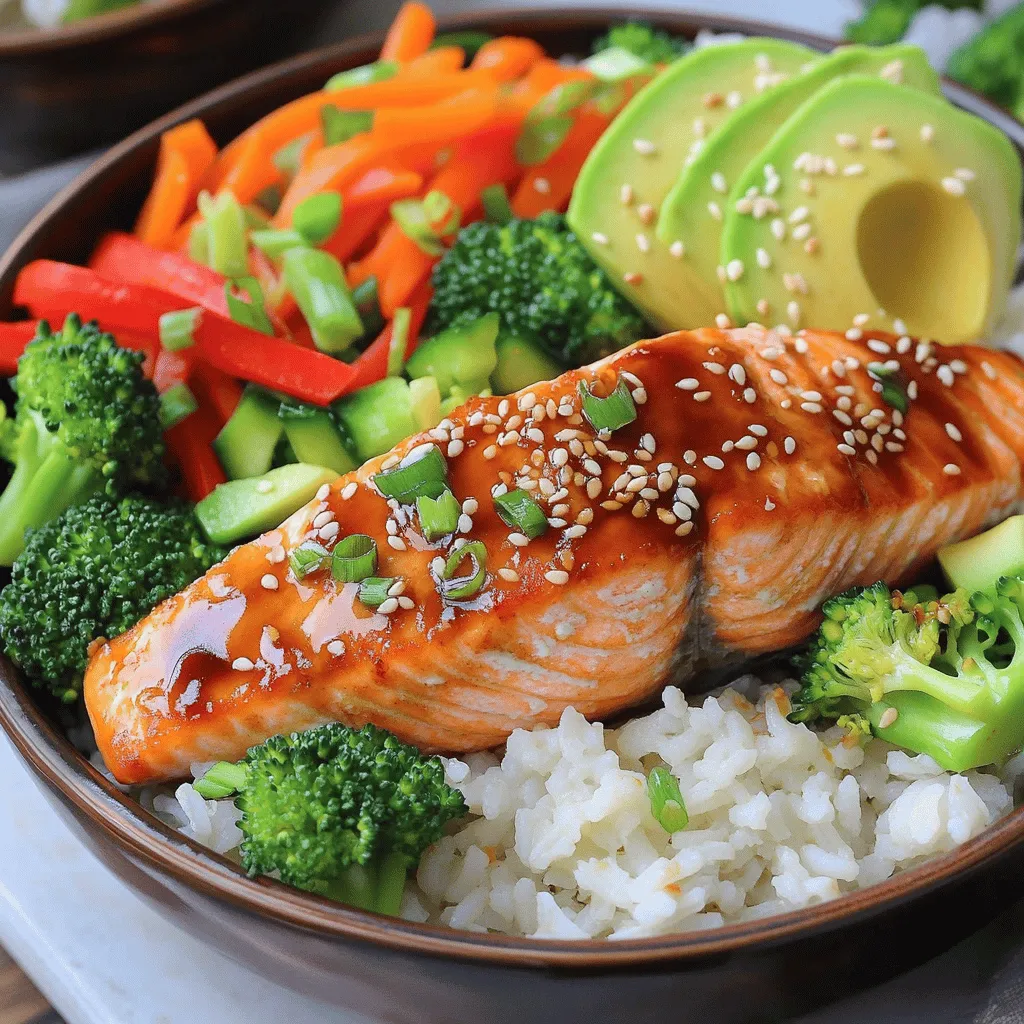
Teriyaki Salmon Bowls Scrumptious and Easy Meal Prep
If you crave a quick, tasty meal that’s healthy and satisfying, teriyaki salmon bowls are your answer. You can whip
Read more…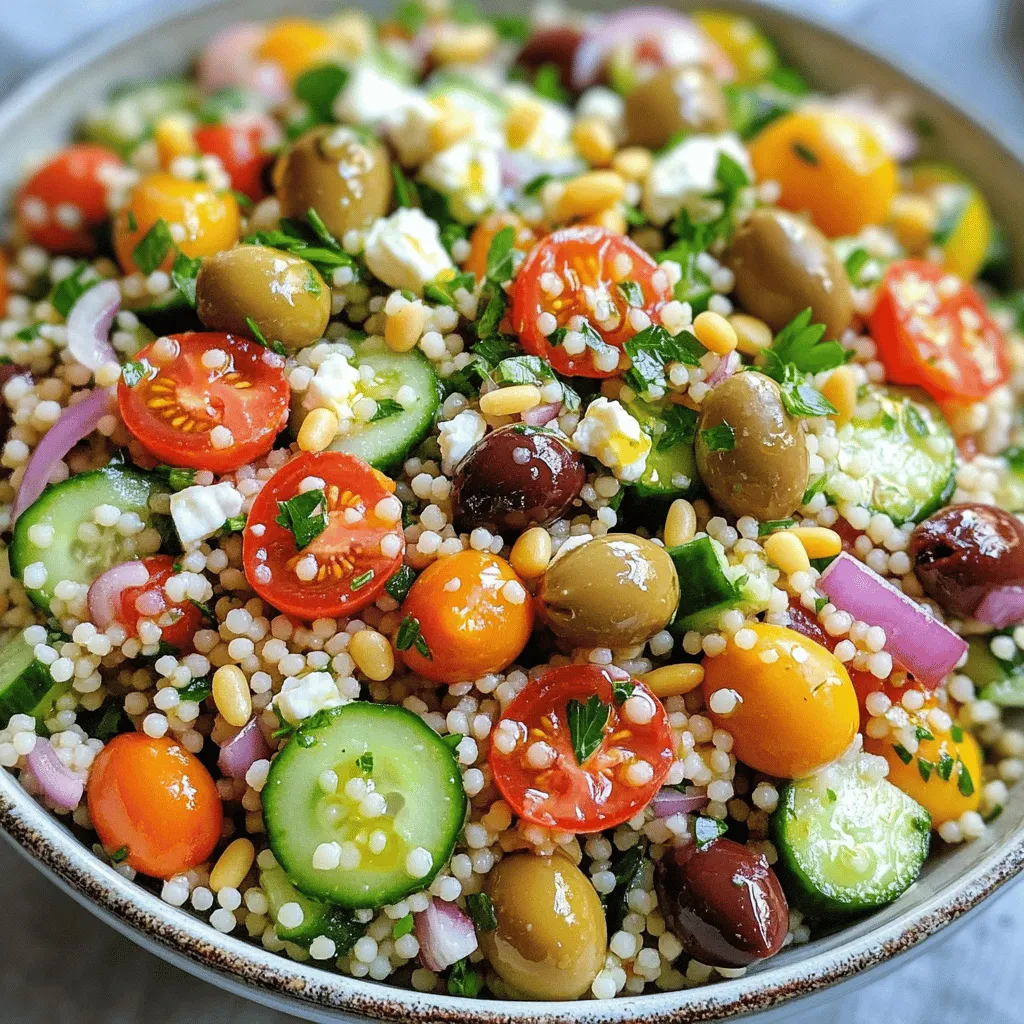
Mediterranean Couscous Salad Fresh and Flavorful Choice
Looking for a fresh, flavorful dish that impresses without the fuss? Mediterranean Couscous Salad is your answer. Bursting with vibrant
Read more…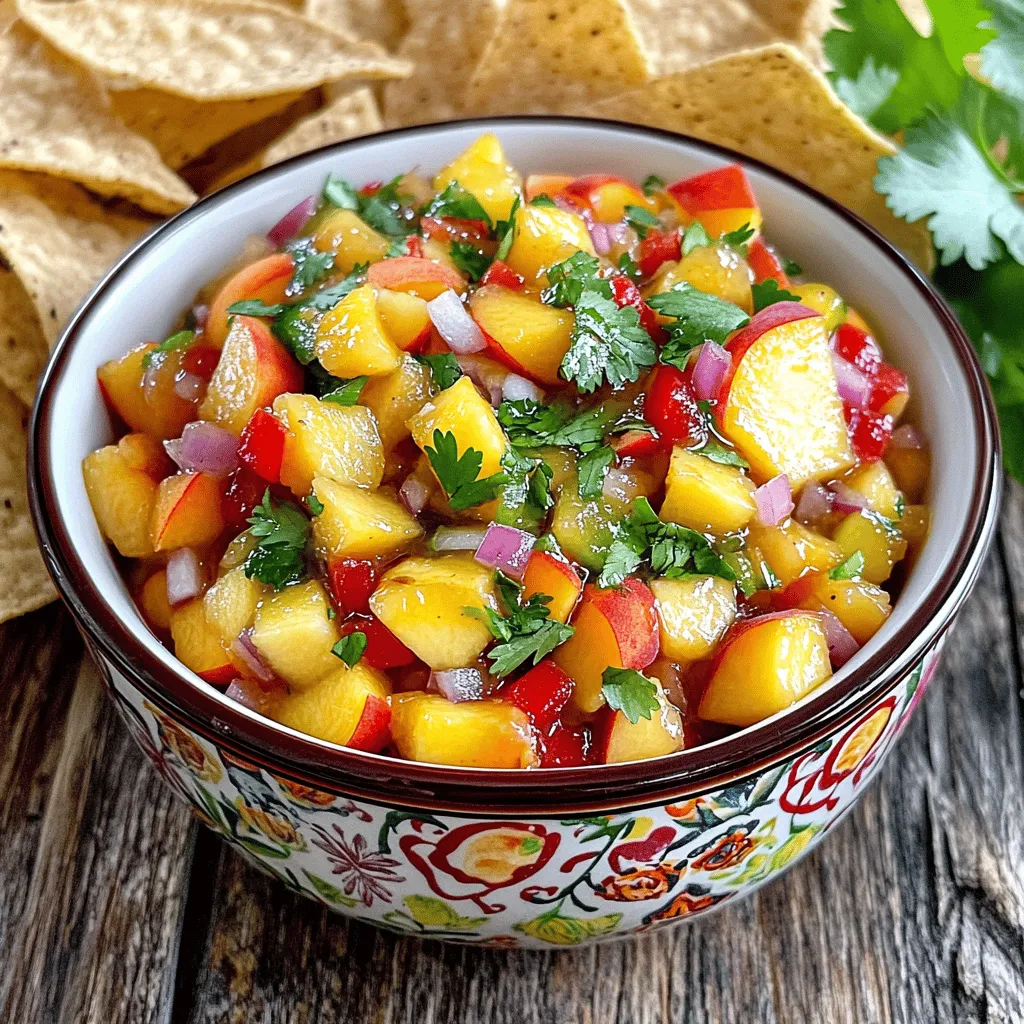
Peach Salsa Fresh and Flavorful Summer Treat
Get ready to savor summer with my fresh and flavorful peach salsa! This sweet and zesty dish makes the perfect
Read more…browse recipes


Copycat Chick-Fil-A Nuggets Tasty and Easy Recipe
Do you crave those tasty Chick-Fil-A nuggets but want to make them at home? You’re in the right place! In this easy recipe, I’ll…
My Latest Desserts
My Latest Recipes

hey,
i’m !
I’m so happy you’re here!
My kitchen is filled with stories, flavors, and love and I’m so happy to share them with you. Here’s to dishes that feel like home.


![For the perfect sweet and spicy chicken wings, you need: - 2 lbs chicken wings - 1/4 cup honey - 1/4 cup sriracha sauce - 2 tablespoons soy sauce - 1 tablespoon rice vinegar - 2 cloves garlic, minced - 1 teaspoon ginger, grated - 1 teaspoon smoked paprika - Salt and pepper to taste These ingredients create a delicious marinade that makes the wings flavorful and juicy. The honey adds sweetness while the sriracha brings the heat. To take your wings to the next level, consider these toppings: - 2 tablespoons sesame seeds - 2 green onions, sliced Sesame seeds give a nice crunch, and green onions add freshness. You can also mix and match toppings based on what you like. For full details on how to make these wings, check the Full Recipe. Preheating the Oven First, preheat your oven to 400°F (200°C). This temperature helps the wings cook evenly. Line a baking sheet with foil. This makes cleanup easier. Place a wire rack on top of the baking sheet. This allows hot air to circulate around the wings, making them crispy. Mixing the Marinade Next, grab a large bowl. Combine the following ingredients: - 1/4 cup honey - 1/4 cup sriracha sauce - 2 tablespoons soy sauce - 1 tablespoon rice vinegar - 2 cloves garlic, minced - 1 teaspoon ginger, grated - 1 teaspoon smoked paprika - Salt and pepper to taste Mix well until smooth. This marinade gives the wings their sweet and spicy flavor. Add the chicken wings to the bowl. Make sure they are coated evenly. Let them marinate for at least 30 minutes. For best flavor, marinate for up to 2 hours in the fridge. Basting and Baking Place the marinated wings on the wire rack. Space them out evenly for proper cooking. Reserve any leftover marinade for basting. Bake the wings in the preheated oven for 25 minutes. After 25 minutes, take them out and baste with the reserved marinade. This adds more flavor and moisture. Crispiness Adjustment Return the wings to the oven for an extra 10-15 minutes. Watch them closely. You want them golden brown and crispy. For added crispiness, switch the oven to broil. Broil the wings for 2-3 minutes. Keep an eye on them to prevent burning. Once done, your sweet and spicy chicken wings are ready! You can sprinkle sesame seeds and sliced green onions on top before serving from the [Full Recipe]. - Marination Time Recommendations I recommend marinating the wings for at least 30 minutes. If time allows, marinate them for up to 2 hours. This helps the flavors soak in deeply. The longer they marinate, the better they taste. - Adjusting Sweetness and Spice Levels You can easily tweak the sweetness and spice. Add more honey for extra sweetness. To make it spicier, increase the sriracha sauce. Taste your marinade before using it to find your perfect balance. - Baking vs. Deep Frying Baking chicken wings is a healthier option than deep frying. It uses less oil and allows for more even cooking. Baking at 400°F gives you crispy skin without the mess of frying. - Broiling for Extra Crisp For those extra crispy wings, broil them for a few minutes at the end. Keep a close eye on them to avoid burning. Broiling can take your wings from good to great with just a bit of time. Enjoy these tips as you prepare your sweet and spicy chicken wings! For the full recipe, check out the recipe section above. {{image_2}} Alternative Sauces You can switch up the sauces in this recipe. Instead of sriracha, try barbecue sauce or buffalo sauce. Both add their own unique flavors. For a sweet touch, use teriyaki sauce. It pairs well with honey. You can also mix sauces to create your own blend. Experiment with different flavors to find your favorite. Heat Level Adjustments If you want less heat, reduce the sriracha. You can add more honey to balance it out. If you like it hotter, add more sriracha or some cayenne pepper. Just a pinch goes a long way. Always taste as you go to get it just right. Pairings with Sides Sweet and spicy chicken wings go well with many sides. Try serving them with celery and carrot sticks for crunch. A fresh salad can also balance the flavors. For a heartier option, pair them with rice or potato wedges. Consider adding coleslaw for a refreshing crunch. Dipping Sauce Ideas Dipping sauces can enhance the wings even more. Ranch or blue cheese dressing are popular choices. You can also use a creamy garlic sauce for a twist. For extra spice, serve with a hot sauce on the side. Having different dips lets everyone customize their meal. This recipe is versatile, making it fun to switch things up. You can find the full recipe to get started. To keep your sweet and spicy chicken wings fresh, use proper storage methods. First, let the wings cool down after cooking. Then, place them in an airtight container. This keeps moisture out and flavors in. You can also wrap them tightly in plastic wrap. This option works well if you don’t have a container. Aim to eat the wings within three to four days. This timeframe ensures they stay tasty and safe to eat. If you want to store them longer, consider freezing. When it’s time to enjoy leftovers, reheating is key. The best way to reheat wings is in the oven. Preheat your oven to 350°F (175°C). Place the wings on a baking sheet lined with foil for easy cleanup. Heat them for about 10 to 15 minutes. This keeps them warm and helps regain some crispiness. To maintain that crispy texture, avoid microwaving the wings. Microwaving makes them soggy. For extra crunch, finish them under the broiler for a few minutes. Watch them closely to avoid burning. Enjoy your wings just like the first time with these simple reheating tips. For the full recipe, check the earlier section. Can I use frozen chicken wings? Yes, you can use frozen wings. Just thaw them first. This helps them cook evenly. Pat them dry before marinating. This step makes the wings crispier. How to make wings crispy in the oven? To make wings crispy, place them on a wire rack. This allows air to flow around them. Bake at 400°F for 25 minutes, then baste. Broil for 2-3 minutes for extra crispiness. What is the best sauce for chicken wings? The best sauce is one that balances sweet and spicy flavors. The honey and sriracha mix in the Sweet and Spicy Chicken Wings is a great choice. It creates a rich, tasty glaze. How long to bake chicken wings at 400°F? Bake chicken wings for about 25 minutes. After that, baste with your sauce. Then bake for an additional 10-15 minutes. This ensures they are cooked through and golden brown. Are sweet and spicy chicken wings healthy? Sweet and spicy chicken wings can be part of a balanced diet. They have protein from chicken. However, watch the sauce for sugar and sodium levels. How many calories are in a serving of chicken wings? A serving of chicken wings has about 400-500 calories. This depends on the size and amount of sauce. You can check the Full Recipe for more details on nutritional info. You now have a clear guide to making delicious chicken wings. We covered essential ingredients, steps, and variations. Topping them with sesame seeds or green onions can enhance flavor. Adjust marination time for the best taste. Remember to store properly and use the right reheating techniques for crispiness. Whether you bake or fry, enjoy experimenting with flavors and techniques. Your perfect chicken wings await!](https://southerndishes.com/wp-content/uploads/2025/05/4dbb56e4-adae-4fc6-86da-57baae3d95f5-300x300.webp)
Skillet Creamed Spinach Creamy and Flavorful Delight
Are you ready to elevate your next meal? My Skillet Creamed Spinach recipe combines fresh spinach, rich cream, and savory cheese for a dish…
![To make skillet creamed spinach, you need fresh, simple ingredients that create a creamy, flavorful dish. Here’s what you will need: - 1 lb fresh spinach, rinsed and roughly chopped - 2 tablespoons olive oil - 3 cloves garlic, minced - 1 small onion, finely chopped - 1 cup heavy cream - ½ cup cream cheese, softened - ½ cup grated Parmesan cheese - ¼ teaspoon nutmeg - Salt and pepper to taste - ¼ cup toasted pine nuts (for garnish) Each ingredient plays a key role in making this dish delicious. The fresh spinach brings a green, vibrant flavor. Olive oil adds richness and helps cook the garlic and onion. Garlic and onion provide a savory base that enhances the overall taste. Heavy cream and cream cheese create a smooth, creamy texture. Parmesan cheese adds a salty, umami kick. Nutmeg brings warmth and depth. Finally, toasted pine nuts give a delightful crunch when you serve it. For the full recipe, refer to the section above. First, heat the olive oil in a large skillet over medium heat. This will create a nice base for your dish. Next, add the minced garlic and finely chopped onion. Sauté them for about 3-4 minutes. You want the onion to turn translucent and fragrant. Now it’s time to cook the spinach. Gradually add the chopped spinach to the skillet. Stir often as the spinach wilts down. This step takes about 5 minutes. You’ll notice the volume decreases as it cooks. Once the spinach is wilted, reduce the heat to low. Stir in the heavy cream and cream cheese. Allow the cream cheese to melt fully. This creates a smooth, creamy texture that enriches the spinach. Next, mix in the grated Parmesan cheese and nutmeg. Stir until everything is well combined and creamy. Taste your dish and season with salt and pepper as needed. Adjust it to your liking. Let the mixture simmer gently for an additional 3-4 minutes. This allows all the flavors to meld together. Once done, remove from the heat. Top it off with toasted pine nuts for a crunchy finish before serving. For the full recipe, refer to the list above. Enjoy your creamy and flavorful delight! - Optimal heat settings: Start with medium heat. This helps the garlic and onion cook evenly. Too high a heat can burn the garlic. - Timing tips for aromatics: Sauté the garlic and onion for 3-4 minutes. Wait until the onion turns translucent. This brings out their best flavors. - Tricks to prevent curdling: Always lower the heat before adding cream. This helps keep it smooth. Stir slowly to ensure even mixing. - Choosing the right cream: Use heavy cream for the best results. It adds richness and helps the sauce stay creamy. - Adding herbs or spices: Nutmeg adds warmth and depth. You can also try adding thyme or basil for fresh flavor. - Adjusting for dietary preferences: For a lighter option, use half-and-half instead of heavy cream. This keeps it tasty while cutting calories. {{image_2}} You can switch up the greens in this dish. Instead of spinach, try kale or Swiss chard. These greens offer a similar texture and flavor. You can even use a mix of greens for a fun twist. For a dairy-free version, replace cream and cheese with nut-based alternatives. Coconut cream works great and adds a unique flavor. Adding bacon or ham can give your creamed spinach a savory kick. Cook the meat first, then mix it in. You could also use different cheeses for added depth. Try gouda or feta instead of Parmesan. Each cheese brings its own flavor, making the dish exciting. Skillet creamed spinach pairs well with many proteins. Serve it alongside grilled chicken or steak for a complete meal. You can also enjoy it as a side dish with roasted fish. For a more casual meal, serve it with crusty bread for dipping. This creamy delight fits any occasion! Don’t forget to check out the Full Recipe for more details! To keep your skillet creamed spinach fresh, store it in an airtight container. Place it in the fridge right after it cools down. It should stay good for about three to five days. If you want to keep it longer, consider freezing it. Use a freezer-safe bag or container. It can last up to three months in the freezer. When you reheat creamed spinach, the goal is to keep it creamy. For stovetop reheating, use a medium-low heat. Stir often to prevent sticking. Add a splash of cream if it seems thick. If you use a microwave, heat it in short bursts of 30 seconds. Stir in between to ensure even heating. The shelf life of creamed spinach varies by storage method. In the fridge, expect it to last about three to five days. In the freezer, it can last up to three months. Always check for signs of spoilage. If it smells off or has an unusual texture, it’s best to toss it. Creamed spinach is a rich side dish made with cooked spinach, cream, and cheese. People often serve it with steak or chicken. It has a creamy texture and a savory flavor. This dish is classic in American cuisine, especially during holidays and family dinners. Many enjoy its smoothness paired with meats or as part of a larger spread. Yes, you can use frozen spinach! Frozen spinach is convenient and saves time. It is often pre-washed and chopped. However, it has some downsides. Frozen spinach can be a bit watery when thawed. This extra moisture may change the dish's texture. You must squeeze out the water after thawing. Fresh spinach has a brighter taste and better texture, but frozen can work well in a pinch. To make creamed spinach gluten-free, you need to check your ingredients. Most of the main ingredients are gluten-free, which is great! Just ensure any added seasonings or cheeses are gluten-free. You can use cornstarch or rice flour to thicken the dish, if needed. This way, you can enjoy the creamy goodness without worry! For the full recipe, check out the [Full Recipe]. This blog post covered how to make a tasty creamed spinach dish. We started with the key ingredients and detailed steps for cooking. I shared tips to ensure creaminess and flavor, along with creative variations for more fun. Proper storage and reheating techniques help maintain quality. Remember, cooking should be enjoyable. Experiment with flavors and find what you love. A dish simple in nature can easily wow your guests! Enjoy making your own creamed spinach and feel free to customize it to your tastes.](https://southerndishes.com/wp-content/uploads/2025/05/764a9977-9c3a-4591-ab48-c900021f0b11.webp)
