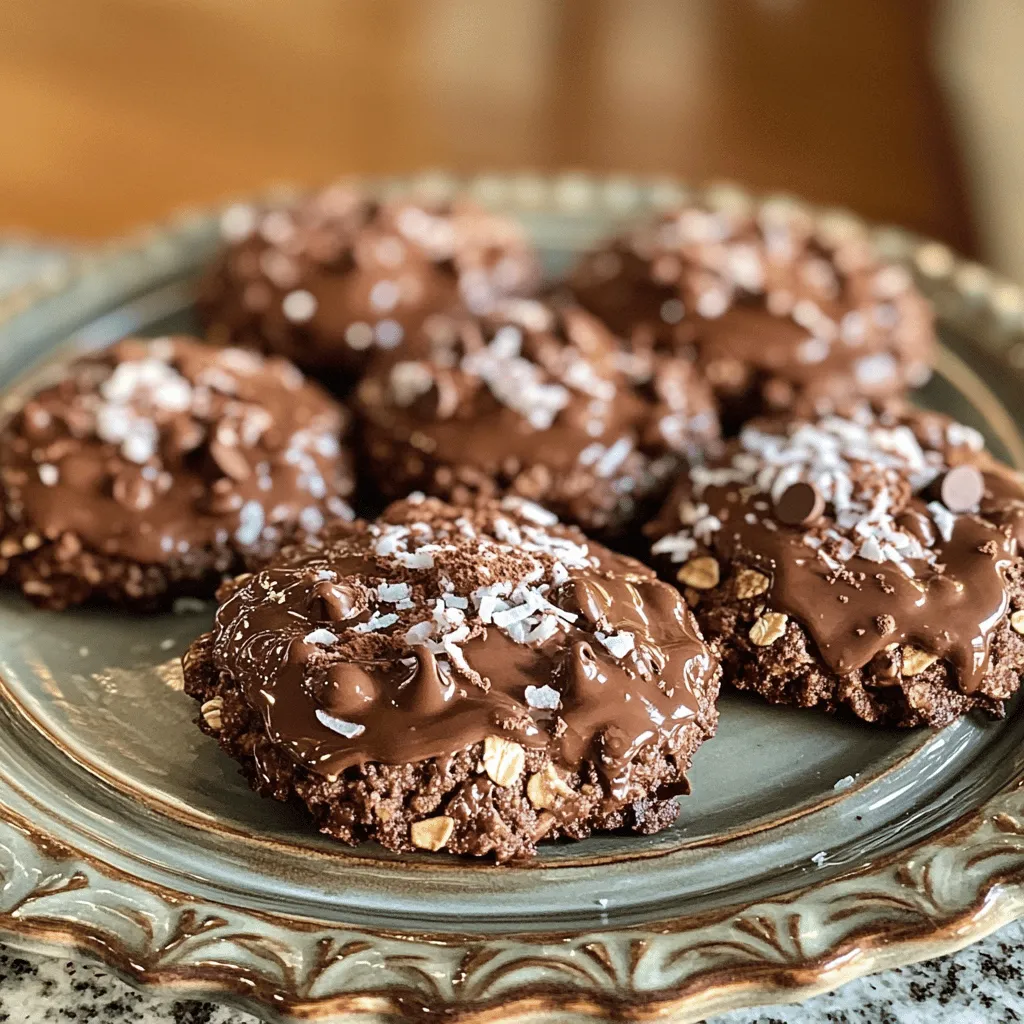
Craving a tasty treat that’s quick to make? No-bake chocolate oatmeal cookies are your answer! With simple ingredients like oats, cocoa, and peanut butter, you’ll whip these up in no time. Whether you love a rich chocolate flavor or a chewy texture, these cookies check all the boxes. Join me as I guide you through this easy recipe that will satisfy your sweet tooth without the fuss of baking!
Ingredients
List of Ingredients
– 1 cup rolled oats
– 1/2 cup creamy peanut butter
– 1/2 cup unsweetened cocoa powder
– 1/2 cup honey or maple syrup
– 1/4 cup coconut oil, melted
– 1 teaspoon vanilla extract
– 1/4 teaspoon salt
– 1/2 cup chocolate chips (optional)
– 1/4 cup shredded coconut (optional)
Measurement Tips
How to measure rolled oats correctly: Use a dry measuring cup. Scoop the oats and level them off with a knife. This gives an accurate measurement for your cookies.
Substitutions for peanut butter: You can use almond butter, sunflower seed butter, or cashew butter. Each will change the taste a little, but they will still hold the cookies together well.
Quality of Ingredients
Importance of using organic cocoa powder: Organic cocoa powder has richer flavor. It also lacks harmful chemicals. This makes your cookies taste better and healthier.
Choosing the right sweetener for flavor: Honey gives a floral sweetness. Maple syrup offers a warm, rich taste. Choose what you like best for your cookies. Each sweetener will change the flavor a bit, so try them out.
Step-by-Step Instructions
Preparation Process
To start, gather your ingredients. In a medium saucepan, mix coconut oil, honey or maple syrup, cocoa powder, and salt. Turn the heat to low or medium. Stir the mixture constantly. This step is key. Make sure it melts fully and becomes smooth. If you skip the stirring, you can burn the mixture. Once it’s melted, remove it from the heat.
Next, add peanut butter and vanilla extract. Stir until they blend well. This creates a creamy texture. After this, you’ll add the rolled oats. Mix them in until fully coated. If you want extra flavor, fold in chocolate chips or shredded coconut. This can make the cookies even better.
Forming the Cookies
Now it’s time to shape your cookies. You can use a cookie scoop or a spoon. A cookie scoop helps make uniform cookies. If you use a spoon, try to keep the size consistent. Shape each scoop into a cookie as you place it on the baking sheet. Line the sheet with parchment paper to prevent sticking. This will help them cool without mess.
Setting the Cookies
Once your cookies are shaped, it’s time to set them. Place the baking sheet in the fridge. Let the cookies chill for at least 30 minutes. This helps them firm up. After thirty minutes, check them for doneness. They should hold their shape but still be soft. If they look good, you’re ready to enjoy! For the best taste, store them in an airtight container in the fridge.
Tips & Tricks
Common Mistakes to Avoid
– Overheating the mixture: Keep the heat low. If the mixture boils, it can change the texture. Stir constantly to ensure even melting.
– Not allowing cookies to set: Patience is key! Let the cookies chill in the fridge for at least 30 minutes. This helps them firm up properly.
Enhancing Flavor and Texture
– Adding nuts or dried fruits: You can mix in chopped nuts like walnuts or pecans. Dried fruits, like raisins or cranberries, can add a nice sweetness.
– Experimenting with spices like cinnamon: A pinch of cinnamon can elevate the taste. It adds warmth and depth to your cookies.
Serving Suggestions
– Pairing with milk or ice cream: These cookies taste amazing with a glass of cold milk. They also pair well with ice cream for a tasty dessert.
– Perfect occasions for serving: Serve these cookies at parties, picnics, or as an after-school snack. They are a hit with kids and adults alike.

Variations
Flavor Variations
You can change the flavors of these cookies to suit your taste. One fun twist is the coconut mocha version. Just add 1/4 cup of shredded coconut and a splash of brewed coffee to the mix. This will give your cookies a rich flavor with a hint of tropical sweetness.
Another great option is to make Almond Joy-inspired cookies. For this, include 1/4 cup of chopped almonds and 1/4 cup of shredded coconut. The chocolate and nut combo makes a delightful treat.
Dietary Variations
If you follow a vegan diet, you can easily adapt this recipe. Replace honey or maple syrup with agave syrup. Use a nut butter that is vegan-friendly, like almond butter. This way, you keep the cookies plant-based.
For those needing gluten-free options, make sure to use gluten-free rolled oats. This small change allows you to enjoy the same great taste without any gluten.
Creative Presentations
How you display your cookies can make them even more fun! Arrange them on a colorful platter and sprinkle some cocoa powder on top. This gives a nice touch and makes them look fancy.
You can also use cookie cutters to shape the cookies. After dropping spoonfuls onto parchment paper, press them with a shaped cutter. This adds a playful twist, especially for kids or parties.
Storage Info
Best Storage Practices
To keep your no-bake chocolate oatmeal cookies fresh, use an airtight container. I suggest a glass jar or a plastic container with a tight lid. This method prevents air from drying them out. Place a piece of parchment paper between layers to stop sticking. For added freshness, keep the container in the fridge.
Freezing Instructions
If you want to save some cookies for later, freeze unformed dough. Scoop the dough into balls and place them on a baking sheet. Freeze for about an hour. Once firm, transfer the balls to a freezer bag. When you’re ready to enjoy, thaw the cookies in the fridge overnight. This way, they taste fresh when served.
Shelf Life
In the fridge, these cookies last about one week. For the best flavor, eat them within the first few days. After that, they may lose some taste, but they will still be safe to eat. Enjoying them fresh gives the best chocolate and oat flavor experience! For the ultimate treat, serve them cold right from the fridge.
FAQs
Can I use instant oats instead of rolled oats?
You can use instant oats, but the cookies will change. Instant oats are smaller and softer. This means the cookies may not hold their shape as well. Rolled oats give a chewy texture and help the cookies stay firm. If you want the best result, stick with rolled oats.
How to fix cookies that are too crumbly?
If your cookies are crumbly, don’t worry. Add a bit more peanut butter or a splash of honey. Mix it well. If they are still crumbly, try pressing them together more firmly on the baking sheet. This will help them stick together better.
Are these cookies healthy?
Yes, these cookies can be a healthy treat! They have oats, which are good for digestion. Peanut butter adds protein and healthy fats. Cocoa powder is rich in antioxidants. Just be mindful of the sugar amount from honey or syrup. Enjoy them in moderation as a sweet snack.
Can I make these cookies without peanut butter?
Absolutely! You can replace peanut butter with almond butter or sunflower seed butter. These will change the flavor slightly but will still bind the cookies well. You could also use applesauce for a lighter texture, but it may make the cookies softer.
What is the best way to serve these cookies?
I love serving these cookies cold with a glass of milk. They also pair well with coffee or tea. You can even crumble them over yogurt for a tasty breakfast. Try placing them on a nice platter for a special touch.
These cookies are easy to make and use simple, tasty ingredients. You learned the best ways to measure, enhance flavor, and avoid common mistakes. I shared tips for storage and freezing, so your treats last longer. Don’t forget to try fun variations and presentations! These cookies can fit any diet or occasion. Enjoy experimenting in the kitchen, and share your results with friends. You will impress everyone with your delicious creations. Happy baking!