No-Bake Chocolate Oat Bars Easy and Delicious Treat

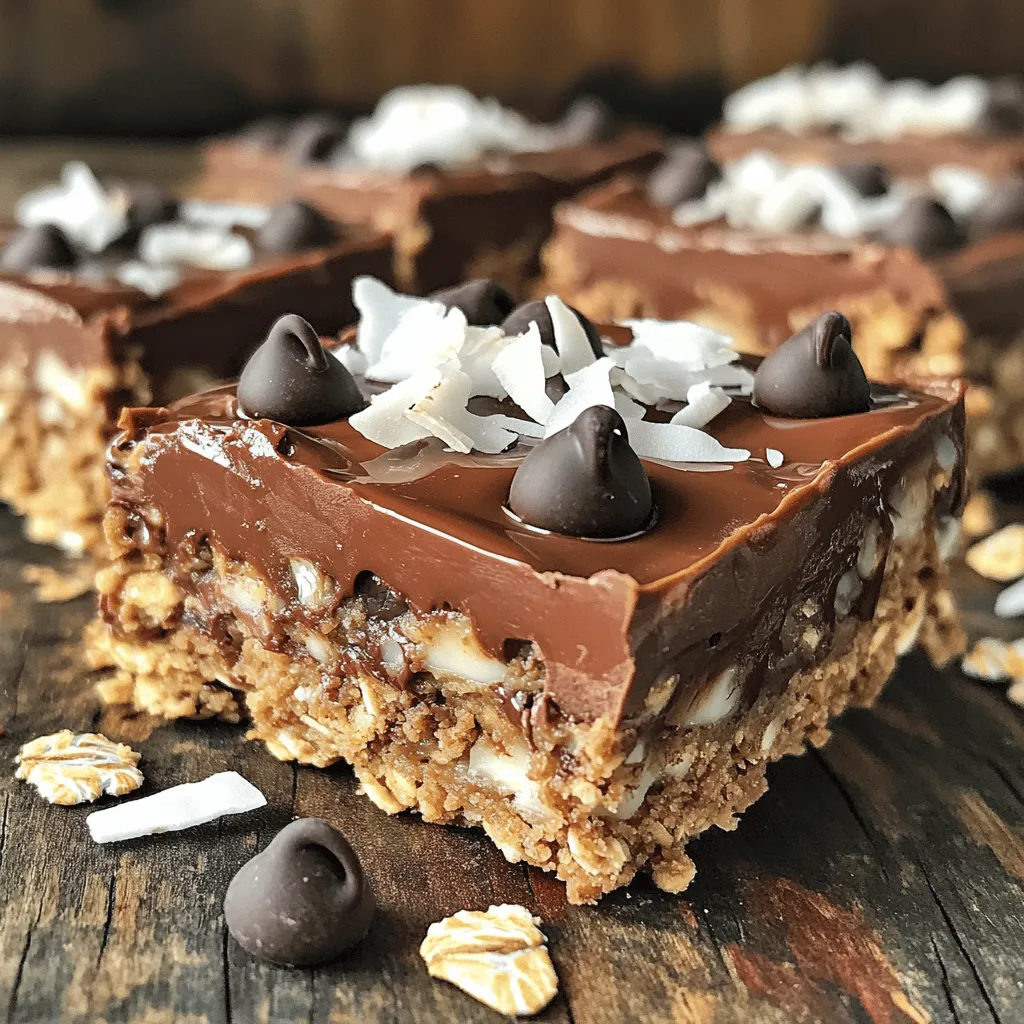
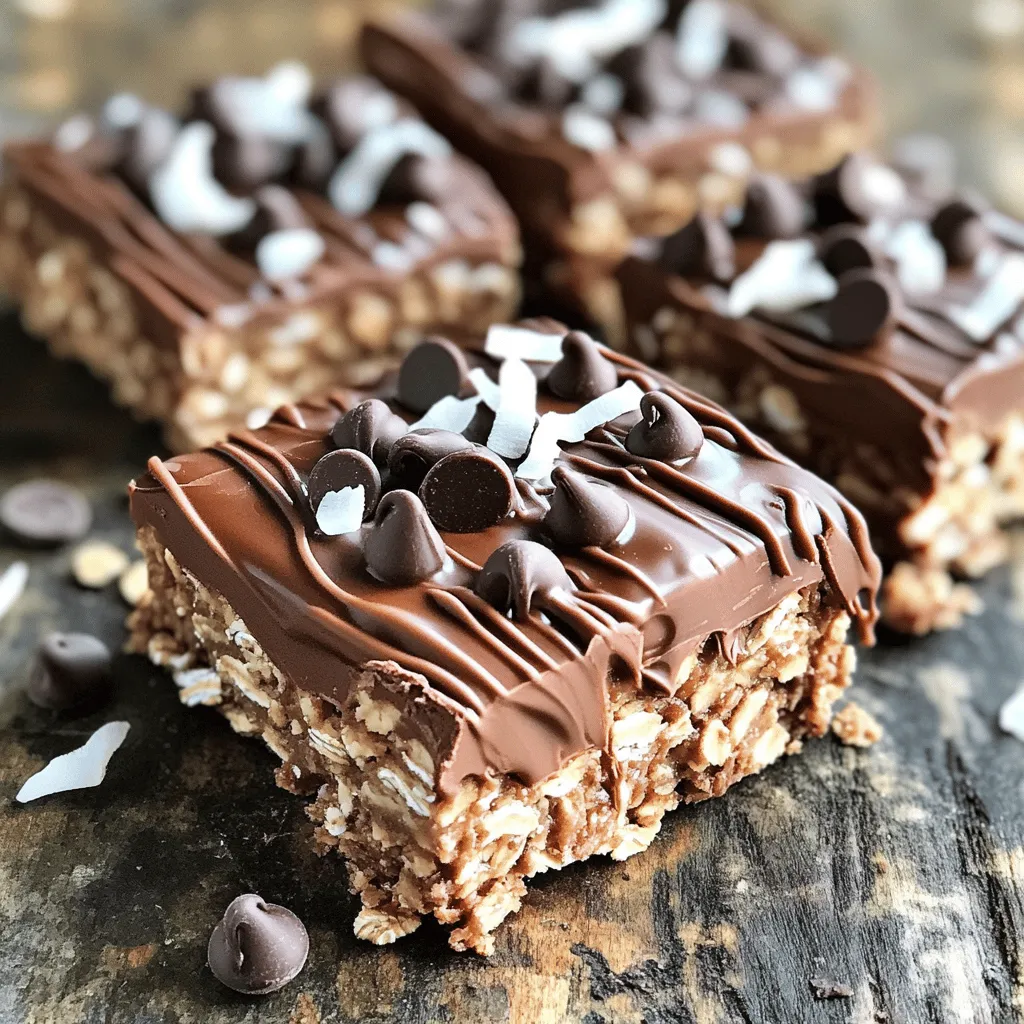
Craving a sweet treat without the oven? I’ve got you covered! These No-Bake Chocolate Oat Bars are quick, easy, and oh-so-delicious. With just a few simple ingredients like oats, almond butter, and cocoa powder, you can whip up a snack that satisfies your chocolate cravings without the fuss of baking. Plus, I’ll share tips on variations and storage. Let’s dive in and make these amazing bars!

Ingredients

Main Ingredients

– 2 cups rolled oats

– 1 cup creamy almond butter

– 1/2 cup honey or maple syrup

– 1/2 cup unsweetened cocoa powder

The main ingredients for No-Bake Chocolate Oat Bars are simple yet satisfying. Rolled oats form the base, providing a hearty texture. Almond butter adds creaminess and healthy fat. Honey or maple syrup gives natural sweetness and binds the mixture. Unsweetened cocoa powder brings rich chocolate flavor without extra sugar. This combo creates a fantastic foundation for tasty bars.

Optional Ingredients

– 1/4 cup dark chocolate chips

– 1/4 cup shredded coconut (unsweetened)

– 1 teaspoon vanilla extract

– A pinch of salt

While the main ingredients shine, optional ingredients can enhance your bars. Dark chocolate chips add extra sweetness and chocolatey goodness. Shredded coconut gives a tropical twist and chewy texture. A teaspoon of vanilla extract boosts flavor depth, while a pinch of salt balances sweetness. Feel free to mix and match these options to suit your taste.

For the full recipe, check out the detailed instructions to make your own No-Bake Chocolate Oat Bars!

Step-by-Step Instructions

Preparation of Dry Ingredients

Start by gathering your dry ingredients. In a large mixing bowl, combine:

– 2 cups rolled oats

– 1/2 cup unsweetened cocoa powder

– 1/4 cup shredded coconut (unsweetened)

– A pinch of salt

Mix these well. You want everything to blend nicely. The cocoa gives a rich taste, while the oats add texture.

Preparing the Wet Mixture

Next, focus on the wet mix. In a microwave-safe bowl, add:

– 1 cup creamy almond butter

– 1/2 cup honey or maple syrup

Heat this mixture in the microwave for about 30-45 seconds. This step makes it easier to stir. Once warm, take it out and mix until smooth. Add in 1 teaspoon of vanilla extract and stir again. This adds a lovely flavor.

Combining Ingredients

Now, it’s time to bring everything together. Pour the warm almond butter mix over your dry ingredients. Stir well until all the dry ingredients are coated. This step is key for flavor.

Next, fold in:

– 1/4 cup dark chocolate chips

Make sure they are evenly spread throughout the mix.

How to Press and Set the Mixture

Line an 8×8 inch baking dish with parchment paper. Leave some paper hanging over the sides for easy removal. Press the mixture firmly into the dish. Use a spatula or your hands to make it even.

Once it is all in, refrigerate for at least 2 hours. This helps the mixture set and hold its shape. After it firms up, lift it out using the parchment paper, and cut it into squares or rectangles.

For the full recipe, you can find it in the ingredients section. Enjoy your delicious no-bake chocolate oat bars!

Tips & Tricks

Perfecting Your No-Bake Bars

To make the best no-bake chocolate oat bars, focus on two key areas: consistency and cooling.

Ensuring the right consistency: Mix the dry ingredients well. This helps all flavors blend. When you add the wet mix, it should be sticky but not too runny. If it feels too dry, add a bit more almond butter. If it’s too wet, add extra oats. You want a thick, moldable mixture.

Cooling and setting times: Chill the bars for at least two hours. This helps them firm up nicely. If you leave them longer, they will be even easier to cut. Make sure to cover them to keep them fresh in the fridge.

Presentation Ideas

How you serve your no-bake bars can elevate their appeal. Here are some fun tips:

Serving suggestions with melted chocolate and coconut: Drizzle melted chocolate over the cut bars. Then, sprinkle some shredded coconut on top. This adds a nice touch and makes them look fancy.

Garnishing for visual appeal: Use fresh berries or nuts as a garnish. They add color and texture. You can also serve the bars on a nice plate. Arrange them with a few extra chocolate chips around for a fun, inviting look.

For a complete guide, check the Full Recipe.

Variations

Dietary Substitutions

If you want to enjoy these bars but need some tweaks, you can make easy changes.

Gluten-free alternatives: Use certified gluten-free oats. This keeps your bars safe for those with gluten issues.

Nut-free options: Switch almond butter for sunflower seed butter. This keeps the bars nut-free while still being tasty.

Flavor Variations

Want to change up the flavor? Here are some fun ideas to try.

Adding different nut butters: You can use cashew or peanut butter instead of almond butter. Each nut butter gives a unique taste.

Incorporating dried fruits or seeds: Mix in raisins, cranberries, or pumpkin seeds for added texture and flavor. These extras add sweetness and chewiness to your bars.

Feel free to explore these variations to make your no-bake chocolate oat bars even more delicious. Check the Full Recipe for the base to start from!

Storage Info

Best Practices for Storage

To keep your no-bake chocolate oat bars fresh, store them in the fridge. Use an airtight container to prevent them from drying out. Make sure to place parchment paper between layers if you stack the bars. This helps avoid sticking.

These bars will last about one week in the fridge. After that, they may lose their texture and taste. It’s best to enjoy them while they are fresh!

Freezing Instructions

If you want to keep the bars for longer, freezing is a great option. First, let the bars cool and set completely. Cut them into squares or rectangles as desired. Next, wrap each piece in plastic wrap. Place them in a freezer-safe bag or container. This prevents freezer burn and keeps them tasty.

To thaw, simply move the bars to the fridge for a few hours. You can also leave them at room temperature for about 30 minutes before serving. This will restore their soft texture. When you are ready to enjoy, you can drizzle some melted chocolate on top for extra flavor.

For the full recipe, check out the detailed steps to make these delicious treats.

FAQs

Common Questions about No-Bake Chocolate Oat Bars

Can I use other sweeteners instead of honey?

Yes, you can use maple syrup or agave syrup. These sweeteners work well in this recipe. They add a nice flavor and help bind the bars together.

How long do these bars last?

These bars can last up to two weeks in the fridge. Store them in an airtight container to keep them fresh. You can also freeze them for longer storage.

Can I substitute almond butter with peanut butter?

Absolutely! Peanut butter is a great substitute. It adds a different flavor and gives the bars a nice twist. Just make sure to use creamy peanut butter for the best texture.

What can I add to enhance the flavor?

You can add ingredients like crushed nuts, dried fruit, or even a pinch of cinnamon. These additions can give your bars extra flavor and texture. Get creative and adjust to your taste!

How do I ensure the bars don’t crumble when cutting?

Press the mixture firmly into the baking dish. Make sure it is compact before refrigerating. After chilling, use a sharp knife to cut clean slices. If they still crumble, try adding a bit more almond butter.

For the full recipe, check out the detailed steps to make these delicious bars!

You now know how to make delicious no-bake chocolate oat bars. With simple ingredients like oats, almond butter, and cocoa powder, you can create a tasty snack. Don’t forget to try variations and tips for the best results. These bars are easy to store and freeze, so you always have a sweet treat ready. Enjoy experimenting to find your perfect flavor. Now, get started and enjoy your delicious homemade snack!

- 2 cups rolled oats - 1 cup creamy almond butter - 1/2 cup honey or maple syrup - 1/2 cup unsweetened cocoa powder The main ingredients for No-Bake Chocolate Oat Bars are simple yet satisfying. Rolled oats form the base, providing a hearty texture. Almond butter adds creaminess and healthy fat. Honey or maple syrup gives natural sweetness and binds the mixture. Unsweetened cocoa powder brings rich chocolate flavor without extra sugar. This combo creates a fantastic foundation for tasty bars. - 1/4 cup dark chocolate chips - 1/4 cup shredded coconut (unsweetened) - 1 teaspoon vanilla extract - A pinch of salt While the main ingredients shine, optional ingredients can enhance your bars. Dark chocolate chips add extra sweetness and chocolatey goodness. Shredded coconut gives a tropical twist and chewy texture. A teaspoon of vanilla extract boosts flavor depth, while a pinch of salt balances sweetness. Feel free to mix and match these options to suit your taste. For the full recipe, check out the detailed instructions to make your own No-Bake Chocolate Oat Bars! Start by gathering your dry ingredients. In a large mixing bowl, combine: - 2 cups rolled oats - 1/2 cup unsweetened cocoa powder - 1/4 cup shredded coconut (unsweetened) - A pinch of salt Mix these well. You want everything to blend nicely. The cocoa gives a rich taste, while the oats add texture. Next, focus on the wet mix. In a microwave-safe bowl, add: - 1 cup creamy almond butter - 1/2 cup honey or maple syrup Heat this mixture in the microwave for about 30-45 seconds. This step makes it easier to stir. Once warm, take it out and mix until smooth. Add in 1 teaspoon of vanilla extract and stir again. This adds a lovely flavor. Now, it’s time to bring everything together. Pour the warm almond butter mix over your dry ingredients. Stir well until all the dry ingredients are coated. This step is key for flavor. Next, fold in: - 1/4 cup dark chocolate chips Make sure they are evenly spread throughout the mix. Line an 8x8 inch baking dish with parchment paper. Leave some paper hanging over the sides for easy removal. Press the mixture firmly into the dish. Use a spatula or your hands to make it even. Once it is all in, refrigerate for at least 2 hours. This helps the mixture set and hold its shape. After it firms up, lift it out using the parchment paper, and cut it into squares or rectangles. For the full recipe, you can find it in the ingredients section. Enjoy your delicious no-bake chocolate oat bars! To make the best no-bake chocolate oat bars, focus on two key areas: consistency and cooling. - Ensuring the right consistency: Mix the dry ingredients well. This helps all flavors blend. When you add the wet mix, it should be sticky but not too runny. If it feels too dry, add a bit more almond butter. If it’s too wet, add extra oats. You want a thick, moldable mixture. - Cooling and setting times: Chill the bars for at least two hours. This helps them firm up nicely. If you leave them longer, they will be even easier to cut. Make sure to cover them to keep them fresh in the fridge. How you serve your no-bake bars can elevate their appeal. Here are some fun tips: - Serving suggestions with melted chocolate and coconut: Drizzle melted chocolate over the cut bars. Then, sprinkle some shredded coconut on top. This adds a nice touch and makes them look fancy. - Garnishing for visual appeal: Use fresh berries or nuts as a garnish. They add color and texture. You can also serve the bars on a nice plate. Arrange them with a few extra chocolate chips around for a fun, inviting look. For a complete guide, check the Full Recipe. {{image_2}} If you want to enjoy these bars but need some tweaks, you can make easy changes. - Gluten-free alternatives: Use certified gluten-free oats. This keeps your bars safe for those with gluten issues. - Nut-free options: Switch almond butter for sunflower seed butter. This keeps the bars nut-free while still being tasty. Want to change up the flavor? Here are some fun ideas to try. - Adding different nut butters: You can use cashew or peanut butter instead of almond butter. Each nut butter gives a unique taste. - Incorporating dried fruits or seeds: Mix in raisins, cranberries, or pumpkin seeds for added texture and flavor. These extras add sweetness and chewiness to your bars. Feel free to explore these variations to make your no-bake chocolate oat bars even more delicious. Check the Full Recipe for the base to start from! To keep your no-bake chocolate oat bars fresh, store them in the fridge. Use an airtight container to prevent them from drying out. Make sure to place parchment paper between layers if you stack the bars. This helps avoid sticking. These bars will last about one week in the fridge. After that, they may lose their texture and taste. It's best to enjoy them while they are fresh! If you want to keep the bars for longer, freezing is a great option. First, let the bars cool and set completely. Cut them into squares or rectangles as desired. Next, wrap each piece in plastic wrap. Place them in a freezer-safe bag or container. This prevents freezer burn and keeps them tasty. To thaw, simply move the bars to the fridge for a few hours. You can also leave them at room temperature for about 30 minutes before serving. This will restore their soft texture. When you are ready to enjoy, you can drizzle some melted chocolate on top for extra flavor. For the full recipe, check out the detailed steps to make these delicious treats. Can I use other sweeteners instead of honey? Yes, you can use maple syrup or agave syrup. These sweeteners work well in this recipe. They add a nice flavor and help bind the bars together. How long do these bars last? These bars can last up to two weeks in the fridge. Store them in an airtight container to keep them fresh. You can also freeze them for longer storage. Can I substitute almond butter with peanut butter? Absolutely! Peanut butter is a great substitute. It adds a different flavor and gives the bars a nice twist. Just make sure to use creamy peanut butter for the best texture. What can I add to enhance the flavor? You can add ingredients like crushed nuts, dried fruit, or even a pinch of cinnamon. These additions can give your bars extra flavor and texture. Get creative and adjust to your taste! How do I ensure the bars don't crumble when cutting? Press the mixture firmly into the baking dish. Make sure it is compact before refrigerating. After chilling, use a sharp knife to cut clean slices. If they still crumble, try adding a bit more almond butter. For the full recipe, check out the detailed steps to make these delicious bars! You now know how to make delicious no-bake chocolate oat bars. With simple ingredients like oats, almond butter, and cocoa powder, you can create a tasty snack. Don't forget to try variations and tips for the best results. These bars are easy to store and freeze, so you always have a sweet treat ready. Enjoy experimenting to find your perfect flavor. Now, get started and enjoy your delicious homemade snack!

No-Bake Chocolate Oat Bars

Indulge in these decadent no-bake chocolate oat bars that make for the perfect guilt-free treat! With creamy almond butter, rich cocoa, and dark chocolate chips, these bars are both delicious and nutritious. In just 15 minutes of prep, you can create a delightful snack that everyone will love. Ready to satisfy your sweet tooth? Click through to discover the full recipe and enjoy a delightful treat that's easy to make!

Ingredients
  

2 cups rolled oats

1 cup creamy almond butter

1/2 cup honey or maple syrup

1/2 cup unsweetened cocoa powder

1/4 cup dark chocolate chips

1/4 cup shredded coconut (unsweetened)

1 teaspoon vanilla extract

A pinch of salt

Instructions
 

In a large mixing bowl, combine the rolled oats, cocoa powder, shredded coconut, and a pinch of salt. Mix well until combined.

    In a separate microwave-safe bowl, add the almond butter and honey (or maple syrup). Heat in the microwave for about 30-45 seconds, or until warm and easily mixable. Stir until smooth.

      Add the vanilla extract to the almond butter mixture and mix well.

        Pour the almond butter mixture over the dry ingredients in the large bowl. Stir until everything is well combined and coated.

          Fold in the dark chocolate chips until evenly distributed throughout the mixture.

            Line an 8x8 inch baking dish with parchment paper, leaving some overhang on the sides for easy removal.

              Press the mixture firmly into the prepared baking dish, smoothing it out with a spatula or your hands to create an even layer.

                Refrigerate for at least 2 hours or until firm.

                  Once set, lift the bars out of the dish using the parchment overhang and cut into squares or rectangles.

                    Prep Time: 15 minutes | Total Time: 2 hours 15 minutes | Servings: 16 bars

                      - Presentation Tips: Serve the bars chilled, drizzled with a little extra melted chocolate, and sprinkle some coconut on top for an inviting presentation. Store leftovers in an airtight container in the fridge.

                        Leave a Comment

                        Recipe Rating