Grilled Chicken Caesar Wraps Tasty Meal for Everyone

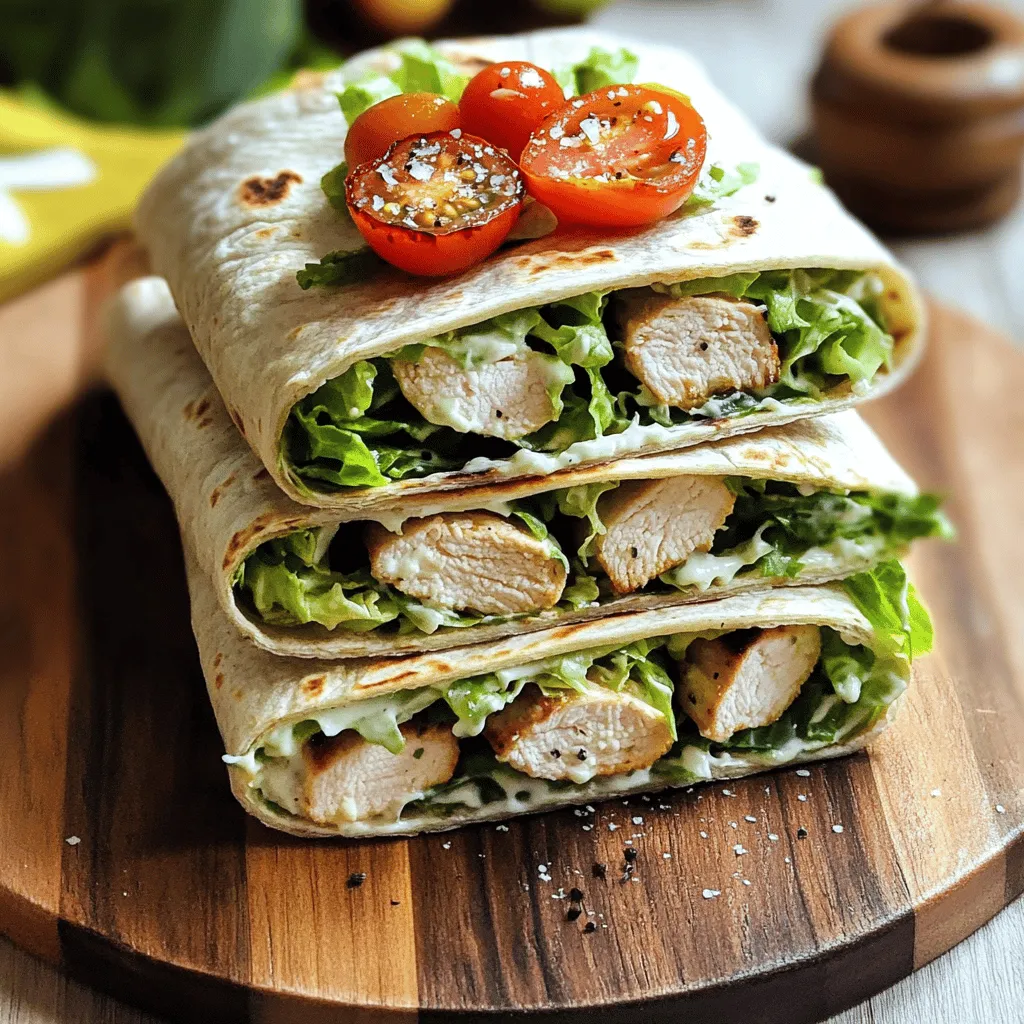
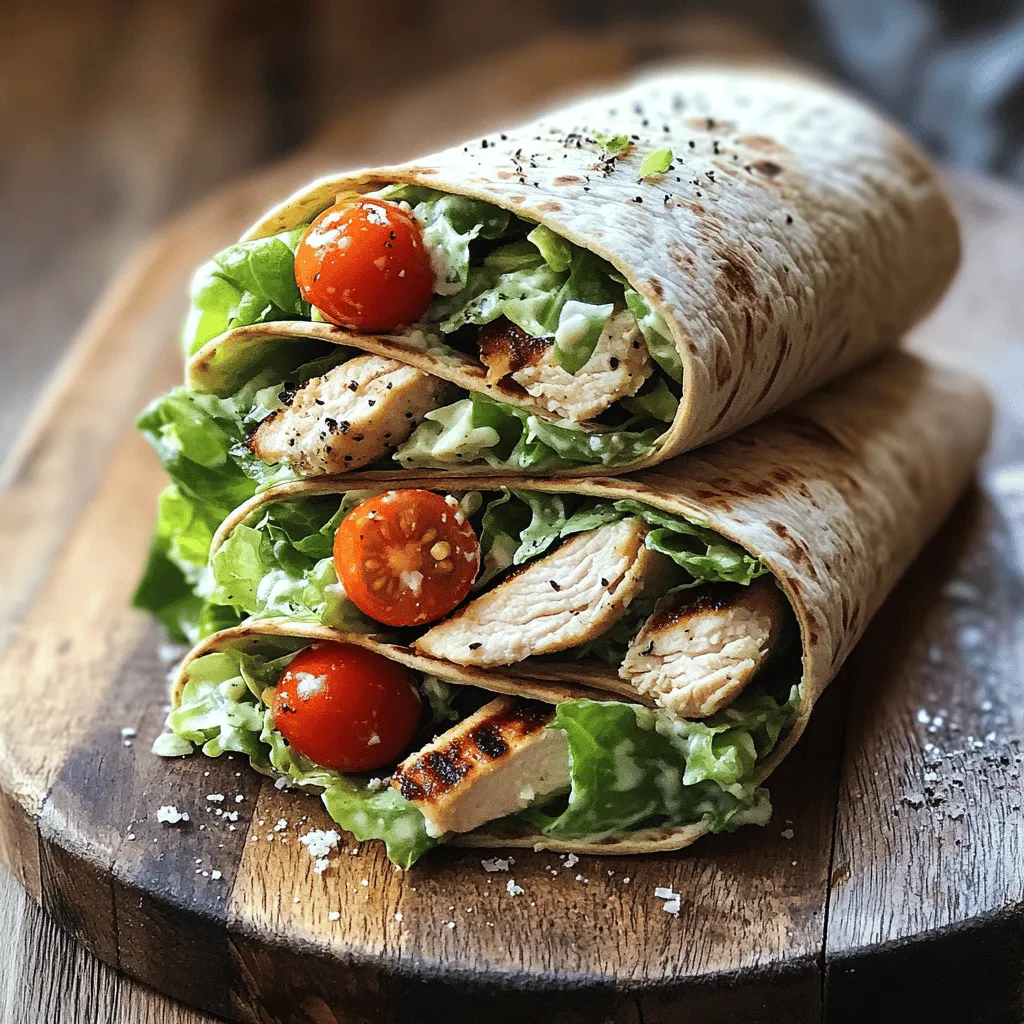
Looking for a simple, tasty meal that everyone will love? I’ve got you covered with Grilled Chicken Caesar Wraps! This dish combines juicy grilled chicken, fresh Romaine lettuce, and zesty dressing, all wrapped in a warm tortilla. It’s perfect for lunch or dinner, easy to make, and customizable for any diet. Let’s dive into the ingredients and get cooking—you’ll impress your family in no time!

Ingredients

Required Ingredients for Grilled Chicken Caesar Wraps

– 2 large boneless, skinless chicken breasts

– 1 tablespoon olive oil

– Salt and pepper to taste

– 1 teaspoon garlic powder

– 1 teaspoon Italian seasoning

– 4 large whole wheat tortillas

– 2 cups Romaine lettuce, chopped

– ½ cup Caesar dressing (store-bought or homemade)

– ½ cup grated Parmesan cheese

– ¼ cup cherry tomatoes, halved

– Freshly cracked black pepper for garnish

In this recipe, I use boneless, skinless chicken breasts. They cook quickly and stay juicy. Olive oil adds flavor and moisture to the chicken. Salt and pepper enhance the taste. Garlic powder gives a nice kick, while Italian seasoning adds depth.

Whole wheat tortillas are my choice for a healthy wrap. They are sturdy and hold the filling well. Romaine lettuce adds crunch and freshness. Caesar dressing brings rich flavor. Grated Parmesan cheese adds creaminess and saltiness. Lastly, cherry tomatoes give a pop of color and sweetness.

When you gather these ingredients, you set the stage for a tasty meal. Each one plays an important role. So, let’s get ready to make Grilled Chicken Caesar Wraps! For the full recipe, check the instructions section.

Step-by-Step Instructions

Preparing the Chicken

To start, you need to marinate and season the chicken. First, brush the chicken breasts with olive oil. Sprinkle salt, pepper, garlic powder, and Italian seasoning all over the chicken. This mix adds great flavor. Let the chicken sit for about 15 minutes to soak in the spices.

Next, you should prep the grill. Preheat your grill to medium-high heat. A hot grill will give you nice grill marks and juicy chicken.

Grilling the Chicken

Now it’s time to grill the chicken. Place the seasoned chicken on the grill. Cook it for about 6-7 minutes on each side. You want the internal temperature to reach 165°F (75°C). This ensures the chicken is safe to eat. Once done, take the chicken off the grill and let it rest for 5 minutes. This helps keep it juicy.

Assembling the Wraps

While the chicken rests, you can mix the filling. In a bowl, combine chopped Romaine lettuce, Caesar dressing, grated Parmesan cheese, and halved cherry tomatoes. Toss this mixture until the lettuce is well coated with dressing.

Next, it’s time to assemble the wraps. Lay a tortilla flat on a clean surface. Place the lettuce mixture and sliced grilled chicken in the center of the tortilla. Make sure not to overfill it.

Now, wrap it up. Fold the sides of the tortilla inward. Then roll it from the bottom up to secure the filling inside. Repeat this for the remaining tortillas.

Your wraps are now ready! You can slice them in half diagonally for easy eating. For extra flavor, sprinkle some freshly cracked black pepper on top. For more detailed steps, check the Full Recipe.

Tips & Tricks

Cooking Tips for Perfect Grilled Chicken

To make great grilled chicken, you need the right internal temperature. Cook the chicken until it reaches 165°F (75°C). Use a meat thermometer for accuracy. This ensures the chicken is safe to eat.

To enhance flavor, season the chicken well. I like to use olive oil, salt, pepper, garlic powder, and Italian seasoning. Let the chicken marinate for 15 minutes before grilling. This short time makes a big difference in flavor.

Wrapping Techniques

To ensure your wrap holds together, don’t overfill it. Place just enough filling in the center. Fold the sides in before rolling it up. This keeps everything inside.

For fun serving ideas, try cutting the wraps in half and placing them on a platter. You can also serve them with a small bowl of extra Caesar dressing for dipping.

Additional Presentation Tips

When serving, use a wooden platter or cutting board. This adds a rustic touch. Garnish with extra cherry tomatoes and a sprinkle of Parmesan cheese. This makes the dish look bright and inviting.

You can also add a side of fresh fruit or a light salad. This adds color and balance to your meal. Enjoy your Grilled Chicken Caesar Wraps with style! For the complete recipe, check the Full Recipe section.

Variations

Alternative Ingredients

You can switch up proteins in your Grilled Chicken Caesar Wraps. Try shrimp for a seafood twist, or tofu for a plant-based option. Each protein adds its own flavor and texture.

When it comes to wraps, consider low-carb or gluten-free options. Lettuce wraps can be a fun, fresh alternative. They make the dish lighter and can help cut carbs if you need.

Dressing Options

Using homemade Caesar dressing can elevate your wraps. It’s easy to make with just a few ingredients. You can control the flavor and adjust it to your taste. Store-bought options are quick and work well too, especially if you’re short on time.

Feel free to experiment with other dressings. Ranch or Greek yogurt dressing can offer a unique spin. These can add new flavors and keep things interesting.

Add-Ons and Extras

Want to make your wraps more colorful? Add extra veggies like bell peppers, cucumbers, or avocados. These not only add crunch but also boost nutrition.

For sides, consider pairing with sweet potato fries or a light salad. These options complement the wraps and make a complete meal. You can also serve with a small bowl of extra Caesar dressing for dipping.

For the full recipe, check out the recipe section above.

Storage Info

How to Store Leftover Wraps

To keep your Grilled Chicken Caesar Wraps fresh, wrap them tightly in plastic wrap or foil. This prevents air from getting in and keeps them tasty. Store the wraps in the fridge for up to three days. If you notice any sogginess, consider adding fresh lettuce when you eat them.

Reheating Guidelines

Reheat your wraps using a skillet on medium heat. This keeps them warm without drying them out. Flip them gently to warm both sides. You can also use a microwave, but wrap them in a damp paper towel to keep moisture in. This method helps to maintain freshness and flavor.

Freezing Tips

Can you freeze Grilled Chicken Caesar Wraps? Yes! To freeze, wrap each one in plastic wrap and then place them in a freezer bag. They can stay in the freezer for up to three months. When you’re ready to eat, thaw them in the fridge overnight. After thawing, reheat them in a skillet for the best taste and texture.

FAQs

Common Questions About Grilled Chicken Caesar Wraps

What sides pair well with these wraps?

You can serve these wraps with a side salad or some sweet potato fries. Fresh fruit also adds a nice touch. Vegetable sticks with dip make a great crunchy side.

How can I make these wraps healthier?

To make your wraps lighter, use less dressing or switch to a yogurt-based dressing. You can also add more veggies, like cucumbers or bell peppers, for extra crunch and nutrition.

Can I use store-bought grilled chicken?

Yes, you can use store-bought grilled chicken. It saves time and still tastes great. Just slice it up and add it to your wraps.

Cooking and Preparation Queries

What is the best way to grill chicken?

Preheat your grill to medium-high heat. Brush the chicken with olive oil and season it well. Grill for about 6-7 minutes on each side. Check the internal temperature; it should reach 165°F (75°C).

Can I make the filling ahead of time?

Absolutely! You can mix the filling a few hours in advance. Just keep it in the fridge until you’re ready to use it. This saves time on busy days.

Dietary Considerations

Are these wraps suitable for meal prep?

Yes, these wraps are great for meal prep. You can make several at once and store them in the fridge. Just wrap them tightly to keep them fresh.

Tips for accommodating dietary restrictions

If you have gluten-free eaters, use gluten-free wraps. For a vegetarian option, swap chicken for grilled veggies or chickpeas. Always check the dressing for allergens.

In this post, we explored how to make tasty Grilled Chicken Caesar Wraps. We covered the key ingredients, like chicken, seasonings, and fresh veggies. I guided you through each cooking step, from marinating the chicken to grilling and assembling the wraps.

Remember, you can customize these wraps with different proteins and dressings. Keep your leftovers fresh by following storage tips. Enjoy your wraps, and get creative with flavors and presentations! Happy cooking!

- 2 large boneless, skinless chicken breasts - 1 tablespoon olive oil - Salt and pepper to taste - 1 teaspoon garlic powder - 1 teaspoon Italian seasoning - 4 large whole wheat tortillas - 2 cups Romaine lettuce, chopped - ½ cup Caesar dressing (store-bought or homemade) - ½ cup grated Parmesan cheese - ¼ cup cherry tomatoes, halved - Freshly cracked black pepper for garnish In this recipe, I use boneless, skinless chicken breasts. They cook quickly and stay juicy. Olive oil adds flavor and moisture to the chicken. Salt and pepper enhance the taste. Garlic powder gives a nice kick, while Italian seasoning adds depth. Whole wheat tortillas are my choice for a healthy wrap. They are sturdy and hold the filling well. Romaine lettuce adds crunch and freshness. Caesar dressing brings rich flavor. Grated Parmesan cheese adds creaminess and saltiness. Lastly, cherry tomatoes give a pop of color and sweetness. When you gather these ingredients, you set the stage for a tasty meal. Each one plays an important role. So, let’s get ready to make Grilled Chicken Caesar Wraps! For the full recipe, check the instructions section. To start, you need to marinate and season the chicken. First, brush the chicken breasts with olive oil. Sprinkle salt, pepper, garlic powder, and Italian seasoning all over the chicken. This mix adds great flavor. Let the chicken sit for about 15 minutes to soak in the spices. Next, you should prep the grill. Preheat your grill to medium-high heat. A hot grill will give you nice grill marks and juicy chicken. Now it's time to grill the chicken. Place the seasoned chicken on the grill. Cook it for about 6-7 minutes on each side. You want the internal temperature to reach 165°F (75°C). This ensures the chicken is safe to eat. Once done, take the chicken off the grill and let it rest for 5 minutes. This helps keep it juicy. While the chicken rests, you can mix the filling. In a bowl, combine chopped Romaine lettuce, Caesar dressing, grated Parmesan cheese, and halved cherry tomatoes. Toss this mixture until the lettuce is well coated with dressing. Next, it's time to assemble the wraps. Lay a tortilla flat on a clean surface. Place the lettuce mixture and sliced grilled chicken in the center of the tortilla. Make sure not to overfill it. Now, wrap it up. Fold the sides of the tortilla inward. Then roll it from the bottom up to secure the filling inside. Repeat this for the remaining tortillas. Your wraps are now ready! You can slice them in half diagonally for easy eating. For extra flavor, sprinkle some freshly cracked black pepper on top. For more detailed steps, check the Full Recipe. To make great grilled chicken, you need the right internal temperature. Cook the chicken until it reaches 165°F (75°C). Use a meat thermometer for accuracy. This ensures the chicken is safe to eat. To enhance flavor, season the chicken well. I like to use olive oil, salt, pepper, garlic powder, and Italian seasoning. Let the chicken marinate for 15 minutes before grilling. This short time makes a big difference in flavor. To ensure your wrap holds together, don’t overfill it. Place just enough filling in the center. Fold the sides in before rolling it up. This keeps everything inside. For fun serving ideas, try cutting the wraps in half and placing them on a platter. You can also serve them with a small bowl of extra Caesar dressing for dipping. When serving, use a wooden platter or cutting board. This adds a rustic touch. Garnish with extra cherry tomatoes and a sprinkle of Parmesan cheese. This makes the dish look bright and inviting. You can also add a side of fresh fruit or a light salad. This adds color and balance to your meal. Enjoy your Grilled Chicken Caesar Wraps with style! For the complete recipe, check the Full Recipe section. {{image_2}} You can switch up proteins in your Grilled Chicken Caesar Wraps. Try shrimp for a seafood twist, or tofu for a plant-based option. Each protein adds its own flavor and texture. When it comes to wraps, consider low-carb or gluten-free options. Lettuce wraps can be a fun, fresh alternative. They make the dish lighter and can help cut carbs if you need. Using homemade Caesar dressing can elevate your wraps. It’s easy to make with just a few ingredients. You can control the flavor and adjust it to your taste. Store-bought options are quick and work well too, especially if you’re short on time. Feel free to experiment with other dressings. Ranch or Greek yogurt dressing can offer a unique spin. These can add new flavors and keep things interesting. Want to make your wraps more colorful? Add extra veggies like bell peppers, cucumbers, or avocados. These not only add crunch but also boost nutrition. For sides, consider pairing with sweet potato fries or a light salad. These options complement the wraps and make a complete meal. You can also serve with a small bowl of extra Caesar dressing for dipping. For the full recipe, check out the recipe section above. To keep your Grilled Chicken Caesar Wraps fresh, wrap them tightly in plastic wrap or foil. This prevents air from getting in and keeps them tasty. Store the wraps in the fridge for up to three days. If you notice any sogginess, consider adding fresh lettuce when you eat them. Reheat your wraps using a skillet on medium heat. This keeps them warm without drying them out. Flip them gently to warm both sides. You can also use a microwave, but wrap them in a damp paper towel to keep moisture in. This method helps to maintain freshness and flavor. Can you freeze Grilled Chicken Caesar Wraps? Yes! To freeze, wrap each one in plastic wrap and then place them in a freezer bag. They can stay in the freezer for up to three months. When you're ready to eat, thaw them in the fridge overnight. After thawing, reheat them in a skillet for the best taste and texture. What sides pair well with these wraps? You can serve these wraps with a side salad or some sweet potato fries. Fresh fruit also adds a nice touch. Vegetable sticks with dip make a great crunchy side. How can I make these wraps healthier? To make your wraps lighter, use less dressing or switch to a yogurt-based dressing. You can also add more veggies, like cucumbers or bell peppers, for extra crunch and nutrition. Can I use store-bought grilled chicken? Yes, you can use store-bought grilled chicken. It saves time and still tastes great. Just slice it up and add it to your wraps. What is the best way to grill chicken? Preheat your grill to medium-high heat. Brush the chicken with olive oil and season it well. Grill for about 6-7 minutes on each side. Check the internal temperature; it should reach 165°F (75°C). Can I make the filling ahead of time? Absolutely! You can mix the filling a few hours in advance. Just keep it in the fridge until you’re ready to use it. This saves time on busy days. Are these wraps suitable for meal prep? Yes, these wraps are great for meal prep. You can make several at once and store them in the fridge. Just wrap them tightly to keep them fresh. Tips for accommodating dietary restrictions If you have gluten-free eaters, use gluten-free wraps. For a vegetarian option, swap chicken for grilled veggies or chickpeas. Always check the dressing for allergens. In this post, we explored how to make tasty Grilled Chicken Caesar Wraps. We covered the key ingredients, like chicken, seasonings, and fresh veggies. I guided you through each cooking step, from marinating the chicken to grilling and assembling the wraps. Remember, you can customize these wraps with different proteins and dressings. Keep your leftovers fresh by following storage tips. Enjoy your wraps, and get creative with flavors and presentations! Happy cooking!

Grilled Chicken Caesar Wraps

Delight your taste buds with Grilled Chicken Caesar Wraps, a simple and delicious meal everyone will love! This recipe combines juicy grilled chicken, fresh Romaine lettuce, and zesty dressing, all wrapped in a warm tortilla. Perfect for lunch or dinner, these wraps are easy to customize for any diet. Ready to impress your family? Click through to explore the full recipe and get cooking today!

Ingredients
  

2 large boneless, skinless chicken breasts

1 tablespoon olive oil

Salt and pepper to taste

1 teaspoon garlic powder

1 teaspoon Italian seasoning

4 large whole wheat tortillas

2 cups Romaine lettuce, chopped

½ cup Caesar dressing (store-bought or homemade)

½ cup grated Parmesan cheese

¼ cup cherry tomatoes, halved

Freshly cracked black pepper for garnish

Instructions
 

Prepare the Chicken: Preheat your grill to medium-high heat. Brush the chicken breasts with olive oil and season with salt, pepper, garlic powder, and Italian seasoning. Let them marinate for about 15 minutes.

    Grill the Chicken: Place the seasoned chicken on the grill and cook for about 6-7 minutes on each side, or until the internal temperature reaches 165°F (75°C). Remove from the grill and let it rest for 5 minutes.

      Slice the Chicken: Once rested, slice the grilled chicken into thin strips.

        Mix the Filling: In a bowl, combine the chopped Romaine lettuce, Caesar dressing, grated Parmesan cheese, and cherry tomatoes. Toss until the lettuce is well coated.

          Assemble the Wraps: Lay a tortilla flat on a clean surface. Layer the lettuce mixture and sliced grilled chicken in the center of the tortilla, ensuring not to overfill.

            Wrap it Up: Fold the sides of the tortilla inwards, then roll from the bottom up to secure the filling inside. Repeat for the remaining tortillas.

              Serve: Slice the wraps in half diagonally and sprinkle with freshly cracked black pepper for added flavor.

                Prep Time: 20 minutes | Total Time: 40 minutes | Servings: 4 wraps

                  - Presentation Tips: Serve the wraps on a wooden platter or cutting board, garnished with extra cherry tomatoes and a sprinkle of grated Parmesan cheese. Add a small bowl of extra Caesar dressing on the side for dipping.

                    Leave a Comment

                    Recipe Rating