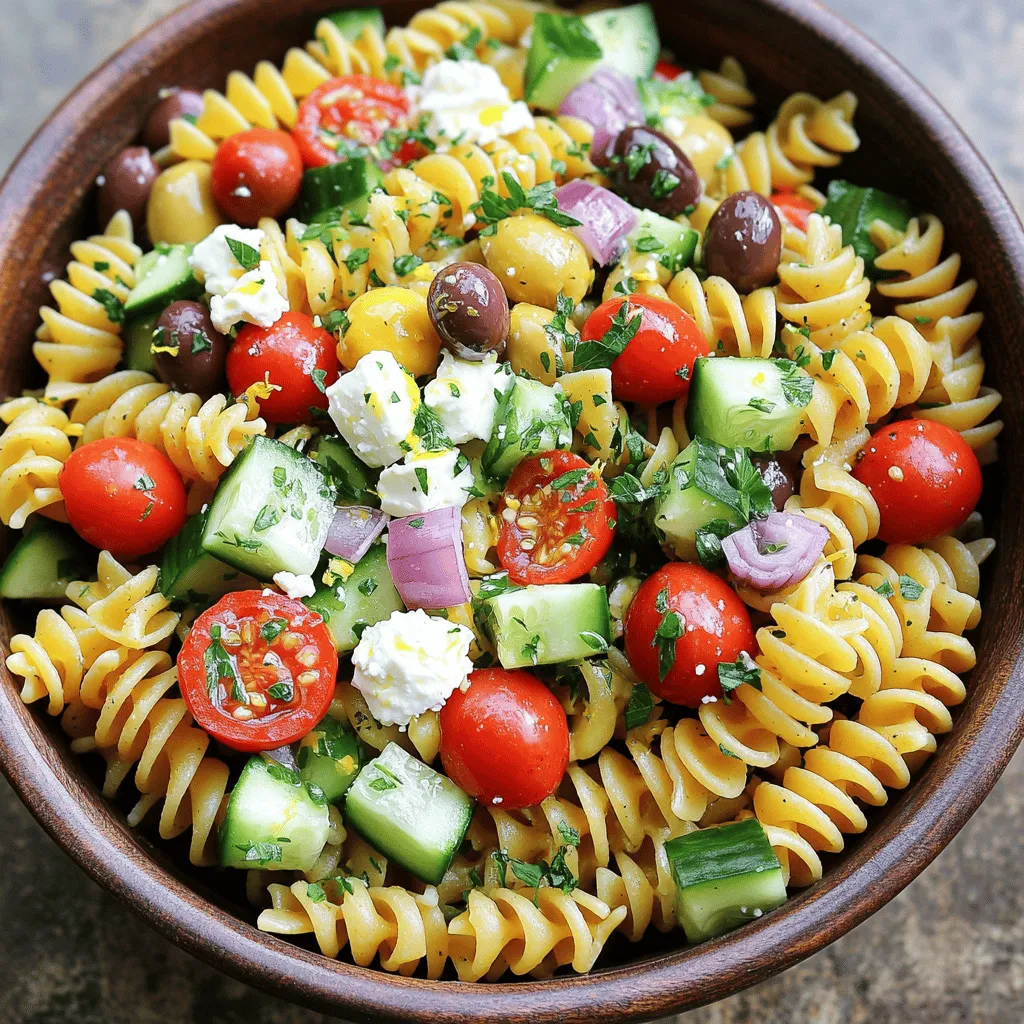
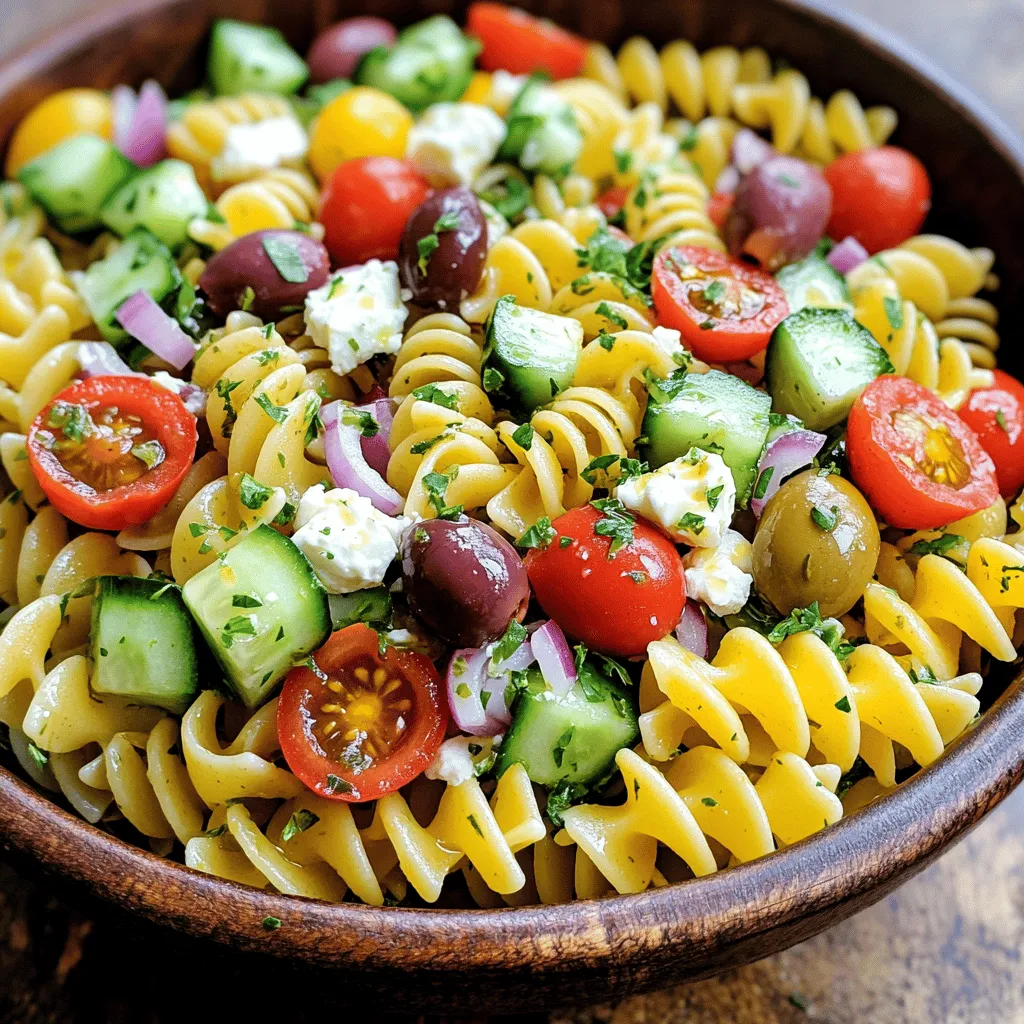
Looking for a quick, fresh dish that bursts with flavor? You’ve come to the right place! My Easy Greek Pasta Salad is perfect for any meal or gathering. With a mix of colorful veggies, savory cheese, and a zesty dressing, it’s a culinary delight you can whip up in no time. Join me as we explore the simple ingredients and steps to create your new favorite salad!
Ingredients
List of Main Ingredients
For my Easy Greek Pasta Salad, I use these main ingredients:
– 2 cups rotini pasta
– 1 cup cherry tomatoes, halved
– 1 cup cucumber, diced
– 1/2 red onion, finely chopped
– 1/2 cup Kalamata olives, pitted and sliced
– 1/2 cup feta cheese, crumbled
I recommend rotini pasta because its shape holds the dressing well. Cherry tomatoes add sweetness, and diced cucumber gives a refreshing crunch. The red onion adds a bit of zing, while Kalamata olives bring a salty bite. Finally, feta cheese adds creaminess and tang.
Dressing Ingredients
For the dressing, I use:
– 1/4 cup extra-virgin olive oil
– 2 tablespoons red wine vinegar (or apple cider vinegar)
– 1 tablespoon lemon juice
– 1 teaspoon dried oregano
– Salt and pepper to taste
I prefer extra-virgin olive oil for its rich flavor. Red wine vinegar adds acidity, while lemon juice brightens the taste. Dried oregano gives it that classic Greek flavor. When seasoning, remember to taste as you go. This helps achieve the perfect balance.
Step-by-Step Instructions
Cooking the Pasta
To make Easy Greek Pasta Salad, start by cooking the rotini pasta. Boil a pot of water. Add a pinch of salt and the pasta. Cook according to the package instructions, usually about 8-10 minutes. You want the pasta to be al dente, which means it should have a slight bite.
To check if the pasta is done, taste a piece. If it’s firm but not hard, it’s ready. Once cooked, drain the pasta in a colander and rinse it under cold water. This stops the cooking process and cools the pasta down quickly.
Mixing the Salad
Now it’s time to mix the salad. In a large bowl, combine the cooled pasta with the other solid ingredients. Add the halved cherry tomatoes, diced cucumber, finely chopped red onion, sliced Kalamata olives, and crumbled feta cheese. This colorful mix makes your salad look great and taste fresh.
For the best mix, gently toss the ingredients. Use a spatula or spoon and lift the pasta from the bottom. This way, everything gets well combined without breaking the pasta or other veggies.
Preparing the Dressing
Next, we’ll prepare the dressing. In a small bowl, whisk together the olive oil, red wine vinegar, lemon juice, dried oregano, salt, and pepper. Whisking helps blend all the flavors together. Make sure it’s well combined and smooth.
When it’s time to mix the dressing with the salad, pour it over your pasta mixture. Gently toss again to coat everything evenly. This helps each bite be full of flavor. For the best taste, let the salad chill in the fridge for 30 minutes before serving. This resting time allows the flavors to meld beautifully.
Tips & Tricks
Perfecting Your Greek Pasta Salad
To make your Greek pasta salad really shine, focus on simplicity and freshness. Use ripe tomatoes and crunchy cucumbers. This will boost the flavor. Fresh herbs also add a bright taste. Try adding chopped parsley or mint for a fresh twist.
For texture, cook the pasta just until it is al dente. This keeps it firm and prevents mushiness. Rinse the pasta under cold water to stop the cooking process. This also helps it stay separate.
Serving Suggestions
Pair your Greek pasta salad with grilled chicken or fish for a complete meal. You can also serve it with warm pita bread or hummus. For a fun twist, try serving it in a hollowed-out cucumber or tomato. This makes it look great on a platter.
Feel free to enjoy it as a light lunch or a side at a barbecue. This salad is also perfect for potlucks. It’s always a hit!
Common Mistakes to Avoid
One common mistake is overcooking the pasta. This can lead to a mushy texture. Always keep an eye on the cooking time.
Another mistake is not letting the salad rest. After mixing, let it chill for at least 30 minutes. This helps the flavors blend well together. If you skip this, the salad may taste flat.
Variations
Customization Options
You can change ingredients in this Greek pasta salad to make it your own. Here are some ideas:
– Swap-ins for different ingredients:
– Instead of rotini, use penne or fusilli.
– Try sun-dried tomatoes instead of fresh ones for a richer flavor.
– Use bell peppers or spinach for extra color and crunch.
– Substitutions for dietary restrictions:
– For gluten-free, use gluten-free pasta.
– If you avoid dairy, swap feta for vegan cheese or skip it entirely.
– To make it low-carb, substitute pasta with zucchini noodles or cauliflower rice.
Seasonal Variations
Change your salad based on the seasons. This keeps it fresh and exciting:
– Adapting the salad for different seasons:
– In spring, add fresh peas or asparagus.
– In summer, use ripe heirloom tomatoes and basil.
– In fall, mix in roasted butternut squash and arugula.
– Using seasonal vegetables and herbs:
– Use what’s fresh at the market. Look for local produce.
– Fresh herbs like dill in spring or rosemary in winter can add great flavor.
Serving Size Adjustments
You may want to make more or less salad. Here’s how to adjust:
– Scaling the recipe for larger groups:
– Simply double or triple the recipe for parties.
– Keep the same ratios for all ingredients.
– Storage considerations for leftovers:
– Store any leftovers in an airtight container.
– It stays fresh in the fridge for 3-4 days.
Storage Info
How to Store Leftovers
To keep your Greek pasta salad fresh, use an airtight container. Glass or plastic containers work well. Make sure to seal it tightly. This helps prevent odors from other foods in your fridge. If you have a big batch, divide it into smaller portions. This way, you can enjoy it easily later.
Freezing Instructions
You can freeze Greek pasta salad, but it may change in texture. To freeze, place it in a freezer-safe container. Leave some space at the top for expansion. When you are ready to eat it, thaw it in the fridge overnight.
Shelf Life
In the fridge, your Greek pasta salad lasts about 3 to 5 days. It’s best to eat it fresh for the best taste. Look for signs of spoilage, like a sour smell or slimy texture. If you see mold or anything odd, throw it away. Enjoy your delicious salad while it’s fresh!
FAQs
What type of pasta is best for Greek pasta salad?
For Greek pasta salad, rotini pasta is ideal. Its spirals hold the dressing well. You can also try penne or farfalle. Both options give a nice bite and texture. Avoid thin pasta, like spaghetti, as it won’t hold up as well with the ingredients. The goal is to have pasta that complements the fresh vegetables and feta.
Can I make this salad ahead of time?
Yes, you can make this salad ahead of time. I recommend prepping it a few hours before serving. This gives the flavors time to mix and meld. If you want to make it even earlier, store the dressing separately. Add it just before serving to keep the pasta fresh and not soggy. Chilling in the fridge for at least 30 minutes helps enhance the taste.
How can I make this recipe vegan?
To make this Greek pasta salad vegan, simply skip the feta cheese. You can replace it with tofu or vegan feta. For the dressing, use a vegan-friendly option for the olive oil and vinegar. Keep the lemon juice and dried oregano for great flavor. This way, you keep all the taste while making it plant-based. For a creamy twist, consider adding avocado for richness.
In this blog post, we explored how to make a delicious Greek pasta salad. We covered key ingredients like pasta, vegetables, cheese, and dressing. I shared step-by-step instructions for cooking the pasta, mixing the salad, and preparing the dressing. We discussed tips for perfecting the dish, variations to suit your taste, and storage information for leftovers. Understanding these details helps you create a tasty salad every time. Enjoy your cooking, and remember to experiment with flavors that excite you!