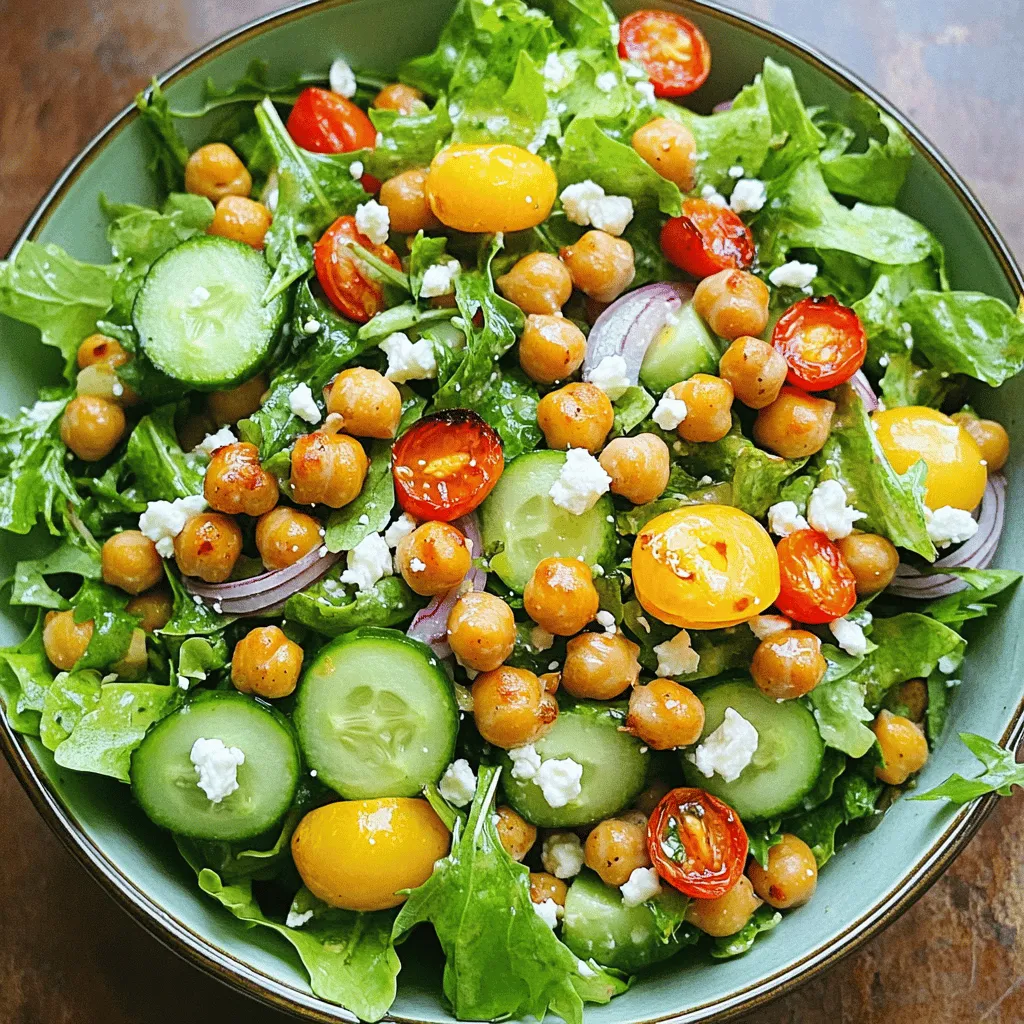
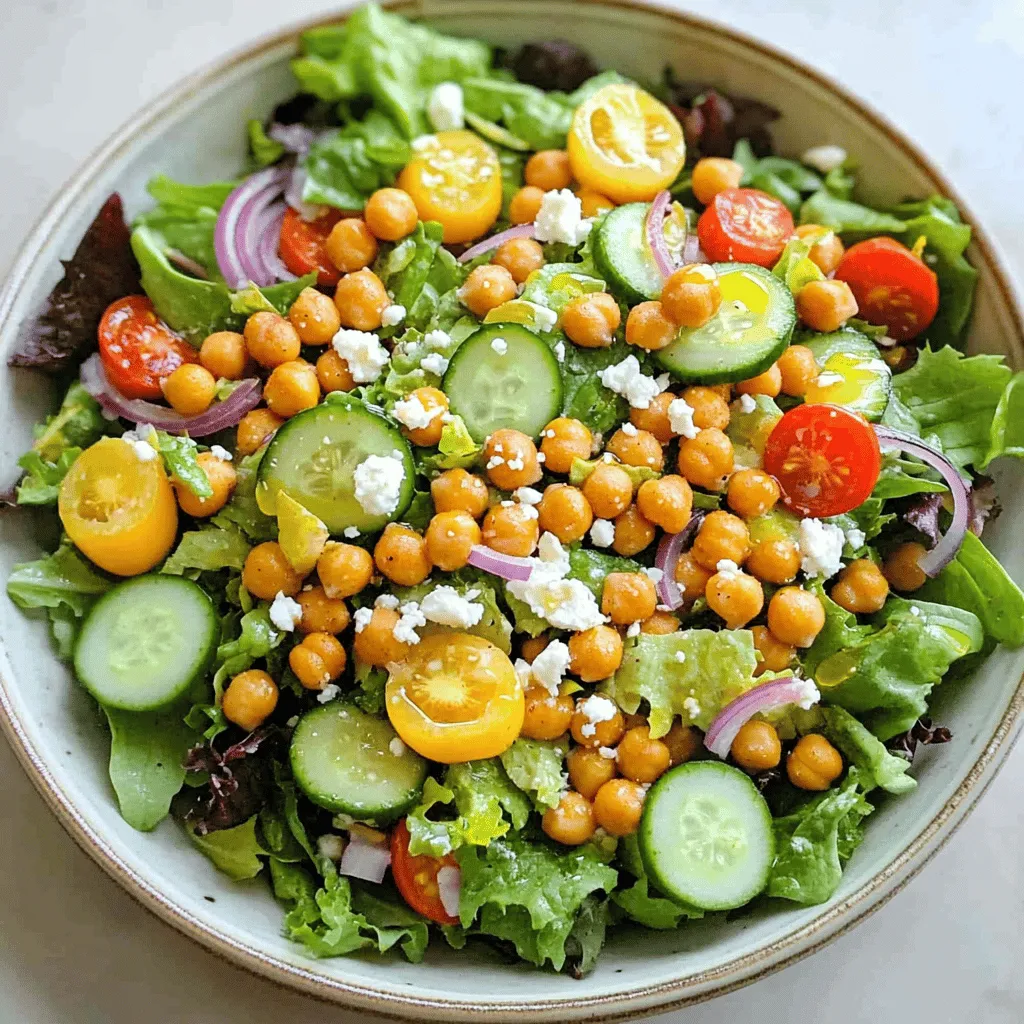
Looking for a tasty and healthy meal option? You’ll love this Crispy Chickpea Salad! Packed with nutrients and flavor, it satisfies your hunger without the guilt. This salad is perfect for lunch or a light dinner. I’ll share all the ingredients, cooking steps, and tips to make it crispy every time. Stick around to discover how easy it is to whip up this delicious dish!
Ingredients
List of Ingredients
To make the crispy chickpea salad, you will need:
– 1 can (15 oz) chickpeas, drained and rinsed
– 2 tablespoons olive oil
– 1 teaspoon smoked paprika
– 1/2 teaspoon garlic powder
– Salt and pepper to taste
– 4 cups mixed greens (spinach, arugula, or lettuce)
– 1 cucumber, diced
– 1 cup cherry tomatoes, halved
– 1/4 red onion, thinly sliced
– 1/4 cup feta cheese, crumbled (optional)
– 2 tablespoons lemon juice
– 1 tablespoon apple cider vinegar
Nutritional Benefits of Each Ingredient
This salad is not only tasty but also packed with nutrients. Chickpeas are high in protein and fiber, which help keep you full. Olive oil provides healthy fats that support heart health. Smoked paprika and garlic powder add flavor without extra calories. Mixed greens are low in calories but rich in vitamins A, C, and K. Cucumbers are hydrating and low in calories. Cherry tomatoes are full of antioxidants. Red onions can help lower blood sugar. Feta cheese adds calcium but can be skipped for a lighter dish. Lemon juice and apple cider vinegar support digestion and add zest.
Substitutions for Dietary Preferences
You can easily customize this salad for different diets. For a vegan option, skip the feta cheese or use a plant-based alternative. If you want gluten-free, this recipe is already safe. For low-carb diets, replace chickpeas with roasted cauliflower. You can swap olive oil with avocado oil for a different flavor. If you dislike any ingredient, feel free to leave it out or replace it with something you enjoy. Remember, cooking should be fun and fit your taste!
Step-by-Step Instructions
Preparation Overview
Making a crispy chickpea salad is easy and fun. You start by gathering your ingredients. You will need chickpeas, oil, and spices. The mixed greens, cucumber, and tomatoes add freshness. The feta cheese adds creaminess, but you can skip it if you want.
Detailed Cooking Steps
1. Preheat Oven: Set your oven to 400°F (200°C). This step is key for crispy chickpeas.
2. Season Chickpeas: In a bowl, mix the chickpeas, olive oil, smoked paprika, garlic powder, salt, and pepper. Make sure every chickpea gets coated well.
3. Spread on Baking Sheet: Take a baking sheet and line it with parchment paper. Spread the chickpeas evenly on the sheet.
4. Roast Chickpeas: Place the sheet in the oven. Roast for 25-30 minutes. Shake the pan halfway through. This helps them cook evenly and become golden brown.
5. Prepare Salad Base: While the chickpeas cook, take a large salad bowl. Add the mixed greens.
6. Add Veggies: Chop the cucumber and halve the cherry tomatoes. Add them to the greens along with the sliced red onion and feta cheese, if using.
7. Make Dressing: In a small bowl, whisk together the lemon juice and apple cider vinegar. Drizzle this over the salad and toss gently.
8. Combine: Once the chickpeas are crispy, let them cool for a moment. Add them to the salad and toss one last time.
Tips for Roasting Chickpeas to Perfection
– Dry Well: Make sure your chickpeas are dry before seasoning. This helps them crisp up.
– Don’t Crowd the Pan: Give them some space on the baking sheet. This allows hot air to circulate.
– Check for Doneness: Keep an eye on them in the last few minutes. You want a nice golden color.
– Cool Before Adding: Let the chickpeas cool a bit before adding to the salad. This keeps the greens fresh.
Enjoy this healthy and filling meal option!
Tips & Tricks
How to Choose the Best Chickpeas
When selecting chickpeas, look for canned ones labeled as “no salt added.” This gives you control over flavor. Check the can for dents or damage. Choose brands that have a clear label for freshness. You can also use dried chickpeas. Just soak them overnight for best results. They should be firm and intact.
Achieving Maximum Crispiness
To get those chickpeas perfectly crispy, drain and rinse them well. Pat them dry with a towel. Removing moisture is key. Coat them in olive oil and spices before roasting. Bake them at 400°F (200°C) for 25-30 minutes. Shake the pan halfway through for even cooking. If they look golden brown, they are done.
Serving Suggestions and Pairings
Serve your crispy chickpea salad in a large, shallow bowl. This makes it look great. For extra flavor, add a dollop of yogurt or a drizzle of tahini. You can pair it with grilled chicken or fish for extra protein. It also goes well with a slice of whole-grain bread. For a fun twist, add some avocado or nuts for crunch.
Variations
Adding Protein: Options and Ideas
You can add protein to your crispy chickpea salad for a heartier meal. Some great options include grilled chicken, shrimp, or tofu. Each of these adds a unique flavor and texture. If you want a plant-based option, try adding black beans or lentils. Both are tasty and filling.
Flavor Boosters: Herbs and Spices to Try
To elevate the taste, use fresh herbs and spices. Basil, cilantro, or parsley can brighten the salad. Add a pinch of cumin or chili powder for warmth. You might also try adding zest from a lemon or lime. This gives a fresh zing that pairs well with the chickpeas.
Seasonal Variations: Incorporating Fresh Produce
Make your salad shine with seasonal produce. In spring, add fresh peas or asparagus. Summer brings juicy peaches or sweet corn. In fall, try roasted squash or apples. Winter calls for hearty greens like kale. These ingredients not only taste great but also make your salad colorful and fun.
Storage Info
How to Store Leftovers
To keep your crispy chickpea salad fresh, store it in an airtight container. Place the salad and chickpeas separately. This way, the chickpeas stay crunchy. Refrigerate both for up to three days. If you mix them together, the chickpeas may lose their crispiness.
Best Practices for Meal Prep
When prepping this salad, think about your week. You can roast the chickpeas in advance and store them in a separate container. Wash and chop the veggies ahead of time. Keep them in the fridge in sealed bags or containers. This makes it easy to assemble your salad quickly.
Reheating Instructions
If you want to reheat the chickpeas, spread them on a baking sheet. Heat them in a preheated oven at 400°F (200°C) for about 10 minutes. This will help them regain their crunch. Be careful not to overcook them. Enjoy your salad fresh whenever you can!
FAQs
How can I make this salad vegan?
To make this salad vegan, skip the feta cheese. You can add avocado for a creamy texture instead. You can also use tahini as a dressing instead of the apple cider vinegar.
Can I prepare the salad in advance?
Yes, you can prepare this salad ahead of time. Just keep the crispy chickpeas separate until you’re ready to serve. This keeps them crunchy. You can mix the veggies and dressing in advance. Store them in a sealed container in the fridge.
What are some alternative dressings for this salad?
You can try many dressings for this salad. Here are a few ideas:
– Balsamic vinaigrette
– Tahini dressing
– Ranch dressing
– Sesame ginger dressing
Each option adds a different taste to the salad.
How to make crispy chickpeas in an air fryer?
To make crispy chickpeas in an air fryer, follow these steps:
1. Preheat your air fryer to 400°F (200°C).
2. Toss the chickpeas with olive oil and spices.
3. Place the chickpeas in the air fryer basket in a single layer.
4. Cook for about 15-20 minutes, shaking the basket halfway through.
This method makes them crunchy and quick.
Can I use canned chickpeas in this recipe?
Yes, you can use canned chickpeas. They save time and are easy to use. Just drain and rinse them well. This helps remove extra sodium and keeps your salad fresh. Using canned chickpeas makes this recipe quick and simple.
In this blog post, we explored the full journey of creating a tasty chickpea salad. We covered key ingredients and their benefits, plus how to roast chickpeas for the best crunch. I shared tips for choosing and pairing flavors to elevate your dish. We also discussed storage and preparation options for your busy life.
Remember, cooking is fun. Try new flavors and enjoy your meals!