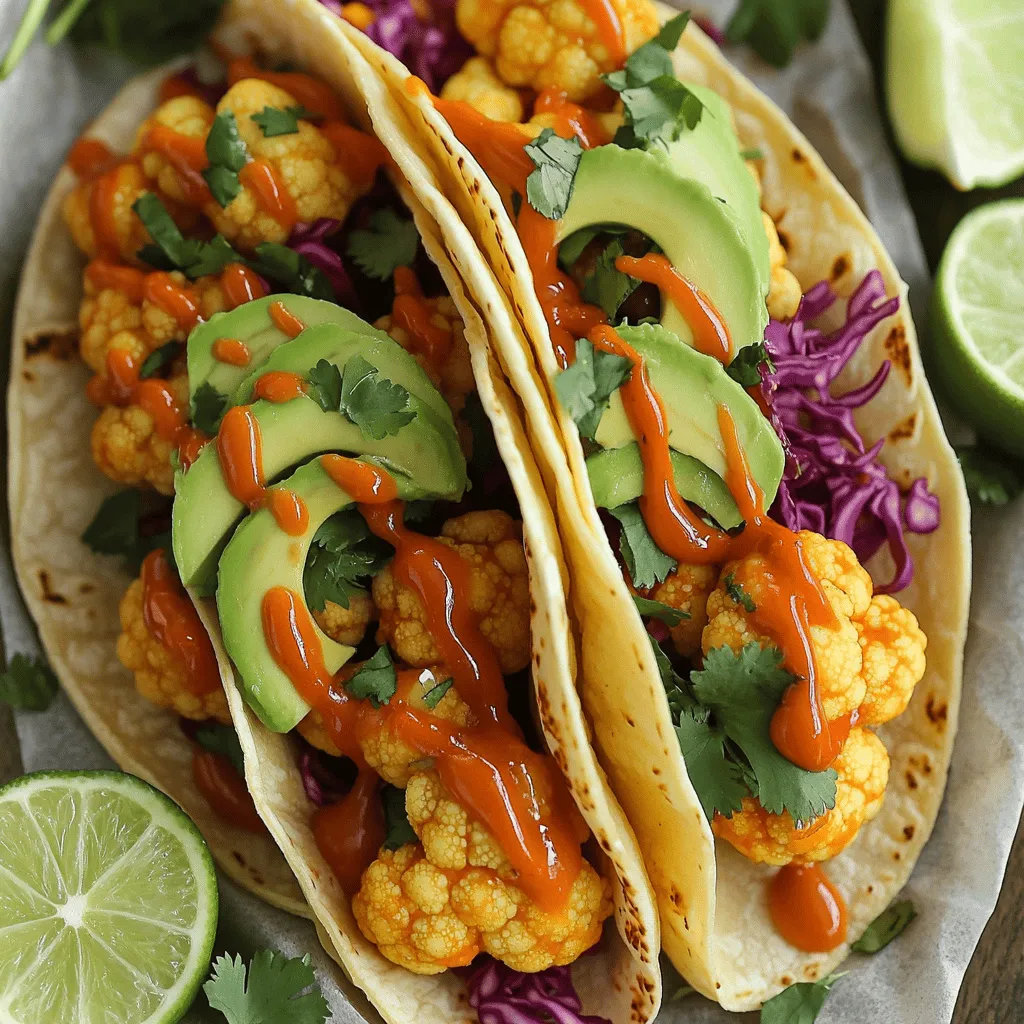
Are you ready to spice up your taco night with a delicious twist? Buffalo Cauliflower Tacos are not just flavorful; they are also simple to make! I’ll guide you through every step, from prepping the cauliflower to adding those tasty toppings. Whether you’re a veggie lover or just looking for a fun recipe, these tacos will satisfy your cravings. Let’s dive into the recipe and bring some excitement to your table!
Ingredients
Main Ingredients
– 1 medium head of cauliflower
– 1 cup all-purpose flour
– 1 cup buffalo sauce
– 8 small tortillas
Seasonings and Additional Toppings
– Garlic powder and onion powder
– Smoked paprika and salt
– Avocado, red cabbage, and cilantro
Optional Additions
– Lime wedges for serving
– Vegan ranch or sour cream
The key to great Buffalo Cauliflower Tacos lies in the ingredients. First, you need a medium head of cauliflower. This will give you plenty of florets to work with. Next, all-purpose flour acts as the base for the batter. You mix it with water and seasonings to create a tasty coating.
Buffalo sauce is the star of this dish. It adds a spicy kick that makes the tacos so enjoyable. You can use store-bought sauce or make your own if you prefer.
Don’t forget about the tortillas! Small tortillas serve as the perfect vessel for your tacos.
For seasonings, garlic powder and onion powder add depth to the batter. Smoked paprika gives a nice smoky flavor, while salt brings everything together.
Now, let’s talk toppings. Avocado adds creaminess, red cabbage adds crunch, and cilantro brings freshness. These toppings elevate your tacos to another level.
If you want to take it up a notch, lime wedges are a great addition. They add brightness and zest. Vegan ranch or sour cream can add a creamy touch if you like.
Step-by-Step Instructions
Prepping the Cauliflower
First, you need to preheat your oven to 450°F (230°C). While your oven heats, line a baking sheet with parchment paper. This will help prevent sticking. Next, grab a mixing bowl. In it, whisk together the flour, garlic powder, onion powder, smoked paprika, and salt. Now, slowly add the water. Keep whisking until the batter is smooth and lump-free. This batter will coat the cauliflower nicely.
Baking the Cauliflower
Once your batter is ready, take the cauliflower head and cut it into florets. Dip each floret into the batter. Make sure to let the excess batter drip off. Place the coated florets on your prepared baking sheet. Bake the cauliflower in the oven for 20 to 25 minutes. Don’t forget to turn them halfway through. This step ensures they get nice and crispy.
Coating and Finishing Touches
After baking, take the cauliflower out of the oven. Place it into a large bowl, and pour in the buffalo sauce. Toss the cauliflower well until every piece is coated. This adds a delicious kick. Now, return the coated cauliflower to the baking sheet. Bake it again for another 10 minutes. This final bake makes the texture even better. Enjoy the thrill of cooking Buffalo Cauliflower Tacos with this easy method.
Tips & Tricks
Achieving Perfectly Crispy Cauliflower
To get that crisp texture, the batter must be just right. It should be smooth but thick enough to coat the florets. If it’s too runny, the cauliflower won’t crisp up well. I recommend using a whisk to blend flour and water until you see no lumps.
For baking, start with a high temperature. Preheat your oven to 450°F (230°C). This heat helps create that golden, crispy exterior. Bake the cauliflower for 20-25 minutes, flipping halfway through. If you want even more crunch, add an extra 10 minutes after tossing in buffalo sauce.
Assembling Tacos
Layering your tacos is key to great flavor. Start with a tortilla, then add a generous scoop of buffalo cauliflower. This base brings the bold taste. Next, add avocado slices for creaminess, then top with shredded red cabbage for crunch. Finish with fresh cilantro for brightness.
For presentation, stack the tacos on a plate and add lime wedges on the side. This not only looks nice but allows for a zesty kick when serving.
Common Mistakes to Avoid
Avoid over-baking or under-baking your cauliflower. Over-baking can make it too dry, while under-baking leads to sogginess. Check for a nice golden color to know it’s done.
Do not skip any seasoning steps. Each spice adds depth to the dish. A well-seasoned batter makes a huge difference in flavor. Missing even one step can leave your tacos tasting bland.

Variations
Different Heat Levels
You can change the heat of your buffalo sauce. For a milder flavor, mix in a bit of honey or ranch dressing. This will tone down the spice while adding creaminess. If you love heat, add cayenne pepper or chili powder to the sauce. For a smoky flavor, try adding smoked paprika. You can make the sauce unique with these simple changes.
Alternative Proteins
Buffalo cauliflower tacos are great, but you can add other proteins too. Beans or lentils work well for a hearty touch. They add fiber and protein while keeping the meal plant-based. If you want to switch the veggies, try mushrooms or zucchini. These options will change the texture and flavor, making each taco special.
Dietary Adjustments
If you need gluten-free options, use almond flour or chickpea flour instead of all-purpose flour. Both are great substitutes and work well in the batter. For a vegan twist, you can skip the eggs and use a flaxseed mix instead. This keeps the tacos vegan while still being delicious. You can adapt the recipe to fit your needs easily.
Storage Info
Keeping Leftovers Fresh
To keep your Buffalo Cauliflower Tacos fresh, store them in the fridge. Place the tacos in an airtight container. This keeps them from drying out. If you have leftover cauliflower and toppings, store them separately. This way, the tortillas won’t get soggy.
Reheating Instructions
When you’re ready to enjoy leftovers, reheat them carefully. You can use the oven or a skillet. For the oven, set it to 350°F (175°C). Place the tacos on a baking sheet. Heat for about 10 minutes. If you use a skillet, warm them on medium heat for a few minutes. This keeps the tortillas nice and soft. To refresh flavors, add a squeeze of lime juice before serving.
Freezing Options
You can freeze baked cauliflower for later use. Let it cool completely, then place it in a freezer bag. Remove as much air as possible. When you’re ready to eat, thaw the cauliflower in the fridge overnight. To reassemble the tacos, warm the tortillas and add the thawed cauliflower. Top with your fresh toppings for a tasty meal.
FAQs
How long do Buffalo Cauliflower Tacos last in the fridge?
Buffalo Cauliflower Tacos can last up to three days in the fridge. To keep them fresh, store them in an airtight container. Make sure to separate the tortillas from the cauliflower. This helps prevent them from getting soggy. If you notice any moisture, use paper towels to absorb it.
Can I make Buffalo Cauliflower Tacos ahead of time?
Yes, you can prep Buffalo Cauliflower Tacos ahead. You can make the cauliflower and store it in the fridge for up to two days. Just reheat it in the oven for a crispy texture. You can also prepare the toppings in advance. Keep the avocado slices and cabbage in separate containers until ready to serve.
What can I serve with Buffalo Cauliflower Tacos?
These tacos pair well with many sides. Here are some ideas:
– Mexican rice for a filling meal
– Black beans for added protein
– Fresh corn salad for a crunchy side
– Simple guacamole for extra flavor
– Chips and salsa for a fun crunch
Buffalo Cauliflower Tacos combine tasty ingredients and simple steps. We prepped the cauliflower, used a healthy batter, and baked it to perfection. I shared tips for crispiness, taco assembly, and common mistakes to avoid. You can even mix it up with different heat levels and proteins.
Enjoy making these tacos! They are easy, fun, and tasty. Try serving them with fresh toppings and sides you love. You won’t regret this flavor-packed meal!


