Skip to content
DisclaimerTerms Of UseGDPR PolicyCookie Policy

Southern Dishes

  • Home
  • Drinks
  • Appetizers
  • Dinner
  • Dessert
  • About
  • Contact
  • Privacy Policy
DisclaimerTerms Of UseGDPR PolicyCookie Policy

Isabella

- 1 cup quinoa, rinsed - 2 cups vegetable broth (or water) - 1 cup cherry tomatoes, halved - 1 cucumber, diced - 1 cup canned chickpeas, drained and rinsed - 1/2 red onion, finely chopped - 1/2 cup Kalamata olives, pitted and halved - 1 cup feta cheese, crumbled - 1/4 cup fresh parsley, chopped - 1 teaspoon dried oregano - 1 lemon, juiced - 3 tablespoons olive oil - Salt and pepper to taste Quinoa is the star of this dish. It’s gluten-free and packed with protein. Rinsing it helps remove any bitter taste. Vegetable broth gives it a rich flavor. Fresh vegetables bring crunch and color. Cherry tomatoes add juiciness, while cucumbers offer a cool bite. Chickpeas boost the protein and fiber. They add heartiness to the bowl. Kalamata olives lend a briny taste, perfect for a Mediterranean vibe. Feta cheese adds a creamy texture and salty kick. For the dressing, lemon juice brightens the whole dish. Olive oil adds smooth richness, while oregano brings a hint of earthiness. Salt and pepper help balance all the flavors. This ingredient list makes a vibrant bowl of health. For the full recipe, check out the complete guide. 1. Start by rinsing the quinoa in a fine mesh strainer. This step removes bitterness. 2. In a medium saucepan, combine the rinsed quinoa and vegetable broth or water. 3. Bring this mixture to a boil over medium heat. 4. Once boiling, reduce the heat to low. Cover the pot and let it simmer for about 15 minutes. 5. Check the quinoa for doneness. It should be fluffy and the liquid should be absorbed. 1. While the quinoa cooks, prepare the dressing. 2. In a small bowl, mix the juice of one lemon with olive oil. 3. Add in the dried oregano, salt, and pepper. 4. Taste the dressing and adjust the seasoning if needed. 1. In a large mixing bowl, add halved cherry tomatoes, diced cucumber, drained chickpeas, chopped red onion, and Kalamata olives. 2. Once the quinoa has cooled slightly, add it to the bowl with the vegetables. 3. Drizzle the prepared dressing over the quinoa and vegetables. 4. Toss everything gently until it is well coated. 5. Finally, top the bowl with crumbled feta cheese and chopped parsley. 6. Mix gently to combine. Serve your Mediterranean quinoa bowls warm or chilled for a fresh and tasty delight. For the full recipe, check out the details above. Rinse the quinoa well before cooking. This step removes the bitterness that some people dislike. Use a fine mesh strainer and rinse under cold water for a minute or two. For fluffy quinoa, use the right water-to-quinoa ratio. I suggest 2 cups of vegetable broth for every 1 cup of quinoa. Bring the broth to a boil, then reduce the heat to low. Cover it and let it simmer for about 15 minutes. Check it after this time; the quinoa should be fluffy and absorb all the liquid. For extra flavor, add spices like cumin or smoked paprika. These spices can add warmth and depth to your quinoa bowls. You can also try adding a pinch of crushed red pepper for some heat. Fresh herbs make a big difference too. Add chopped basil or mint right before serving. They add a burst of freshness that elevates the dish. Always taste your dish as you go. This helps you find the right balance. Serve your quinoa bowls in wide, shallow bowls. This makes each layer visible and inviting. Layer the ingredients neatly for a colorful display. For garnishing, sprinkle extra feta cheese or a handful of fresh parsley on top. You can also add a few lemon wedges on the side. It not only looks nice but adds flavor when squeezed over the bowl. Try these tips to make your Mediterranean quinoa bowls fresh and tasty. For a complete recipe, check the Full Recipe section. {{image_2}} You can switch up ingredients to keep things fresh and fun. Here are some ideas: - Alternative proteins: You can use grilled chicken, shrimp, or tofu instead of chickpeas. These add different flavors and textures. - Seasonal vegetable swaps: In summer, add bell peppers or zucchini. In fall, use roasted squash or sweet potatoes. This keeps your bowl vibrant and tasty. Making this dish fit your needs is easy. Here are some options: - Vegan options: Skip the feta cheese and use a vegan cheese or avocado. This still gives you creaminess without dairy. - Gluten-free considerations: Quinoa is gluten-free, so you’re already on the right track. Just avoid any added ingredients that contain gluten. You can change the taste of your bowl with these tips: - Mediterranean spice variations: Try adding cumin or sumac for a unique twist. These spices add depth and warmth. - Adding heat with chili or pepper options: If you like spice, toss in some red pepper flakes or sliced jalapeños. This gives your bowl a nice kick. With these variations, you can make your Mediterranean quinoa bowls truly your own. For the full recipe, check out the details above. To keep your Mediterranean quinoa bowls fresh, use airtight containers. Glass or BPA-free plastic containers work best. They help keep moisture out and flavors in. Make sure to cool the bowls fully before sealing. This avoids condensation, which can make your food soggy. When placing the bowls in the fridge, store them on a middle shelf. This shelf has a stable temperature and prevents spoilage. Avoid keeping them in the door, as the temperature can change often. How long can quinoa bowls last in the fridge? If stored properly, they can last about 3 to 5 days. Just check for any off smells or changes in texture before eating. Now, let’s talk about creative ways to repurpose leftovers. You can turn your quinoa bowls into a quick salad by adding some fresh greens. Toss in some extra dressing, and you have a new meal. You can also use the quinoa as a filling for wraps or stuffed peppers. The options are endless, and it makes meal prep fun! For the full recipe, check out the Mediterranean Quinoa Bowls. Quinoa is a super grain packed with protein, fiber, and essential nutrients. It is gluten-free and offers all nine amino acids. This makes it a great choice for various diets. Key health benefits of quinoa include: - High protein content supports muscle health. - Rich in fiber aids digestion and keeps you full. - Contains iron, magnesium, and B vitamins for energy. The Mediterranean diet promotes heart health and weight control. It emphasizes fruits, veggies, whole grains, and healthy fats. Eating this way can lower the risk of chronic diseases. Yes, you can make Mediterranean quinoa bowls ahead of time. This makes meal prep easy and fast during busy weeks. Here are some meal prep tips: - Cook a big batch of quinoa. - Chop veggies and store them in airtight containers. - Prepare the dressing and keep it separate until serving. For storage and reheating: - Store bowls in the fridge for up to five days. - Reheat in the microwave or enjoy cold. To make Mediterranean quinoa bowls more appealing, adjust the ingredients. You can swap out veggies or proteins for what your family likes. Here are some tips for picky eaters: - Use mild vegetables like bell peppers or carrots. - Try different proteins like grilled chicken or tofu. - Serve dressings on the side for kids to choose. Family-friendly variations to try include: - Add avocado for creaminess. - Use shredded cheese instead of feta. - Mix in a favorite sauce for added flavor. This guide covered all you need for tasty Mediterranean quinoa bowls. We explored each ingredient, focused on cooking steps, and shared tips for flavor and presentation. You learned about variations to fit your needs, plus how to store leftovers properly. Remember, cooking should be fun and creative. Feel free to adjust this recipe to suit your taste. Enjoy your journey in making delicious, healthy meals!

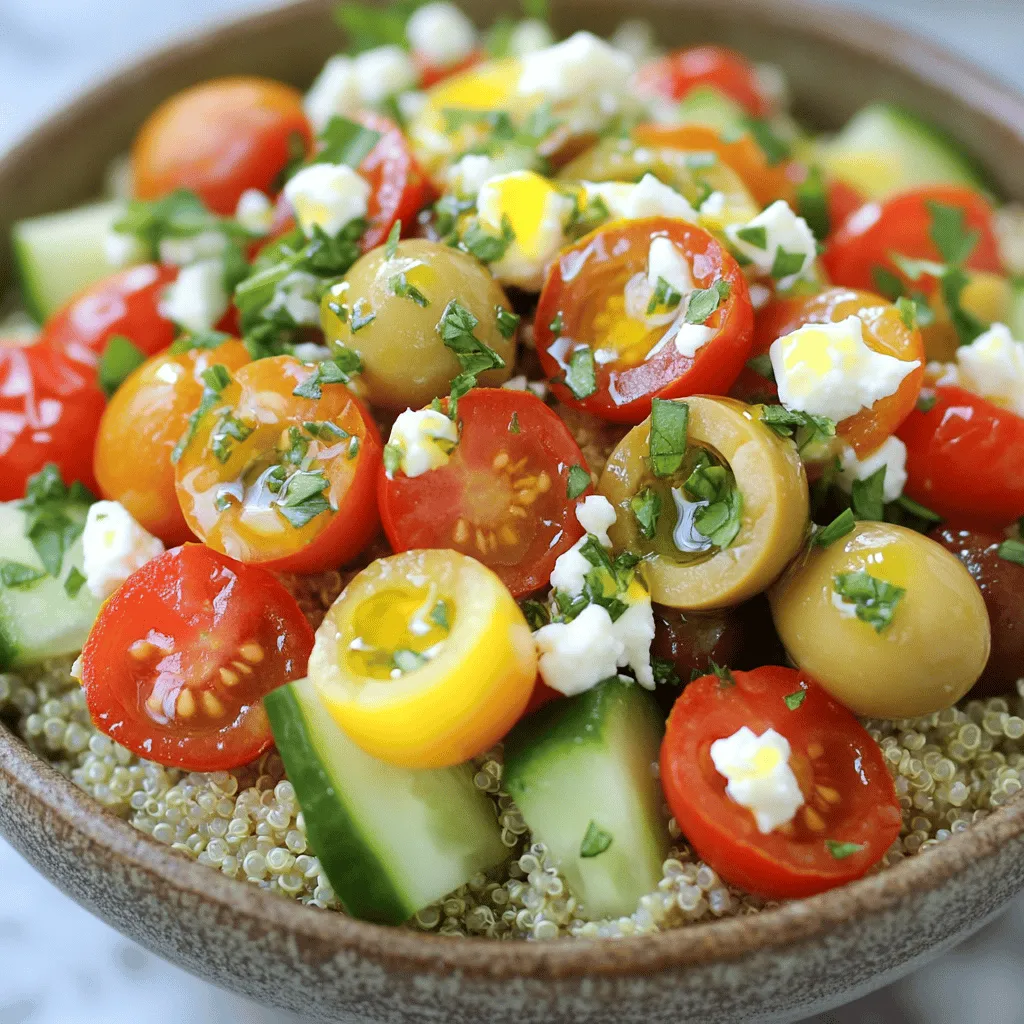
Mediterranean Quinoa Bowls Fresh and Tasty Delight

Looking for a fresh, tasty meal that packs a punch of flavor? Mediterranean quinoa bowls are your answer. This dish

- 8 oz fettuccine or linguine pasta - 1 lb shrimp, peeled and deveined - 4 cloves garlic, minced - 1/4 teaspoon red pepper flakes (optional) - 3 tablespoons olive oil - 2 tablespoons unsalted butter - Zest of 1 lemon - 1/4 cup fresh lemon juice The main ingredients make this dish shine. Fettuccine or linguine pasta forms the base. I love how these noodles hold the sauce well. Shrimp adds protein and a sweet, briny flavor. Garlic gives the dish its aromatic kick. Red pepper flakes add a hint of heat, but you can skip them if you want a milder taste. Olive oil and butter create a rich sauce that’s hard to resist. Finally, lemon zest and juice brighten the dish with a zesty punch. - Salt and black pepper to taste - 1/4 cup chicken or vegetable broth - Fresh parsley, chopped (for garnish) - Grated Parmesan cheese (for serving) Seasonings enhance the flavor of your dish. Salt and black pepper bring everything together. Broth adds depth and moisture to the sauce. Fresh parsley not only looks good but adds a fresh taste. Grated Parmesan cheese gives a creamy finish that completes your pasta. This careful mix of ingredients makes each bite a flavorful delight. You can find the full recipe in the article for all the details! To start, you need to boil salted water in a large pot. Once it’s bubbling, add your fettuccine or linguine. Cook it according to the package instructions, about 8-10 minutes, or until it's al dente. This means it should be firm yet tender. After cooking, reserve about 1/2 cup of the pasta water. Then, drain the pasta and set it aside. While your pasta cooks, let’s prepare the shrimp. Season the shrimp with salt, black pepper, and red pepper flakes if you like heat. In a large skillet, heat olive oil and unsalted butter over medium heat. When the butter melts, add minced garlic. Sauté the garlic for about 1 minute until it’s fragrant but not burnt. Next, add the shrimp in a single layer. Cook them for 2-3 minutes on one side, then flip. Cook for another 2-3 minutes until the shrimp turn pink and opaque. Now it’s time to make the sauce. Add lemon zest, fresh lemon juice, and chicken or vegetable broth to the skillet. Stir well to combine and scrape up any bits stuck to the pan. Let this simmer for about 2 minutes. Finally, add your cooked pasta to the skillet and toss everything together gently. If the pasta seems dry, add some reserved pasta water until it reaches the right consistency. For a detailed list of ingredients and instructions, check out the Full Recipe. To make your dish shine, balance the acidity with broth. This adds depth. Use chicken or vegetable broth to enhance the flavor. A splash of broth works wonders to create a rich sauce. Always adjust seasoning to taste. Start with salt and pepper. After mixing in the pasta, taste it again. You may need more seasoning. Trust your palate. Sautéing shrimp without overcrowding is essential. If you add too many shrimp at once, they will steam instead of sear. Cook them in batches for that perfect golden color. Timing is key for perfect pasta texture. Cook it just until al dente. This means it should feel firm but not hard. Drain it and reserve some pasta water. This water helps bind the dish together later. For the full recipe, check out the detailed instructions provided earlier. {{image_2}} You can switch up the pasta for Zesty Lemon Garlic Shrimp Pasta. Try gluten-free pasta if you need a gluten-free option. It tastes great and works well with the sauce. Whole wheat or egg noodles also add a nice twist. Whole wheat noodles give a nutty flavor, while egg noodles offer a rich taste. Each type brings its own charm to the dish. Adding veggies can make your dish even better. Spinach or cherry tomatoes brighten the plate and add color. Spinach wilts nicely, while cherry tomatoes burst with flavor. You might also enjoy bell peppers or zucchini. Both add texture and crunch. Just sauté them in the pan before adding shrimp. This extra step makes your meal healthier and tastier! You can also switch proteins to suit your taste. Try chicken or scallops if you want a change. Chicken breast can be grilled or sautéed until cooked through. Scallops give a sweet, ocean-like taste that pairs well with lemon. If you're vegetarian, use tofu. Just press it to remove extra water, then cube it. Sauté until golden and crispy. These options let you customize your dish to fit your needs. For the full recipe, check out the link! To store your Zesty Lemon Garlic Shrimp Pasta, let it cool first. Use an airtight container to keep the flavors fresh. This dish lasts up to three days in the fridge. Make sure to label the container with the date. This way, you’ll know when to enjoy it. You can reheat the pasta in the microwave or on the stovetop. For the microwave, place the pasta in a bowl and add a splash of water. Cover it with a damp paper towel. Heat in short bursts, stirring in between until warm. If you prefer the stovetop, use a skillet over low heat. Add a little broth or water to keep the pasta moist. Stir gently until heated through. This method helps keep the shrimp tender and the pasta from becoming dry. Enjoy every bite of your flavorful delight! Yes, you can use frozen shrimp for this dish. The best way to thaw shrimp is to place them in the fridge overnight. If you're in a hurry, you can use cold water. Just put the shrimp in a sealed bag and submerge it in cold water for about 30 minutes. This method keeps the shrimp safe and tasty. To make the dish less spicy, simply omit the red pepper flakes. This keeps the lemon and garlic flavors front and center. You can also add a little extra lemon juice for brightness without the heat. Yes, you can prep this dish ahead. Cook the pasta and shrimp, then store them separately. When you are ready to eat, reheat them in a pan with a splash of broth or olive oil. This keeps the pasta from drying out and makes it easy to enjoy that zesty flavor. Feel free to check the Full Recipe for more tips! This blog post covered a simple shrimp pasta recipe. We explored the main ingredients like fettuccine, shrimp, and lemon, along with tips for perfect flavor. You learned how to cook pasta and sauté shrimp while balancing the sauce. We also discussed variations, such as using different pasta types or proteins. Remember these tips when storing leftovers. Keep your pasta fresh and delicious! Try new ideas and make this dish your own. Enjoy cooking and sharing this tasty meal!

Zesty Lemon Garlic Shrimp Pasta Flavorful Delight

If you’re craving a quick and tasty meal that’s big on flavor, you’re in for a treat! My Zesty Lemon

- Rolled oats: These form the base of the bars. They add fiber and texture. - Unsweetened shredded coconut: This adds a sweet, nutty flavor and chewy texture. - Nut butter options: Almond butter is my favorite. You can use peanut or cashew butter too. - Sweetener options: Honey works well, but maple syrup is a great vegan choice. - Chopped nuts: Almonds or walnuts add crunch and healthy fats. - Dark chocolate chips or chunks: They bring sweetness and richness to the bars. - Sea salt and vanilla extract: These enhance all the flavors in your bars. - Optional ingredients (dried fruits): Try cranberries, apricots, or raisins for extra sweetness. These simple ingredients make a delicious snack. You can find the full recipe at the end of this section. Using fresh and quality ingredients makes a big difference in taste. Enjoy your homemade granola bars! 1. Preheat the Oven: Start by preheating your oven to 350°F (175°C). Line an 8x8 inch baking pan with parchment paper. Leave some paper hanging over the sides. This will help you lift the bars out later. 2. Mix Dry Ingredients: In a large bowl, combine 2 cups of rolled oats, 1 cup of unsweetened shredded coconut, 1/2 cup of chopped nuts, and 1/2 cup of dark chocolate chips. Add 1/4 teaspoon of sea salt. Stir everything well to mix. 3. Combine Wet Ingredients: In a small saucepan, add 1/2 cup of almond butter and 1/4 cup of honey (or maple syrup). Heat on low while stirring until it melts and becomes smooth. Remove from heat and mix in 1/2 teaspoon of vanilla extract. 4. Combine Mixtures: Pour the melted almond butter mix over the dry ingredients. Fold everything together until it’s well mixed. If you want to add dried fruit, like cranberries or apricots, fold them in now. 5. Press into Pan: Transfer the granola mixture to your prepared baking pan. Press down firmly with a spatula or your hands. Make sure it is tightly packed. This helps the bars hold together. 6. Bake: Place the pan in your preheated oven. Bake for 20-25 minutes, or until the edges turn golden brown. Keep an eye on them to prevent burning. 7. Cool and Slice: After baking, remove the pan from the oven. Let it cool for about 10 minutes. Use the parchment paper to lift the bars out of the pan. Let them cool completely on a wire rack before slicing into bars. 8. Store: Place your granola bars in an airtight container. They can stay fresh at room temperature for up to one week. For longer freshness, store them in the fridge. Follow these steps from the Full Recipe, and you will have a tasty and healthy snack ready in no time! To get the right texture for your granola bars, mix the dry and wet ingredients well. You want a thick, sticky mix. This helps hold the bars together. If your mixture feels too dry, add a splash of water or a bit more nut butter. Press the mixture down firmly in the pan. This step is key to avoid crumbling. Tips for avoiding crumbling: - Use parchment paper for easy lifting. - Pack the mixture tightly into the pan. - Bake until the edges are golden brown. Spices can boost the taste of your granola bars. A pinch of cinnamon adds warmth. Nutmeg brings a lovely depth of flavor. Feel free to experiment! Using nut butters: - Almond butter gives a mild flavor. - Peanut butter adds a rich, nutty taste. - Sunflower seed butter is a great nut-free option. Presentation can make your bars more appealing. Arrange the bars neatly on a plate for serving. Garnish them with a sprinkle of shredded coconut or a few chocolate chips on top. This adds a nice touch. For a fun idea, wrap each bar in parchment paper. This makes them portable and cute for snacks on the go. {{image_2}} To make these granola bars vegan, swap honey for maple syrup. Maple syrup adds sweetness without animal products. You can also use plant-based protein like pea protein or hemp protein. This keeps your bars nutritious and friendly for vegans. For gluten-free bars, choose certified gluten-free oats. These oats ensure no cross-contamination with gluten. You can also replace nuts with seeds like sunflower or pumpkin seeds. This keeps the crunch while avoiding gluten. Get creative with flavor! Adding seeds like chia or flax boosts nutrition. They offer healthy fats and fiber. You can also mix in nut or seed butters, such as peanut or sunflower butter. These add creaminess and extra flavor to your bars. Feel free to explore variations that suit your taste. You can make these bars truly your own! For the full recipe, check out the Crunchy Coconut-Chocolate Granola Bars. To keep your homemade granola bars fresh, store them in airtight containers. This helps keep moisture out. You can keep them at room temperature for a week. If you want them to last longer, put them in the fridge. The cold helps maintain their crunch. When stored at room temperature, these granola bars last about a week. In the fridge, they can stay fresh for up to two weeks. If you want to enjoy them longer, consider freezing them. Just wrap each bar in plastic wrap before placing them in a freezer bag. Yes, you can make these bars without nuts. If you have nut allergies, use seeds instead. Sunflower seeds or pumpkin seeds work well. You can also use more dried fruit or extra oats to replace the nuts. This keeps the bars tasty and safe for everyone. Granola bars last about one week at room temperature. Store them in an airtight container to keep them fresh. If you put them in the fridge, they can last longer, up to two weeks. Be sure to check for any signs of spoilage before eating. Yes, you can freeze these bars. Wrap each bar tightly in plastic wrap or foil. Place them in a freezer bag for easy storage. To thaw, just take them out and let them sit at room temperature for about 30 minutes before eating. These granola bars are healthy! They contain rolled oats, which are high in fiber. The nuts provide healthy fats, and dark chocolate adds antioxidants. Using honey or maple syrup gives natural sweetness without too much sugar. Plus, adding dried fruits boosts vitamins and minerals. To make these bars vegan, replace honey with maple syrup. For gluten-free options, make sure to use certified gluten-free oats. You can also swap almond butter for a seed butter to accommodate nut-free diets. This way, everyone can enjoy these tasty snacks! Making granola bars at home is fun and easy. We covered essential ingredients and step-by-step instructions to create perfect bars. I shared tips to enhance flavor and texture. You can try different variations, from vegan to gluten-free, to suit your needs. Storing your bars correctly helps keep them fresh longer. With these ideas, you can create healthy snacks that fit your diet. Now, go ahead and enjoy your homemade granola bars, knowing they are tailored just for you!

Homemade Granola Bars Healthy and Tasty Snack Idea

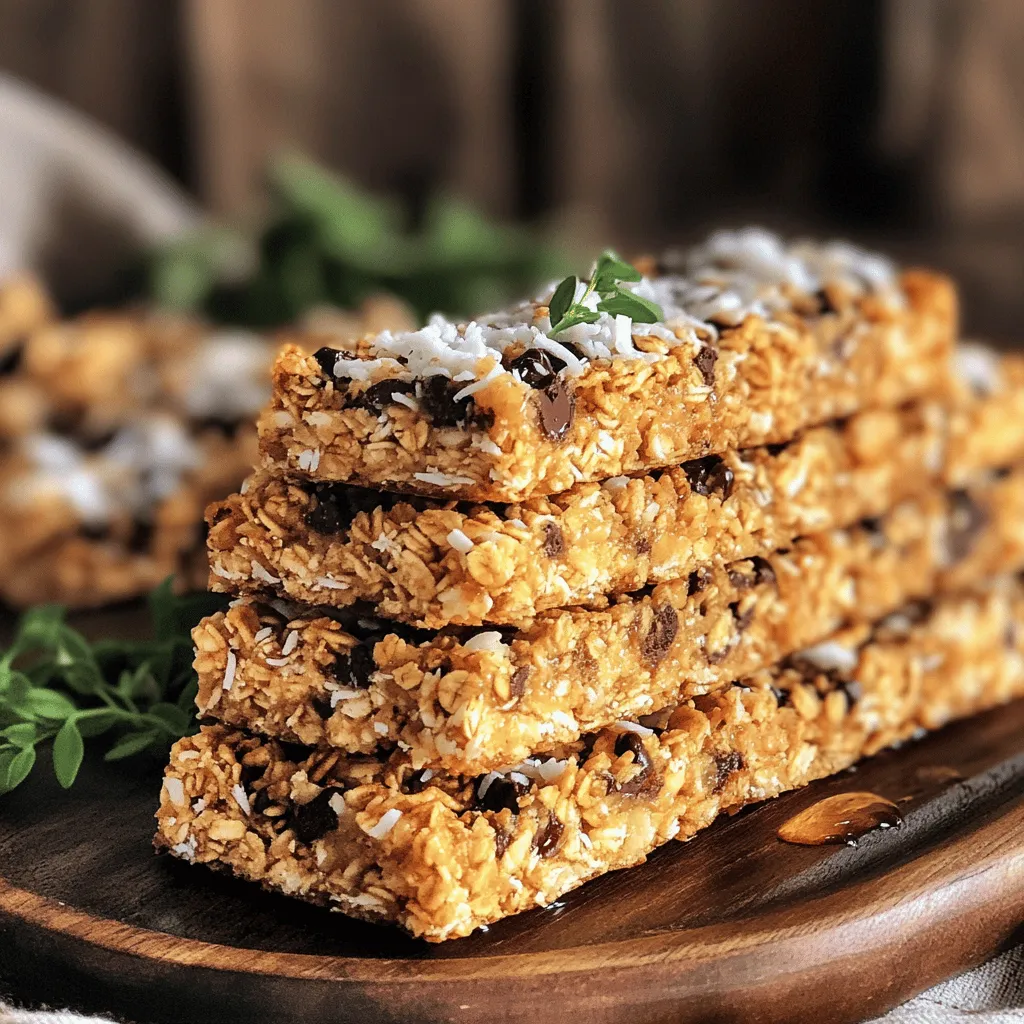
Looking for a quick, healthy snack? Homemade granola bars are the perfect answer! You can mix simple ingredients to create

To make this tasty dish, gather the following ingredients: - 1 lb (450g) boneless chicken breasts, sliced into thin strips - 2 tablespoons cornstarch - 2 tablespoons vegetable oil - 1 red bell pepper, sliced - 1 yellow bell pepper, sliced - 1 cup broccoli florets - 2 carrots, julienned - 4 green onions, chopped - 2 cloves garlic, minced - 1 tablespoon fresh ginger, minced - 3 tablespoons soy sauce - 1 tablespoon chili paste (adjust for spice preference) - 2 tablespoons honey - 1 tablespoon rice vinegar - Salt and pepper to taste - Sesame seeds for garnish When picking ingredients, freshness is key. Look for bright bell peppers, crisp broccoli, and firm chicken. The chicken should be pink with no smell. Choose organic if possible for better taste. Fresh garlic and ginger add great flavor, so buy the whole roots. For the sauce, select good quality soy sauce. This makes a big difference in taste. Always check the expiration dates on any packaged items. If you have dietary needs, there are great substitutes. Use tofu or tempeh instead of chicken for a vegan option. You can swap honey for maple syrup if you want it vegan. For gluten-free diets, use tamari sauce instead of soy sauce. You can also add more veggies, like snap peas or mushrooms, to change the flavor. Adjust the chili paste for milder or spicier tastes based on your preference. Start by slicing 1 pound of boneless chicken breasts into thin strips. Place the chicken in a bowl. Add 2 tablespoons of cornstarch to the chicken. Toss until the chicken is well coated. This step helps make the chicken crispy. Heat 1 tablespoon of vegetable oil in a large skillet or wok over medium-high heat. Once hot, add the chicken strips in a single layer. Cook for 4-5 minutes, flipping occasionally. The chicken should turn golden brown and be fully cooked. Remove the chicken from the skillet and set aside. In the same skillet, add another tablespoon of vegetable oil. Next, add 2 cloves of minced garlic and 1 tablespoon of minced ginger. Stir for about 30 seconds until fragrant. Then, add 1 sliced red bell pepper, 1 sliced yellow bell pepper, 1 cup of broccoli florets, and 2 julienned carrots. Stir-fry these vegetables for 2-3 minutes. They should be tender but still crisp. In a small bowl, mix 3 tablespoons of soy sauce, 1 tablespoon of chili paste, 2 tablespoons of honey, and 1 tablespoon of rice vinegar. Pour this sauce over the vegetables. Return the cooked chicken to the skillet and toss everything together. Cook for another 2 minutes until heated through. Remove from heat and sprinkle with chopped green onions and sesame seeds. Serve your Sweet and Spicy Chicken Stir-Fry in bowls, garnished with additional green onions and sesame seeds. For a complete meal, pair it with jasmine rice or quinoa. You can find the Full Recipe for more details. To make a great stir-fry, use high heat. This helps to cook food fast without losing flavors. Woks are awesome for this. They heat evenly and give a nice sear. If you don’t have a wok, a large skillet works too. Cut your ingredients into similar sizes. This ensures even cooking. Always prep everything before you start cooking. Stir-frying goes quickly, so you need to be ready! The heat in this dish comes from chili paste. Start with one tablespoon if you like mild spice. You can always add more later. Taste your sauce before adding it to the stir-fry. Add more chili paste if you want it hotter. You can also add a splash of hot sauce at the end. This way, you can control the spice perfectly. Crispy chicken is a must in stir-fry. Coat your chicken strips with cornstarch before cooking. This step is key for that crunch. Heat your oil until it shimmers. This means it’s hot enough. Cook the chicken in a single layer. Don’t overcrowd the pan. This helps the chicken sear instead of steam. Flip the chicken only once to create a nice crust. Follow these steps, and you will have crispy chicken every time. For the full recipe, check out the Sweet and Spicy Chicken Stir-Fry! {{image_2}} You can mix and match your veggies in this stir-fry. Try using snap peas, zucchini, or mushrooms. Each adds a new flavor and texture. Add baby corn for a sweet crunch or bok choy for a soft bite. The key is to cut your veggies into small, even pieces. This way, they cook evenly and stay crisp. If you want something other than chicken, you have options. Tofu is a great choice for a good texture. Shrimp cooks quickly and adds a nice seafood flavor. You could also use beef or pork if you prefer those meats. Just remember to adjust cooking times based on your protein choice. To make this dish vegan, swap out the chicken for tofu. Use a vegan soy sauce or tamari for flavor. Honey can be replaced with maple syrup or agave nectar. This still gives you that sweet taste without using animal products. Your stir-fry will be just as tasty and colorful, perfect for any meal. For the full recipe, check out [Full Recipe]. To keep your sweet and spicy chicken stir-fry fresh, let it cool first. Place it in an airtight container. Make sure to cover it tightly. This helps prevent any air from spoiling the food. Store the container in the fridge. It will stay good for about three to four days. When you are ready to enjoy your leftovers, reheat them on the stove. Use a skillet over medium heat. Add a splash of water or broth to keep it moist. Stir often until it is heated through. You can also use the microwave. Heat in short bursts, stirring in between. This helps avoid hot spots and keeps the food tasty. If you want to save some for later, you can freeze your stir-fry. Place it in a freezer-safe container. Be sure to leave some space for expansion. It can last up to three months in the freezer. When you want to eat it, take it out and let it thaw overnight in the fridge. Reheat it on the stove for the best taste. For the full recipe, check the section above. Yes, you can make Sweet and Spicy Chicken Stir-Fry ahead of time. Store it in an airtight container. It stays good in the fridge for about three days. When ready to eat, just reheat it in a pan or microwave. This helps keep the flavors fresh and delicious. You can serve this dish with several sides. Here are some great options: - Jasmine rice - Quinoa - Noodles - Steamed vegetables - A fresh salad These sides balance the sweet and spicy flavors. They also add more texture to your meal. To make more servings of Sweet and Spicy Chicken Stir-Fry, double or triple the ingredients. For example, use 2 pounds of chicken and increase the veggies too. Just ensure your pan is big enough to hold all the ingredients. You may need to cook in batches if the pan is small. This way, every bite will be just as tasty! In this blog post, I covered how to make a tasty Sweet and Spicy Chicken Stir-Fry. We explored key ingredients and how to select the best ones. You saw how to cook chicken perfectly and stir-fry vegetables right. I shared helpful tips for cooking and adjusting spice levels. Finally, I outlined ways to store leftovers safely and answered common questions. This dish is versatile and easy to make. With a few changes, you can fit any diet. Enjoy your cooking and happy eating!

Sweet and Spicy Chicken Stir-Fry Flavorful Meal Idea

Get ready to excite your taste buds with my Sweet and Spicy Chicken Stir-Fry! This flavorful dish combines tender chicken

To make crispy roasted chickpeas, gather these simple items: - 1 can (15 oz) chickpeas, rinsed and drained - 2 tablespoons olive oil - 1 teaspoon smoked paprika - 1 teaspoon garlic powder - ½ teaspoon cayenne pepper (optional for spice) - ½ teaspoon ground cumin - Salt to taste - Freshly ground black pepper to taste Chickpeas are a great choice for many reasons. They are high in protein and fiber. This helps keep you full for longer. Chickpeas also have vitamins and minerals like iron and magnesium. These nutrients support your body in many ways. Eating chickpeas can aid in weight management and improve heart health. They are a smart addition to your diet. Feel free to get creative with your seasonings! While I love smoked paprika and garlic powder, you can try other flavors. Here are a few ideas: - Italian herbs: Use dried oregano or basil for a fresh twist. - Curry powder: This adds a warm, spicy taste. - Cheesy flavor: Sprinkle nutritional yeast for a cheese-like taste. - Sweet option: Try cinnamon and a touch of sugar for a dessert twist. These seasoning options can give your crispy roasted chickpeas a unique flair. You can mix and match to find your favorite combination. Check out the Full Recipe for more tips! To start, gather your ingredients. You need a can of chickpeas, olive oil, and spices. Rinse and drain the chickpeas in a colander. This step removes extra salt and liquid. Next, spread the chickpeas on a clean kitchen towel. Pat them dry gently. Removing moisture is important for getting them crispy. Preheat your oven to 400°F (200°C). While it heats, place parchment paper on a baking sheet. This keeps your pan clean and helps with even cooking. In a mixing bowl, toss the dried chickpeas with olive oil and spices. The key spices are smoked paprika, garlic powder, cumin, salt, and pepper. If you like heat, add cayenne pepper. Spread the seasoned chickpeas on the baking sheet in a single layer. Make sure they have space to breathe. Roast them for 25-30 minutes. Shake the pan halfway through to ensure they cook evenly. Watch closely so they don’t burn. For the best crunch, make sure the chickpeas are very dry before roasting. Too much moisture leads to soggy chickpeas. Also, don’t overcrowd the baking sheet; this allows heat to circulate. If you want extra crispiness, you can roast them longer, but keep an eye on them! After roasting, let the chickpeas cool a bit. They will get even crispier as they cool. Enjoy these tasty snacks or add them to your meals for a nice crunch. For more details, check out the Full Recipe! A few mistakes can ruin your crispy roasted chickpeas. First, don’t skip drying the chickpeas. Wet chickpeas won’t crisp up well. Use a clean towel to pat them dry. Second, avoid overcrowding the baking sheet. If they are too close, they will steam instead of roast. Lastly, keep an eye on them at the end. They can brown quickly, so check often. You can change the flavor of your chickpeas easily. Try different spices based on your taste. For a smoky kick, add more smoked paprika. If you like heat, increase the cayenne pepper. You can also mix in herbs. Rosemary, thyme, or oregano can add a fresh touch. Don’t be afraid to experiment! Crispy roasted chickpeas are fun to serve. You can enjoy them as a snack or a topping. Serve them in a colorful bowl for a nice look. They are great on salads, too. Just sprinkle them on top for crunch. You can also mix them into grain bowls for extra protein. If you want more ideas, check out the Full Recipe for inspiration. {{image_2}} For those who love heat, spice up your chickpeas! Start with the basic recipe. Add more cayenne pepper for extra kick. You can also mix in chili powder or crushed red pepper flakes. For a different flavor, try harissa or sriracha. Toss the chickpeas with these spices before roasting. This will give them a bold, fiery taste that wakes up your senses! Want a fresh twist? Use herbs to add flavor. Mix chopped fresh rosemary, thyme, or oregano into the olive oil. You can also try dried herbs if fresh ones are not available. Toss the chickpeas with these herbs and coat them well. The result is a fragrant snack that pairs perfectly with salads or soups. Yes, you can enjoy chickpeas in a sweet way! After roasting, sprinkle your chickpeas with cinnamon and a little brown sugar. You can also use maple syrup or honey for sweetness. Toss them gently to coat. This creates a crunchy, sweet treat that satisfies your dessert cravings. For a twist, add cocoa powder for a chocolatey flavor. These variations bring exciting tastes to your crispy roasted chickpeas. You can create endless flavor combinations. Try them out and see which one becomes your favorite! For the full recipe, check out the details above. After making crispy roasted chickpeas, let them cool down completely. Then, place them in an airtight container. This keeps them fresh. If you do not have an airtight container, use a resealable plastic bag. Make sure to squeeze out the air before sealing it. Store them at room temperature. They stay crunchy for a short time, about 1-2 days. If you want to enjoy the crispy texture again, reheating is key. Preheat your oven to 350°F (175°C). Spread the leftover chickpeas on a baking sheet. Heat them for about 10 minutes. This helps restore their crunch. Avoid the microwave; it makes them soft and chewy. For the best taste and texture, eat your crispy roasted chickpeas within 2 days. After that, they may lose their crunch and flavor. If you want to keep them longer, consider freezing. Place them in a freezer-safe bag and store for up to 3 months. Just remember to reheat them in the oven to bring back that crispy goodness. For more details, you can check the Full Recipe. Yes, you can use dried chickpeas. First, soak them overnight in water. This step makes them soft. After soaking, cook them until tender, about an hour. Once cooked, drain and dry them well. Then, you can follow the [Full Recipe] to roast them. This method gives you fresh chickpeas with great flavor. Crispy roasted chickpeas are already gluten-free! The ingredients in the recipe do not contain gluten. Just ensure your spices do not have any gluten additives. If you use new brands, check the label for safety. With proper choices, you can enjoy this snack without worry. There are many fun ways to serve crispy roasted chickpeas! Here are some ideas: - As a snack: Enjoy them right from the bowl. - On salads: Add them for a nice crunch. - In wraps: Use them in wraps for extra texture. - With dips: Pair them with hummus or yogurt dip. - As toppings: Sprinkle them on soups for added flavor. These ideas help you enjoy chickpeas in different meals. Chickpeas offer many benefits and great flavors. We explored their key ingredients and their nutritional perks. You learned how to prepare and roast them perfectly. I shared tips to avoid common mistakes and ways to customize your flavor. You can whip up spicy or sweet variations to keep things exciting. Store leftovers correctly to enjoy them later. Remember, chickpeas are versatile and nutritious, providing a tasty snack for everyone to love. Enjoy your cooking and get creative!

Crispy Roasted Chickpeas Irresistible Flavor Boost

Looking for a tasty snack that’s easy to make? Crispy roasted chickpeas pack a punch with flavor! You can turn

- 1 cup rolled oats - 1 cup almond milk (or any milk of choice) - ½ cup pumpkin puree - 2 tablespoons maple syrup (or honey) - 1 teaspoon pumpkin spice blend - 1 tablespoon chia seeds - ¼ teaspoon vanilla extract - Pinch of salt - Optional Toppings: chopped pecans, sliced banana, or a dollop of yogurt The ingredients in pumpkin spice overnight oats are simple yet powerful. Rolled oats provide fiber and energy. They keep you full and satisfied. Almond milk adds creaminess without dairy. Pumpkin puree gives a rich flavor and is packed with nutrients. Maple syrup or honey adds natural sweetness. Pumpkin spice brings warmth and comfort to each bite. Chia seeds are small but mighty. They add healthy omega-3 fats and fiber. A splash of vanilla enhances the overall taste. A pinch of salt balances the sweetness. Optional toppings make your oats even more fun. Chopped pecans add crunch. Sliced banana gives extra sweetness. A dollop of yogurt makes it creamy and adds protein. You can adjust these toppings based on what you like or have on hand. This recipe is not only tasty but also nutritious. You can find the full recipe at the end of the article. To start, gather your dry ingredients. In a medium bowl, combine: - 1 cup rolled oats - 1 tablespoon chia seeds Mix these well. Chia seeds add a nice crunch and help thicken the oats. Next, prepare the wet ingredients. In another bowl, whisk together: - 1 cup almond milk (or any milk of choice) - ½ cup pumpkin puree - 2 tablespoons maple syrup (or honey) - 1 teaspoon pumpkin spice blend - ¼ teaspoon vanilla extract - Pinch of salt Make sure this mixture is smooth. The pumpkin puree gives flavor and creaminess. Now, pour the pumpkin mixture over the oats and chia seeds. Stir it well until all ingredients are combined. You want every oat to soak up that delicious pumpkin flavor. Chilling is key. Place your mixture in two jars or containers and seal them tightly. Refrigerate overnight or for at least four hours. This time lets the oats absorb the liquid. You will notice a big change in texture. The oats will soften and become creamy. When morning comes, it’s time for the final touches. Take your jars out of the fridge. Give the oats a good stir to mix everything again. Now, let’s talk about presentation. Serve in clear jars to show off those pretty layers. Top with: - Chopped pecans - Sliced banana - A dollop of yogurt A sprinkle of extra pumpkin spice adds a nice touch. Enjoy your lovely Pumpkin Spice Overnight Oats! Check out the Full Recipe for all the details. To avoid mushy oats, use rolled oats instead of quick oats. Rolled oats soak up liquid well but still keep their shape. Make sure to measure your almond milk correctly. Too much milk can make your oats soggy. Chia seeds play a big role in texture. They absorb liquid and swell. This thickens the oats and gives a nice creaminess. Adding one tablespoon of chia seeds boosts both nutrition and texture. You can add more spices to boost flavor. Try adding a pinch of nutmeg or ginger for extra warmth. A dash of cinnamon also works well. For sweetness, consider using honey or agave syrup. Both add a nice touch. If you want a lower-calorie option, you can use stevia or monk fruit. These sweeteners provide sweetness without extra sugar. Toppings are key to making your oats fun and tasty. Chopped pecans add crunch and healthy fats. Sliced bananas not only taste great but also add potassium. A dollop of yogurt gives creaminess and protein. Pair your oats with fresh fruits like berries or apples. Nuts also add texture and flavor. You can serve your oats in clear jars to show off the layers. This makes for a stunning breakfast display. For the full recipe, check the details above. {{image_2}} You can change the base ingredients in pumpkin spice overnight oats. - Dairy-free alternatives: Use almond milk, coconut milk, or oat milk. These choices keep the oats creamy without dairy. - Gluten-free options: Choose certified gluten-free rolled oats. This makes the dish safe for those with gluten intolerance. Mixing in different flavors can make your overnight oats fun and exciting. - Spicy variations: Add ginger or cloves for a spicy kick. These spices enhance the warm pumpkin flavor. - Seasonal adaptations: Toss in cranberries or nuts. This adds texture and makes your oats festive. Adjusting portions can help you serve more or fewer people. - Scaling the recipe for larger servings: Simply double or triple the ingredients. This is great for family gatherings or meal prep. - Making single servings: Halve the ingredients for a quick breakfast. This is perfect for busy mornings. Check out the Full Recipe for all the details on how to make these tasty variations! To keep your pumpkin spice overnight oats fresh, store them in airtight containers. This seals in moisture and flavor. Always refrigerate them right after you make them. Use jars with tight lids for best results. If you want to keep them for a longer time, try to eat them within five days. Yes, you can freeze overnight oats. This is great if you want to prepare meals ahead. To freeze, place the oats in freezer-safe containers. Leave some space at the top as they may expand. When you are ready to eat, move them to the fridge overnight to thaw. You can also use the microwave for a quick thaw. In the fridge, your oats will stay fresh for about five days. If they look dry or smell sour, it's time to toss them out. Always trust your senses. If they taste off, do not eat them. Enjoy your pumpkin spice overnight oats while they are fresh! For the full recipe, check out the earlier section. What are the key ingredients for Pumpkin Spice Overnight Oats? The key ingredients are simple and wholesome. You will need: - 1 cup rolled oats - 1 cup almond milk (or any milk of choice) - ½ cup pumpkin puree - 2 tablespoons maple syrup (or honey) - 1 teaspoon pumpkin spice blend - 1 tablespoon chia seeds - ¼ teaspoon vanilla extract - Pinch of salt These ingredients come together to create a creamy, flavorful treat. Can I use other types of milk or sweetness? Yes, you can! Any milk works well. Use almond, oat, soy, or regular milk based on your taste. For sweetness, maple syrup or honey is great. You could also use agave nectar or stevia for a lower-calorie option. Feel free to adjust to your liking! How long do I need to let the oats soak? Let the oats soak overnight for the best texture. If you’re short on time, at least four hours will work. This soaking time allows the oats to absorb the liquid and flavors, making them soft and delicious. How to make this recipe vegan? To make the recipe vegan, use plant-based milk like almond or oat milk. Substitute maple syrup for honey, and you’re all set! This way, you enjoy the same tasty oats without any animal products. Can I add protein powder? Absolutely! Adding protein powder boosts the nutritional value. Mix it in with the oats and chia seeds before adding the wet ingredients. This addition helps keep you full and satisfied longer. How many servings does this recipe make? This recipe makes two servings. Each serving is perfect for a healthy breakfast or snack. You can easily double the recipe if you need more. What is the calorie count per serving? Each serving of Pumpkin Spice Overnight Oats has about 300 calories. This count may vary based on the milk and toppings you choose. It’s a balanced meal with good carbs, fats, and protein! Pumpkin spice overnight oats are easy and fun to make. You learned about the key ingredients, their health benefits, and how to prepare them. I shared tips for perfecting texture and flavor. You can try variations to fit your taste. Storing and freezing them is simple too. Enjoy whipping up this delicious and nutritious breakfast. It's a great way to start your day and feel good!

Pumpkin Spice Overnight Oats Delicious and Nutritious

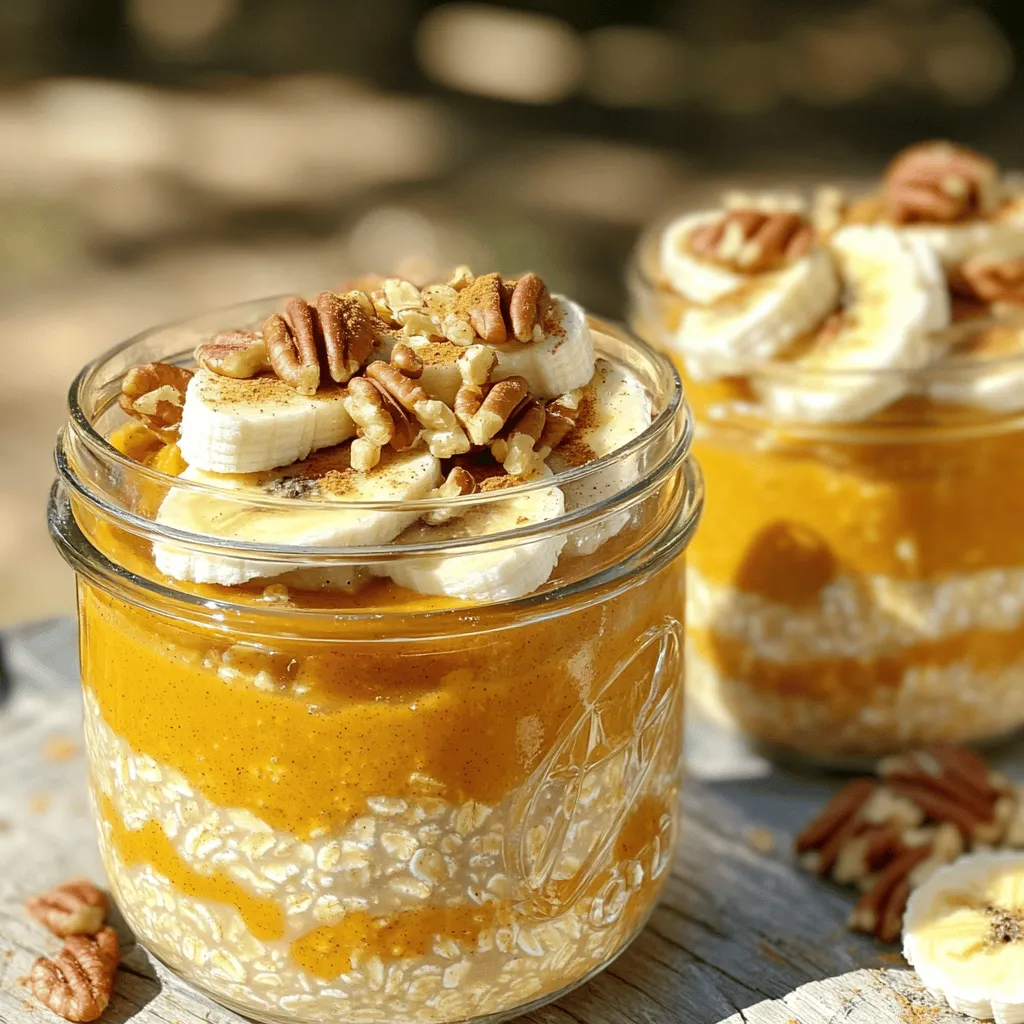
Get ready to elevate your breakfast game with my Pumpkin Spice Overnight Oats! This delightful dish combines warm autumn flavors

To make a rich and creamy chocolate avocado mousse, you need just a few simple items. These ingredients blend to create a smooth, decadent treat. Here’s the full list: - 2 ripe avocados, pitted and peeled - 1/2 cup unsweetened cocoa powder - 1/2 cup pure maple syrup or honey - 1/4 cup almond milk - 1 teaspoon vanilla extract - A pinch of salt - Optional toppings: Whipped coconut cream, dark chocolate shavings, fresh berries, crushed nuts Ripe avocados are key. They provide a creamy base and a mild flavor. Unsweetened cocoa powder gives the mousse its rich chocolate taste. The maple syrup or honey adds sweetness, but you can adjust it to your liking. Almond milk makes it smooth, while vanilla and salt enhance the flavors. You can top your mousse with whipped coconut cream for extra richness. Dark chocolate shavings add a nice crunch. Fresh berries bring a bright flavor, and crushed nuts add texture. Each topping makes this mousse even more special. Now, gather these ingredients to create a delightful dessert. Trust me, this mousse is a crowd-pleaser! Making chocolate avocado mousse is easy and fun. Follow these steps to create a rich treat. - Step 1: Blend ripe avocados until smooth. Start with two ripe avocados. Cut them, remove the pit, and scoop out the flesh. Place the avocado in a food processor. Blend until you get a silky texture. Make sure there are no lumps. This step is key for creaminess. - Step 2: Mix in cocoa powder, sweetener, almond milk, and vanilla. Add half a cup of unsweetened cocoa powder to the blender. Next, pour in half a cup of pure maple syrup or honey. If you want it sweeter, you can adjust this later. Add a quarter cup of almond milk and one teaspoon of vanilla extract. Don't forget a pinch of salt. This enhances the chocolate flavor. - Step 3: Adjust sweetness and chill before serving. Blend the mixture again until it's completely smooth. Taste the mousse. If it needs more sweetness, add a little more maple syrup or honey. Once it’s perfect, scoop the mousse into bowls or glasses. Chill in the fridge for at least 30 minutes. This helps the mousse firm up and gives it a nice texture. Now you’re ready to enjoy this rich and creamy delight! For the detailed recipe, check out the Full Recipe. To make the best chocolate avocado mousse, start with ripe avocados. Ripe avocados are soft and creamy. They blend into a smooth mixture. If your avocados are hard, wait a few days. Check them for a slight give when you press gently. Next, use a good blender or food processor. This helps achieve that creamy texture. Blend the avocados first until smooth. Scrape down the sides to get every bit mixed in. Then, add the cocoa powder, sweetener, almond milk, and vanilla. Blend again until everything is combined. The mousse should be rich and creamy. Taste your mousse before serving. You can adjust the sweetness to your liking. If it is not sweet enough, add more maple syrup or honey. Blend again to mix it well. This way, you get the perfect flavor balance. Enjoy the process and trust your taste buds! {{image_2}} You can easily change up the flavor of your chocolate avocado mousse. Here are some fun ideas to try: - Adding a hint of espresso or coffee: A small amount of espresso can enhance the chocolate flavor. Just one teaspoon can add a nice depth. Blend it right in with the other ingredients. You will love the rich taste! - Incorporating peanut butter or almond butter: Mixing in a spoonful of your favorite nut butter gives a creamy texture. This adds protein and a unique flavor. Just remember to adjust the sweetness since nut butters can have their own taste. - Try different sweeteners: You can swap maple syrup or honey for other sweeteners. Agave nectar or coconut sugar work well too. Taste as you go to find your perfect sweetness level. Each sweetener brings its own flavor profile, allowing you to create a mousse that is just right for you. These variations keep your mousse exciting and personalized. Experimenting with different flavors can make your dessert journey even more fun! For the complete recipe, check out the [Full Recipe]. To keep your chocolate avocado mousse fresh, use an airtight container. This will stop air from getting in and keep it creamy. If stored well, the mousse lasts for about 3 to 5 days in the fridge. If you want to save some for later, you can freeze it. Just scoop it into a freezer-safe container. Make sure to leave some space at the top, as it may expand. The mousse can stay good for up to 2 months in the freezer. When you are ready to eat it again, move the mousse to the fridge overnight to thaw. Give it a quick stir after thawing. This will help restore the smooth texture. Enjoy this rich and creamy delight whenever you crave it! For the full recipe, check out the section above. Yes, you can easily make this mousse dairy-free. Use almond milk or any non-dairy milk instead of regular milk. This keeps the mousse creamy and delicious without dairy. Check for a dark green or black skin color. Gently squeeze the avocado. It should feel soft but not mushy. If it is hard, leave it out to ripen for a few days. Sure! You can use coconut milk, oat milk, or soy milk. Each type adds a unique taste but keeps the mousse creamy. Avocados are full of healthy fats, vitamins, and fiber. They can improve heart health and help with digestion. Using avocados makes this mousse rich and nutritious. Serve the mousse in small bowls or glasses. Top it with whipped coconut cream, dark chocolate shavings, fresh berries, or crushed nuts for added flavor and fun. You can find the full recipe above for more details. This blog post shows you how to make a simple chocolate avocado mousse. You need ripe avocados, cocoa powder, and a sweetener. Proper blending gives a creamy texture, and you can add fun flavors like peanut butter. For storage, keep your mousse in an airtight container. This treat is healthy and easy to customize. Enjoy making this tasty dessert that pleases many palates. Dive into your kitchen and create something amazing!

Chocolate Avocado Mousse Rich and Creamy Delight

Indulging in a rich and creamy dessert doesn’t have to mean guilt. With this Chocolate Avocado Mousse, you get both!

- 1 lb Brussels sprouts, trimmed and halved - 3 tablespoons olive oil - 4 cloves garlic, minced - Zest and juice of 1 lemon - 1 teaspoon honey - Salt and pepper to taste - 1/4 teaspoon red pepper flakes (optional for heat) - 2 tablespoons grated Parmesan cheese (optional for garnish) - Fresh parsley, chopped for garnish Brussels sprouts are small but mighty. They are full of vitamins and minerals. They bring a nutty flavor that works well with garlic and lemon. Garlic adds depth and richness. The lemon brightens up the dish, making it fresh and lively. A serving of Lemon Garlic Roasted Brussels Sprouts has about 100 calories. Each serving contains: - 6g of fat - 10g of carbs - 4g of protein Brussels sprouts are a great source of vitamins C and K. They also help with digestion due to their fiber content. Garlic offers health benefits too. It may support immune function and heart health. Enjoying this dish gives you tasty flavors and nutrition. For the full recipe, check [Full Recipe]. First, you need to trim the Brussels sprouts. This means cutting off the tough stem end. Then, slice each sprout in half. This helps them cook evenly. Next, prepare the garlic and lemon. Mince four cloves of garlic until fine. For the lemon, zest it first, then squeeze it for juice. This will give a bright flavor to our dish. Now, let's mix our ingredients. In a large bowl, combine the halved Brussels sprouts with three tablespoons of olive oil. Add the minced garlic, lemon zest, lemon juice, and one teaspoon of honey. Don’t forget to season with salt, pepper, and if you like it spicy, add a pinch of red pepper flakes. Toss everything well. You want the Brussels sprouts to be nicely coated. Preheat your oven to 425°F (220°C). This high heat helps to caramelize the sprouts. Spread the Brussels sprouts on a baking sheet. Make sure they are cut-side down. This will give them a nice, crispy edge. Roast for 20-25 minutes. Check them halfway through and stir for even cooking. The sprouts should be tender and caramelized when done. If you like, sprinkle grated Parmesan cheese on top while they are hot. Garnish with chopped parsley to add color and freshness. For the full recipe, click here. To get the best results, set your oven to 425°F (220°C). This temperature is key for a crispy outside and tender inside. You want to ensure the Brussels sprouts cook evenly. Place them cut-side down on your baking sheet. This position helps them caramelize. The caramelization adds rich flavor and a nice texture. To amp up the taste, consider adding more spices. A sprinkle of smoked paprika can give a smoky flavor. If you like heat, try adding cayenne pepper instead of red pepper flakes. You can also mix in some fresh herbs, like thyme or rosemary, before roasting. For garnishes, Parmesan cheese is great, but you can switch things up. Try crumbled feta or goat cheese for a tangy twist. A squeeze of fresh lemon juice right before serving adds brightness. Play with flavors to find what you love best! For the full recipe, check out the [Full Recipe]. {{image_2}} If you want to switch things up, try using different oils or sweeteners. Instead of olive oil, you can use avocado oil for a richer taste. If you prefer a little sweetness, maple syrup works great instead of honey. Brussels sprouts are tasty, but you can use other veggies too. Broccoli, cauliflower, or green beans are great options. Just cut them into similar sizes to cook evenly. You can make Lemon Garlic Roasted Brussels Sprouts in different ways. The stovetop is quick and easy. Heat some oil in a pan, add the sprouts, and sauté until they are golden brown. This method takes about 10-15 minutes. Oven roasting gives a deeper flavor. The heat makes the edges crispy. For a faster option, try an air fryer. Set it to 400°F (200°C) and cook for 15 minutes. Shake the basket halfway through for best results. For the full recipe, check out the details above. To keep your Lemon Garlic Roasted Brussels Sprouts fresh, store them properly. Place them in an airtight container. Glass or plastic containers work well. Leave a little space at the top to prevent squishing. You can keep them in the fridge for up to three days. If you want to enjoy them later, make sure they are cool before sealing. When it's time to enjoy your leftovers, you want them to taste great. Reheat your Brussels sprouts in the oven for the best results. Preheat the oven to 350°F (175°C) and place them on a baking sheet. Heat for about 10-15 minutes. This method helps keep their crispiness. If you're short on time, the microwave is a quick option. Place them in a microwave-safe dish. Heat for about 1-2 minutes. Check them halfway through to avoid overcooking. Remember, reheating adds time, so keep a close eye! Yes, you can use frozen Brussels sprouts. However, fresh ones taste better. Frozen sprouts may have more water. To use them, thaw first. Pat them dry with a towel. This helps them roast well. You may need to bake them longer, about 30 minutes. Check for the same signs of doneness. Brussels sprouts are done when they are tender. Look for a golden-brown color on the edges. If you poke one with a fork, it should feel soft inside. You can also taste one to check. They should have a nice, sweet flavor when cooked well. Lemon garlic roasted Brussels sprouts pair well with many dishes. Try them with grilled chicken or fish. They also go great with pork chops or steak. For a vegetarian meal, serve them with quinoa or a hearty salad. These sprouts add a bright flavor to any meal. For the full recipe, visit the detailed cooking instructions. This blog post covered how to make delicious Lemon Garlic Roasted Brussels sprouts. We discussed key ingredients, the cooking process, and tips for perfecting your dish. You learned about storage and reheating methods, plus variations to try. Enjoy these tasty Brussels sprouts as a side or main dish. They are healthy and easy to make. I hope this inspires you to cook and share a joyful meal with others.

Lemon Garlic Roasted Brussels Sprouts Tasty Side Dish

Are you ready to elevate your dinner table with a vibrant side dish? Lemon Garlic Roasted Brussels Sprouts are the

To make Spinach Feta Stuffed Chicken Breast, you need fresh and simple ingredients. Here’s what to gather: - 4 boneless, skinless chicken breasts - 2 cups fresh spinach, chopped - 1 cup feta cheese, crumbled - 1/2 cup cream cheese, softened - 2 cloves garlic, minced - 1 teaspoon dried oregano - 1 tablespoon olive oil - Salt and pepper to taste - 1/2 cup breadcrumbs (optional for topping) - Fresh parsley, for garnish These ingredients come together to create a tasty dish that is both hearty and healthy. The spinach adds color and nutrients, while the feta and cream cheese give it a creamy, rich flavor. You can use fresh or frozen spinach, but fresh gives the best texture. The garlic and oregano add a nice touch of warmth and earthiness. If you want a crunch, consider using breadcrumbs on top. They add texture and make the dish look even better. For the full recipe, you can check out the detailed instructions to guide you through each step. Enjoy cooking! - Preheat the oven to 375°F (190°C). - In a skillet, add olive oil and sauté minced garlic until fragrant. - Add chopped spinach and cook until it wilts, about 2-3 minutes. - Take each chicken breast and create a pocket by slicing the thickest side. - In a bowl, mix the wilted spinach, feta cheese, cream cheese, and oregano. - Stuff each chicken breast with the spinach and cheese mixture. - Place the stuffed chicken in a baking dish. - Cover with foil and bake for 25 minutes. - Uncover and bake for an additional 15-20 minutes. - Check the internal temperature; it should reach 165°F (75°C) for doneness. To keep your chicken juicy, avoid overcooking. Use a meat thermometer to check the internal temperature. Aim for 165°F (75°C) for safe eating. If you cook it too long, the chicken will dry out. When stuffing chicken breasts, create a pocket carefully. Slice the thick side of the chicken, but don’t cut all the way through. This way, you can fill it well with the spinach and feta mixture. Use your fingers to help push the filling inside. Make sure to pack it in, but don't overstuff. For extra flavor, try using garlic powder or onion powder. You can also add a pinch of red pepper flakes for a little heat. Fresh herbs like basil or thyme can brighten the dish, too. If you want to switch up the cheese, try using goat cheese or ricotta. These cheeses add a creamy texture and unique taste. You can also mix in some Parmesan for a nutty flavor. {{image_2}} You can switch up the greens in your stuffed chicken. Kale, Swiss chard, or even arugula work great. Each brings a unique taste and texture. Don’t be afraid to mix them up! For cheese, feta is classic, but you can try mozzarella or goat cheese. Cream cheese adds creaminess, but ricotta can do the same. Each cheese offers a different flavor profile that can elevate your dish. Grilling your stuffed chicken gives it a smoky flavor. It’s a fun way to enjoy the outdoors. Just be sure to monitor the heat. You want the chicken cooked through but not dry. Baking is a great option for a hands-off meal. It allows the flavors to blend well. Plus, it’s easy to prepare while you cook sides. If you're short on time, try the air fryer. It cooks faster and keeps the chicken juicy. Just set the temperature to 375°F and check for doneness. For the full recipe, refer to the main section above. After enjoying your Spinach Feta Stuffed Chicken Breast, store any leftovers in the fridge. Place the chicken in an airtight container. This keeps it fresh and safe to eat. Leftovers will last for up to three days. When reheating, ensure the chicken is warm throughout. You can use a microwave or an oven to heat it again. If you want to keep the stuffed chicken longer, freezing is a great option. Wrap each stuffed chicken breast tightly in plastic wrap. Then, place them in a freezer-safe bag. This helps prevent freezer burn. It’s best to use the chicken within three months for the best flavor. For thawing, move the chicken to the fridge the night before you want to eat it. This way, the chicken defrosts slowly and safely. If you need to thaw it quickly, you can use the microwave. Just follow your microwave's instructions for defrosting meat. After thawing, cook it right away. Enjoy your tasty meal again! For the full recipe, check the previous section. How long does it take to cook Spinach Feta Stuffed Chicken Breast? This dish takes about 50 minutes from start to finish. It includes 15 minutes for prep and 35 minutes for cooking. You will bake the chicken for 25 minutes covered, then for another 15-20 minutes uncovered. This helps keep it juicy and ensures it cooks through. Can I make this recipe ahead of time? Yes, you can make this dish ahead of time. Prepare the stuffed chicken, then cover and store it in the fridge for up to 24 hours. When ready to cook, just bake it straight from the fridge. It may need a few extra minutes to cook. What to serve with Spinach Feta Stuffed Chicken Breast? You can serve this chicken with many sides. Try roasted vegetables, a fresh salad, or quinoa. These options add color and nutrition to your meal. A light lemon dressing also pairs well. Can I use frozen spinach instead of fresh? Yes, frozen spinach works well in this recipe. Just thaw it and squeeze out the extra water before using. This helps keep the filling from getting too soggy. What can I use instead of feta cheese? If you don’t have feta, you can use goat cheese or ricotta. Both add creaminess and flavor. You can also try mozzarella for a milder taste. What to do if chicken is not cooked through? If your chicken is not cooked through, return it to the oven. Bake for an extra 5-10 minutes. Check that the internal temperature reaches 165°F (75°C). This ensures it is safe to eat and juicy. How to spice it up for a more flavorful dish? Add spices like paprika, cumin, or red pepper flakes to the filling. You can also mix in herbs like basil or thyme for extra flavor. A squeeze of lemon juice can brighten up the taste, too. We covered a simple and tasty way to make Spinach Feta Stuffed Chicken. You learned the key ingredients, preparation steps, and cooking tips to keep the chicken juicy. I shared storage tips and important FAQs to help you enjoy this dish later. You can even mix things up with different greens or cheeses. Remember, cooking should be fun and flexible. Now, you can create your own delicious version for family and friends. Enjoy your cooking adventure!

Spinach Feta Stuffed Chicken Breast Simple and Tasty

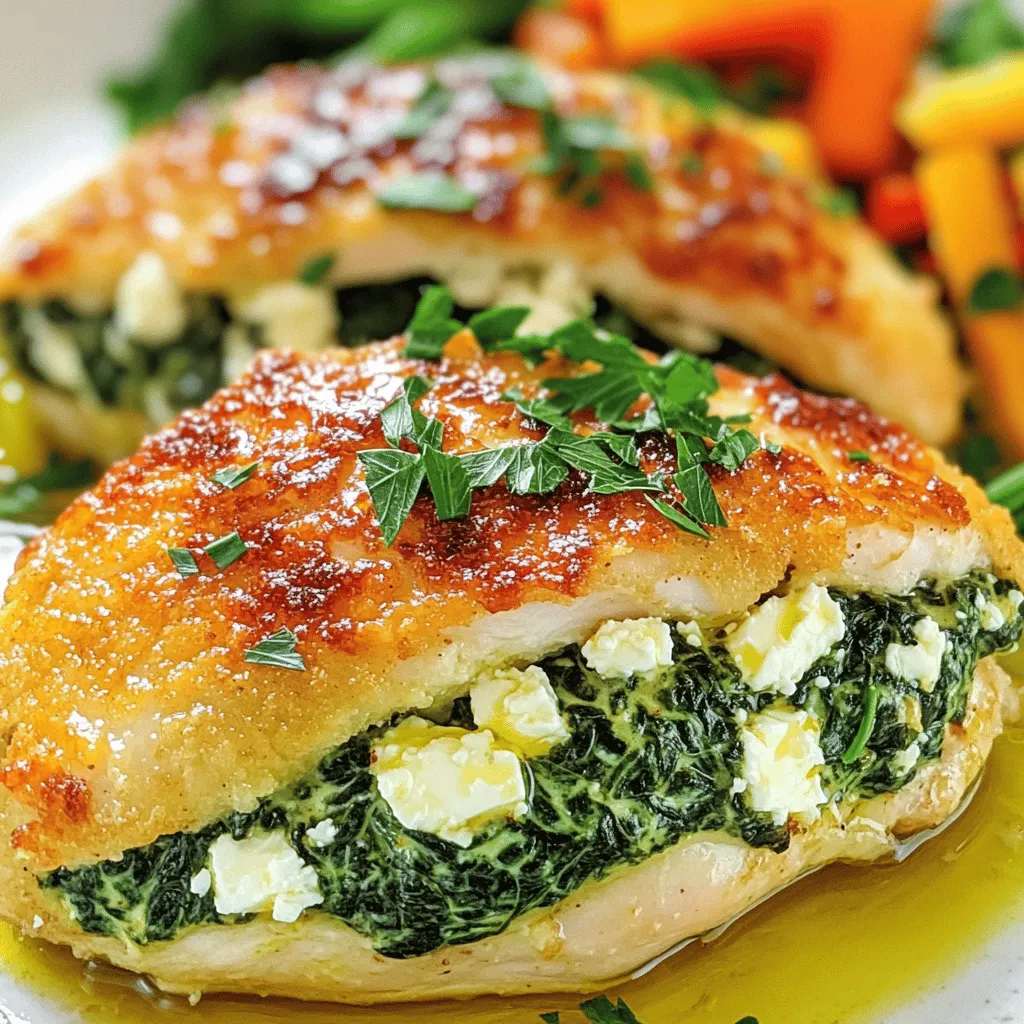
If you’re craving a meal that combines flavor and nutrition, look no further! My Spinach Feta Stuffed Chicken Breast is

- Pasta options: You can use fettuccine, linguine, or any pasta you like. I enjoy fettuccine for its wide, flat shape that holds sauce well. - Types of mushrooms: Button mushrooms are common, but cremini or a mix adds great flavor. Each type brings its unique taste and texture. - Garlic: Garlic is key in this dish. It adds a rich, warm flavor that enhances the mushrooms and cream. - Heavy cream: Heavy cream makes the sauce rich and smooth. It creates that creamy texture we all love. - Grated Parmesan cheese: This cheese enhances the flavor. It adds a salty tang that balances the creaminess. - Vegetable broth: The broth deepens the taste. It brings a savory note that rounds out the sauce. - Recommended herbs: Thyme and parsley are great choices. Thyme adds earthiness, while parsley gives a fresh touch. - Salt and pepper: These basic seasonings are crucial. They bring out the flavors in the dish. Always taste and adjust to your liking. For a detailed guide on how to prepare this dish, check the Full Recipe. To boil pasta, start with a big pot of salted water. Bring the water to a rapid boil. Add the pasta and stir it gently. Cook the pasta as the package directs, usually around 8-10 minutes. You want it al dente, which means it should be firm, not mushy. To check, taste a piece a minute or two before the time is up. Once ready, save about 1 cup of the pasta water. Then, drain the pasta and set it aside. To get golden mushrooms, heat olive oil and butter in a large skillet over medium heat. Once hot, add the sliced mushrooms. Stir them often for about 5-7 minutes. You want them to release their moisture and turn golden brown. For the garlic, add it after the mushrooms are golden. Cook the garlic for only 1-2 minutes. Keep an eye on it so it doesn’t burn. Burnt garlic can ruin the dish. Start by pouring vegetable broth into the skillet with the mushrooms and garlic. Bring it to a simmer. This helps to reduce the broth, enhancing the flavor. Let it simmer for 2-3 minutes. After that, lower the heat and add heavy cream and grated Parmesan cheese. Stir well until the cheese melts and the sauce turns creamy. If the sauce seems too thick, add some of that reserved pasta water. This will help you get the perfect creamy finish. For the full recipe, check the earlier sections. To make your sauce just right, you can adjust the thickness with pasta water. After cooking your pasta, save about 1 cup of the starchy water. If your sauce feels too thick, add a little pasta water. Keep mixing until it reaches the right creamy texture. The starch in the water helps bind the sauce to the pasta. If you don’t have heavy cream, you can substitute it with half-and-half or a mix of milk and butter. This will give you a lighter sauce but still keep some creaminess. Just remember, using less cream will change the flavor a bit. To make your creamy garlic mushroom pasta even better, think about adding more herbs or spices. Dried oregano or fresh basil can add a nice touch. A pinch of red pepper flakes can bring a bit of heat if you like spice. You can also pair this dish with grilled chicken, shrimp, or roasted vegetables. These options add protein and make your meal more filling. If you want to save time, you can pre-cook the pasta earlier in the day. Just follow the same cooking steps, but do not mix it with the sauce yet. Store it in an airtight container. For leftovers, store the pasta and sauce separately. This keeps the pasta from getting mushy. You can keep them in the fridge for up to three days. When you’re ready to eat, just heat the sauce and mix it with the pasta. For the full recipe, check out the Creamy Garlic Mushroom Pasta 🧄. {{image_2}} Want to make your creamy garlic mushroom pasta heartier? You can add protein! Chicken, shrimp, or tofu all work well. - Chicken: Dice and cook it in the skillet before adding mushrooms. This takes an extra 5-7 minutes. - Shrimp: Add peeled shrimp after cooking the mushrooms. Cook for about 3-4 minutes until pink. - Tofu: Cube and sauté tofu until golden. This takes about 8-10 minutes. Adjust the cooking time based on what you choose. Ensure everything is cooked through for a tasty meal. For a vegetarian or vegan twist, you can swap out a few ingredients. - Cheese and cream: Use cashew cream or coconut cream instead of heavy cream. Nutritional yeast can replace cheese for that savory taste. - More veggies: Add spinach, bell peppers, or zucchini. These boost nutrition and flavor. These changes keep your dish creamy while catering to different diets. You can give your creamy garlic mushroom pasta a new taste with simple changes. - Mushroom varieties: Try shiitake, portobello, or oyster mushrooms. Each brings a unique flavor. - Lemon juice or zest: A squeeze of lemon or a bit of zest brightens the dish. This adds freshness that balances the creaminess. Experiment with these ideas to find a flavor you love! For the full recipe, check out the details above. To keep your creamy garlic mushroom pasta fresh, store it in airtight containers. This method helps prevent moisture loss and keeps flavors intact. Let the pasta cool to room temperature before packing. This step avoids condensation inside the container. Keep the leftovers in the fridge for up to three days. If you plan to eat it later, consider separating the pasta and sauce. This way, each part stays fresh longer. When reheating, the goal is to keep the texture creamy. The stovetop is best for this dish. Heat a little olive oil in a pan and add the pasta. Stir gently to warm it up. If the pasta seems dry, add a splash of vegetable broth or pasta water. The microwave can work, but it may make the sauce less creamy. If using the microwave, heat in short bursts. Stir in between to ensure even warming. You can freeze creamy garlic mushroom pasta, but it's best to freeze the sauce and pasta separately. To freeze, let the sauce cool completely. Pour it into freezer-safe bags or containers. Label with the date for easy tracking. For pasta, cook it just until al dente before freezing. When ready to eat, thaw in the fridge overnight. Reheat on the stovetop for the best taste and texture. Add a little broth to bring back the creaminess after thawing. This dish is quick and easy. You can make creamy garlic mushroom pasta in just 30 minutes. It takes about 10 minutes to prep the ingredients. Cooking the pasta and sauce takes around 20 minutes. This makes it a great option for a busy weeknight meal. Yes, you can use gluten-free pasta! Look for options made from rice or chickpeas. These types cook well and hold up nicely in the sauce. Just follow the package instructions for best results. You can enjoy this dish while sticking to your gluten-free diet. For creamy garlic mushroom pasta, button and cremini mushrooms are great choices. Button mushrooms are mild and tender. Cremini mushrooms have a richer flavor. You can also mix different types for more taste. Try using shiitake or portobello for a unique twist. Each type will add its own special touch to your meal. In this post, we explored how to make creamy garlic mushroom pasta. We covered key ingredients, from pasta types to the role of garlic. You learned the steps for cooking pasta and sautéing mushrooms. I've shared tips for a creamy sauce and variations for protein and dietary needs. Remember, you can store and reheat this dish for later. Enjoy experimenting with flavors and ingredients. Making this pasta will impress and satisfy your taste buds!

Creamy Garlic Mushroom Pasta Flavorful and Easy Meal

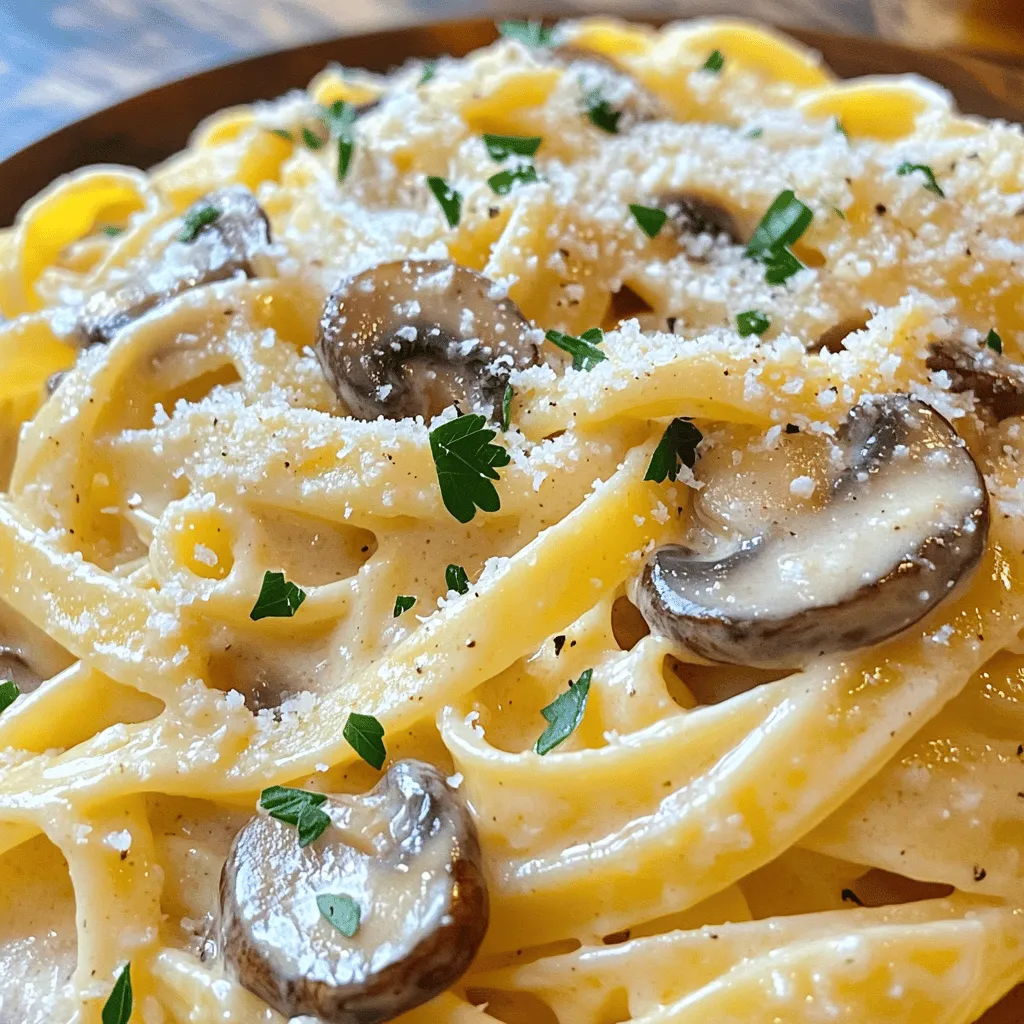
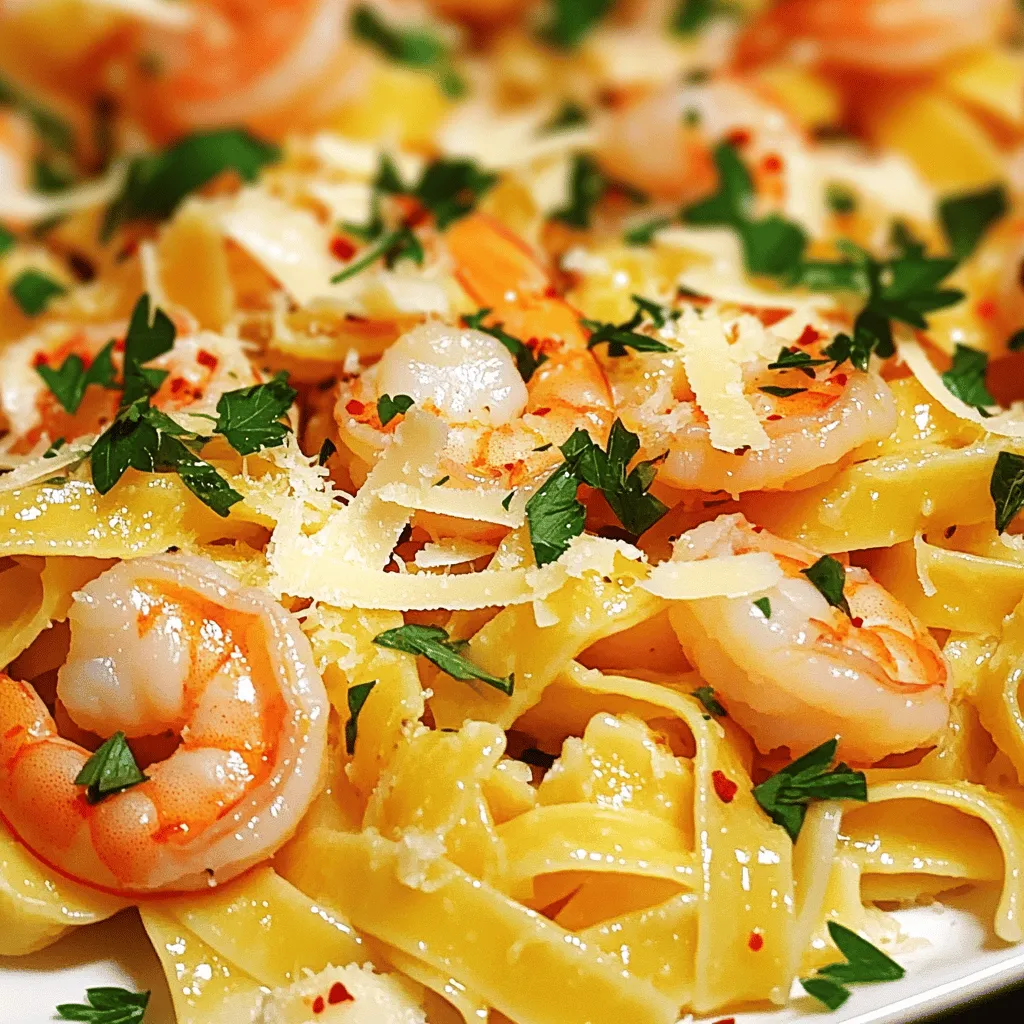
If you’re craving a dish that’s both simple and delicious, look no further! Creamy Garlic Mushroom Pasta is the answer

Older posts
Newer posts
← Previous Page1 … Page60 Page61 Page62 … Page68 Next →

dsad

© 2025 Southern Dishes • Built with GeneratePress

Our Policies

  • Copyright Policy
  • Cookie Policy
  • GDPR Policy
  • Privacy Policy
  • Disclaimer
  • Terms Of Use

More Information

  • Home
  • About
  • Contact
  • Appetizers
  • Dessert
  • Dinner
  • Drinks
©2025, Southern Dishes About Back To Top