Skip to content
DisclaimerTerms Of UseGDPR PolicyCookie Policy

Southern Dishes

  • Home
  • Drinks
  • Appetizers
  • Dinner
  • Dessert
  • About
  • Contact
  • Privacy Policy
DisclaimerTerms Of UseGDPR PolicyCookie Policy

Isabella

To make Garlic Parmesan Roasted Potatoes, gather these items: - 2 pounds baby potatoes, halved - 4 tablespoons olive oil - 1 teaspoon garlic powder - 4 cloves garlic, minced - 1 cup grated Parmesan cheese - 1 teaspoon dried oregano - Salt and pepper to taste - Fresh parsley, chopped (for garnish) You can easily adjust the amounts based on how many people you serve. If you want less, cut the recipe in half. Need more? Just double it. If you can’t find baby potatoes, use regular potatoes. Just cut them into smaller pieces. You can swap olive oil for melted butter, but olive oil gives a nice flavor. For a twist, try adding different cheeses or herbs to match your taste. When picking potatoes, look for firm ones without spots or bruises. Baby potatoes are great for roasting because they cook evenly. Choose ones that are about the same size for best results. If you use larger potatoes, make sure to cut them into evenly sized pieces. This helps them roast evenly and get that perfect crispiness. Always wash your potatoes well to remove dirt before cooking. To start, gather all your ingredients. You need baby potatoes, olive oil, garlic powder, minced garlic, Parmesan cheese, oregano, salt, and pepper. Preheat your oven to 425°F (220°C). Line a baking sheet with parchment paper to avoid sticking. This step makes cleanup easy. Next, take the baby potatoes and cut them in half. Place them in a large mixing bowl. Add olive oil, garlic powder, minced garlic, dried oregano, salt, and pepper. Toss everything together until the potatoes are well coated. This ensures every bite is full of flavor. Spread the seasoned potatoes in a single layer on the baking sheet. This helps them roast evenly. Place the baking sheet in the oven and roast for about 25 minutes. Stir the potatoes halfway through cooking. This simple step helps them brown nicely. After 25 minutes, take the baking sheet out. Sprinkle the grated Parmesan cheese evenly over the potatoes. This will create a delicious, crispy topping. Put the baking sheet back in the oven for another 10-15 minutes. Watch closely until the cheese turns golden brown. To achieve even roasting, make sure the potatoes are cut to similar sizes. Smaller pieces cook faster, while larger ones may need more time. Stirring halfway through cooking helps too. It allows all sides of the potatoes to get crispy. For a more flavorful touch, you can add fresh herbs like rosemary or thyme. These herbs pair well with the garlic and Parmesan. You can find the full recipe at the end of this section, which includes all the steps and tips you need to enjoy this tasty side dish! To get those potatoes nice and crispy, use a high heat. I like 425°F. Spread them out on the baking sheet. If they are too close, they will steam instead of roast. Stir them halfway through cooking. This helps them cook evenly. After the first 25 minutes, add the cheese. This step makes the cheese melt and turn golden brown. If you want to boost the flavor, try adding fresh herbs. Rosemary or thyme works great with garlic and Parmesan. You can also mix in some red pepper flakes. This adds a little heat to the dish. For more depth, consider using smoked paprika. It gives a nice earthy flavor that pairs well with the potatoes. One common mistake is not seasoning enough. Don't be shy with salt and pepper. Another mistake is using too much oil. Just enough will help the potatoes crisp up. Avoid using cold potatoes straight from the fridge. Let them sit at room temp for a bit. This helps them cook more evenly. For the full recipe, check out the complete steps and tips. {{image_2}} You can switch the Parmesan cheese for other types. Try Pecorino Romano for a sharper taste. Cheddar adds a nice creaminess. Feta cheese brings a tangy flavor that pairs well with garlic. Each cheese gives the dish a unique twist. Experiment and find your favorite! Feel free to change up the herbs and spices. Add rosemary or thyme for a fragrant touch. A pinch of cayenne pepper can give a kick. You can also use Italian seasoning for added flavor. Don’t be afraid to get creative with what you have at home! To make this dish vegan, skip the cheese or use a dairy-free alternative. Nutritional yeast offers a cheesy flavor without dairy. You can mix in some cashew cream for a rich taste. These changes keep the dish tasty and plant-based for all to enjoy. For the full recipe, check out Garlic Parmesan Roasted Potatoes. After enjoying Garlic Parmesan Roasted Potatoes, store any leftovers in an airtight container. This keeps them fresh. You can keep them in the fridge for about 3 to 5 days. If you want to keep them longer, consider freezing. Just make sure to cool them completely before sealing. To reheat, you can use an oven or a microwave. For the oven, preheat it to 350°F (175°C). Spread the potatoes on a baking sheet and heat for about 10 to 15 minutes. This helps them regain crispiness. If you use a microwave, warm them for about 1 to 2 minutes. They may not be as crispy, but they will still taste good. If you want to freeze Garlic Parmesan Roasted Potatoes, first let them cool. Then, place them in a freezer-safe bag or container. Make sure to remove as much air as possible. They can last up to 2 months in the freezer. When you're ready to eat them, thaw in the fridge overnight before reheating. Yes, you can use other potatoes. Yukon Gold or red potatoes work well. These potatoes have a nice flavor and texture. They will roast nicely, just like baby potatoes. If you use larger potatoes, cut them into smaller chunks. This helps them cook evenly. To spice up your Garlic Parmesan Roasted Potatoes, add red pepper flakes. Start with a pinch and taste as you go. You can also mix in some cayenne pepper for a more intense heat. Another great option is to use a spicy garlic powder. This adds a kick without changing the recipe too much. These tasty potatoes pair well with many dishes. Try serving them with grilled chicken or steak. They also go great with fish or a fresh salad. If you want a vegetarian option, serve them alongside roasted veggies or pasta. A dollop of sour cream or a yogurt dip adds a nice touch too. Feel free to explore more ideas for meals that match these flavorful potatoes! You can find the full recipe for Garlic Parmesan Roasted Potatoes above. You learned how to make Garlic Parmesan Roasted Potatoes with easy steps and tips. We covered ingredients, cooking methods, and storage for your leftovers. Remember to choose the right potatoes and avoid common mistakes. Don't forget to try variations to make this dish your own. Enjoy crafting this tasty side dish that everyone loves. You can impress friends and family with your new skills in the kitchen. Now, get cooking and have fun!

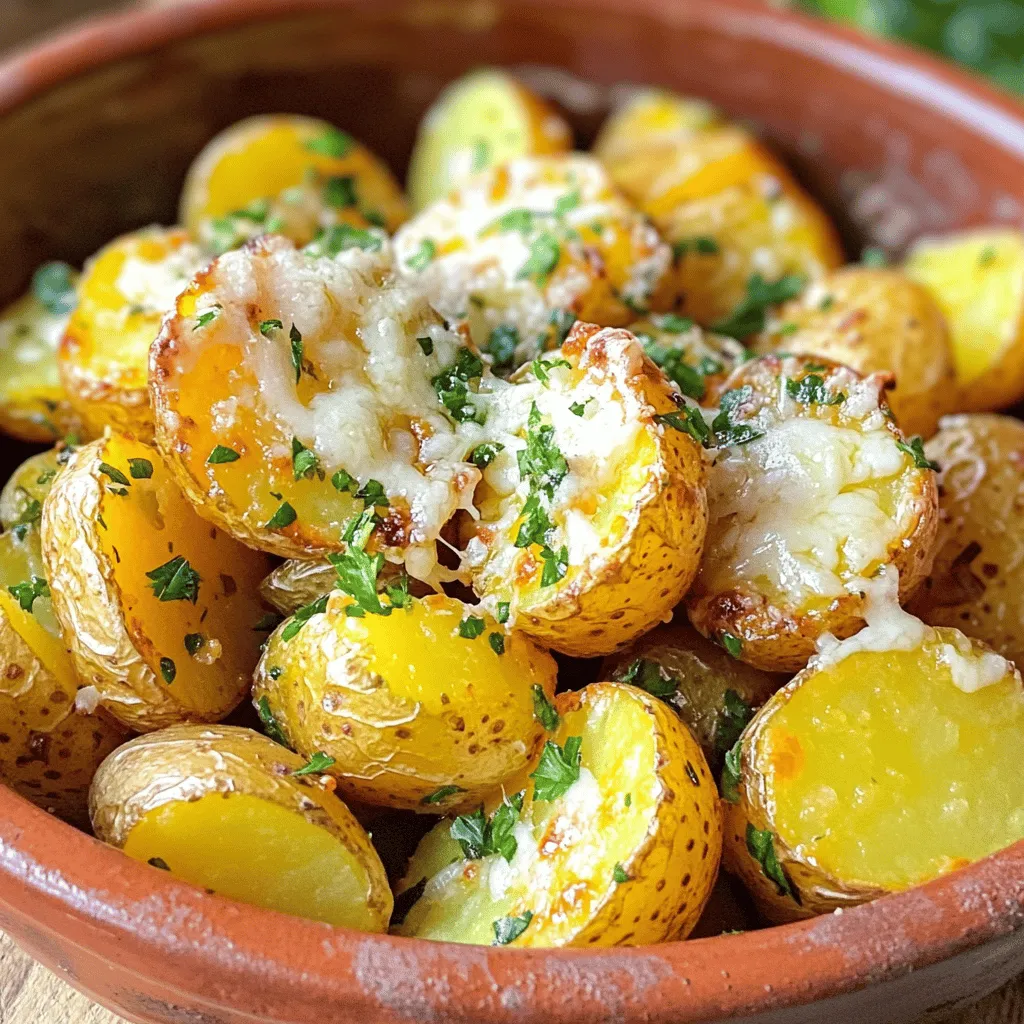
Garlic Parmesan Roasted Potatoes Tasty Side Dish

Are you ready to elevate your dinner table with a delicious side dish? Garlic Parmesan Roasted Potatoes are crispy, cheesy,

To make your Blueberry Oatmeal Bake, gather these simple ingredients: - 2 cups rolled oats - 1 cup fresh blueberries (or frozen) - 2 ripe bananas, mashed - 1/4 cup honey or maple syrup - 1 cup almond milk (or any milk of choice) - 1 teaspoon vanilla extract - 1 teaspoon baking powder - 1 teaspoon cinnamon - 1/4 teaspoon salt - Optional toppings: chopped nuts, coconut flakes, or an extra sprinkle of blueberries You can easily swap some ingredients if needed. Here are a few ideas: - Instead of honey, use agave syrup for a vegan option. - Swap almond milk for oat milk, soy milk, or cow's milk. - You can replace bananas with unsweetened applesauce for a different flavor. - Use any berry you love, like raspberries or strawberries, in place of blueberries. The ingredients in this bake provide a wealth of health benefits: - Rolled oats are high in fiber, promoting heart health. - Blueberries are packed with antioxidants, great for your brain. - Bananas provide potassium, which helps with muscle function. - Honey or maple syrup adds natural sweetness without refined sugars. - Almond milk is low in calories and rich in vitamin E. - Cinnamon can help regulate blood sugar levels and add flavor. This Blueberry Oatmeal Bake is not just tasty; it fuels your body well. To make Blueberry Oatmeal Bake, start by gathering your ingredients. You will need rolled oats, blueberries, ripe bananas, honey or maple syrup, almond milk, vanilla extract, baking powder, cinnamon, and salt. 1. Preheat your oven to 350°F (175°C). Grease a 9x9 inch baking dish with oil or butter. 2. In a large bowl, mix the rolled oats, baking powder, cinnamon, and salt. Stir until combined. 3. In another bowl, mash the ripe bananas. Add honey or maple syrup, almond milk, and vanilla. Mix until smooth. 4. Pour the wet mixture into the dry ingredients. Stir to combine well. 5. Gently fold in the blueberries. Be careful not to break them. 6. Spread the oatmeal mix evenly in the greased baking dish. 7. Optionally, add more blueberries or chopped nuts on top. 8. Bake for 30-35 minutes. The total cooking time is about 35 minutes. This includes 30-35 minutes for baking. The prep time is around 10 minutes, which makes this a quick and easy recipe. To check if your Blueberry Oatmeal Bake is done, look for a golden top. You can also insert a toothpick into the center. If it comes out clean, the bake is ready. If it’s still wet, return it to the oven for a few more minutes. Let it cool before slicing. Enjoy it warm or at room temperature. You will love how easy and tasty it is! For the full recipe, refer to the earlier section. To get a soft and chewy texture, use rolled oats. They absorb moisture well. Make sure to mash the bananas thoroughly. They act as a binding agent, which helps hold everything together. Also, don’t skip the baking powder. It makes your bake rise nicely, giving it a fluffy feel. If you want a firmer texture, you can bake it a few extra minutes. Let your Blueberry Oatmeal Bake cool completely before storing. Once cool, slice it into squares. Place the squares in an airtight container. You can keep it in the fridge for up to five days. If you want to store it longer, freeze individual squares. Just wrap them tightly in plastic wrap and place them in a freezer bag. Serve your Blueberry Oatmeal Bake warm for the best taste. A drizzle of honey or maple syrup adds a sweet touch. You can also top it with a splash of almond milk for creaminess. Fresh blueberries or nuts on top make it look pretty and add crunch. This dish is great for breakfast or a snack anytime! For the full recipe, check out the details above. {{image_2}} You can switch out blueberries for other fruits. Ripe bananas add sweetness and creaminess. Chopped apples give a crisp bite. Peaches or strawberries also work well. You can mix different fruits too. Try combining apples and cinnamon for a warm flavor. To make this bake vegan, replace honey with maple syrup. Use plant-based milk like almond or oat milk. For gluten-free options, choose certified gluten-free oats. This keeps the dish safe for those with gluten issues. The texture stays great, and the taste remains delicious. Spices can elevate your bake. Add nutmeg for a warm flavor or ginger for a kick. You can also mix in some vanilla for more depth. Toppings like chopped nuts or coconut flakes add crunch. A drizzle of honey on top is a sweet finish. For an extra treat, sprinkle more blueberries before baking. For the full recipe, check out the details above. To store your Blueberry Oatmeal Bake, let it cool first. Then, slice it into squares. Place the squares in an airtight container. This keeps the bake fresh for up to five days. You can also cover it tightly with plastic wrap. Keep it in the fridge to prevent spoilage. Want to keep some for later? You can freeze Blueberry Oatmeal Bake! Wrap the squares in plastic wrap. Then, place them in a freezer-safe bag. Make sure to remove as much air as possible. This helps avoid freezer burn. The bake can last up to three months in the freezer. When you're ready to eat, just thaw it in the fridge overnight. To enjoy leftovers, reheat your Blueberry Oatmeal Bake. You can use the microwave for quick heating. Place a square on a plate and heat for 30-60 seconds. If you prefer the oven, preheat it to 350°F. Bake for about 10-15 minutes. This method keeps the texture nice and warm. For added flavor, drizzle a little honey or almond milk on top before serving. Blueberry Oatmeal Bake can last for about five days in the fridge. Make sure to store it in an airtight container. This helps keep it fresh and moist. I love to reheat individual portions in the microwave. It only takes a minute or two. Yes, you can use dried blueberries instead of fresh or frozen ones. Dried blueberries work well, but they may add more sweetness. If you choose dried, cut back on the honey or maple syrup. Soak them in warm water for about 10 minutes to soften them. This step helps them blend better into the dish. Absolutely! Blueberry Oatmeal Bake is great for meal prep. You can make it ahead of time and enjoy it all week. Just cut it into squares and store the pieces in the fridge. Grab a piece in the morning for a quick breakfast. It also makes a wholesome snack or dessert. For the full recipe, check the earlier sections! Blueberry Oatmeal Bake offers a healthy and tasty option for any meal. We covered ingredients, preparation, and storage tips. You can mix and match fruits, try vegan options, and even spice it up. Remember to store leftovers properly to keep them fresh. This dish is not only good to eat, but it's also fun to make and share. Explore the variations and find what you love most. Enjoy every bite of your Blueberry Oatmeal Bake!

Blueberry Oatmeal Bake Healthy Breakfast Delight

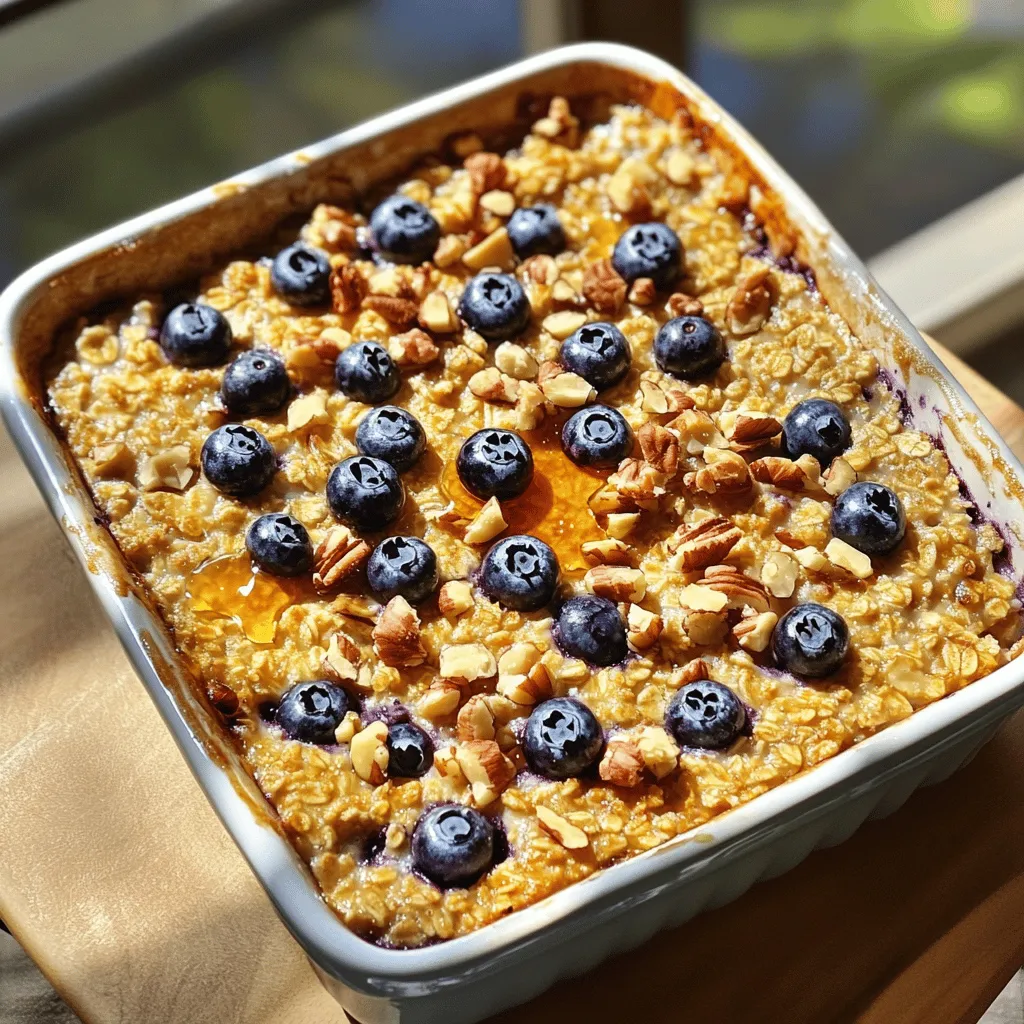
Looking for a delicious and healthy breakfast? You’ll love this Blueberry Oatmeal Bake! It’s sweet, easy to make, and packed

For this veggie loaded quiche, gather these key items: - 1 pre-made pie crust (9-inch) - 4 large eggs - 1 cup heavy cream - 1 cup fresh spinach, chopped - 1 cup broccoli florets, blanched and chopped - 1/2 bell pepper, diced (any color) - 1/2 cup cherry tomatoes, halved - 1/2 cup shredded cheddar cheese - 1/4 cup feta cheese, crumbled - 1/2 teaspoon garlic powder - 1/2 teaspoon onion powder - Salt and pepper to taste - Fresh herbs for garnish (like parsley or chives) These ingredients make a colorful and tasty quiche. The eggs and cream form a rich base, while the veggies add flavor and nutrition. You can enhance your quiche with these fun toppings: - Extra cheese (like mozzarella or goat cheese) - Sliced avocado - Sautéed mushrooms - Chopped green onions - Hot sauce for a kick These options can make your dish even more exciting. Feel free to mix and match! Each slice of quiche packs a nutritious punch. Here’s a quick look at what you get: - Calories: 300 - Protein: 12g - Carbohydrates: 20g - Fat: 20g - Fiber: 2g This quiche is a great way to enjoy veggies while getting a good balance of nutrients. It’s filling but not too heavy. You can find the full recipe to get started on your veggie adventure! Start by preheating your oven to 375°F (190°C). Take your pre-made pie crust and place it in a 9-inch pie dish. Use a fork to prick the bottom of the crust. This helps prevent bubbles. Now, pre-bake the crust for about 10 minutes. This gives it a nice, crisp base. Once it's done, take it out and let it cool slightly. In a large mixing bowl, whisk together the four large eggs and one cup of heavy cream. Mix them until they are fully combined. Next, add in one cup of chopped fresh spinach, one cup of blanched and chopped broccoli, and half a diced bell pepper. Toss in half a cup of halved cherry tomatoes, half a teaspoon of garlic powder, and half a teaspoon of onion powder. Don’t forget to add salt and pepper to taste! Stir everything gently until the veggies blend well with the egg mix. Finally, add half a cup of shredded cheddar cheese and a quarter cup of crumbled feta cheese. Give it one last gentle mix. Now, pour that colorful veggie and egg mixture into your pre-baked pie crust. Spread it evenly for a nice bake. Pop the quiche into your preheated oven and bake for 35 to 40 minutes. It’s done when the center is set and the top turns golden. You can check it by inserting a knife into the center; if it comes out clean, you’re good to go! After baking, let the quiche cool for about 10 minutes before slicing. Enjoy your creation! For more details, refer to the Full Recipe. To get a great texture, use the right amount of eggs and cream. I recommend using four large eggs and one cup of heavy cream. This mix keeps your quiche fluffy and creamy. Another tip is to pre-bake your crust. This step stops it from getting soggy. Prick the crust with a fork before baking to avoid bubbles. You can boost flavor easily. Try adding fresh herbs like thyme or basil. They make your quiche taste fresh and bright. You can also mix in spices like paprika or cayenne for heat. For a richer taste, add a bit more cheese. Mixing different cheeses can create a unique flavor profile. One common mistake is overcrowding the filling. Too many veggies can lead to a watery quiche. Stick to the amounts in the recipe for the best results. Another mistake is not letting it cool before slicing. Let your quiche rest for ten minutes. This helps it hold its shape when served. {{image_2}} You can make this quiche even more veggie-packed. Swap in vegetables like zucchini, carrots, or mushrooms. These choices add texture and flavor. You can also use kale instead of spinach for a heartier taste. The great thing about quiche is that it welcomes all kinds of veggies. Just make sure to chop them small for even cooking. If you want to change the cheese, you have many options. Try using goat cheese for a tangy kick. Mozzarella will give a nice, creamy pull. For a dairy-free option, use cashew cheese or nutritional yeast. Each choice changes the flavor, making your quiche unique. Don’t be afraid to mix and match cheeses for a fun twist! Use seasonal vegetables to keep things fresh and exciting. In spring, try asparagus or fresh peas. Summer is perfect for using zucchini and bell peppers. In fall, add roasted butternut squash or sweet potatoes. Winter calls for hearty greens like collards or Swiss chard. This not only tastes great but also supports local farms. Always check what’s in season for the best flavor! For the complete recipe, check out the Full Recipe. To store leftover quiche, let it cool to room temperature first. Place it in an airtight container. Keep it in the fridge for up to three days. If you want to save it longer, consider freezing it. Reheat your quiche in the oven for the best taste. Preheat your oven to 350°F (175°C). Place the quiche on a baking sheet and cover it with foil. Heat for about 15-20 minutes or until warm. You can also use the microwave, but the crust may get soggy. To freeze quiche, slice it first for easy serving later. Wrap each slice tightly in plastic wrap. Then, place the wrapped slices in a freezer bag. Label the bag with the date. Your quiche can last in the freezer for up to two months. When ready to eat, thaw it overnight in the fridge before reheating. For the best results, follow the Full Recipe for the perfect quiche experience. Yes, you can use a different crust. A whole wheat crust or a gluten-free crust works well. You can even try a crustless version. Just pour the filling directly into a greased pie dish. This option is lighter and still tasty. You can check if the quiche is done by inserting a knife in the center. If it comes out clean, the quiche is ready. The top should also be golden brown. If it jiggles too much, give it more time in the oven. Absolutely! You can prepare the quiche a day before serving. Just store it in the fridge after baking. When you are ready, warm it up in the oven at 350°F (175°C) until heated through. This quiche tastes great even the next day! This blog post covered how to make a delicious quiche. We explored key ingredients, prep steps, and baking tips. You learned about variations, storage methods, and common questions. Quiche is simple to customize to fit your taste and needs. By following these steps, you can create a tasty dish anyone will enjoy. I hope you feel ready to make your own perfect quiche now. Enjoy your cooking and the delicious results.

Veggie Loaded Quiche Delicious and Easy Recipe

Craving a delicious and healthy meal? You’ll love this Veggie Loaded Quiche recipe! Packed with fresh veggies and protein, it’s

To make honey garlic roasted carrots, gather these simple ingredients: - Carrots - Honey - Olive Oil - Garlic - Thyme - Salt and Pepper - Sesame Seeds - Fresh Parsley Using fresh carrots makes a big difference in taste. Choose medium-sized, crisp carrots for the best results. The honey brings a lovely sweetness, while garlic adds a rich flavor. Olive oil helps the carrots roast nicely. Thyme gives a subtle earthiness. Salt and pepper enhance all the flavors. Sesame seeds add a nice crunch on top, and fresh parsley brings brightness to the dish. For the full recipe, check out Honey Garlic Roasted Carrots! 🥕 Each ingredient plays a key role in creating this simple yet tasty dish. 1. First, preheat your oven to 425°F (220°C). This step is key for roasting. 2. Next, in a large bowl, whisk together the honey, olive oil, minced garlic, thyme, salt, and black pepper. This blend makes the carrots sweet and savory. 3. Now, add the carrot sticks to the bowl. Toss them well in the honey garlic mixture. Make sure every stick gets coated. 4. Spread the carrot sticks in a single layer on a baking sheet. Lining it with parchment paper helps with cleanup. 5. Roast the carrots for 25-30 minutes. Stir them halfway through to ensure even cooking. 6. You will know they are done when they are tender and caramelized. A fork should slide in easily. 7. Once roasted, take the carrots out of the oven. Sprinkle sesame seeds on top for a nice crunch. 8. Add fresh parsley for a touch of color and flavor. 9. Serve the warm carrots as a side dish or a tasty snack. Enjoy the sweet and savory flavors! For the full recipe, check out the details above. - Choosing the right carrots: Pick medium-sized carrots. They cook evenly and taste sweet. Look for bright orange carrots with no soft spots. Fresh carrots have a crisp texture and vibrant color. - Ensuring even cooking: Cut the carrots into sticks of the same size. This helps them roast evenly. If some pieces are too thick, they may not cook through. Stir the carrots halfway through cooking for the best results. - Adjusting sweetness and seasoning: Taste the honey garlic mixture before coating the carrots. If you want more sweetness, add a bit more honey. For a savory kick, add extra salt or pepper. Taste as you go for the best balance. - Overcrowding the baking sheet: If you crowd the carrots, they will steam instead of roast. This leads to soggy carrots instead of caramelized goodness. Spread them out in a single layer for the best texture. - Not preheating the oven: Always preheat your oven to 425°F (220°C). This step ensures the carrots roast quickly and get that nice caramelization. Don’t skip this crucial step. - Skipping the garnish: The garnish adds more than color; it adds flavor. Sprinkle sesame seeds and fresh parsley on top after roasting. This makes the dish look great and adds a nice crunch. {{image_2}} You can change the taste of honey garlic roasted carrots with some simple tweaks. - Adding spices: Try adding cumin or paprika for a warm kick. These spices enhance the sweet flavor of the honey. - Using different herbs: Rosemary or dill can give a fresh twist. Both herbs pair well with the carrots and honey. - Additional sweeteners: If you want to switch it up, use maple syrup or brown sugar. These options add a unique depth of sweetness to your dish. You can also adapt this dish to fit various diets easily. - Vegan options: This recipe is already vegan-friendly since it uses plant-based ingredients. Just ensure your honey is vegan if that's a concern. - Gluten-free considerations: The ingredients in this recipe are gluten-free. Enjoy without worry if you are gluten-sensitive. - Low-sugar adaptations: To cut back on sugar, use less honey or substitute with a sugar-free syrup. This keeps the dish tasty while being mindful of sugar intake. For the complete recipe to try these variations, check out the Full Recipe. To keep your honey garlic roasted carrots fresh, follow these tips. First, let the carrots cool to room temperature before storing. Place them in an airtight container. They can last up to four days in the fridge. If you want to store them longer, consider freezing. Spread the cooled carrots on a baking sheet. Freeze them for about one hour until firm. Then, transfer them to a freezer-safe bag. You can store them in the freezer for up to three months. When you want to enjoy your leftovers, reheating is easy. You can microwave them for a quick option. Just heat in short bursts, stirring in between. For a crispier texture, reheat in the oven. Set it to 350°F (175°C) and bake for about 10-15 minutes. To ensure your carrots stay fresh, eat them within four days if refrigerated. Always check for signs of spoilage before eating. Look for any off smells or slimy textures. Using the right storage containers helps too. Glass or BPA-free plastic containers work best. They keep your carrots fresh and tasty for longer. For freezing, use freezer bags that seal tightly to prevent freezer burn. For a delicious meal anytime, remember to store your honey garlic roasted carrots properly! Honey garlic roasted carrots last about 3 to 5 days in the fridge. Store them in an airtight container to keep them fresh. After that, they may lose texture and flavor. Always check for any signs of spoilage before eating. Yes, you can use baby carrots! They will cook faster than regular carrots. If you use baby carrots, cut them in half for even cooking. The sweet flavor will still shine through in this dish. Honey garlic roasted carrots go well with many dishes. Serve them with grilled chicken, fish, or steak. They also pair nicely with rice or quinoa. For a veggie option, try them alongside a mixed salad. You can prep the carrots in advance. Cut and coat them with the honey garlic mixture. Store them in the fridge for up to 24 hours before roasting. When ready, just pop them in the oven for a quick and tasty side. Absolutely! You can mix the honey, olive oil, garlic, herbs, salt, and pepper ahead of time. Store the mixture in the fridge for up to a week. When you’re ready to roast, just toss it with the carrot sticks. For the full recipe, check out the Honey Garlic Roasted Carrots section. We covered how to make tasty honey garlic roasted carrots from start to finish. We discussed the key ingredients, easy steps, and tips to make them perfect. You can adjust flavors and diets to suit your needs. Proper storage keeps leftovers fresh for later enjoyment. With these ideas, you can create a yummy dish that fits any meal. Try it out, and enjoy these delicious roasted carrots!

Honey Garlic Roasted Carrots Simple and Flavorful Dish

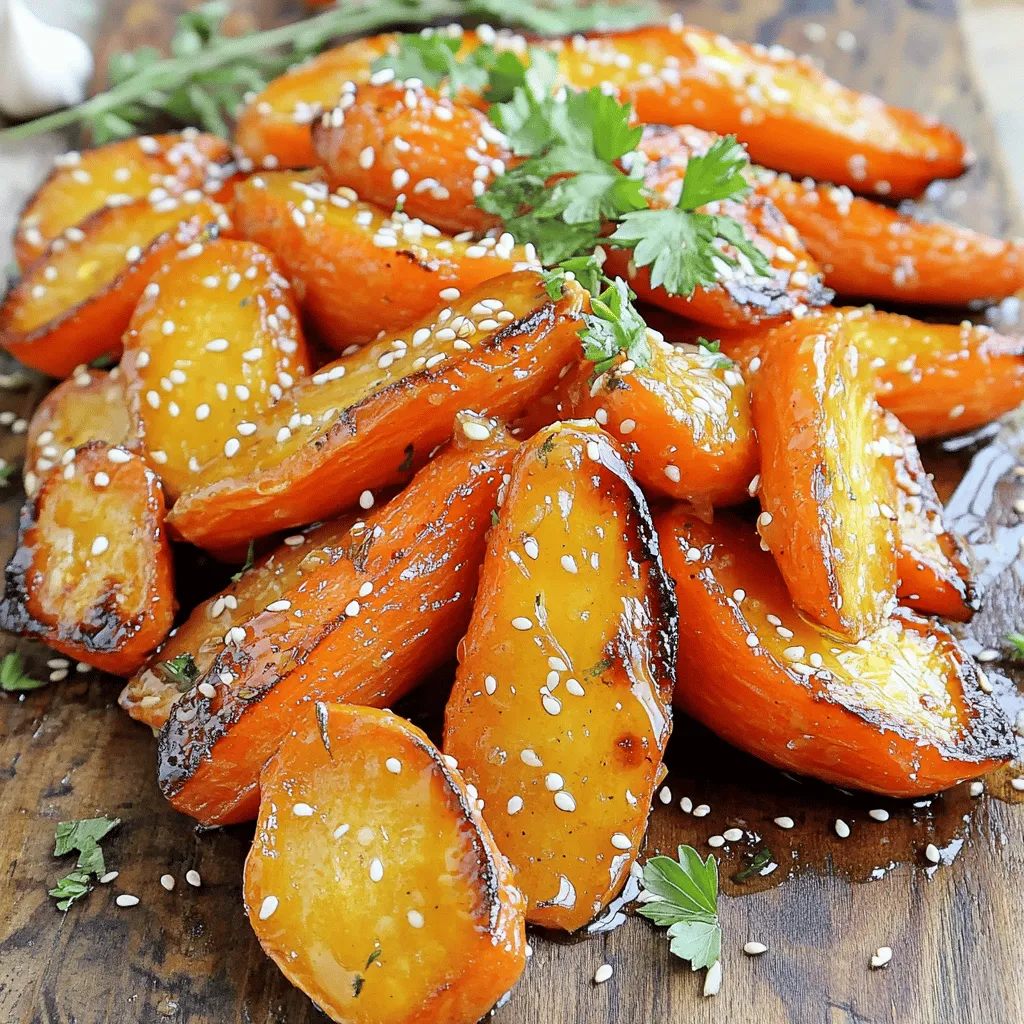
Looking for a simple and tasty side dish? Honey Garlic Roasted Carrots are the answer! These sweet and savory carrots

To make this tasty dish, gather these simple ingredients: - 4 boneless, skinless chicken breasts - 1/2 cup balsamic vinegar - 1/4 cup honey - 2 tablespoons Dijon mustard - 3 cloves garlic, minced - 1 tablespoon olive oil - 1 teaspoon dried oregano - 1 teaspoon salt - 1/2 teaspoon black pepper - Fresh basil leaves, for garnish If you need to swap some items, here are a few ideas: - Use maple syrup instead of honey for a different sweetness. - Swap Dijon mustard with yellow mustard if that’s what you have. - Try fresh herbs like thyme or rosemary instead of dried oregano. - Use chicken thighs for a richer flavor and juicier meat. You will need some key tools to make this dish: - A large resealable plastic bag or shallow dish for marinating - A whisk for mixing the marinade - A grill or grill pan for cooking the chicken - A meat thermometer to check the chicken's doneness - A cutting board and sharp knife for slicing the chicken This dish is fun to make and full of flavor. You can find the full recipe easily for more detailed steps. Start by mixing your marinade. In a medium bowl, whisk together: - 1/2 cup balsamic vinegar - 1/4 cup honey - 2 tablespoons Dijon mustard - 3 cloves minced garlic - 1 tablespoon olive oil - 1 teaspoon dried oregano - 1 teaspoon salt - 1/2 teaspoon black pepper This mixture gives the chicken flavor. Place your chicken breasts in a large resealable bag or a shallow dish. Pour half the marinade over the chicken. Make sure each piece is covered. Seal the bag or cover the dish, and place it in the fridge. Marinate for at least 30 minutes, or up to 2 hours. The longer it sits, the more flavor it gets. Preheat your grill or grill pan to medium-high heat. Take the chicken out of the marinade, letting excess drip off. Grill the chicken for 6-7 minutes on each side. The chicken should reach 165°F (75°C) to be safe to eat. In the last few minutes, brush on the rest of the marinade. This forms a nice glaze. After grilling, let the chicken rest for 5 minutes. This helps keep it juicy. Slice the chicken, drizzle any remaining glaze over the top, and add fresh basil for color. To get the best flavor, marinate your chicken for at least 30 minutes. If you can, try to marinate it for 2 hours. This allows the chicken to soak up all the flavors from the marinade. Remember to keep it in the fridge while it’s marinating. If you're in a hurry, use a fork to poke small holes in the chicken. This helps the marinade get inside faster. Always save some marinade for glazing after cooking. You can grill or bake your balsamic glazed chicken. Grilling gives a smoky flavor and nice grill marks. If you choose to bake, preheat your oven to 400°F (200°C). Place the chicken in a baking dish, brush with marinade, and bake for about 25-30 minutes. Both methods work well, but grilling adds a special touch. Whichever you pick, your chicken will taste great when it’s finished. For the full recipe, you can check the section above. To get that perfect glaze on your chicken, you need to use the marinade wisely. Start by marinating the chicken for at least 30 minutes. This lets the flavors seep in. When cooking, brush the chicken with the remaining marinade during the last few minutes. This adds a shiny coating and enhances the flavor. Make sure to cook on medium heat. Too high heat can burn the sugars in the glaze. Timing is key to juicy chicken. Grill each side for about 6-7 minutes. Use a meat thermometer to check that the chicken reaches 165°F (75°C). If you bake it, set the oven to 375°F (190°C) and cook for about 25-30 minutes. Let it rest for 5 minutes after cooking. This helps keep the juices inside. For a great plate, slice the chicken to show off the glaze. You can place it on a wooden board or a nice plate. Add fresh basil leaves for color and aroma. Pair it with grilled veggies or a light salad. This makes a well-rounded meal. You can also serve it with rice or quinoa. The flavors work well together. For more ideas, check the Full Recipe. {{image_2}} You can enhance your balsamic glazed chicken by adding seasonal vegetables. Bell peppers, zucchini, and asparagus all pair well. Simply chop the veggies into bite-sized pieces. Toss them in olive oil, salt, and pepper. Add the veggies to the grill alongside the chicken. They will soak up the glaze and become sweet and tender. If you want to try different flavors, consider using other ingredients. Swap balsamic vinegar with apple cider vinegar for a fruity twist. You can also add soy sauce for a savory touch. Try using maple syrup instead of honey for a unique sweetness. Experiment with fresh herbs like rosemary or thyme to create your own signature glaze. Balsamic glazed chicken is great for meal prep. Cook a big batch and store it in containers. This dish stays fresh for up to four days in the fridge. Pair it with grains like rice or quinoa for balanced meals. It’s easy to reheat and perfect for lunches or quick dinners. Check out the Full Recipe for more ideas! To store leftover balsamic glazed chicken, first let it cool. Place it in an airtight container. Make sure to cover it well to keep it fresh. You can store it in the fridge for up to four days. If you want to keep it longer, freezing is a great option. When reheating, aim to keep the chicken moist. The best way is to use the oven. Preheat your oven to 350°F (175°C). Place the chicken on a baking sheet and cover it with foil. Heat it for about 15-20 minutes. If you prefer, you can use a microwave. Just add a splash of water and cover it to keep the moisture. Freezing balsamic glazed chicken is easy. First, wrap each piece in plastic wrap. Then place them in a freezer-safe bag. It will last for about three months in the freezer. When you're ready to eat, thaw it in the fridge overnight. After that, you can reheat it as described above. Enjoy your flavorful meal even after some time! You should marinate chicken in balsamic vinegar for at least 30 minutes. This gives the meat time to soak up the flavors. If you want a stronger taste, marinate it for up to 2 hours. Just remember, longer is often better with marinades! Yes, you can use balsamic glaze instead of balsamic vinegar. However, keep in mind that glaze is thicker and sweeter. If you use glaze, you might want to cut back on the honey in the recipe. This way, your dish won’t be too sweet! Balsamic glazed chicken pairs well with many side dishes. Here are some great options: - Grilled vegetables like zucchini, bell peppers, and asparagus - Light quinoa salad with fresh herbs - Roasted potatoes seasoned with herbs - A simple green salad with vinaigrette These sides add color and flavor, making your meal more exciting! For the full recipe, check out the Balsamic Glazed Chicken Delight. Balsamic Glazed Chicken offers a mix of flavor and ease. We explored the key ingredients, substitutions, and essential tools needed. I shared step-by-step cooking directions, marinating tips, and techniques for grilling and baking. You learned how to achieve the perfect glaze and timing advice. Variations and storage tips are handy for future meals. Remember, this dish is simple yet delicious. Enjoy cooking and make it your own!

Balsamic Glazed Chicken Flavorful and Simple Recipe

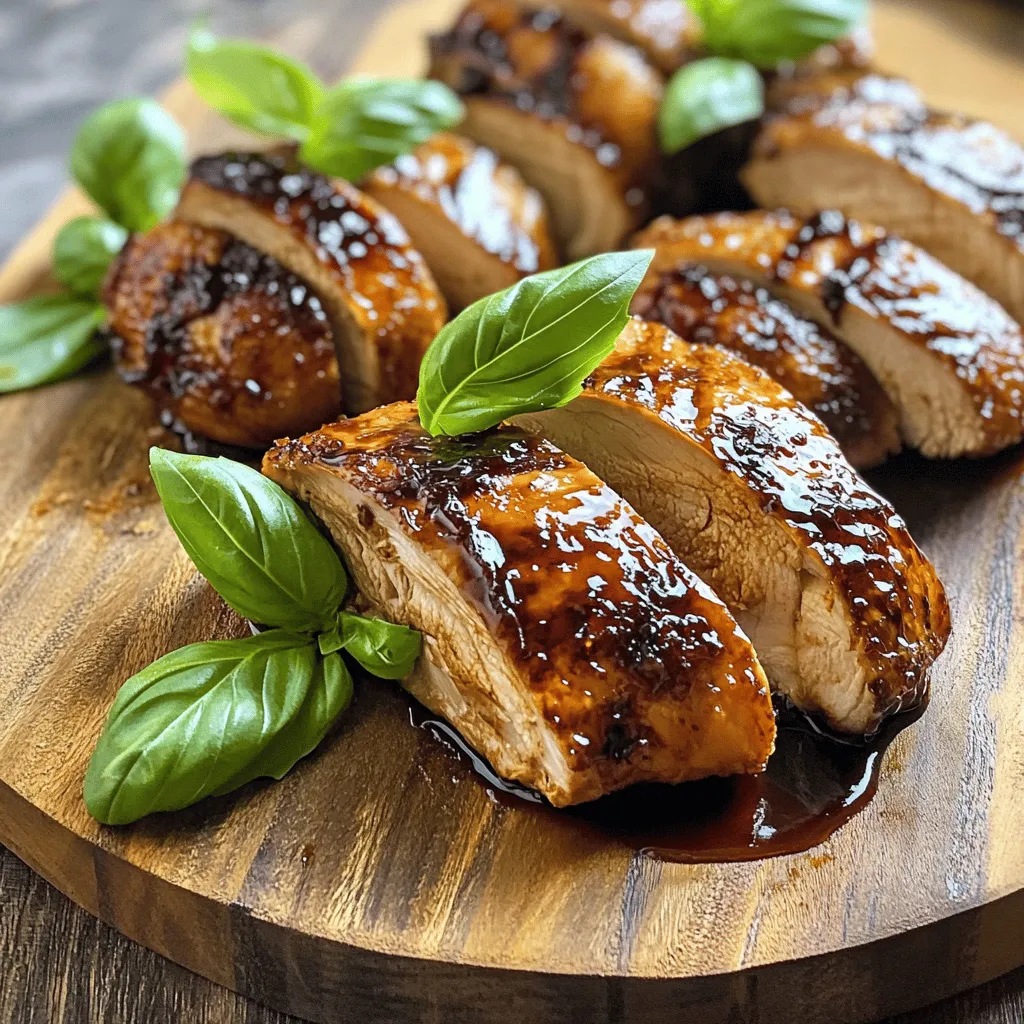
Looking for a quick and tasty chicken dish? You’ve found it! Balsamic Glazed Chicken is simple, flavorful, and perfect for

- 2 ripe avocados - 1 cup cherry tomatoes, halved - 1 cup fresh mozzarella balls, halved or diced - 1/4 cup fresh basil leaves, chopped - 2 tablespoons balsamic glaze - 1 tablespoon extra virgin olive oil - Salt and pepper to taste - Optional: Pinch of crushed red pepper flakes The ingredients for Caprese stuffed avocados are simple and fresh. Start with two ripe avocados. They should feel slightly soft when you press them gently. Next, gather one cup of cherry tomatoes. Halve them for easy mixing. You will also need one cup of fresh mozzarella balls. If you can't find them, you can cut larger mozzarella into cubes. Chop up a quarter cup of fresh basil leaves. This herb adds a burst of flavor. For a sweet and tangy touch, grab two tablespoons of balsamic glaze. You can find this in most grocery stores. Add one tablespoon of extra virgin olive oil to enhance the dish's richness. Don’t forget salt and pepper to taste. If you love a little kick, sprinkle in a pinch of crushed red pepper flakes. Each serving of this dish is packed with nutrients. It includes healthy fats from the avocados. The mozzarella adds protein and calcium. Fresh tomatoes provide vitamins and antioxidants. Overall, this dish is low in calories and high in flavor. - Cutting board - Chef's knife - Mixing bowl You will need a cutting board and a sharp chef’s knife to chop and slice. A mixing bowl helps combine all the ingredients easily. These tools make the process smooth and quick. For the full recipe, check out the [Full Recipe]. - Cut each avocado in half. - Carefully remove the pit with a knife. - Use a spoon to scoop out some flesh. - Set aside the scooped avocado in a bowl. By scooping some of the flesh, you make more room for the filling. This step is key to a great dish. - In a mixing bowl, combine the halved cherry tomatoes. - Add the halved or diced mozzarella balls. - Toss in the chopped basil too. - Drizzle in the olive oil and balsamic glaze. - Season with salt and pepper to taste. Mix the ingredients gently. If you like heat, add a pinch of crushed red pepper flakes. This adds a nice kick! - Generously fill each avocado half with the Caprese mixture. - Pile the filling high for a beautiful look. For garnishing, drizzle more balsamic glaze over the top. You can also add extra basil for color and flavor. This step makes your dish pop! You can find the full recipe for Caprese Stuffed Avocados in the earlier section. Enjoy this fresh and tasty dish! To find ripe avocados, look for a dark green skin. Gently squeeze; it should feel soft but not mushy. If it's too hard, leave it on the counter for a few days. Once ripe, store it in the fridge to slow down the ripening. This way, you can enjoy your avocados longer. Caprese stuffed avocados shine on their own, but they pair well with many items. Try serving them with slices of crusty bread. A fresh garden salad adds a nice crunch. For a heartier meal, serve them alongside grilled chicken or fish. These combos make for a balanced and colorful plate. To boost flavor, think about adding spices or herbs. A sprinkle of garlic powder gives a nice kick. You can also try adding fresh herbs like oregano or thyme. If you like heat, a pinch of red pepper flakes works great. These small tweaks make your Caprese stuffed avocados even more delightful. For the full recipe, check out the details above. {{image_2}} You can switch up the cheese in your Caprese stuffed avocados. Feta or goat cheese adds a tangy twist. These cheeses melt differently than mozzarella, giving a unique taste. You can also add other veggies. Bell peppers or cucumbers can give a nice crunch. Just chop them small and mix them in. This way, you create a fresh flavor. If you want a vegan version, leave out the cheese. You can use avocado or a nut-based cheese instead. This keeps the dish creamy and rich. Make sure to check any sauces for hidden dairy. For gluten-free eaters, this recipe is perfect as is. Just be careful with any added dressings or sauces. You can serve Caprese stuffed avocados as an appetizer or a main dish. As an appetizer, make smaller portions. For a main dish, serve larger halves with salad. You can also decide if you want them cold or warm. Cold stuffing feels fresh, while warm stuffing can be comforting. There’s no wrong choice here; just go with what you love! For the full recipe, check out the Caprese Stuffed Avocados 🥑. To keep your Caprese stuffed avocados fresh, store them properly. First, place any leftover stuffed avocados in an airtight container. This helps to reduce air exposure. If you notice browning, squeeze some lemon juice on the exposed avocado flesh. It prevents oxidation and keeps it vibrant. Store them in the fridge to maintain freshness. Stored correctly, your Caprese stuffed avocados can last about one to two days in the fridge. After this time, they may begin to lose flavor and texture. If you only have the filling left, it can last up to three days in the fridge. Just remember to keep it sealed well. Avocados do not reheat well because they can become mushy. Instead, enjoy your stuffed avocados cold. If you want to warm the filling, use a microwave for about 10-15 seconds. Check it often to avoid overheating. Always keep the avocado halves cold for the best taste. For the full recipe, check the link above. If you don’t have basil, try using fresh parsley or cilantro. Both add great flavor. You can also use oregano or thyme for a different taste. Each herb gives a unique twist to your Caprese stuffed avocados. If you want a spicy kick, try arugula. Yes, you can use leftover filling! Store it in an airtight container in the fridge. Use the filling in salads, sandwiches, or as a dip with crackers. The flavors will blend nicely. Just remember to eat it within a few days for the best taste. You can easily make a dairy-free version. Substitute mozzarella with avocado or hummus for a creamy texture. Another option is using vegan cheese. It works well and keeps the dish fresh. Just be sure to check the labels for any allergens. This blog post covered how to make delicious Caprese stuffed avocados. We discussed the needed ingredients, kitchen tools, and step-by-step instructions. I shared tips for choosing ripe avocados and ways to enhance the flavors. You can also explore variations to make the dish your own. In conclusion, this recipe is simple and satisfying. It brings fresh flavors together in a fun way. Enjoy making these tasty stuffed avocados for a healthy meal or snack!

Caprese Stuffed Avocados Flavorful and Fresh Dish

Get ready to enjoy a burst of flavors with Caprese Stuffed Avocados! This fresh dish combines ripe avocados, juicy tomatoes,

To make Coconut Curry Lentil Soup, you will need a few key ingredients. Here is the list: - 1 cup red lentils, rinsed - 1 can (14 oz) coconut milk - 4 cups vegetable broth - 1 medium onion, chopped - 2 cloves garlic, minced - 1-inch piece of ginger, grated - 2 tablespoons curry powder - 1 teaspoon turmeric - 1 teaspoon cumin - 1 medium carrot, diced - 1 red bell pepper, diced - 1 cup spinach leaves, chopped - 1 tablespoon olive oil - Salt and pepper to taste - Fresh cilantro for garnish - Lime wedges for serving Each of these ingredients plays an important role in creating a rich, flavorful soup. The red lentils provide protein and thickness. Coconut milk adds creaminess and a hint of sweetness. Fresh vegetables bring color and nutrients. The spices give the soup its warm, inviting flavor. You can find the full recipe [Full Recipe]. When you gather your ingredients, try to choose fresh and organic options. This choice makes the soup taste better and supports sustainable farming. Enjoy the process of cooking, as it adds to the joy of eating! 1. Start by heating the olive oil in a large pot over medium heat. 2. Add the chopped onion and sauté it until it turns translucent, about 5 minutes. 3. Next, stir in the minced garlic and grated ginger. Cook for 1-2 minutes until you smell their aroma. 4. Now, add the curry powder, turmeric, and cumin. Stir well to coat the onion mix. Cook for another minute to toast the spices. 5. Incorporate the diced carrot and red bell pepper. Cook for 3-4 minutes, allowing the veggies to soften. 6. Then, add the rinsed red lentils to the pot. Pour in the vegetable broth and coconut milk. Mix everything well. 1. Bring the soup to a gentle boil. Once boiling, reduce the heat to low. 2. Let it simmer uncovered for 25-30 minutes. Check that the lentils become tender during this time. 1. After the lentils cook, stir in the chopped spinach. Let it wilt for 2-3 minutes. 2. Adjust the seasoning with salt and pepper to suit your taste. 3. For a creamy texture, blend part of the soup with an immersion blender. Keep some lentils whole for a chunky feel. 4. Ladle the soup into bowls. Garnish with fresh cilantro and serve with lime wedges for squeezing over the top. This simple process makes Coconut Curry Lentil Soup both easy and fun to prepare. For the complete recipe, check the [Full Recipe]. To make your Coconut Curry Lentil Soup shine, you can customize the spice levels. Start with the recipe's suggested spices. If you like it hot, add more curry powder or a pinch of cayenne. For milder soup, reduce the spices. Adjust seasoning by tasting as you cook. A squeeze of fresh lime juice brings out the flavors, too. Texture is key in this soup. For a creamy texture, use an immersion blender. Blend just half the soup to keep some lentils whole. This gives a nice bite. If you want a chunkier soup, skip the blending. Just serve it as is. The mix of textures makes each bite fun. A common mistake is overcooking lentils. They should be tender but not mushy. Check them at the 25-minute mark. Another mistake is not adjusting seasoning properly. Always taste the soup before serving. If it needs more salt or spices, add a little at a time. This ensures a well-balanced flavor. For the full recipe, check the section above. {{image_2}} You can switch lentils for other types. Green or brown lentils work well. You can also use canned beans like chickpeas or black beans. These swaps add new flavors and textures. For coconut milk, you can try almond milk or oat milk. These options keep it creamy but change the taste. Use light coconut milk for fewer calories. Want to add more veggies? Carrots and bell peppers are great choices. You can also use seasonal veggies like zucchini or mushrooms. They add color and nutrients. Sweet potatoes are another hearty option. They make the soup more filling. Dice them small and add them early in the cooking process. This soup is vegan-friendly, so it suits plant-based diets. You don’t need to change much to keep it vegan. Just ensure your broth is vegetable-based. If you need gluten-free options, you’re in luck! All the ingredients are gluten-free. This soup fits into many diets, making it a great choice for everyone. For the full recipe, check out the complete details above. To store leftover Coconut Curry Lentil Soup, let it cool first. Then, scoop it into airtight containers. I recommend using glass containers. They do not stain and keep the soup fresh. Store the soup in the fridge for up to four days. You can freeze portions for later use. Use freezer-safe bags or containers. Make sure to leave space for expansion. To thaw, place the soup in the fridge overnight. You can also use the microwave. Reheat it gently on low heat. Stir often to keep it smooth and creamy. In the fridge, the soup stays fresh for about four days. If you freeze it, it can last up to three months. Watch for signs of spoilage. If the soup smells sour or has an off color, it’s best to toss it. Enjoy your delicious meals without worries! For the full recipe, check here: [Full Recipe]. Making this soup is quick and easy. It takes about 10 minutes to prep and 30 minutes to cook. You will have a delicious meal in just 40 minutes! Yes, you can use dried lentils. First, rinse them well. Add them to the pot with 4 cups of vegetable broth. You may need to increase the cooking time by 10 to 15 minutes. Check for tenderness before serving. This soup pairs well with various sides. Try serving it with warm naan or crusty bread. A simple side salad with greens can balance the meal. Rice or quinoa can also make it more filling. To reheat, place the soup in a pot over low heat. Stir gently to keep it from sticking. You can also microwave it in a bowl. Heat for 1 to 2 minutes, stirring halfway through. This keeps the flavor intact. In this post, we explored how to make Coconut Curry Lentil Soup. We reviewed the key ingredients, preparation steps, and cooking times. I shared tips to boost flavor and texture, along with common mistakes to avoid. We also discussed fun ingredient swaps and how to store your soup properly. Now, you can enjoy a warm and tasty dish that’s easy to make. With these steps and ideas, your Coconut Curry Lentil Soup will be a hit!

Coconut Curry Lentil Soup Easy and Flavorful Recipe

Craving something warm and comforting? This Coconut Curry Lentil Soup blends rich flavors with fresh ingredients for a delicious and

- 1 can (15 oz) chickpeas, drained and rinsed - 1 tablespoon olive oil - Spices: - 2 teaspoons cumin - 1 teaspoon smoked paprika - 1 teaspoon chili powder - 1/2 teaspoon garlic powder - 1/2 teaspoon onion powder - Salt and pepper The heart of this recipe is the chickpeas. They give a nice texture and protein to the tacos. Use a can for ease, but feel free to cook dried chickpeas if you prefer. Olive oil adds richness and helps the spices stick. This blend of spices is key to that bold flavor. Adjust them to your taste, but remember, the cumin and smoked paprika are must-haves! - 8 small corn tortillas - 1 ripe avocado, diced - 1 cup red cabbage, finely shredded - 1/4 cup fresh cilantro, chopped - 1 lime, cut into wedges - Sriracha or your favorite hot sauce Toppings make these tacos shine! Corn tortillas are soft and delicious. Avocado adds creaminess, while red cabbage gives a crunchy bite. Fresh cilantro brightens the dish and lime juice adds a zesty kick. Don’t forget the hot sauce if you like it spicy. These toppings mix well and create a fun flavor party in each bite. For the full recipe, check the recipe section. First, heat one tablespoon of olive oil in a skillet over medium heat. Once the oil is hot, add one can of drained and rinsed chickpeas. Stir them for about 2 to 3 minutes. This warms the chickpeas nicely. Next, sprinkle in the spices: two teaspoons of cumin, one teaspoon of smoked paprika, one teaspoon of chili powder, half a teaspoon each of garlic powder and onion powder, and add salt and pepper to taste. Mix everything well. Cook them for another 5 to 7 minutes. You want the chickpeas to be heated through and just a bit crispy for that great texture. While the chickpeas cook, it’s time to warm the corn tortillas. Place a dry skillet over medium heat. Add your tortillas, one at a time. Heat them for about one minute on each side. You want them soft and pliable, not crispy. This step is key for easy folding and eating. Now comes the fun part: assembling your tacos. Take a warm tortilla and add a generous spoonful of the spicy chickpeas right in the center. Next, layer on diced avocado for creaminess, followed by finely shredded red cabbage for crunch. Finish with a sprinkle of fresh cilantro. For an extra kick, drizzle some Sriracha or your favorite hot sauce on top. Serve with lime wedges on the side to squeeze over your tacos. This adds bright flavor and brings everything together. For the full recipe, check out the details earlier in the article. Enjoy your delicious, homemade spicy chickpea tacos! To make great spicy chickpeas, start by adjusting the spices. For a milder taste, cut back on chili powder. If you love heat, add more Sriracha. You can also try different spices, like cayenne or paprika, for a unique flavor. Next, focus on that crispy texture. After cooking the chickpeas with spices, let them sit in the pan for a few minutes. This helps them get crispy. Stir them less often for that perfect crunch. When serving your tacos, think about sides and drinks. A fresh salad pairs well with these tacos. You can also serve corn on the cob or rice for a fuller meal. For drinks, try a light beer or a refreshing lemonade. Get creative on taco night! Set up a taco bar. Let everyone choose their own toppings. This makes the meal fun and interactive. These tacos can easily fit vegan and gluten-free diets. Simply use corn tortillas, as they are gluten-free. For a vegan twist, skip any dairy toppings. You can also switch up the toppings. Try adding diced tomatoes or pickled onions for extra flavor. Different sauces, like avocado crema or mango salsa, can make your tacos shine. For the full recipe, check out the [Full Recipe]. {{image_2}} You can switch chickpeas for other proteins. Black beans are a great choice. They have a rich flavor and creamy texture. Lentils also work well. They cook fast and absorb spices well. Both options provide great protein and fiber. You can keep the spices the same or adjust them to fit the new protein. You can change the spice mix to fit your taste. Try adding cayenne pepper for heat. A pinch of cinnamon brings warmth. You can also use taco seasoning for a quick fix. For toppings, consider fresh corn or pickled onions. Add a dollop of yogurt or sour cream for creaminess. These tweaks make the tacos unique and exciting. Different cuisines can inspire your tacos. For a Mediterranean twist, add feta and olives. Use za'atar seasoning for a fresh flavor. If you like Asian flavors, try hoisin sauce and sesame seeds. You can also make it a Thai dish with peanut sauce and cilantro. Each change gives you a new taco experience. Explore and have fun with your food! To store any leftover spicy chickpeas, let them cool first. Place them in an airtight container. You can keep them in the fridge for up to three days. For the tacos, store the fillings and tortillas separately. This keeps everything fresh. Make sure to wrap the tortillas in foil or plastic wrap. When you’re ready to enjoy leftovers, reheat the chickpeas in a skillet. This helps keep them crispy. Heat them over medium heat for about 5 minutes. Stir occasionally to avoid burning. For tortillas, warm them in a dry skillet for 30 seconds on each side. This brings back their soft texture. You can freeze the spicy chickpeas if you want to keep them longer. Place cooled chickpeas in a freezer-safe bag. Remove as much air as possible before sealing. They can last up to three months in the freezer. For best results, freeze the chickpeas and tortillas separately. When you’re ready to eat, thaw the chickpeas in the fridge overnight. Reheat them as before after thawing. To make these tacos, you start by heating olive oil in a skillet. Next, add drained chickpeas and cook for 2 to 3 minutes. Then, add cumin, smoked paprika, chili powder, garlic powder, onion powder, salt, and pepper. Stir well to coat the chickpeas. Cook them for about 5 to 7 minutes until they are warm and slightly crispy. While that cooks, warm your corn tortillas in a dry skillet for about 1 minute on each side. After that, you can assemble your tacos. Spoon the spicy chickpeas onto each tortilla. Top with diced avocado, shredded cabbage, and cilantro. Drizzle Sriracha or your favorite hot sauce on top. Don't forget to serve lime wedges to add a fresh zing. For the complete recipe, check out the Full Recipe. You can serve these tacos with a variety of side dishes. A simple side salad with mixed greens adds freshness. Chips and salsa or guacamole could bring extra flavor. You might enjoy a side of Mexican rice or quinoa for heartiness. For drinks, try a cold glass of limeade or a light beer. A refreshing fruit-infused water also pairs well. These tacos are indeed healthy. Chickpeas are high in protein and fiber, which helps keep you full. They also contain vitamins and minerals, like iron and folate. The avocado adds healthy fats, while cabbage provides crunch and nutrients. However, be mindful of the hot sauce; it can add sodium. Overall, this dish is a great choice for a balanced meal. Yes, you can prepare these tacos in advance. Cook the chickpeas and store them in an airtight container in the fridge. They will stay fresh for 3 to 4 days. You can also warm the tortillas ahead of time. Just reheat them briefly in a skillet before serving. For best results, add fresh toppings like avocado and cilantro just before you eat. In this post, we explored how to make delicious Spicy Chickpea Tacos. We covered the main ingredients, from chickpeas to toppings. I shared step-by-step instructions to prepare and assemble your tacos. Remember to adjust spices to match your taste. You can customize these tacos with different proteins and toppings. Storing leftovers is easy, too. With simple storage and reheating tips, you can enjoy these tacos anytime. Get ready to impress your friends or family with your tasty creation!

Spicy Chickpea Tacos Flavorful and Simple Recipe

Tired of the same old taco night? Let’s spice things up! In this blog post, I’ll show you how to

To make this zesty dressing, you will need these key ingredients: - 1 cup Greek yogurt - 1/4 cup fresh cilantro leaves, packed - 2 tablespoons lime juice (about 1 lime) - 1 tablespoon honey (or agave syrup for a vegan option) - 1 clove garlic, minced - 1/2 teaspoon cumin powder - 1/4 teaspoon salt (or to taste) - 1-2 tablespoons water (to adjust consistency) These ingredients blend together to create a creamy and tangy dressing. The Greek yogurt gives it richness, while lime juice adds freshness. The cilantro brings an herby note, and garlic adds depth. You can personalize your dressing with these fun options: - Fresh herbs like parsley or dill for a different flavor - A pinch of red pepper flakes for some heat - A splash of vinegar for extra tang - Avocado for added creaminess and healthy fats Feel free to mix and match based on your taste. Experimenting makes cooking fun! To whip up this dressing, you will need: - A blender or food processor for smooth blending - A jar or airtight container to store it - A measuring cup and spoons for precise amounts Having the right tools makes the process easier and more enjoyable. It's all about enjoying the cooking journey! For the full recipe, check out the details above. To get started, gather all your ingredients. You need: - 1 cup Greek yogurt - 1/4 cup fresh cilantro leaves, packed - 2 tablespoons lime juice (about 1 lime) - 1 tablespoon honey (or agave syrup for a vegan option) - 1 clove garlic, minced - 1/2 teaspoon cumin powder - 1/4 teaspoon salt (or to taste) - 1-2 tablespoons water (to adjust consistency) Make sure your cilantro is fresh. Rinse it well under cold water. Pat it dry with a clean towel. This keeps your dressing bright and green. In a blender or food processor, combine all your ingredients. Start with the Greek yogurt for a creamy base. Then add the cilantro, lime juice, honey, minced garlic, cumin, and salt. Blend on high until smooth. If you see any lumps, don’t worry. Just scrape down the sides and blend again. Check the dressing's thickness. If it seems too thick, add water one tablespoon at a time. Blend after each addition until you reach your desired creaminess. Taste your dressing. You can add more salt or lime juice if you want it zestier. Once it’s just right, transfer the dressing to a jar or airtight container. Refrigerate it for at least 30 minutes. This helps the flavors blend nicely. Enjoy this fresh and zesty dressing on salads or as a dip for veggies. For more details, check the Full Recipe. To make this dressing shine, use fresh cilantro. It gives a bright flavor. Lime juice is key, too. Fresh limes taste better than bottled juice. Honey adds a nice touch of sweetness. Adjust the amount based on your taste. Garlic gives a subtle kick, so don't skip it. Cumin adds warmth and depth. It helps balance the tanginess from the lime. For a creamy texture, stick with Greek yogurt. It makes the dressing rich and smooth. Store your dressing in an airtight jar in the fridge. This keeps it fresh and tasty. It will last up to a week. If you see any change in color or smell, toss it out. You can also freeze it in small portions. This makes it easy to use later. Just thaw in the fridge before serving. If it separates, just shake or stir it well. This dressing is so versatile! Drizzle it on salads for a zesty finish. It pairs well with tacos or grilled chicken. You can also use it as a dip for veggies. Try it with fresh carrots or cucumbers. For a fun twist, mix it into grain bowls. It adds a bright flavor that enhances any dish. For the full recipe, visit the recipe section. {{image_2}} If you want a vegan twist, Greek yogurt is easy to swap. Use silken tofu for creaminess. You can also try cashew cream. To make cashew cream, soak raw cashews in water for a few hours. Blend them with water until smooth. This adds a rich texture. Looking to spice things up? Add diced jalapeños for heat. You can also mix in a pinch of cayenne. If you want depth, a splash of hot sauce works well too. These additions will make your dressing exciting and bold. Feel free to play with herbs. Try parsley for a different flavor. You can also use basil for a fresh twist. Another fun option is to add avocado for creaminess. This will give your dressing a unique taste and texture. To explore the full recipe, check out the zesty creamy cilantro lime dressing. To keep your creamy cilantro lime dressing fresh, store it in a clean jar. Make sure the jar has a tight seal. This will help keep the dressing safe from air and light. Avoid using metal containers because they can react with the lime juice. This dressing lasts about one week in the fridge. Store it at a cool temperature. Always check for any change in smell or color before using it. If it smells sour or looks off, it’s best to throw it away. You can freeze this dressing if you make more than you need. Use an ice cube tray for easy portions. Once frozen, transfer the cubes to a zip-top bag. This way, you can grab just what you need later. When you want to use it, thaw it in the fridge or at room temperature. Just remember, the texture may change slightly after freezing. For the best taste, use it within three months. Feel free to try this dressing on salads or as a dip with fresh veggies. For the full recipe, check out the Zesty Creamy Cilantro Lime Dressing. You can use Creamy Cilantro Lime Dressing on many dishes. Drizzle it over salads for a fresh kick. It works great as a dip for veggies, chips, or quesadillas. You can also add it to tacos or burrito bowls. Try it on grilled chicken or fish for a zesty flavor boost. This dressing enhances everything it touches, making meals lively and bright. Homemade Creamy Cilantro Lime Dressing lasts about 5 to 7 days in the fridge. Store it in a sealed jar or container. Always check for signs of spoilage before using. If it smells bad or changes color, it’s time to toss it. Keeping it cold helps maintain its fresh taste and creamy texture. You can use dried cilantro, but fresh is best for flavor. Dried herbs lose some taste during drying. If you use dried cilantro, use less than fresh. About 1 tablespoon of dried cilantro equals 1/4 cup of fresh. Mix it in and let it sit for a bit to develop flavor. You might notice a difference, but it can still work in a pinch. This article covers how to make creamy cilantro lime dressing. We looked at key ingredients, steps to blend it, and tips for great flavor. You can create custom versions or keep it simple. Storing it properly helps keep it fresh longer. Remember, homemade dressings are easy to make and taste much better. Try using it on salads, tacos, or grilled meats. Enjoy elevating your meals with this bright, tasty dressing!

Creamy Cilantro Lime Dressing Fresh and Zesty Recipe

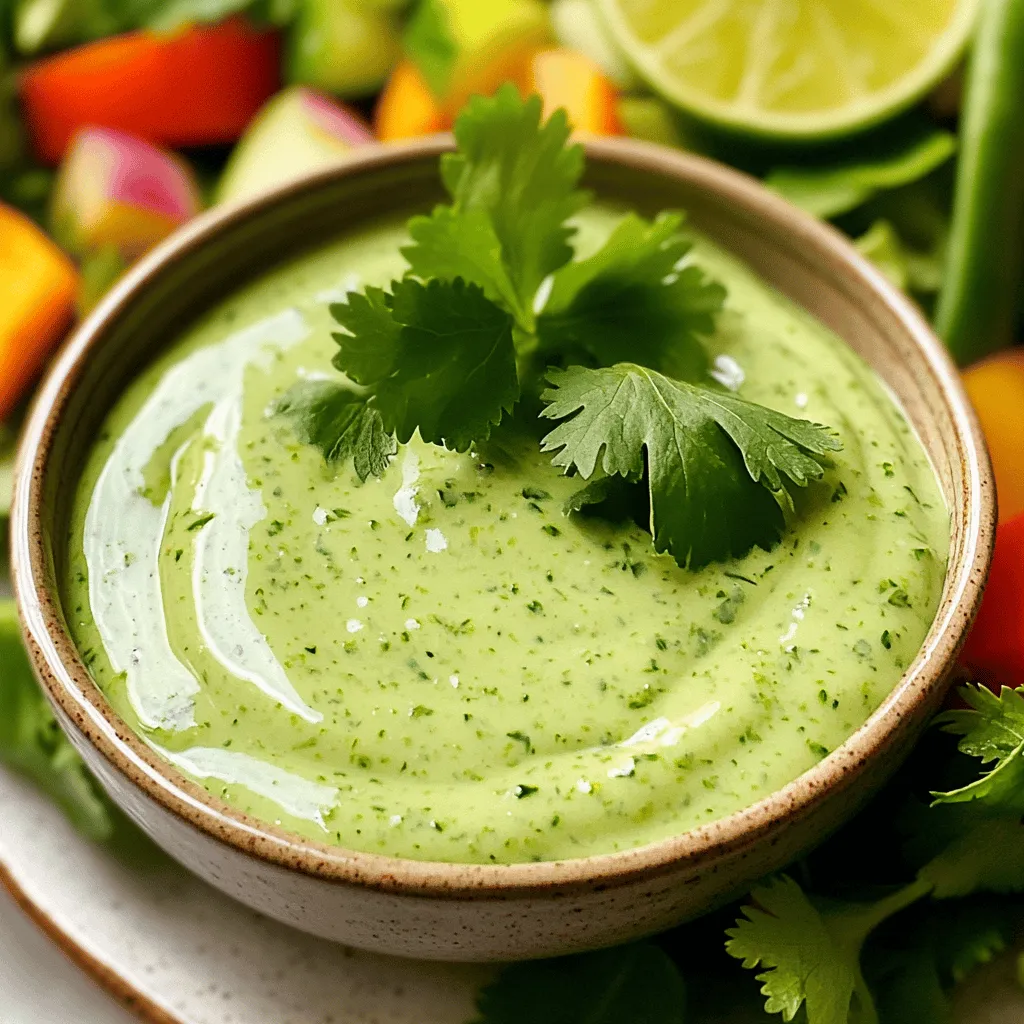
Looking for a fresh and zesty way to upgrade your meals? This creamy cilantro lime dressing will brighten any dish!

- Cauliflower and Cooking Oils - You need 1 large head of cauliflower, cut into florets. The cauliflower gives the dish a great texture. Use 4 tablespoons of olive oil to help the flavors stick and roast well. - Seasonings and Garnishes - For seasoning, you will use 4 cloves of garlic, minced. This adds a strong, rich flavor. Add 1 teaspoon of salt and ½ teaspoon of black pepper for taste. A sprinkle of ½ teaspoon smoked paprika adds a nice touch. Lastly, garnish with 2 tablespoons of chopped fresh parsley to brighten the dish. - Cheese Requirements - You will need ½ cup of grated Parmesan cheese. This cheese melts beautifully and adds a creamy, savory flavor. It makes the cauliflower extra special. For the full recipe, check out the section above. Start by preheating your oven to 425°F (220°C). This step makes sure your cauliflower cooks well. Line a large baking sheet with parchment paper. This helps with cleanup and keeps the cauliflower from sticking. In a big mixing bowl, add the cauliflower florets. Pour in 4 tablespoons of olive oil. Next, add 4 cloves of minced garlic, 1 teaspoon of salt, ½ teaspoon of black pepper, and ½ teaspoon of smoked paprika. Mix everything well until the florets are covered. This will add great flavor to your dish. Spread the cauliflower evenly on the baking sheet in a single layer. Roast it in the oven for about 25-30 minutes. Halfway through, toss the florets to make sure they cook evenly. Look for that golden brown color for the best results. When the cauliflower is tender, take it out of the oven. Right away, sprinkle ½ cup of grated Parmesan cheese over the hot florets. This allows the cheese to melt just a bit. Then, return the baking sheet to the oven. Broil for 2-3 minutes. Keep an eye on it to prevent burning. You want it bubbly and golden. Once done, take the baking sheet out of the oven. Garnish the cauliflower with 2 tablespoons of chopped fresh parsley. This adds a pop of color and freshness. Serve it warm right away. This dish pairs well with many meals or can be enjoyed alone. For the full recipe, check the earlier section! To make your garlic Parmesan roasted cauliflower great, follow these tips. - Achieving the Right Texture: Cut the cauliflower into even florets. This helps them roast evenly. Aim for pieces that are about the same size. A mix of small and large pieces can lead to uneven cooking. Roasting at 425°F (220°C) gives a crispy outside and tender inside. - Flavor Enhancement Techniques: Use fresh garlic for a strong taste. Mince it finely to release its flavor. Adding smoked paprika brings a nice depth. For an extra kick, try adding a pinch of cayenne pepper. Toss the cauliflower well so every piece gets coated with oil and spices. Getting the cheese just right can elevate your dish. - Best Practices for Melting Parmesan: Sprinkle the grated Parmesan on hot cauliflower right after it comes out of the oven. The heat will help melt the cheese slightly. For a deeper melt, broil for 2-3 minutes. Keep an eye on it to avoid burning. - Alternative Cheese Options: If you want to switch it up, try other cheeses like cheddar or mozzarella. Both melt well and add different flavors. For a dairy-free option, use a plant-based cheese that melts. {{image_2}} You can change the flavor of garlic Parmesan roasted cauliflower easily. Try different spices for a new taste. Here are some ideas: - Cajun Style: Mix in Cajun seasoning for a spicy kick. - Italian Touch: Add oregano and basil for an Italian flair. - Lemon Zest: Grate some lemon peel for a fresh, zesty flavor. You can also mix in other veggies or proteins. Try adding: - Broccoli: Combine cauliflower and broccoli florets for more color. - Chickpeas: Toss in canned chickpeas for added protein and texture. Many people need to adjust recipes for their diets. This dish can fit many needs. - Gluten-Free: This recipe is naturally gluten-free. No need to change any ingredients. - Dairy-Free: You can replace Parmesan cheese with nutritional yeast. This gives a cheesy flavor without dairy. - Vegan Substitutions: Use olive oil and nutritional yeast to keep it vegan. This way, everyone can enjoy the dish! These variations and adaptations make garlic Parmesan roasted cauliflower tasty for everyone. You can find the full recipe for this dish in the article above. To keep your Garlic Parmesan Roasted Cauliflower fresh, use an airtight container. This keeps moisture out and helps it stay tasty. If you have a lot left, divide it into smaller portions. This way, you can grab just what you need. Store the container in the fridge for up to 3 days. If you want to save it longer, you can freeze it. Place it in a freezer-safe bag or container. It will stay good for about 2 months. When it’s time to enjoy your leftovers, reheating is easy. You can use the oven for best results. Preheat your oven to 350°F (175°C). Spread the cauliflower on a baking sheet. Heat for about 15 minutes. This helps it regain some of that crispiness. If you’re in a hurry, use the microwave. Just place it in a microwave-safe dish. Heat it for 1-2 minutes, stirring halfway through. This method is quick, but it may not be as crispy. Enjoy your Garlic Parmesan Roasted Cauliflower again with these simple steps! For the full recipe, click here. Can I use frozen cauliflower? Yes, you can use frozen cauliflower for this recipe. Just remember to thaw it first. Drain any excess water to avoid soggy cauliflower. The cooking time may be slightly shorter, so keep an eye on it while roasting. How can I make this dish spicier? To add heat, try using red pepper flakes or cayenne pepper. You can mix these into the olive oil before tossing it with the cauliflower. For a smoky flavor, add chipotle powder. Adjust the spice level to your taste, but start small to avoid overpowering the other flavors. What to serve with roasted cauliflower? Roasted cauliflower pairs well with grilled chicken or fish. It also goes great with a fresh salad or quinoa. You can serve it alongside rice or pasta for a complete meal. For a fun twist, try it in tacos or as a sandwich topping. Can I use this as a meal prep option? Absolutely! Garlic Parmesan roasted cauliflower makes a fantastic meal prep choice. It stores well in the fridge for up to four days. Simply reheat it in the oven or microwave. You can pack it with other cooked grains or proteins for easy lunches or dinners. For the full recipe, check the Garlic Parmesan Roasted Cauliflower section above. This post covered how to make garlic Parmesan roasted cauliflower. We discussed ingredients, preparation, and cooking steps. You now know the best tips for perfect roasting and cheese melting. We explored delicious variations for different diets, too. Remember to store leftovers properly to keep them fresh. Roasted cauliflower is easy to make and fits many meals. Try it out for a tasty side or snack. Enjoy your cooking journey with this healthy dish!

Garlic Parmesan Roasted Cauliflower Easy and Tasty Dish

Looking for a simple yet delicious dish? Garlic Parmesan Roasted Cauliflower is your answer! This tasty recipe pairs tender cauliflower

Older posts
Newer posts
← Previous Page1 … Page59 Page60 Page61 … Page68 Next →

dsad

© 2025 Southern Dishes • Built with GeneratePress

Our Policies

  • Copyright Policy
  • Cookie Policy
  • GDPR Policy
  • Privacy Policy
  • Disclaimer
  • Terms Of Use

More Information

  • Home
  • About
  • Contact
  • Appetizers
  • Dessert
  • Dinner
  • Drinks
©2025, Southern Dishes About Back To Top