Skip to content
DisclaimerTerms Of UseGDPR PolicyCookie Policy

Southern Dishes

  • Home
  • Drinks
  • Appetizers
  • Dinner
  • Dessert
  • About
  • Contact
  • Privacy Policy
DisclaimerTerms Of UseGDPR PolicyCookie Policy

Isabella

To make a rich and creamy chocolate avocado mousse, you need simple, fresh ingredients. Here’s what you’ll need: - 2 ripe avocados, peeled and pitted - 1/2 cup unsweetened cocoa powder - 1/2 cup maple syrup or honey - 1/4 cup almond milk or coconut milk - 1 teaspoon vanilla extract - A pinch of salt These ingredients work together to create a smooth, velvety texture. The avocados provide creaminess, while the cocoa powder adds a rich chocolate flavor. You can dress up your mousse with fun toppings. Here are some ideas: - Shaved dark chocolate - Fresh berries - Whipped coconut cream Adding these toppings not only enhances the look but also boosts flavor. You can mix and match based on what you like. If you want to change things up, consider these alternatives: - Use agave syrup instead of maple syrup or honey. - Try coconut milk for a richer taste. - Use date syrup for a more natural sweetener. These swaps can make your mousse fit different diets or taste preferences. Remember, the key is to keep it delicious! For the full recipe, check out the details above. Start by selecting ripe avocados. They should feel slightly soft when you press them. Cut the avocados in half, remove the pit, and scoop the flesh into a food processor. This step is key. Ripe avocados give your mousse that rich, creamy texture. If the avocados are not ripe, the mousse will be lumpy. Next, add the unsweetened cocoa powder, maple syrup (or honey), almond milk, vanilla extract, and a pinch of salt to the food processor. Blend everything until it is completely smooth. This might take a minute. Stop to scrape down the sides as needed. Taste your mousse after blending. If it's not sweet enough, add more maple syrup or honey. Once your mousse is blended, transfer it into serving bowls or ramekins. Chill them in the refrigerator for at least 30 minutes. This helps the flavors mix well and the mousse to set. When ready to serve, top with shaved dark chocolate, fresh berries, or whipped coconut cream for a lovely touch. Enjoy your rich and creamy chocolate avocado mousse! You can find the full recipe above. Pick ripe avocados for the best mousse. They should feel soft but not mushy. Gently squeeze them to check. If they yield slightly, they are ready. Overripe avocados can ruin the mousse's texture. Under-ripe avocados won’t blend smoothly, so always choose wisely. You can make your mousse even better with add-ins. Try a pinch of espresso powder for a rich taste. Add a teaspoon of almond extract for a nutty hint. For a fruity twist, mix in pureed banana or a bit of orange zest. Each of these will add depth to your chocolate avocado mousse. Many people forget to taste their mousse before serving. Adjust sweetness if needed, using more maple syrup or honey. Also, don’t skip chilling the mousse; it helps the flavors blend and firms up the texture. Lastly, ensure your food processor is clean to avoid unwanted flavors. Follow these tips for a perfect creamy delight every time! {{image_2}} Avocados are packed with healthy fats. They contain monounsaturated fats, which help your heart. Each avocado is rich in vitamins and minerals. You get vitamin K, vitamin E, and potassium from them. Avocados also provide fiber, aiding digestion. This creamy fruit boosts your energy without added sugar. Eating avocados supports skin health, keeping it soft and smooth. Plus, they can help you feel full longer, making them great for weight control. Cocoa and dark chocolate are not just tasty; they are good for you too. Dark chocolate is full of antioxidants. These protect your body from damage. Cocoa can help improve heart health by lowering blood pressure. It can also boost mood and brain function. Eating a small amount can make you feel happier. Just remember, choose dark chocolate with at least 70% cocoa. This gives you the most health benefits. Chocolate avocado mousse is a great swap for heavy desserts. It offers a rich taste without the guilt. You can enjoy dessert while still being healthy. Using avocados and cocoa makes this dessert nutrient-rich. It’s lower in sugar and calories than traditional mousse. You can satisfy your sweet tooth without feeling bad afterward. This mousse is a perfect fit for many diets, including vegan and gluten-free. With the full recipe, you can whip up this creamy delight easily at home! You can easily make this mousse vegan and dairy-free. Just use maple syrup instead of honey. Choose almond milk or coconut milk for a creamy texture. This will keep the mousse rich without using any animal products. You can add extra flavors to your mousse. Try a tablespoon of espresso powder for a coffee kick. You can mix in a bit of nut butter for added richness. Want a fruity twist? Add a splash of orange juice or some pureed berries. Each option makes the mousse unique and fun. If you want more servings, just double the recipe. Use four ripe avocados instead of two. Keep the same amounts for cocoa powder, sweetener, and milk. Blend it all together and chill as usual. This way, you can share more of this delightful treat with friends and family. For the complete guide, refer to the Full Recipe. Yes, you can use other sweeteners. Honey works well if you prefer it. You can also try agave syrup or stevia. Each sweetener offers a unique taste. Adjust the amount to suit your liking. Keep in mind that each sweetener has different sweetness levels. For example, stevia is much sweeter than maple syrup. Start with a little and taste as you go. To store leftover mousse, place it in an airtight container. Cover the top with plastic wrap to prevent air from getting in. This helps keep it fresh and smooth. You can keep it in the fridge for up to three days. When ready to eat, give it a quick stir. This helps restore its creamy texture. Yes, this mousse is perfect for a vegan diet. It uses avocados and plant-based milk. Also, you can swap maple syrup for agave or another vegan sweetener. This dessert is rich, creamy, and full of flavor. You can enjoy it without any animal products. For the full recipe, check the details above. This blog post covered how to make chocolate avocado mousse. We explored key ingredients, like avocados and cocoa, and optional toppings to enhance flavor. I shared step-by-step instructions for easy preparation and serving. You learned vital tips to avoid common mistakes and to pick the right avocados. The health benefits of avocados and cocoa showed they can be a nutritious dessert option. Experiment with variations and modifications to suit your taste. Enjoy this simple, healthy treat!

Chocolate Avocado Mousse Rich and Creamy Delight

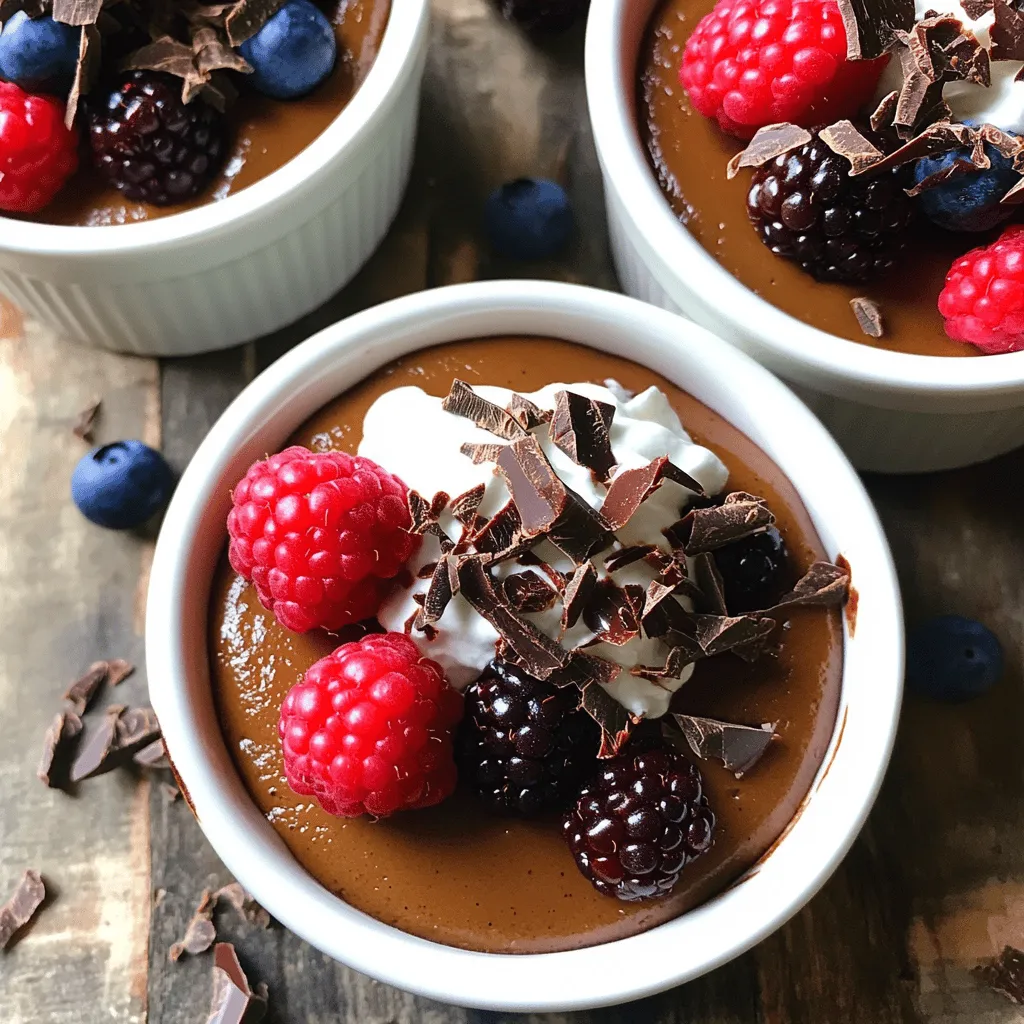
Dive into the rich and creamy world of Chocolate Avocado Mousse! This dessert is not only delicious but also incredibly

- 8 ounces fettuccine or spaghetti - 4 tablespoons unsalted butter - 4 cloves garlic, minced - 1 cup heavy cream - 1 cup freshly grated Parmesan cheese - Salt and pepper to taste - 1 teaspoon Italian seasoning - 1 cup baby spinach (optional) - Fresh parsley, chopped (for garnish) The star of this dish is the garlic. It brings a bold, savory flavor. Freshly grated Parmesan cheese adds creaminess and a rich taste. Heavy cream makes the sauce smooth and luscious. Butter enriches the sauce and adds depth. If you add baby spinach, it brings a nice color and nutrition. You can swap fettuccine for spaghetti or any pasta you like. For a lighter sauce, use half-and-half instead of heavy cream. If you don’t have Parmesan, try Pecorino Romano for a similar taste. You can also use olive oil instead of butter for a vegan option. Fresh garlic can be replaced with garlic powder if needed, but the flavor will change. This creamy garlic Parmesan pasta is simple, but the flavors shine through. You can find the full recipe easily for more details. Start with a large pot of water. Add salt to the water to enhance flavor. Bring the water to a boil. Once boiling, add 8 ounces of fettuccine or spaghetti. Cook the pasta according to the package directions. Aim for an al dente texture, which means it should still have a bit of bite. This usually takes about 8-10 minutes. Remember to save 1 cup of pasta water before draining. This starchy water helps adjust the sauce later. In the same pot, melt 4 tablespoons of unsalted butter over medium heat. Once melted, add 4 cloves of minced garlic. Sauté the garlic for about 1 minute. You want it fragrant, not burned. Then, pour in 1 cup of heavy cream. Let it come to a gentle simmer. Stir in 1 cup of freshly grated Parmesan cheese. Mix until the cheese melts, creating a smooth and creamy sauce. Season the sauce with salt, pepper, and 1 teaspoon of Italian seasoning. If you like, toss in 1 cup of baby spinach. Cook until it wilts, about 1-2 minutes. Now, add the drained pasta to the creamy sauce. Toss the pasta gently to coat it well. If your sauce seems too thick, use some of that reserved pasta water. Gradually mix it in until you reach the right consistency. Finally, plate your creamy garlic Parmesan pasta. Garnish with fresh parsley for a nice touch. This dish is rich and full of flavor and sure to impress! For a complete guide, check the Full Recipe. To make your sauce creamier, use heavy cream. It gives a rich texture. Always add cheese slowly. This helps it melt smoothly. Stir the sauce while it simmers. This keeps it from sticking to the pot. If the sauce is too thick, add some pasta water. This will help loosen it up. One mistake is burning the garlic. Always sauté it on medium heat. If you cook it too fast, it turns bitter. Another mistake is not reserving pasta water. This water is full of starch. It helps the sauce cling to the pasta. Lastly, don’t skip the seasoning. Salt and pepper are key for flavor. You can get creative with herbs. Try fresh basil or thyme for new flavors. A pinch of red pepper flakes adds heat. For a zestier taste, squeeze fresh lemon juice. You can also mix in some fresh spinach. It adds color and nutrients. If you want a nutty taste, sprinkle in some toasted pine nuts. For the full recipe, visit the mentioned link. {{image_2}} You can make this creamy garlic Parmesan pasta even better by adding veggies or protein. Toss in some baby spinach, broccoli, or cherry tomatoes. They add color and nutrition. You can also add grilled chicken, shrimp, or even crispy bacon for extra flavor. Mix and match based on what you like or have at home. Just remember to cook any protein before adding it to the dish. While fettuccine or spaghetti works great, feel free to try other pasta types. Penne, rigatoni, or even whole wheat pasta can be tasty choices. You can also use gluten-free pasta if you need it. The key is to cook the pasta until it is just right. This will help it hold onto that creamy sauce and deliver maximum flavor. Parmesan is the star, but why stop there? You can mix in other cheeses for a unique taste. Try adding mozzarella for a stretchy bite or goat cheese for a tangy twist. Grated Pecorino Romano can add a sharp flavor to the dish. Just remember to adjust the amount based on how cheesy you want it. Each cheese brings its own character, so explore what you enjoy most. You can find the full recipe for creamy garlic Parmesan pasta to get started on this delicious dish. After enjoying your creamy garlic Parmesan pasta, store leftovers in an airtight container. Make sure to let the pasta cool down first. This method helps keep it fresh. Place it in the fridge for up to three days. If you have extra sauce, store it separately. This will keep the pasta from getting soggy. To reheat your pasta, use a skillet for best results. Add a splash of water or cream to the pan. This helps to revive the creamy texture. Heat over low to medium heat, stirring gently. You can also use a microwave. Just cover the pasta loosely and heat in short bursts. Stir in between to ensure even heating. If you want to keep the pasta longer, freezing is a great option. Portion the pasta into freezer-safe bags. Remove as much air as possible before sealing. You can freeze it for up to two months. When ready to eat, thaw in the fridge overnight. Reheat it as mentioned above. Enjoy your creamy garlic Parmesan pasta even later! For the full recipe, check the recipe section. You can pair this pasta with many sides. A fresh salad works great. You can also serve garlic bread to soak up the sauce. Roasted vegetables add color and nutrition. For protein, grilled chicken or shrimp are tasty choices. These options balance the richness of the pasta. Yes, you can easily make this recipe gluten-free. Just swap regular pasta for gluten-free pasta. Many brands offer delicious gluten-free options. Look for fettuccine or spaghetti made from rice or quinoa. This way, you still enjoy the creamy flavor without gluten. To boost the flavor, try adding fresh herbs. Basil or thyme adds a nice touch. You can also mix in some red pepper flakes for heat. A splash of lemon juice brightens the dish too. For extra richness, stir in more Parmesan cheese. These small changes make each bite more exciting. For the complete recipe, check the Full Recipe section! You learned about the key ingredients and how to cook them well. The creamy sauce can be made just right with the tips given. We also explored fun variations to add more flavor or nutrition. Don't forget about proper storage to keep leftovers fresh. Enjoy cooking and get creative with this dish. You can make it unique and delicious!

Creamy Garlic Parmesan Pasta Rich and Flavorful Dish

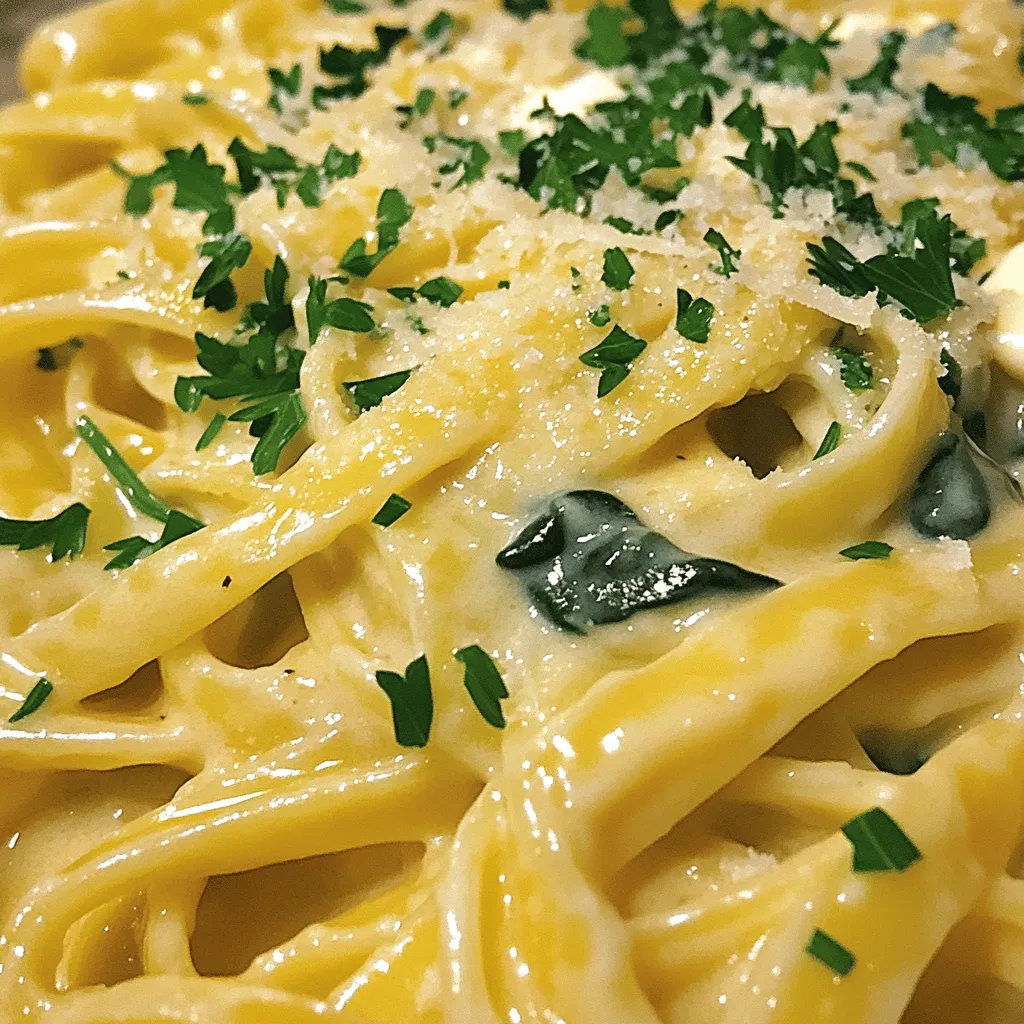
Craving a cozy dish that bursts with savory flavor? You’ve found it! My Creamy Garlic Parmesan Pasta is your new

- 4 large bell peppers - 1 cup quinoa - 2 cups vegetable broth or water - 1 can (15 oz) black beans - 1 cup corn - 1 cup diced tomatoes - 1 teaspoon cumin - 1 teaspoon smoked paprika - 1 cup shredded cheese - Fresh cilantro or parsley for garnish When preparing stuffed bell peppers, I always choose large, ripe bell peppers. They hold the filling well and add great flavor. Quinoa is my go-to grain for stuffing. It cooks quickly and is packed with protein. I prefer using vegetable broth for cooking quinoa. It gives the dish more depth. Next, I add black beans, corn, and diced tomatoes to my filling. They add texture and taste. Black beans are rich in protein and fiber. Corn adds a sweet crunch, while tomatoes bring juiciness. For seasonings, I love cumin and smoked paprika. They enhance the flavor profile. I usually sprinkle shredded cheese on top. It melts beautifully and adds a nice finish. Fresh cilantro or parsley makes for a lovely garnish. It adds color and freshness to the dish. For the full recipe, check out the detailed instructions. - Rinse the quinoa to remove the bitter coating. - In a pot, cook the rinsed quinoa with vegetable broth. Bring it to a boil, then lower the heat. Cover the pot and simmer for about 15 minutes. The quinoa should be fluffy and absorb all the liquid. - Cut off the tops of the bell peppers and remove the seeds. This step is key to making room for the tasty filling. - Place the bell peppers upright in a baking dish. This helps them stay standing while baking. - In a large bowl, mix the cooked quinoa, black beans, corn, diced tomatoes, cumin, smoked paprika, salt, and pepper. Stir well to combine all the flavors. - Carefully fill each bell pepper with the quinoa mixture, packing it in generously. - Top each stuffed bell pepper with shredded cheese. This adds a nice melty layer. - Add a splash of water to the bottom of the baking dish. This helps steam the peppers while they bake. Cover the dish with aluminum foil. - Bake in the preheated oven for 25 minutes. After that, remove the foil and bake for another 10-15 minutes. This makes the peppers tender and the cheese bubbly. - Once done, take them out of the oven and let them cool for a few minutes. - For a finishing touch, garnish with fresh cilantro or parsley before serving. This is how you make nutritious stuffed bell peppers with quinoa, perfect for any meal. For the full recipe, check out the details above. To make sure your quinoa is fluffy, rinse it well first. This removes the bitter coating called saponin. Then, cook it in vegetable broth for added taste. Bring it to a boil, cover, and simmer for about 15 minutes. Check if the liquid is absorbed and the quinoa is soft. If not, give it a few more minutes. When baking the stuffed peppers, timing matters. Bake them for 25 minutes covered with foil. This helps steam the peppers. Then, remove the foil and bake for another 10 to 15 minutes. This step makes the cheese bubbly and the peppers tender. Spices make your dish pop! I suggest using cumin and smoked paprika. They add depth and warmth. You can also play with herbs like oregano or basil for extra flavor. For cheese, I love using sharp cheddar. It melts beautifully and adds a nice tang. You can also try mozzarella or a blend for a different taste. Just sprinkle it on top for that melty goodness. Garnish is key to a lovely dish. Use fresh cilantro or parsley for a pop of green. It brightens the plate and adds freshness. When serving, place each stuffed pepper upright on a plate. This looks stunning and keeps the filling inside. You can serve them with a side salad or some crusty bread for a complete meal. {{image_2}} You can change the protein in your stuffed peppers. Ground turkey or beef adds a hearty texture. Simply brown it before mixing with other ingredients. For a vegetarian option, try lentils or chickpeas. Both add great flavor and protein. Mixing up the beans can enhance taste. Black beans are popular, but kidney or pinto beans work well too. You can also add more vegetables. Chopped zucchini, spinach, or mushrooms boost nutrition and flavor. Feel free to get creative! Cheese brings a creamy touch to your dish. If you want a vegan option, use cashew cheese or nutritional yeast. They melt well and add flavor. For a different twist, try blending mozzarella with pepper jack for a spicy kick. For the full recipe of these nutritious stuffed bell peppers, check out the [Full Recipe]. To keep your stuffed peppers fresh, use airtight containers. Glass containers work best. You can also use plastic containers, but glass is safer. Stored this way, your leftovers last for about three to five days in the fridge. The best way to reheat stuffed peppers is in the oven. Preheat your oven to 350°F (175°C). Place the peppers in a baking dish, cover them with foil, and heat for about 20 minutes. This method keeps the texture nice and the flavor intact. You can also use a microwave for quicker reheating, but the oven gives better results. To freeze stuffed peppers, let them cool completely first. Wrap each pepper tightly in plastic wrap, then place them in a freezer bag. They can stay in the freezer for up to three months. When you’re ready to eat, thaw them in the fridge overnight. Reheat them in the oven for the best taste. Yes, you can make stuffed bell peppers ahead of time. They are great for weekend meal prep. Cook the quinoa and mix your filling. Stuff the peppers and place them in a baking dish. Cover with foil and store in the fridge for up to three days. When ready to eat, just bake them. This saves time and effort on busy weeknights. Yes, you can use brown rice. However, quinoa and rice differ in texture and nutrition. Quinoa cooks faster and has more protein. It also has a nutty flavor that pairs well with spices. Brown rice is chewy and more filling. If you use brown rice, cook it longer and add more liquid. To adjust for more servings, simply double or halve the ingredient amounts. For example, if you want to serve eight people, use eight large bell peppers and two cups of quinoa. Keep the other ingredients in proportion. This method keeps the flavors balanced and delicious. Yes, stuffed bell peppers are very healthy. They are low in calories and high in nutrients. Quinoa is a complete protein, which means it has all nine essential amino acids. Black beans add fiber, while bell peppers are rich in vitamins A and C. This dish is a great way to enjoy a balanced meal. Stuffed bell peppers are a tasty, flexible dish. We covered key ingredients, such as quinoa, beans, and spices. You learned how to prepare and bake them perfectly. I shared useful tips for flavor and presentation. In summary, feel free to customize these peppers to fit your taste. Experiment with proteins and veggies. Store leftovers properly, and enjoy them later. Keep this recipe handy for a quick, healthy meal option. Happy cooking!

Nutritious Stuffed Bell Peppers with Quinoa Recipe

Looking for a healthy, tasty meal? My Nutritious Stuffed Bell Peppers with Quinoa recipe is perfect for you! Packed with

For these lemon blueberry muffins, start with 1 ½ cups of all-purpose flour. This flour gives your muffins the right texture. You will also need ½ cup of granulated sugar and ½ cup of packed brown sugar. The mix of these sugars adds sweetness and depth to the flavor. Next, gather your baking essentials. You will need 2 teaspoons of baking powder and 1 teaspoon of baking soda. These ingredients help the muffins rise and become fluffy. Don’t forget ½ teaspoon of salt, which balances the sweetness and enhances the flavors. Now, let's focus on the wet ingredients. You will need 1 large egg, which helps bind the batter. Use ⅓ cup of melted unsalted butter for richness. For that creamy goodness, add ¾ cup of buttermilk, or use plain yogurt if that's what you have. The zest of 1 large lemon and 2 tablespoons of fresh lemon juice will bring bright flavors to your muffins. Finally, include 1 cup of fresh blueberries. If fresh ones aren’t available, frozen blueberries work too. This combination of ingredients will create a delicious muffin that bursts with flavor. For the complete recipe, check out the Full Recipe section. Start by preheating your oven to 375°F (190°C). This step is key for even baking. Line your muffin tin with paper liners or lightly grease it. This will help the muffins pop out easily after baking. In a large bowl, whisk together the dry ingredients. Combine 1 ½ cups of all-purpose flour, ½ cup of granulated sugar, and ½ cup of brown sugar. Add in 2 teaspoons of baking powder, 1 teaspoon of baking soda, and ½ teaspoon of salt. Whisk them well until mixed. This blend makes a great base for your muffins. In a separate bowl, beat 1 large egg. Add ⅓ cup of melted unsalted butter, ¾ cup of buttermilk, the zest of 1 large lemon, and 2 tablespoons of fresh lemon juice. Mix these ingredients until smooth. This mixture adds moisture and flavor to your muffins. Now, gently fold the wet ingredients into the dry mix. Use a spatula or wooden spoon for this. Be careful not to overmix. A few lumps are okay, as this keeps your muffins light and fluffy. Carefully fold in 1 cup of fresh blueberries. Make sure they are evenly spread in the batter. Next, divide the batter among the muffin tin cups, filling each about ¾ full. Bake your muffins in the preheated oven for 18–22 minutes. Check for doneness by inserting a toothpick. It should come out clean when they are ready. Once baked, let the muffins cool in the tin for about 5 minutes. Then, transfer them to a wire rack to cool completely. For a nice touch, dust cooled muffins with powdered sugar. Serve them on a platter with lemon slices and a handful of fresh blueberries. Enjoy this zesty treat with your morning coffee or tea! To get soft, fluffy muffins, don’t overmix the batter. Mix just until the dry and wet ingredients combine. A few lumps are okay. This keeps the muffins tender. Also, adding buttermilk helps create a moist texture. You can use plain yogurt as a substitute if needed. Zesting a lemon gives your muffins a bright, fresh taste. Use a microplane to finely grate the lemon peel. This adds a punch of citrus flavor. Don’t skip this step! The zest makes a big difference in taste. You can also add a bit more lemon juice for extra zing. One common mistake is overbaking the muffins. Keep a close eye on them. Check for doneness with a toothpick. If it comes out clean, they are ready. Another error is not using fresh blueberries. Fresh berries burst with flavor and juice. If you must use frozen, do not thaw them before mixing. To make your muffins look extra special, dust them with powdered sugar. It adds a nice touch. Arrange them on a pretty platter. You can also serve them with lemon slices and fresh blueberries. This simple presentation will impress your guests. Enjoy your beautiful muffins! For the full recipe, check out the Zesty Blueberry Bliss Muffins. {{image_2}} You can make these muffins gluten-free by using a gluten-free flour blend. Look for one that works cup-for-cup with regular flour. This will keep the texture light and fluffy. Make sure the baking powder is also gluten-free. You won’t lose any flavor! To make these muffins vegan, swap the egg with a flaxseed egg. Mix one tablespoon of ground flaxseed with three tablespoons of water. Let it sit for five minutes to thicken. Use plant-based milk instead of buttermilk. Almond milk works great and keeps the muffins moist. You can add other fruits to these muffins for a fun twist. Try raspberries or strawberries for a berry medley. Peaches or apples can also add great flavor. Just chop the fruit into small pieces and fold them in with the blueberries. This gives you endless options to enjoy! For the full recipe, you can refer to the Zesty Blueberry Bliss Muffins section. To keep your lemon blueberry muffins fresh, store them in an airtight container. This helps keep moisture in and prevents them from drying out. If you have leftover muffins, let them cool completely first. Place them in the container at room temperature. They stay good for about 2-3 days. If you want to keep them longer, consider freezing. You can freeze these muffins easily. Wrap each muffin tightly in plastic wrap. Then, place them in a freezer bag. This helps prevent freezer burn. They can stay in the freezer for up to 3 months. When ready to eat, just take one out and let it thaw at room temperature. Reheat your muffins for a warm, fresh taste. The best way is to use an oven. Preheat it to 350°F (175°C). Place the muffins on a baking sheet. Heat them for about 10 minutes. You can also use a microwave. Place a muffin on a plate and warm it for 15-20 seconds. Enjoy your warm, zesty treat! For the full recipe, check out the section above. Lemon blueberry muffins stay fresh for about 3 to 5 days. Store them in an airtight container at room temperature. If you want them to last longer, you can refrigerate them for up to a week. Yes, you can use frozen blueberries. They work well in this recipe. Just fold them into the batter while still frozen. This helps keep the muffins from turning too blue. If you don’t have buttermilk, you can use plain yogurt. Mix equal parts yogurt and water to get the right consistency. You can also use milk with a splash of lemon juice or vinegar. Let it sit for a few minutes before using. Absolutely! This recipe is great for mini muffins. Just adjust the baking time. Bake mini muffins for about 10 to 15 minutes. Keep an eye on them and check for doneness with a toothpick. To store your muffins, place them in an airtight container. If you want to keep them fresh longer, wrap them tightly in plastic wrap and freeze them. Just thaw at room temperature when you're ready to enjoy. For the full recipe, check out the details above. This post covered key ingredients, clear steps, and helpful tips for making lemon blueberry muffins. You learned how to mix, bake, and serve them well. Remember, the right texture and flavor come from careful mixing and great ingredients. Explore variations to fit your taste, like gluten-free or vegan options. Lastly, store your muffins properly for the best taste later. Happy baking!

Lemon Blueberry Muffins Irresistible Breakfast Treat

Looking for the perfect breakfast treat? These Lemon Blueberry Muffins are a must-try! Bright lemon flavor meets sweet, juicy blueberries

- 2 tablespoons olive oil - 1 medium onion, chopped - 3 cloves garlic, minced - 1 teaspoon salt - 1/2 teaspoon black pepper - 1 teaspoon dried oregano - 1 (28-ounce) can crushed tomatoes - 2 cups vegetable broth - 1/4 cup fresh basil leaves, roughly chopped - 1 tablespoon balsamic vinegar - 1 teaspoon sugar (optional, to taste) - 1/2 cup heavy cream (or coconut cream for a vegan option) When I make this soup, I love using fresh ingredients. Each one adds flavor and depth. The olive oil helps create a rich base. Onion and garlic bring out sweetness. Salt and black pepper balance the taste. Dried oregano adds an earthy note. The crushed tomatoes are the star of the dish. They give the soup its bright color and rich texture. Vegetable broth enhances the soup’s savory profile. Fresh basil adds a fresh, aromatic touch. A splash of balsamic vinegar gives it a slight tang. If you like it sweeter, a bit of sugar can help. Finally, heavy cream or coconut cream makes it creamy and smooth. This recipe is a wonderful way to enjoy a classic dish. The combination of these ingredients creates a delicious and comforting soup. You can find the Full Recipe above to guide you through every step. 1. Heating olive oil and cooking onion Start by heating 2 tablespoons of olive oil in a large pot over medium heat. Once hot, add 1 medium onion, chopped. Cook the onion for about 5 minutes. You want it to become soft and translucent. 2. Adding garlic and seasonings Next, stir in 3 cloves of minced garlic, 1 teaspoon of salt, 1/2 teaspoon of black pepper, and 1 teaspoon of dried oregano. Cook this mixture for an extra 1 to 2 minutes. The garlic should smell fragrant and delicious. 3. Incorporating crushed tomatoes and broth Now, it’s time to add the main ingredients. Pour in 1 can (28 ounces) of crushed tomatoes and 2 cups of vegetable broth. Stir well, and bring the mixture to a gentle simmer. This will set the stage for your soup. 1. Duration and method for simmering Reduce the heat and let the soup simmer uncovered for 15 to 20 minutes. This allows the flavors to meld together beautifully. Keep an eye on it, and stir occasionally. 2. Stirring in basil, vinegar, and optional sugar After simmering, add 1/4 cup of roughly chopped fresh basil leaves, 1 tablespoon of balsamic vinegar, and 1 teaspoon of sugar if you like. Stir everything in and let it simmer for another 5 minutes. This step enhances the taste of your soup. 1. Using an immersion blender vs. regular blender Now, it’s time to blend. If you have an immersion blender, use it to puree the soup right in the pot. If not, carefully transfer the soup to a regular blender in batches. Blend it until it reaches your desired smoothness. 2. Stirring in heavy cream and final seasoning adjustments Return the blended soup to the pot. Stir in 1/2 cup of heavy cream for richness. Heat it through for about 3 to 4 minutes, but avoid boiling it. Finally, taste your soup and adjust the seasoning if needed. Now, you have a delightful homemade tomato basil soup! For more details, check out the Full Recipe. To enhance flavor, cook your onion until it’s soft and clear. This step builds a strong base. Add garlic and spices right after. This way, you release their full taste. For the best consistency, use an immersion blender. This tool lets you control how smooth or chunky you want your soup. If you like it thicker, simmer it a bit longer. If it’s too thick, add more broth. Serve your soup in warm bowls. A drizzle of olive oil adds shine and flavor. Fresh basil leaves make a lovely garnish. Pair your soup with crusty bread. A grilled cheese sandwich on the side is a classic choice. You can also top the soup with croutons or a sprinkle of cheese. Want to spice it up? Add a pinch of red pepper flakes or a splash of hot sauce. You can also mix in different herbs, like thyme or parsley. To make a vegan version, switch heavy cream for coconut cream. This keeps it rich and creamy without dairy. You can also use vegetable broth for a full vegan experience. {{image_2}} You can switch canned tomatoes for fresh ones. Fresh tomatoes create a vibrant taste. Use ripe, juicy tomatoes for the best flavor. If you want a heartier soup, add veggies like carrots or bell peppers. They provide nice texture and nutrition. You can also add protein sources like beans or cooked chicken. This turns your soup into a filling meal. Want to spice things up? Add herbs like thyme or rosemary for a twist. A pinch of chili flakes can add heat. For a cheesy version, mix in shredded cheese or a dollop of cream cheese. These options make the soup richer and creamier. You can adapt this soup for any season. In spring, add peas and asparagus for a fresh taste. Summer calls for diced zucchini and corn. In fall, consider adding roasted pumpkin. For winter, a dash of smoked paprika adds warmth. Pair your soup with a simple salad in spring or crusty bread in winter. These sides enhance the meal and make it special. To keep your soup fresh, let it cool first. Pour the soup into airtight containers. You can also use freezer bags for easy storage. Make sure to leave some space at the top. This allows for expansion when freezing. Label your containers with the date. This helps you track how long it has been stored. When you want to enjoy leftovers, the best method is the stove. Pour the soup into a pot and heat it over low heat. Stir often to prevent sticking. If you want to use a microwave, transfer the soup to a microwave-safe bowl. Heat in short bursts, stirring in between. To keep the soup creamy, avoid boiling it. This will help maintain a rich texture. Freezing is great for long-term storage. Pour the cooled soup into freezer-safe containers. Leave some space for expansion. If using freezer bags, press out as much air as you can. This helps avoid freezer burn. The soup will stay fresh for about three months in the freezer. When you're ready to eat, just thaw it in the fridge overnight before reheating. For the full recipe, refer to the earlier sections. Can I use fresh tomatoes instead of canned? Yes, you can use fresh tomatoes. Just chop about 2 pounds of ripe tomatoes. Cook them for longer to break them down and thicken the soup. How can I make the soup vegan-friendly? To make it vegan, simply swap heavy cream for coconut cream. This gives the soup a rich texture without dairy. What should I do if my soup is too acidic? If the soup tastes too acidic, add a teaspoon of sugar. This balances the flavors. You can also add more cream or broth to dilute it. The soup has about 200 calories per serving. Each serving contains: - 10g fat - 25g carbs - 5g protein For a healthier option, use less oil and add more vegetables. Spinach or carrots blend well and add nutrients. You need a large pot to cook the soup. A cutting board and knife help with prepping the veggies. An immersion blender is best for pureeing the soup. If you don’t have one, a standard blender works too. Choose a sturdy pot that distributes heat evenly for the best results. You learned how to make a delicious homemade tomato basil soup. We covered key ingredients, step-by-step instructions, and helpful tips to enhance your cooking. Whether you want to add spices or try different vegetables, there are plenty of ways to make this soup your own. Remember, you can easily store and reheat leftovers, ensuring nothing goes to waste. Enjoy this comforting soup on any occasion, and feel free to share your own variations. With simple cooking techniques, you can create a dish that warms the heart.

Savory Homemade Tomato Basil Soup Delight

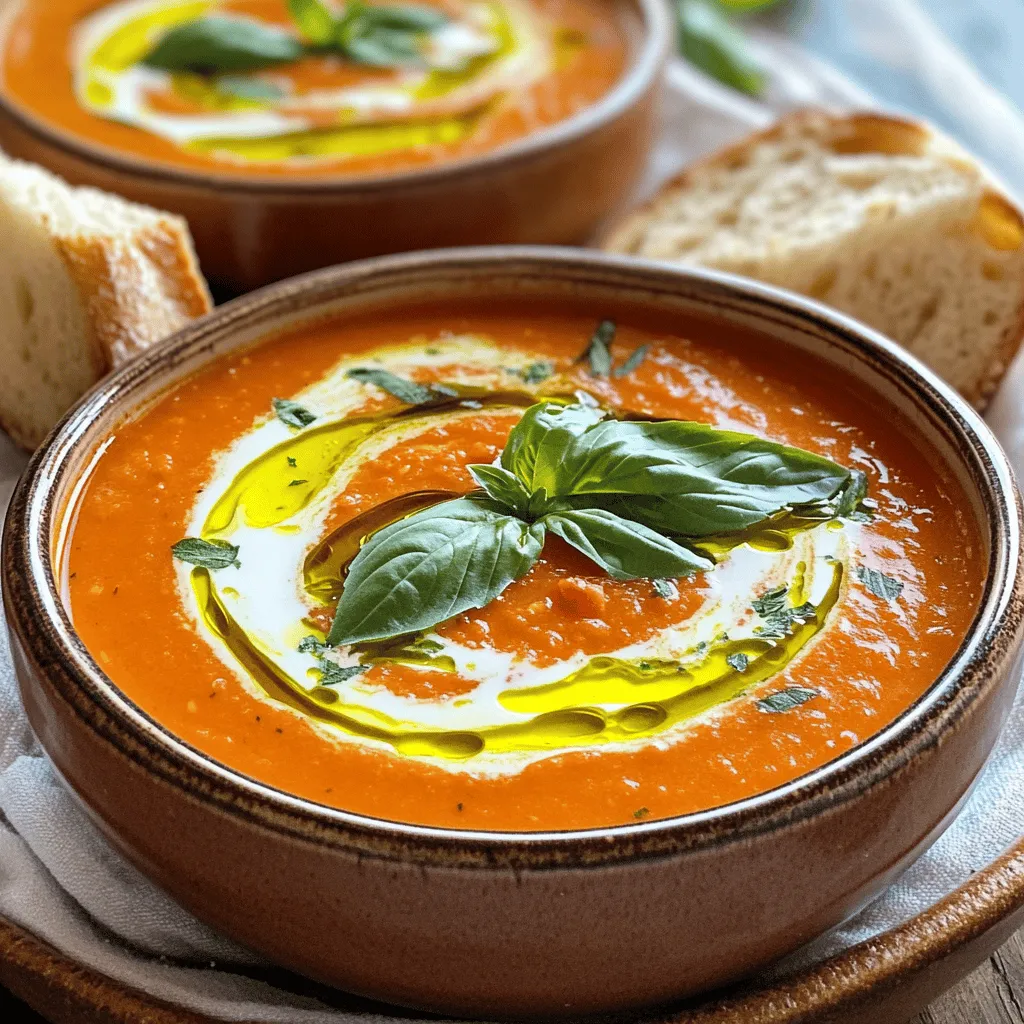
Craving a warm and comforting bowl of soup? You’re in for a treat with my Savory Homemade Tomato Basil Soup

- Zucchini - Bell Pepper - Red Onion - Cherry Tomatoes - Mushrooms - Olive Oil - Garlic Powder - Smoked Paprika - Dried Oregano - Salt and Pepper - Fresh Parsley (for garnish) The key to great grilled vegetable skewers is quality ingredients. Start with fresh produce. The vegetables should be firm and colorful. You want them to shine on the grill. Here’s a closer look at each ingredient: - Zucchini: Slice it into thick rounds. This keeps it juicy and tender. - Bell Pepper: Use red or yellow. They add sweetness and color. - Red Onion: Cut it into wedges. This gives a bold flavor when grilled. - Cherry Tomatoes: Use whole for a burst of sweetness. They cook quickly and add color. - Mushrooms: Whole or halved works well. They absorb flavors and add earthiness. Now, let’s talk about the seasoning. The right mix brings out the natural flavors of the vegetables. - Olive Oil: This adds richness and helps the spices stick. - Garlic Powder: A must for depth. It gives a nice kick without overpowering. - Smoked Paprika: This adds a lovely smokiness. It’s like a hint of barbecue. - Dried Oregano: This brings a Mediterranean touch. It pairs well with all the veggies. - Salt and Pepper: Simple but essential. They enhance the overall taste. - Fresh Parsley: Use it as a garnish. It adds a pop of color and freshness. For the Full Recipe, check the details at the start of this article. Each ingredient plays a role in making your skewers delicious and visually appealing. Enjoy the process of selecting and preparing them! Preheating the Grill Start by preheating your grill. Set it to medium-high heat, around 400°F or 200°C. This step is key for cooking the vegetables evenly. Soaking Wooden Skewers If you use wooden skewers, soak them in water for 30 minutes. This helps stop them from burning on the grill. Slicing and Cutting Next, slice the vegetables. Cut the zucchini into thick rounds. Dice the bell pepper into squares. Wedge the red onion. Halve the cherry tomatoes and mushrooms if needed. Mixing Vegetables in a Bowl Put all the sliced vegetables in a large bowl. Mix them well. This helps the flavors blend. Threading on Skewers Grab your soaked skewers. Start threading the vegetables onto the skewers. Alternate types of vegetables for a colorful look. Arranging for Aesthetic Appeal Leave some space between each piece. This ensures they cook evenly and look great on the plate. Cooking Time and Temperature Place the skewers on the hot grill. Cook them for about 10-12 minutes. The heat helps bring out the natural flavors. Turning the Skewers for Even Cooking Turn the skewers occasionally. This action helps all sides get those lovely grill marks. Enjoy the smell as they cook! - Temperature Control: Set your grill to medium-high heat. This gives a nice sear. The right heat helps the veggies cook evenly. If the grill is too hot, they may burn. Use a thermometer to check that it’s around 400°F or 200°C. - Timing When to Turn: Grill the skewers for about 10-12 minutes. Turn them every 3-4 minutes. This helps to get those perfect grill marks. Don’t rush, as turning too soon can stick to the grill. - Avoiding Overcrowding: Don’t pack the skewers too tightly. Each piece should have space. This allows heat to reach all sides, cooking them evenly. - Leaving Space Between Vegetables: Leave gaps between veggies on the skewer. This helps them get nice char marks. Plus, it makes them look pretty and colorful. - Marinade Tips: Soak your vegetables in olive oil and seasonings for at least 30 minutes. This adds flavor deep into the veggies. You can try different marinades, like balsamic vinegar or lemon juice. - Additional Seasonings to Try: Besides garlic powder and smoked paprika, try herbs like thyme or rosemary. A sprinkle of chili flakes can add heat. Experiment with your favorites to create unique flavors. For a full recipe, check out the details in the Full Recipe section. {{image_2}} You can change up your skewers by using seasonal vegetables. In summer, add fresh corn or eggplant. In fall, try squash or Brussels sprouts. Winter brings hearty options like carrots and parsnips. The key is to pick veggies that are fresh and in season. They taste better and add color to your dish. You can also substitute with fruits. Pineapple adds sweetness. Peaches bring a nice twist. Just remember, fruits cook faster than veggies. Keep an eye on them to avoid mushiness. You can grill your skewers in different ways. An outdoor grill gives a smoky flavor. Make sure it's preheated well. This will help achieve those nice grill marks. If you don’t have an outdoor grill, you can use your oven. Just set it to broil. Place the skewers on a baking sheet. This method works well, and you still get a great taste. Using a grill pan is another option. It’s perfect for indoor cooking. Just heat the pan on medium-high. The ridges will create grill marks and help with even cooking. Adding flavor is easy with marinades and sauces. A simple mix of olive oil, lemon juice, and herbs works great. You can let the veggies soak in it for an hour. This will boost the taste of your skewers. You can also try different sauces after grilling. A drizzle of balsamic glaze adds depth. You can use pesto for a fresh touch. Topping your skewers with fresh herbs like basil or cilantro can elevate your dish. For more detailed steps on preparing these delicious skewers, check out the Full Recipe. To store grilled vegetable skewers, let them cool first. Place them in an airtight container. This keeps them fresh and prevents drying out. You can put parchment paper between layers if stacking. For safe refrigeration, keep them in the fridge for up to 3 days. After that, the veggies may lose flavor and texture. Always check for any signs of spoilage before eating. When you want to reheat your skewers, the best method is using the oven. Preheat your oven to 350°F (175°C). Place the skewers on a baking sheet and cover them with foil. This keeps them moist while heating. You can also use a grill or stovetop. Heat a grill pan over medium heat. Turn the skewers every few minutes until warm. This method helps maintain their texture and flavor. Avoid microwaving, as it can make them soggy. For the full recipe, check back at the beginning of the article. To stop veggies from burning, keep them moist. Brush them with olive oil. This helps lock in moisture and adds flavor. Set your grill to medium-high heat. This way, the vegetables cook well without burning. Turn them often for even cooking. Yes, you can prepare skewers ahead of time. Just store them in the fridge. Wrap them tightly with plastic wrap. This keeps them fresh and tasty. Aim to grill within 24 hours for the best flavor. You can also chop veggies a day before. Just store them in a sealed container. I love to serve these skewers with hummus or tzatziki. They add a nice creaminess. Try a balsamic glaze for a sweet touch. For a spicy kick, serve with sriracha or chimichurri. These sauces pair well with the grilled flavors. For the complete recipe steps and ingredients, check out the [Full Recipe] for Grilled Rainbow Vegetable Skewers. Grilled vegetable skewers are easy and fun to make. You learned about choosing the right veggies and perfect seasonings. We also covered grilling tips for great flavor and texture. Remember to add your favorite sauces for extra delight. Whether it's a summer cookout or a cozy dinner, these skewers can fit any meal. Enjoy experimenting with different vegetables and techniques. Your next grilling adventure awaits!

Grilled Vegetable Skewers Flavorful and Easy Recipe

Are you ready to elevate your summer grilling game? Grilled vegetable skewers are not just colorful; they burst with flavor!

To make this tasty strawberry shortcake trifle, gather these ingredients: - 2 cups fresh strawberries, sliced - 2 tablespoons sugar (for strawberries) - 1 cup heavy cream - 1/2 cup powdered sugar - 1 teaspoon vanilla extract - 1 package (about 10 oz) store-bought angel food cake or pound cake, cut into cubes - 1 cup plain Greek yogurt - Mint leaves for garnish (optional) Use ripe strawberries for the best flavor. If you can’t find fresh strawberries, try using frozen ones. Just thaw them first and drain excess liquid. You can swap the heavy cream for coconut cream if you want a dairy-free version. Instead of Greek yogurt, you can use regular yogurt, but it may change the texture a bit. For a lighter taste, consider using light whipped cream. Strawberries shine in summer, but you can switch things up with seasonal fruits. In spring, try adding fresh blueberries or raspberries. In fall, sliced apples or pears work great. In winter, use citrus fruits like oranges for a bright twist. Each season brings different flavors, so feel free to explore! Start by washing the strawberries. Slice them evenly. In a medium bowl, mix the sliced strawberries with 2 tablespoons of sugar. This helps the strawberries release their juices. Let them sit for about 15-20 minutes. You will notice the strawberries become syrupy. This syrup adds sweetness and flavor to your trifle. In a clean mixing bowl, pour in 1 cup of heavy cream. Use a hand mixer or whisk to whip the cream. Beat it until soft peaks form. Then, add 1/2 cup of powdered sugar and 1 teaspoon of vanilla extract. Continue to whip until you see stiff peaks. The whipped cream should be light and fluffy. This will give your trifle a rich and creamy texture. Grab a large trifle dish or individual glasses. Start with a layer of cake cubes at the bottom. Next, add a layer of the macerated strawberries on top. Spoon a layer of the yogurt-cream mixture next. Repeat these layers: cake, strawberries, and yogurt-cream. Keep layering until you fill the dish. End with a layer of yogurt-cream. For a nice touch, add sliced strawberries and mint leaves on top. Now, refrigerate your trifle for at least 1 hour. This allows the flavors to meld beautifully. Check out the Full Recipe for more details! To make great whipped cream, start with cold heavy cream. Cold cream whips better and faster. Use a clean bowl and beaters to avoid any grease. Whip the cream until soft peaks form. Then, slowly add powdered sugar and vanilla. Keep whipping until you see stiff peaks. Stiff peaks hold their shape well, making them perfect for your trifle. You can prepare most parts of the trifle a day ahead. It’s a great time-saver! Slice the strawberries and mix them with sugar. Store them in the fridge overnight to let the juices flow. You can also whip the cream and mix it with yogurt ahead of time. Just make sure to keep everything covered. Assemble the trifle just before serving for the best texture. To make your trifle look stunning, use clear glass dishes. This way, everyone can see the colorful layers. Start with a layer of cake at the bottom. Then, alternate between strawberries and the yogurt-cream mix. Finish with a generous layer of whipped cream. Add fresh strawberries and mint leaves on top for a pop of color. A well-presented trifle makes the treat even more appealing and exciting to eat. For the complete recipe, check out the Full Recipe section. {{image_2}} You can switch up the fruit for a berry mix. Use blueberries, raspberries, or blackberries. This adds color and flavor. Each berry brings its own taste. Mix and match them based on what you like. You can also adjust the sugar amount. Some berries are sweeter, so taste as you go. If you need a gluten-free trifle, choose a gluten-free cake. Many stores sell gluten-free angel food cakes. You can also use gluten-free ladyfingers. Just check the labels to be sure. The rest of the recipe stays the same. You still get that fluffy texture and amazing taste. For a dairy-free version, use coconut cream instead of heavy cream. Chill it overnight, then scoop out the solid part. This gives you a great whipped texture. Use almond or coconut yogurt in place of Greek yogurt. These swaps keep the trifle creamy and delicious, while being dairy-free. You can find the full recipe to create your perfect trifle. To keep your strawberry shortcake trifle fresh, cover it tightly with plastic wrap or a lid. This helps prevent air from getting in, which can dry it out. If you use a trifle dish, ensure the lid fits well. If not, choose a large bowl with a tight seal. Your trifle can last up to three days in the fridge. The strawberries stay juicy and the cream remains fresh. After three days, the cake may get soggy, and the flavors might change. For the best taste, eat it within this time frame. If you have leftovers, be gentle when serving. The layers may shift, but that’s okay! Use a large spoon to scoop out portions. If the trifle looks messy, don’t worry. It will still taste great. For a fresh look, add a few new strawberries and mint leaves on top before serving. Enjoy your delicious treat! Yes, you can use frozen strawberries. Just thaw them first. Drain any extra juice. This will help keep your trifle from getting too soggy. The flavor will still be great! If you don’t have Greek yogurt, try sour cream. You can also use regular yogurt. Both will work well in the trifle. They keep the dish creamy and tasty. To make it sweeter, add more sugar to the strawberries or whipped cream. Start with a tablespoon at a time. If you want it less sweet, cut back on the sugar in those layers. Taste as you go to find the right balance. Yes, you can add other fruits! Blueberries, raspberries, or peaches work well. Just make sure to cut them small. This way, they mix nicely with the other layers. You can store the trifle in the fridge for about three days. Cover it tightly to keep it fresh. The layers may get softer, but the flavors will still be yummy. Yes! You can make this trifle a day ahead. Just assemble it and store it in the fridge. This helps the flavors blend together perfectly. Absolutely! Kids love the sweet taste and fun layers. It’s a great way to get them involved in the kitchen. Let them help assemble the trifle! Yes, you can use any cake you like! Pound cake or sponge cake are both great options. Just make sure to cut them into cubes for easy layering. You can use a large trifle dish or individual glasses. If you use a big dish, it will serve more people. Individual glasses are fun for parties! This blog post covers everything you need for a delicious trifle. We discussed the ingredients, with notes on substitutions and seasonal choices. You learned how to prepare strawberries, whip cream, and assemble the trifle step-by-step. I shared tips for perfect whipped cream, how to make it ahead, and presentation ideas. There are also fun variations, storage tips, and answers to common questions. Now you have the tools to create your own perfect trifle and impress anyone who tries it! Enjoy the process and make it your own.

Strawberry Shortcake Trifle Easy and Delicious Treat

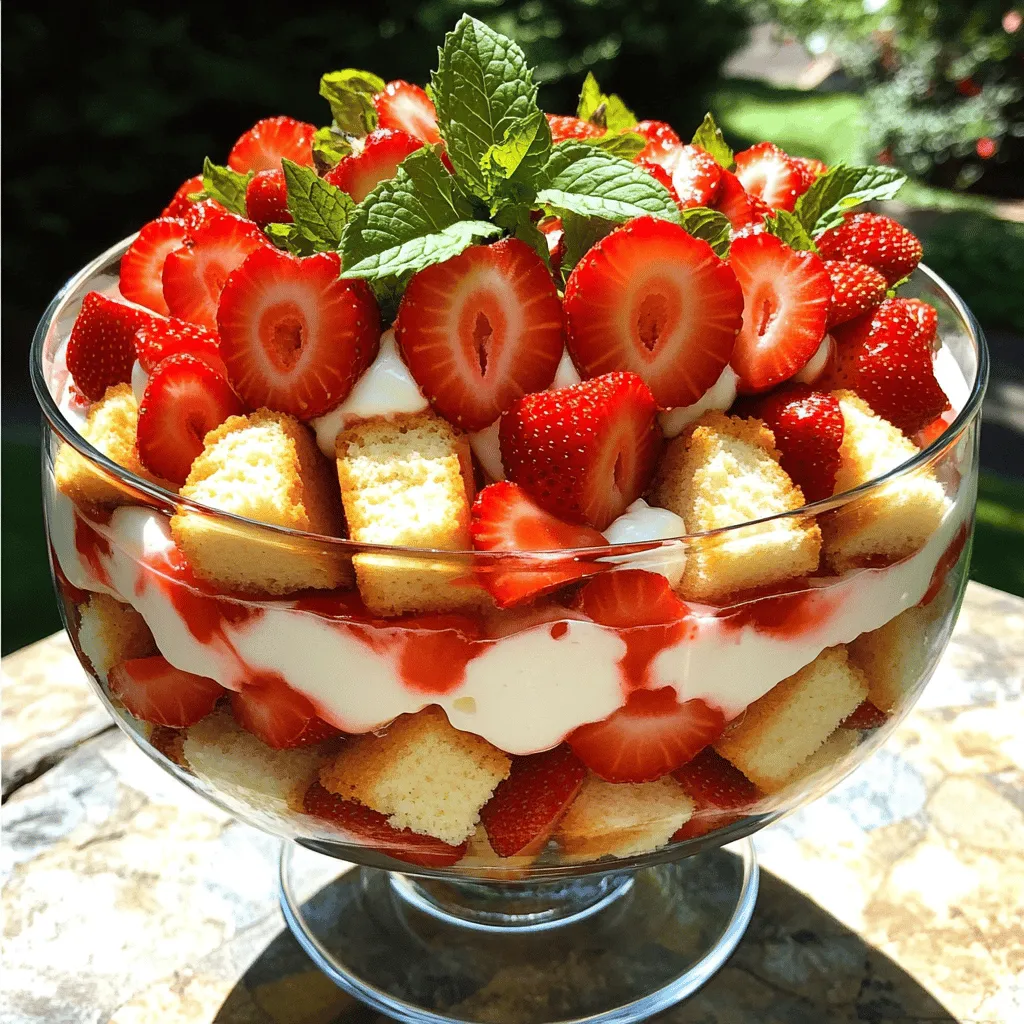
If you’re craving a sweet, easy-to-make dessert, look no further than this Strawberry Shortcake Trifle! In this guide, I’ll share

- 2 ripe avocados - 4 slices of whole-grain or sourdough bread - 1 small lemon, juiced - 1 teaspoon olive oil - Salt and pepper to taste - ½ teaspoon red pepper flakes - 1 tomato, sliced - ¼ cup feta cheese, crumbled - 1 radish, thinly sliced - Fresh herbs (like cilantro or parsley) for garnish Avocado toast is a healthy choice. One serving has good fats, fiber, and vitamins. Here is a rough breakdown: - Calories: 250 - Protein: 6g - Carbohydrates: 30g - Fat: 12g - Fiber: 10g This dish offers a balance of flavors and textures. You can enjoy it for breakfast or a snack. The creamy avocado pairs well with crunchy toppings. It’s simple yet satisfying. For the full recipe, check out the Avocado Toast Delight above. To start, choose your favorite bread. Whole-grain or sourdough works best. Next, toast four slices until golden brown. You can use a toaster, a skillet, or a grill. I like to grill mine for that smoky flavor. Toasting adds a great crunch to your avocado toast. While your bread toasts, grab two ripe avocados. Cut them in half and remove the pit. Scoop the green flesh into a bowl. Add the juice from one small lemon. This keeps the avocado fresh and bright. Drizzle in one teaspoon of olive oil. Season the mix with salt and pepper. Now, mash everything with a fork. You can leave some chunks for texture if you want. A smooth and creamy avocado mix is perfect for spreading. Once your bread is done, it’s time to build. Spread a generous layer of the mashed avocado on each slice. For the first variation, top with sliced tomatoes. Sprinkle crumbled feta cheese on top. A dash of red pepper flakes adds spice. For the second variation, add thinly sliced radish. Finish with fresh herbs like cilantro or parsley. This adds color and flavor to your toast. Each bite will be a delight. You can find the full recipe details above. To make great avocado toast, you need ripe avocados. Look for avocados that feel slightly soft when you press them gently. The skin should be dark green or black, depending on the type. Avoid any that feel overly mushy or have dark spots. If you find hard avocados, leave them at room temperature for a few days. They will ripen nicely. For the perfect spread, mash your avocados just right. Use a fork for a chunky texture or a potato masher for a creamier feel. I love leaving some small pieces for extra bite. Add lemon juice right away to keep the avocado bright green. Mix in salt and pepper for flavor as you mash. Elevate your avocado toast with exciting flavors. Try adding a drizzle of balsamic glaze or a sprinkle of everything bagel seasoning. Fresh herbs like cilantro or parsley bring brightness. You can also add a pinch of garlic powder for a kick. Don't forget toppings like sliced radish or tomato for crunch and color. For a richer taste, consider crumbled feta or a poached egg. Each ingredient adds its own twist to your toast. For more ideas, check out the Full Recipe. {{image_2}} For a classic twist, try adding fresh tomato and feta cheese. After you mash the avocado, spread it on your toasted bread. Then, top it with sliced tomatoes. Crumble feta cheese on top for a salty kick. A sprinkle of red pepper flakes adds some heat. This combo is bright and full of flavor. It’s a perfect way to enjoy the creamy avocado. Want something crunchy? Use thinly sliced radish and fresh herbs. Start with the same avocado base. Spread it over the toasted bread. Then, layer the radish slices on top. Add a handful of fresh herbs like cilantro or parsley. This gives a nice crisp texture and a burst of freshness. It’s a fun way to change up your toast! Get creative with toppings! You can add smoked salmon for a rich taste. Simply place the salmon on top of your avocado spread. A poached egg is another great choice. It adds creaminess and protein. Just place the egg gently on the avocado. You can also try adding pickled onions or spicy sriracha for extra flavor. The options are endless! For more ideas, check out the Full Recipe. Enjoy experimenting with your avocado toast! If you have leftover avocado mixture, store it in an airtight container. To keep it fresh, add a bit of lemon juice. This helps slow down browning. Press plastic wrap onto the surface of the mixture to keep air out. Store it in the fridge for up to two days. If it turns brown, you can just stir it up. The flavor will still be good! Avocado toast is best enjoyed fresh. If you must store it, do so carefully. Wrap the toast in plastic wrap or place it in a container. Keep it in the fridge for up to one day. The bread may get a bit soggy, but it will still taste good. You can re-toast it briefly to regain some crispness. Avoid adding toppings until you are ready to eat. To save time, prep your ingredients ahead of time. You can slice the bread and store it in a bag. Keep the avocado mixture ready in the fridge. When you’re ready to eat, just toast the bread and spread the avocado. This meal prep method works well for busy mornings. You can enjoy fresh avocado toast with minimal effort! For more ideas, check out the Full Recipe. To stop avocado from browning, use lemon juice. The acid in lemon helps slow down the process. You can also cover the avocado tightly with plastic wrap. Press it directly on the flesh to limit air exposure. Another option is to store it in an airtight container with a slice of onion. The sulfur in onion helps keep the avocado green. Yes, you can use frozen avocado! Frozen avocado works well in avocado toast. Just thaw it in the fridge overnight. Drain any extra water before mashing. It may be a bit softer, but the taste remains great. This is a perfect way to use leftover avocado. For gluten-free options, try using gluten-free bread. Many stores sell various types, like almond or rice flour bread. You can also use lettuce leaves as a base. They add a nice crunch and keep it light. Another option is to use sweet potato slices, baked until soft. They bring a unique flavor and texture to your toast. This post covered the key ingredients and step-by-step instructions for making avocado toast. We explored helpful tips to pick the best avocados and achieve the right texture. We also looked at tasty variations, from classic to creative combos. Storage info helps you keep your toast fresh and your leftovers handy. Avocado toast is simple to make and offers endless ways to enjoy it. Get creative with your toppings and share your favorite combinations!

Avocado Toast Variations Simple and Tasty Ideas

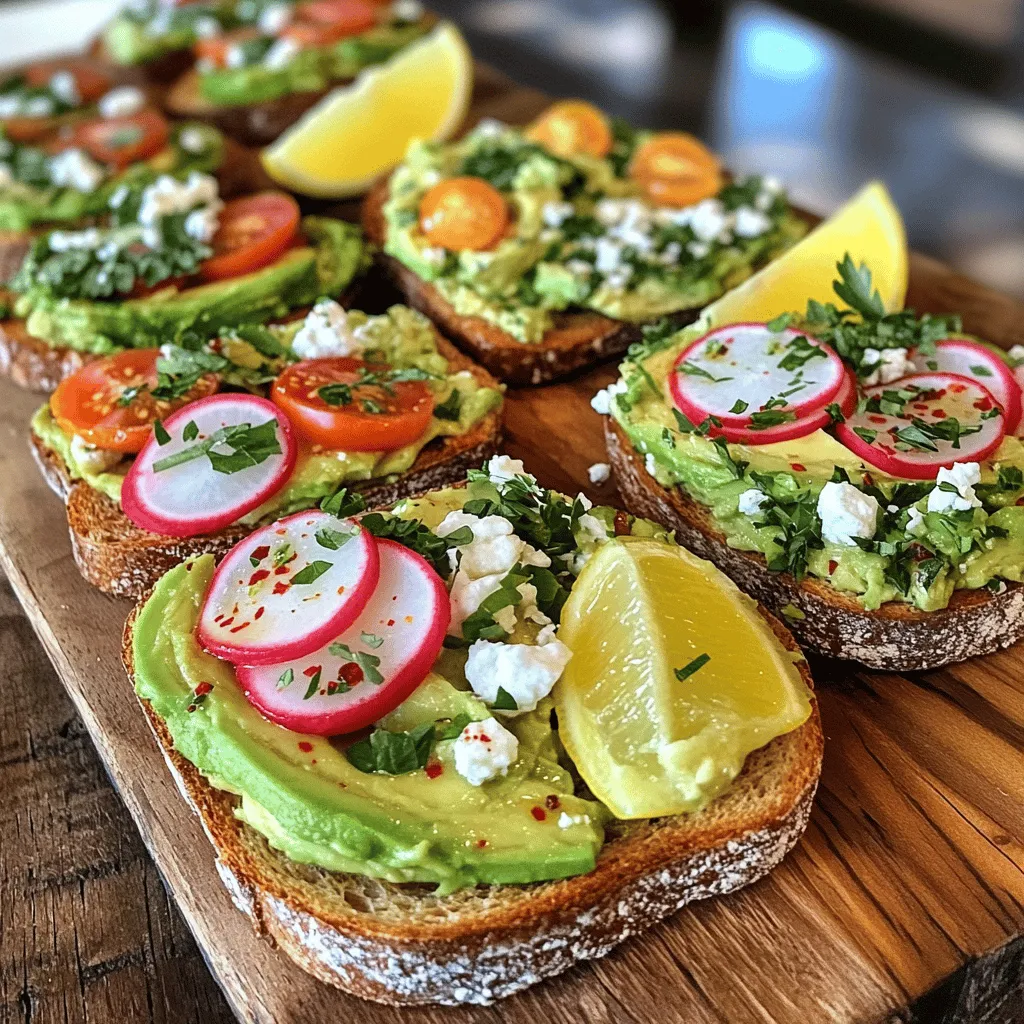
Avocado toast is a simple yet tasty way to elevate your meals. Whether you’re searching for a quick breakfast or

To make a rich chocolate lava cake, gather these simple ingredients: - 1/2 cup (115g) unsalted butter - 1 cup (170g) good-quality dark chocolate, chopped - 2 large eggs - 2 large egg yolks - 1/4 cup (50g) granulated sugar - 2 tablespoons all-purpose flour - Pinch of salt - Powdered sugar for dusting - Ice cream or whipped cream for serving (optional) You can modify some ingredients for different needs. If you want a dairy-free option, use coconut oil instead of butter. For chocolate, select dairy-free or vegan dark chocolate. You can replace granulated sugar with coconut sugar for a healthier touch. If you need a gluten-free version, try almond flour instead of all-purpose flour. Using high-quality ingredients makes a big difference. Good chocolate gives the cake a deep, rich flavor. Unsalted butter adds a creamy texture. Fresh eggs help create the perfect rise. When you choose top-notch items, your cake turns out better. The taste and texture will impress everyone. Always remember, quality matters when you want the best chocolate lava cake. Start by preheating your oven to 425°F (220°C). This step is key for the perfect bake. While the oven warms, grease four ramekins with unsalted butter. Make sure to coat the insides well. Then, lightly dust each ramekin with flour. This helps the cakes release easily after baking. Next, take a microwave-safe bowl and add your chopped dark chocolate and unsalted butter. Microwave this mixture in 30-second bursts. Stir after each interval. Keep doing this until the chocolate and butter melt smoothly. This step creates a rich, decadent base for your cakes. In a separate bowl, whisk together the two large eggs, two large egg yolks, and the granulated sugar. Whisk until the mixture becomes pale and slightly thick. This should take about two minutes. This step adds air to your batter, making your cakes light and fluffy. Now, slowly pour the melted chocolate mixture into the egg mixture. Stir continuously as you combine them. After that, sift in two tablespoons of flour and a pinch of salt. Gently fold these in using a spatula. Be careful not to over-mix, as this can toughen your cakes. Once the batter is ready, divide it evenly among your prepared ramekins. Place them on a baking sheet for easy handling. Bake the cakes in your preheated oven for about 12 to 14 minutes. The edges should look set, but the center should still jiggle slightly. This jiggle means you will get that gooey lava effect when you serve them. To get that gooey center, watch your baking time closely. Bake for only 12 to 14 minutes. The edges should be firm, but the middle must look soft. Overbaking makes the center less liquid. Remember, you want that warm, flowing chocolate when you cut into it. One common mistake is not greasing the ramekins well. This can make the cakes stick. Also, avoid overmixing the batter. This can lead to dense cakes instead of light ones. Lastly, don’t skip the flour dusting. It helps the cakes release easily from the ramekins. To test if your cakes are done, gently shake the baking sheet. If the cakes jiggle slightly in the center, they are ready. A toothpick test won't work here. You want the edges set but the center soft. This is the key to that rich, molten chocolate experience. Enjoy this fun dessert right after baking for the best taste! For more details, check out the Full Recipe. {{image_2}} You can change the flavor of your chocolate lava cake easily. Adding espresso gives a rich, bold taste. Just mix in one tablespoon of brewed espresso with the melted chocolate. This will enhance the chocolate flavor. If you prefer a fresher taste, try orange zest. Grate the peel from one orange and stir it into the batter. This adds a bright note that pairs perfectly with chocolate. The citrus flavor will lift the dessert to new heights. If you need a gluten-free version, you can substitute the all-purpose flour. Almond flour works great in this recipe. Use the same amount as the original flour. It adds a nutty flavor and helps keep the cake moist. Another option is to use a gluten-free flour blend. Just ensure it is a 1:1 blend for the best results. Both options make the lava cake just as delicious. The best part of a chocolate lava cake is how you can serve it. Ice cream is a classic choice. A scoop of vanilla or mint chocolate chip pairs well with the warm cake. You can also try fresh berries. Strawberries or raspberries add a tart contrast to the rich chocolate. Another fun idea is to drizzle caramel or chocolate sauce over the cake. For a special touch, sprinkle sea salt on top. It enhances the chocolate flavor and adds a crunchy texture. These creative additions will make your dessert even more indulgent. For the full recipe, check out the decadent chocolate lava cake instructions above. After enjoying your chocolate lava cake, you may have some leftovers. To store them, let the cakes cool completely. Then, cover each ramekin tightly with plastic wrap or transfer them to an airtight container. This way, they stay fresh for up to two days in the fridge. Remember to avoid stacking them to keep their shape intact. When you're ready to enjoy your leftover lava cake, reheating is key. Preheat your oven to 350°F (175°C). Place the ramekin on a baking tray and heat for about 10 minutes. This will warm the cake while keeping the center soft and gooey. Avoid using the microwave, as it can make the cake rubbery and dry. If you want to make your chocolate lava cake ahead of time, freezing is a great option. Prepare the cakes in ramekins but do not bake them. Cover each ramekin with plastic wrap and then foil, ensuring they are airtight. You can freeze them for up to three months. When ready to bake, no need to thaw. Just add a couple of extra minutes to the baking time. Enjoy the ease of a delicious dessert ready to go! For the full recipe, check out the detailed steps above. You know the cake is done when the edges look set but the center remains soft. It should jiggle a bit when you shake it. The baking time is key. If you bake it too long, you lose that oozy center. Aim for 12 to 14 minutes in a hot oven. Yes, you can prepare the batter in advance. Just cover the ramekins and place them in the fridge. Bake them fresh when you're ready to serve. This way, you’ll have a warm dessert with a gooey center. If you don’t have ramekins, you can use muffin tins or small oven-safe dishes. Just make sure they can hold the batter and withstand the heat. Adjust the baking time since smaller or larger molds may cook at different rates. You can pour the batter into a lined muffin tin. Fill each cup halfway to allow space for rising. Once baked, let them cool for a minute, then flip them out like cupcakes. Enjoy each serving just like a lava cake. You can add flavors to change things up. Try mixing in espresso for coffee notes or orange zest for a citrus twist. Some people love adding a splash of peppermint extract. These small changes can create a whole new dessert experience. This blog post explained how to make the perfect chocolate lava cake. We discussed ingredients and their quality, plus clever substitutions. The step-by-step guide made baking simple, with tips to get a molten center. Variations offered exciting flavors, while storage info helped keep leftovers fresh. By following these steps, you can create a dessert that impresses. Enjoy making this treat and share it with friends. Baking can be fun and rewarding.

Chocolate Lava Cake Decadent and Indulgent Dessert

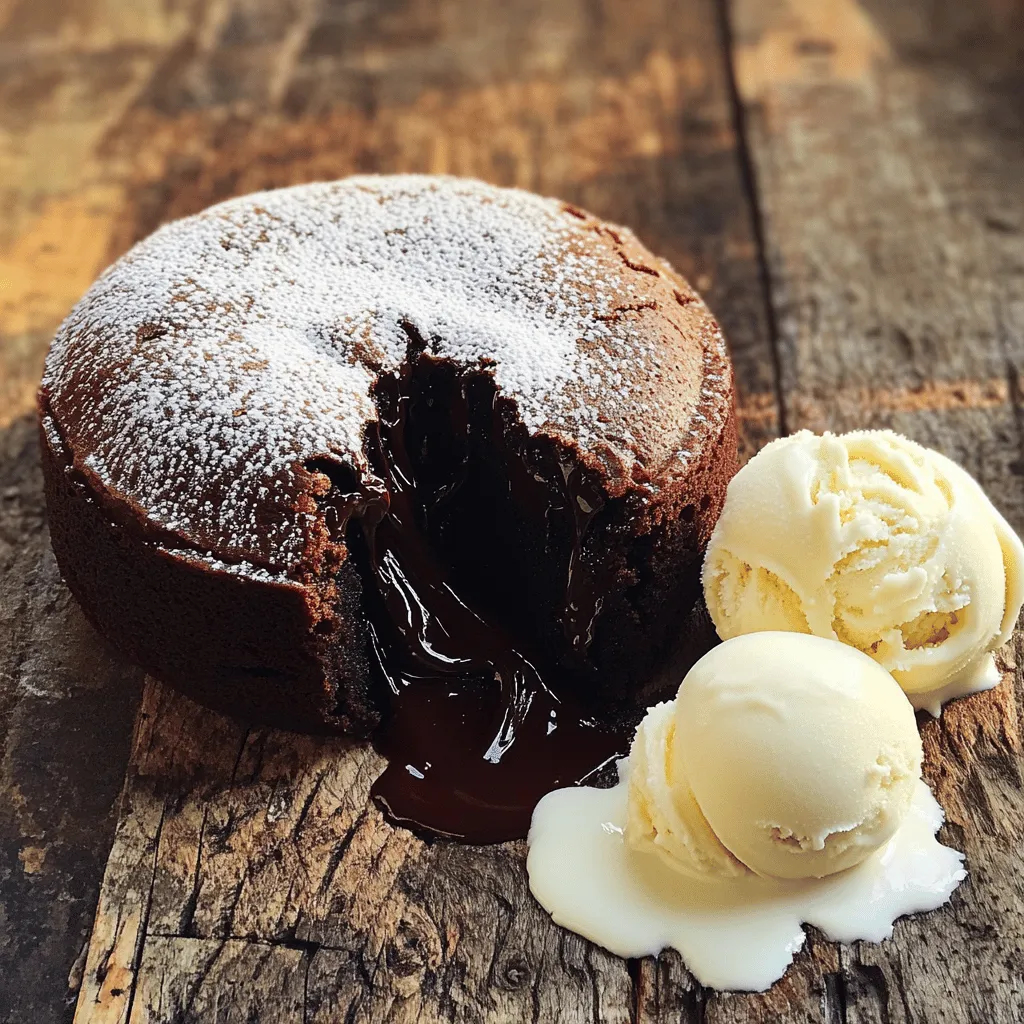
Indulge in the rich and molten goodness of Chocolate Lava Cake. This dessert delivers a warm, gooey center that melts

- 2 cups rolled oats - 1 cup mixed nuts (almonds, walnuts, cashews, or your choice), chopped - 1/2 cup almond butter or peanut butter - 1/4 cup honey or maple syrup (for a vegan option) - 1/4 cup unsweetened coconut flakes - 1/4 cup dried cranberries or other dried fruit Each serving has around 200 calories. You get about 10 grams of fat, 5 grams of protein, and 30 grams of carbs. These bars are great for a quick snack or breakfast. They give you energy without too much sugar. You can find the full recipe in the article above. Enjoy making your own nutty granola bars! 1. Preheat your oven to 350°F (175°C). 2. Line an 8x8 inch baking dish with parchment paper. Leave some paper hanging over the edges for easy removal later. 3. In a large mixing bowl, add the rolled oats, chopped nuts, coconut flakes, dried cranberries, salt, and optional cinnamon. Mix them well until they are evenly spread. 1. In a small saucepan, warm the almond butter and honey over low heat. Stir them gently until they blend well. 2. Once mixed, take it off the heat and stir in the vanilla extract. 3. Pour this warm mixture over your dry ingredients. Mix thoroughly until everything is coated and combined. 4. Transfer the mixture to your prepared baking dish. Press it firmly and evenly into the bottom with your spatula or hands. 1. Place the dish in the preheated oven. Bake for 15 to 20 minutes. 2. Watch closely to ensure the edges are golden brown but not burnt. 3. When done, take them out and let them cool completely in the pan. Use the parchment paper to lift the bars out. Cut them into squares or rectangles as you like. For the full recipe, check the details above. To make the best nutty granola bars, you need to mix well. Start by combining all dry ingredients in a big bowl. This helps the oats and nuts blend. Use a spatula or your hands to mix thoroughly. Pressing the mixture firmly is key. After you pour it into the baking dish, use your hands to press down. This will help the bars hold together when baked. If you skip this step, your bars may crumble. Want to spice things up? Add a pinch of cinnamon or a dash of nutmeg to your mix. These spices add warmth and depth to your bars. You can also include a splash of vanilla extract for extra sweetness. For fun add-ins, consider chocolate chips, seeds, or even dried fruits like apricots or raisins. These will add texture and flavor. Mix and match your favorites to keep things interesting. When it's time to serve, think about presentation. Arrange your granola bars on a wooden cutting board. This gives a nice rustic look. You can also wrap individual bars in parchment paper. Tie them with twine for a cute touch. Pair your bars with a glass of milk, a cup of tea, or yogurt. They make a great snack anytime. Enjoy them after school, on a hike, or at work. For a full recipe, check out the [Full Recipe]. {{image_2}} You can easily make a nut-free version of these bars. Instead of using nut butter and mixed nuts, try seeds like pumpkin or sunflower seeds. This swap keeps your bars crunchy and full of flavor. Seeds provide healthy fats too, making them a great alternative. Want to mix things up? Here are some fun flavor ideas: - Chocolate Chip Granola Bars: Add 1/2 cup of chocolate chips to your mixture. This makes a sweet treat for chocolate lovers. - Tropical Granola Bars: Use dried mango and coconut flakes instead of cranberries. The tropical taste brings a sunny vibe to your snacks. These bars fit many diets. For a vegan option, replace honey with maple syrup. This keeps the bars sweet without using animal products. If you need them gluten-free, use certified gluten-free oats. These changes make the bars suitable for everyone! For the full recipe, check out Nutty Granola Bars. To keep your nutty granola bars fresh, use an airtight container. This helps prevent moisture from ruining their texture. If you prefer, you can store them in the refrigerator. The cold can help extend their shelf life. However, they may become a bit firmer when chilled. Choose what works best for you. Nutty granola bars stay fresh for about one week at room temperature. If you want them to last longer, you can freeze them. Wrap each bar in plastic wrap or foil before placing them in a freezer bag. This way, they can last up to three months. When you're ready to eat them, just thaw them in the fridge overnight. If your granola bars get stale, don't worry! You can refresh them. Preheat your oven to 350°F (175°C). Place the bars on a baking sheet and warm them for about 5 to 10 minutes. This will help bring back some of their original texture. Enjoy your tasty snack again! To make nutty granola bars vegan, simply swap out honey for maple syrup. Maple syrup gives a sweet touch without using animal products. You can also use a nut butter made from sunflower seeds if you need a nut-free option. This keeps your bars tasty and vegan-friendly. Yes, you can use other nuts or seeds in your granola bars. Almonds, walnuts, or cashews work great. If you want to use seeds, try sunflower or pumpkin seeds. Keep the ratio the same: one cup of nuts or seeds for the recipe. This will keep your texture perfect. Granola bars offer many health benefits. They are full of oats, which give you energy and fiber. Nuts provide healthy fats and protein, while dried fruits add vitamins. These bars are a good snack that can help you feel full and satisfied. You can find nutty granola bars at many stores. Check your local grocery store or health food store. Online retailers like Amazon also offer a wide range of choices. Look for brands that use natural ingredients for the best taste. To make granola bars allergy-friendly, you can replace common allergens. Use seed butter instead of nut butter for nut allergies. For gluten sensitivity, choose gluten-free oats. Always check labels to avoid allergens. This way, everyone can enjoy your tasty bars. This blog post covered how to make delicious granola bars. We discussed essential and optional ingredients, step-by-step instructions, tips for perfecting texture, and creative serving ideas. I also shared variations and storage tips to keep your bars fresh. Making granola bars at home is easy and fun. You can tailor them to your taste and dietary needs. Enjoy your tasty, homemade treats that are perfect for any time of the day!

Nutty Granola Bars Easy and Tasty Recipe Guide

Are you ready to whip up a tasty treat that’s both easy and healthy? In this guide, I’ll show you

Older posts
Newer posts
← Previous Page1 … Page56 Page57 Page58 … Page68 Next →

dsad

© 2025 Southern Dishes • Built with GeneratePress

Our Policies

  • Copyright Policy
  • Cookie Policy
  • GDPR Policy
  • Privacy Policy
  • Disclaimer
  • Terms Of Use

More Information

  • Home
  • About
  • Contact
  • Appetizers
  • Dessert
  • Dinner
  • Drinks
©2025, Southern Dishes About Back To Top