Skip to content
DisclaimerTerms Of UseGDPR PolicyCookie Policy

Southern Dishes

  • Home
  • Drinks
  • Appetizers
  • Dinner
  • Dessert
  • About
  • Contact
  • Privacy Policy
DisclaimerTerms Of UseGDPR PolicyCookie Policy

Isabella

When making apple cinnamon overnight oats, you need simple and fresh ingredients. Here’s what you will need: - 1 cup rolled oats - 1 ½ cups almond milk (or any milk of choice) - 1 medium apple, diced - 1 teaspoon ground cinnamon - 2 tablespoons maple syrup (or honey) - ¼ cup Greek yogurt (optional) - 2 tablespoons chopped walnuts or pecans - A pinch of salt - Toppings: Additional apple slices, cinnamon Each ingredient plays a key role in flavor and texture. The rolled oats are the base. They soak up the milk and soften overnight. Almond milk adds a nutty flavor, but you can use any milk you like. Diced apples bring sweetness and freshness. I suggest using Fuji or Honeycrisp apples for the best taste. Ground cinnamon adds warmth. It pairs perfectly with apples. Maple syrup or honey sweetens the mix naturally. Greek yogurt is optional. It makes the oats creamier. Chopped walnuts or pecans add crunch and healthy fats. Don't forget a pinch of salt. It enhances all the flavors. For toppings, I love adding extra apple slices and a sprinkle of cinnamon. They make the dish look pretty and taste even better. You can find the full recipe at [Full Recipe]. Start by gathering your ingredients. You will need rolled oats, almond milk, a diced apple, and more. Take a moment to measure everything out. This makes mixing easier. In a mixing bowl or a mason jar, add all your ingredients. Use 1 cup of rolled oats and 1 ½ cups of almond milk. Then, add 1 medium diced apple. Sprinkle in 1 teaspoon of ground cinnamon and 2 tablespoons of maple syrup. If you like, mix in ¼ cup of Greek yogurt for creaminess. Don't forget a pinch of salt! Stir well until everything is mixed. This ensures the oats soak up the flavors. Cover your bowl or seal the jar tightly. Place it in the refrigerator overnight. If you rush, let it sit for at least 6 hours. This soaking time is key. It allows the oats to soften and blend with the flavors. In the morning, give your oats a good stir. If they are too thick, add a splash of milk. Enjoy your tasty creation! For the full recipe, check out the details above. To get creamy oats, choose the right milk. Almond milk works well, but you can also try oat milk or regular milk. Use more yogurt for a thicker texture. I suggest adding ¼ cup of Greek yogurt. It gives a rich taste and smooth feel. Mix well to coat all oats evenly. Let them soak fully overnight. This helps them absorb all the flavors. Maple syrup and honey both taste great in these oats. Maple syrup adds a warm, rich flavor. Honey gives a nice, floral sweetness. You can use either, based on your choice or what you have at home. If you want a healthier option, try agave nectar or stevia. Just remember to adjust the amount to match your taste. To make your oats more exciting, add a splash of vanilla extract. It pairs well with apple and cinnamon. Nutmeg is another great addition. Just a pinch will add a warm spice that enhances the flavor. Feel free to get creative! You can also mix in dried fruits or other spices to make this dish your own. For the full recipe, check out the link above. {{image_2}} You can easily make this recipe dairy-free. Simply swap regular milk for almond milk, coconut milk, or oat milk. Each option adds its own flavor. Almond milk adds a nutty taste, while coconut milk gives a creamy texture. You still get a rich taste without dairy. If you need a nut-free version, leave out the nuts. You can replace them with seeds, like pumpkin or sunflower seeds. They add crunch and healthy fats without nuts. You can also use a little extra fruit for texture. Change up the fruit based on the season. In fall, add pears or cranberries. In summer, try peaches or berries. Each fruit gives a unique twist. These changes keep breakfast exciting and fresh. Use your favorite fruits for a personal touch. For the full recipe, check out the Apple Cinnamon Overnight Oats section. You can store leftover apple cinnamon overnight oats in the fridge. Use a sealed container. They stay fresh for up to five days. Just give them a stir before eating. If they look thick, add a splash of milk. You can freeze overnight oats if you want to save them longer. Use freezer-safe containers or jars. They last for up to three months. To eat, let them thaw in the fridge overnight. Then, stir well and enjoy. For the best taste, eat your oats within five days. Check for any off odors or changes in texture. If you see or smell something strange, toss them out. Always label your containers with the date. This helps you track freshness. Follow these tips to ensure you get a tasty meal every time. For the complete recipe, check out the Full Recipe. You can store Apple Cinnamon Overnight Oats in the fridge for up to five days. Just keep them in a sealed container. The flavors get better as they sit. If you notice any change in texture, just stir in a little more milk before eating. Yes, you can make overnight oats without yogurt. The oats will still taste great! You can simply skip it or replace it with more milk. This will keep the oats creamy. If you want a thicker texture, try adding mashed banana or nut butter instead. Overnight oats are great for you! They are full of fiber, which helps digestion. They also keep you full longer, which can help with weight control. Plus, oats are rich in vitamins and minerals. Adding fruit boosts the nutrition even more! For the full recipe, please refer to the details above. This blog post showed you how easy it is to make Apple Cinnamon Overnight Oats. You learned about the simple ingredients, like oats, almond milk, and apples. I shared step-by-step instructions and helpful tips to make them creamy and tasty. You can store leftovers or even freeze them for later. Remember, you can adjust the recipe to fit your taste, using different fruits or sweeteners. This healthy breakfast is fun to make and enjoy. So start creating your own delicious version today!

Apple Cinnamon Overnight Oats Simple and Healthy Meal

Start your day right with Apple Cinnamon Overnight Oats! This simple and healthy meal is quick to make and packed

To make a No-Bake Nutella Cheesecake, you need the following: - 1 ¾ cups graham cracker crumbs - ½ cup unsweetened cocoa powder - ½ cup unsalted butter, melted - 1 cup Nutella - 16 oz cream cheese, softened - ½ cup powdered sugar - 1 teaspoon vanilla extract - 1 cup heavy whipping cream - Chocolate shavings or hazelnuts for garnish (optional) Each ingredient plays a big role in the taste and texture. The graham cracker crumbs form a sweet and crunchy crust. The cocoa powder adds a rich chocolate flavor. Nutella is the star of this dessert, bringing creamy chocolate-hazelnut goodness. Cream cheese gives the cheesecake its smooth and rich texture. The heavy whipping cream makes it light and fluffy. Lastly, powdered sugar sweetens it just right. When you shop for ingredients, look for fresh products. Choose high-quality cream cheese for a smooth finish. Check the Nutella for the best flavor; it should be creamy and rich. Fresh heavy whipping cream whips up better and adds more volume. For the crust, get graham crackers without artificial flavors. Quality ingredients make a big difference in your cheesecake's taste! Start by mixing 1 ¾ cups of graham cracker crumbs and ½ cup of cocoa powder in a medium bowl. This mix gives the crust a rich chocolate flavor. Next, add ½ cup of melted unsalted butter. Stir until the mixture looks like wet sand. Pack this mix tightly into a 9-inch springform pan. Use your fingers or a measuring cup to press it down firmly. This step is key to a sturdy crust. Once pressed, place the pan in the fridge to set while you make the filling. In a large bowl, beat 16 oz of softened cream cheese until it is smooth. Then, add 1 cup of Nutella, ½ cup of powdered sugar, and 1 teaspoon of vanilla extract. Mix these together until the filling is creamy and well combined. In another bowl, whip 1 cup of heavy whipping cream until you see soft peaks. Now, gently fold the whipped cream into the Nutella mix. Be careful not to deflate the cream, as the airy texture is important. Pour the Nutella cheesecake filling over your prepared crust. Use a spatula to smooth the top evenly. Cover the springform pan with plastic wrap and place it in the fridge. Let it chill for at least 4 hours, or overnight for the best texture. Once it is set, carefully remove the sides of the springform pan. If you want, you can garnish with chocolate shavings or chopped hazelnuts. Now you are ready to serve this delicious No-Bake Nutella Cheesecake! For a complete recipe, check out the Full Recipe section. To get a smooth and creamy cheesecake, start with softened cream cheese. Cold cream cheese will create lumps. Beat it well until it's fluffy. When you add whipped cream, fold gently. This keeps the air in the cream. The mixture should be light and airy. One big mistake is not pressing the crust firmly. If it's loose, the crust will fall apart. Another mistake is over-mixing the filling. This can make the cheesecake dense. Lastly, don’t skip the chilling time. It needs time to set. Four hours is the minimum, but overnight is best. For a richer taste, try adding a pinch of sea salt. It balances the sweetness. You can also mix in some hazelnuts for crunch. They add a nice texture. Feel free to drizzle extra Nutella on top before serving. Chocolate shavings also make it look fancy. For the full recipe, check out the details above. {{image_2}} You can change up the flavor of the cheesecake easily. Try using peanut butter instead of Nutella for a nutty twist. You can also mix in some caramel sauce for a sweet touch. For a fruity option, consider adding pureed strawberries or mango. Each of these flavors brings a unique taste to your cheesecake. You can also add spices like cinnamon or nutmeg for warmth. If you want a gluten-free cheesecake, use gluten-free graham crackers. Many brands offer these today. For a dairy-free option, substitute cream cheese with a non-dairy cream cheese. Use coconut cream in place of heavy whipping cream. This will still give you a rich texture without dairy. Always check the labels to ensure all your ingredients fit your dietary needs. Serve your cheesecake with a dollop of whipped cream on top. Fresh berries make a colorful and tasty addition too. You can also drizzle extra Nutella or chocolate sauce over the slices. Pair the cheesecake with coffee or tea for a delightful dessert experience. For a crunch, sprinkle some crushed hazelnuts or chocolate shavings on top. These small touches make a big difference. For the full recipe, check out [Full Recipe]. Store your no-bake Nutella cheesecake in the fridge. Keep it in the springform pan. Cover it with plastic wrap to prevent drying. You can also use a cake box. This keeps it fresh and ready to serve. Your cheesecake lasts about 5 days in the fridge. It tastes best within the first couple of days. Check for any signs of spoilage, like off smells or a change in texture. If it looks good and smells fine, it’s still safe to eat. For the best taste, serve it chilled. You can freeze leftovers if you need to. First, let it set completely in the fridge. Then, remove it from the springform pan. Wrap each slice tightly in plastic wrap. Place the slices in a freezer-safe bag. They can last up to 2 months in the freezer. To serve, let it thaw in the fridge overnight. Enjoy your no-bake Nutella cheesecake later with the same creamy taste! You can tell the cheesecake is set when it is firm to the touch. The edges should feel solid, and the center should have a slight jiggle. The best way to check is to give the pan a gentle shake. If it wobbles but does not appear liquid, it’s ready. It’s crucial to refrigerate the cheesecake for at least four hours. Overnight is even better for a perfect texture. Yes, you can make this cheesecake ahead of time. It actually tastes better after sitting in the fridge. Preparing it the day before allows the flavors to blend well. Just cover it with plastic wrap to avoid any fridge odors. When you are ready to serve, simply remove it from the fridge and garnish as you like. If you want to swap Nutella, try using chocolate hazelnut spread or a plain chocolate spread. You can also blend peanut butter with melted chocolate for a different flavor. For a lighter touch, consider using a fruit spread, like raspberry or strawberry, for a fruity twist. Adjust the sugar in the recipe as needed, depending on the sweetness of your substitute. This blog post covered key ingredients for your cheesecake, from the crust to the filling. I shared tips on selecting quality ingredients and avoiding common mistakes. We also explored variations to suit different diets. Remember proper storage to keep your cheesecake fresh. Always chill your dessert thoroughly for the best texture. Feel free to experiment with flavors or try substitutes. Enjoy making your cheesecake, and have fun with it!

No-Bake Nutella Cheesecake Rich and Creamy Delight

If you love rich and creamy desserts, this No-Bake Nutella Cheesecake is for you! I’ll show you how to create

For this tasty dish, you need fresh and vibrant ingredients. Here’s what you will use: - 4 cloves garlic, minced - 1/4 cup fresh lemon juice - 1 teaspoon lemon zest - 1/4 cup olive oil - 2 teaspoons dried oregano - 2 teaspoons dried thyme - 1 teaspoon paprika - Salt and pepper to taste These ingredients create a bright and bold flavor. The lemon juice adds tanginess, while the garlic gives depth. The herbs bring a fresh note that pairs well with chicken. You will use 4 boneless, skinless chicken breasts. They are perfect for grilling. Chicken breasts are lean and soak up the marinade well. Make sure they are even in size. This helps them cook evenly. You can pound them slightly to ensure they grill perfectly. To add a pop of color and flavor, use fresh parsley. Chop it finely and sprinkle it over the grilled chicken before serving. This not only enhances the look but also adds a fresh taste. You can also serve with lemon wedges for an extra burst of flavor. For the full recipe, check the complete instructions. To make the marinade, grab a medium bowl. In it, whisk together these ingredients: - 4 cloves garlic, minced - 1/4 cup fresh lemon juice - 1 teaspoon lemon zest - 1/4 cup olive oil - 2 teaspoons dried oregano - 2 teaspoons dried thyme - 1 teaspoon paprika - Salt and pepper to taste Mix until all ingredients blend well. The garlic gives a nice kick, while lemon adds brightness. This marinade makes the chicken juicy and flavorful. Now, take the chicken breasts and place them in a large resealable plastic bag or a shallow dish. Pour the marinade over the chicken. Make sure every piece is well coated. Seal the bag tightly or cover the dish. Refrigerate the chicken for at least 1 hour. For the best taste, marinate it for up to 4 hours. This time lets the flavors soak deep into the chicken. When you're ready to grill, preheat your grill to medium-high heat. Remove the chicken from the marinade and let any extra drip off. Place the chicken on the grill. Grill each side for about 6-7 minutes. The chicken is done when the internal temperature reaches 165°F (75°C). Look for nice grill marks and a golden brown color. After grilling, let the chicken rest for 5 minutes. This helps keep it juicy. Finally, garnish with fresh chopped parsley before serving. For the full recipe, check out the details above. To get great grill marks, start with a clean grill. A dirty grill can stick and ruin your chicken. Preheat your grill to medium-high heat. This helps the chicken sear quickly. Place the chicken on the grill and don’t move it for at least six minutes. This will allow the marks to form. After six minutes, flip the chicken and cook for another six minutes. Check for those lovely, dark grill lines. Want to boost the flavor? Try adding fresh herbs like rosemary or basil to the marinade. These herbs add a nice touch. You can also use lime juice instead of lemon for a twist. If you like heat, add some crushed red pepper flakes. Marinade your chicken for up to four hours for a deeper taste. The longer it marinates, the more flavor it gets. After grilling, let the chicken rest for five minutes. This helps the juices stay inside. Slice it after resting for the best texture. Serve the chicken with a sprinkle of fresh parsley on top. You can pair it with a side salad or grilled veggies. This makes a colorful and tasty plate. For more ideas, check out the Full Recipe. {{image_2}} You can switch up the marinade to change the flavor. Try adding honey for sweetness. A splash of soy sauce gives a nice umami taste. For a spicy kick, add red pepper flakes or hot sauce. Fresh herbs like basil or cilantro can replace oregano and thyme. Use lime juice instead of lemon for a different zest. You don’t need a grill to enjoy this dish. An oven works well too. Preheat your oven to 400°F (200°C). Place the marinated chicken on a baking sheet. Bake for 20-25 minutes. Check that the chicken reaches 165°F (75°C). For an air fryer, set it to 375°F (190°C). Cook for 12-15 minutes, flipping halfway through. Each method keeps the chicken juicy and tasty. Pair your grilled chicken with fresh salad or roasted veggies. A side of rice or quinoa adds bulk and flavor. You can also serve it with garlic bread for a fun twist. For a light meal, add a fruit salsa, like mango or pineapple. This adds a sweet touch that complements the herbs. Enjoy your meal with family and friends! For the full recipe, check out the details above. You can keep your lemon garlic herb grilled chicken in the fridge. Place it in an airtight container. It stays fresh for about 3 to 4 days. Make sure it cools down before sealing it. This helps prevent moisture and keeps it tasty. To freeze the chicken, wrap it tightly in plastic wrap. After that, place it in a freezer bag or container. It is best to use it within 2 to 3 months. When ready to eat, thaw it overnight in the fridge. This will help maintain the flavor and texture. When reheating, use a skillet over medium heat. Add a little oil to prevent sticking. Heat for about 5 to 7 minutes, flipping often. You can also use the microwave. Heat it for 1 to 2 minutes, checking to avoid overcooking. Enjoy your delicious chicken with new sides or salads! For the full recipe, check out the link provided. To keep your chicken juicy, marinate it. Use a mix of lemon juice, garlic, and herbs. This adds flavor and moisture. Aim to marinate for at least one hour. For best results, marinate up to four hours. Grill the chicken over medium heat. This helps it cook evenly. Avoid overcooking; check for an internal temperature of 165°F. Let the chicken rest for five minutes after grilling. This keeps juices inside when you slice it. Yes, you can use chicken thighs! They are richer and more flavorful than breasts. Thighs stay juicy even if cooked longer. Adjust cooking time slightly, as thighs may take longer to grill. Check the internal temperature to ensure they are safe to eat. The same marinade works well for thighs too. They absorb flavors nicely, just like breasts. Pair your grilled chicken with simple sides. Here are some tasty ideas: - Grilled vegetables: Zucchini, bell peppers, and asparagus work great. - Fresh salad: A light green salad with a vinaigrette is refreshing. - Rice: Lemon or herb rice complements the chicken's flavors. - Potato salad: Creamy or mustard-based potato salads add a nice touch. - Pasta: A light pasta dish with olive oil and parsley brings it all together. These sides enhance the meal and are easy to prepare. This blog post covered key points for grilling chicken. You learned about fresh marinade ingredients, how to prepare chicken, and the best garnishes. Step-by-step instructions guided you through making and using the marinade and grilling techniques. Tips helped you achieve perfect grill marks and flavor. We discussed variations and storage for leftovers. In the end, easily customize your grilled chicken for every meal. Enjoy the process and impress your loved ones!

Lemon Garlic Herb Grilled Chicken Simple and Tasty

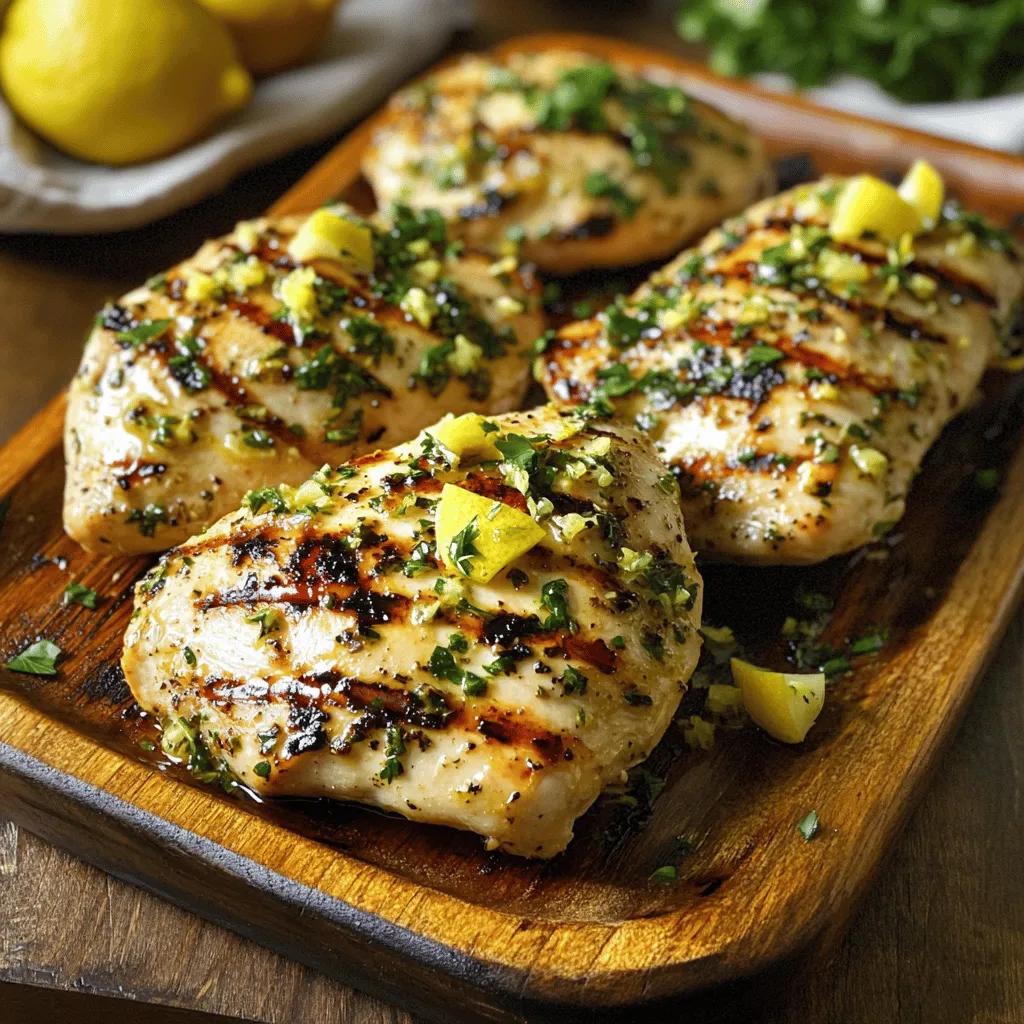
When you’re craving a juicy, flavorful meal, my Lemon Garlic Herb Grilled Chicken hits the spot. This simple recipe brings

To make these delicious Chocolate Chip Cookie Dough Bites, you only need a few simple items. Here’s the list for you: - 1 cup all-purpose flour (heat-treated for safety) - 1/2 cup brown sugar, packed - 1/4 cup granulated sugar - 1/2 cup unsalted butter, softened - 1 teaspoon vanilla extract - 2 tablespoons milk (or dairy-free alternative) - 1/2 cup semi-sweet chocolate chips - 1/4 teaspoon salt - 1/4 cup mini chocolate chips (for coating) Using these ingredients ensures a tasty and safe treat. Heat-treating the flour is key. This step kills any bacteria, making the dough safe to eat. I love how the brown sugar adds depth, while the vanilla gives a warm, sweet aroma. You can also mix in a splash of your favorite milk or use a dairy-free option. The semi-sweet chocolate chips provide rich flavor, while the mini chocolate chips create a lovely coating. Want the full recipe? Check the section above for all the steps! - Heat-treat the flour: Preheat your oven to 350°F. Spread the flour on a baking sheet. Bake for 5-7 minutes. This kills any germs. Let it cool before using. - Mix the butter and sugars: In a large bowl, cream the softened butter with brown and granulated sugars. Mix until fluffy. - Add vanilla and milk: Stir in the vanilla extract and milk. This makes the dough rich and tasty. - Incorporate flour and salt: Gradually add the cooled flour and salt. Mix until everything is combined. The dough should be thick. - Fold in chocolate chips: Gently add the semi-sweet chocolate chips. Make sure they are evenly mixed into the dough. - Shape the bites: Use a cookie scoop or your hands. Roll the dough into small balls, about 1 inch wide. - Coat with mini chocolate chips: Roll each ball in mini chocolate chips. This adds a fun crunch and extra sweetness. - Refrigerate for firmness: Place the bites on a baking sheet lined with parchment paper. Chill in the fridge for 30 minutes. This helps them hold their shape. Follow these steps to make your chocolate chip cookie dough bites. Enjoy the fun of making a tasty treat! For the complete process, check the Full Recipe. - Ensure flour is heat-treated. This step kills germs. Spread flour on a baking sheet. Bake at 350°F for 5-7 minutes. Let it cool before mixing. - Soften butter properly. Remove butter from the fridge 30 minutes before use. This makes it easy to cream with sugars. - Use a cookie scoop for uniformity. A scoop helps you make the same-sized bites. This way, they bake evenly. - Tips for coating bites evenly. Roll each bite in mini chocolate chips. Use your hands to press them into the dough. This gives a nice texture. - Add different extracts or flavorings. Try almond or peppermint extract for a twist. Just a little makes a big change. - Using various types of chocolate. Mix semi-sweet with dark or milk chocolate chips. This creates a richer taste. For more details, check the Full Recipe for Chocolate Chip Cookie Dough Bites. {{image_2}} You can easily make these cookie dough bites vegan. Just swap the butter for plant-based alternatives like coconut oil or vegan butter. For the chocolate chips, choose vegan options without dairy. This way, everyone can enjoy these delightful treats! If you need a gluten-free version, use gluten-free flour like almond flour or oat flour. Always check the label to ensure no gluten contamination. This keeps your bites safe while still delicious. Feel free to get creative! You can add nuts or seeds for extra crunch. Try mixing in shredded coconut or even dried fruit for a fun twist. These little changes can take your cookie dough bites to a whole new level! To keep your cookie dough bites fresh, store them in the fridge. Place them in an airtight container. This helps prevent them from drying out or absorbing other smells. Your bites will stay tasty for about 5 to 7 days in the fridge. If you want to save some for later, freezing is a great choice. First, arrange the bites in a single layer on a baking sheet. Freeze them for about 1 hour, until they're firm. Then, transfer the frozen bites to a zip-top bag or airtight container. They can last up to 3 months in the freezer. When you’re ready to enjoy them, take out the number you want. Let them thaw in the fridge or at room temperature for a few minutes. These bites taste great cold or slightly chilled! For the full recipe, refer back to the earlier section. Yes, you can eat raw cookie dough, but be careful. Raw flour and eggs can contain harmful germs. To stay safe, always heat-treat your flour before use. This means baking the flour for about 5-7 minutes. This step kills any bad bacteria, making it safe to eat. If you want to skip the eggs, go for recipes that avoid them. You can make these bites healthier by swapping some ingredients. Here are a few ideas: - Use whole wheat flour instead of all-purpose flour. - Replace butter with coconut oil for a healthier fat option. - Try maple syrup or honey instead of granulated sugar for natural sweetness. - Choose dark chocolate chips for added antioxidants and less sugar. These swaps keep the taste but boost the health benefits. You can find pre-made chocolate chip cookie dough bites in many local stores. Look in the frozen or snack aisle. Popular brands include: - Nestlé Toll House - Ben & Jerry's - Edoughble Check your local grocery store or online retailers for these options. You now have a clear guide for making chocolate chip cookie dough bites. We've covered all the key ingredients, simple steps, and helpful tips to enhance your bites. You can also adapt the recipe for vegan or gluten-free needs. When stored correctly, these treats can last and even be frozen for later enjoyment. Experimenting with flavors opens up even more delicious possibilities. Dive into making these bites, and enjoy the fun of creating your own sweet treats!

Chocolate Chip Cookie Dough Bites Tasty and Simple Treat

If you love the taste of chocolate chip cookie dough but want a safe and easy treat, you’ve come to

To make Berry Smoothie Popsicles, you need some fresh and tasty ingredients. Here’s what you will need: - 1 cup strawberries, hulled and halved - 1 cup blueberries - 1 cup raspberries - 1 banana, sliced - 1 cup Greek yogurt (vanilla or plain) - 1/4 cup honey (adjust based on sweetness preference) - 1 tablespoon lemon juice These ingredients work together to create a refreshing and creamy treat. Each berry adds its own burst of flavor. The banana gives a smooth texture, while Greek yogurt adds creaminess and protein. Honey sweetens the mix just right. Lemon juice brightens up the taste, making it a perfect summer snack. Feel free to adjust the honey to match your taste. If you like it sweeter, add more. If you want it less sweet, reduce the amount. This recipe is flexible and allows you to make it your own. For the full recipe, check out the Berry Blast Smoothie Popsicles. You will enjoy making these tasty treats! To make berry smoothie popsicles, follow these simple steps. 1. Blend the Ingredients Start by placing the strawberries, blueberries, raspberries, and banana into your blender. Then, add the Greek yogurt, honey, and lemon juice. Blend everything until it is smooth and creamy. If needed, scrape down the sides to mix well. Taste the mixture and add more honey if you want it sweeter. 2. Pour into Molds Next, pour the smoothie mixture into popsicle molds. Be sure to leave a little space at the top of each mold. This space allows the mixture to expand as it freezes. 3. Freezing Guidelines Insert the popsicle sticks into the molds. Place the molds in the freezer and let them freeze for at least 4 to 6 hours. Wait until they are completely solid. When you are ready to eat, run warm water over the outside of the molds for a few seconds. This will help the popsicles come out easily. For the full recipe, check out the Berry Blast Smoothie Popsicles. Enjoy making these tasty treats! To make the best berry smoothie popsicles, start with the right sweetness. I often use honey, but you can also try maple syrup. Taste the mix before you freeze it. If it’s not sweet enough, add a bit more honey. You want a balance of sweet and tangy. Choosing the best berries is key. Fresh berries give a bright taste. Strawberries, blueberries, and raspberries are my favorites. They blend well and look great in the popsicles. You can also mix in some blackberries for a new twist. Just make sure they are ripe and sweet! Removing popsicles from molds can be tricky. I have a tip for that! Run warm water over the outside of the molds. The heat loosens the popsicles without breaking them. Hold the mold upside down for a few seconds. This usually does the trick. For more details, check the full recipe. Enjoy your yummy treats! {{image_2}} You can have fun with your berry smoothie popsicles. Try using different fruits to change the taste. Here are some great choices: - Peaches: They add a sweet and juicy twist. - Mangoes: These bring a tropical flavor that kids love. You can also add leafy greens to boost nutrition. Spinach works well and has a mild taste. Kale is another option, though it has a stronger flavor. Just a handful can make your popsicles healthier. If you want to change the sweetness, consider using different sweeteners. Agave syrup is a great choice because it blends well. Maple syrup can add a unique flavor, too. Both options are natural and tasty. Using the Full Recipe, you can mix and match these ideas. Be creative and see what you enjoy most! To keep your berry smoothie popsicles fresh, freeze them well. Use sturdy molds for best results. When filling molds, leave a little space at the top. This space lets the popsicles expand as they freeze. You can store the popsicles in the freezer for up to three months. Make sure they are fully frozen before you take them out. If you notice frost or ice crystals on them, it means they may not be as tasty. Label your popsicle bags or containers clearly. Write the date and flavor on each. This helps you keep track of what you have. Organize them in your freezer so you can find your favorite flavors easily. Enjoy making and storing these delicious treats! Can I use frozen berries instead of fresh? Yes, you can use frozen berries. They blend well and keep the popsicles cool. Frozen berries often have the same taste and nutrients as fresh ones. Just be sure to let them thaw a bit before blending for a smoother mix. How many calories are in one berry smoothie popsicle? Each berry smoothie popsicle has about 70-100 calories. The exact number can change based on the ingredients you use. If you add more honey or yogurt, it may increase the calorie count. Can I customize the recipe for dietary restrictions? Yes, you can easily customize the recipe. For a dairy-free option, use coconut yogurt or almond yogurt. If you need a lower sugar option, try using a sugar substitute or skip the honey. You can also mix in your favorite fruits or add greens for extra nutrients. Check the Full Recipe for more ideas! This post shared a simple recipe for berry smoothie popsicles. We covered the ingredients, preparation steps, and helpful tips to make them perfect. I also shared fun variations to try and storage advice for keeping popsicles fresh. Berry smoothie popsicles are tasty, healthy, and easy to make. By customizing them, you get a snack that suits your style. Enjoy experimenting with flavors and staying cool!

Berry Smoothie Popsicles Refreshing Summer Treat

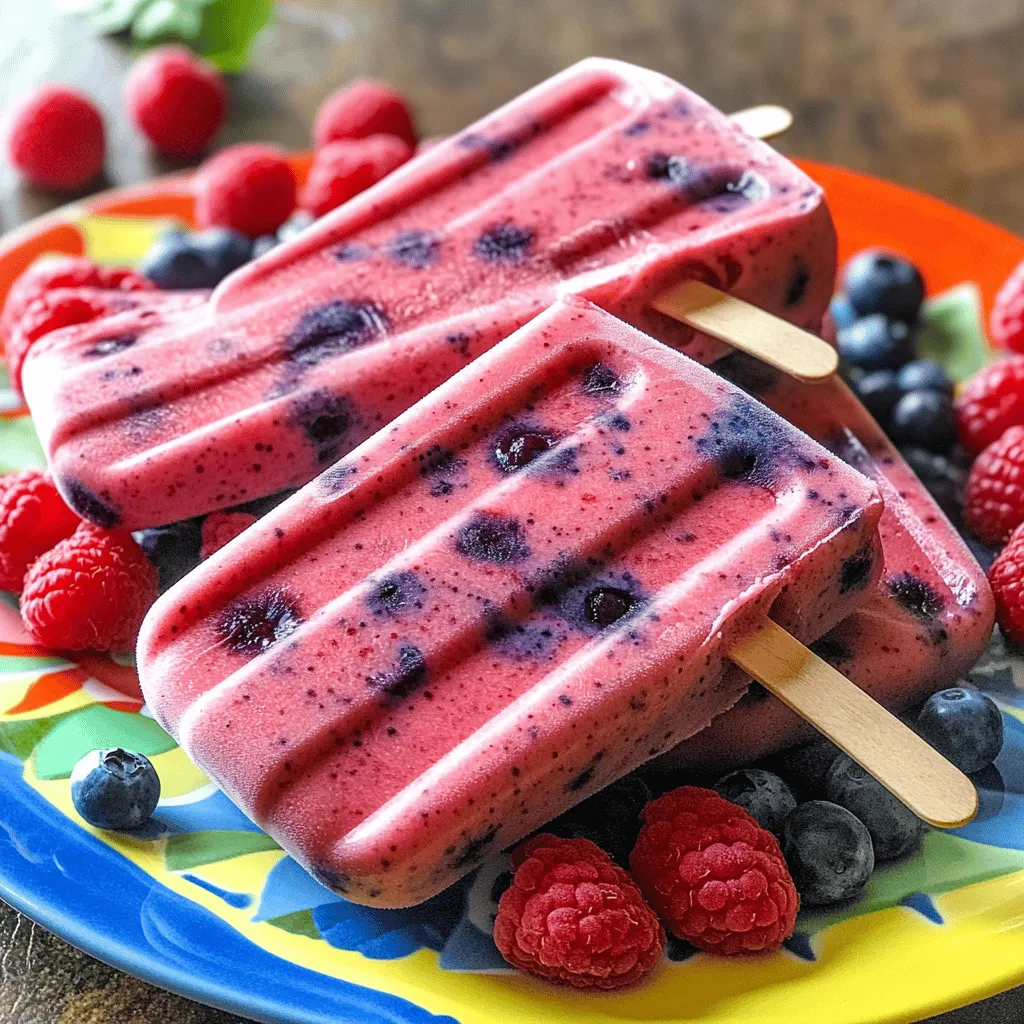
Looking for a cool way to beat the summer heat? Try these Berry Smoothie Popsicles! Made with fresh fruit and

To make herbed lemon grilled chicken, you need simple yet fresh ingredients. Here’s a list of what you will need: - 4 boneless, skinless chicken breasts - 1/4 cup olive oil - 3 tablespoons fresh lemon juice - Zest of 1 lemon - 3 cloves garlic, minced - 2 teaspoons dried oregano - 2 teaspoons dried thyme - 1 teaspoon rosemary, finely chopped - 1 teaspoon salt - 1/2 teaspoon black pepper - Fresh parsley, chopped (for garnish) These ingredients work together to create a bright and tasty flavor. The lemon juice adds zest, while the herbs bring depth. Using the right herbs makes a big difference. Here are my favorites and why I love them: - Oregano: This herb adds a warm, aromatic taste. It also has antioxidants. - Thyme: Thyme has a subtle, earthy flavor. It may help with digestion. - Rosemary: This herb offers a pine-like taste. It can boost memory and concentration. These herbs not only taste great but also offer health benefits. They make the chicken flavorful and fresh. If you wish to take your dish up a notch, consider these optional ingredients: - Chili flakes: Add a little heat for spice lovers. - Honey: A touch of sweetness can balance the acidity of the lemon. - Lemon slices: Throw them on the grill for extra citrus flavor. These ingredients help customize your dish. Feel free to mix and match to suit your taste. For the full recipe, check out the details above. Start by making the marinade. In a large bowl, combine olive oil, lemon juice, lemon zest, and minced garlic. Next, add the dried oregano, thyme, rosemary, salt, and black pepper. Whisk this mix until it blends well. Now, place the chicken breasts in the bowl, ensuring they are fully coated in the marinade. Cover the bowl and put it in the fridge. Let the chicken marinate for at least 30 minutes. If you have time, marinate for up to 4 hours. This step helps the chicken soak up all the tasty flavors. Preheat your grill to medium-high heat, around 375°F to 400°F. Take the chicken out of the marinade. Let the excess marinade drip off. Place the chicken on the hot grill. Cook each side for 6-8 minutes. You want the chicken to reach an internal temperature of 165°F. When done, the juices should run clear. This means your chicken is perfectly grilled and safe to eat. Once the chicken is off the grill, let it rest for 5 minutes. This helps keep it juicy. After resting, slice the chicken and serve it on a platter. Garnish with fresh chopped parsley for a pop of color. You can also add lemon wedges and serve with grilled vegetables or a light salad. Enjoy your Herbed Lemon Grilled Chicken! For the complete recipe, check the Full Recipe section. To get those nice grill marks, start with a hot grill. Preheat it to medium-high heat. Place the chicken on the grill and let it sit without moving it for 6 to 8 minutes. When you flip it, you should see those beautiful lines. Keep the lid closed to keep the heat in. This way, your chicken cooks evenly and stays juicy. To check if your chicken is done, use a meat thermometer. The internal temperature should reach 165°F. If you don’t have a thermometer, cut into the thickest part of the chicken. The juices should run clear, not pink. This ensures your chicken is safe to eat and perfectly cooked. Feel free to mix it up with your herbs. Instead of oregano, try basil or cilantro for a fresh twist. You can also switch lemon juice with lime juice for a different zing. Want some heat? Add a pinch of red pepper flakes to the marinade. These simple swaps can create new and exciting flavors in your Herbed Lemon Grilled Chicken. For the full recipe, check out the detailed instructions above. {{image_2}} You can change the flavor of your chicken with a citrus herb marinade. Simply replace the lemon juice with orange or lime juice. Add some zest from these fruits for extra zing. This mix brightens up the taste and adds a sweet touch. Try using fresh herbs like basil or cilantro for a fresh twist. The chicken will taste fresh and lively. If you like heat, add some spice to your grilled chicken. Mix red pepper flakes into the marinade for a kick. You can also use a spicy sauce like Sriracha or hot sauce. Just a teaspoon can change the whole dish. This spicy version pairs well with a cooling side, like yogurt sauce. It adds depth and excitement to each bite. For a fun twist, make chicken skewers. Cut the chicken breasts into chunks and marinate them as usual. Thread the pieces onto skewers with veggies like bell peppers and onions. Grill them until the chicken is cooked through. This makes a great dish for parties. You can even serve them with a tasty dipping sauce. Enjoy the burst of flavors in every bite. For the full recipe and more ideas, check out the Herbed Lemon Grilled Chicken. After enjoying your herbed lemon grilled chicken, store leftovers right. Let the chicken cool down first. Then, place it in an airtight container. This keeps it fresh for up to three days in the fridge. Make sure to label the container with the date. This way, you won't forget about it! When it's time to eat the leftovers, reheating is key. Use an oven or a skillet for the best taste. Preheat your oven to 350°F. Place the chicken on a baking sheet and cover it with foil. Heat for about 15 minutes. If using a skillet, add a splash of water and cover it. This keeps the chicken juicy. Always check the internal temperature. It should reach 165°F for safety. Want to save some for later? Freezing is a great option! Wrap the chicken tightly in plastic wrap. Then, place it in a freezer bag. Remove as much air as you can. It can last for up to three months in the freezer. When you're ready to eat, thaw it overnight in the fridge. Reheat as mentioned above for the best flavor. For the full recipe, check back to ensure you don't miss any steps! You should marinate the chicken for at least 30 minutes. This lets the flavors soak in. For a better taste, you can marinate it for up to 4 hours. Longer marinating time makes the chicken juicy and tasty. Just don’t go over 24 hours, or the chicken may get too soft. Yes, you can use bone-in chicken for this recipe. Bone-in chicken adds more flavor. Just remember that it will take longer to cook. Check the internal temperature. It should still reach 165°F to be safe to eat. Many sides go well with Herbed Lemon Grilled Chicken. Here are a few great options: - Grilled vegetables like zucchini and bell peppers - A light salad with mixed greens and vinaigrette - Roasted potatoes or sweet potatoes - Rice pilaf or lemon-flavored couscous These sides will enhance your meal and offer a nice balance to the dish. For the full recipe, check out the previous sections. We explored the steps to make herbed lemon grilled chicken. From choosing the best ingredients to marinating techniques, I shared key tips for grilling. Variations like spicy or citrus herb add fun twists. Proper storage keeps leftovers tasty for later meals. In the end, you can enjoy a flavorful dish that's easy to make. Whether you’re grilling for family or friends, these tips will help you shine in the kitchen. A great meal awaits you!

Herbed Lemon Grilled Chicken Tasty Flavorful Delight

Are you ready to fire up the grill? Herbed Lemon Grilled Chicken is a tasty and simple dish that everyone

- 1 medium head of cauliflower (or 4 cups pre-riced cauliflower) - 2 tablespoons sesame oil - 1 small onion, finely chopped - 2 cloves garlic, minced - 1 cup mixed vegetables (carrots, peas, and corn) - 2 eggs, lightly beaten - 3 green onions, sliced - 3 tablespoons soy sauce (or tamari for gluten-free) - 1 teaspoon fresh ginger, grated - Salt and pepper to taste - Optional: 1 tablespoon sriracha Cauliflower fried rice needs fresh ingredients. First, you need cauliflower. It can be a whole head or pre-riced. I often use pre-riced for speed. Next, sesame oil gives a great flavor. You can’t skip the onion and garlic. Their smell fills the kitchen and makes you hungry. You should include mixed vegetables. Frozen ones work well, too. Eggs add protein and richness. Green onions add a nice crunch and color. Soy sauce gives the dish salt and depth. Fresh ginger adds a little zing. Don’t forget salt and pepper for taste. If you like heat, add sriracha. These ingredients come together for a tasty dish. You can find the full recipe in the earlier section. Each part plays a role in making this meal flavorful and healthy. Start by ricing the cauliflower. If you have a whole head, remove the leaves and stem. Chop the cauliflower into small florets. Use a food processor to pulse them until they look like rice. If you prefer, you can also grate the florets by hand. Once done, set the riced cauliflower aside for later. Next, heat 1 tablespoon of sesame oil in a large skillet or wok over medium heat. Add the finely chopped onion. Sauté until the onion turns translucent, which takes about 3 to 4 minutes. This step builds a great base flavor. After that, add the minced garlic and fresh ginger. Cook for another 1 to 2 minutes until both smell strong and tasty. Now it’s time to bring everything together. Stir in 1 cup of mixed vegetables, like carrots, peas, and corn. Cook this mix for around 3 to 4 minutes. Make sure the veggies are hot and tender. Then, push the vegetable mixture to one side of the skillet. Add the remaining sesame oil to the empty side. Pour in 2 lightly beaten eggs and scramble them until cooked. Mix the eggs into the veggies. Finally, stir in the riced cauliflower along with 3 tablespoons of soy sauce. If you want a spicy kick, add 1 tablespoon of sriracha now. Cook everything together for 5 to 7 minutes. This is when the cauliflower gets tender and a bit crispy. Season with salt and pepper to taste. When you finish cooking, mix in 3 sliced green onions for extra flavor. You can find the full recipe for Cauliflower Fried Rice [here](insert link). To make great cauliflower fried rice, you need to avoid overcooking the cauliflower. Overcooked cauliflower turns mushy. You want it tender yet slightly crunchy. Cook the riced cauliflower for just 5-7 minutes, stirring often. This gives it a nice texture. For a crispy finish, use high heat when cooking. Start with a hot skillet and add a little oil. This helps the cauliflower get golden brown. Spread the rice out in the pan. Let it sit for a bit before stirring. This way, you get those tasty crispy bits. If you need a soy sauce alternative, try coconut aminos. It gives a sweet, salty flavor without soy. You can also use tamari for a gluten-free option. Feel free to swap in your favorite veggies. Bell peppers, broccoli, or snap peas are great. You can even add spinach or kale for extra nutrients. Mix and match to keep things fun and fresh. To add more flavor, consider spices like cumin or paprika. A splash of sesame oil enhances the taste too. If you love heat, add sriracha for a spicy kick. For a beautiful presentation, garnish with sliced green onions. A sprinkle of sesame seeds adds nice crunch. You can serve it in bowls or on plates. Make it look as good as it tastes! For the full recipe, check out the [Full Recipe]. {{image_2}} You can boost your cauliflower fried rice with protein. Chicken, shrimp, and tofu work great. For chicken, use cooked, diced chicken breast. For shrimp, add fresh or frozen shrimp. Cook them until pink. If you prefer tofu, use firm tofu. Cube it and sauté until golden. To add protein, cook your choice of meat or tofu first. Set it aside. Then, combine it back into the skillet with the riced cauliflower. This step ensures that every bite is tasty and filling. Using fresh, seasonal vegetables makes this dish even better. In spring, try peas and asparagus. In summer, add zucchini and bell peppers. In fall, use carrots and Brussels sprouts. In winter, think about kale or root veggies. To adapt your dish, swap out the mixed vegetables for what’s in season. This keeps your meal fresh and exciting. Plus, seasonal produce often tastes better and is more affordable. If you love heat, spice up your fried rice. Start with sriracha or chili paste. A teaspoon can add a nice kick. You can also mix in chopped spicy peppers like jalapeños or serranos. For a spicy blend, sprinkle in some chili flakes or a spice mix. Just be careful to taste as you go. This way, you can control the heat level. Adjusting spice makes this dish fun and personal. For the full recipe, check out the [Full Recipe]. Enjoy making your own versions of cauliflower fried rice! Store your cauliflower fried rice in an airtight container. Glass or plastic containers work well. Make sure the lid fits snugly to keep air out. Place it in the fridge if you plan to eat it within a few days. For longer storage, freeze it in portion-sized bags. Remove as much air as possible before sealing to prevent freezer burn. The best way to reheat cauliflower fried rice is in a skillet. Heat it over medium heat. Add a splash of water or oil to keep it moist. Stir often to heat evenly. You can also use a microwave. Place it in a microwave-safe dish. Cover it with a damp paper towel to keep it from drying out. Heat in short bursts, stirring in between. To keep the texture nice, avoid overheating. Cauliflower can become mushy if cooked too long. Aim for just a few minutes of reheating, whether on the stove or in the microwave. This way, your dish remains tasty and fresh! To rice cauliflower, you can use a food processor or a box grater. I find the food processor works best for speed. Cut the cauliflower into florets. Then pulse in short bursts until it looks like rice. Avoid over-processing, as it can turn mushy. If you don’t have a food processor, use a box grater. Grate the florets until they resemble rice. This method takes a bit longer but works well. Yes, you can make cauliflower fried rice ahead of time. Cook the dish and let it cool fully. Then store it in an airtight container. Place it in the fridge for up to three days. For longer storage, freeze it for up to three months. When you’re ready to eat, simply reheat it in a skillet or microwave. Just remember, fresh cauliflower fried rice tastes best! Cauliflower fried rice is low in calories compared to regular fried rice. A serving has about 100 calories, depending on added ingredients. Cauliflower is a great alternative to rice. It is low in carbs and high in fiber. This dish also offers vitamins C and K. Plus, you get antioxidants from the mixed veggies. It makes a healthy choice for any meal. For the full recipe, check out the details above! Cauliflower fried rice is easy and fun to make. You learned about the key ingredients, like the riced cauliflower, sesame oil, and eggs. We went through each step, from prepping the cauliflower to cooking it just right. You picked up tips for great texture, flavor boosts, and even tasty variations. Don’t forget storage tips, as leftovers can stay fresh. Embrace this flexible dish, and feel free to explore different proteins or veggies. Enjoy making this quick meal your own!

Cauliflower Fried Rice Flavorful and Healthy Dish

If you’re searching for a tasty, healthy dish, cauliflower fried rice is a winner! This flavorful meal swaps out white

To make Caprese salad skewers, you need simple, fresh ingredients. These flavors come together to create a bright, tasty dish. Here’s what you will need: - Fresh cherry tomatoes - Basil leaves - Mozzarella balls (bocconcini) - Balsamic glaze and olive oil - Lemon zest and seasoning The cherry tomatoes bring sweetness and color. You can use any ripe variety you like. Basil leaves add a lovely aroma and a fresh taste. The mozzarella balls offer a creamy texture that balances the other flavors. Balsamic glaze gives a tangy sweetness, while olive oil adds richness. The lemon zest and seasoning enhance the dish with a zesty kick. When you gather these ingredients, you prepare yourself for a delightful experience in the kitchen. Each bite of the skewer bursts with flavor. You can find the full recipe [Full Recipe]. 1. Cleaning and prepping ingredients: Start by rinsing the cherry tomatoes and basil leaves under cold water. Pat them dry with a paper towel. Drain the mozzarella balls if they are in water. This helps keep everything fresh. 2. Assembling the skewers: Grab your small skewers or toothpicks. You will thread each ingredient onto the skewer. 3. Preparing the dressing: In a small bowl, whisk together the balsamic glaze, olive oil, lemon zest, salt, and cracked pepper. This zesty dressing adds flavor to your skewers. 1. Threading ingredients onto skewers: Begin with a cherry tomato. Next, add a fresh basil leaf. Finally, slide on a mozzarella ball. Repeat this until you have three of each ingredient on one skewer. 2. Drizzling the dressing: Once all skewers are ready, place them on a serving plate. Drizzle the dressing over the skewers. Make sure every skewer gets a nice touch of flavor. 3. Presentation tips for serving: For a fun display, stand the skewers up in a glass jar filled with rock salt or quinoa. This makes an eye-catching centerpiece. You can also lay them flat on a long platter for a more elegant look. To make great Caprese salad skewers, select the best tomatoes and mozzarella first. Look for cherry tomatoes that are firm and bright in color. They should feel heavy for their size. This shows they are juicy and fresh. For mozzarella, choose small balls called bocconcini. They should be creamy and slightly springy. Check the package date for freshness. Next, when picking basil, aim for large, healthy leaves. They should be vibrant green and fragrant. The size enhances flavor and looks great on the skewer. Use young leaves for a milder taste. Older leaves can be strong and bitter. When serving your Caprese salad skewers, presentation matters. For a fun look, arrange the skewers vertically in a glass jar filled with rock salt or quinoa. This adds height to your table. You can also lay them flat on a long platter for a more elegant style. Pair these skewers with a light white wine or sparkling water for a refreshing drink. They also go well with other appetizers like bruschetta or olives. This mix can delight your guests and make your meal feel complete. {{image_2}} You can change the cheese in your Caprese salad skewers. Feta or goat cheese works well. These cheeses add a different taste and texture. You can also use skewers of different types. Bamboo or metal skewers are both great options. Each skewer type can change how your dish looks and tastes. Want to spice up your skewers? Adding fruits like peaches or strawberries can make them sweeter. These fruits pair well with the cheese and basil. You can also infuse your skewers with different herbs and spices. Try adding a sprinkle of oregano or thyme for extra flavor. Each tweak can give your dish a unique twist. For more ideas, check the Full Recipe for inspiration! To keep your Caprese salad skewers fresh, store them properly. I suggest using an airtight container. This helps keep the flavors intact. Place a layer of paper towel at the bottom. This will absorb any extra moisture. Line the skewers in the container without overcrowding them. You can also use a glass jar for a fun presentation. Just make sure the skewers stay upright. You can prepare these skewers ahead of time. Just assemble them a few hours before serving. If you need to prepare them a day in advance, that's fine too. Store the skewers in the fridge. They will stay fresh for about 24 hours. Be careful not to leave them too long. The basil leaves may wilt and lose their bright color. Always check for freshness before serving. For the best taste, serve them chilled. For the full recipe, refer to the earlier section. Enjoy making these tasty appetizers! Can I make Caprese salad skewers ahead of time? Yes, you can! I often prepare these skewers a few hours before serving. Just keep them in the fridge. This helps the flavors mix well. However, avoid adding the dressing until you serve them. This keeps them fresh. What’s the best way to transport them for a picnic? For a picnic, place the skewers in a container with a lid. Use a cooler if it’s hot outside. You can layer them with damp paper towels to keep them fresh. Remember to pack the dressing separately. Drizzle it on just before you eat. Are Caprese skewers gluten-free? Yes, they are naturally gluten-free! The ingredients are all safe for gluten-free diets. Just ensure any added sauces are also gluten-free. What are the health benefits of the ingredients? Caprese salad skewers are packed with nutrients. Cherry tomatoes are rich in vitamins A and C. Basil adds antioxidants and has anti-inflammatory properties. Mozzarella provides protein and calcium. Olive oil offers healthy fats, which are great for heart health. Caloric and macronutrient breakdown per serving Each serving, which includes three skewers, has about 150 calories. They have roughly 10 grams of fat, 8 grams of protein, and 5 grams of carbs. This makes them a balanced snack or appetizer. For the full recipe, you can find more details on serving sizes and adjustments. In this post, we covered how to make delicious Caprese skewers. You learned about the key ingredients, like fresh tomatoes and mozzarella. I explained how to prepare and assemble your skewers and shared helpful tips for serving. We also discussed fun variations and storage methods. My final thought is simple: Caprese skewers are not just tasty, but they are also easy to make. Enjoy trying your own creations, and have fun sharing them with friends and family!

Caprese Salad Skewers Fresh and Tasty Appetizer

Looking for a fresh and tasty appetizer that impresses? You’ve come to the right place! Caprese Salad Skewers are easy

- Ripe mangoes - Ripe avocado - Small red onion - Red bell pepper - Jalapeño - Fresh cilantro - Fresh lime juice - Seasoning (salt and pepper) Selecting the right ingredients is key. Ripe mangoes should yield slightly when you press them. Look for a sweet smell near the stem. For avocados, choose ones that feel soft but not mushy. The skin should be dark green and smooth. Fresh cilantro should have bright green leaves without wilting. - Medium mixing bowl - Spatula or mixing tool - Knife and cutting board These tools will make your prep easy. A sharp knife helps you dice quickly and safely. A medium mixing bowl gives you enough space to combine all your ingredients. - How to select ripe mangoes: Look for a mango that is slightly soft and fragrant. The skin color varies by type, so feel for ripeness. - Choosing the best avocados: Press gently; it should give a bit. Avoid ones with dark spots. - Freshness indicators for herbs: Fresh cilantro should smell strong and look vibrant. Look for bright green leaves. These tips will help you find the best ingredients for your mango salsa. Enjoy the process—it makes the final dish even better! For the complete recipe, check the Full Recipe section. To make a tasty mango salsa, start with the mango and avocado. - Dicing mango and avocado: Take two ripe mangoes. Cut them into small, even cubes. Next, slice a ripe avocado in half. Remove the pit, and then dice the flesh into similar-sized pieces. - Chopping onion and bell pepper: Grab one small red onion. Chop it finely. Then, take one red bell pepper. Dice it into small bits, matching the size of the mango and avocado. - Mince jalapeño: Take one jalapeño. Cut it in half and remove the seeds. Mince it finely, so it adds just the right kick without being too hot. Now it's time to mix everything in a bowl. - Mixing ingredients in a bowl: In a medium mixing bowl, combine your diced mango and avocado. Add in the chopped red onion, diced red bell pepper, and minced jalapeño. - Flavor distribution tips: To ensure even flavor, use a spatula to gently mix all the ingredients together. Be careful not to mash the avocado; you want nice chunks. The last steps add the finishing flavor. - Season to taste: Drizzle two tablespoons of fresh lime juice over the mixture. Season with salt and pepper as needed. Taste and adjust if necessary. - Letting flavors meld: Let the salsa sit for about 10 minutes. This waiting time allows all the flavors to blend beautifully. Enjoy your vibrant and fresh mango salsa with avocado, as described in the Full Recipe. To make mango salsa with avocado, balance sweetness and acidity. Mangoes are sweet, while lime juice adds tang. Use fresh lime juice to brighten the salsa. If the salsa feels too sweet, add more lime juice. This helps it taste fresh and alive. For spice lovers, adjust heat by adding jalapeño. Start with a small amount, then taste. You can always add more if you like more heat. If you want less spice, remove the seeds from the jalapeño. This keeps the heat down while still adding flavor. When serving at parties, use a colorful bowl. A bright dish makes the salsa pop. Garnish with a sprig of cilantro. This adds a nice touch and makes it look fresh. Serve it with tortilla chips for dipping. You can also use it as a topping for grilled fish or chicken. For an elegant touch, serve individual portions. Small cups can hold salsa for each guest. This makes it easy for everyone to enjoy their own. Avoid mushy avocado by dicing it just before serving. If you prep early, the avocado may brown. To keep ingredients fresh, store salsa in an airtight container. If you have leftovers, eat them within a day. Stir gently when mixing to maintain the avocado's shape. You want creamy chunks, not a mushy mix. This keeps the salsa vibrant and adds a nice texture contrast. {{image_2}} You can change the peppers in your salsa to suit your taste. Try using green bell peppers for a milder flavor. You can also swap in a poblano pepper for a smoky taste. If you want a little heat, use serrano peppers instead of jalapeños. They add a nice kick! Cilantro is a favorite herb for many, but not everyone loves it. You can replace cilantro with fresh parsley for a different taste. Basil also works well, giving your salsa a fresh twist. Want to mix things up? Try adding fruits like pineapple or peach. These fruits add sweetness and a burst of flavor. You can chop them and mix them right in. Spices can also elevate your salsa. A pinch of cumin adds warmth and depth. You might also try a little chili powder for a spicy kick. Experiment with what you like best! This mango salsa is naturally vegan, making it perfect for plant-based diets. It’s fresh and full of flavor, so everyone can enjoy it. If you need a gluten-free option, you’re in luck! This salsa has no gluten ingredients. It pairs perfectly with gluten-free chips or grilled meats, making it a great choice for all diets. For the full recipe, check out the Mango Avocado Fiesta Salsa section above. Store your mango salsa in the fridge if you have leftovers. Use an airtight container to keep it fresh. Glass containers work well and help you see the salsa. You can also use plastic containers, but make sure they seal tightly. You can freeze mango salsa for later use. Just spoon it into a freezer-safe bag and remove excess air. Label the bag with the date. When you want to use it, thaw the salsa in the fridge overnight. To refresh the taste, stir in a little fresh lime juice or more cilantro. In the fridge, mango salsa lasts about three days. After that, it may lose its fresh taste. Watch for signs of spoilage. If it smells sour, looks brown, or has a watery texture, it’s best to throw it out. Enjoy your salsa while it’s fresh for the best flavor! To make mango salsa with avocado, follow this quick guide: 1. Gather Ingredients: You need ripe mangoes, avocado, onion, bell pepper, jalapeño, cilantro, lime juice, salt, and pepper. 2. Mix Base: In a bowl, combine diced mango and avocado. 3. Add Veggies: Stir in chopped onion, bell pepper, and minced jalapeño for heat. 4. Add Herbs: Toss in cilantro for freshness. 5. Add Lime: Squeeze lime juice over the mix for zing. 6. Combine Gently: Use a spatula to mix without mashing the avocado. 7. Season: Sprinkle with salt and pepper, adjusting to taste. 8. Rest: Let it sit for 10 minutes for flavors to blend. You can find the full recipe above! Yes, you can use frozen mango. But keep in mind, it may change the texture. Frozen mango can become mushy when thawed. The fresh flavor might also be less bright. If using frozen, thaw it well and drain excess liquid before mixing. This helps keep the salsa from getting watery. Mango salsa pairs well with many dishes: - Tortilla Chips: Perfect for dipping. - Grilled Fish: Adds a tropical twist. - Chicken: Use as a topping for grilled chicken. - Tacos: Great in fish or chicken tacos. - Salads: Mix into green salads for extra flavor. This salsa is versatile and brightens up any meal! You now know how to make a fresh mango salsa with avocado. I covered the key ingredients, tools, and tips for selecting ripe produce. You learned easy steps to prepare and mix your salsa. Remember to balance flavors and adjust spice levels to suit your taste. With some simple variations and storage tips, your salsa will shine at any gathering. Enjoy making and sharing your tasty creation!

Mango Salsa with Avocado Tasty Fresh Delight

Ready to brighten your next meal? Mango Salsa with Avocado is a fresh and tasty delight that will wow your

- 1 large head of cauliflower, cut into florets - 1 cup shredded sharp cheddar cheese - 1 cup cream cheese, softened - 1/2 cup milk - 1/2 cup grated Parmesan cheese For this dish, the cauliflower serves as the star. It provides a nice, soft base. The sharp cheddar and Parmesan add a rich, cheesy flavor. Cream cheese makes the sauce creamy and smooth. The milk helps blend everything together. - 2 cloves garlic, minced - 1 teaspoon onion powder - 1 teaspoon Italian seasoning - 1/2 teaspoon paprika - Salt and pepper to taste Seasonings are vital for a tasty bake. Minced garlic brings a nice depth to the dish. Onion powder adds a hint of sweetness. Italian seasoning gives it a warm, herbal note. Paprika adds a touch of color and flavor. Don't forget to season with salt and pepper! - Fresh parsley, chopped (for garnish) Garnishing with fresh parsley makes the dish pop. It adds a bright color and a fresh taste. This simple touch makes your Cheesy Cauliflower Bake look inviting. I found that using high-quality cheese makes a big difference. It enhances the flavor and texture. You can find the Full Recipe at the beginning of this article. Enjoy cooking! - Preheat the oven to 375°F (190°C). - In a large pot, bring salted water to a boil. Add the cauliflower florets. Cook for 5-7 minutes until tender, then drain well. - In a mixing bowl, combine 1 cup of softened cream cheese, 1/2 cup of milk, and seasonings like minced garlic, onion powder, Italian seasoning, paprika, salt, and pepper. Mix until smooth. - Stir in 1 cup of shredded sharp cheddar cheese and half of the 1/2 cup of grated Parmesan. - Add the cooked cauliflower florets to the cheese mixture. Gently stir until the cauliflower is fully coated. - Transfer the mixture to a greased baking dish. Spread it evenly and sprinkle the remaining Parmesan on top. - Bake in the preheated oven for 25-30 minutes, until the top is golden and bubbly. This cheesy cauliflower bake is rich and flavorful, making it a perfect side dish. For the full recipe, check the details above. To get the best texture, cook the cauliflower until it is just tender. Boil it for 5-7 minutes. You want it soft but not mushy. Drain the florets well to avoid excess water. For the cheese sauce, mix the ingredients until smooth. This makes it easy to coat the cauliflower. You can make this dish even tastier. Try adding fresh herbs like thyme or basil. A pinch of garlic powder can also boost flavor. For cheese, mix in Gruyère or mozzarella for a twist. Each cheese brings its own unique taste. Serve your cheesy cauliflower bake with a fresh salad. It pairs well with roasted chicken or grilled fish. If you want a vegetarian meal, add a grain like quinoa or rice. For gluten-free options, ensure your cheese and seasonings are gluten-free. This dish is sure to please everyone at the table. Enjoy it warm and share the love! For the complete details on making this dish, check the Full Recipe. {{image_2}} You can make Cheesy Cauliflower Bake even more fun by changing up the veggies. Broccoli works great if you want a different taste. Spinach can add a nice green touch too. You can even mix these vegetables for a colorful dish. If you prefer a dairy-free option, consider using plant-based cheeses. Many brands offer creamy, tasty alternatives that melt well. This swap keeps the dish rich without dairy. Want to add some extra flavor? Try adding cooked bacon or ham. These meats bring a savory punch that pairs well with the cheese. You can also spice things up! Adding jalapeños gives a nice kick, or try a bit of cayenne pepper for more heat. How you serve this dish can change the whole experience. Individual servings in ramekins look fancy and are easy to serve. Plus, they make great portions for guests. For a more casual vibe, go for a casserole-style dish. Just scoop out portions straight from the baking dish. Both ways make the Cheesy Cauliflower Bake look appealing and delicious. For the full recipe, check out the [Full Recipe]. To keep your cheesy cauliflower bake fresh, store leftovers in an airtight container. This seals in flavor and moisture. You can keep it in the fridge for about 3 to 5 days. If you notice any off smells or changes in texture, it’s best to toss it out. You can freeze cheesy cauliflower bake for longer storage. First, let it cool completely before packing it away. Use a freezer-safe container or heavy-duty freezer bag. It will stay fresh for up to 3 months. When you want to eat it, move it to the fridge overnight to thaw. When reheating, the oven is the best choice. Preheat it to 350°F (175°C). Place the bake in a dish and cover it with foil. This helps keep it moist. Bake for about 20 minutes or until heated through. If using a microwave, heat in short bursts. Stir in between to keep it even. This way, your cheesy cauliflower bake stays tasty and creamy. Yes, you can prepare Cheesy Cauliflower Bake ahead of time. To make this easier, cook the cauliflower and mix it with the cheese sauce. Then, place it in a greased baking dish. Cover the dish with plastic wrap. Store it in the fridge for up to two days. When you are ready to bake, remove the wrap and bake it straight from the fridge. You might need to add a few extra minutes to the bake time for even cooking. Yes, Cheesy Cauliflower Bake is gluten-free. The main ingredients, such as cauliflower, cheese, and cream, do not contain gluten. Always check labels on your cheese and cream for any hidden gluten. Fresh herbs and spices used in the recipe are also gluten-free. This makes it a great choice for those with gluten intolerance. If you want to add some heat, there are a few great options. You can mix in some diced jalapeños or a pinch of cayenne pepper into the cheese sauce. Another option is to add a few dashes of hot sauce. You can also sprinkle red pepper flakes on top before baking for extra flavor. Adjust the spice level to what you enjoy most. Cheesy Cauliflower Bake pairs well with many sides. A fresh green salad adds a nice crunch. Roasted vegetables like carrots or Brussels sprouts complement the dish's creaminess. Grilled chicken or fish also works well for a balanced meal. For a comforting option, serve it with garlic bread or rolls to soak up the cheese sauce. Cheesy Cauliflower Bake combines creamy cheese and tender cauliflower for a delicious dish. We explored main ingredients, including sharp cheddar, cream cheese, and seasonings. I shared tips for texture and flavor, plus storage advice for leftovers. This dish is easy to customize with other veggies or spices. Enjoy experimenting with your own twists. Make it for a cozy family dinner or a fun gathering. You’ll love how simple and tasty it is!

Cheesy Cauliflower Bake Rich and Flavorful Delight

Are you ready to elevate your dinner game? My Cheesy Cauliflower Bake is a rich, flavorful delight that makes any

Older posts
Newer posts
← Previous Page1 … Page54 Page55 Page56 … Page69 Next →

dsad

© 2025 Southern Dishes • Built with GeneratePress

Our Policies

  • Copyright Policy
  • Cookie Policy
  • GDPR Policy
  • Privacy Policy
  • Disclaimer
  • Terms Of Use

More Information

  • Home
  • About
  • Contact
  • Appetizers
  • Dessert
  • Dinner
  • Drinks
©2025, Southern Dishes About Back To Top