Skip to content
DisclaimerTerms Of UseGDPR PolicyCookie Policy

Southern Dishes

  • Home
  • Drinks
  • Appetizers
  • Dinner
  • Dessert
  • About
  • Contact
  • Privacy Policy
DisclaimerTerms Of UseGDPR PolicyCookie Policy

Isabella

- 4 boneless skinless chicken breasts - 2 cups fresh spinach, chopped - 1 cup feta cheese, crumbled - 1/4 cup cream cheese, softened - 2 cloves garlic, minced - 1 tablespoon olive oil - 1 teaspoon dried oregano - Salt and pepper to taste - Toothpicks or kitchen twine Cooking this dish is easy and fun. First, gather your ingredients. You need boneless skinless chicken breasts to hold the tasty filling. Fresh spinach adds a vibrant color and good nutrients. Feta cheese gives a nice tangy flavor, while cream cheese adds creaminess. Garlic is a must for that aromatic kick. Olive oil helps with cooking and adds richness. Dried oregano brings in a lovely herb note. Don’t forget salt and pepper to enhance all the flavors. Finally, use toothpicks or kitchen twine to secure the chicken. - Sharp knife - Mixing bowl - Skillet (oven-safe) - Measuring cups and spoons Having the right tools makes cooking smooth. A sharp knife is key to making pockets in the chicken. A mixing bowl helps you combine the filling ingredients well. An oven-safe skillet is perfect for browning the chicken and then baking it. Measuring cups and spoons ensure you add just the right amounts for the best taste. For the full recipe, check out Spinach & Feta Delight Chicken Breasts 🥗. First, I preheat the oven to 375°F (190°C). This step is crucial as it ensures even cooking. Next, I prepare the stuffing mix. In a mixing bowl, I combine: - 2 cups fresh spinach, chopped - 1 cup feta cheese, crumbled - 1/4 cup cream cheese, softened - 2 cloves garlic, minced - 1 teaspoon dried oregano - Salt and pepper to taste I mix these ingredients well until they form a creamy blend. Now, I grab the chicken breasts. I place them on a clean cutting board. Using a sharp knife, I carefully create pockets in each breast. I slice horizontally, making sure not to cut all the way through. Once I have the pockets ready, I generously fill them with the spinach and feta mix. I use toothpicks or kitchen twine to secure the openings. This keeps the yummy filling inside while cooking. Next, I heat olive oil in a large oven-safe skillet over medium-high heat. Once hot, I add the stuffed chicken breasts. I sear them for about 3-5 minutes on each side until they turn a nice golden brown. After that, I transfer the skillet to the oven. I bake the chicken for 20-25 minutes. I check that the internal temperature reaches 165°F (75°C) to ensure it's fully cooked. Remember, if you want the full recipe, check out the complete instructions. To make your spinach feta stuffed chicken truly shine, focus on key temperatures and cooking times. Start by preheating your oven to 375°F (190°C). This temperature allows the chicken to cook evenly while keeping the filling warm and tasty. Cook the chicken for 20-25 minutes or until its internal temperature hits 165°F (75°C). To avoid dry chicken, do not overcook it. Keep an eye on the time, and use a meat thermometer. This tool ensures you get juicy chicken every time. When you let the chicken rest for five minutes after cooking, it allows the juices to settle. This step makes every bite tender and moist. Adding herbs and spices can elevate your dish to new heights. Try adding fresh basil, thyme, or even a touch of red pepper flakes for a hint of heat. Each herb brings its unique flavor, making your chicken even more delicious. Consider using alternative cheese options if you want to mix things up. Goat cheese offers a tangy flavor that pairs well with spinach. Mozzarella can add a creamy texture while still melting beautifully. The key is to find flavors you love and experiment! For the full recipe, check out the Spinach & Feta Delight Chicken Breasts. {{image_2}} If you want a meat-free meal, use portobello mushrooms. These large mushrooms have a nice texture. They soak up flavors well and provide a hearty base. Simply remove the stems and gills, then stuff the mushroom caps with the same spinach and feta mix. Bake them until soft and joyful. This option is tasty and colorful! You can always add extra flavors to your stuffed chicken. Sun-dried tomatoes bring a sweet and tangy burst. Roasted red peppers add a smoky touch. You can also mix in nuts like pine nuts or walnuts for a nice crunch. These additions create exciting layers of flavor and texture. Feel free to experiment! You can cook your spinach feta stuffed chicken in different ways. Grilling gives the chicken a smoky flavor and nice grill marks. Just be sure to keep an eye on the temp. Baking is a great way to cook the chicken evenly. For a hands-off approach, use a slow cooker. Cook on low for 4-6 hours and enjoy a tender, juicy meal. Each method offers a unique taste and texture! For the full recipe, check out the Spinach & Feta Delight Chicken Breasts. To keep your spinach feta stuffed chicken fresh, store it in the fridge. Place leftovers in an airtight container. This keeps moisture in and prevents the chicken from drying out. Make sure to consume them within three days for the best taste and safety. You can freeze cooked stuffed chicken for later use. First, let it cool completely. Wrap each piece tightly in plastic wrap. Then, place the wrapped chicken in a freezer bag. Remember to label it with the date. This method helps preserve flavor and texture for up to three months. When it's time to enjoy your leftovers, reheat them carefully. Preheat your oven to 350°F (175°C). Place the chicken in an oven-safe dish and cover it with foil. This keeps it moist. Heat for about 20-25 minutes or until warm. For the best flavor, avoid using the microwave. It can make the chicken rubbery. Enjoy your delicious spinach feta stuffed chicken again! You can find the full recipe linked above. Can I prepare the filling in advance? Yes, you can make the filling ahead of time. Just mix the spinach, feta, cream cheese, garlic, and spices. Store it in the fridge for up to a day. This saves time on cooking day. How do I know when the chicken is fully cooked? Use a meat thermometer to check the chicken's center. It should read 165°F (75°C) for safety. If you don’t have a thermometer, cut into the thickest part. The meat should be white, not pink. What sides pair well with stuffed chicken? Serve your stuffed chicken with a simple salad, rice, or roasted veggies. Mashed potatoes also work well. These sides add balance to the meal and complement the flavors nicely. Chicken not browning If your chicken isn’t browning, make sure your skillet is hot enough. Sear on medium-high heat for a good crust. Avoid overcrowding the pan; cook in batches if needed. Filling leaking out during cooking To prevent the filling from leaking, make sure you secure the chicken well. Use toothpicks or kitchen twine to hold the pockets closed. Also, don’t overstuff the chicken; a little filling goes a long way. How many calories are in Spinach Feta Stuffed Chicken Breasts? Each stuffed chicken breast contains about 350 calories. This makes it a hearty yet healthy meal option. What are the protein and fat contents? Each serving has roughly 35 grams of protein and 20 grams of fat. This high protein content helps keep you full and satisfied. For a complete guide on making this dish, check out the Full Recipe. In this blog post, we explored how to make Spinach Feta Stuffed Chicken Breasts. We covered the key ingredients, useful tools, and clear steps for cooking. I shared tips to keep the chicken juicy and flavorful. You can also try vegetarian options or extra fillings for variety. Lastly, I gave you the best ways to store and reheat your dish. With this guide, you’re ready to create a delicious meal that will impress everyone. Enjoy your cooking adventure!

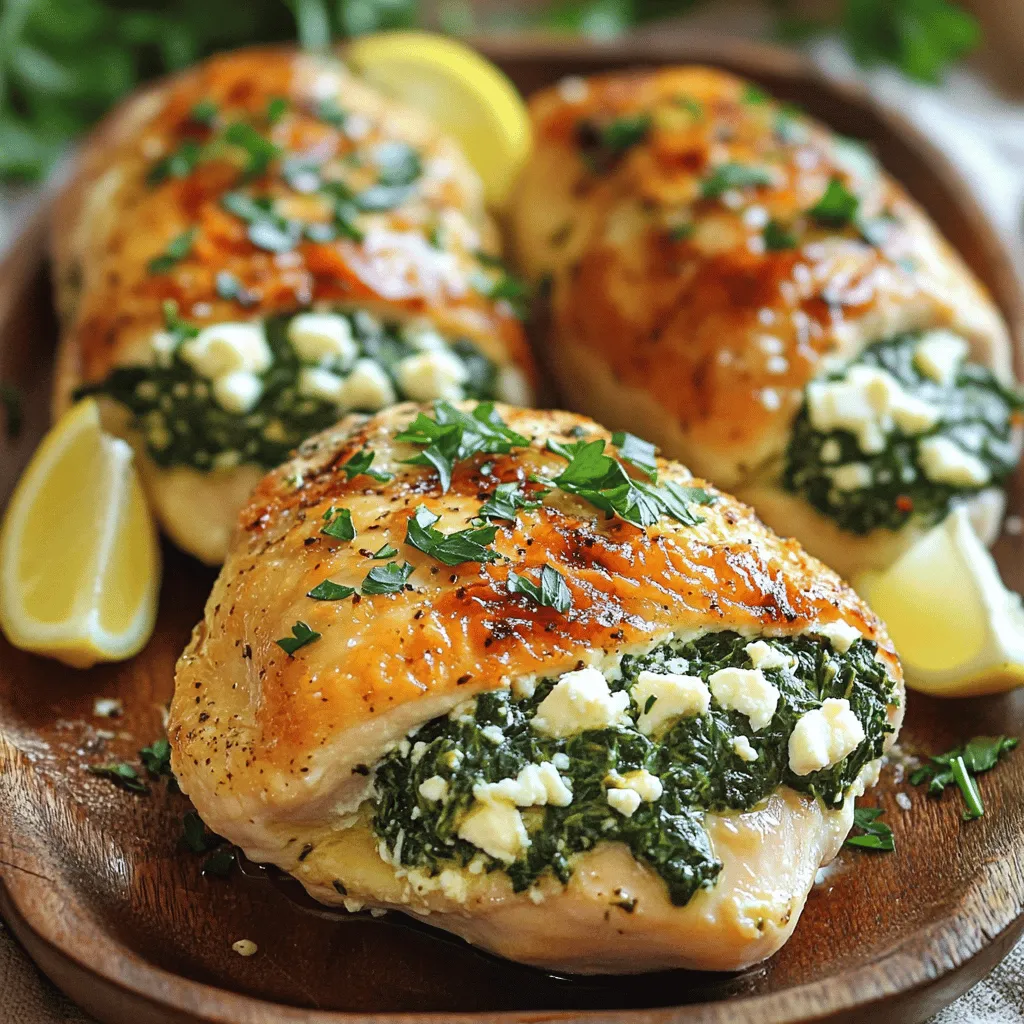
Spinach Feta Stuffed Chicken Breasts Flavorful Delight

Looking for a tasty and healthy dinner option? You’re in the right place! In this post, I’ll show you how

- Quinoa: This tiny seed packs a big punch. It's rich in protein and fiber. Quinoa is gluten-free and works well in salads. - Fresh Vegetables: Use bright cherry tomatoes, crisp cucumbers, and sweet bell peppers. These add color and crunch. Red onion brings a nice bite to the mix. Kalamata olives add a briny flavor, making the salad even tastier. - Herbs: Fresh parsley and mint are key. They add a burst of flavor. These herbs brighten up the dish and give it a fresh taste. - Olive Oil: A must-have for any salad. It adds richness and helps blend the flavors. Use a high-quality extra virgin olive oil for the best taste. - Lemon Juice: This adds acidity and brightness. Fresh lemon juice balances the flavors and makes the salad refreshing. - Seasoning: Don’t forget salt and pepper! They enhance the taste of all the ingredients. Adjust to your liking for the best flavor. For the full recipe, check out the Mediterranean Quinoa Salad 🥗. To start, rinse the quinoa in cold water. This step removes the bitter coating called saponin. Use a fine-mesh sieve to make this easy. Next, add 1 cup of rinsed quinoa and 2 cups of vegetable broth or water to a medium pot. Bring the pot to a boil over high heat. Once it boils, reduce the heat to low. Cover the pot and let it simmer for about 15 minutes. The quinoa will absorb all the liquid. After 15 minutes, take the pot off the heat and let it sit covered for 5 more minutes. Now, fluff the quinoa with a fork. This helps separate the grains. Spread it out on a plate to cool. While the quinoa cools, it’s time to chop your veggies. Use a sharp knife for safety and ease. Start by halving the cherry tomatoes. Then, dice the cucumber and bell pepper into small pieces. Next, finely chop the red onion. Finally, halve the Kalamata olives. In a large mixing bowl, add all the chopped vegetables. This bowl will hold the quinoa later, so make sure it’s big enough. In a small bowl, whisk together the dressing. Combine 2 tablespoons of olive oil, 2 tablespoons of lemon juice, and a pinch of salt and pepper. Whisk until it’s well mixed. Now, add the cooled quinoa to the bowl with the veggies. Toss gently to mix everything. Then, pour the dressing over the top. Toss again to coat all the ingredients evenly. If you want, sprinkle crumbled feta cheese, fresh parsley, and mint into the salad. Toss once more, and it's ready to serve. For the full recipe, check out the instructions above. Enjoy! To make a great quinoa salad, focus on two key parts: texture and flavor. - Achieving the right texture Start by rinsing the quinoa well. This removes the bitter coating called saponin. Use a ratio of 1 cup quinoa to 2 cups broth or water. Cook it until all the liquid absorbs. After cooking, let it rest for 5 minutes. Fluff it with a fork to keep it light and airy, not mushy. - Balancing flavors with herbs and spices Fresh herbs bring life to the salad. I love using parsley and mint. They add bright notes. A splash of lemon juice brightens the dish. Salt and pepper enhance the overall taste. Adjust these to your liking for a personal touch. Presentation matters. A well-presented dish makes the meal more inviting. - Presentation ideas Serve the salad in a big bowl. Top it with extra feta and mint leaves. This adds color and a fresh look. You can also layer it in clear cups for a fun twist. - Pairing with proteins for a complete meal To make the salad a full meal, add protein. Grilled chicken, shrimp, or chickpeas work well. These options complement the flavors and make the dish filling. Pairing it with a protein makes it a perfect main course. For more details on preparing this tasty dish, check the Full Recipe. {{image_2}} You can easily make this salad vegan. To do this, skip the feta cheese. Instead, you can use avocado for a creamy touch. It adds healthy fats and a nice flavor. Another option is to add nutritional yeast for a cheesy taste without dairy. For protein, consider chickpeas or black beans. They boost the protein level and make the dish more filling. Just rinse and drain them before adding. You can also add roasted tofu. It brings a chewy texture that complements the salad well. You can swap in seasonal veggies to keep things fresh. In summer, use zucchini or bell peppers for crunch. In winter, consider roasted sweet potatoes or beets for warmth. They add color and flavor. Try different dressings to keep it interesting. A balsamic vinaigrette can add sweetness. A tahini dressing gives a creamy texture and nutty flavor. You can also use a spicy harissa dressing for a kick. This keeps your Mediterranean quinoa salad exciting and new every time. For the full recipe, check out the [Full Recipe]. To keep your Mediterranean quinoa salad fresh, store it in an airtight container. Make sure it cools to room temperature before sealing. This helps prevent moisture buildup. Place the container in the fridge. Your salad will stay fresh for about three to five days. If you want to keep the flavors bright and tasty, store the dressing separately. Add it just before serving. This keeps the veggies crisp and prevents sogginess. Can you reheat quinoa salad? Yes, but it’s best served cold. If you prefer it warm, gently heat it in a pan. Add a splash of water or olive oil for moisture. Stir until heated through, but don’t cook it too long. For leftovers, enjoy the salad as a quick snack or lunch. You can also add it to wraps or bowls. Mixing it with grilled chicken or shrimp makes a great meal. Try adding a bit more lemon juice to brighten the flavors again. A Mediterranean quinoa salad is a fresh dish that mixes quinoa with veggies and herbs. This salad comes from the Mediterranean region, known for its vibrant flavors and healthy ingredients. It is colorful, tasty, and packed with nutrients. The main ingredients include cherry tomatoes, cucumbers, bell peppers, olives, and feta cheese. This salad is perfect for lunch, dinner, or a side dish. To enhance the flavor of your quinoa salad, start by using vegetable broth instead of water. This small change adds depth to the quinoa. Add fresh herbs like parsley and mint to bring a burst of freshness. Try different spices like cumin or paprika for a unique twist. A splash of red wine vinegar can brighten the salad too. Lastly, don’t forget to taste as you go. Adjust the salt and pepper to your liking. Yes, you can make this salad ahead of time. To prep, cook the quinoa and chop the vegetables. Store them separately in the fridge until ready to serve. You can mix everything together just before serving. This way, the veggies stay crisp, and the flavors stay fresh. The salad will last up to three days in the fridge, but it tastes best within the first two days. This salad pairs well with many dishes. For protein, try grilled chicken, fish, or chickpeas. A side of hummus or tzatziki adds creaminess. If you want more crunch, serve it with pita chips or fresh bread. This salad can also complement a light soup or a roasted vegetable platter. It’s a versatile dish that can fit any meal! In this blog post, we explored the essentials of a Mediterranean quinoa salad. We covered the main ingredients, including quinoa, fresh vegetables, and herbs. You learned how to cook quinoa, prep veggies, and combine everything for a tasty dish. Offering tips for perfecting flavors and presenting your salad enhanced the appeal. Lastly, we discussed storage and variations, ensuring you can customize your salad. Enjoy making this delicious, healthy choice that fits many diets and preferences!

Mediterranean Quinoa Salad Fresh and Flavorful Boost

Looking for a fresh and tasty dish? This Mediterranean Quinoa Salad is just what you need! Packed with bright veggies,

To make delicious coconut macaroon cookies, gather these simple ingredients: - 3 cups sweetened shredded coconut - 1 cup sweetened condensed milk - 1 teaspoon vanilla extract - 1/4 teaspoon almond extract (optional) - 2 large egg whites - 1/4 teaspoon salt - 1/2 cup semi-sweet chocolate chips (for drizzling, optional) These ingredients blend together to create a chewy and sweet treat. The sweetened shredded coconut gives these cookies their signature texture and flavor. Sweetened condensed milk adds moisture and sweetness, making each bite delightful. Vanilla extract enhances the overall flavor, while almond extract can add a nice twist if you choose to use it. Egg whites are key for a light, airy macaroon. They help the cookies puff up and stay soft inside. A pinch of salt balances the sweetness perfectly. If you want to add a touch of chocolate, the semi-sweet chocolate chips make a nice drizzle on top. This list makes it easy to see what you need. You can find most of these ingredients at your local grocery store. If you want to dive deeper, check out the Full Recipe for exact amounts and instructions. First, you need to get your oven ready. Preheat it to 325°F (160°C). This step helps your cookies bake evenly. While the oven warms up, line two baking sheets with parchment paper. This keeps the cookies from sticking and makes for easy cleanup. Next, grab a large mixing bowl. In this bowl, combine the following ingredients: - 3 cups sweetened shredded coconut - 1 cup sweetened condensed milk - 1 teaspoon vanilla extract - 1/4 teaspoon almond extract (optional) Stir these ingredients together well. Make sure the coconut is fully coated with the sweetened condensed milk. This mix gives your cookies their chewy texture and sweet taste. Now, let’s whip up the egg whites. Take two large egg whites and add 1/4 teaspoon of salt to a clean bowl. Use a hand mixer or whisk to beat the egg whites. You want to whip them until soft peaks form. This should take about 2-3 minutes. Soft peaks mean the egg whites hold their shape but still appear fluffy. Once you achieve this, gently fold the whipped egg whites into your coconut mixture. Be careful not to deflate the egg whites. You want your cookies to be light and airy. Mix until just combined, and then you’re ready to scoop the batter onto your prepared baking sheets. For the complete instructions, check the Full Recipe. To get the right texture in your coconut macaroons, focus on mixing. When you mix the coconut and condensed milk, ensure every shred gets coated. This step is key. Whipping the egg whites is also crucial. Whip until soft peaks form. This keeps the cookies light and airy. Finally, gently fold the egg whites into the coconut mix. Be careful not to deflate them. This tip makes all the difference. One big mistake is overbaking. Keep an eye on your cookies as they bake. You'll want them golden on the edges but soft in the center. Also, make sure to use parchment paper. This helps prevent sticking and keeps the bottoms from browning too much. Lastly, avoid crowding the baking sheets. Give each cookie space to expand. This keeps them from merging into one big blob. Drizzling chocolate can add flair to your cookies. First, melt the chocolate chips in short bursts in the microwave. Stir in between to avoid burning. Once smooth, use a fork to drizzle. Hold the fork above the cookies and move it side to side. This creates a nice pattern. If you want more control, use a piping bag. Cut a tiny hole in the corner and squeeze gently. Your cookies will look professional and taste amazing. For more tips, check out the Full Recipe. {{image_2}} Add a fun twist with chocolate! After baking your coconut macaroons, melt semi-sweet chocolate chips in the microwave. Use short bursts of heat to avoid burning. Once melted, drizzle the chocolate over the cooled cookies using a spoon or a piping bag. This adds a rich flavor and makes your treats look fancy. The sweet coconut pairs perfectly with the chocolate. For a nutty flavor, try adding almond extract. Just swap in a bit more almond extract instead of the vanilla. You can also mix in chopped almonds for extra crunch. These almond coconut macaroons are a great way to change things up. They taste amazing and have a lovely texture. Want a bright flavor? Add lemon zest to your coconut mixture. Just mix in a tablespoon of fresh lemon zest before baking. This gives the cookies a refreshing twist. The tangy lemon balances the sweetness of the coconut. It’s a delightful surprise in every bite. Explore these variations to make your coconut macaroons even more special. Each option brings a new taste and fun to your baking. Try them out and see which one you like best! For the complete process, check the Full Recipe. To keep your coconut macaroons fresh, use an airtight container. This helps keep moisture in and air out. Store them at room temperature for up to a week. If you want to enjoy them later, consider freezing them. Freezing is a great way to save coconut macaroons. Place your cooled cookies in a single layer on a baking sheet. Once frozen, transfer them to a freezer-safe bag. They can last for up to three months in the freezer. When you are ready to eat, just take them out. To reheat coconut macaroons, you can use your oven or microwave. For the oven, set it to 300°F (150°C). Place the cookies on a baking sheet for about 5 to 8 minutes. If you use the microwave, heat them for about 10 to 15 seconds. This softens them without drying them out. Enjoy them warm for the best taste! Yes, you can use unsweetened coconut. However, the cookies will taste less sweet. I suggest adding more sugar or a little honey to balance the flavor. It’s all about your taste. If you like it sweet, stick with sweetened coconut. It gives the best results in flavor and texture. Coconut macaroons can last up to a week. Store them in an airtight container at room temperature. If you want them to stay fresh longer, keep them in the fridge for about two weeks. Just remember to let them come to room temperature before serving. This will help regain their soft texture. If you need a substitute, try using coconut cream mixed with sugar. You can also use evaporated milk with added sugar. Another option is a mixture of milk and cream with sugar. These choices work well in recipes. They help keep the cookies moist and sweet. For the best results, I recommend using sweetened condensed milk for that perfect flavor. Check out the Full Recipe for more details on making these tasty treats. Coconut macaroons are easy to make and fun to eat. We covered key ingredients, step-by-step instructions, and helpful tips. You now know how to achieve the right texture and avoid common mistakes. We also explored tasty variations and storage methods. You can enjoy coconut macaroons fresh or save them for later. Experiment with flavors and share them with friends. Baking can bring joy, so dive in and enjoy the process!

Coconut Macaroon Cookies Delicious and Simple Treat

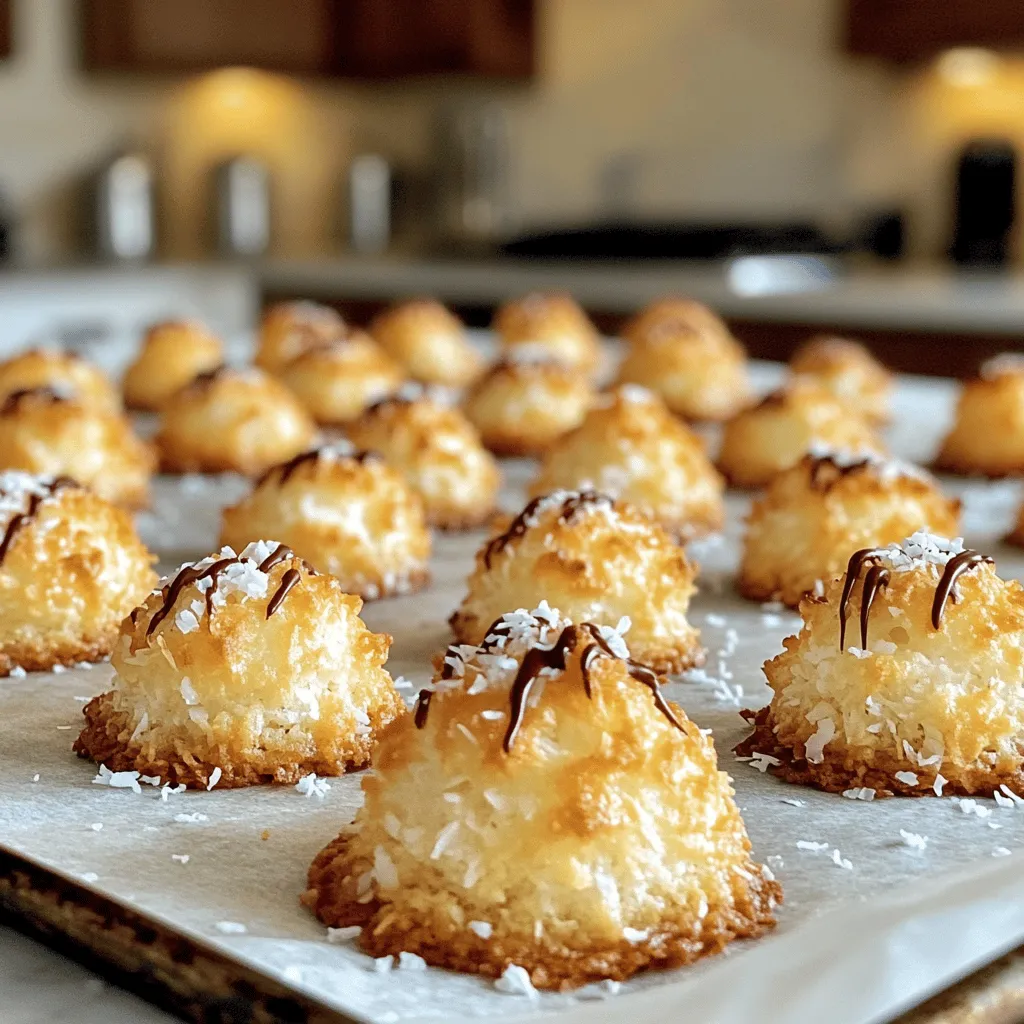
Are you ready to whip up a sweet treat that’s easy and delicious? Coconut macaroon cookies combine simple ingredients to

- 1 ½ cups all-purpose flour - 1 teaspoon baking powder - ½ teaspoon baking soda - ½ teaspoon salt - 2 teaspoons pumpkin spice - 1 cup packed brown sugar - ½ cup granulated sugar - ½ cup vegetable oil - 2 large eggs - 1 cup canned pumpkin puree - 1 teaspoon vanilla extract - ½ cup brewed espresso or strong coffee, cooled - 1 cup heavy cream - 2 tablespoons powdered sugar - Extra pumpkin spice for dusting To make pumpkin spice latte cupcakes, gather your ingredients first. This way, you stay organized and quick. Start with the dry ingredients. In a bowl, mix flour, baking powder, baking soda, salt, and pumpkin spice. Pumpkin spice gives these cupcakes a warm flavor. Next, gather the wet ingredients. In another bowl, blend brown sugar, granulated sugar, and vegetable oil. Add eggs, one at a time. Then stir in pumpkin puree and vanilla extract. Finally, mix in cooled espresso. This coffee adds a rich taste to your cupcakes. For the topping, whip heavy cream and powdered sugar until stiff peaks form. This light topping balances the rich flavors of the cupcake. Dust with extra pumpkin spice for a festive touch. You can find the full recipe to guide you through each step. Enjoy the process! 1. Preheat your oven to 350°F (175°C). Line a muffin tin with cupcake liners. 2. In a medium bowl, mix the dry ingredients: - 1 ½ cups all-purpose flour - 1 teaspoon baking powder - ½ teaspoon baking soda - ½ teaspoon salt - 2 teaspoons pumpkin spice 3. In a separate large bowl, combine the wet ingredients: - 1 cup packed brown sugar - ½ cup granulated sugar - ½ cup vegetable oil - 2 large eggs - 1 cup canned pumpkin puree - 1 teaspoon vanilla extract - ½ cup brewed espresso or strong coffee, cooled 4. Gradually mix the dry ingredients into the wet mixture. Alternate with the brewed espresso. Start and end with the flour mixture. 5. Fill each cupcake liner about 2/3 full with batter. Bake for 18-20 minutes. Check with a toothpick; it should come out clean. 6. Let the cupcakes cool in the pan for about 5 minutes. Then, transfer them to a wire rack to cool completely. 7. While the cupcakes cool, prepare the whipped cream. Beat together 1 cup heavy cream and 2 tablespoons powdered sugar until stiff peaks form. 8. Once the cupcakes are cool, top each with whipped cream. Dust a little extra pumpkin spice on top for a festive look. For the full recipe, check the details above! To bake perfect pumpkin spice latte cupcakes, focus on texture. Use room temperature ingredients. They blend better and create a smoother batter. Mix dry and wet ingredients separately. This ensures even distribution. Overmixing can lead to dense cupcakes, so mix until just combined. Always fill the cupcake liners about two-thirds full. This allows room for rising without overflow. Recommended tools for baking: - Muffin tin - Cupcake liners - Mixing bowls - Whisk - Rubber spatula For the best whipped cream, use chilled heavy cream. It whips better when cold. Start mixing on low speed, then increase to high. This helps avoid splattering. Keep beating until you see stiff peaks. This means the cream holds its shape well. Flavor variations for whipped cream: - Add vanilla extract for a classic taste. - For a twist, mix in a bit of pumpkin spice or cocoa powder. Make your cupcakes stand out by decorating them creatively. Use a piping bag to swirl the whipped cream on top. Dust with extra pumpkin spice for a beautiful finish. You can also add chocolate shavings or caramel drizzle. Serving suggestions for occasions: - Serve them at fall parties or Thanksgiving. - Pack them in boxes for a sweet gift. {{image_2}} You can make your pumpkin spice latte cupcakes even more fun with some tasty additions. - Nut substitutes for texture: Try adding chopped walnuts or pecans. They give a nice crunch and flavor. - Chocolate drizzle for extra sweetness: Melt some chocolate and drizzle it over the frosted cupcakes. This adds a rich sweetness that pairs well with coffee. Need to adjust for dietary needs? Here are some easy swaps. - Gluten-free options for the flour: Use a gluten-free all-purpose blend instead of regular flour. This keeps the cupcakes soft and moist. - Vegan substitutions for eggs and dairy: For eggs, try flax eggs or applesauce. Use almond or oat milk in place of dairy in the whipped cream. Frosting can change the whole cupcake vibe. - Other frosting suggestions besides whipped cream: Try a light vanilla buttercream or a sweet maple frosting. Both pair well with pumpkin flavors. - Using cream cheese frosting for a tangy twist: Cream cheese frosting adds a nice tang. It balances the sweetness and enhances the pumpkin spice. For full details on making these delicious cupcakes, refer to the Full Recipe. To keep your pumpkin spice latte cupcakes fresh, store them in an airtight container. This helps prevent them from drying out. A good choice is a plastic or glass container with a tight lid. You can also use a cake dome for extra protection. If you have leftover whipped cream, store it separately in the fridge. You can freeze your cupcakes for later enjoyment. First, let them cool completely. Place them in a single layer in a freezer-safe container. Use wax paper between layers to prevent sticking. For best results, wrap each cupcake in plastic wrap before placing them in the container. When you're ready to eat them, thaw them in the fridge overnight. This keeps their texture nice. These cupcakes stay fresh at room temperature for up to three days. Make sure to keep them away from direct sunlight and heat. If you see any mold or if they smell off, it’s time to toss them. Always trust your senses; they guide you well! Can I use a different type of coffee? Yes, you can use any strong coffee you like. Brewed coffee or cold brew works well. The taste may change a bit, but it will still be good. How do I make these cupcakes dairy-free? To make these cupcakes dairy-free, use almond milk or oat milk instead of regular milk. You can also use coconut cream for the topping. What's the best way to prevent cupcakes from sinking? To prevent sinking, do not overmix the batter. Mix until just combined. Also, ensure your baking powder is fresh. Can I substitute pumpkin puree with fresh pumpkin? Yes, you can use fresh pumpkin. Cook and mash it well before adding it to the batter. Aim for a smooth texture for the best results. Is it necessary to use eggs? Eggs help bind the cupcakes. If you need an egg-free version, use unsweetened applesauce or a flaxseed meal mix instead. What to do if my cupcakes come out too dense? If the cupcakes are dense, you may have overmixed the batter or added too much flour. Try measuring your flour more carefully next time. How to fix overbaked cupcakes? If your cupcakes are overbaked, they may be dry. Serve them with a scoop of ice cream or some frosting to add moisture back. These cupcakes combine simple ingredients and steps for a delicious treat. We covered dry and wet ingredients, topped with creamy goodness. I shared tips for perfect texture and fun variations. Remember, fresh storage is key for keeping your treats tasty. Feel free to explore substitutes for a unique twist. With these ideas, you can bake with confidence and creativity. Happy baking!

Pumpkin Spice Latte Cupcakes Delicious Fall Treat

Fall is here, and it’s time to indulge in the cozy flavors of the season! Imagine sinking your teeth into

For Baked Eggplant Parmesan, you need these simple ingredients: - 2 large eggplants, sliced into 1/4-inch rounds - 1 teaspoon salt - 1 cup all-purpose flour - 3 large eggs, beaten - 1 cup breadcrumbs (preferably Italian seasoned) - 2 cups marinara sauce - 2 cups shredded mozzarella cheese - 1 cup grated Parmesan cheese - 1 tablespoon olive oil - 1 teaspoon dried basil - 1 teaspoon dried oregano - Fresh basil leaves, for garnish These ingredients come together to create a dish full of flavor and comfort. If you can't find an ingredient, don't worry! Here are some easy swaps: - Eggplants: Zucchini works well as a substitute. - Breadcrumbs: You can use crushed crackers or panko for a crunchier texture. - Marinara sauce: Try using store-bought pasta sauce or homemade tomato sauce. - Mozzarella cheese: Swap it for provolone or a dairy-free cheese if needed. - Parmesan cheese: Nutritional yeast can replace Parmesan for a vegan option. These substitutions keep your dish tasty and fun! Choosing the right eggplant is key for the best results. Here’s how to pick a good one: - Look for firm, shiny skin. It should feel heavy for its size. - Check for a smooth surface without bruises or blemishes. - Choose eggplants that have a vibrant color. Deep purple is a good sign. - Smaller eggplants often taste sweeter and are less bitter. These tips will help you select the best eggplants for your Baked Eggplant Parmesan. Enjoy the cooking process and savor your delicious meal! First, we need to prep the eggplant. Start by slicing two large eggplants into 1/4-inch rounds. This size helps the eggplant bake evenly. Next, sprinkle one teaspoon of salt over the slices. Let them sit in a colander for about 30 minutes. This draws out excess moisture and bitterness. After 30 minutes, rinse the slices under cold water. Pat them dry with paper towels. This step is key for crispiness. Now, let’s set up a breading station. You will need three bowls. Fill the first bowl with one cup of all-purpose flour. In the second bowl, beat three large eggs. The third bowl should have one cup of breadcrumbs, preferably Italian seasoned. This mix gives great flavor. Take each eggplant slice and dip it into the flour, coating it lightly. Next, dip it into the beaten eggs. Finally, roll it in the breadcrumbs. Place the breaded slices on a baking sheet. This process builds a crunchy crust. Once the eggplant is breaded, it’s time to layer for baking. Preheat your oven to 375°F (190°C). Start by spreading a layer of marinara sauce on the bottom of a baking dish. Place a layer of baked eggplant slices on top. Next, sprinkle with mozzarella and Parmesan cheese. Add a pinch of dried basil and oregano for extra flavor. Repeat these layers until all ingredients are used. Finish with a generous layer of mozzarella and Parmesan on top. This layering creates a delicious, melty dish. For the complete cooking instructions, check the Full Recipe. To get your eggplant crispy, start by salting it. This draws out water and helps reduce bitterness. After 30 minutes, rinse and dry the slices. Next, bread your eggplant well. Use a mix of flour, egg, and seasoned breadcrumbs. Make sure to coat each piece evenly. Drizzle olive oil on the breaded slices before baking. This step adds flavor and crunch. Finally, bake at 375°F (190°C) until golden brown. Flip halfway for even cooking. To make Baked Eggplant Parmesan healthier, use less cheese. You can reduce the mozzarella and Parmesan by half. Use whole wheat breadcrumbs instead of white ones. This will add fiber and nutrients. Adding more veggies in the layers can also help. Try using spinach or zucchini along with the eggplant. These changes keep the dish tasty while lowering calories. You can boost the flavor of Baked Eggplant Parmesan easily. Add fresh herbs like thyme or rosemary to the marinara sauce. A splash of balsamic vinegar gives a nice tang. For a spicy kick, add red pepper flakes to the breading. You can also mix in some garlic powder for extra depth. Experiment with different cheeses, like provolone or fontina. These tweaks create a richer taste that everyone will love. {{image_2}} You can make a vegan version of baked eggplant parmesan. Instead of eggs, use aquafaba. Aquafaba is the liquid from canned chickpeas. It works great as a binder. For cheese, try cashew cheese or nutritional yeast. These give a cheesy taste without dairy. You can still layer it with marinara sauce and baked eggplant. This dish stays tasty and enjoyable, even without animal products. If you need a gluten-free option, substitute the flour and breadcrumbs. Use gluten-free flour and gluten-free breadcrumbs. Almond flour or ground oats are good choices too. They add a nice crunch. Just follow the same steps in the recipe. The dish will still be flavorful and delicious. You can enjoy baked eggplant parmesan without worrying about gluten. Want to add a Mediterranean flair? Mix it up with different herbs and veggies. Add sliced olives or roasted red peppers for extra flavor. You can also use feta cheese instead of Parmesan. It adds a nice tang to the dish. Don’t forget to include some fresh herbs like oregano or thyme. This twist will help you explore new flavors in a classic dish. To store leftover baked eggplant parmesan, let it cool first. Then, place it in an airtight container. You can keep it in the fridge for up to three days. Make sure the lid is tight to keep it fresh. When you're ready to enjoy your leftovers, preheat your oven to 350°F (175°C). Place the eggplant parmesan in an oven-safe dish. Cover it with foil to prevent it from drying out. Heat for about 20-25 minutes, or until it’s hot throughout. You can also use a microwave, but the oven keeps it crispy. You can freeze baked eggplant parmesan for later meals. First, let it cool completely. Cut it into portions for easy serving. Wrap each piece tightly in plastic wrap, then place them in a freezer bag. It can last up to three months in the freezer. When you're ready to eat, thaw it overnight in the fridge before reheating. Enjoy this dish anytime with these simple steps! For the full recipe, check out the details above. Yes, you can prep Baked Eggplant Parmesan ahead of time. Just follow the recipe until the baking step. Once you layer the eggplant with sauce and cheese, cover it with foil. Keep it in the fridge for up to 24 hours. When ready to bake, just pop it in the oven. This makes it easy for a busy weeknight or a dinner party. Baked Eggplant Parmesan pairs well with many sides. Here are some great options: - A fresh green salad with vinaigrette - Garlic bread or Italian bread - Steamed vegetables like broccoli or green beans - Pasta tossed in olive oil and herbs These sides balance the meal and add extra flavor. To make great marinara sauce, start with fresh ingredients. Here’s a simple recipe: - 2 tablespoons olive oil - 1 can (28 ounces) crushed tomatoes - 4 cloves garlic, minced - 1 teaspoon sugar - 1 teaspoon dried basil - 1 teaspoon dried oregano - Salt and pepper to taste Heat olive oil in a pot. Add garlic and sauté for one minute. Then, add crushed tomatoes. Stir in sugar, basil, oregano, salt, and pepper. Let it simmer for about 20 minutes. This sauce is rich and perfect for your Baked Eggplant Parmesan. For the full recipe, check the detailed cooking instructions. Baked Eggplant Parmesan is a simple dish. It starts with prepping the eggplant. First, slice the eggplants into 1/4-inch rounds. Sprinkle salt on the slices. Let them sit for 30 minutes in a colander. This draws out excess moisture. After that, rinse the slices and pat them dry. Next, set up a breading station. You will need three bowls. Fill one with flour, another with beaten eggs, and the last with breadcrumbs. Take each eggplant slice and dip it in the flour first. Then dip it in the egg, and finally coat it in breadcrumbs. Place the breaded slices on a baking sheet. Drizzle olive oil over the breaded slices. Bake them at 375°F for 25 to 30 minutes. Flip them halfway through. They should be golden brown and crispy. Now, it’s time to layer the dish. In a baking dish, spread marinara sauce on the bottom. Add a layer of baked eggplant slices. Then, sprinkle mozzarella and Parmesan cheese on top. Add some dried basil and oregano. Repeat these layers until you use all the ingredients. Finish with mozzarella and Parmesan on top. Bake in the oven again for another 25 to 30 minutes. Wait for the cheese to become bubbly and golden. After baking, let it cool for a few minutes. Slice and serve with fresh basil leaves on top. This dish serves six people. Each serving has about 300 calories. It contains 15 grams of fat and 35 grams of carbs. You also get 12 grams of protein from the cheese and eggs. Eggplant adds fiber and vitamins too. This dish is a great mix of flavors and nutrients. You can enjoy Baked Eggplant Parmesan in many ways. Serve it with a simple green salad. A side of crusty bread pairs well too. For a heartier meal, serve it with pasta. You might also want to add a glass of red wine. This dish is warm and inviting, perfect for family gatherings or dinner parties. Check out the Full Recipe for more details! This post covered making baked eggplant Parmesan, from ingredients to storage tips. You learned how to choose the best eggplants, prep them, and create a great breading station. We discussed variations to suit different diets, too. In the end, this dish offers flavor and comfort, fitting for anyone. Enjoy exploring your options and taste the joy of cooking!

Baked Eggplant Parmesan Delicious and Simple Dish

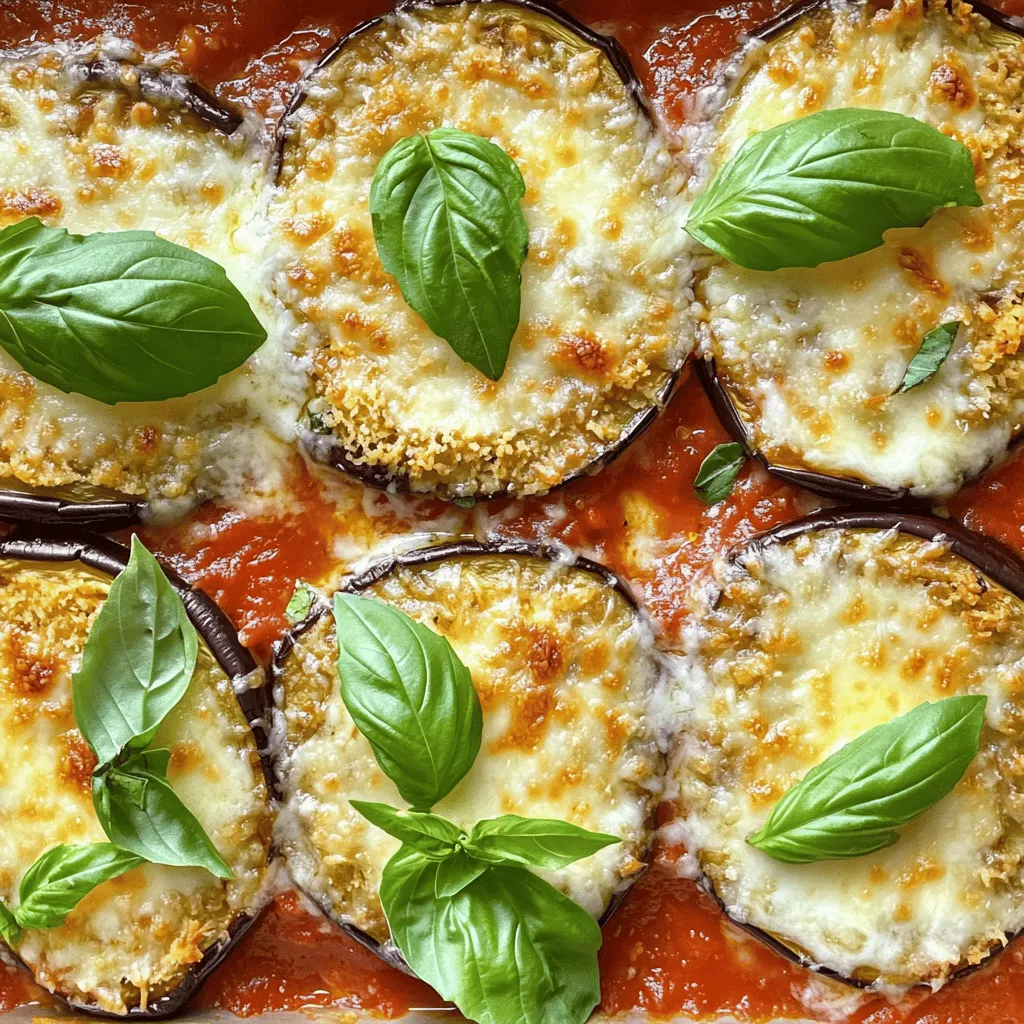
Craving a tasty, healthy meal? Baked Eggplant Parmesan is your answer! This simple dish packs flavor and comfort in every

- 2 cups all-purpose flour - 1 teaspoon salt - 1 tablespoon sugar - 1 packet (2 ¼ teaspoons) instant yeast - ¾ cup warm water (about 110°F) - 1 tablespoon olive oil - 1 cup tomato sauce (preferably homemade or high-quality store-bought) - 2 cups fresh mozzarella cheese, sliced - Fresh basil leaves - Extra virgin olive oil for drizzling - Freshly ground black pepper to taste For a great Margherita pizza, use the best ingredients. Look for high-quality flour like King Arthur. Use fresh mozzarella, preferably from a local dairy. This cheese melts well and gives a lovely texture. For the tomato sauce, I recommend San Marzano tomatoes. They bring a rich flavor that stands out. Lastly, use fresh basil and extra virgin olive oil for that finishing touch. Fresh ingredients make a big difference. They enhance the pizza's flavor and texture. Fresh mozzarella gives a creamy taste. It melts beautifully when baked. Fresh basil adds a fragrant touch, brightening every bite. Quality tomatoes in your sauce bring sweetness and depth. Using fresh ingredients makes your Margherita pizza shine. This dish is all about simplicity, and fresh ingredients are key to its success. Enjoy the full recipe to create this classic dish! Start by mixing the dry ingredients. In a big bowl, combine 2 cups of flour, 1 teaspoon of salt, 1 tablespoon of sugar, and 1 packet of instant yeast. Stir them together until mixed well. Next, slowly add ¾ cup of warm water and 1 tablespoon of olive oil. Mix until the dough starts to form. Once it forms, move the dough to a floured surface. Knead the dough for 8 to 10 minutes until it feels smooth and elastic. After kneading, place the dough in a lightly greased bowl. Cover it with a kitchen towel to keep it warm. Let it rise in a warm spot for about 1 hour. You want the dough to double in size. This step is key. A good rise helps create a light and airy crust. Preheat your oven to 475°F (245°C). If you have a baking stone, place it in the oven to heat up. When the dough has risen, punch it down gently and move it to a floured surface. Roll it out to your desired thickness. If you like thin crust, roll it out thin. Transfer the rolled dough to parchment paper. Spread 1 cup of tomato sauce on the base, leaving a small border. Then, add 2 cups of fresh mozzarella cheese on top. Carefully place the pizza on the heated stone or tray. Bake it for 10 to 12 minutes until the crust is golden and cheese is bubbly. Once baked, remove the pizza from the oven. Scatter fresh basil leaves on top and drizzle with extra virgin olive oil. Let it cool for a minute, slice it up, and enjoy! For the full recipe, check out the complete guide. To get a great crust, start with the right flour. Use all-purpose flour, as it gives the best results. When you knead the dough, do it for about 8-10 minutes. This builds gluten and makes the crust chewy. After rising, roll it out gently. Avoid pressing too hard. A thin crust is classic for Margherita pizza. The oven should be very hot. Preheat it to 475°F (245°C). If you have a pizza stone, place it in the oven while it heats. This helps create a crispy bottom. When the dough is ready, use parchment paper to transfer it to the stone. This makes handling easier. Bake for 10-12 minutes. Keep an eye on it. You want a golden crust and bubbling cheese. To boost flavor, use fresh basil leaves. Scatter them on right after baking. Drizzle extra virgin olive oil on top for richness. You can also add a pinch of black pepper for a bit of spice. For a twist, try using homemade tomato sauce. This adds depth and freshness. Follow these tips for a truly authentic Margherita pizza experience. For the full recipe, check out the details above. {{image_2}} You can make a gluten-free Margherita pizza using almond flour or gluten-free flour. Mix the gluten-free flour with salt and yeast. Use warm water to help form the dough. Make sure to add some extra olive oil for flavor. Roll out the dough as you would with regular flour. Bake it just like the classic version. This way, everyone can enjoy a slice! For a vegan Margherita pizza, swap the mozzarella with vegan cheese. You can also use cashew cream for a creamy texture. Make sure your tomato sauce is vegan, too. Fresh basil leaves add that classic flavor. Drizzle with olive oil before serving. This option is not only tasty but also friendly for plant lovers! Margherita pizza is great as is, but you can get creative! Try adding sliced tomatoes or roasted garlic for extra flavor. You can mix in arugula or spinach for some greens. For spice, sprinkle crushed red pepper on top. Want a twist? Add balsamic glaze after baking. This gives it a sweet and tangy kick. Feel free to experiment and find your favorite combinations! For the complete recipe, check out the Full Recipe section. To keep your leftover Margherita pizza fresh, wrap it well in plastic wrap. You can also use aluminum foil. Place it in the fridge. This way, it stays tasty for up to three days. If you have more pizza than you can eat, consider freezing it. To reheat your pizza, preheat the oven to 375°F (190°C). Place the slices on a baking sheet. Heat for about 10 minutes. This method keeps the crust crisp and the cheese melty. Avoid microwaving as it can make the crust soggy. For longer storage, freeze your pizza. Wrap each slice in plastic wrap. Then, put the slices in a freezer bag. Remove as much air as possible. You can freeze it for up to three months. When ready to eat, thaw in the fridge overnight and reheat. Enjoy the flavors of your Margherita pizza any time with these simple steps! If you want the full recipe, check out the [Full Recipe]. Margherita pizza has roots in Italy, dating back to the late 1800s. Legend says that Queen Margherita of Savoy visited Naples. She tried a pizza made with tomatoes, mozzarella, and basil. The colors matched the Italian flag—red, white, and green. This simple dish became her favorite. Since then, Margherita pizza has spread around the world. Yes, you can make Margherita pizza without a pizza stone. If you don't have one, simply use an inverted baking tray. Preheat the tray in your oven at 475°F (245°C). This will help create a nice, crispy crust. Just remember to bake the pizza on parchment paper so it slides off easily. The best sauce for Margherita pizza is simple tomato sauce. Use high-quality canned tomatoes or fresh ones for a great flavor. You can also blend in some garlic or basil for extra taste. Avoid heavy sauces, as they can overpower the fresh ingredients. A light, smooth sauce allows the cheese and basil to shine. Check out the Full Recipe for more tips. We've covered all the key parts of making Margherita pizza. From choosing fresh, quality ingredients to preparing your dough and baking it just right, each step matters. Remember to explore variations, like gluten-free and vegan options, to suit your needs. Proper storage can keep leftovers tasty for later. Creating your pizza at home can be fun and rewarding. With these tips and recipes, you’ll craft the perfect pie every time. Enjoy sharing your delicious creations!

Classic Margherita Pizza Simple and Flavorful Recipe

Are you ready to make the perfect Margherita pizza? This simple and tasty recipe will guide you step-by-step. Fresh ingredients

- 4 large egg whites - 1 cup superfine sugar - 1/4 teaspoon cream of tartar Meringue cookies need just a few simple ingredients. The egg whites give them their lightness. Superfine sugar helps create a smooth texture. Cream of tartar stabilizes the egg whites, ensuring they hold their shape. - 1 teaspoon vanilla extract - 1/4 teaspoon almond extract Adding flavor is key. Vanilla extract provides a warm sweetness. Almond extract adds a nice, nutty touch. Together, they create a delicious taste that pairs well with fruit. - 1 cup mixed fresh fruits (strawberries, raspberries, kiwi) - Optional: Edible flowers Fruit is the star of this treat. Use fresh strawberries, raspberries, and kiwi for bright colors and flavors. You can also add edible flowers for a beautiful touch. The fruit balances the sweetness of the meringue, making each bite refreshing. For the [Full Recipe], follow the steps to create these delightful cookies. 1. Preheat your oven. Set it to 200°F (90°C). Line two baking sheets with parchment paper. 2. Beat the egg whites. In a clean bowl, add 4 large egg whites and a pinch of salt. Use an electric mixer on medium speed. Beat until soft peaks form. This means the egg whites should hold a little shape but still flow. 1. Add sugar. Gradually add 1 cup of superfine sugar, one tablespoon at a time. Keep beating on high speed. Let the sugar dissolve fully each time. 2. Beat to stiff peaks. Once all sugar is mixed in, add 1/4 teaspoon of cream of tartar, 1 teaspoon of vanilla extract, and 1/4 teaspoon of almond extract. Beat until stiff peaks form. The meringue should look shiny and hold its shape well. 1. Dollop or pipe the meringue. Use a piping bag or a spoon to create small mounds on the lined baking sheets. Make sure to leave space between each piece. 2. Bake the meringue. Place the sheets in the oven and bake for 1.5 to 2 hours. The meringues should feel dry and lift off the parchment easily. 3. Cool properly. Turn off the oven and leave the meringue inside with the door slightly ajar. This helps prevent cracking. Once fully cool, top each meringue with fresh fruit. For a fun touch, add edible flowers as a garnish. For a full recipe, check the instructions detailed above. To make perfect meringue, start with clean tools. Any fat can ruin your egg whites. Use a glass or metal bowl for best results. Make sure your egg whites are at room temperature. This helps them whip better. When you beat the egg whites, add a pinch of salt. This aids in creating stable peaks. When adding sugar, do it slowly. Add one tablespoon at a time. Mix on high until the sugar fully dissolves. This is key for a smooth texture. Once all the sugar is added, you should see stiff peaks. The meringue should look shiny and hold its shape. Serving meringue cookies can be fun. You can stack them high for a tower of sweet. A simple way to serve is on a plate with fruit around them. This makes a colorful display. For a unique touch, use edible flowers. They add beauty and fun to your treats. Just sprinkle them on top or place them beside the cookies. You can change the flavor of your meringue easily. Try different extracts like lemon or coconut. A little spice, like cinnamon, can also add warmth. For fruits, feel free to mix it up. Use berries for a tart taste or tropical fruits for sweetness. Sliced peaches or mangoes can be a delightful surprise. You can also top them with yogurt for a creamy twist. {{image_2}} Using fresh fruit makes your meringue cookies pop. You can mix seasonal fruits like strawberries, peaches, or blueberries. These fruits add flavor and color. Berries work well because they are sweet and tart. Tropical fruits like mango, pineapple, or kiwi bring a fun twist. Choose fruits that you love. Their natural sweetness pairs well with the lightness of meringue. Want to change things up? Add some zest! You can make citrus meringue cookies by adding lemon or lime zest. This gives a bright and fresh taste. For a rich flavor, try chocolate meringue. Just mix in some cocoa powder with the sugar. You’ll have a sweet treat that is both crunchy and creamy. Are you looking for gluten-free options? Good news! Meringues are naturally gluten-free since they use egg whites and sugar. For vegan meringues, use aquafaba, the liquid from canned chickpeas. Whip it up just like egg whites. Your vegan friends will love this tasty treat! To keep your meringue cookies fresh, store them in an airtight container. Place them in a cool, dry area. Avoid moisture to keep them crisp. You can also add a piece of parchment paper between layers to prevent sticking. If your meringues start to soften, they may have absorbed moisture. To fix this, dry them in a low oven briefly. You can freeze meringue cookies for longer storage. Flash-freeze them first by placing them on a baking sheet. After they freeze solid, transfer them to a freezer bag. This method keeps them from sticking together. When you want to eat them, thaw meringue at room temperature. Don't rush this step. Thawing too fast can ruin their texture. Meringue cookies last about 1 to 2 weeks at room temperature. After that, they may lose their crunch. Signs of spoilage include a sticky surface or off smell. If they feel soft or chewy, discard them. For the best taste, enjoy them fresh after making them. For a complete guide, check out the Full Recipe. You can tell meringue is done by its texture and color. It should look dry and crisp. The outside should be firm, and the inside will be airy. If it lifts off the parchment easily, that’s a good sign. The color should remain white or slightly off-white, not browned. You can use granulated sugar, but it may change the texture. Granulated sugar takes longer to dissolve. This can lead to a grainy meringue. Superfine sugar mixes in smoothly, giving a light and fluffy texture. If you use granulated sugar, beat it longer to ensure it fully dissolves. Store leftover meringue cookies in an airtight container. Keep them in a cool, dry place. This helps maintain their crispness. Avoid the fridge, as moisture can make them soft. If you want to keep them longer, you can freeze them. Just thaw them at room temperature before serving. Meringue cookies are fun and easy to make. You need just a few main ingredients like egg whites and sugar. Each step, from beating the eggs to baking, matters. Following the tips ensures your meringue turns out perfect. You can even try different flavors and fruits to make them special. Store them right to keep them fresh. Making these cookies can be a rewarding experience. Enjoy sharing your sweet treats with others!

Meringue Cookies with Fruit Easy and Colorful Treat

If you’re looking for a fun and colorful treat, meringue cookies topped with fresh fruit are the answer! These light

To create a tasty berry smoothie bowl, use these main ingredients: - 1 cup frozen mixed berries (strawberries, blueberries, raspberries) - 1 banana, sliced - 1/2 cup Greek yogurt (or any dairy-free yogurt) - 1/2 cup almond milk (or any milk of choice) - 2 tablespoons chia seeds These ingredients give your smoothie bowl a smooth and creamy base. The frozen berries add a chill, while the banana brings sweetness and texture. Greek yogurt packs in protein, making it filling and nutritious. Chia seeds offer fiber and healthy fats, boosting the health factor. Toppings make your smoothie bowl fun and tasty. Here are some great options: - Fresh berries - Sliced banana - Granola - Coconut flakes - Mint leaves Add fresh berries and sliced banana for extra flavor and color. Granola gives a nice crunch. Coconut flakes add a tropical twist. Mint leaves not only look pretty but also add a refreshing taste. If you prefer a sweeter bowl, consider these sweeteners: - 1 tablespoon honey - 1 tablespoon maple syrup Both honey and maple syrup work well to enhance sweetness. Adjust the amount based on your taste. You can skip sweeteners if you like your smoothie bowl naturally sweet from the fruits. For the full recipe, check out the Berry Bliss Smoothie Bowl. To start your berry smoothie bowl, gather all your ingredients. You need: - 1 cup frozen mixed berries (strawberries, blueberries, raspberries) - 1 banana, sliced - 1/2 cup Greek yogurt (or any dairy-free yogurt) - 1/2 cup almond milk (or any milk of choice) - 2 tablespoons chia seeds - 1 tablespoon honey or maple syrup (optional) In a blender, combine the frozen mixed berries, sliced banana, Greek yogurt, almond milk, chia seeds, and honey if you want some extra sweetness. Make sure all the ingredients fit well in your blender. Now, blend everything together. Start on low speed. This helps mix the ingredients without splattering. Gradually increase to high speed. Blend until the mixture is smooth and creamy. If it seems too thick, add a little more almond milk. Blend again until you reach your desired texture. Once the smoothie base is ready, pour it into a bowl. Now comes the fun part: toppings! You can use fresh berries, sliced banana, granola, and coconut flakes. Arrange them nicely on top of the smoothie. For a bright touch, add mint leaves. This makes your bowl look fresh and inviting. Enjoy your delicious berry smoothie bowl right away! For the full recipe, check out the details above. To get that creamy, dreamy texture in your berry smoothie bowl, start with frozen fruit. Frozen mixed berries give a thick base. If you want it thicker, add less milk. For a thinner mix, add more almond milk. Blend well until it's smooth. Sometimes, stopping to scrape the sides helps. This makes sure all the fruit gets blended. You can easily change the recipe to fit your needs. If you are dairy-free, use coconut yogurt instead of Greek yogurt. For nut-free options, choose oat milk or rice milk. If you want a lower-carb option, skip the banana and add avocado. This keeps the creaminess but cuts the sugar. To boost nutrition, add a scoop of protein powder or spinach. Both blend well without changing the taste. Chia seeds are great for fiber and omega-3s, so keep those in your mix. You can also top your bowl with nuts or seeds for extra crunch and health benefits. These small changes can add big health rewards. For the full recipe, check out the Berry Bliss Smoothie Bowl! {{image_2}} You can mix and match berries to create your own flavor. Try strawberries, blueberries, and blackberries for a sweet treat. Or, combine raspberries and strawberries for a tart twist. Each berry adds its own taste and nutrition. Mixing different berries also gives you a colorful bowl! If you have nut allergies, use oat milk or coconut milk instead of almond milk. For a creamy base, try coconut yogurt or soy yogurt. Both options keep your smoothie bowl tasty and smooth, without nuts or dairy. You won't miss the creaminess at all. Add seasonal fruits to keep your bowl fresh and exciting. In summer, throw in peaches or cherries for sweetness. In fall, try apples or pears for a cozy flavor. This way, your smoothie bowl changes with the seasons, making it fun to enjoy all year long. For the full recipe, check out the Berry Bliss Smoothie Bowl. If you have leftover smoothie bowl, store it in an airtight container. Keep it in the fridge. It stays fresh for up to 24 hours. When ready to eat, stir it well. If it seems thick, add a splash of almond milk. This helps bring back the creamy texture. You can freeze smoothie ingredients for later use. Portion your mixed berries and banana slices into freezer bags. This keeps them fresh for about three months. When ready to make a smoothie bowl, just grab a bag. It saves time and reduces waste. You can blend frozen fruits directly without thawing. A prepared berry smoothie bowl tastes best when eaten fresh. However, if stored properly, it lasts up to one day in the fridge. The toppings may get soggy over time. For best results, add toppings right before serving. This keeps your bowl looking and tasting great. For a tasty berry smoothie bowl, check out the Full Recipe! Berry smoothie bowls are packed with vitamins and minerals. They are rich in antioxidants, which help fight free radicals. Berries boost your immune system and improve heart health. The yogurt adds protein and calcium, which are good for bones. Chia seeds provide healthy fats and fiber, keeping you full. This bowl is a tasty way to eat healthy. Yes, you can use fresh berries! Fresh berries will give your smoothie bowl a lighter texture. If you prefer a cooler bowl, you can freeze the fresh berries first. Just blend them until smooth. The taste will still be great, but the texture may be different. To make your smoothie bowl vegan, use dairy-free yogurt and plant-based milk. Almond milk or oat milk works well. Skip the honey and use maple syrup instead if you want sweetener. This way, you can enjoy a delicious bowl that fits a vegan diet. Serve your smoothie bowl in a wide, shallow bowl. This makes it easy to add toppings. Use a spoon to scoop out the smoothie. Arrange toppings in a colorful way for a pretty look. You can add fresh fruit, granola, or nuts on top. You can customize your smoothie bowl in many ways! Change the type of berries you use. Add spinach for a green boost or nut butter for creaminess. Try different toppings like seeds, nuts, or even dark chocolate. Mix and match to find your perfect flavor. For the full recipe, check out the Berry Bliss Smoothie Bowl. You learned about making delicious berry smoothie bowls from ingredients to storage. Remember, choosing the right berries and toppings can boost taste and health benefits. Don’t hesitate to experiment with different textures and flavors to find your perfect blend. With these tips, you can create a beautiful, nutritious dish for any time of day. Enjoy every bite and share your creations with others!

Berry Smoothie Bowl Flavorful and Nutritious Delight

Are you ready to whip up a berry smoothie bowl that’s both tasty and good for you? I’m excited to

- 1 cup basmati rice - 2 cups vegetable broth (or water) - 1 tablespoon olive oil - 1 lime (zested and juiced) - 1/2 cup fresh cilantro, chopped - 1/2 teaspoon garlic powder - 1/4 teaspoon cumin - Salt to taste - Additional herbs (parsley or green onions) - Spices (paprika or chili flakes) - Tacos - Grilled chicken or fish - Black beans Gather these ingredients to make the zesty cilantro lime rice. Start with the basmati rice. It gives us a nice fluffy texture. Use vegetable broth for rich flavor, or water if you prefer. The olive oil adds a bit of richness. The lime zest and juice deliver a bright taste. Cilantro provides freshness, while garlic powder and cumin add depth. You can adjust salt to your liking. For optional ingredients, consider fresh herbs like parsley or green onions. They can add more layers of flavor. Spices such as paprika or chili flakes can bring some heat. Pair this dish with tacos for a fun meal. Grilled chicken or fish also works great. Lastly, serve it alongside black beans for a hearty touch. If you want to make it a full meal, check the full recipe for more guidance. - Rinse the basmati rice and remove excess starch. - Heat olive oil and toast the rice. To start, rinse the basmati rice under cold water. This step is key. It removes the extra starch that can make your rice sticky. Rinsing helps the grains stay fluffy. Next, heat one tablespoon of olive oil in a medium saucepan over medium heat. When the oil is warm, add the rinsed rice. Sauté the rice for about 2-3 minutes. Stir it gently so it toasts evenly without burning. This step adds a nice depth of flavor. - Boil the vegetable broth (or water). - Cover and simmer until the rice is tender. Now, pour in two cups of vegetable broth or water. This will create the perfect base for the rice. Bring the mixture to a boil. Once it starts bubbling, reduce the heat to low. Cover the saucepan tightly and let it simmer for about 15 minutes. Wait patiently while the rice absorbs the liquid and becomes tender. - Fluff rice and mix with lime, cilantro, and spices. - Serve in a decorative bowl for presentation. After the cooking time, turn off the heat. Let the rice sit, covered, for another 5 minutes. This steaming step helps the rice get even fluffier. After that, fluff the rice with a fork. Add the lime zest, lime juice, chopped cilantro, garlic powder, cumin, and salt to taste. Mix gently to combine all the flavors. For a beautiful presentation, serve the zesty cilantro lime rice in a decorative bowl. Top it with some cilantro leaves and lime wedges for a pop of color. Enjoy this dish with your favorite meals. For the full recipe, check the recipe section above. - Rinsing rice is key. It removes extra starch. This helps the rice stay fluffy. - Use a medium saucepan for even cooking. Heat the olive oil before adding the rice. Toasting the rice adds flavor and texture. - Adjust lime and cilantro to fit your taste. Add more lime for tang. Use less if you prefer it milder. - Get creative with spices. A pinch of chili flakes adds heat. Cumin brings warmth, while garlic powder adds depth. - Serve your rice in a bright bowl. It makes meals pop and look fresh. - Garnish with extra cilantro leaves and lime wedges. A sprinkle of lime zest adds color. It makes your dish look tasty and fun. {{image_2}} You can swap out the basmati rice for brown rice. Brown rice has more fiber and a nutty taste. Just remember, it takes longer to cook. You will need to adjust the liquid amount and cooking time. For the broth, you can use chicken broth instead of vegetable broth. If you don't have broth, plain water works too. Each option changes the flavor, so choose what you like best. Want some heat? Add diced jalapeños to your rice. Start with one jalapeño and taste as you go. You can always add more if you want it spicier. If you're feeling adventurous, try adding other herbs. Mint or basil can enhance the flavor. These herbs give a fresh twist to the dish. Experiment with different combinations to find what you enjoy. You can serve this rice cold as a rice salad. Just let it cool and mix in some chopped veggies. It makes a great side dish for summer meals. Another fun way is to stuff the rice in burritos. It pairs well with grilled proteins like chicken or shrimp. This adds a zesty kick to your favorite wraps. To keep zesty cilantro lime rice fresh, store it in the fridge. Place the rice in an airtight container. This helps prevent moisture loss and keeps it flavorful. It's best to refrigerate leftovers within two hours of cooking. You can enjoy it for up to four days. When reheating, you want to keep the rice moist. The microwave is quick but can dry it out. Add a splash of water before covering the bowl. Heat in short bursts, stirring in between. The stovetop works well too. Just add a bit of water in a pan. Heat on low, stirring gently until warm. Yes, you can freeze zesty cilantro lime rice! First, let it cool completely. Then, pack the rice into freezer-safe bags or containers. Remove as much air as possible. This keeps it from getting freezer burn. For thawing, place it in the fridge overnight. You can also microwave it directly from the freezer, adding some water to keep it moist. It takes about 30 minutes to make zesty cilantro lime rice. You will spend 10 minutes on prep and 20 minutes cooking. This simple breakdown makes it easy to fit into your meal plan. Yes, this recipe is vegan! All the ingredients are plant-based. You can use vegetable broth or water for cooking the rice. This makes it a great choice for everyone. Zesty cilantro lime rice goes well with many dishes. Here are some ideas: - Tacos - Grilled chicken or fish - Black beans - Fajitas - Stir-fried veggies These pairings enhance the flavors of the rice and create a tasty meal. Yes, you can use other rice types. Here are some options: - Brown rice (add extra cooking time) - Jasmine rice (similar cooking time) - Quinoa for a gluten-free option Each rice has its own flavor and texture, so try what you like best! If your rice tastes too sour, try these tips: - Add a pinch of sugar. - Mix in more rice to balance flavors. - Use less lime juice next time. These adjustments help you find the perfect taste for your dish. This blog post covers how to make zesty cilantro lime rice. You need simple ingredients like basmati rice, vegetable broth, and lime. I shared easy step-by-step instructions for cooking and serving. You can also tweak flavors and use tips for perfecting your dish. Remember, prep and storage matter too. Try new ingredients and pair it well with tacos or grilled meats. With these methods, you can enjoy a tasty side dish that enhances any meal. Enjoy cooking and experimenting in your kitchen!

Zesty Cilantro Lime Rice Flavorful Side Dish Recipe

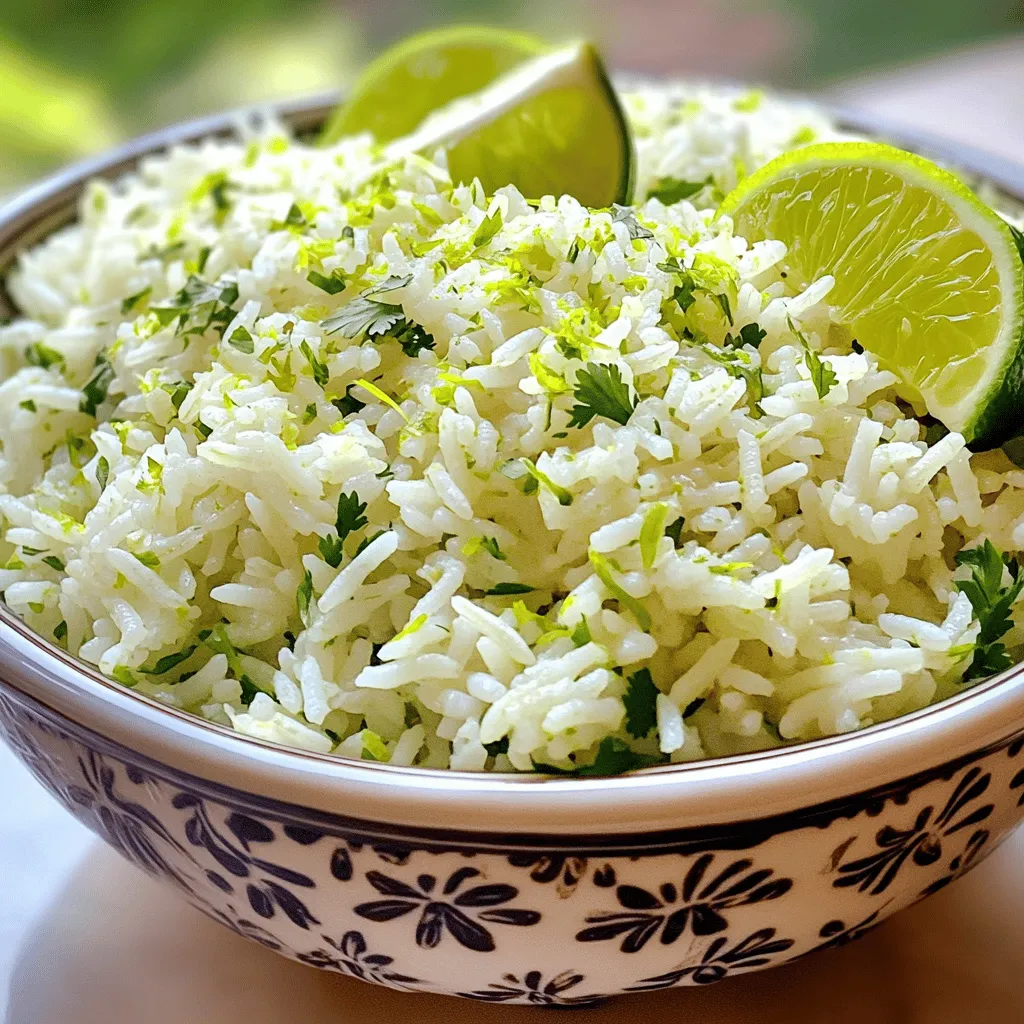
Ready to add a burst of flavor to your meals? This Zesty Cilantro Lime Rice is the perfect side dish.

To make quinoa vegetable pilaf, you need fresh and simple ingredients. Here’s what you will need: - 1 cup quinoa, rinsed - 2 cups vegetable broth - 1 onion, diced - 2 cloves garlic, minced - 1 carrot, diced - 1 bell pepper, chopped (any color) - 1 zucchini, diced - 1 cup green peas (fresh or frozen) - 1 teaspoon cumin - 1 teaspoon smoked paprika - 2 tablespoons olive oil - Salt and pepper to taste - Fresh parsley, chopped, for garnish These ingredients create a tasty and nutritious meal. Quinoa is the star here. It is packed with protein and has a great texture. The broth adds depth, while the veggies give color and crunch. You can switch up the veggies based on what you have. This recipe is all about using what you love. Check out the Full Recipe for the easy steps to cook this dish. To start, heat 2 tablespoons of olive oil in a medium pot over medium heat. Add 1 diced onion and sauté it until it turns translucent. This usually takes about 3-4 minutes. Next, stir in 2 minced garlic cloves, along with 1 diced carrot, 1 chopped bell pepper, and 1 diced zucchini. Cook these vegetables for about 5-7 minutes. You want them to soften and blend well. Once the veggies are ready, stir in 1 teaspoon of cumin and 1 teaspoon of smoked paprika. This step brings out their rich flavors. After 1-2 minutes, add 1 cup of rinsed quinoa to your pot. Make sure the quinoa is well-coated with the vegetable mix. Then, pour in 2 cups of vegetable broth and season with salt and pepper to taste. Bring the mixture to a boil. Once it bubbles, reduce the heat to low. Cover the pot and let it simmer for around 15 minutes. The quinoa will absorb the broth and become fluffy. In the last 5 minutes of cooking, add 1 cup of green peas. Stir them in gently. When the time is up, take the pot off the heat. Let it sit for 5 minutes before fluffing the quinoa with a fork. This dish is perfect as a warm, healthy meal. For the full recipe, check the details above. - Ensuring quinoa is properly rinsed Rinsing quinoa helps remove its natural coating called saponin. This coating can taste bitter. To rinse, place quinoa in a fine mesh strainer. Run cold water over it until the water runs clear. This step is key for a great taste. - Seasoning effectively Seasoning your dish makes all the difference. Use salt and pepper, but also explore herbs and spices. Cumin and smoked paprika add depth. Add these spices early while cooking to release their full flavor. - Alternative vegetables for pilaf You can change the veggies to suit your taste. Try corn, spinach, or broccoli. Each one brings a unique flavor and texture. Mix and match for variety! - Using different herbs and spices Explore different herbs to change the flavor. Fresh basil or cilantro can brighten the dish. You can also try thyme or oregano for a more earthy taste. - Best side dishes to pair with quinoa pilaf Quinoa pilaf pairs well with many side dishes. You can serve it with roasted chicken or grilled fish. A simple green salad also works nicely. - Presentation ideas for serving Make your pilaf pop on the plate! Use a ring mold for a neat shape. Garnish with fresh parsley for a splash of color. Serve in a bowl with a drizzle of olive oil for a charming look. {{image_2}} You can boost your quinoa vegetable pilaf with protein. If you want meat, try chicken or shrimp. For a plant-based option, add beans or lentils. Chickpeas work great, too. Simply rinse and drain canned beans. Stir them in during the last few minutes of cooking. This adds both flavor and texture. To make your pilaf even tastier, play with spices. Try adding turmeric for a warm color. Or, mix in curry powder for a bold twist. You can also use fresh herbs like basil or cilantro. These will brighten the dish. Drizzle a little lemon juice or balsamic dressing before serving. This adds a nice zing. Change your vegetable mix to match the seasons. In spring, add asparagus or fresh peas. Summer calls for corn or tomatoes. In fall, use pumpkin or sweet potatoes. Winter is perfect for root veggies like parsnips or carrots. You can also use seasonal herbs like thyme or rosemary. These choices make your pilaf fresh and exciting. To keep your quinoa vegetable pilaf fresh, store it in an airtight container. This helps prevent drying out. Place it in the fridge if you plan to eat it within a few days. For longer storage, freezing is a good option. When storing in the fridge: - Let it cool completely before sealing. - Use a glass or plastic container with a tight lid. - It can last up to 5 days in the fridge. For freezing: - Divide the pilaf into portions for easy reheating. - Use freezer-safe bags or containers. - Label them with the date for reference. - It can stay good for up to three months in the freezer. How long can you keep it in the fridge? Quinoa vegetable pilaf can last about five days in the fridge. After that, the texture may change, and it may not taste as fresh. Signs of spoilage Look for any off smells or a change in color. If you see mold or the pilaf feels slimy, it’s best to throw it away. Always trust your senses; if it seems off, don’t eat it. Quinoa vegetable pilaf is a tasty dish made with quinoa and vegetables. It is healthy, colorful, and full of flavor. Quinoa is a great source of protein and fiber. The mix of vegetables adds vitamins and minerals. You can use any veggies you like, making it a flexible recipe. This dish is perfect as a side or a main meal. Plus, it's quick to make and easy to enjoy. Cooking quinoa vegetable pilaf takes about 30 minutes in total. You spend about 10 minutes prepping the ingredients. This includes chopping the veggies and rinsing the quinoa. Then, you cook everything for about 20 minutes. The quinoa cooks in the vegetable broth, absorbing all the flavors. You can have a warm, tasty meal ready in no time! Yes, you can make quinoa vegetable pilaf ahead of time. Prepare it and let it cool before storing. Place it in an airtight container in the fridge. It stays fresh for about 3 to 5 days. To reheat, add a splash of water and heat it in the microwave or on the stove. This way, you can enjoy a quick, healthy meal whenever you want! For the full recipe, check out the instructions above. In this blog post, we explored how to make delicious quinoa vegetable pilaf. We covered the key ingredients, cooking steps, and helpful tips for the best results. You can easily customize this dish with various proteins and spices. Don’t forget to store any leftovers properly for later. Quinoa pilaf is a healthy and flexible meal that anyone can enjoy. Give it a try, and you might just discover your new favorite dish!

Quinoa Vegetable Pilaf Simple and Flavorful Recipe

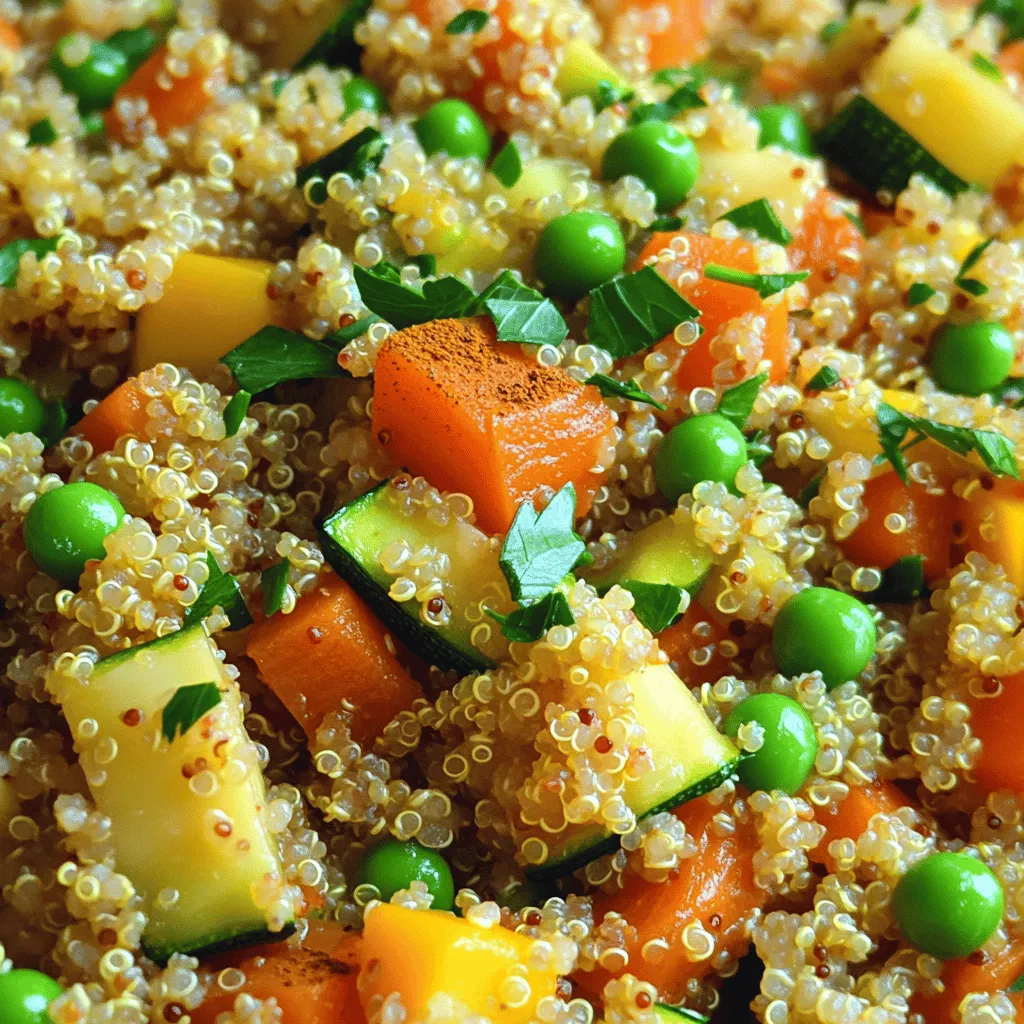
Looking for a quick, tasty, and healthy meal? You’re in the right place! This Quinoa Vegetable Pilaf packs a punch

Older posts
Newer posts
← Previous Page1 … Page52 Page53 Page54 … Page71 Next →

dsad

© 2025 Southern Dishes • Built with GeneratePress

Our Policies

  • Copyright Policy
  • Cookie Policy
  • GDPR Policy
  • Privacy Policy
  • Disclaimer
  • Terms Of Use

More Information

  • Home
  • About
  • Contact
  • Appetizers
  • Dessert
  • Dinner
  • Drinks
©2025, Southern Dishes About Back To Top