Skip to content
DisclaimerTerms Of UseGDPR PolicyCookie Policy

Southern Dishes

  • Home
  • Drinks
  • Appetizers
  • Dinner
  • Dessert
  • About
  • Contact
  • Privacy Policy
DisclaimerTerms Of UseGDPR PolicyCookie Policy

Isabella

- Bell peppers (red, yellow, green) - Broccoli florets - Carrots - Sugar snap peas - Red cabbage - Sesame oil - Soy sauce (or tamari) - Honey or maple syrup - Garlic and ginger - Cooked rice - Quinoa - Sesame seeds for garnish In this Rainbow Veggie Stir Fry, I love using fresh vegetables. Each one adds color and nutrition. The bell peppers give sweetness and crunch. Broccoli florets bring a nice texture and flavor. Carrots add a hint of earthiness, while sugar snap peas offer a delightful snap. Red cabbage not only looks pretty but also adds a slight peppery bite. I use sesame oil for its rich, nutty taste. Soy sauce or tamari gives a salty depth. Honey or maple syrup balances the flavors with sweetness. Garlic and ginger round out the dish with warmth and zest. For serving, I recommend cooked rice or quinoa. Both options soak up the sauce well. A sprinkle of sesame seeds adds a nice touch. This dish is not just colorful but also a feast for your taste buds. For the full experience, don’t forget to check out the Full Recipe. - First, prepare and chop all vegetables. - Next, measure out the sauces and seasonings. Make sure to use fresh vegetables for the best taste. The colors of the veggies make this dish fun and bright. This is a great way to get kids excited about eating veggies. - Heat sesame oil in a large skillet or wok over medium-high heat. - Add minced garlic and grated ginger; sauté for about 1 minute until fragrant. - Toss in the sliced bell peppers and carrots. Stir-fry for about 3 minutes until they begin to soften. - Add the broccoli florets and sugar snap peas, cooking for an additional 2-3 minutes, stirring frequently. - Finally, add the shredded red cabbage and cook for another 2 minutes. All vegetables should be vibrant and tender but still crisp. Cooking the veggies in stages helps keep them bright and crunchy. This method lets each veggie shine while blending flavors. - In a small bowl, mix together soy sauce and honey or maple syrup. - Pour this mixture over the stir-fried veggies and toss to coat evenly. - Cook for another minute. - Remove from heat and sprinkle sesame seeds over the top for garnish. This adds a lovely crunch and flavor boost to your dish. Serve the stir fry over cooked rice or quinoa for a complete meal. For the full recipe, check out the detailed instructions earlier in this article. - Use fresh, seasonal vegetables. They taste better and add color. - Customize the sauce to your taste. Add more honey for sweetness or soy sauce for saltiness. - Avoid overcooking the vegetables. They should be crisp and bright. - Maintain brightness and crunch. This makes each bite fun and tasty. - Pair with different grains. Rice or quinoa works great. - Add proteins for a complete meal. Tofu, chicken, or shrimp can boost nutrition. Using these tips, you can make your Rainbow Veggie Stir Fry even more delicious. For the full recipe, check the section above. {{image_2}} You can add protein to your Rainbow Veggie Stir Fry for extra flavor and nutrition. - Tofu: Firm tofu works best. Press it to remove extra water, then cube it. Sauté it until golden before adding veggies. This gives a nice texture. - Chicken or shrimp: Thinly slice chicken breast or use peeled shrimp. Cook them first in the hot skillet. Once they are cooked through, add your veggies. You can mix up the vegetables based on what's in season or what you have at home. - Seasonal swaps: Try zucchini or bok choy. They add great flavor and texture. Just chop them up and toss them in when you add the other veggies. - Using frozen vegetables: Frozen veggies are a great option. They save time and are often just as nutritious. Just make sure to thaw them before cooking. Changing the sauce can give your stir fry a new twist. - Spicy versions: If you like spice, add chili paste or sriracha to the sauce. Start with a little and add more if you want more heat. - Vegan options: If you prefer vegan, skip the honey. Use maple syrup instead. It gives the same sweetness without using animal products. Explore these variations for your Rainbow Veggie Stir Fry to keep your meals exciting! For the full recipe, check out the detailed instructions above. After cooking your rainbow veggie stir fry, cool it down quickly. Store leftovers in an airtight container. This keeps your meal fresh and tasty. Use the stir fry within three days for the best flavor. Always check for signs of spoilage, like off smells or changes in color. You can freeze your stir-fried veggies for later use. Let them cool completely before packing. Use freezer-safe bags or containers to prevent freezer burn. They can last up to three months. To reheat, thaw them overnight in the fridge. Heat on the stove or in the microwave until warm. Stir often to keep them even. You can make the rainbow veggie stir fry ahead of time. Chop your veggies and store them in separate containers. This lets you mix and match for quick meals. You can also prepare the sauce in advance. Just combine the soy sauce, honey, garlic, and ginger. This makes your cooking time faster and hassle-free. Enjoy the flavors anytime with little effort! To make your stir fry healthier, focus on lower-calorie ingredients. Here are some suggestions: - Use more leafy greens like spinach or kale. - Swap out sugar snap peas for green beans to cut calories. - Replace honey with a sugar-free sweetener. - Use less oil, or choose a spray oil to control portions. - Add more protein with beans or lentils instead of meat. These changes help keep the dish light and nutritious. Plus, you'll still enjoy great flavors! Yes, you can easily make this recipe vegetarian or vegan. Here are some options: - Use tamari instead of soy sauce for a gluten-free option. - Replace honey with maple syrup or agave nectar for sweetness. - Add tofu, tempeh, or chickpeas for protein. - Use vegetable broth instead of any meat-based sauces. These swaps ensure everyone can enjoy this colorful dish! You can add many flavors and textures to your veggie stir fry. Here are some ideas: - Toss in some fresh herbs like basil or cilantro for a burst of flavor. - Add nuts like cashews or almonds for crunch. - Include other veggies such as zucchini, mushrooms, or baby corn. - Experiment with different sauces like teriyaki or sweet chili. Feel free to get creative and mix in what you love! To keep your vegetables crisp in stir fry, follow these tips: - Cook on high heat to sear the veggies quickly. - Add harder vegetables first, like carrots and broccoli. - Stir-fry in small batches to avoid steaming them. - Don't overcook; aim for vibrant colors and tenderness. These methods help maintain that satisfying crunch in every bite! This stir fry recipe uses fresh vegetables and sauces to pack in flavor. You learned how to choose the best ingredients, prepare them, and cook them just right. Remember to customize the meal to fit your taste and use seasonal veggies for the best outcome. Whether you want to make it healthier or add protein, options are plenty. Now, use these tips to create your perfect stir fry at home. Enjoy every bite!

Rainbow Veggie Stir Fry Flavorful and Fresh Meal

Are you ready to brighten up your dinner plate? My Rainbow Veggie Stir Fry brings together vibrant vegetables and tasty

To make this tasty dish, you need: - 12 oz (340g) penne pasta - 1 tablespoon olive oil - 1 medium onion, finely chopped - 3 cloves garlic, minced - 1 teaspoon red pepper flakes (optional) - 1 (14 oz) can crushed tomatoes - 2 cups vegetable broth - 1 cup heavy cream - 1 teaspoon dried basil - 1 teaspoon dried oregano - Salt and pepper to taste - ½ cup grated Parmesan cheese (plus extra for serving) - Fresh basil leaves for garnish You can add these to make your pasta even better: - A splash of balsamic vinegar for tang - Spinach or kale for some green goodness - A pinch of sugar to balance the acidity of the tomatoes If you have dietary needs, here are some swaps: - Use gluten-free pasta for a gluten-free dish - Almond or coconut milk can replace heavy cream - Nutritional yeast can stand in for Parmesan cheese This recipe comes together quickly and brings comfort to your table. For the full recipe, check out the details above! To make One-Pot Creamy Tomato Pasta, start by heating olive oil in a large pot over medium heat. Add finely chopped onion and cook for about 4-5 minutes until it looks clear. Next, stir in minced garlic and the optional red pepper flakes. Cook this for 1-2 minutes until you smell the garlic. Then, add the crushed tomatoes, vegetable broth, and heavy cream to the pot. Mix everything well. Bring the mixture to a light boil. Once it bubbles, add the penne pasta. Make sure the pasta is fully covered by the sauce. Cover the pot and let it cook for 12-15 minutes. Stir it every few minutes to keep it from sticking. Check if the pasta is al dente and has soaked up most of the liquid. When the pasta is ready, take the pot off the heat. Stir in grated Parmesan cheese, and season with salt and pepper. If you find the sauce too thick, add a bit more broth or cream to thin it out. Serve it hot with fresh basil leaves and extra Parmesan on top. To get the best pasta, use a large pot to give it room. Stir it often during cooking to stop it from clumping together. Make sure to check the pasta a minute or two before the time is up. You want it firm but cooked through. If it seems too dry, add a little more broth or cream to keep it creamy. - Heating olive oil and cooking onion: 4-5 minutes - Adding garlic and red pepper flakes: 1-2 minutes - Mixing in tomatoes, broth, and cream: 2 minutes - Bringing to a simmer: 2-3 minutes - Cooking penne pasta: 12-15 minutes - Stirring in cheese and seasoning: 2 minutes This breakdown helps you see how quickly this dish comes together. You can prepare a tasty meal in just about 25 minutes using the Full Recipe. Enjoy the rich flavors and creamy texture of this comforting dish! One of the biggest mistakes is overcooking the pasta. Pasta should be al dente. It cooks more in the pot after you add the cream. Another mistake is adding all the ingredients at once. Start with the aromatics like onion and garlic. This builds a strong base for flavor. Skipping the seasoning can ruin your dish. Always taste and adjust salt and pepper as you go. To make cleanup easy, use a large pot. Cook everything in this pot to reduce dishes. Line your pot with parchment paper if you want. This helps with sticking. Use a wooden spoon to avoid scratches. Clean as you go. Rinse utensils and bowls right after use. This saves time later. To enhance your one-pot creamy tomato pasta, add fresh herbs. Fresh basil adds a bright taste. You can also try thyme or parsley. For a kick, include a pinch of red pepper flakes. If you want a deeper flavor, add a splash of balsamic vinegar. A dash of lemon juice can brighten the dish, too. For more richness, consider a sprinkle of smoked paprika or a bit of nutmeg. These small additions can make a big difference. {{image_2}} You can make this dish vegetarian or vegan easily. To make it vegetarian, just use vegetable broth and keep the heavy cream. For a vegan version, swap the heavy cream for coconut milk or cashew cream. This keeps the dish rich and creamy. You can also add nutritional yeast for a cheesy flavor. Using vegan cheese can add extra taste too. If you want to add protein, chicken or shrimp works well. For chicken, cut it into small pieces and cook it with the onion at the start. This helps it soak up all the great flavors. For shrimp, add them when you stir in the pasta. Cook them just until they turn pink. This keeps them tender and juicy. Adding veggies boosts nutrition and flavor. Spinach, bell peppers, or zucchini are great options. You can toss them in with the garlic for a few minutes to soften them. You can also use frozen peas or broccoli. Just stir them in during the last few minutes of cooking. This keeps them bright and fresh. Feel free to get creative with these ideas! You can find the Full Recipe at the end for all the details. To keep your One-Pot Creamy Tomato Pasta fresh, first let it cool. Place it in an airtight container. Store it in the fridge for up to three days. This way, you can enjoy it later without losing flavor. When you reheat, use a pot on low heat. Add a splash of vegetable broth or cream to keep it creamy. Stir often to avoid sticking. You can also microwave it in a bowl. Cover it with a damp paper towel. Heat in short bursts, stirring in between. If you want to freeze your pasta, use a freezer-safe container. Portion it out into single servings for easy meals. It will stay good for up to three months. To reheat, let it thaw overnight in the fridge. Then, reheat as mentioned above for the best results. It takes about 25 minutes to make One-Pot Creamy Tomato Pasta. You spend 10 minutes prepping and 15 minutes cooking. This quick time makes it great for busy nights. You can enjoy a tasty meal without a lot of fuss. Yes, you can use different types of pasta. Penne works well, but you can try spaghetti, fusilli, or farfalle. Just keep an eye on cooking times, as they may vary. Remember, thicker pasta may take longer to cook. You can use several substitutes for heavy cream. A popular choice is half-and-half. You can also use coconut milk for a dairy-free option. Another option is to blend silken tofu with a bit of water. Each choice will give a different flavor and texture. We covered the key steps to make One-Pot Creamy Tomato Pasta. You learned about essential ingredients, cooking instructions, and tips to avoid common mistakes. We also discussed fun variations and how to store leftovers. This easy dish is perfect for busy nights. Try adding your favorite proteins or veggies for an extra twist. With these tips, you can simplify cooking and enjoy delicious pasta any time. Happy cooking!

One-Pot Creamy Tomato Pasta Flavorful Comfort Meal

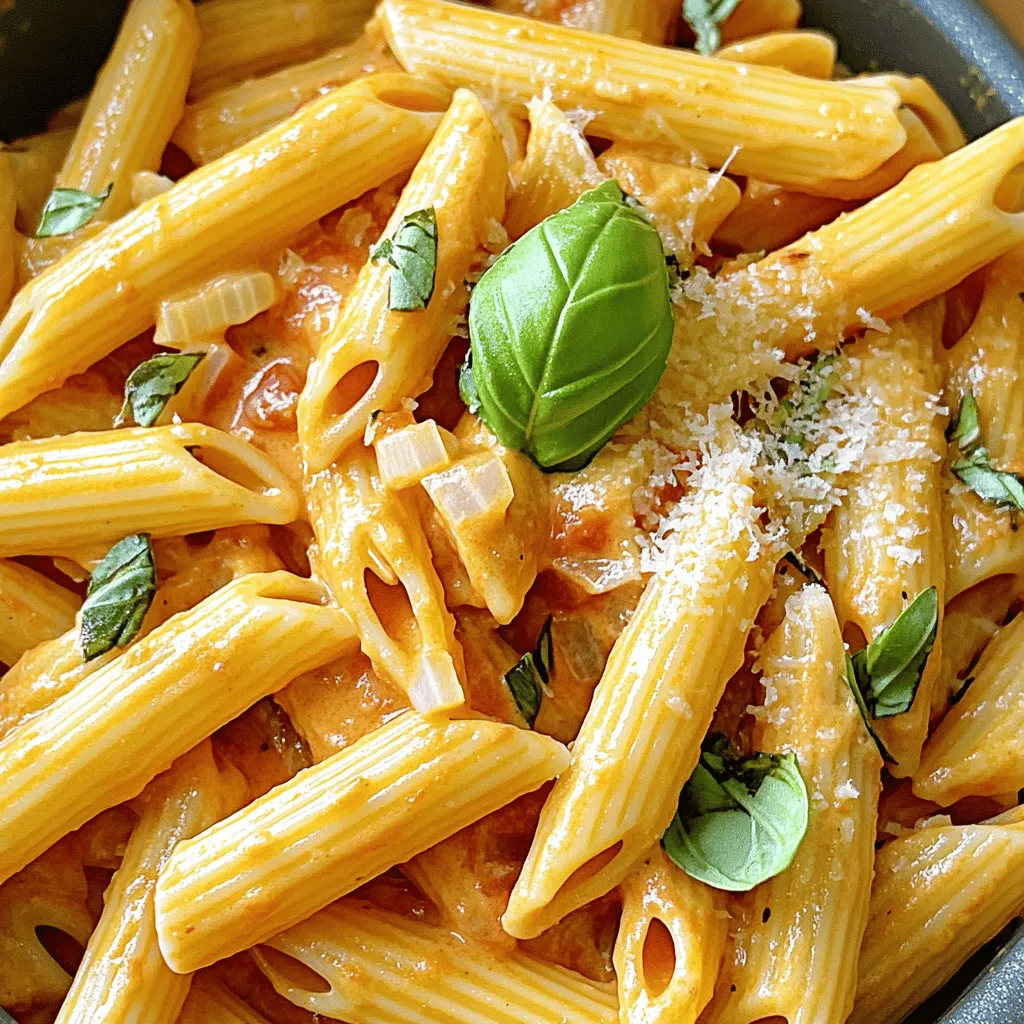
Craving a warm and tasty meal? One-Pot Creamy Tomato Pasta is sure to hit the spot! This dish combines rich

- 1 can (15 oz) chickpeas - 2 tablespoons olive oil - 1 teaspoon smoked paprika - 1/2 teaspoon cayenne pepper (adjust to taste) - 1 teaspoon garlic powder - Salt and pepper to taste - 1 cup quinoa, rinsed - 2 cups vegetable broth (or water) The base of your Spicy Chickpea Buddha Bowl is the chickpeas. They give protein and texture. Olive oil and spices add flavor and richness. Quinoa serves as a great grain. It’s light and fluffy, making the bowl hearty. Using vegetable broth instead of water enhances the quinoa's taste. - 1 cup cherry tomatoes, halved - 1 cucumber, diced - 1 avocado, sliced - 2 cups spinach or mixed greens Fresh vegetables make the bowl bright and healthy. Cherry tomatoes add sweetness, while cucumber brings crunch. Avocado offers a creamy element that balances the spices. Spinach or mixed greens provide nutrients and color. - 1/4 cup tahini - 2 tablespoons lemon juice - Water to thin tahini sauce - Fresh herbs (cilantro or parsley) for garnish The tahini sauce ties everything together. It adds a nutty flavor and creaminess. Lemon juice brightens the sauce and cuts through the richness. You can adjust the sauce thickness with water. Fresh herbs make the dish pop and add freshness. For the full recipe and details, check out the [Full Recipe]. Preheat the oven Start by preheating your oven to 400°F (200°C). This high heat helps the chickpeas become crispy. Spice the chickpeas In a mixing bowl, add one can of drained and rinsed chickpeas. Pour in two tablespoons of olive oil. Then, add one teaspoon of smoked paprika, half a teaspoon of cayenne pepper, one teaspoon of garlic powder, salt, and pepper to taste. Toss the chickpeas until they are well coated with the spices. Spread chickpeas on baking sheet Next, take a baking sheet and spread the seasoned chickpeas in a single layer. Make sure they have space between them for even cooking. Cook time and technique Roast the chickpeas for 25 to 30 minutes. Halfway through, shake the pan to ensure even cooking. You want them crispy and golden. Cooking instructions using broth While the chickpeas roast, add one cup of rinsed quinoa and two cups of vegetable broth to a saucepan. Bring it to a boil over medium heat. Tips for fluffiness Once it boils, reduce the heat to low. Cover the pot and let it simmer for about 15 minutes. This way, the quinoa absorbs the liquid and becomes fluffy. Fluff it with a fork when done. For the full recipe, you can check out the detailed instructions above. - How to store leftovers: Place leftover Buddha bowl components in airtight containers. Store the roasted chickpeas and veggies separately to keep them fresh. You can keep them in the fridge for up to three days. - Best practices for reheating: To reheat, warm the chickpeas in the oven or on the stove. This keeps them crispy. You can microwave the quinoa and veggies, but avoid overcooking. Heat them until warm, not hot. - Ingredient substitutions: You can swap chickpeas for black beans or lentils. Try brown rice or farro instead of quinoa for a different grain. - Adding protein options: For extra protein, add grilled chicken, tofu, or tempeh. Shrimp also works well, adding a nice contrast to the spices. - Serving suggestions: Serve your bowl in colorful dishes to make it pop. Layer the ingredients neatly for a beautiful look. - Enhancing visual appeal: Add sesame seeds or chopped nuts for crunch. Fresh herbs like cilantro or parsley add color and flavor. A lemon wedge on the side brightens the dish and adds freshness. {{image_2}} You can switch up your grain for this bowl. Quinoa is great, but rice or farro works too. Rice gives a softer texture. Farro adds a nutty taste. Both options fill you up nicely. If you need gluten-free, stick with rice or quinoa. They are naturally gluten-free and still delicious. The tahini sauce is a star, but yogurt is a tasty choice too. Mix plain yogurt with lemon and herbs for a creamy twist. If you like heat, try a hot sauce or fresh salsa. These add a zesty kick. Experiment with flavors to find what you love. Using seasonal veggies makes your Buddha bowl fresh and vibrant. In summer, add zucchini or bell peppers. In fall, try roasted sweet potatoes or Brussels sprouts. If you can't find a veggie, swap it with what you have. This bowl is flexible and can adapt to your pantry. Each serving of the Spicy Chickpea Buddha Bowl has around 500 calories. This bowl packs a balanced meal into one dish. The macronutrient distribution is roughly 15% protein, 45% carbohydrates, and 40% fats. This balance keeps you satisfied and full of energy. Chickpeas are a great plant-based protein source. One cup offers about 15 grams of protein. This helps your body build muscles and repair tissues. They are also high in fiber, which aids digestion and keeps you feeling full. Each serving provides essential nutrients like iron, magnesium, and vitamin B6. These nutrients help support overall health. You should consider the calories from added ingredients. The olive oil and tahini add healthy fats but also extra calories. If you want to lower calories, you can reduce the oil or tahini. For those with dietary needs, you can swap quinoa with rice for gluten-free options. This bowl is versatile and can fit many diets. Yes, you can prepare this bowl ahead of time. It makes meal prep easy and fun. - Tips for meal prep: Cook the chickpeas and quinoa in advance. Store them in separate containers. This keeps them fresh and tasty. - What components can be stored? You can store roasted chickpeas, cooked quinoa, and tahini sauce. Keep veggies fresh in the fridge until you are ready to eat. If you love heat, you can easily spice things up. Adjusting spice levels is simple. - Spice level adjustments: Add more cayenne pepper to the chickpeas. Start with a little and taste as you go. - Recommended spice additions: Try adding red pepper flakes or hot sauce for extra fire. You can also mix in some diced jalapeños for a fresh kick. This bowl is versatile. You can enjoy it with many tasty sides. - Side dish suggestions: Pair with a light salad or roasted veggies. A warm pita or flatbread also complements the meal well. - Complementary flavors: Squeeze some lemon juice on top for added brightness. Fresh herbs like cilantro or parsley also enhance the dish's flavor. Don't forget to check the Full Recipe for all the details needed to create your own Spicy Chickpea Buddha Bowl! This blog post walks you through making a delicious Buddha bowl. We covered key ingredients like chickpeas, quinoa, and fresh veggies. I shared how to roast chickpeas, cook quinoa perfectly, and create a tasty tahini sauce. You learned tips for storage and customization, plus ways to make your bowl visually appealing. Embrace the flexibility of this dish. Experiment with different grains, sauces, and seasonal veggies. Making adjustments keeps meals exciting and fresh. Enjoy nourishing your body while savoring flavors specific to your taste.

Spicy Chickpea Buddha Bowl Flavorful and Healthy Meal

Are you ready to spice up your meal plan? I’m excited to share my Spicy Chickpea Buddha Bowl recipe with

To make the No-Bake Lemon Icebox Pie, you need the following ingredients: - 1 ½ cups graham cracker crumbs - ½ cup unsalted butter, melted - 1 cup sweetened condensed milk - ½ cup fresh lemon juice - Zest of 2 lemons - 1 container (8 oz) whipped topping, thawed - Lemon slices and mint leaves for garnish (optional) These ingredients come together to create a smooth, creamy pie with a bright, zesty flavor. The graham cracker crumbs form a crunchy crust that balances the softness of the filling. Fresh lemon juice and zest give the pie its tangy kick. Sweetened condensed milk adds a rich sweetness that makes each bite delightful. Lastly, the whipped topping lightens the filling, making it airy and easy to eat. You can find the full recipe, which includes simple steps to bring this pie to life. This dessert is perfect for any occasion and sure to impress your guests. Enjoy this refreshing treat with friends and family! To start, take a medium bowl. Combine 1 ½ cups of graham cracker crumbs with ½ cup of melted butter. Mix them well until the crumbs look like wet sand. This step is key for a tasty crust. Next, grab a 9-inch pie dish. Press the graham mixture into the bottom and up the sides of the dish. Use the back of a measuring cup to pack it tightly. This way, your crust will hold together nicely. Now for the fun part! In another bowl, whisk together 1 cup of sweetened condensed milk, ½ cup of fresh lemon juice, and the zest of 2 lemons. This mix will be your pie's heart. Make sure it's smooth and well combined. Next, gently fold in one container of thawed whipped topping. This adds a light, fluffy texture to your filling. Be careful not to deflate the mixture. Pour your lemon filling into the prepared crust. Use a spatula to smooth the top. This makes it look nice and neat. Cover the pie with plastic wrap and place it in the fridge. Let it chill for at least 4 hours, or even overnight for the best results. This waiting time helps the pie to set perfectly. When you’re ready to serve, you can garnish it with lemon slices and mint leaves if you like. For the full recipe, check out the instructions above. To make the best crust, combine your graham cracker crumbs with melted butter. Mix until the crumbs look like wet sand. This helps the crust hold its shape. When you press the mixture into the pie dish, use a measuring cup. This tool helps pack the crumbs tightly and evenly. A well-packed crust gives you a strong base for your pie. Want to kick up the flavor? Add more lemon zest! It gives the pie a bright and zesty kick. You can also try different toppings. Fresh berries, toasted coconut, or whipped cream are great options. Each topping adds its own charm and taste to the pie. For the best results, refrigerate your pie overnight. This allows it to set fully. If you are in a rush, chill for at least four hours. But trust me, overnight is always better. A well-chilled pie will slice neatly and taste amazing. {{image_2}} You can easily change the taste of your pie. For a fun twist, swap the lemon juice for lime juice. This gives you a tasty Key Lime Pie variation. The tartness of lime adds a new zing. You can also add berries to the filling. Blueberries or raspberries mix well with the lemon. This gives the pie a fresh burst of flavor. If you need a gluten-free pie, you have options. You can use gluten-free cookies to make the crust. Just crush them the same way you would with graham crackers. Look for gluten-free whipped topping as a great substitute. This way, everyone can enjoy the dessert. Layering can make your pie even more exciting. You might add a layer of fresh fruit on top of your filling. Sliced strawberries or kiwis can brighten it up. Another idea is to add a chocolate layer for richness. Just melt some chocolate and pour it over the filling before refrigerating. Each bite will be a delightful surprise. For the full recipe, check out the details above. Store any leftover pie in an airtight container in the refrigerator. This keeps the pie fresh and safe to eat. The pie tastes best when consumed within 3 days. After that, the crust may become soggy. You can freeze this pie for up to 1 month. To do this, wrap it well in plastic wrap and then in foil. When you're ready to enjoy it, simply thaw the pie overnight in the refrigerator. This keeps the texture smooth and tasty. There is no need to reheat this pie. It is best enjoyed chilled, straight from the fridge. This makes it a perfect dessert for warm days! This pie needs at least 4 hours to set. For the best results, chill it overnight. This helps the filling firm up and gives you a perfect slice. You can use bottled lemon juice if you need to. However, I always suggest fresh lemon juice. It gives the pie a bright and zesty flavor that bottled juice just can't match. If you don't have whipped topping, you have options. You can use homemade whipped cream for a rich taste. A dairy-free alternative also works if needed. This recipe makes about 8 servings. It’s great for sharing at gatherings or enjoying on a warm day. You can easily double the recipe for a crowd. In this blog post, we covered an easy and tasty lemon pie recipe. You learned about the ingredients, from graham cracker crumbs to fresh lemon juice. We walked through step-by-step instructions for making the crust and filling. You also found tips for the perfect pie, fun variations, and storage details. This pie is simple to make and great to share. Try it out and enjoy a refreshing treat that everyone will love. Happy baking!

No-Bake Lemon Icebox Pie Refreshing and Easy Dessert

Looking for a dessert that’s simple and bursting with fresh flavor? My No-Bake Lemon Icebox Pie hits all the right

To make a delicious garden veggie frittata, gather these ingredients: - 6 large eggs - 1/4 cup milk (or dairy-free milk) - 1 cup spinach, chopped - 1 medium zucchini, diced - 1/2 red bell pepper, diced - 1/2 cup cherry tomatoes, halved - 1/4 cup onion, finely chopped - 1/2 cup feta cheese, crumbled (optional) - 2 tablespoons olive oil - Salt and pepper to taste - Fresh basil for garnish (optional) These ingredients create a vibrant dish that bursts with flavor. Feel free to add your favorite veggies or herbs. Here are some great ideas: - Mushrooms, sliced - Broccoli florets - Asparagus, chopped - Fresh herbs like parsley or dill - Different cheeses like cheddar or goat cheese Mix and match to make the frittata your own. This veggie frittata is not just tasty but also nutritious. Each serving has: - Protein from eggs and cheese - Vitamins from spinach and bell pepper - Healthy fats from olive oil - Low carbs, making it a great choice for many diets This dish offers a balanced meal packed with essential nutrients. Enjoy the guilt-free goodness! To make a great garden veggie frittata, start with fresh ingredients. Gather everything you need first. Use a large bowl to whisk together the eggs and milk. This mix will be the base of your frittata. Add salt and pepper to taste. Chop your veggies: spinach, zucchini, red bell pepper, and onion. Halve the cherry tomatoes. If you like, crumble some feta cheese for extra flavor. Use an oven-safe skillet for this recipe. Heat the olive oil over medium heat. Add the chopped onion. Sauté it for about 3-4 minutes until it looks clear. Then, add the diced zucchini and red bell pepper. Cook these for another 3-4 minutes. Next, stir in the spinach and cherry tomatoes. Cook until the spinach wilts, which takes about 2 minutes. Now, pour the egg mix over the vegetables. Stir gently to spread them out. If you want, sprinkle the crumbled feta cheese on top. Let the frittata cook on the stove for about 5 minutes. You will notice the edges start to set. Now, it’s time to bake! Move the skillet to the oven, set at 375°F (190°C). Bake for 15-20 minutes. The frittata should puff up and turn golden. To check if it’s done, insert a knife in the center. If it comes out clean, it’s ready! Once baked, take it out and let it cool for a few minutes. Slice it up and serve it warm or at room temperature. Garnish with fresh basil for a nice touch. Serve it alongside mixed greens for a colorful plate. For the full recipe, check the earlier section! When making your Garden Veggie Frittata, avoid these common mistakes: - Overcooking the vegetables: You want them soft but not mushy. - Skipping the whisking: Mix eggs and milk well for a fluffy texture. - Not seasoning enough: Salt and pepper make a big difference in flavor. You can easily adapt this recipe for different diets: - Dairy-free: Use plant-based milk and skip the feta. - Gluten-free: This recipe is naturally gluten-free; no changes needed! - Low-carb: Replace the potatoes with extra veggies like mushrooms or spinach. To take your frittata to the next level, try these ideas: - Add herbs: Fresh basil or parsley adds a bright flavor. - Incorporate spices: A pinch of paprika or chili flakes can add warmth. - Experiment with cheese: Try goat cheese or cheddar for different tastes. For more guidance, check the Full Recipe for detailed steps. Enjoy your cooking! {{image_2}} You can change the veggies in your frittata to suit your taste. Try using broccoli, asparagus, or even mushrooms. You can mix and match based on what you have at home or what’s in season. This flexibility makes the recipe fun and unique every time. Feta is a great choice, but you can also use cheddar, goat cheese, or mozzarella. Each cheese adds a different flavor and creaminess. For a dairy-free option, try using nutritional yeast or a plant-based cheese. Experimenting with cheese can really change the dish! Herbs like basil, chives, or parsley boost flavor. You can mix in spices like paprika or a pinch of chili flakes for some heat. Fresh herbs taste great, but dried ones work too. Adding these extras makes every bite exciting and fresh. For the full recipe, check out the earlier section. Enjoy making your frittata! After enjoying your Garden Veggie Frittata, let it cool to room temperature. Slice the frittata into portions. Place each slice in an airtight container. This helps to keep it fresh. Store it in the fridge for up to three days. Make sure to separate layers with parchment paper to avoid sticking. When you are ready to eat the leftovers, preheat your oven to 350°F (175°C). Place the slices on a baking sheet. Heat them for about 10-15 minutes. This method warms the frittata evenly. You can also use a microwave. Heat on medium for 1-2 minutes, but this may make it soft. To freeze the frittata, let it cool completely first. Cut it into individual slices. Wrap each slice tightly in plastic wrap. Place the wrapped slices in a freezer-safe bag or container. Label it with the date. You can freeze frittata for up to three months. When you are ready to eat, thaw it in the fridge overnight before reheating. Enjoy a quick and tasty meal anytime! For the complete details, check the Full Recipe. The best way to serve a frittata is warm or at room temperature. Slice it into wedges. You can add fresh basil on top for color. A side of mixed greens adds crunch. This makes your plate bright and inviting. You can tell the frittata is done when it puffs up and turns golden. Insert a knife into the center. If it comes out clean, the frittata is ready. The edges should also look set, not runny. Yes, you can make a frittata in advance. Cook it fully, then let it cool. Store it in the fridge for up to three days. Reheat it in the oven or microwave before serving. This saves time on busy mornings. You can serve a veggie frittata with a fresh salad or some toast. A dollop of salsa or a side of avocado works well too. For a heartier meal, pair it with roasted potatoes. These sides make the meal complete. The Garden Veggie Frittata offers a great mix of taste and nutrition. You learned how to prepare it with fresh veggies while also customizing it to your needs. Using the right cooking method ensures a perfect frittata every time. Remember to avoid common mistakes for the best results. You can also explore various ingredient options to keep things exciting. With proper storage, leftovers can remain tasty and convenient. Enjoy your frittata at any meal and feel proud of your tasty creation.

Garden Veggie Frittata Flavorful and Easy Recipe

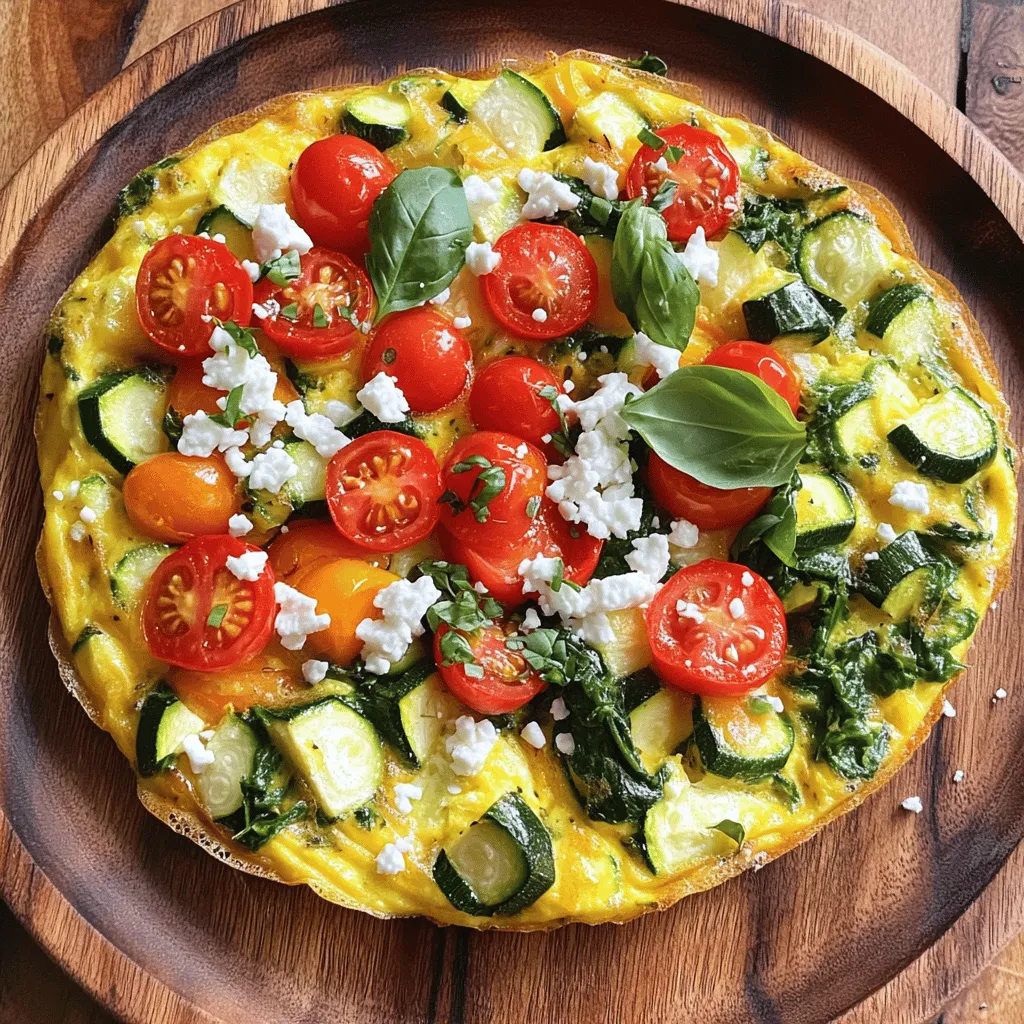
Are you ready to elevate your brunch game? Try my Garden Veggie Frittata! This dish is packed with fresh veggies

To make fresh peach salsa, you'll need a few simple ingredients. Each one adds flavor and texture to your dish. Here’s what you need: - Ripe peaches - Red onion - Red bell pepper - Jalapeño - Fresh cilantro - Lime juice - Honey - Salt Ripe peaches are key. They should be soft and fragrant. Red onion adds a nice crunch and a bit of bite. The red bell pepper brings sweetness and color. Jalapeño gives a spicy kick, but you can adjust it to your taste. Fresh cilantro adds a bright, herbal note. Lime juice brightens the salsa and keeps it fresh. Honey can balance the spice and enhance sweetness if you like. Finally, salt brings all the flavors together. You can find the full recipe in the recipe section above. This salsa is perfect for summer gatherings or a tasty snack anytime. 1. Start by peeling the peaches. Use a sharp knife to cut off the skin. Then, dice the peaches into small cubes and place them in a mixing bowl. This fresh fruit gives the salsa its sweet base. 2. Next, chop the red onion. Make sure you cut it finely so it mixes well. Add the chopped onion to the bowl with the peaches. The onion adds a nice crunch and flavor. 3. Now, dice the red bell pepper and jalapeño. Remove the seeds from the jalapeño for less heat. Mix these diced veggies into the bowl. This step adds color and a kick to your salsa. 4. Finally, finely chop fresh cilantro. Fold it into the salsa mixture. This herb gives the salsa a fresh taste. 1. Drizzle the lime juice over the mixture. This juice helps brighten the flavors. If you want extra sweetness, add honey at this point. 2. Season your salsa with salt to taste. This step brings all the flavors together. 3. Let the salsa sit for at least 15 minutes. This allows the flavors to meld. You can find the full recipe for fresh peach salsa at the beginning. Serve your fresh peach salsa with chips or on grilled dishes. Enjoy the burst of flavors! To make your fresh peach salsa pop, use ripe, seasonal peaches. These peaches have the best taste and sweetness. Choose peaches that feel slightly soft to the touch. They should smell sweet and fragrant. Balancing sweetness with honey can help bring out peach flavors. If your peaches are not very sweet, add a tablespoon of honey. This extra touch can make a big difference. You can adjust spice levels with jalapeño. If you like heat, keep the seeds and ribs in the jalapeño. For a milder salsa, remove them. You can also use less jalapeño if you prefer less spice. Serving suggestions with tortilla chips make for a great snack. Use a colorful bowl to hold your salsa. This adds fun and excitement to your table. Garnishing with cilantro and lime wedges can make the dish look beautiful. Sprinkle chopped cilantro on top for a fresh look. Place lime wedges around the bowl for a bright touch. This also invites others to squeeze lime juice into their salsa. For the full recipe, check out the details above! {{image_2}} You can switch up the flavors in your peach salsa. Here are some fun ideas: - Substituting mango for peaches: Mango adds a sweet twist. This swap makes the salsa tropical and bright. - Adding diced avocado or tomatoes: Avocado brings creaminess. Tomatoes add juiciness and color. Both make the salsa richer. - Experimenting with different herbs: Try mint or basil instead of cilantro. Each herb gives the salsa a fresh taste. Changing the flavor profile can make your salsa unique. Here’s how to do it: - Incorporating spices like cumin: Cumin adds warmth. Just a pinch can enhance the peach flavor and give it depth. - Using a splash of vinegar for tanginess: A little vinegar can brighten the salsa. It balances the sweetness of the peaches and makes the taste pop. These variations let you enjoy fresh peach salsa in new ways. Check out the Full Recipe for the base salsa and start experimenting! To keep fresh peach salsa tasty, store it in the fridge. Use an airtight container. This will help keep the salsa fresh and prevent it from drying out. Glass or plastic containers work well. Make sure the lid seals tightly to avoid any air getting in. Fresh peach salsa lasts about 3 to 5 days in the fridge. The longer it sits, the more the flavors blend. However, be mindful of spoilage signs. If you see any mold or if it smells sour, it's time to toss it. Fresh salsa should look bright and colorful. Enjoy the taste while it’s still fresh! Can I use canned peaches for this recipe? Yes, you can use canned peaches. However, fresh peaches taste better. Canned peaches may be softer and sweeter. If you choose canned, drain them well. This will help keep your salsa from being too watery. What can I serve with peach salsa? Peach salsa pairs well with many dishes. Serve it with tortilla chips for a crunchy snack. You can also use it as a topping on grilled chicken or fish. It adds a fresh twist to tacos and burritos too! How long does homemade peach salsa last? Homemade peach salsa lasts about three to five days in the fridge. Store it in a sealed container. Check for any signs of spoilage before using. If it smells sour or looks strange, it’s best to toss it out. For the full recipe, check out the detailed steps above. This blog post guided you through making fresh peach salsa. We covered the key ingredients, like ripe peaches and jalapeño, and the steps to blend them perfectly. I shared tips for enhancing flavor and discussed fun variations you can try. Remember to store your salsa properly to keep it fresh. Whether you use it with chips or as a topping, it’s a dish that shines in flavor and color. Enjoy experimenting with this recipe and making it your own!

Fresh Peach Salsa Zesty and Flavorful Dip Idea

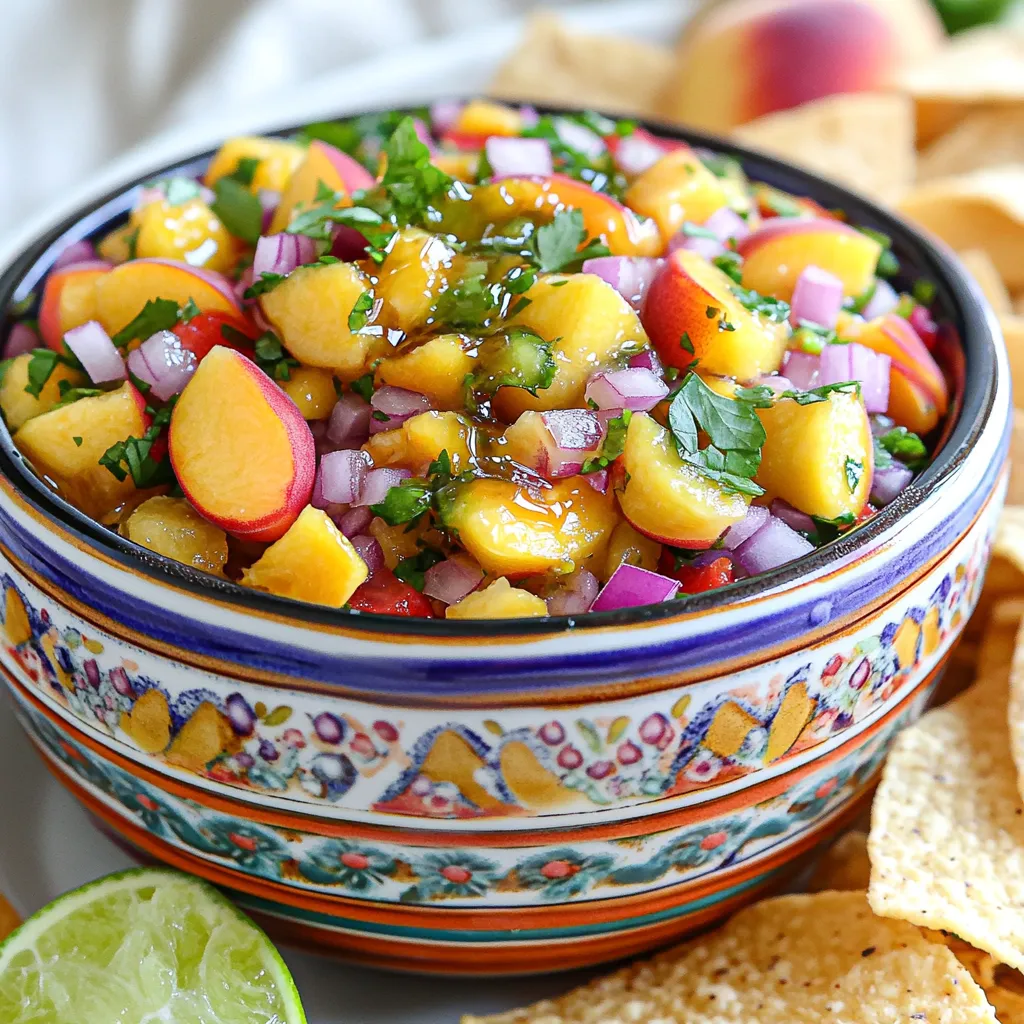
Are you ready to spice up your summer gatherings? This Fresh Peach Salsa is a zesty, flavorful dip that will

- 4 medium cucumbers, thinly sliced - 1 cup apple cider vinegar - 1 cup granulated sugar - 1 tablespoon kosher salt - 1 teaspoon mustard seeds - 1 teaspoon dill seeds - 1 teaspoon garlic powder - 1/2 teaspoon red pepper flakes (optional for spice) - 1/2 onion, thinly sliced - Fresh dill sprigs for garnish To make sweet and tangy refrigerator pickles, start with fresh cucumbers. I always choose medium-sized ones for the best crunch. The apple cider vinegar gives the pickles their tangy kick. You will need one cup of it. Granulated sugar adds sweetness. Use one cup for the perfect balance. Kosher salt helps to enhance the flavors. One tablespoon is all you need. Mustard and dill seeds bring depth to the taste. One teaspoon of each will do. Garlic powder adds a nice touch, too. A teaspoon is enough for flavor. If you like a bit of heat, add red pepper flakes. Just a half teaspoon can spice things up. You will also need half an onion, sliced thin. Finally, fresh dill sprigs will add a lovely finish to your pickles. Gather all these ingredients to create your sweet and tangy refrigerator pickles. This recipe is simple and full of flavor. For the complete method, check the Full Recipe. 1. Mixing the vinegar solution: Start by grabbing a mixing bowl. Pour in 1 cup of apple cider vinegar. Add 1 cup of granulated sugar and 1 tablespoon of kosher salt. Stir this mix until the sugar and salt dissolve completely. This step creates a sweet and tangy base for your pickles. 2. Layering the cucumbers and onions: Take 4 medium cucumbers and slice them thin. Use a sharp knife for the best results. Next, slice half an onion. In a clean glass jar, layer the cucumber slices followed by the onion slices. Make sure to pack them tightly but gently. 3. Pouring the marinade over the veggies: Once your jar is layered, take the vinegar mix and pour it over the veggies. Ensure that the cucumbers and onions are fully submerged. This step helps the flavors soak in deeply. 1. Sealing the jar: After pouring the marinade, seal the jar tightly with its lid. This keeps the flavors locked in and prevents spills. 2. Shaking the mixture: Give the jar a gentle shake. This helps distribute the spices evenly throughout the cucumbers and onions. You want every bite to be flavorful. 3. Refrigeration time: Place your jar in the refrigerator. Let it sit for at least 24 hours, but 48 hours is best for full flavor. During this time, the pickles will absorb all the tangy goodness from the marinade, creating a delightful treat. For the complete recipe and more details, check out the Full Recipe. To get the right taste, you must adjust the sugar and vinegar. Start with equal parts of sugar and vinegar, like 1 cup each. If you want more sweetness, add a bit more sugar. For more tartness, add extra vinegar. Infusion time also plays a big role. I suggest letting your pickles sit for 48 hours. This allows the flavors to blend well. If you are in a hurry, 24 hours works too, but longer is better. Layering your ingredients right helps with flavor. Start with a layer of cucumbers, then onions. This method helps the spices reach every bite. For even spice distribution, mix your spices into the vinegar well. Make sure you pour the vinegar mixture evenly over the layers. This way, every bite of your pickles is packed with flavor. Check out the Full Recipe for more tips. {{image_2}} You can make your sweet and tangy refrigerator pickles even better by adding spices. Try adding coriander or black pepper to the mix. These spices bring warmth and depth to the flavors. Just a pinch of black pepper can make a big difference. Coriander adds a unique, bright taste. Get creative with your spice choices! You don’t have to stick to just cucumbers. You can add other veggies for fun flavors. Carrots and bell peppers work great in this recipe. Slice them thin and layer them with the cucumbers. You get a colorful jar full of crunch. Each veggie brings its own taste, making every bite exciting. If you want to switch up the sweetness, consider using honey or maple syrup. These natural sweeteners can enhance the pickles without being too sugary. Honey adds a rich flavor, while maple syrup gives a nice twist. You can adjust the amount to fit your taste. Experimenting with sweetness can lead to a new favorite recipe! For the full recipe, check out the Sweet and Tangy Refrigerator Pickles section. To keep your sweet and tangy refrigerator pickles fresh, use clean glass jars with tight lids. Glass helps maintain the flavor and crunch of the cucumbers. Make sure the jars are dry before adding the pickles. Fill each jar with the cucumbers and onions, then pour the vinegar mixture over them. Ensure the cucumbers are fully covered by the liquid. In the refrigerator, these pickles last about two weeks. The flavors will deepen over time, so try to wait at least 24 hours before tasting. If you want them to stay crisp, keep them in the coldest part of your fridge. Always check your pickles before eating them. Look for these signs to ensure freshness: - Color Change: If the cucumbers turn mushy or discolored, it's time to discard them. - Smell: A sour or off smell indicates spoilage. - Bubbles: If you see bubbles in the jar, it may mean fermentation has started. - Texture: If the pickles feel slimy, they are no longer safe to eat. By storing your sweet and tangy refrigerator pickles right, you can enjoy their flavor and crunch for longer! Sweet and tangy refrigerator pickles can last up to two months in the fridge. Store them in a clean, airtight jar. Make sure the cucumbers stay submerged in the brine. This helps keep them fresh longer. If you notice any off smells or changes in color, discard them. You can can these pickles, but the method is different. Canning requires heat to kill bacteria. It also creates a vacuum seal. With refrigerator pickles, you skip this step. They are quick, easy, and ready in a day or two. Canned pickles can last for years, while refrigerator pickles are best enjoyed fresh. Refrigerator pickles are quick to make and full of flavor. They often have less salt than canned options. You can also control the sweetness. Plus, they use fresh ingredients, which can be healthier. The crunch of fresh cucumbers stays intact. Enjoy them on sandwiches or as a snack. You get a tasty boost of flavor without much effort. Check out the Full Recipe for more delicious details! You’ve learned how to make delicious refrigerator pickles with simple steps. This recipe includes cucumbers, onions, and flavorful spices. We covered how to mix the vinegar solution, layer the veggies, and seal the jar. Remember, you can adjust the sweetness and add different spices for variety. With proper storage, these pickles can stay fresh for weeks. Enjoy them on sandwiches or as a snack. Making refrigerator pickles is fun and easy, adding tasty crunch to your meals. Give it a try—you'll love the results!

Sweet and Tangy Refrigerator Pickles Easy Flavor Boost

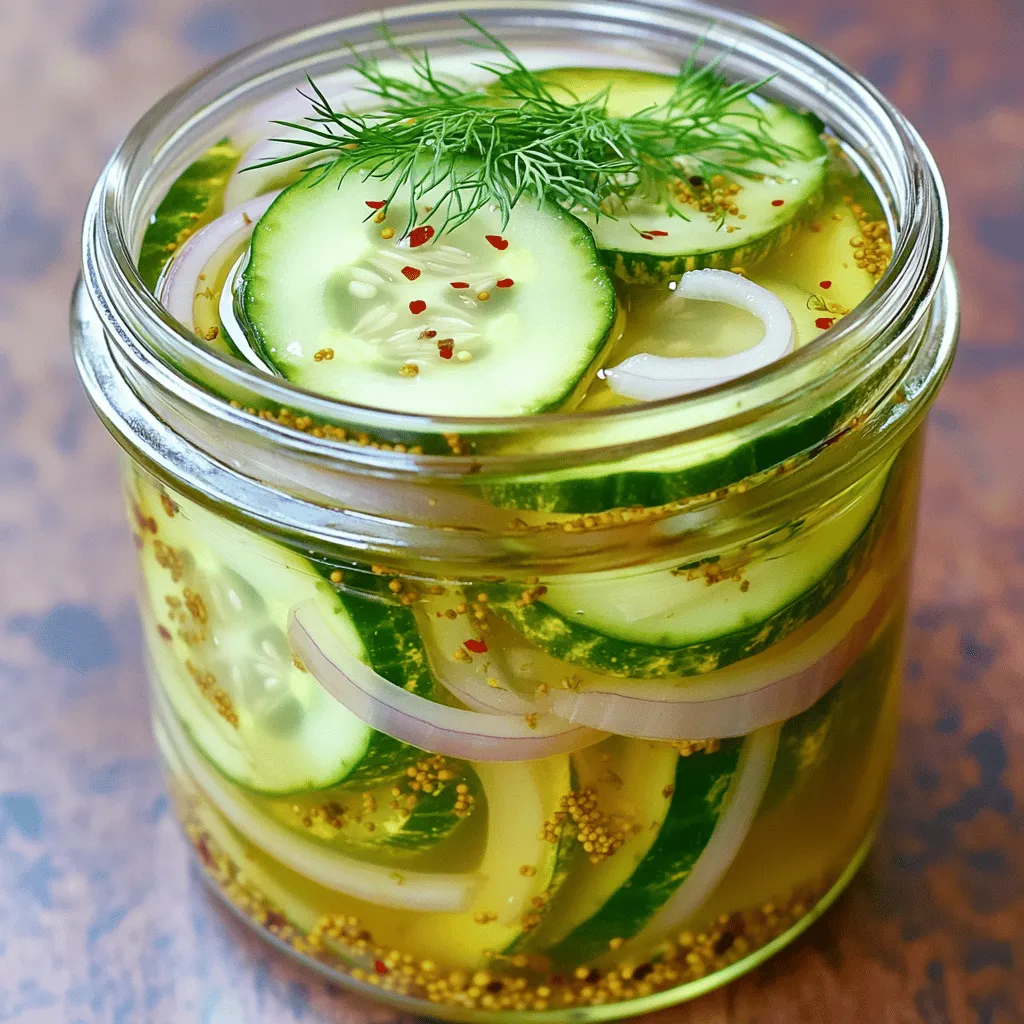
If you love a burst of flavor in every bite, then sweet and tangy refrigerator pickles are for you! These

To make the best spicy garlic pickled okra, you need fresh ingredients. Here’s what you will need: - 1 pound fresh okra, trimmed - 4 cloves garlic, smashed These fresh ingredients give your pickled okra a vibrant taste. Always choose firm okra. It should be bright green and free from blemishes. The right spices make this recipe pop. Here are the key spices: - 1 teaspoon red pepper flakes (adjust to taste) - 1 tablespoon pickling salt - 1 tablespoon sugar - 1 teaspoon mustard seeds - 1 teaspoon black peppercorns Red pepper flakes add heat. Pickling salt helps preserve the okra. The sugar balances the flavors, while mustard seeds and black peppercorns add depth. Pickling requires some simple equipment. Make sure you have: - Medium saucepan - Sterilized jars with lids - Measuring cups and spoons The saucepan is for heating the brine. You need the jars to store your pickles. Sterilizing the jars keeps your pickled okra safe and tasty. For the full recipe, check out the detailed steps! First, wash the okra under cold water. This step is key to removing dirt. Next, trim the stems to keep the okra whole. Leaving the okra whole helps it stay crunchy. This texture is perfect for pickles. In a medium saucepan, combine the vinegar, water, sugar, and pickling salt. Heat the mix over medium heat. Stir until the salt and sugar dissolve. Bring it to a boil, and then remove it from heat. Let the brine cool for about 10 minutes. This cooling step is important for flavor. Grab some sterilized jars for packing. Place the smashed garlic, red pepper flakes, mustard seeds, and black peppercorns at the bottom. Pack the okra tightly into the jars. Leave some space at the top for brine. Carefully pour the cooled brine over the okra. Make sure all pieces are submerged. If needed, add more vinegar or water to cover the okra. Seal the jars with lids and let them cool to room temperature. Once cooled, refrigerate for at least 24 hours. This waiting lets the flavors mix well. For the best taste, let them sit longer. Enjoy your spicy garlic pickled okra! For the Full Recipe, refer to the earlier section. To make the best spicy garlic pickled okra, use fresh okra. Look for firm, vibrant pods. Trim the stems carefully, but leave the pods whole. This helps keep them crunchy. Sterilize your jars by boiling them in water for ten minutes. This step keeps your pickles safe and fresh. You can adjust the heat level by changing the red pepper flakes. Use less for milder pickles. For more zing, add sliced jalapeños to the jars. You can also try adding fresh herbs like dill or thyme. They add a new layer of flavor. If you want a sweeter taste, increase the sugar in the brine. Don't skip the brine cooling step. Pouring hot brine over the okra can make them mushy. Ensure all okra is fully submerged in the brine. This helps them pickle evenly. Avoid using table salt; it can make the brine cloudy. Stick to pickling salt for the best results. Follow the Full Recipe for more detailed guidance on making this dish. {{image_2}} You can easily spice up your pickled okra. Add slices of fresh jalapeños for heat. A few sprigs of dill can give a nice herbal note. For a sweet twist, try adding slices of carrot or bell pepper. They add color and crunch. You can also add a tablespoon of coriander seeds for a unique flavor. Each addition brings a new layer to your dish. If you want a milder version, use less red pepper flakes. You can swap apple cider vinegar for a sweeter taste. Instead of pickling salt, kosher salt works well too. Want to experiment? Try using different types of okra, like baby okra for a tender bite. Each change helps you create a flavor that suits your taste buds. Spicy garlic pickled okra shines as a snack or side dish. Serve it in a colorful bowl for a pretty display. Pair it with sandwiches or burgers for a crunchy contrast. You can also use it in salads for extra zest. For a fun twist, add it to your next cheese board. The bright flavors will impress your guests. If you want to learn more, check the Full Recipe for tips on presentation. After making your spicy garlic pickled okra, store it in the fridge. Keep the jars sealed tight. This keeps the okra fresh and tasty. Always use a clean utensil to take out okra. This prevents unwanted germs. Your pickled okra lasts about 2 months in the fridge. It may stay safe to eat longer, but the taste may change. You want the crunch and flavor to stay fresh. Trust your taste buds; if it smells or looks off, toss it. For long-term storage, consider canning. Sterilize jars and lids before use. Fill the jars with your pickled okra, leaving some space at the top. Process them in a boiling water bath for about 10 minutes. Let them cool, then store in a cool, dark place. Properly canned okra can last for a year or more, keeping that spicy garlic flavor intact. For extra fun, label the jars with the date. This way, you’ll know just how long they’ve been stored. For the full recipe, check out the section above. Pickled okra takes about 24 hours to start tasting great. After that, the flavors grow deeper over time. I recommend waiting at least 48 hours for the best taste. The longer you wait, the more the garlic and spices blend into the okra. Using frozen okra is not the best choice for pickling. Frozen okra can become mushy when thawed. Fresh okra gives you that perfect crunch you want in pickles. Always go for fresh for the best results. You can find ready-made spicy garlic pickled okra at specialty food stores or online. Many local farmers' markets also sell homemade versions. Look for jars with clear labels to find quality products. Leftover pickling brine is versatile and can be used in many ways. You can use it as a salad dressing or marinade. It adds great flavor to roasted vegetables or meats. You can even pickle other veggies, like carrots or cucumbers, using the same brine. Just make sure to refrigerate the brine if you plan to reuse it. We explored how to make spicy garlic pickled okra. Fresh ingredients and essential spices are key. I guided you through preparing the okra and making the brine. Remember the best practices and adjustments for perfect pickling. You can add unique flavors and serve it in fun ways. For storage, keep your pickled okra in the fridge to enjoy longer. I hope these tips help you create delicious pickled okra. Dive into pickling and make this tasty treat your own!

Spicy Garlic Pickled Okra Flavorful and Easy Recipe

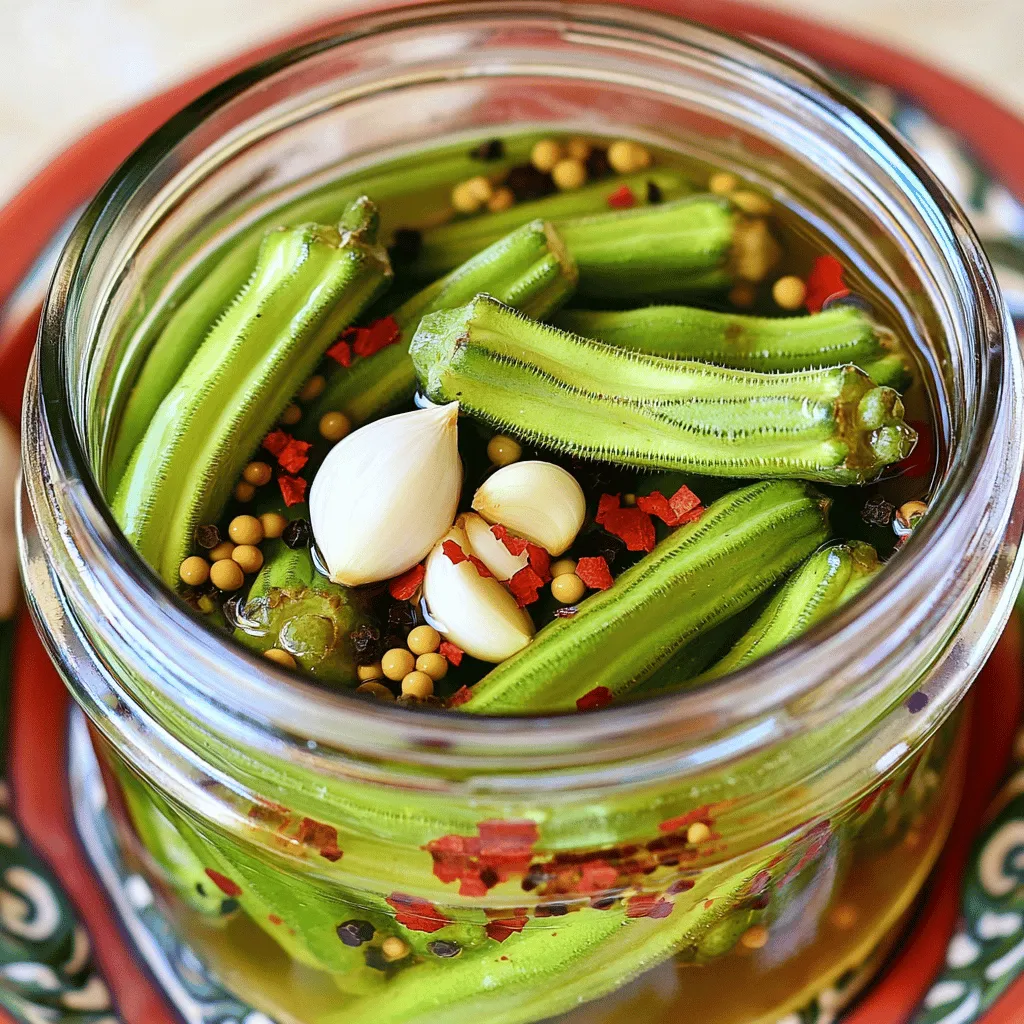
Do you love bold flavors and crunchy snacks? Then you’ll adore making Spicy Garlic Pickled Okra! This easy recipe packs

- 2 medium zucchinis, sliced into fries - 1 cup panko breadcrumbs - ½ cup grated Parmesan cheese - 1 teaspoon garlic powder - 1 teaspoon onion powder - ½ teaspoon paprika - 2 large eggs - Salt and pepper to taste - Olive oil spray To make crispy zucchini fries, we need simple ingredients. Fresh zucchinis are key. They give a nice crunch and great flavor. Panko breadcrumbs add texture and make them extra crispy. Parmesan cheese gives a nice salty bite. Garlic and onion powders bring depth to the taste. Paprika adds a hint of smokiness. Eggs help the coating stick well. You can adjust salt and pepper to match your taste. Lastly, a light spray of olive oil helps achieve that golden brown finish. Each serving has about 150 calories, 10 grams of carbs, 6 grams of protein, and 9 grams of fat. These fries are a tasty treat that feels light and satisfying. If you want to switch things up, you can use other breadcrumbs like regular or gluten-free options. For cheese, try mozzarella or nutritional yeast for a vegan choice. If you need an egg substitute, use flaxseed meal or a store-bought egg replacer. These changes can still give you a delicious result while fitting your diet. Check the full recipe for more details. To make perfect zucchini fries, start by slicing the zucchinis. Cut them into sticks about half an inch thick. This size helps them cook evenly. If the fries are too thick, they may not get crispy. If they are too thin, they can burn. Moisture control is key. Zucchini has a lot of water. To remove some moisture, sprinkle salt on the cut fries. Let them sit for about 10 to 15 minutes. Then, pat them dry with a paper towel. This helps the fries get crispier when baked. Now, it's time to bread the zucchini. First, dip each fry into the beaten eggs. Make sure to let the excess egg drip off. Then, coat the fry in the panko mixture. Press the crumbs onto the fry gently. This ensures the coating sticks well. For maximum crunch, use fresh panko breadcrumbs. They are lighter than regular breadcrumbs. This will give your fries that extra crispiness you want. Next, preheat your oven to 425°F (220°C). This high heat helps the fries become golden and crispy. Line a baking sheet with parchment paper. It makes cleanup easy and helps prevent sticking. Arrange the zucchini fries in a single layer on the sheet. Make sure they are not touching, so they cook evenly. Lightly spray the tops with olive oil for extra crispiness. Bake the fries for 20 to 25 minutes. Halfway through, turn them over with a spatula. This helps both sides cook evenly. When they are golden brown, they are ready to enjoy! To get that perfect crunch, use panko breadcrumbs. They are lighter and flakier than regular breadcrumbs. This gives your zucchini fries more texture. When you bake them, they turn golden and crispy. Don't skip the olive oil spray! A light mist helps the fries crisp up nicely. It also adds flavor without extra fat. Zucchini fries taste great with dips. Marinara sauce is a classic choice. Ranch dressing adds a creamy touch. You can also try garlic aioli for a fun twist. These fries pair well with burgers or sandwiches. They make a great side for any meal! Use a sturdy baking sheet for best results. A non-stick sheet can help prevent sticking. If you have one, a wire rack is perfect for cooling your fries. It lets air flow around them, keeping them crisp. A good knife and cutting board will make slicing zucchini easy. Don't forget a shallow bowl for the egg and another for the panko mix. These tools will help you make the best crispy zucchini fries. For the full recipe, check out the earlier section. {{image_2}} You can boost the taste of your zucchini fries with spices. Try adding cayenne for heat or Italian herbs for a fresh taste. You can also mix in a bit of lemon zest for a bright kick. If you want to get creative, use other veggies like carrots or eggplant. Cut them into fry shapes and follow the same steps. This way, you can enjoy different flavors while keeping it fun! If you need a gluten-free option, you can still enjoy these fries. Swap panko breadcrumbs with gluten-free breadcrumbs or ground almonds. Both options give a nice crunch. Just make sure to check the labels to avoid hidden gluten. This way, everyone can enjoy crispy zucchini fries! For a vegan twist, replace the eggs with flaxseed meal or chia seeds. Mix one tablespoon of either with three tablespoons of water. Let it sit for a few minutes until it thickens. This acts like an egg and helps the coating stick. You can also use nutritional yeast instead of Parmesan cheese for a cheesy flavor without dairy. This makes your crispy zucchini fries vegan-friendly! For the full recipe, check the recipe section above. To store your zucchini fries in the fridge, place them in an airtight container. This helps keep them fresh. Make sure they cool down first to avoid steam. For freezing, let them cool completely, then spread them on a baking sheet. Freeze until solid, then transfer them to a freezer bag. This method prevents them from sticking together. For the best results when reheating, use an oven or an air fryer. Preheat the oven to 400°F (200°C). Place the fries on a baking sheet and heat for about 10 minutes. This method keeps them crispy. If using an air fryer, set it to 375°F (190°C) and heat for around 5-7 minutes. In the fridge, zucchini fries last about 3-4 days. If frozen, they can stay good for up to 3 months. Just remember to check for any signs of freezer burn before using them. Always trust your nose; if they smell off, it’s best to toss them out. To get the best crispiness, follow these tips: - Use panko breadcrumbs. They are lighter and airier than regular breadcrumbs. - Sprinkle olive oil. A light spray helps the fries crisp up in the oven. - Bake at high heat. Set your oven to 425°F (220°C) for a nice crunch. - Don’t overcrowd the pan. Give each fry space to cook evenly. These steps ensure your zucchini fries have that perfect crispy bite! Yes, you can use regular breadcrumbs, but your fries may not be as crispy. - Texture difference: Panko is coarser and provides a crunchier coating. - Results: Regular breadcrumbs can lead to a denser texture, not as light. If you want that extra crunch, stick with panko! Zucchini fries go great with many sauces. Here are some popular choices: - Marinara sauce for a classic Italian touch. - Ranch dressing for a creamy, tangy flavor. - Garlic aioli adds a nice kick. - Spicy ketchup brings a bit of heat to the party. Feel free to mix and match your favorites! In this post, I shared a tasty recipe for zucchini fries. You learned about essential ingredients, cooking steps, and tips for great texture. You can now easily customize the recipe based on your needs. Remember, using panko breadcrumbs gives the best crunch, and olive oil spray helps too. Enjoy these fries with your favorite dips. Whether you serve them as a snack or a side dish, they are sure to impress!

Crispy Zucchini Fries Simple and Tasty Recipe

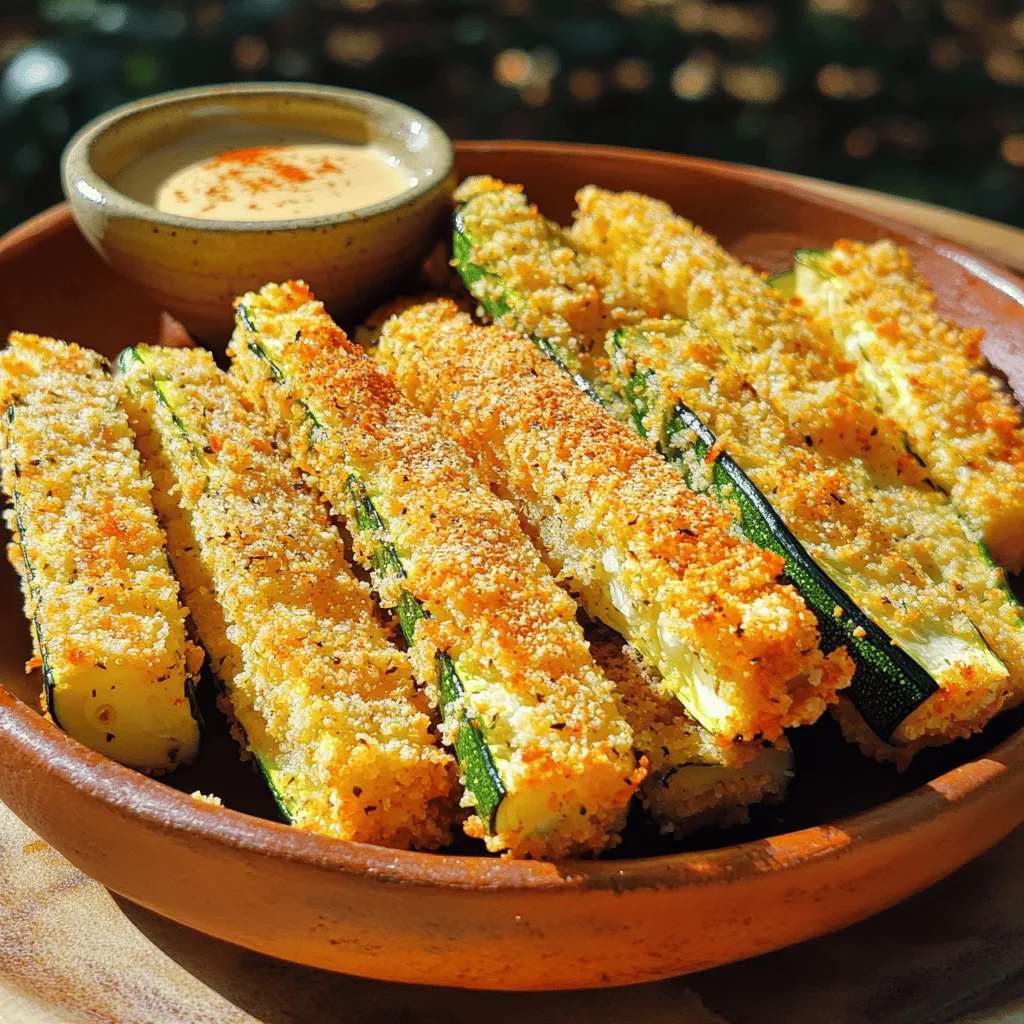
Are you ready to enjoy a crunchy snack that’s both simple and healthy? My Crispy Zucchini Fries recipe is just

- 3 medium yellow summer squash, thinly sliced - 2 medium zucchinis, thinly sliced - 1 small onion, finely chopped - 2 cloves garlic, minced - 1 cup heavy cream - 1 cup shredded Gruyère cheese - 1/2 cup grated Parmesan cheese - 1 teaspoon fresh thyme leaves (or 1/2 tsp dried thyme) - Salt and pepper to taste - 1 tablespoon olive oil - 1/2 cup breadcrumbs (for topping) - 1 tablespoon fresh parsley, chopped (for garnish) You can add other flavors to your gratin. Try fresh herbs like basil or oregano. You might also like to use different cheeses, such as mozzarella or cheddar. For a kick, consider adding a pinch of red pepper flakes. These small changes can make a big difference! To make this dish, you need a few simple tools: - A large skillet for cooking the veggies - A 9x13-inch baking dish for the gratin - A sharp knife for slicing the squash and zucchini - Mixing bowls for combining the cream and cheese These tools will help you create a great summer squash gratin. Follow the instructions in the Full Recipe for best results! To start, you need to thinly slice summer squash and zucchini. Hold the squash steady on a cutting board. Use a sharp knife and cut them into thin rounds. Aim for about 1/4 inch thick. This helps them cook evenly. Next, chop the onion finely. You want small pieces to spread flavor well. For the garlic, take two cloves and mince them. Press down on each clove with the flat side of the knife. Then, chop them into tiny bits. Now, heat a large skillet over medium heat. Pour in one tablespoon of olive oil. Let it warm up for a minute. Add the chopped onion and cook it until it turns clear, about 3 to 4 minutes. This brings out its sweet taste. Stir in the minced garlic and cook for one more minute. You will smell a nice aroma. Next, add the sliced summer squash and zucchini to the pan. Cook them for 5 to 7 minutes until they start to soften. Season with salt, pepper, and fresh thyme. This will brighten up the flavors. Grab a greased 9x13-inch baking dish. Layer half of the sautéed veggies at the bottom. Pour half of the cream and cheese mixture over the veggies. Spread it evenly. Then, repeat with the rest of the vegetables. Top it off with the remaining cream mix. Finally, sprinkle the rest of the Gruyère and Parmesan cheese on top. To finish, cover the dish with breadcrumbs. This gives a crispy layer when baked. This layering helps create a tasty and beautiful gratin. Follow these steps, and you will have a dish that looks as good as it tastes. For the full recipe, check out the details above! To get the best texture from your squash, slice it thin. Thin slices cook faster and keep their shape. Don't overcrowd the pan when you sauté. This helps the squash stay crisp. Season well with salt and pepper. Taste as you go. This will make your dish more flavorful. Garnishing makes your gratin pop. Use chopped parsley on top just before serving. For more color, add sliced tomatoes or a sprinkle of paprika. Arrange the gratin in a nice baking dish. This makes it more inviting for guests. A good presentation shows your care and effort. Soggy gratin? This can happen if you add too much cream or don't sauté long enough. Make sure to cook the vegetables until they soften. For burnt toppings, cover the dish with foil for the first half of baking. Then, remove the foil to allow the top to brown nicely. Adjust baking time as needed, too. {{image_2}} You can change the cheese in this gratin to fit your taste. Cheddar gives a sharp bite. Mozzarella melts well and adds creaminess. Try a mix of cheeses for a fun twist. Use goat cheese for a tangy flavor. Each cheese brings its own character to the dish. Make sure to adjust the amount based on how cheesy you want it. If you want to boost the dish, add proteins like chicken or bacon. Cook diced chicken in the skillet before adding the veggies. This adds heartiness. For bacon, cook it until crispy, then crumble it on top of the layers. This gives a nice crunch and flavor. You can also use ground turkey or sausage for a tasty change. For a vegan take, swap heavy cream for plant-based cream. Look for cashew or coconut cream for a rich base. Replace cheese with vegan cheese or nutritional yeast for a cheesy taste without dairy. You can use sautéed mushrooms to add depth. These swaps keep the dish creamy and satisfying while being friendly for all diets. For the full recipe, check out the Golden Summer Squash Gratin 🥔. To keep your Summer Squash Gratin fresh, let it cool first. Once cool, transfer it to an airtight container. Place a layer of plastic wrap on top, then seal the lid. This helps prevent moisture loss. Store it in the fridge for up to three days. If you notice any off smells, it's best to toss it. When you want to reheat your gratin, the oven is the best choice. Preheat your oven to 350°F (175°C). Place the gratin in an oven-safe dish. Cover it with foil to keep it moist. Heat for about 15-20 minutes until warm. You can also reheat it in the microwave. Use a microwave-safe dish and heat in short bursts. Stir between each burst to avoid hot spots. If you want to freeze your gratin, first let it cool completely. Cut it into portions for easy thawing. Wrap each piece tightly in plastic wrap, then place in a freezer bag. Label the bags with the date. You can freeze it for up to three months. To thaw, place it in the fridge overnight. Reheat it in the oven as mentioned above. This keeps the texture and flavor intact. Summer Squash Gratin can last about 3 to 5 days in the fridge. To check for spoilage, look for changes in color or smell. If it smells sour or looks off, it's best to throw it away. Always store it in an airtight container to keep it fresh longer. Yes, you can prepare Summer Squash Gratin ahead of time. Just follow these steps: - Prepare the gratin: Assemble it as per the recipe but skip baking. - Cover it well: Use plastic wrap or foil to seal it tightly. - Store in the fridge: It can sit for up to a day before you bake it. When ready to cook, preheat your oven and bake as directed. If it’s cold from the fridge, it may need a few extra minutes. Summer Squash Gratin pairs well with many dishes. Here are some great options: - Grilled chicken: The light, juicy flavor works well. - Steamed vegetables: Broccoli or green beans add freshness. - Simple salad: A green salad with vinaigrette brightens the meal. - Crusty bread: A good loaf can help soak up the creamy sauce. These sides balance the rich flavors of the gratin and make for a cozy meal. This blog post covered all the key steps to make delicious Summer Squash Gratin. You learned about the ingredients, kitchen tools, and the step-by-step process. I shared tips for perfecting the dish and ideas for variations, making it easy to customize. Whether you want a simple side or a show-stopping main, this gratin can fit the bill. Enjoy experimenting with your flavors and impressing others with your cooking skills!

Savory Summer Squash Gratin Simple Comfort Food

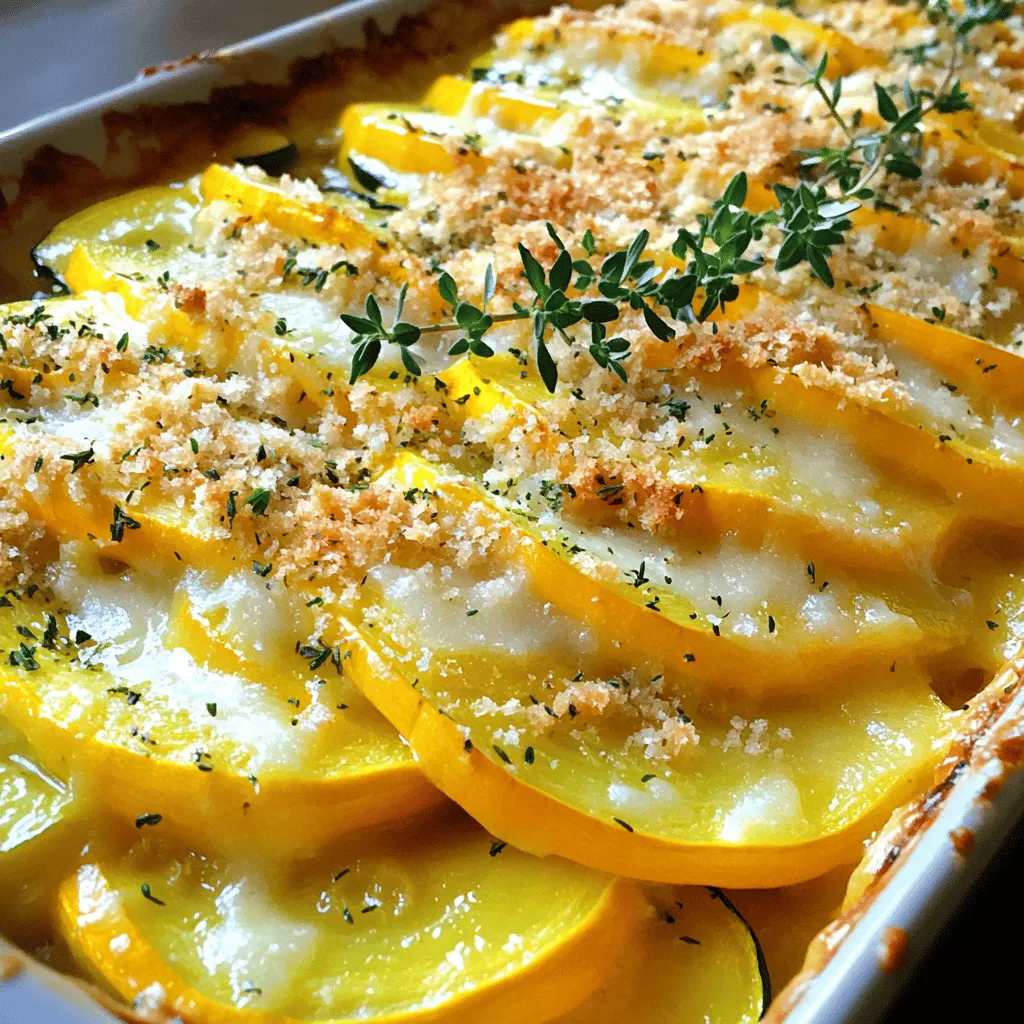
Looking for a warm, comforting dish to enjoy this summer? My Savory Summer Squash Gratin is just what you need!

Older posts
Newer posts
← Previous Page1 … Page3 Page4 Page5 … Page67 Next →

dsad

© 2025 Southern Dishes • Built with GeneratePress

Our Policies

  • Copyright Policy
  • Cookie Policy
  • GDPR Policy
  • Privacy Policy
  • Disclaimer
  • Terms Of Use

More Information

  • Home
  • About
  • Contact
  • Appetizers
  • Dessert
  • Dinner
  • Drinks
©2025, Southern Dishes About Back To Top