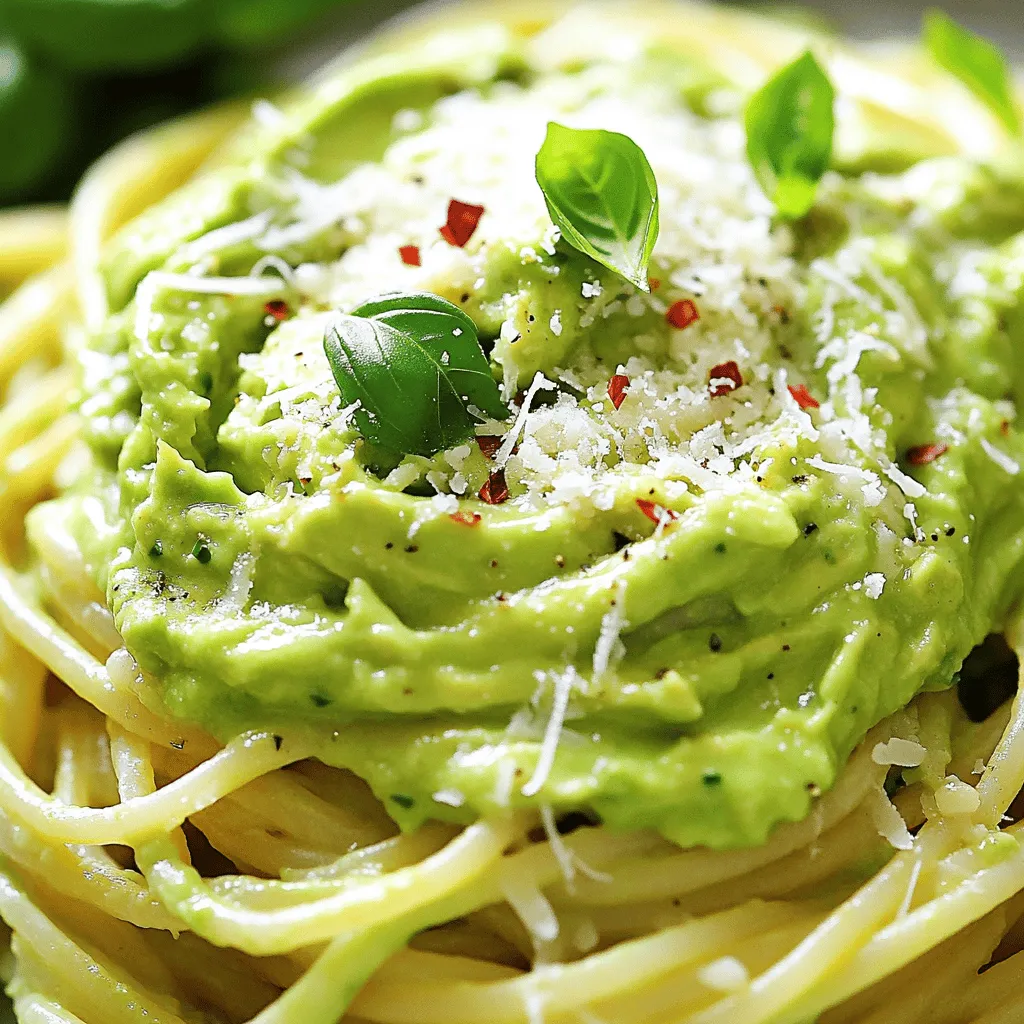
Creamy Avocado Pasta Flavorful and Easy Recipe
Are you ready to whip up something delicious? This Creamy Avocado Pasta is not only flavorful but also super easy
Are you ready to whip up something delicious? This Creamy Avocado Pasta is not only flavorful but also super easy
![To make these no-bake chocolate oatmeal cookies, you will need: - 1 cup rolled oats - 1/2 cup creamy peanut butter - 1/4 cup unsweetened cocoa powder - 1/2 cup honey or maple syrup - 1/2 cup brown sugar - 1/4 cup milk (or dairy-free alternative) - 1 teaspoon vanilla extract - 1/2 cup dark chocolate chips (dairy-free if preferred) - A pinch of salt If you need to convert measurements, here are some quick tips: - 1 cup = 8 fluid ounces - 1/2 cup = 4 fluid ounces - 1/4 cup = 2 fluid ounces - 1 teaspoon = 5 milliliters These conversions help ensure your cookies turn out just right. You can easily adjust this recipe for dietary needs: - Use almond or sunflower butter instead of peanut butter for nut-free options. - Maple syrup can replace honey for a vegan choice. - Swap regular milk for almond or oat milk for a dairy-free version. These substitutions keep the flavor and texture delicious while catering to different diets. To make no-bake chocolate oatmeal cookies, start by gathering your ingredients. You will need rolled oats, peanut butter, cocoa powder, honey (or maple syrup), brown sugar, milk, vanilla extract, dark chocolate chips, and a pinch of salt. 1. First, take a medium saucepan. Over low heat, mix honey, brown sugar, cocoa powder, and milk. Stir it well until it melts and becomes smooth. This should take about 2-3 minutes. 2. Once melted, remove the pan from the heat. Add peanut butter and vanilla extract into the pan. Stir until the peanut butter melts and combines well with the chocolate mix. 3. In a large bowl, put the rolled oats and a pinch of salt. Pour the warm chocolate mixture over the oats. Mix well until every oat is coated. 4. Next, fold in the dark chocolate chips. Make sure they spread evenly through the mixture. 5. Now, line a baking sheet with parchment paper. Use a tablespoon to scoop the mixture and drop it onto the sheet. Flatten each scoop slightly with the back of the spoon. 6. Place the baking sheet in the fridge for at least 30 minutes. This helps the cookies set and become firm. 7. After they are set, take the cookies out and serve! Store any extras in an airtight container in the fridge. When melting chocolate or peanut butter, keep the heat low. High heat can burn them, leading to a gritty texture. Stir slowly to ensure everything melts evenly. If using natural peanut butter, it may be thicker. You can warm it slightly in the microwave for easier mixing. Avoid using quick oats in this recipe; they don’t hold up as well. Always measure ingredients accurately for the best results. If the mix feels too dry, add a splash more milk to reach the right consistency. Lastly, don’t skip the chilling step. This helps the cookies firm up nicely. For the full recipe, check out the [Full Recipe]. To get the best texture in your no-bake chocolate oatmeal cookies, use rolled oats. They give a chewier bite than quick oats. If you want a creamier feel, add more peanut butter. This adds richness and a smooth texture. Balance is key. Too much cocoa can make them dry. Adjust the cocoa powder to suit your taste. For uniform cookies, use a cookie scoop. This tool helps you portion out the dough evenly. If you don’t have a scoop, use a tablespoon. Make sure to flatten each cookie slightly. This helps them set evenly in the fridge. A consistent size ensures they all taste great and look good too! To boost the chocolate flavor, add a splash of espresso. It makes chocolate taste richer without adding a coffee flavor. You can also try different chocolate chips. Use dark, milk, or even white chocolate for fun twists. Another option is to sprinkle some sea salt on top. This contrast makes the chocolate stand out even more. For the full recipe, check out the complete guide. {{image_2}} You can change these cookies with fun add-ins. Try adding: - Chopped nuts (like almonds or walnuts) - Dried fruit (like raisins or cranberries) - Seeds (like chia or flaxseeds) - Coconut flakes These options add flavor and texture. You can mix and match to find your favorite. Want to change the taste? You can swap the peanut butter for other nut butters. Almond butter or cashew butter works well. For sweeteners, use agave syrup or coconut sugar instead of honey or brown sugar. These swaps can give the cookies a new twist. You can make your cookies chewy or crunchy. For chewy cookies, use more oats and let them set less time in the fridge. For crunchier cookies, add more oats or let them sit longer. You can even bake them for a few minutes if you want a different texture. Experiment with these variations to create the perfect no-bake chocolate oatmeal cookies that suit your taste! To keep your no-bake chocolate oatmeal cookies fresh, store them in an airtight container. Place parchment paper between layers if stacking. This prevents sticking and keeps the cookies intact. Store the container in the fridge for the best flavor and texture. Avoid leaving them at room temperature for too long. When stored properly, these cookies last about one week in the fridge. You may notice the texture change slightly over time, but they remain tasty. If you want to enjoy them longer, consider freezing them. Freezing cookies is simple. First, let them cool completely. Then, place them in a freezer-safe bag or container. They can last for up to three months in the freezer. When you want to eat some, take them out and let them thaw in the fridge. For a quick treat, you can also enjoy them straight from the freezer! Yes, you can use quick oats. They will change the texture. Quick oats create a softer, chewier cookie. For more bite, stick with rolled oats. Rolled oats give cookies a heartier feel. To make these cookies vegan, swap honey for maple syrup. Use dairy-free chocolate chips and nut milk. This way, you enjoy a tasty treat that fits a vegan diet. To soften hardened peanut butter, microwave it for a few seconds. Stir it well to mix the heat. You can also add a splash of warm water. This helps smooth it out for easier mixing. Yes! Almond or cashew butter works great. Each nut butter gives a unique taste. Choose one that you like best for your cookies. These cookies take about 30 minutes to set in the fridge. Make sure they are firm before serving. This helps them hold their shape and adds to the texture. Absolutely! Chopped nuts or seeds add crunch and flavor. Walnuts or sunflower seeds are great options. Just mix them in with the oats for an extra boost. Store your cookies in an airtight container. Keep them in the fridge for freshness. They will last up to a week if stored properly. Yes, you can freeze them! Place cookies in a single layer in a freezer bag. They last up to three months in the freezer. Just thaw before enjoying again! If you prefer a sweeter cookie, add more honey or maple syrup. You can also sprinkle some sugar on top before chilling. This gives a nice touch of sweetness. Yes! Use gluten-free oats to make them gluten-free. Check the label to ensure they are certified gluten-free. This way, everyone can enjoy your cookies! We covered the key ingredients, cooking steps, and helpful tips for making cookies. Knowing the right measurements and substitutions helps everyone enjoy baking, no matter their needs. Use my tips to avoid common mistakes and create perfect cookies. Explore variations to keep your recipes fresh and exciting. Finally, remember the best ways to store your treats for later enjoyment. With these insights, you can confidently bake delicious cookies every time. Enjoy your baking journey!](https://southerndishes.com/wp-content/uploads/2025/04/bdc3a8b3-e808-48e8-81dc-b90a5ebe4587.webp)
Are you on the hunt for a quick and easy dessert? Look no further! My No-Bake Chocolate Oatmeal Cookies are

Looking for a meal that combines bold flavor with ease? Honey Mustard Chicken Thighs are your answer. This dish is
![For these tasty bites, you need: - Medium head of cauliflower - All-purpose flour - Buffalo sauce These ingredients form the base of your dish. The cauliflower gives a nice crunch. The flour helps create a light batter. Buffalo sauce adds that bold, spicy flavor. To make these bites even better, add: - Garlic powder - Onion powder - Smoked paprika - Cayenne pepper These spices bring warmth and depth. Garlic and onion powders add aroma. Smoked paprika gives a hint of smokiness. Adjust the cayenne pepper for your spice level. For a complete snack, consider: - Ranch or blue cheese dressing - Fresh parsley - Celery sticks These add freshness and crunch. The dressing cools down the heat from the buffalo sauce. Parsley makes the dish pop with color. Celery sticks add a nice crunch and are great for dipping. For the full recipe with step-by-step instructions, check out the [Full Recipe]. - Preheat the oven: Set your oven to 450°F (230°C). Line a baking sheet with parchment paper. This helps the bites crisp up nicely. - Make the batter: In a bowl, mix the flour, garlic powder, onion powder, smoked paprika, cayenne pepper, and salt. Slowly add water or non-dairy milk. Whisk until smooth. The batter should be thick but pourable, like pancake mix. - Dipping technique: Take each cauliflower floret and dip it into the batter. Make sure the floret is well-coated. Let any extra batter drip off. This step ensures even cooking and crispness. - Arranging on the baking sheet: Place the coated florets on the lined baking sheet. Make sure they have space between them. This helps them get crispy and not steam. - Baking time: Bake the cauliflower bites for 20-25 minutes. Halfway through, flip them over. This ensures they cook evenly and get golden brown. - Final steps with buffalo sauce: Once they are crispy, take them out and drizzle the buffalo sauce over the bites. Toss them gently to coat all sides. Return them to the oven for another 10 minutes. This allows the sauce to stick and caramelize. For the full recipe, check out the detailed steps above. Enjoy your savory Buffalo Cauliflower Bites! To get your cauliflower bites crispy, I have a few key tips. First, make sure to dry the cauliflower florets well after washing them. Extra moisture can make them soggy. You want the batter to stick but not too much water. When coating the florets, use a dipping technique. Dip each piece into the batter, then shake off the excess. This step helps them cook evenly. Arrange the coated florets on your baking sheet with space in between. Crowding the pan can lead to steaming instead of crisping. If you need a gluten-free option, swap all-purpose flour with almond or chickpea flour. Both work well and add a nice flavor. You can also use gluten-free breadcrumbs for an extra crunchy texture. For those who want to change up the sauce, try different options. A spicy BBQ sauce can add sweetness and heat. You could also use a teriyaki sauce for a fun twist. Experiment with dressings like ranch or a creamy avocado dip for added flavor. Serving your buffalo cauliflower bites can be fun. You can create a platter with celery sticks, carrot sticks, and various dips. This adds color and flavor to your table. Another idea is to serve them in tacos. Just add some shredded cabbage and a drizzle of ranch. You can also place them on a salad for a crunchy topping. The options are endless! For the full recipe, check out the detailed instructions above. Enjoy your cooking! {{image_2}} You can easily change the flavor of your Buffalo cauliflower bites. For a spicy kick, add more cayenne pepper or a pinch of chili powder. You can also try chili flakes for an extra punch. If you want a sweet and spicy version, mix honey or maple syrup into the buffalo sauce. This combo adds depth and balances the heat. You can cook your cauliflower bites in different ways. If you want them extra crispy, use an air fryer. Set the temperature to 400°F (200°C) and cook for about 15 minutes. Shake the basket halfway through for even cooking. Grilling is another fun option. It gives your bites a smoky flavor. Just toss them on a preheated grill for about 10 minutes, turning occasionally. If you need to avoid dairy, you have great options. Instead of regular milk, use non-dairy milk like almond or oat milk for the batter. It gives the same creamy texture without the dairy. For dips, choose vegan ranch or a cashew-based dressing. These options keep your dish delicious and allergen-friendly. For the Full Recipe, check the earlier section. Enjoy your cooking adventure! To keep your Buffalo Cauliflower Bites fresh, use an airtight container. Glass containers work well. They help prevent moisture loss. Store the bites in the fridge for up to three days. For best results, let them cool before placing them in the container. This keeps them crispy longer. When reheating, the oven is best. Preheat it to 350°F (175°C). Place the bites on a baking sheet. Heat for about 10-15 minutes. This method keeps them crispy. If you use a microwave, they may become soft. To avoid this, heat in short bursts. Check often to maintain texture. To freeze, let the bites cool completely. Arrange them in a single layer on a baking sheet. Freeze for a few hours until solid. Then, move them to a freezer-safe bag. Remove as much air as possible. They can last for up to three months. When ready to enjoy, thaw in the fridge overnight. Reheat in the oven for best results. This way, you get that nice crunch again. Buffalo Cauliflower Bites can last about 3 to 5 days in the fridge. Store them in an airtight container. This keeps them fresh and tasty. Yes, you can make these bites ahead of time. Prepare them and store in the fridge before baking. Bake them just before serving for the best taste. You can serve Buffalo Cauliflower Bites with several tasty sides. I like pairing them with celery sticks and ranch or blue cheese dressing. These add crunch and creaminess. Yes, they are a healthier option compared to traditional buffalo wings. Cauliflower is low in calories and high in fiber. Baking instead of frying keeps the fat content lower. The heat level depends on the cayenne pepper you use. You can adjust it to fit your taste. For milder bites, use less cayenne. For more heat, add extra buffalo sauce. Buffalo cauliflower bites are a tasty and fun snack. You learned about the main ingredients, seasonings, and how to bake them. We also covered tips for making them crispy and variations to try. These bites are easy to store and reheat. Whether you want them spicy, sweet, or vegan, you can adapt them to your taste. Enjoy your cooking adventure and share these bites with others. They'll love this healthy treat!](https://southerndishes.com/wp-content/uploads/2025/04/ba90220c-b71b-4376-a46b-9e7c0456dacf.webp)
Are you ready to spice up your snack game? These Savory Buffalo Cauliflower Bites are crispy, flavorful, and packed with
![- 2 pounds Yukon Gold potatoes, peeled and cubed - 4 cloves garlic, peeled and minced - ½ cup unsalted butter - ½ cup sour cream - ½ cup whole milk (or coconut milk for a dairy-free option) - Salt and pepper to taste - Fresh chives, chopped (for garnish) Choosing the right type of potatoes for creaminess I love Yukon Gold potatoes for their rich flavor. They have a smooth texture that makes them perfect for creamy mashed potatoes. Avoid starchy potatoes like Russets; they can turn gummy. Fresh vs. jarred garlic for flavor Fresh garlic gives a brighter taste compared to jarred garlic. When you mince fresh garlic, it releases oils that add depth. Always use fresh for the best flavor. How butter and milk enhance texture Butter adds richness and a silky feel. Milk or coconut milk helps to achieve that perfect creamy consistency. Use warm milk for better blending; this keeps the mash soft and smooth. For a full recipe, check the detailed instructions to make your creamy garlic mashed potatoes shine! To make creamy garlic mashed potatoes, start by boiling your potatoes. First, peel and cube 2 pounds of Yukon Gold potatoes. Place them in a large pot and cover them with water. Make sure the water covers the potatoes by at least one inch. This helps them cook evenly. Add a pinch of salt to the water. Salting the water is crucial. It adds flavor to the potatoes as they cook. Bring the pot to a boil over medium-high heat. Once boiling, reduce the heat to a simmer. Cook for about 15 to 20 minutes. The potatoes are ready when you can pierce them easily with a fork. While the potatoes cook, it’s time to prepare the garlic. Take 4 cloves of garlic and mince them finely. In a skillet, melt ½ cup of unsalted butter over medium heat. When the butter is melted, add the minced garlic. Sauté the garlic for about 2 to 3 minutes. You want it to become fragrant and slightly golden. Watch carefully, as burnt garlic can ruin your dish. Perfectly sautéed garlic should smell amazing and have a light golden color. Once the potatoes are cooked, drain them well. Return them to the pot. Now, pour in the sautéed garlic and butter mixture. Add ½ cup of sour cream and ½ cup of whole milk (or coconut milk if you prefer). To achieve the right mash consistency, use a potato masher or a hand mixer. Mash the potatoes until smooth and creamy. If you like it chunkier, mash to your liking. Season the mashed potatoes with salt and pepper to taste. Taste is key here. Adjust the seasoning to enhance the flavor. Finally, transfer your creamy garlic mashed potatoes to a serving dish. Sprinkle chopped fresh chives on top for a lovely garnish. For the complete recipe, check the [Full Recipe]. To make creamy garlic mashed potatoes, you must choose the right tools. A potato ricer gives a smoother finish than a masher. When using a ricer, the potatoes become light and fluffy. If you use a masher, they may be a bit chunkier, which some people prefer. Temperature matters too. Warm potatoes blend better with butter and cream. If the potatoes are cold, they can become gluey. Always mash them while they are hot. This helps keep the texture smooth and creamy. To boost garlic flavor, consider adding roasted garlic. Roasting mellows its taste and adds depth. You can also mix in garlic powder for an extra kick. Balance the flavors with a pinch of lemon juice. It brightens the dish and cuts through the richness. If you want more flavor layers, add fresh herbs. Chopped parsley or thyme can enhance the garlic taste. They add freshness and make your dish shine. Make your creamy garlic mashed potatoes look stunning. A sprinkle of fresh chives adds color and freshness. For a fancy touch, drizzle some olive oil or melted butter on top. Serve these potatoes alongside roasted meats or grilled veggies. They pair well with steak, chicken, or a hearty salad. For a festive look, use a piping bag to create swirls on your serving dish. This makes the dish more appealing and shows off your cooking skills. For the full recipe, check out the detailed guide. {{image_2}} To make creamy garlic mashed potatoes dairy-free, swap out the butter, milk, and sour cream. Use coconut milk instead of whole milk for a rich flavor. You can try plant-based butter or olive oil in place of regular butter. For the sour cream, use cashew cream or a store-bought dairy-free alternative. These swaps keep the taste great while meeting dietary needs. You can boost flavor by adding fresh herbs like rosemary or thyme. These herbs bring a lovely aroma and taste. Mix in cheese types for extra creaminess. Cream cheese or mascarpone works well for a richer dish. Even a sprinkle of Parmesan can elevate the taste. Each addition offers a new twist to your creamy garlic mashed potatoes. Explore flavors from around the world by adapting this recipe. For an Italian flair, mix in some roasted garlic and a pinch of oregano. An Indian twist could include spices like cumin or coriander for warmth. Each culture has unique tastes that can enhance your mashed potatoes. This way, you create a dish that reflects your favorite cuisines. To keep your creamy garlic mashed potatoes fresh, store them in the fridge. Use an airtight container. This helps prevent moisture loss and keeps them creamy. Make sure to cool them to room temperature before sealing. They will stay good for about three to five days in the fridge. When reheating, I recommend using the stovetop or microwave. For the stovetop, add a splash of milk to restore creaminess. Heat on low, stirring often until warm. If using a microwave, cover the dish with a lid. Heat in short bursts of one minute, stirring in between. This keeps them from drying out. Yes, you can freeze creamy mashed potatoes! Portion them into freezer-safe bags or containers. Make sure to leave some space for expansion. When ready to eat, thaw them in the fridge overnight. To reheat, warm them on the stove with a bit of milk to regain that smooth texture. Enjoy your creamy garlic mashed potatoes anytime! For the full recipe, check out the detailed steps above. Sticky mashed potatoes often come from overcooking the potatoes or using the wrong type. When potatoes cook too long, they release too much starch. This makes them gluey. To fix this, ensure you cook them just until they are tender. Solutions for a smoother consistency: - Use Yukon Gold or Russet potatoes for their fluffy texture. - Drain them well after cooking to remove excess moisture. - Mash them gently to keep the starch from getting too gummy. Yes, you can use different potatoes. Each type has its own texture and flavor. Comparison of potato types and their impact on texture: - Yukon Gold: Creamy and buttery, great for smooth mash. - Russet: Fluffy and light, good for a more rustic texture. - Red Potatoes: Waxy and firm, gives a chunkier mash. - Fingerling Potatoes: Earthy flavor, adds a fun twist. There are many tasty add-ins for mashed potatoes. Common add-ins and their flavor profiles: - Cheddar cheese: Adds sharpness and creaminess. - Roasted garlic: Deepens the garlic flavor and adds sweetness. - Herbs: Fresh parsley or thyme can brighten the dish. - Cream cheese: Gives a rich and tangy taste. Suggestions for unique and creative variations: - Try adding caramelized onions for a sweet touch. - Mix in sautéed mushrooms for an earthy flavor. - A splash of lemon juice can add brightness and balance. For the full recipe, check out the Creamy Garlic Mashed Potatoes section. Now you know how to create creamy mashed potatoes that excite your taste buds. We covered every step, from selecting ingredients to presentation tips. The right potatoes and garlic can make a big difference. You can also try out various flavors to make it your own. Follow these tips for perfect mashed potatoes, and enjoy every bite. Remember, cooking is about experimenting and finding what you love. Happy cooking!](https://southerndishes.com/wp-content/uploads/2025/04/b40df985-0566-4ad3-b84b-9a786802acbd.webp)
Welcome to your new favorite side dish: Creamy Garlic Mashed Potatoes! Imagine fluffy Yukon Gold potatoes, perfectly blended with rich
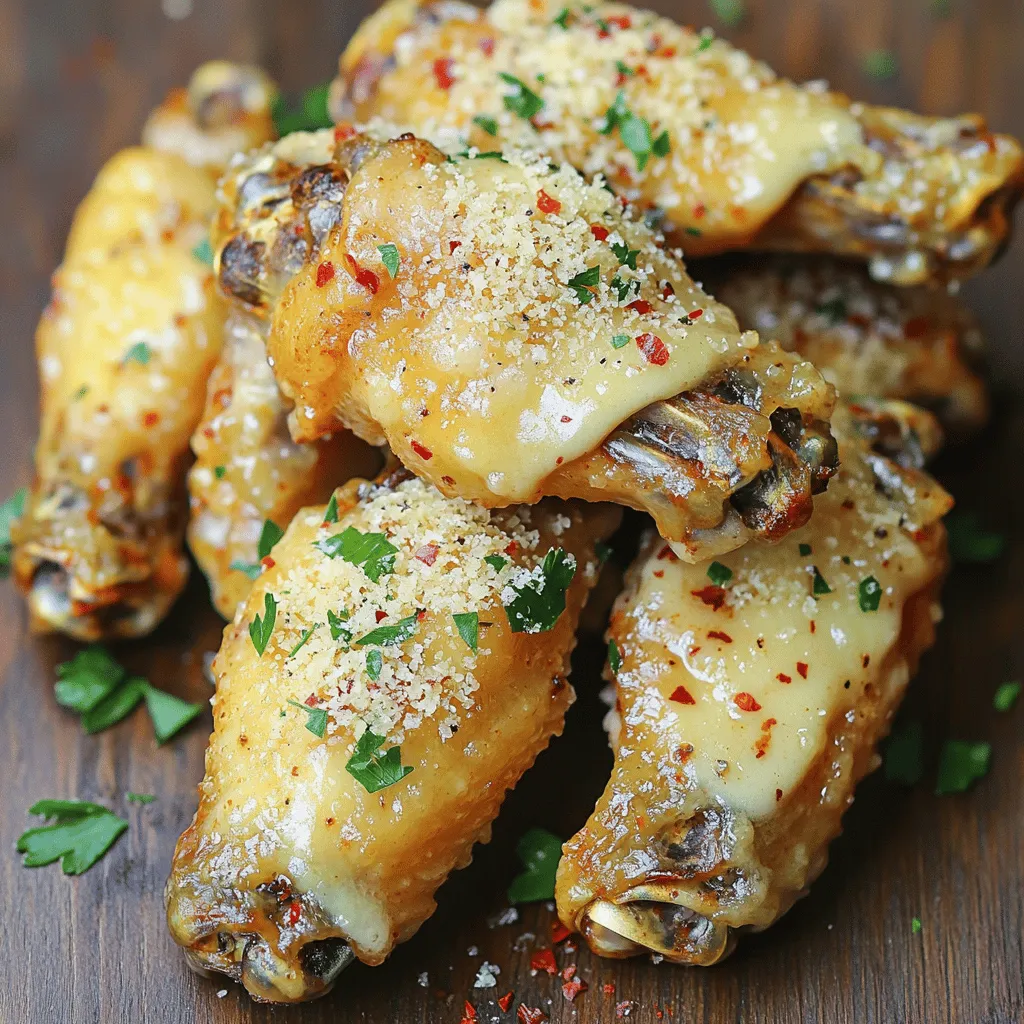
If you crave a tasty treat that’s easy to make, crispy garlic Parmesan wings are your answer! This recipe combines
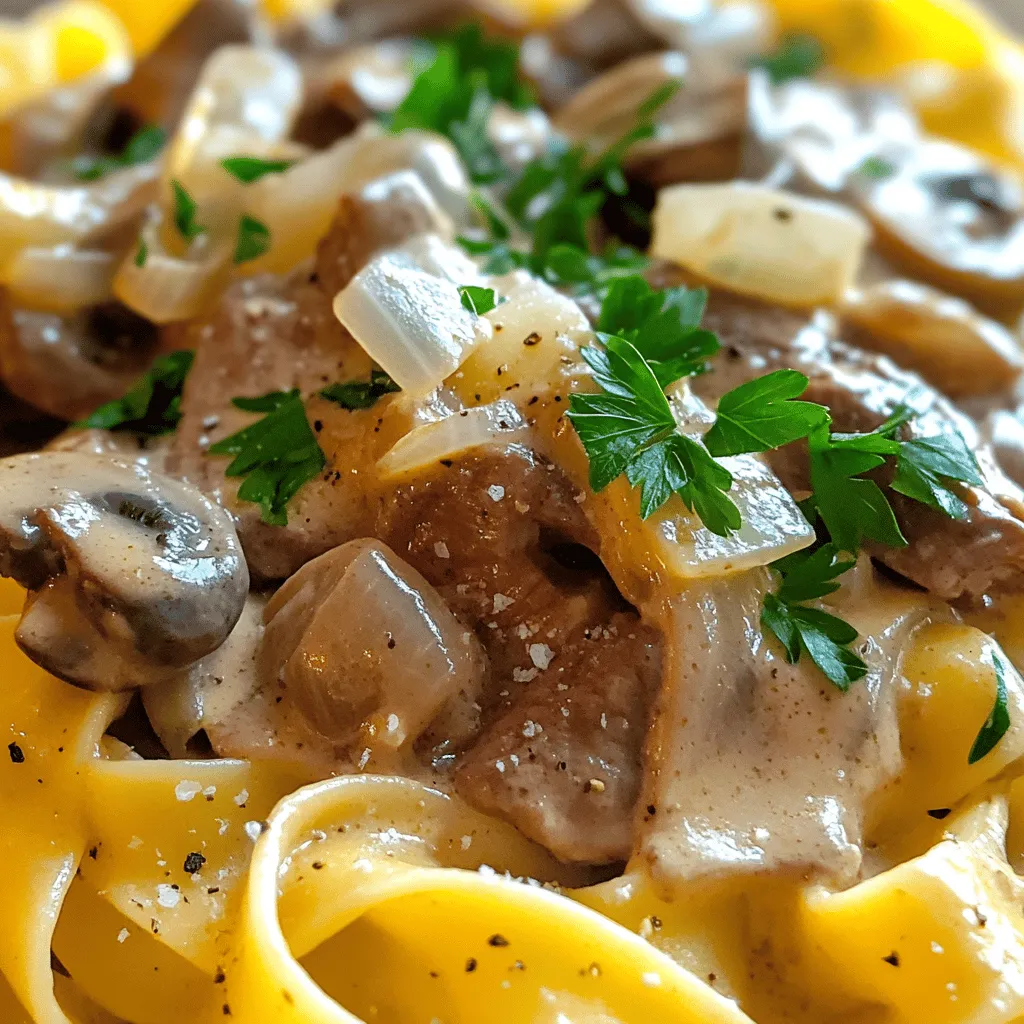
Welcome to my take on Classic Beef Stroganoff! This dish is rich, creamy, and loaded with flavor. It’s simple enough
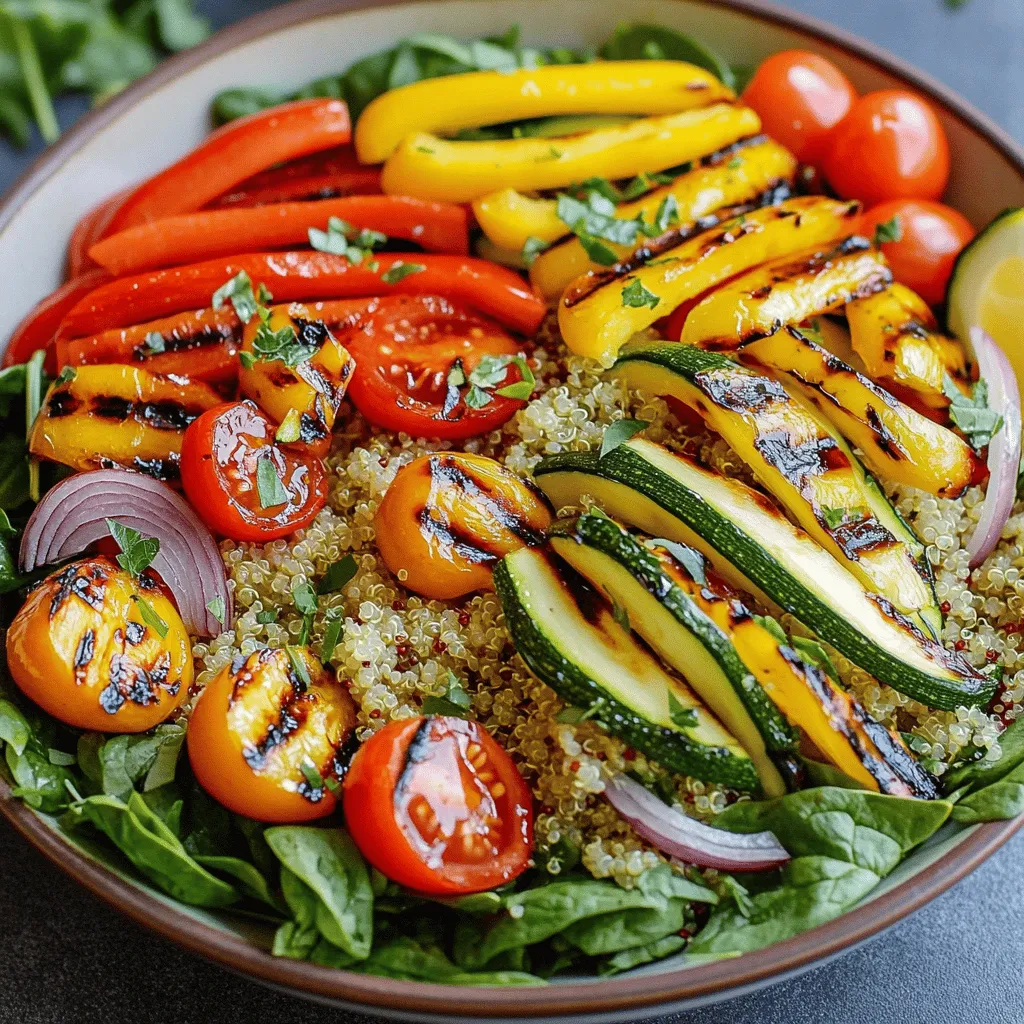
If you’re looking for a fresh, healthy dish that bursts with flavor, you’ve found it! This Grilled Vegetable and Quinoa
Are you ready to whip up a hearty dish that is both easy and tasty? My Instant Pot Creamy Mushroom

Looking for a quick and tasty dinner idea? Teriyaki chicken bowls with rice could be your new favorite! This dish
