Skip to content
DisclaimerTerms Of UseGDPR PolicyCookie Policy

Southern Dishes

  • Home
  • Drinks
  • Appetizers
  • Dinner
  • Dessert
  • About
  • Contact
  • Privacy Policy
DisclaimerTerms Of UseGDPR PolicyCookie Policy

Isabella

- 1 lb Brussels sprouts, trimmed and halved - 3 tablespoons olive oil - 4 cloves garlic, minced - Zest and juice of 1 lemon - 1 teaspoon honey - Salt and pepper to taste - 1/4 teaspoon red pepper flakes (optional for heat) - 2 tablespoons grated Parmesan cheese (optional for garnish) - Fresh parsley, chopped for garnish Brussels sprouts are small but mighty. They are full of vitamins and minerals. They bring a nutty flavor that works well with garlic and lemon. Garlic adds depth and richness. The lemon brightens up the dish, making it fresh and lively. A serving of Lemon Garlic Roasted Brussels Sprouts has about 100 calories. Each serving contains: - 6g of fat - 10g of carbs - 4g of protein Brussels sprouts are a great source of vitamins C and K. They also help with digestion due to their fiber content. Garlic offers health benefits too. It may support immune function and heart health. Enjoying this dish gives you tasty flavors and nutrition. For the full recipe, check [Full Recipe]. First, you need to trim the Brussels sprouts. This means cutting off the tough stem end. Then, slice each sprout in half. This helps them cook evenly. Next, prepare the garlic and lemon. Mince four cloves of garlic until fine. For the lemon, zest it first, then squeeze it for juice. This will give a bright flavor to our dish. Now, let's mix our ingredients. In a large bowl, combine the halved Brussels sprouts with three tablespoons of olive oil. Add the minced garlic, lemon zest, lemon juice, and one teaspoon of honey. Don’t forget to season with salt, pepper, and if you like it spicy, add a pinch of red pepper flakes. Toss everything well. You want the Brussels sprouts to be nicely coated. Preheat your oven to 425°F (220°C). This high heat helps to caramelize the sprouts. Spread the Brussels sprouts on a baking sheet. Make sure they are cut-side down. This will give them a nice, crispy edge. Roast for 20-25 minutes. Check them halfway through and stir for even cooking. The sprouts should be tender and caramelized when done. If you like, sprinkle grated Parmesan cheese on top while they are hot. Garnish with chopped parsley to add color and freshness. For the full recipe, click here. To get the best results, set your oven to 425°F (220°C). This temperature is key for a crispy outside and tender inside. You want to ensure the Brussels sprouts cook evenly. Place them cut-side down on your baking sheet. This position helps them caramelize. The caramelization adds rich flavor and a nice texture. To amp up the taste, consider adding more spices. A sprinkle of smoked paprika can give a smoky flavor. If you like heat, try adding cayenne pepper instead of red pepper flakes. You can also mix in some fresh herbs, like thyme or rosemary, before roasting. For garnishes, Parmesan cheese is great, but you can switch things up. Try crumbled feta or goat cheese for a tangy twist. A squeeze of fresh lemon juice right before serving adds brightness. Play with flavors to find what you love best! For the full recipe, check out the [Full Recipe]. {{image_2}} If you want to switch things up, try using different oils or sweeteners. Instead of olive oil, you can use avocado oil for a richer taste. If you prefer a little sweetness, maple syrup works great instead of honey. Brussels sprouts are tasty, but you can use other veggies too. Broccoli, cauliflower, or green beans are great options. Just cut them into similar sizes to cook evenly. You can make Lemon Garlic Roasted Brussels Sprouts in different ways. The stovetop is quick and easy. Heat some oil in a pan, add the sprouts, and sauté until they are golden brown. This method takes about 10-15 minutes. Oven roasting gives a deeper flavor. The heat makes the edges crispy. For a faster option, try an air fryer. Set it to 400°F (200°C) and cook for 15 minutes. Shake the basket halfway through for best results. For the full recipe, check out the details above. To keep your Lemon Garlic Roasted Brussels Sprouts fresh, store them properly. Place them in an airtight container. Glass or plastic containers work well. Leave a little space at the top to prevent squishing. You can keep them in the fridge for up to three days. If you want to enjoy them later, make sure they are cool before sealing. When it's time to enjoy your leftovers, you want them to taste great. Reheat your Brussels sprouts in the oven for the best results. Preheat the oven to 350°F (175°C) and place them on a baking sheet. Heat for about 10-15 minutes. This method helps keep their crispiness. If you're short on time, the microwave is a quick option. Place them in a microwave-safe dish. Heat for about 1-2 minutes. Check them halfway through to avoid overcooking. Remember, reheating adds time, so keep a close eye! Yes, you can use frozen Brussels sprouts. However, fresh ones taste better. Frozen sprouts may have more water. To use them, thaw first. Pat them dry with a towel. This helps them roast well. You may need to bake them longer, about 30 minutes. Check for the same signs of doneness. Brussels sprouts are done when they are tender. Look for a golden-brown color on the edges. If you poke one with a fork, it should feel soft inside. You can also taste one to check. They should have a nice, sweet flavor when cooked well. Lemon garlic roasted Brussels sprouts pair well with many dishes. Try them with grilled chicken or fish. They also go great with pork chops or steak. For a vegetarian meal, serve them with quinoa or a hearty salad. These sprouts add a bright flavor to any meal. For the full recipe, visit the detailed cooking instructions. This blog post covered how to make delicious Lemon Garlic Roasted Brussels sprouts. We discussed key ingredients, the cooking process, and tips for perfecting your dish. You learned about storage and reheating methods, plus variations to try. Enjoy these tasty Brussels sprouts as a side or main dish. They are healthy and easy to make. I hope this inspires you to cook and share a joyful meal with others.

Lemon Garlic Roasted Brussels Sprouts Tasty Side Dish

Are you ready to elevate your dinner table with a vibrant side dish? Lemon Garlic Roasted Brussels Sprouts are the

To make Spinach Feta Stuffed Chicken Breast, you need fresh and simple ingredients. Here’s what to gather: - 4 boneless, skinless chicken breasts - 2 cups fresh spinach, chopped - 1 cup feta cheese, crumbled - 1/2 cup cream cheese, softened - 2 cloves garlic, minced - 1 teaspoon dried oregano - 1 tablespoon olive oil - Salt and pepper to taste - 1/2 cup breadcrumbs (optional for topping) - Fresh parsley, for garnish These ingredients come together to create a tasty dish that is both hearty and healthy. The spinach adds color and nutrients, while the feta and cream cheese give it a creamy, rich flavor. You can use fresh or frozen spinach, but fresh gives the best texture. The garlic and oregano add a nice touch of warmth and earthiness. If you want a crunch, consider using breadcrumbs on top. They add texture and make the dish look even better. For the full recipe, you can check out the detailed instructions to guide you through each step. Enjoy cooking! - Preheat the oven to 375°F (190°C). - In a skillet, add olive oil and sauté minced garlic until fragrant. - Add chopped spinach and cook until it wilts, about 2-3 minutes. - Take each chicken breast and create a pocket by slicing the thickest side. - In a bowl, mix the wilted spinach, feta cheese, cream cheese, and oregano. - Stuff each chicken breast with the spinach and cheese mixture. - Place the stuffed chicken in a baking dish. - Cover with foil and bake for 25 minutes. - Uncover and bake for an additional 15-20 minutes. - Check the internal temperature; it should reach 165°F (75°C) for doneness. To keep your chicken juicy, avoid overcooking. Use a meat thermometer to check the internal temperature. Aim for 165°F (75°C) for safe eating. If you cook it too long, the chicken will dry out. When stuffing chicken breasts, create a pocket carefully. Slice the thick side of the chicken, but don’t cut all the way through. This way, you can fill it well with the spinach and feta mixture. Use your fingers to help push the filling inside. Make sure to pack it in, but don't overstuff. For extra flavor, try using garlic powder or onion powder. You can also add a pinch of red pepper flakes for a little heat. Fresh herbs like basil or thyme can brighten the dish, too. If you want to switch up the cheese, try using goat cheese or ricotta. These cheeses add a creamy texture and unique taste. You can also mix in some Parmesan for a nutty flavor. {{image_2}} You can switch up the greens in your stuffed chicken. Kale, Swiss chard, or even arugula work great. Each brings a unique taste and texture. Don’t be afraid to mix them up! For cheese, feta is classic, but you can try mozzarella or goat cheese. Cream cheese adds creaminess, but ricotta can do the same. Each cheese offers a different flavor profile that can elevate your dish. Grilling your stuffed chicken gives it a smoky flavor. It’s a fun way to enjoy the outdoors. Just be sure to monitor the heat. You want the chicken cooked through but not dry. Baking is a great option for a hands-off meal. It allows the flavors to blend well. Plus, it’s easy to prepare while you cook sides. If you're short on time, try the air fryer. It cooks faster and keeps the chicken juicy. Just set the temperature to 375°F and check for doneness. For the full recipe, refer to the main section above. After enjoying your Spinach Feta Stuffed Chicken Breast, store any leftovers in the fridge. Place the chicken in an airtight container. This keeps it fresh and safe to eat. Leftovers will last for up to three days. When reheating, ensure the chicken is warm throughout. You can use a microwave or an oven to heat it again. If you want to keep the stuffed chicken longer, freezing is a great option. Wrap each stuffed chicken breast tightly in plastic wrap. Then, place them in a freezer-safe bag. This helps prevent freezer burn. It’s best to use the chicken within three months for the best flavor. For thawing, move the chicken to the fridge the night before you want to eat it. This way, the chicken defrosts slowly and safely. If you need to thaw it quickly, you can use the microwave. Just follow your microwave's instructions for defrosting meat. After thawing, cook it right away. Enjoy your tasty meal again! For the full recipe, check the previous section. How long does it take to cook Spinach Feta Stuffed Chicken Breast? This dish takes about 50 minutes from start to finish. It includes 15 minutes for prep and 35 minutes for cooking. You will bake the chicken for 25 minutes covered, then for another 15-20 minutes uncovered. This helps keep it juicy and ensures it cooks through. Can I make this recipe ahead of time? Yes, you can make this dish ahead of time. Prepare the stuffed chicken, then cover and store it in the fridge for up to 24 hours. When ready to cook, just bake it straight from the fridge. It may need a few extra minutes to cook. What to serve with Spinach Feta Stuffed Chicken Breast? You can serve this chicken with many sides. Try roasted vegetables, a fresh salad, or quinoa. These options add color and nutrition to your meal. A light lemon dressing also pairs well. Can I use frozen spinach instead of fresh? Yes, frozen spinach works well in this recipe. Just thaw it and squeeze out the extra water before using. This helps keep the filling from getting too soggy. What can I use instead of feta cheese? If you don’t have feta, you can use goat cheese or ricotta. Both add creaminess and flavor. You can also try mozzarella for a milder taste. What to do if chicken is not cooked through? If your chicken is not cooked through, return it to the oven. Bake for an extra 5-10 minutes. Check that the internal temperature reaches 165°F (75°C). This ensures it is safe to eat and juicy. How to spice it up for a more flavorful dish? Add spices like paprika, cumin, or red pepper flakes to the filling. You can also mix in herbs like basil or thyme for extra flavor. A squeeze of lemon juice can brighten up the taste, too. We covered a simple and tasty way to make Spinach Feta Stuffed Chicken. You learned the key ingredients, preparation steps, and cooking tips to keep the chicken juicy. I shared storage tips and important FAQs to help you enjoy this dish later. You can even mix things up with different greens or cheeses. Remember, cooking should be fun and flexible. Now, you can create your own delicious version for family and friends. Enjoy your cooking adventure!

Spinach Feta Stuffed Chicken Breast Simple and Tasty

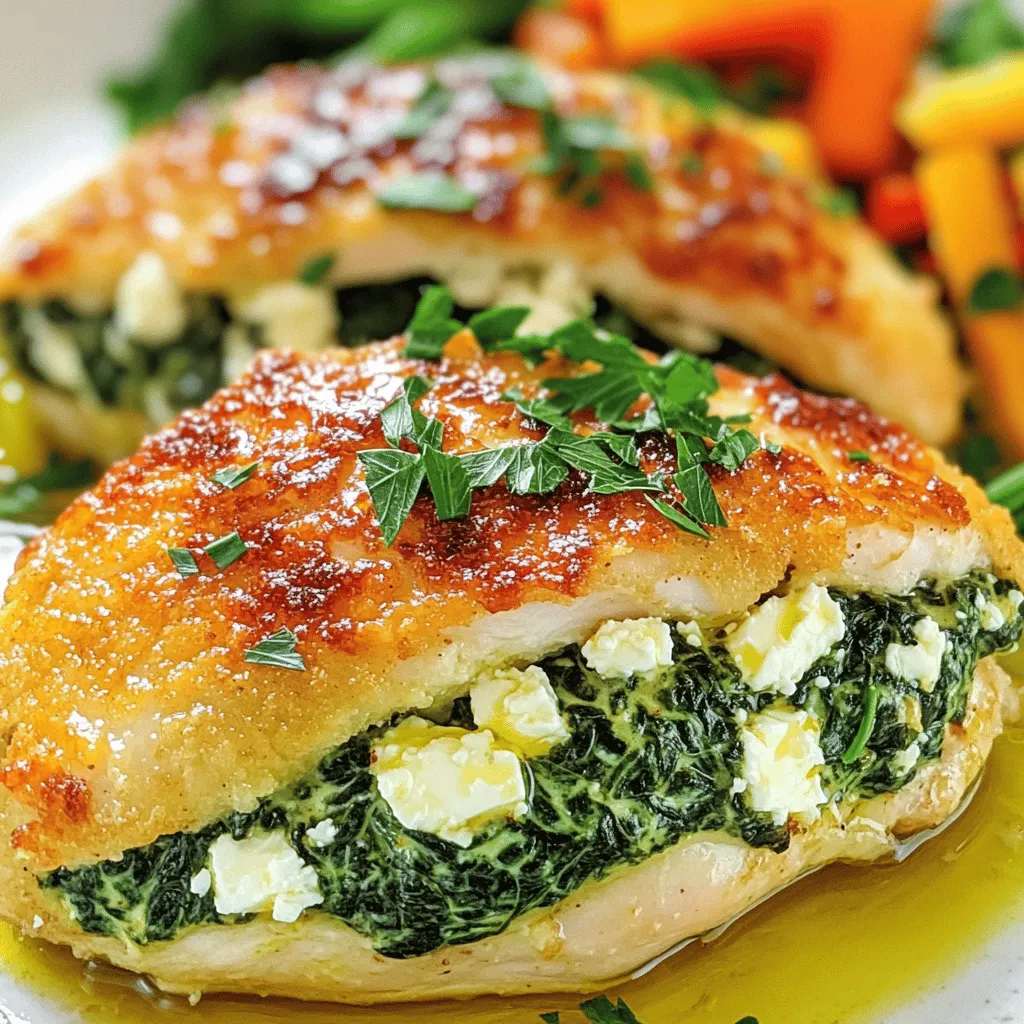
If you’re craving a meal that combines flavor and nutrition, look no further! My Spinach Feta Stuffed Chicken Breast is

- Pasta options: You can use fettuccine, linguine, or any pasta you like. I enjoy fettuccine for its wide, flat shape that holds sauce well. - Types of mushrooms: Button mushrooms are common, but cremini or a mix adds great flavor. Each type brings its unique taste and texture. - Garlic: Garlic is key in this dish. It adds a rich, warm flavor that enhances the mushrooms and cream. - Heavy cream: Heavy cream makes the sauce rich and smooth. It creates that creamy texture we all love. - Grated Parmesan cheese: This cheese enhances the flavor. It adds a salty tang that balances the creaminess. - Vegetable broth: The broth deepens the taste. It brings a savory note that rounds out the sauce. - Recommended herbs: Thyme and parsley are great choices. Thyme adds earthiness, while parsley gives a fresh touch. - Salt and pepper: These basic seasonings are crucial. They bring out the flavors in the dish. Always taste and adjust to your liking. For a detailed guide on how to prepare this dish, check the Full Recipe. To boil pasta, start with a big pot of salted water. Bring the water to a rapid boil. Add the pasta and stir it gently. Cook the pasta as the package directs, usually around 8-10 minutes. You want it al dente, which means it should be firm, not mushy. To check, taste a piece a minute or two before the time is up. Once ready, save about 1 cup of the pasta water. Then, drain the pasta and set it aside. To get golden mushrooms, heat olive oil and butter in a large skillet over medium heat. Once hot, add the sliced mushrooms. Stir them often for about 5-7 minutes. You want them to release their moisture and turn golden brown. For the garlic, add it after the mushrooms are golden. Cook the garlic for only 1-2 minutes. Keep an eye on it so it doesn’t burn. Burnt garlic can ruin the dish. Start by pouring vegetable broth into the skillet with the mushrooms and garlic. Bring it to a simmer. This helps to reduce the broth, enhancing the flavor. Let it simmer for 2-3 minutes. After that, lower the heat and add heavy cream and grated Parmesan cheese. Stir well until the cheese melts and the sauce turns creamy. If the sauce seems too thick, add some of that reserved pasta water. This will help you get the perfect creamy finish. For the full recipe, check the earlier sections. To make your sauce just right, you can adjust the thickness with pasta water. After cooking your pasta, save about 1 cup of the starchy water. If your sauce feels too thick, add a little pasta water. Keep mixing until it reaches the right creamy texture. The starch in the water helps bind the sauce to the pasta. If you don’t have heavy cream, you can substitute it with half-and-half or a mix of milk and butter. This will give you a lighter sauce but still keep some creaminess. Just remember, using less cream will change the flavor a bit. To make your creamy garlic mushroom pasta even better, think about adding more herbs or spices. Dried oregano or fresh basil can add a nice touch. A pinch of red pepper flakes can bring a bit of heat if you like spice. You can also pair this dish with grilled chicken, shrimp, or roasted vegetables. These options add protein and make your meal more filling. If you want to save time, you can pre-cook the pasta earlier in the day. Just follow the same cooking steps, but do not mix it with the sauce yet. Store it in an airtight container. For leftovers, store the pasta and sauce separately. This keeps the pasta from getting mushy. You can keep them in the fridge for up to three days. When you’re ready to eat, just heat the sauce and mix it with the pasta. For the full recipe, check out the Creamy Garlic Mushroom Pasta 🧄. {{image_2}} Want to make your creamy garlic mushroom pasta heartier? You can add protein! Chicken, shrimp, or tofu all work well. - Chicken: Dice and cook it in the skillet before adding mushrooms. This takes an extra 5-7 minutes. - Shrimp: Add peeled shrimp after cooking the mushrooms. Cook for about 3-4 minutes until pink. - Tofu: Cube and sauté tofu until golden. This takes about 8-10 minutes. Adjust the cooking time based on what you choose. Ensure everything is cooked through for a tasty meal. For a vegetarian or vegan twist, you can swap out a few ingredients. - Cheese and cream: Use cashew cream or coconut cream instead of heavy cream. Nutritional yeast can replace cheese for that savory taste. - More veggies: Add spinach, bell peppers, or zucchini. These boost nutrition and flavor. These changes keep your dish creamy while catering to different diets. You can give your creamy garlic mushroom pasta a new taste with simple changes. - Mushroom varieties: Try shiitake, portobello, or oyster mushrooms. Each brings a unique flavor. - Lemon juice or zest: A squeeze of lemon or a bit of zest brightens the dish. This adds freshness that balances the creaminess. Experiment with these ideas to find a flavor you love! For the full recipe, check out the details above. To keep your creamy garlic mushroom pasta fresh, store it in airtight containers. This method helps prevent moisture loss and keeps flavors intact. Let the pasta cool to room temperature before packing. This step avoids condensation inside the container. Keep the leftovers in the fridge for up to three days. If you plan to eat it later, consider separating the pasta and sauce. This way, each part stays fresh longer. When reheating, the goal is to keep the texture creamy. The stovetop is best for this dish. Heat a little olive oil in a pan and add the pasta. Stir gently to warm it up. If the pasta seems dry, add a splash of vegetable broth or pasta water. The microwave can work, but it may make the sauce less creamy. If using the microwave, heat in short bursts. Stir in between to ensure even warming. You can freeze creamy garlic mushroom pasta, but it's best to freeze the sauce and pasta separately. To freeze, let the sauce cool completely. Pour it into freezer-safe bags or containers. Label with the date for easy tracking. For pasta, cook it just until al dente before freezing. When ready to eat, thaw in the fridge overnight. Reheat on the stovetop for the best taste and texture. Add a little broth to bring back the creaminess after thawing. This dish is quick and easy. You can make creamy garlic mushroom pasta in just 30 minutes. It takes about 10 minutes to prep the ingredients. Cooking the pasta and sauce takes around 20 minutes. This makes it a great option for a busy weeknight meal. Yes, you can use gluten-free pasta! Look for options made from rice or chickpeas. These types cook well and hold up nicely in the sauce. Just follow the package instructions for best results. You can enjoy this dish while sticking to your gluten-free diet. For creamy garlic mushroom pasta, button and cremini mushrooms are great choices. Button mushrooms are mild and tender. Cremini mushrooms have a richer flavor. You can also mix different types for more taste. Try using shiitake or portobello for a unique twist. Each type will add its own special touch to your meal. In this post, we explored how to make creamy garlic mushroom pasta. We covered key ingredients, from pasta types to the role of garlic. You learned the steps for cooking pasta and sautéing mushrooms. I've shared tips for a creamy sauce and variations for protein and dietary needs. Remember, you can store and reheat this dish for later. Enjoy experimenting with flavors and ingredients. Making this pasta will impress and satisfy your taste buds!

Creamy Garlic Mushroom Pasta Flavorful and Easy Meal

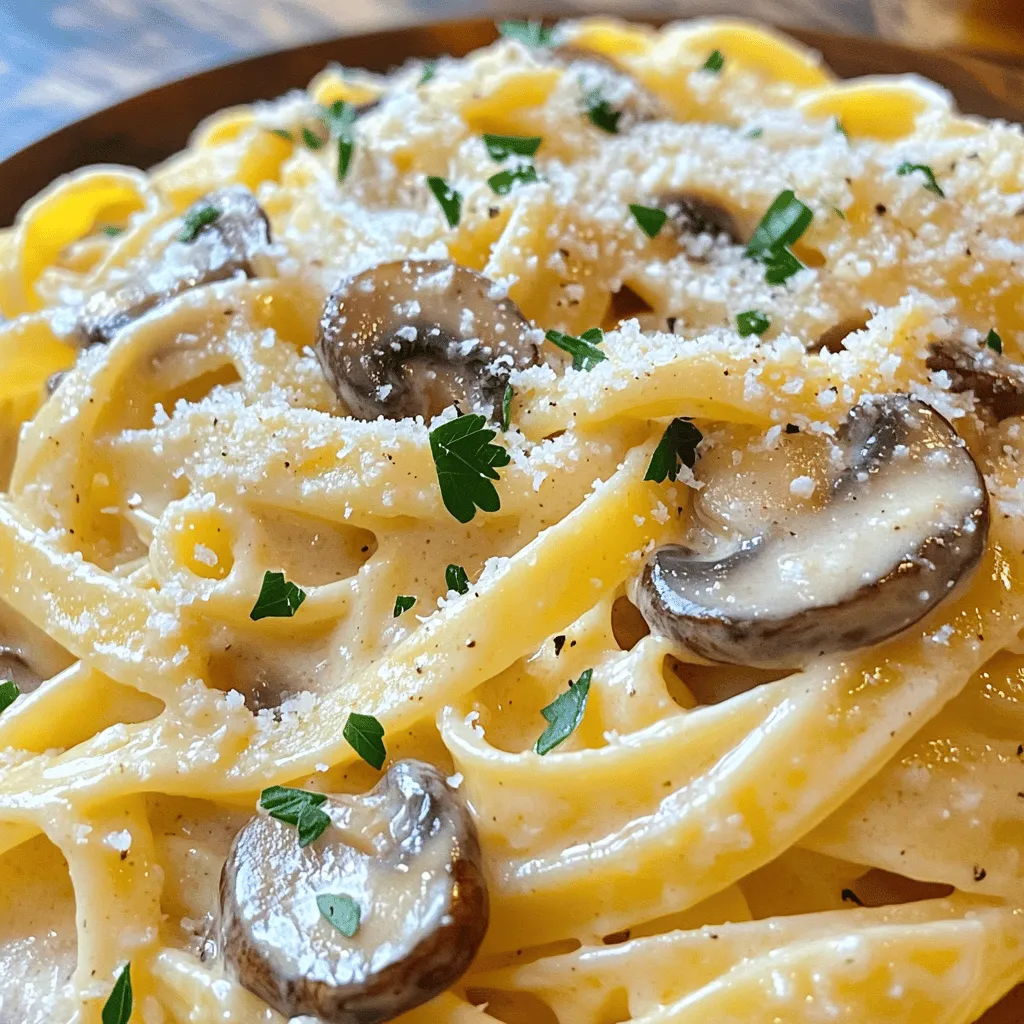
If you’re craving a dish that’s both simple and delicious, look no further! Creamy Garlic Mushroom Pasta is the answer

To make Peanut Butter Banana Overnight Oats, you need these simple ingredients: - 1 cup rolled oats - 2 cups almond milk (or any milk of choice) - 2 ripe bananas, sliced - 1/2 cup creamy peanut butter - 2 tablespoons honey or maple syrup (optional) - 1 teaspoon vanilla extract - 1/2 teaspoon cinnamon - A pinch of salt - Chopped peanuts and banana slices for topping This mix creates a tasty, filling breakfast that keeps you energized. You can change the recipe to suit your taste. Here are some fun add-ins and variations: - Add chia seeds for more fiber. - Use Greek yogurt for extra protein. - Swap peanut butter with almond or cashew butter. - Mix in some chocolate chips for a sweet treat. - Try different fruits like berries or apples. These options let you enjoy your oats in new ways. Understanding the nutrition can help you make informed choices: - Rolled oats: High in fiber, they help with digestion and keep you full. - Almond milk: Low in calories and dairy-free, it's a great milk alternative. - Bananas: They add natural sweetness and provide potassium. - Peanut butter: Packed with protein and healthy fats, it boosts energy. - Honey or maple syrup: Adds sweetness but should be used in moderation. - Vanilla extract: Enhances flavor without extra calories. - Cinnamon: It may help regulate blood sugar levels. - Salt: Balances flavors and enhances taste. Each ingredient brings its own benefits, making this dish not only delicious but also healthy. For the complete recipe, you can check the [Full Recipe]. Making peanut butter banana overnight oats is simple. You only need ten minutes to prep. The oats soak overnight, so they are ready in the morning. This dish is great for busy days. 1. Start with a large mixing bowl. Add 1 cup of rolled oats and 2 cups of almond milk. 2. Next, add 1/2 cup of creamy peanut butter. If you want some sweetness, mix in 2 tablespoons of honey or maple syrup. 3. Pour in 1 teaspoon of vanilla extract and 1/2 teaspoon of cinnamon. Add a pinch of salt to boost the flavor. 4. Stir everything until it blends well. Make sure the peanut butter mixes in fully. 5. Now, fold in half of the sliced bananas. Save the rest for topping later. 6. Divide the mix evenly into two jars or airtight containers. Seal them tightly to keep them fresh. Place the jars in the fridge overnight. This allows the oats to soak and soften. In the morning, stir the oats before eating. Top with the remaining banana slices and some chopped peanuts for a nice crunch. You can enjoy them cold or heat them in the microwave for 30 seconds if you like them warm. For the full recipe, check out the complete guide. To make the best peanut butter banana overnight oats, use rolled oats. They soak up the liquid well and give the right texture. Always use ripe bananas for the sweetest flavor. If you want extra creaminess, use creamy peanut butter. You can even mix in yogurt for a protein boost. One mistake is not mixing well enough. Make sure the peanut butter blends in fully. If you leave clumps, the oats won't taste great. Another issue is not sealing the jars tightly. If air gets in, your oats may dry out. Finally, don’t forget to stir your oats before eating. This ensures even flavor and texture. These oats are perfect for meal prep. You can make a batch for the week. Just double the recipe and store in jars. Use mason jars for easy transport. They fit well in your bag and look nice, too. If you want variety, try different toppings each day. Chopped nuts, berries, or a sprinkle of chocolate can change things up. For the full recipe, check out the Peanut Butter Banana Bliss Overnight Oats section. {{image_2}} You can switch your oats for different types. Steel-cut oats give a chewy texture. Quick oats are softer and soak faster. Choose what you like best! For milk, use almond, cow, or oat milk. Each adds its own flavor. You can even try coconut milk for a tropical twist. Want to spice up your oats? Add a scoop of cocoa powder for chocolatey goodness. You can also mix in some chia seeds for extra fiber. If you like a hint of spice, try adding nutmeg or cardamom. These flavors blend well with banana and peanut butter. Toppings make your oats more fun! Try adding chopped nuts, like walnuts or pecans, for crunch. A sprinkle of granola adds a nice texture too. You can also drizzle some honey or maple syrup on top for sweetness. Fresh berries or shredded coconut bring a bright touch to your dish. For a full list of ingredients and their uses, check out the Full Recipe. To keep your Peanut Butter Banana Overnight Oats fresh, use airtight containers. Glass jars work great. Make sure to seal them tightly. This helps to keep air out and prevents spoiling. If you plan to make a batch, divide it into individual servings. This way, you can grab one easily when you need it. These oats can last in the fridge for about 3 to 5 days. After a few days, the bananas may brown and change texture. The oats will still taste good, but fresh slices on top will make them look better. If you notice a change in smell or texture, it's best to toss them. Always trust your senses! If you like your oats warm, you can heat them in the microwave. Take off the lid, then heat for 30 seconds. Stir them well, and check the temperature. If they need more heat, do it in 10-second bursts. Remember, you can also enjoy them cold straight from the fridge! Yes, you can use quick oats. Quick oats will cook faster. They absorb liquid more quickly than rolled oats. This means your oats might turn out creamier, but they may also lose some texture. If you like a softer oat, quick oats work well. If you want a chewier bite, stick with rolled oats. Soaking overnight is key for the best texture. It allows the oats to absorb the liquid fully. This makes them soft and creamy. If you skip soaking, your oats may be too chewy. However, if you’re in a hurry, you can soak them for just a few hours. Just remember, the longer they soak, the better they taste! You can add many tasty ingredients to make it your own. Here are some ideas: - Chia seeds: For extra fiber and nutrition. - Cocoa powder: For a chocolatey twist. - Greek yogurt: To boost protein and creaminess. - Different fruits: Try berries, apples, or mango for variety. - Nut butters: Swap peanut butter for almond or cashew butter. These options let you create different flavors each time. Feel free to experiment with what you love! For the full recipe, check out the detailed instructions above. Overnight oats are easy and fun to make. We covered key ingredients, step-by-step instructions, and smart tips. You can customize them with flavors and toppings to fit your taste. Remember to store them well for freshness. With these ideas, you can enjoy tasty oats any day. Experiment with your favorite ingredients and make them your own. Now, you have all the tools to make perfect overnight oats. Enjoy every bite!

Peanut Butter Banana Overnight Oats Easy and Healthy

If you love a quick, tasty breakfast, Peanut Butter Banana Overnight Oats are perfect for you! They combine creamy peanut

To make honey mustard chicken thighs, you need these key items: - 4 bone-in, skin-on chicken thighs - 1/4 cup honey - 1/4 cup Dijon mustard - 2 tablespoons olive oil - 2 cloves garlic, minced - 1 teaspoon dried thyme - 1 teaspoon paprika - Salt and pepper to taste These ingredients work together to create a tasty blend. The honey brings sweetness, while the Dijon mustard adds a nice tang. The garlic and herbs enhance the flavor, making each bite rich and delicious. For a fresh touch, you might want these optional items: - Fresh parsley for garnish Adding parsley gives a nice pop of color and freshness. It also brightens the dish. You can sprinkle it on right before serving. To cook this meal, gather these tools: - Baking dish - Mixing bowl - Whisk - Paper towels Having the right tools makes cooking easier. A good baking dish helps the chicken cook evenly. A mixing bowl is great for blending the sauce. Don’t forget to pat the chicken dry with paper towels for crispier skin. For the full recipe, check the provided link. First, you need to make the tasty marinade. In a small bowl, whisk together these simple ingredients: - 1/4 cup honey - 1/4 cup Dijon mustard - 2 tablespoons olive oil - 2 cloves garlic, minced - 1 teaspoon dried thyme - 1 teaspoon paprika - Salt and pepper to taste Mix until everything is smooth and well blended. This sweet and tangy mixture gives the chicken great flavor. Now, let's get the chicken ready. Take 4 bone-in, skin-on chicken thighs and pat them dry with paper towels. This helps the skin get crispy. Place the thighs skin-side up in a baking dish. Pour the honey mustard mixture over the chicken. Make sure each thigh is well coated. This step adds lots of flavor. Preheat your oven to 400°F (200°C). Once the oven is ready, place the dish inside. Bake the chicken for 35 to 40 minutes. The chicken should reach an internal temperature of 165°F (75°C) to be safe to eat. If you want crispy skin, switch to broil for 2 to 3 minutes at the end. Keep a close eye on it to avoid burning. After baking, let the chicken rest for 5 minutes. This makes it juicy and delicious. You can find the full recipe details for more guidance! To get that golden and crispy skin, start by drying the chicken thighs well. Use paper towels to pat them dry. This step helps remove moisture, which can make the skin soggy. After coating the chicken with the honey mustard mix, bake it at 400°F (200°C). For the last few minutes, switch to broil. Watch closely to avoid burning. This method gives you a crunchy bite that everyone loves. You can boost the flavor of your honey mustard chicken thighs easily. Try adding a splash of apple cider vinegar to the marinade. This adds a nice tang. Fresh herbs like rosemary or thyme can also enhance the taste. You can sprinkle crushed red pepper for a little heat. Don't forget to adjust the salt and pepper to match your taste. One common mistake is not preheating the oven. Always preheat before you bake. If you overcrowd the baking dish, the chicken won’t cook evenly. Give each piece space to crisp up. Also, avoid cooking the chicken at too low a temperature. This can lead to chewy skin. Follow these tips for great results every time. For the full recipe, you can refer to the Honey Mustard Glazed Chicken Thighs section above. {{image_2}} You can switch up the flavor by using different herbs. Instead of thyme, try rosemary or oregano for a new twist. Both herbs add a nice touch. You could also use fresh herbs instead of dried ones. Fresh herbs will give a brighter taste. Just chop them finely and mix them in with the honey mustard glaze. Grilling gives a smoky flavor that pairs well with honey mustard. To grill, marinate the chicken thighs as usual. Then, heat the grill to medium-high. Grill each side for about 6-7 minutes or until cooked through. Make sure the internal temperature reaches 165°F (75°C). Slow cooking is another great method. It makes the chicken very tender. Just place the chicken thighs in your slow cooker with the honey mustard mix. Cook on low for 6-8 hours or on high for 3-4 hours. The chicken will soak up all the flavors! If you want a different sweet taste, try using maple syrup or agave nectar. Both work well in this recipe. Maple syrup gives a rich flavor, while agave is a bit milder. You can also use brown sugar for a deeper caramel taste. Just remember to keep the same amount as the honey in the recipe. Each sweetener brings its own charm to the dish! For the full recipe, check out the Honey Mustard Glazed Chicken Thighs. After enjoying your honey mustard chicken thighs, store any leftovers in an airtight container. Make sure the chicken cools down first. Place it in the fridge for up to three days. Label the container with the date. This way, you keep track of freshness. You can freeze honey mustard chicken thighs for longer storage. First, let the chicken cool completely. Wrap each thigh in plastic wrap. Then, place them in a freezer bag or airtight container. They will stay good for about three months. When you're ready to eat, just thaw them in the fridge overnight. To reheat your chicken, preheat your oven to 350°F (175°C). Place the thighs on a baking sheet. Cover them with foil to keep moisture in. Heat for about 20 minutes or until warm. You can also microwave the chicken. Just use a microwave-safe dish and cover it. Heat in short bursts to avoid drying it out. Enjoy your meal with a fresh side dish! Yes, you can use boneless chicken thighs. They will cook faster, so check for doneness early. Boneless thighs still soak up the honey mustard flavors well. I recommend using a meat thermometer. Aim for 165°F (75°C) for safe eating. Honey mustard chicken thighs pair wonderfully with many sides. Here are a few great options: - Roasted vegetables like carrots and broccoli. - Fluffy mashed potatoes for a creamy touch. - A fresh green salad for crunch. - Rice or quinoa to soak up the sauce. Feel free to mix and match your favorites! You can store leftovers in an airtight container. They will stay fresh for about 3-4 days in the fridge. If you want to keep them longer, consider freezing them. When properly frozen, they can last up to 3 months. Just thaw before reheating! You can find the full recipe in the main section. This blog post covered a simple and tasty honey mustard chicken thighs recipe. We discussed the main and optional ingredients needed, kitchen tools, and how to prepare the marinade. I shared tips for achieving crispy skin and methods to enhance flavor. We explored variations and how to store leftovers properly. Cooking can be fun and easy with the right info. Enjoy making this dish your own!

Honey Mustard Chicken Thighs Flavorful Dinner Recipe

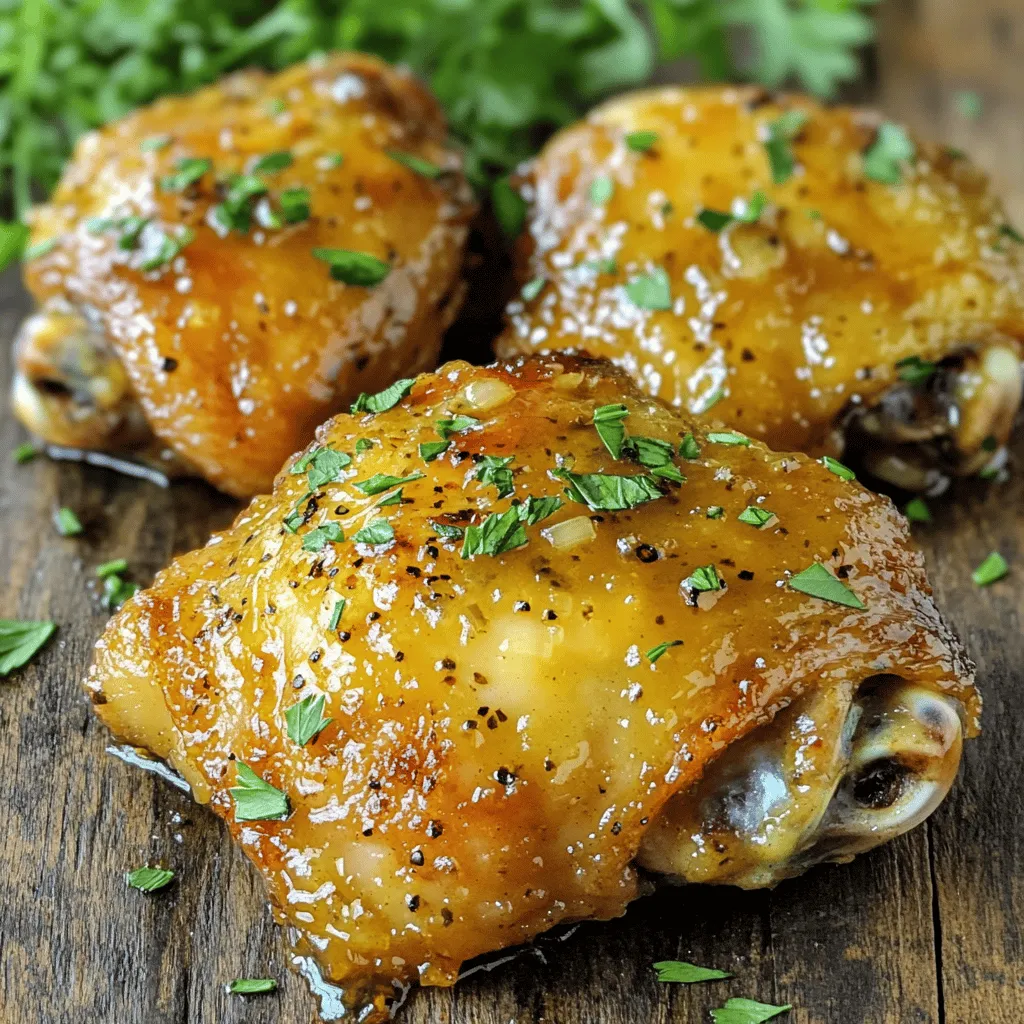
Looking to spice up your dinner routine? This Honey Mustard Chicken Thighs recipe is your answer! Juicy chicken thighs coated

- 2 large boneless, skinless chicken breasts - 1 tablespoon olive oil - Salt and pepper to taste - 1 teaspoon garlic powder - 1 teaspoon Italian seasoning - 4 large whole wheat tortillas - 2 cups Romaine lettuce, chopped - ½ cup Caesar dressing (store-bought or homemade) - ½ cup grated Parmesan cheese - ¼ cup cherry tomatoes, halved - Freshly cracked black pepper for garnish In this recipe, I use boneless, skinless chicken breasts. They cook quickly and stay juicy. Olive oil adds flavor and moisture to the chicken. Salt and pepper enhance the taste. Garlic powder gives a nice kick, while Italian seasoning adds depth. Whole wheat tortillas are my choice for a healthy wrap. They are sturdy and hold the filling well. Romaine lettuce adds crunch and freshness. Caesar dressing brings rich flavor. Grated Parmesan cheese adds creaminess and saltiness. Lastly, cherry tomatoes give a pop of color and sweetness. When you gather these ingredients, you set the stage for a tasty meal. Each one plays an important role. So, let’s get ready to make Grilled Chicken Caesar Wraps! For the full recipe, check the instructions section. To start, you need to marinate and season the chicken. First, brush the chicken breasts with olive oil. Sprinkle salt, pepper, garlic powder, and Italian seasoning all over the chicken. This mix adds great flavor. Let the chicken sit for about 15 minutes to soak in the spices. Next, you should prep the grill. Preheat your grill to medium-high heat. A hot grill will give you nice grill marks and juicy chicken. Now it's time to grill the chicken. Place the seasoned chicken on the grill. Cook it for about 6-7 minutes on each side. You want the internal temperature to reach 165°F (75°C). This ensures the chicken is safe to eat. Once done, take the chicken off the grill and let it rest for 5 minutes. This helps keep it juicy. While the chicken rests, you can mix the filling. In a bowl, combine chopped Romaine lettuce, Caesar dressing, grated Parmesan cheese, and halved cherry tomatoes. Toss this mixture until the lettuce is well coated with dressing. Next, it's time to assemble the wraps. Lay a tortilla flat on a clean surface. Place the lettuce mixture and sliced grilled chicken in the center of the tortilla. Make sure not to overfill it. Now, wrap it up. Fold the sides of the tortilla inward. Then roll it from the bottom up to secure the filling inside. Repeat this for the remaining tortillas. Your wraps are now ready! You can slice them in half diagonally for easy eating. For extra flavor, sprinkle some freshly cracked black pepper on top. For more detailed steps, check the Full Recipe. To make great grilled chicken, you need the right internal temperature. Cook the chicken until it reaches 165°F (75°C). Use a meat thermometer for accuracy. This ensures the chicken is safe to eat. To enhance flavor, season the chicken well. I like to use olive oil, salt, pepper, garlic powder, and Italian seasoning. Let the chicken marinate for 15 minutes before grilling. This short time makes a big difference in flavor. To ensure your wrap holds together, don’t overfill it. Place just enough filling in the center. Fold the sides in before rolling it up. This keeps everything inside. For fun serving ideas, try cutting the wraps in half and placing them on a platter. You can also serve them with a small bowl of extra Caesar dressing for dipping. When serving, use a wooden platter or cutting board. This adds a rustic touch. Garnish with extra cherry tomatoes and a sprinkle of Parmesan cheese. This makes the dish look bright and inviting. You can also add a side of fresh fruit or a light salad. This adds color and balance to your meal. Enjoy your Grilled Chicken Caesar Wraps with style! For the complete recipe, check the Full Recipe section. {{image_2}} You can switch up proteins in your Grilled Chicken Caesar Wraps. Try shrimp for a seafood twist, or tofu for a plant-based option. Each protein adds its own flavor and texture. When it comes to wraps, consider low-carb or gluten-free options. Lettuce wraps can be a fun, fresh alternative. They make the dish lighter and can help cut carbs if you need. Using homemade Caesar dressing can elevate your wraps. It’s easy to make with just a few ingredients. You can control the flavor and adjust it to your taste. Store-bought options are quick and work well too, especially if you’re short on time. Feel free to experiment with other dressings. Ranch or Greek yogurt dressing can offer a unique spin. These can add new flavors and keep things interesting. Want to make your wraps more colorful? Add extra veggies like bell peppers, cucumbers, or avocados. These not only add crunch but also boost nutrition. For sides, consider pairing with sweet potato fries or a light salad. These options complement the wraps and make a complete meal. You can also serve with a small bowl of extra Caesar dressing for dipping. For the full recipe, check out the recipe section above. To keep your Grilled Chicken Caesar Wraps fresh, wrap them tightly in plastic wrap or foil. This prevents air from getting in and keeps them tasty. Store the wraps in the fridge for up to three days. If you notice any sogginess, consider adding fresh lettuce when you eat them. Reheat your wraps using a skillet on medium heat. This keeps them warm without drying them out. Flip them gently to warm both sides. You can also use a microwave, but wrap them in a damp paper towel to keep moisture in. This method helps to maintain freshness and flavor. Can you freeze Grilled Chicken Caesar Wraps? Yes! To freeze, wrap each one in plastic wrap and then place them in a freezer bag. They can stay in the freezer for up to three months. When you're ready to eat, thaw them in the fridge overnight. After thawing, reheat them in a skillet for the best taste and texture. What sides pair well with these wraps? You can serve these wraps with a side salad or some sweet potato fries. Fresh fruit also adds a nice touch. Vegetable sticks with dip make a great crunchy side. How can I make these wraps healthier? To make your wraps lighter, use less dressing or switch to a yogurt-based dressing. You can also add more veggies, like cucumbers or bell peppers, for extra crunch and nutrition. Can I use store-bought grilled chicken? Yes, you can use store-bought grilled chicken. It saves time and still tastes great. Just slice it up and add it to your wraps. What is the best way to grill chicken? Preheat your grill to medium-high heat. Brush the chicken with olive oil and season it well. Grill for about 6-7 minutes on each side. Check the internal temperature; it should reach 165°F (75°C). Can I make the filling ahead of time? Absolutely! You can mix the filling a few hours in advance. Just keep it in the fridge until you’re ready to use it. This saves time on busy days. Are these wraps suitable for meal prep? Yes, these wraps are great for meal prep. You can make several at once and store them in the fridge. Just wrap them tightly to keep them fresh. Tips for accommodating dietary restrictions If you have gluten-free eaters, use gluten-free wraps. For a vegetarian option, swap chicken for grilled veggies or chickpeas. Always check the dressing for allergens. In this post, we explored how to make tasty Grilled Chicken Caesar Wraps. We covered the key ingredients, like chicken, seasonings, and fresh veggies. I guided you through each cooking step, from marinating the chicken to grilling and assembling the wraps. Remember, you can customize these wraps with different proteins and dressings. Keep your leftovers fresh by following storage tips. Enjoy your wraps, and get creative with flavors and presentations! Happy cooking!

Grilled Chicken Caesar Wraps Tasty Meal for Everyone

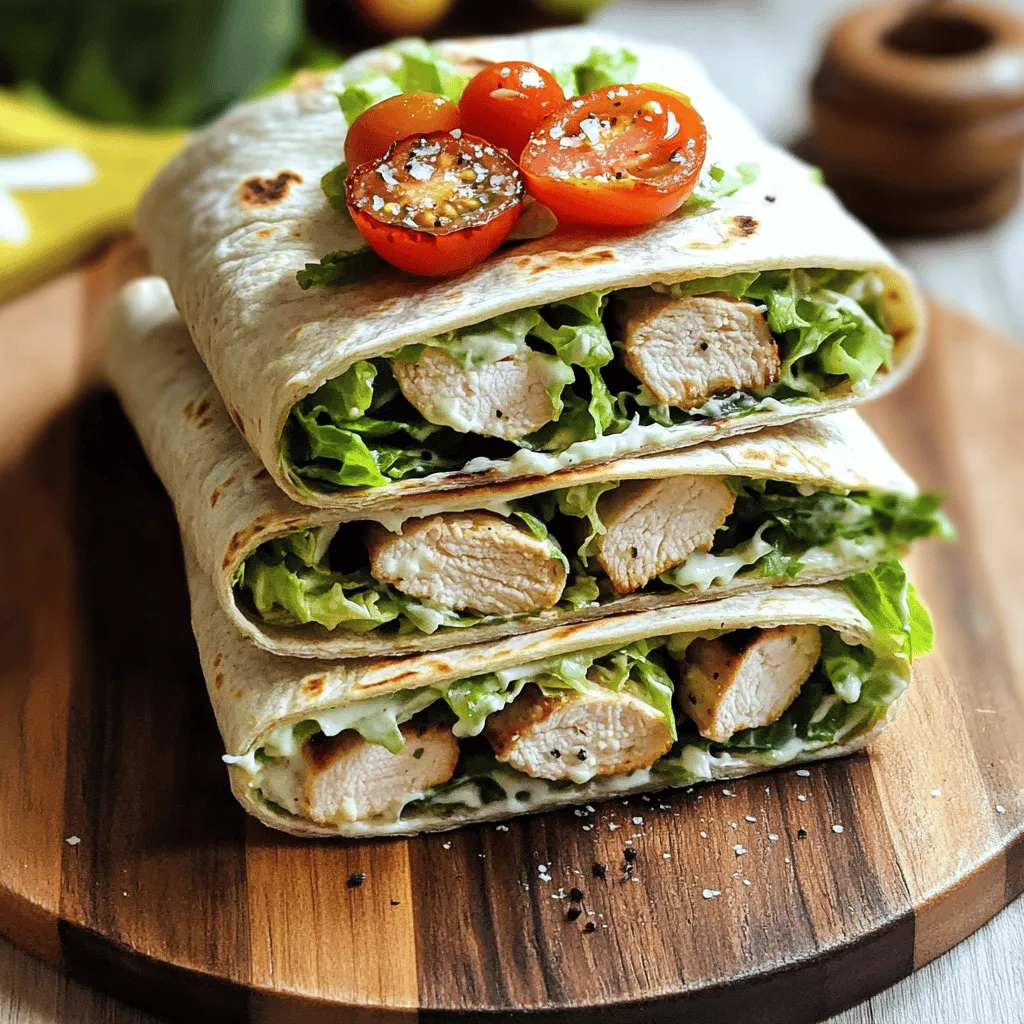
Looking for a simple, tasty meal that everyone will love? I’ve got you covered with Grilled Chicken Caesar Wraps! This

To make Zucchini Noodles with Pesto, you will need these fresh ingredients: - 4 medium zucchinis, spiralized - 1 ripe avocado - 1 cup fresh basil leaves - 2 cloves garlic, minced - 1/4 cup pine nuts (or walnuts) - 2 tablespoons nutritional yeast (optional for a cheesy flavor) - 2 tablespoons lemon juice - 3 tablespoons olive oil - Salt and pepper to taste - Cherry tomatoes, halved (for garnish) - Grated Parmesan cheese (for garnish, optional) These ingredients come together to create a dish that is both flavorful and fresh. The star of this recipe is the zucchini, which you spiralize to create a fun, noodle-like texture. The avocado provides creaminess, while the basil adds a burst of freshness. Garlic gives it a punch, and nuts bring in a lovely crunch. Nutritional yeast is optional, but it adds a great cheesy taste. Lemon juice and olive oil tie everything together, while cherry tomatoes brighten the dish. Grated Parmesan can be added on top for extra flavor. This combination makes a delightful meal that is healthy and satisfying. For the complete method, check out the Full Recipe! To start, I spiralize the zucchinis. This makes long, curly noodles, also known as zoodles. You can use a spiralizer or a julienne peeler. Both work well and are easy to use. Once you have your zoodles, place them in a colander. Next, sprinkle a pinch of salt over the noodles. This step helps to draw out excess moisture. Let the zoodles sit for about ten minutes. After that, pat them dry with a paper towel. Now, let’s make the avocado pesto. Take your food processor and add the ripe avocado, fresh basil leaves, minced garlic, and pine nuts. You can also add nutritional yeast if you want a cheesy flavor. Don’t forget a pinch of salt and pepper. Pulse the mixture until it’s smooth. While the processor runs, slowly drizzle in the olive oil. This step gives the pesto a nice, creamy texture. In a large bowl, toss the zucchini noodles with the avocado pesto. Make sure all the zoodles get coated nicely. If the pesto feels too thick, you can fix that. Just add a splash of water or more olive oil until you reach the right consistency. The next step is to add the halved cherry tomatoes. Gently fold them into the zoodles. This adds a fresh burst of flavor. For serving, plate the zoodles in individual bowls. If you like, top them with freshly grated Parmesan cheese. For a special touch, you can also add extra basil leaves and a drizzle of olive oil. Enjoy this flavorful and fresh dish! To make a great pesto, start with ripe avocados. A ripe avocado feels slightly soft when you press it. This gives your pesto a creamy base. You can also adjust the flavor by adding optional ingredients. Try using different nuts or herbs. A touch of cheese adds depth if you like. To avoid soggy noodles, salt your zucchini slices. This step draws out extra moisture. Let them rest in a colander for about 10 minutes, then pat them dry. For the best spiralizing methods, use a good spiralizer. Look for one that is sturdy and easy to use, so you can create long, uniform noodles. Serve your zoodles in a large, shallow bowl. This makes them look fresh and inviting. For garnishing, add bright basil leaves or a drizzle of olive oil. You can also sprinkle some red pepper flakes for a pop of color and flavor. For an extra touch, add halved cherry tomatoes on top. They add color and a nice contrast. For the full recipe, check out the section above. {{image_2}} You can make your pesto unique by changing the nuts or herbs. Instead of pine nuts, try walnuts or almonds for a different taste. You could also use arugula or parsley instead of basil. Every change gives a new flavor. Adding cheese can make your pesto creamy. Parmesan is classic, but you can use pecorino or nutritional yeast for a vegan option. It adds a cheesy taste without dairy. For a heartier dish, add protein. Grilled chicken or shrimp pairs well with the fresh flavors. Simply cook them first, then toss them with the zoodles and pesto. If you want a vegan option, try tofu or chickpeas. Cook the tofu until golden, or use canned chickpeas for ease. Both options add protein and texture. Make your dish fresh by using seasonal veggies. In summer, add bell peppers or corn for crunch. In fall, butternut squash or spinach can add warmth and depth. You can also change your zoodles. Use carrots or sweet potatoes for a new twist. Each season brings different veggies, so explore and enjoy! To keep your zucchini noodles and pesto fresh, use airtight containers. Glass containers work well, as they are safe for the fridge and easy to clean. You can also use BPA-free plastic containers. Store your leftovers in the fridge for up to three days. If you want to keep them longer, consider freezing. You can freeze zucchini noodles easily. First, spiralize the zucchinis, then lay them flat on a baking sheet. Freeze them for about an hour. Once frozen, transfer the zoodles to a freezer bag. This helps keep them from clumping together. For pesto, pour it into an ice cube tray. Once frozen, pop out the cubes and store in a bag. This way, you can use small amounts as needed. To reheat zucchini noodles, use a skillet over low heat. Add a splash of water or olive oil to prevent sticking. Stir gently to warm them up without overcooking. Avoid using the microwave, as it can make the zoodles mushy. For pesto, just warm it slightly in a pan or add it to the hot zoodles. This keeps the fresh flavor intact. Yes, you can use store-bought pesto. It saves time and still tastes great. However, homemade pesto gives a fresher flavor. You can adjust the taste to your liking. If you feel adventurous, try making your own pesto with the recipe in the Full Recipe section. To prevent watery zucchini noodles, sprinkle them with salt and let them sit. This draws out excess moisture. After ten minutes, pat them dry with a paper towel. This step is key to keeping your dish fresh and tasty. Zucchini noodles pair well with protein. You can add grilled chicken, shrimp, or tofu. A side salad with greens and veggies also works. This adds balance and makes your meal more filling. Yes, this recipe is easily vegan. Just skip the Parmesan cheese or use a vegan substitute. The avocado pesto is naturally plant-based, so you can enjoy it guilt-free. Leftovers can last about 2 to 3 days in the fridge. Store them in an airtight container. When reheating, be careful to avoid overcooking. This keeps your zucchini noodles from getting mushy. Zucchini noodles are a fun and healthy option for meals. We covered all you need: ingredients for zoodles and avocado pesto, step-by-step instructions, and tips for the best results. Remember to pick ripe avocados and avoid soggy noodles. You can also adjust flavors with different nuts and herbs. Store your leftovers wisely, and don't be afraid to experiment with vegetables or proteins. This dish is versatile and easy to make, so enjoy creating your own version!

Zucchini Noodles with Pesto Flavorful and Fresh Dish

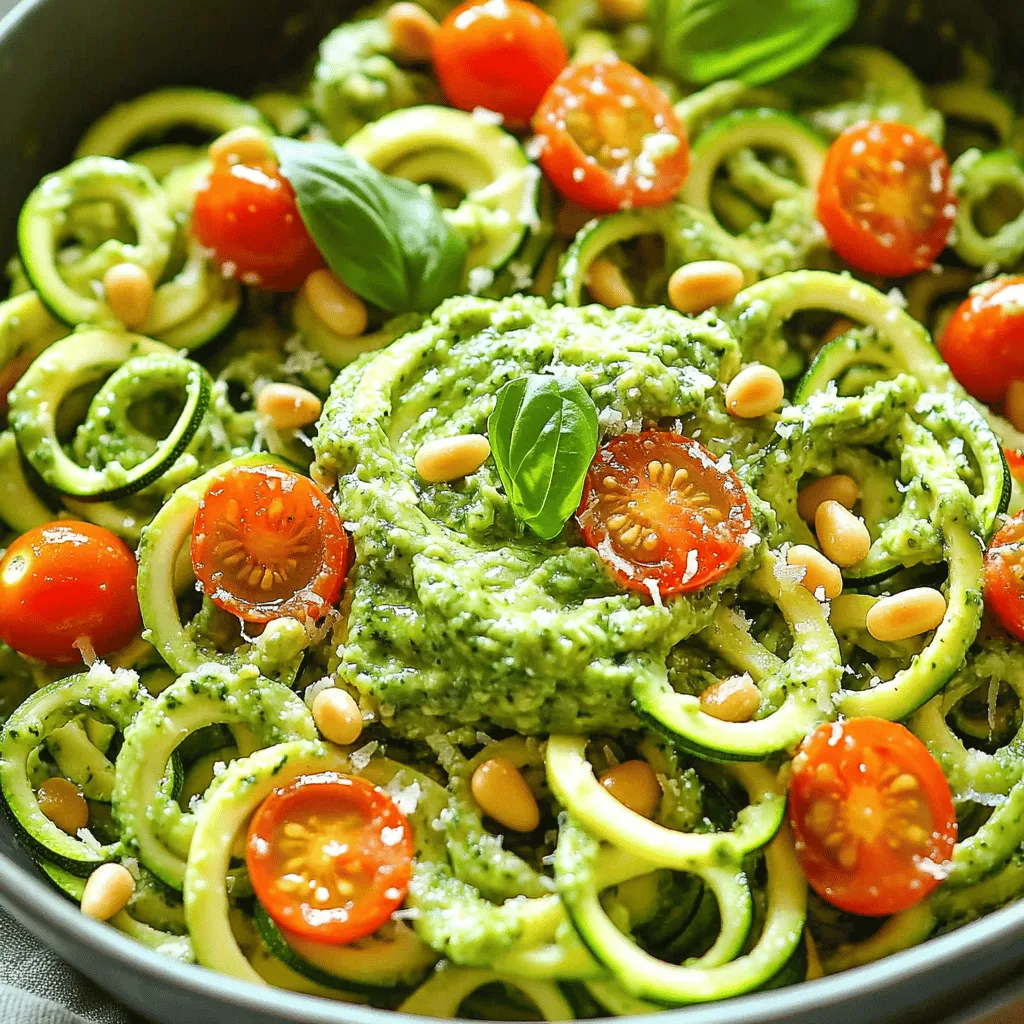
Looking for a fresh, tasty dish? Zucchini noodles with pesto are your answer! This colorful meal bursts with flavor and

- 1 pound Brussels sprouts, trimmed and halved - 3 tablespoons olive oil - 1/4 cup pure maple syrup - 2 tablespoons balsamic vinegar - 3 cloves garlic, minced - 1/2 teaspoon salt - 1/2 teaspoon black pepper - 1/4 teaspoon red pepper flakes (optional for heat) - 1/4 cup walnuts, chopped (optional for crunch) - Fresh parsley, chopped (for garnish) To make maple glazed Brussels sprouts, gather fresh Brussels sprouts. Look for those that are firm and bright green. The olive oil adds richness while the maple syrup brings a sweet touch. Balsamic vinegar cuts through the sweetness, adding depth. Garlic infuses flavor and aroma, making the dish pop. - Other nuts or seeds for crunch - Alternative sweeteners like honey or agave You can switch things up with different nuts or seeds. Try pecans or sunflower seeds for added texture. If you prefer, swap the maple syrup for honey or agave. Each option provides a unique flavor to the dish. - Additional spices or herbs to enhance flavor Feel free to play with spices! Adding a pinch of cumin or smoked paprika will give a new twist. Fresh herbs like thyme or rosemary can add more layers of taste. Cooking should be fun, so don’t be afraid to experiment! For the full recipe, check out the Full Recipe section. - Preheat the oven to 400°F (200°C). - Trim the ends off and cut the Brussels sprouts in half. This helps them cook evenly. - In a bowl, mix together: - 3 tablespoons olive oil - 1/4 cup pure maple syrup - 2 tablespoons balsamic vinegar - 3 cloves garlic, minced - 1/2 teaspoon salt - 1/2 teaspoon black pepper - 1/4 teaspoon red pepper flakes (optional) - Stir until well combined. This glaze will coat the sprouts and add a sweet and tangy flavor. - Spread the halved Brussels sprouts on a baking sheet. Make sure they are in a single layer. - Pour the glaze over the sprouts and toss them to coat. - Roast in the oven for 25 to 30 minutes. Stir halfway through to help them caramelize. - For extra crunch, add chopped walnuts during the last 5 minutes of roasting. Enjoy this savory and sweet dish as a side for any meal! You can find the Full Recipe for more details. To get crispy edges on your Brussels sprouts, follow these tips: - Use high heat: Set your oven to 400°F (200°C). This helps them roast nicely. - Spread evenly: Place the sprouts in a single layer on the baking sheet. - Do not overcrowd: Give them space. Overcrowding makes them steam instead of roast. - Stir halfway: Turn the sprouts halfway through cooking to ensure even browning. For even cooking, check these best practices: - Trim properly: Cut the sprouts in half for quick cooking. - Uniform size: Choose sprouts of similar size for consistent roasting. - Check doneness: They should be tender and caramelized after 25-30 minutes. You can personalize the maple glaze to suit your taste. Here are some suggestions: - Add spices: Try cinnamon or nutmeg for warmth. - Use different sweeteners: Honey or agave can work as alternatives. - Incorporate herbs: Fresh thyme or rosemary adds a fragrant touch. For pairing, consider these complementary dishes: - Serve with roasted meats: Chicken or pork pairs well with the sweet glaze. - Add grains: Quinoa or farro can balance the dish and add texture. - Include salads: A fresh salad with lemon dressing can brighten the meal. Make your dish visually appealing with these creative serving suggestions: - Use a rustic bowl: A wooden or ceramic bowl adds charm. - Garnish well: Sprinkle fresh parsley and drizzle extra maple syrup on top. - Layer colors: Arrange the sprouts with colorful roasted veggies for a vibrant plate. These tips will help your maple glazed Brussels sprouts shine on any table! {{image_2}} You can add fun flavors to maple glazed Brussels sprouts. One tasty twist is maple bacon Brussels sprouts. Just cook chopped bacon until crispy, then mix it in with the sprouts before roasting. The smoky flavor pairs well with the sweet maple glaze. Another option is to add citrus for a zesty kick. Squeeze fresh lemon or orange juice over the sprouts before serving. This brightens the dish and adds a nice contrast to the sweet maple syrup. If you want to make a vegan version, swap the maple syrup for agave syrup. This keeps the sweet taste while ensuring it's plant-based. For gluten-free considerations, use gluten-free balsamic vinegar. Most balsamic vinegars are gluten-free, but always check the label. This way, everyone can enjoy the dish without worry. Incorporating seasonal vegetables or fruits can also elevate your dish. Try adding diced apples or pears in the fall. Their sweetness complements the maple glaze. In spring, toss in some fresh asparagus or peas. These additions not only provide color but also great texture. You can mix and match to keep the recipe exciting all year long. For the complete experience, check out the Full Recipe. Enjoy these variations for a fun twist on a classic dish! To keep your maple glazed Brussels sprouts fresh, store them in an airtight container. Place them in the fridge within two hours of cooking. This helps to keep the flavors intact. Make sure the sprouts are cool before sealing the container. For freezing, let them cool completely first. Spread them on a tray to freeze individually. Once frozen, transfer them to a freezer bag. This method prevents clumping. When you want to enjoy leftovers, you can reheat them in several ways. The best way is to use an oven. Preheat the oven to 350°F (175°C). Spread the sprouts on a baking sheet and heat for about 10-15 minutes. This keeps them crispy. You can also use a microwave. Just cover them with a damp paper towel and heat for 1-2 minutes. This method may not keep them crispy but is quick. In the fridge, these maple glazed Brussels sprouts last about 3-5 days. If you freeze them, they can last up to 3 months. To enjoy them at their best, eat them within these time frames. When reheating, check for any off smells or changes in texture. If they seem off, it's best to toss them. Enjoy your delicious dish safely! Brussels sprouts are packed with nutrients. They are high in vitamins C and K. These vitamins help boost your immune system and support bone health. Brussels sprouts also contain fiber, which aids digestion. They are low in calories, making them a great choice for healthy eating. Plus, they have antioxidants that protect your body from damage. Eating Brussels sprouts can help reduce inflammation and lower the risk of chronic diseases. They are a smart addition to any meal. Yes, you can make this dish ahead of time. After cooking, let the Brussels sprouts cool completely. Store them in an airtight container in the fridge. They will last for about three days. To reheat, place them on a baking sheet in the oven at 350°F (175°C) for about 10-15 minutes. This keeps them crispy and tasty. You can also microwave them in a bowl for a quicker option. Just cover them with a damp paper towel to prevent drying out. Maple glazed Brussels sprouts pair well with many dishes. They are great alongside roasted chicken or turkey. For a plant-based option, try serving them with quinoa or lentils. They also complement grilled fish nicely. If you want a hearty meal, add mashed potatoes or sweet potatoes. These sides balance the sweet and savory flavors of the sprouts. Feel free to mix and match to find your favorite combos. You can find the Full Recipe for Maple Glazed Brussels Sprouts [here](#). This blog post provided a tasty guide to making maple glazed Brussels sprouts. You learned the key ingredients and steps for a delicious dish. We shared tips and tricks to enhance flavor and make your sprouts crispy. You can also explore fun variations and storage tips. In closing, enjoy crafting your own version of these Brussels sprouts. Experiment with add-ins and seasonings to make the dish truly yours. Happy cooking!

Maple Glazed Brussels Sprouts Savory and Simple Dish

Are you ready to elevate your veggie game with a simple dish that’s packed with flavor? Maple Glazed Brussels Sprouts

- 4 large bell peppers (any color) - 1 cup quinoa, rinsed - 2 cups vegetable broth (or water) - 1 can (15 oz) black beans - 1 cup corn kernels (fresh, frozen, or canned) - 1 teaspoon ground cumin - 1 teaspoon paprika - 1/2 teaspoon chili powder - Salt and pepper to taste When making stuffed bell peppers, the right ingredients are key. Start with four large bell peppers. Any color works well, so choose your favorite. Next, grab one cup of quinoa and rinse it well. Rinsing is important to remove any bitterness. For cooking the quinoa, I use two cups of vegetable broth. It adds great flavor. You can also use water if that's what you have. Then, think about adding some optional ingredients. A can of black beans adds protein and fiber. One cup of corn kernels adds sweetness and crunch. You can use fresh, frozen, or canned corn based on what you have on hand. Spices and seasonings really enhance the dish. Ground cumin adds warmth and depth. Paprika gives a nice color and a bit of heat. Chili powder brings a kick, so use it carefully. Finally, add salt and pepper to taste for balance. This combination of ingredients creates a tasty and filling meal. You can find the full recipe to guide you through the cooking process. Enjoy your stuffed bell peppers! To start, take your bell peppers and slice the tops off. Make sure to remove all the seeds and white membranes inside. This step is key. It helps the peppers cook evenly and allows the flavors to shine through. Place the cleaned peppers upright in a baking dish. This will hold them steady while baking. Next, heat a splash of olive oil in a medium saucepan over medium heat. Add the finely chopped onion and minced garlic to the pan. Sauté them for about 3 to 4 minutes until they soften. This brings out their natural sweetness. Then, add the rinsed quinoa to the pan. Pour in vegetable broth, cumin, paprika, chili powder, salt, and pepper. Bring this mixture to a boil. Once boiling, reduce the heat, cover, and let it simmer for about 15 minutes. The quinoa should be fluffy and all the liquid should be absorbed. Now it’s time to mix the filling. In a large bowl, combine the cooked quinoa with black beans, corn, diced tomatoes, and half of the shredded cheese. Stir well to mix all the ingredients. Carefully spoon this delicious filling into each prepared bell pepper. Make sure to pack it down gently so every bite is full of flavor. Top each stuffed pepper with the remaining cheese. This will melt and create a nice crust while baking. For the full recipe, check out the details above. Rinsing quinoa is key. This process removes the bitter coating called saponin. To rinse quinoa, place it in a fine mesh strainer. Rinse it under cold water for about 2 minutes. You will notice the water running clear. This step makes your quinoa taste better and helps it fluff up nicely. To make your stuffed peppers really pop, think about adding fresh herbs. Chopped cilantro or parsley adds a bright taste. You can also try spices like oregano or thyme. These small changes can really change the flavor of the dish. Experiment with your favorites! Baking and steaming are two great methods for cooking stuffed peppers. Baking gives a nice, roasted flavor. Wrap the peppers in foil for a softer texture. Steaming is faster and keeps the peppers tender. Both methods allow the flavors to blend well. Choose the one that fits your taste best! {{image_2}} You can easily change the protein in your stuffed bell peppers. If you want to add meat, ground turkey or beef works great. Just brown the meat with the onions and garlic before mixing it into the filling. This adds a rich flavor. If you prefer a plant-based option, try crumbled tofu. Press it to remove extra water, sauté it in a pan, and mix it with the quinoa and beans. This keeps your meal light yet filling. Feel free to get creative with your veggie choices! You can add diced zucchini, chopped spinach, or even sweet potatoes. These vegetables not only add flavor but also boost the nutrition. Just chop them small and sauté them with the onions and garlic. This way, they blend well into your filling. You can also toss in some finely chopped carrots or mushrooms for an extra crunch. When it comes to cheese, the options are endless! Cheddar is a classic choice, but you can try Monterey Jack for a milder taste. If you want a creamy texture, use goat cheese or feta. For a vegan option, consider cashew cheese or a store-bought vegan cheese. Just remember to add the cheese on top before baking. This gives you that gooey, melty goodness that everyone loves. For the full recipe, check out the complete details above! To store leftover stuffed peppers, let them cool to room temperature. Place them in an airtight container. Store in the fridge for up to four days. This keeps the peppers fresh and tasty. If you want to enjoy them later, make sure to label the container with the date. You can freeze stuffed peppers either before or after baking. If you freeze before baking, wrap each pepper in plastic wrap and place them in a freezer bag. They can stay frozen for up to three months. If you bake them first, let them cool completely. Then, wrap each pepper and store in a freezer bag. To reheat stuffed peppers, you can use the oven or microwave. For the oven, preheat to 350°F (175°C). Place the peppers in a baking dish and cover with foil. Heat for about 20 minutes, or until warm. If using a microwave, place one pepper on a plate and cover it. Heat for 2-3 minutes, checking if it's hot. Enjoy your meal! You can find the Full Recipe for stuffed bell peppers with quinoa above. Stuffed bell peppers stay fresh in the fridge for about 3 to 5 days. Make sure to store them in an airtight container. If you want to keep them longer, consider freezing them. They last up to 3 months in the freezer. Just remember to thaw them overnight in the fridge before reheating. Yes, you can prepare stuffed bell peppers ahead of time. You can make the filling and stuff the peppers a day before cooking. Store the stuffed peppers in the fridge, covered, until you’re ready to bake. This makes meal prep easy and quick. You can also freeze them after stuffing. Just bake them straight from the freezer, but add a bit of extra cooking time. Quinoa-stuffed bell peppers pair well with many side dishes. Here are some great options: - A fresh green salad with vinaigrette - Roasted vegetables like zucchini or carrots - Garlic bread for a crunchy contrast - A light soup, such as tomato or vegetable - Guacamole or salsa for a zesty kick These sides bring color and flavor to your meal, making it even more enjoyable. For the complete recipe, you can check the Full Recipe. You learned how to make tasty quinoa-stuffed bell peppers. We covered the key ingredients, like bell peppers, quinoa, and spices. I shared step-by-step instructions for preparation and cooking. You discovered tips to enhance flavor and explore variations, like adding protein or cheese. Remember to store leftovers properly and reheat them well. These peppers are healthy, fun, and easy to make. Try them out, and enjoy a colorful meal that fits your taste!

Stuffed Bell Peppers with Quinoa Flavorful Delight

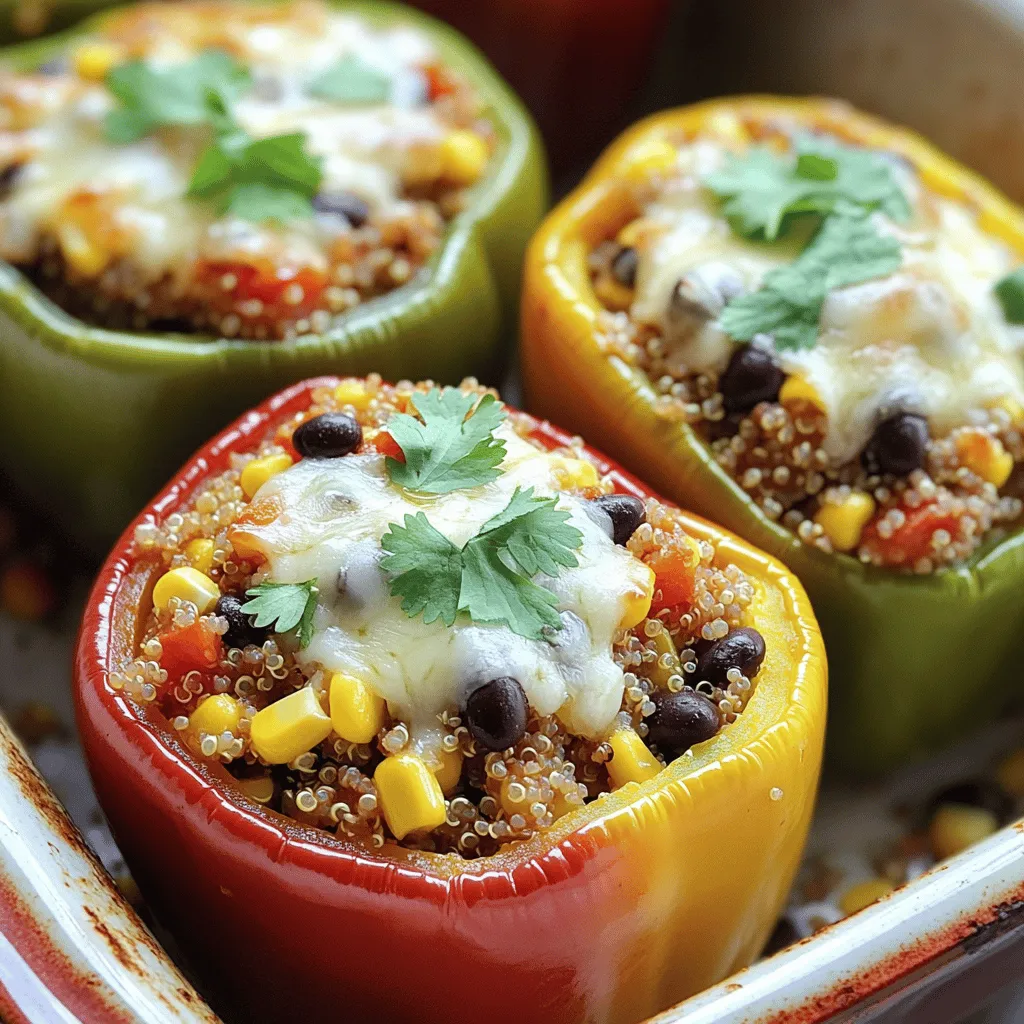
Get ready for a meal that’s both delicious and healthy! In this post, I’ll show you how to make stuffed

For a rich and creamy chocolate avocado mousse, gather these main ingredients: - 2 ripe avocados - 1/2 cup unsweetened cocoa powder - 1/4 cup maple syrup (or honey) - 1/4 cup almond milk (or any non-dairy milk) - 1 teaspoon vanilla extract - A pinch of sea salt These ingredients work together to create a smooth and velvety texture. Ripe avocados are key because they provide creaminess. Cocoa powder gives the mousse its rich chocolate flavor. Maple syrup or honey offers natural sweetness, while almond milk keeps it light. Vanilla adds depth, and sea salt enhances all the flavors. After you blend the mousse, you can add fun toppings to make it even better. Consider these options: - Shredded coconut - Cacao nibs - Fresh berries These toppings not only add flavor but also a nice crunch or freshness. Shredded coconut gives a tropical touch. Cacao nibs add a bit of bitterness and crunch. Fresh berries, like raspberries or strawberries, bring a pop of color and a burst of sweetness. This mousse is not just tasty; it's also good for you. Here’s a quick look at its nutrition: - Calories: About 150 per serving - Fats: 10g (mostly healthy fats from avocados) - Carbs: 15g - Protein: 2g Enjoying this mousse can be a guilt-free treat. The healthy fats from avocados help keep you full. The natural sweeteners add flavor without refined sugars. Overall, this dessert fits well into many diets while still satisfying your sweet tooth. To make a great chocolate avocado mousse, start with ripe avocados. Here’s how to peel and pit them: - Cut the avocado in half lengthwise. - Twist the two halves to separate them. - Carefully use a spoon to scoop out the flesh. Next, measure your dry ingredients. You will need: - 1/2 cup unsweetened cocoa powder. - A pinch of sea salt. For blending, use a food processor. Here are the steps: 1. Add the avocado flesh, cocoa powder, maple syrup, almond milk, vanilla extract, and sea salt into the processor. 2. Blend on high speed. Stop to scrape down the sides as needed. You want a smooth consistency. This should take about 1-2 minutes. If needed, blend longer until creamy. Chill the mousse in the refrigerator for at least 30 minutes. This helps it firm up. For serving, scoop the mousse into bowls or glasses. Here are some garnishing tips: - Top with shredded coconut for crunch. - Add cacao nibs for a chocolatey bite. - Fresh berries give a nice pop of color. This mousse is not just tasty; it also looks beautiful! Enjoy your rich and creamy treat. To get the best mousse, start with ripe avocados. Ripe avocados are soft, creamy, and blend easily. They give the mousse a rich texture. If your avocados are hard, let them sit on the counter for a few days until they soften. When blending, remember to scrape down the sides of the food processor. This helps mix all the ingredients well. If you don't scrape, you may end up with lumps. Smoothness is key to a perfect mousse. Sweetness is important in this recipe. You can use natural sweeteners like maple syrup or honey. Start with the amount in the recipe, then taste. If it needs more sweetness, add a bit more syrup or honey. Blend again until smooth. Always taste as you go to get it just right. The way you serve your mousse matters. Layer it in clear glass cups for a beautiful look. You can see the rich color and texture. Top with shredded coconut, cacao nibs, or fresh berries for added flair. A sprig of mint on top adds a nice green touch. This makes your dessert not only tasty but also visually appealing. For the full recipe and more tips, check out the [Full Recipe]. {{image_2}} You can make this mousse even more exciting! First, try adding espresso or coffee. This gives a rich flavor that pairs well with chocolate. Just add one shot of espresso to the blending step. Blend until smooth. It adds depth and warmth to every bite. Another fun twist is using peanut butter. Just a few tablespoons can change the taste to a nutty delight. Mix it in with the other ingredients. This gives a creamy texture and adds healthy fats. Your mousse will have a unique twist that everyone will love! If you need a nut-free version, it’s easy to adjust. Simply swap out almond milk for oat milk or coconut milk. Both work great and keep your mousse creamy. Always check labels to avoid any hidden nuts. For those with allergies, you can also use agave syrup instead of maple syrup. This makes it safe for those allergic to certain sweeteners. You can adjust to fit your needs and still enjoy the rich taste. Serving styles can change your mousse experience! Try layering the mousse in parfait glasses. This makes it look fancy and fun. Add layers of fresh berries or granola for crunch. Your guests will be impressed! You can also use the mousse as a filling for desserts. It works well in cakes or as a topping for brownies. The creamy texture adds a rich layer to any dessert. Just spread it between layers or on top. The options are endless! For the full recipe, don’t forget to check the details! To keep your Chocolate Avocado Mousse fresh, place it in airtight containers. Cover the mousse tightly with plastic wrap before sealing. This helps avoid exposure to air and keeps it creamy. Remember, air can cause the mousse to brown. When stored in the fridge, your mousse lasts about three days. Check for any changes in color or smell. If it smells sour or looks darker, it’s time to toss it. Fresh mousse should have a rich chocolate scent and a smooth texture. Yes, you can freeze Chocolate Avocado Mousse! Use freezer-safe containers for storage. Just remember to leave some space at the top, as the mousse expands when frozen. To serve, thaw it in the fridge overnight. Stir it well before serving to restore its creamy texture. Enjoy your delicious mousse again! For the full recipe, refer to the earlier section. Chocolate avocado mousse has a rich, chocolatey flavor. It tastes creamy and smooth. The cocoa brings deep chocolate notes. Unlike traditional mousse, this version lacks eggs. It feels light yet satisfying. You won’t taste the avocado at all. The texture is velvety and thick, perfect for a dessert. Yes, this recipe is great for vegans. It uses simple, plant-based ingredients. The ripe avocados serve as the creamy base. Cocoa powder adds the rich chocolate flavor. Maple syrup provides natural sweetness. Almond milk keeps it dairy-free. This mousse has no animal products, making it vegan-friendly. You can use other sweeteners like honey or agave. Each sweetener changes the mousse's flavor. Honey adds a floral note, while agave is milder. You could also try coconut sugar for a deeper taste. Just remember to adjust the amount to your liking. Always taste as you go to find your perfect match. In this blog post, we explored how to make a rich chocolate avocado mousse. We covered key ingredients, step-by-step instructions, and helpful tips. You learned about variations and storage methods to keep your mousse fresh. This dessert is simple, tasty, and healthy. It offers a fun way to enjoy chocolate while sneaking in good fats from avocados. Try it out, impress your friends, and enjoy a sweet treat without the guilt.

Chocolate Avocado Mousse Rich and Creamy Delight

Are you ready to indulge in a dessert that’s both rich and healthy? Chocolate Avocado Mousse combines creamy avocados with

Older posts
Newer posts
← Previous Page1 … Page22 Page23 Page24 … Page29 Next →

dsad

© 2025 Southern Dishes • Built with GeneratePress

Our Policies

  • Copyright Policy
  • Cookie Policy
  • GDPR Policy
  • Privacy Policy
  • Disclaimer
  • Terms Of Use

More Information

  • Home
  • About
  • Contact
  • Appetizers
  • Dessert
  • Dinner
  • Drinks
©2025, Southern Dishes About Back To Top