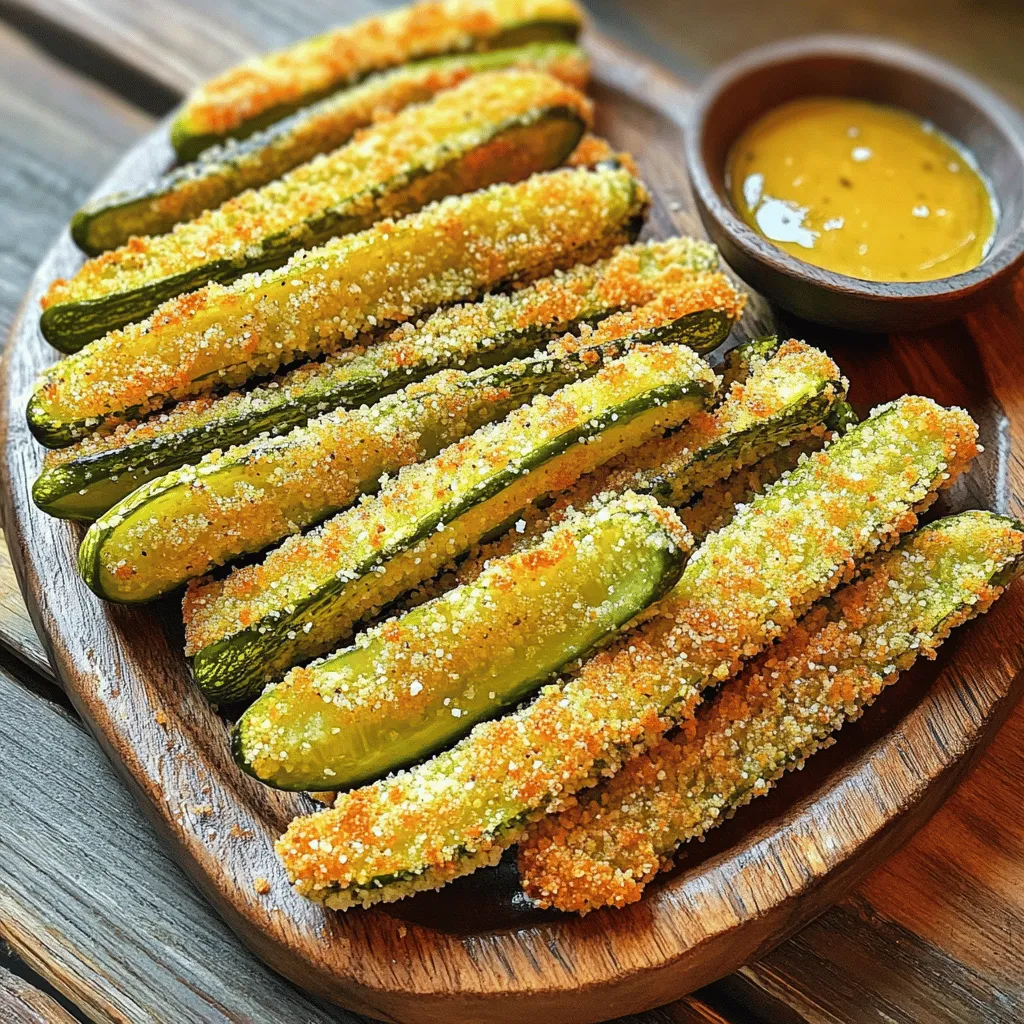
Crispy Pickle Fries Delightful and Flavorful Snack
If you love snacks that pack a punch, you’re in for a treat! Crispy Pickle Fries are the perfect mix
If you love snacks that pack a punch, you’re in for a treat! Crispy Pickle Fries are the perfect mix
![- 1 cup all-purpose flour - 1/2 cup whole wheat flour - 1/2 cup granulated sugar - 1/4 cup brown sugar, packed - 2 teaspoons baking powder - 1/2 teaspoon baking soda - 1/4 teaspoon salt - 2 large eggs - 1/2 cup milk - 1/4 cup vegetable oil - 1 teaspoon vanilla extract - 1 cup fresh cherries, pitted and halved - 1/2 cup dark chocolate chips - 1 tablespoon powdered sugar (for dusting) To make cherry chocolate chip muffins, you need simple ingredients. First, I use all-purpose and whole wheat flour. They give the muffins a nice texture. Next, I mix granulated and brown sugar. This blend adds sweetness and depth to the flavor. I also add baking powder and baking soda. These help the muffins rise. A pinch of salt balances the sweetness. For the wet ingredients, I whisk together eggs, milk, vegetable oil, and vanilla extract. The eggs provide structure, while the milk keeps the muffins moist. The oil adds richness, and the vanilla enhances the taste. Now for the stars of the show: fresh cherries and dark chocolate chips. The cherries burst with flavor, while the chocolate adds a delightful touch. Finally, I use powdered sugar to dust the tops. It gives the muffins a pretty finish. This ingredient list makes the cherry chocolate chip muffins easy and fun to make. You can find the full recipe to get started! 1. First, preheat your oven to 375°F (190°C). This step helps the muffins bake evenly. 2. Next, line your muffin tin with paper liners or lightly grease it with cooking spray. This keeps the muffins from sticking. 3. In a large mixing bowl, combine the all-purpose flour, whole wheat flour, granulated sugar, brown sugar, baking powder, baking soda, and salt. Whisk these dry ingredients together until they look even. 4. In another bowl, whisk the eggs, milk, vegetable oil, and vanilla extract until mixed well. This forms your wet ingredients. 5. Pour the wet mixture into the dry mixture. Stir gently with a wooden spoon or spatula. Be careful not to overmix; a few lumps are fine. 1. Now, fold in the halved cherries and dark chocolate chips. Make sure they spread evenly throughout the batter. 2. Spoon the batter into your prepared muffin tin, filling each cup about two-thirds full. This gives the muffins room to rise. 1. Bake your muffins in the preheated oven for 18-20 minutes. To check for doneness, insert a toothpick into the center of a muffin. If it comes out clean, they are ready. 2. Let the muffins cool in the pan for about 5 minutes. Then, transfer them to a wire rack to cool completely. 3. Once cooled, dust the tops with powdered sugar for a sweet touch. This adds a nice finish to your muffins. For a complete list of ingredients and instructions, refer to the Full Recipe. To bake the best cherry chocolate chip muffins, follow these tips. - Avoid Overmixing: When mixing your batter, stir gently. Overmixing can make muffins tough. You want a tender, fluffy texture. - Check Your Leavening Agents: Make sure your baking powder and baking soda are fresh. Old leavening agents can lead to flat muffins. - Use Room Temperature Ingredients: Eggs and milk should be at room temperature. This helps create a smooth batter. - Fill Muffin Tins Correctly: Fill each cup about two-thirds full. This allows room for the muffins to rise nicely. Presentation matters, especially with these delightful muffins. - Serve on a Colorful Platter: Arrange your muffins on a decorative plate. A bright platter adds visual appeal. - Garnish with Fresh Cherries: Place whole cherries around the muffins. This adds color and hints at the flavors inside. - Dust with Powdered Sugar: A light sprinkle of powdered sugar on top gives a sweet finish. It makes the muffins look even more tempting. - Pair with a Beverage: Serve with coffee, tea, or milk for a complete treat. This makes for a cozy breakfast or snack. For the complete recipe, check the [Full Recipe]. {{image_2}} You can easily change some ingredients in this recipe. Here are some ideas: - Alternative flours or sugars: You can swap all-purpose flour with almond or oat flour. If you want less sugar, try using honey or maple syrup. Just reduce the liquid a bit since these sweeteners are liquid. - Dairy-free or egg-free options: Use almond or oat milk instead of regular milk. For an egg substitute, you can use one tablespoon of flaxseed meal mixed with three tablespoons of water. Let it sit for a few minutes to thicken up. Adding unique flavors can make your muffins stand out. - Adding spices or other fruits: Try adding a pinch of cinnamon or nutmeg for warmth. You can also mix in blueberries or raspberries for a fruity twist. Just keep the same amount for a balanced flavor. - Chocolate variations and additional mix-ins: For a richer taste, use milk or white chocolate chips instead of dark. You can also add nuts like walnuts or pecans for a crunchy texture. Just chop them up and fold them in with the cherries. These variations let you play with flavors and textures. You can make a new version every time you bake! For the full recipe, check out the main guide. To keep your cherry chocolate chip muffins fresh, store them properly. Place the muffins in an airtight container. This keeps moisture in and helps them stay soft. You can also use a zip-top bag for storage. Make sure to remove as much air as possible. You can store muffins at room temperature for up to three days. If your kitchen is warm, they may not last as long. If you want to keep them longer, consider refrigeration. But remember, refrigeration may dry them out a bit. If you choose this option, wrap them in plastic wrap first. Freezing your muffins is a great way to enjoy them later. To freeze muffins correctly, let them cool completely first. Then, wrap each muffin in plastic wrap. After that, place the wrapped muffins in a freezer bag. Make sure to label the bag with the date. For thawing, take a muffin out and let it sit at room temperature. This usually takes about an hour. If you want to warm it up, use the microwave for about 15 seconds. This brings back that fresh-baked taste. Enjoy your muffins any time! For the full recipe, check back to the beginning of this article. What can I use instead of cherries? If you don't have cherries, try using blueberries or raspberries. You can even use chopped strawberries. Each fruit gives a different flavor but stays sweet and yummy. How can I tell if my muffins are done baking? To check if muffins are done, insert a toothpick into the center. If it comes out clean, your muffins are ready. If it has batter on it, bake them a bit longer. Can I make these muffins ahead of time? Yes, you can make these muffins ahead. They taste great for up to two days stored in an airtight container. You can also freeze them for later. What is the best way to reheat muffins? To reheat muffins, place them in the microwave for about 10 to 15 seconds. You can also warm them in an oven at 350°F (175°C) for 5 to 10 minutes. Reheating brings back their soft texture. For the full recipe, check out the Cherry Chocolate Chip Muffins section above. In this blog post, we explored how to make cherry chocolate chip muffins. I shared a detailed list of ingredients and easy step-by-step instructions for mixing and baking. You also learned tips for perfect muffins and fun variations to try. Remember to store them correctly for lasting freshness. Baking can be fun and creative. Enjoy these muffins with friends or family, and don’t be afraid to experiment with flavors. Happy baking!](https://southerndishes.com/wp-content/uploads/2025/07/30b2e2f8-a452-4c8f-b0c5-2b290fd43b7e.webp)
Get ready to bake some magic with my Cherry Chocolate Chip Muffins! This easy recipe combines tart cherries and rich
![- 4 large russet potatoes, cut into wedges - 1 cup dill pickle juice - 1 tablespoon olive oil - 1 teaspoon garlic powder - 1 teaspoon onion powder - 1 teaspoon smoked paprika - 1 teaspoon dried dill - Salt and pepper to taste - ½ cup ranch dressing (store-bought or homemade) - Fresh dill fronds for garnish When making Pickle Ranch Potato Wedges, start with fresh ingredients. Russet potatoes are the best choice. They give a fluffy inside and a crispy outside. You can soak them in dill pickle juice for a tangy flavor. This step is key to making your wedges special. If you want to switch up the potatoes, try Yukon Gold or sweet potatoes. They add unique flavors and textures. For ranch dressing, you can make your own with yogurt and herbs. This option allows you to control the flavors. If you need a lower-sodium choice, look for low-sodium ranch or pickle juice. These changes can help fit your diet while still enjoying delicious wedges. For the full recipe, check out the recipe section above. To start, you need to coat the potato wedges in pickle juice. Take your large russet potatoes and cut them into wedges. Place the wedges in a large bowl. Pour the dill pickle juice over them. Make sure every wedge gets a good soak. Cover the bowl with plastic wrap. You want to refrigerate them for at least 30 minutes. This time helps the potatoes absorb all the zesty flavor. Next, let’s prep your oven. Preheat it to 425°F (220°C). This high temperature is key for getting those crispy edges. While the oven heats up, line a baking sheet with parchment paper. This step makes cleaning up easy later. You don’t want to scrub stuck-on potato pieces! After marinating, drain the potato wedges. Now, you’ll want to toss them in a separate bowl with olive oil, garlic powder, onion powder, smoked paprika, dried dill, salt, and pepper. Mix them well until each wedge is evenly coated. This step is important for flavor. Spread the seasoned wedges on the lined baking sheet. Make sure they are in a single layer. This helps them cook evenly. Bake them in your preheated oven for 30-35 minutes. Flip them halfway through cooking. This will give you that golden brown, crispy finish. Try not to open the oven door too often, as it can drop the temperature. Enjoy the delicious smell while they bake! To get that perfect crisp, flip the wedges halfway through baking. This ensures even cooking and browning. Bake the wedges for 30-35 minutes at 425°F (220°C) for that golden finish. If you prefer extra crunch, add a few more minutes to the timer. Spicing up your wedges can lead to exciting flavors. You might try adding cayenne for heat or paprika for smokiness. After baking, top your wedges with extra ranch dressing, parmesan cheese, or even crumbled bacon for added taste. One common mistake is not letting the potatoes marinate long enough. A solid 30 minutes in pickle juice boosts flavor. Also, avoid overcrowding the baking sheet. This can lead to soggy wedges. Make sure to leave space for hot air to circulate around each wedge. For the full recipe, check out the main section. {{image_2}} To add a kick, mix in cayenne pepper or your favorite hot sauce. This will give your wedges a nice heat. You can also try a zesty ranch dressing. Look for options that add bold flavors, like chipotle or sriracha. These changes take your snack to the next level. If you love cheese, sprinkle shredded cheese on the wedges before baking. It melts beautifully and adds a rich flavor. For an even cheesier treat, top with cheese after baking. Let it melt under the broiler for a few minutes. This step brings a gooey, delicious finish to your wedges. To make this dish vegetarian or vegan, use dairy-free ranch dressing. Many brands offer great options that taste just as good. Instead of olive oil, try using avocado oil. It has a mild flavor and works well with these wedges. These simple swaps enable everyone to enjoy this tasty snack. For the full recipe, check out [Full Recipe]. To store leftover potato wedges, place them in an airtight container. This keeps them fresh and prevents them from drying out. Wedges will last in the fridge for up to three days. Be sure to let them cool before sealing the container. You can reheat your potato wedges in the oven or microwave. For the oven, preheat it to 400°F (200°C). Spread the wedges on a baking sheet and heat for 10 to 15 minutes. This method helps keep them crispy. If using a microwave, place wedges on a microwave-safe plate and heat for one to two minutes. Note that the microwave may make them a bit soggy. To restore crispiness, you can briefly place them back in the oven after microwaving. To freeze cooked potato wedges, let them cool completely first. Place the wedges in a single layer on a baking sheet and freeze until solid. Once frozen, transfer them to a freezer bag. They can last up to three months in the freezer. To thaw, place them in the fridge overnight or microwave them on low for a few minutes. Reheat in the oven to regain their crunch. Enjoy these tasty snacks anytime with the full recipe! Yes, you can use other potatoes. Yukon gold potatoes add a creamy texture. Sweet potatoes give a hint of sweetness. Red potatoes hold their shape well but may not get as crispy. Each type has its own flavor and texture. Experimenting can lead to fun results. Just remember to adjust cooking times if needed. Making ranch dressing is simple and quick. Here’s a basic recipe: - 1 cup sour cream - ½ cup mayonnaise - 1 tablespoon lemon juice - 1 teaspoon garlic powder - 1 teaspoon onion powder - 1 teaspoon dried dill - Salt and pepper to taste Mix all these ingredients in a bowl until smooth. You can adjust the spices for your taste. This creamy dressing pairs perfectly with the potato wedges. Pickle Ranch Potato Wedges are great with many sides. Here are some tasty options: - A fresh garden salad for crunch - Grilled chicken or fish for protein - Buffalo wings for a spicy kick - Veggie sticks and dip for a health boost These sides balance the savory flavor of the wedges. Enjoy creating a fun meal! In this article, I shared how to make delicious Pickle Ranch Potato Wedges. We covered essential ingredients, marinating techniques, and cooking steps for crispy results. I also included tips to help you avoid common mistakes and variations to try. Remember, take time to marinate and avoid overcrowding your baking sheet for the best flavor. These wedges can be stored, reheated, or even frozen. Enjoy experimenting with substitutions and different flavors in your cooking! Trust me, these wedges will be a hit!](https://southerndishes.com/wp-content/uploads/2025/07/a88d1175-8736-49f7-aefc-1f05696dce55.webp)
Get ready to elevate your snacking game with Pickle Ranch Potato Wedges! These crispy, flavorful treats blend the tang of
![When making Cherry Lemonade Popsicles, the right ingredients make all the difference. Here’s what you need: - 2 cups fresh cherries, pitted and halved - 1 cup freshly squeezed lemon juice - 1/2 cup granulated sugar - 1 cup water - Zest of 1 lemon - Optional: Fresh mint leaves for garnish Each ingredient plays a key role in flavor and texture. Fresh cherries provide a sweet and tart taste. Lemon juice adds the right amount of zing and brightness. Sugar balances the tartness, making each bite delightful. Water helps blend everything smoothly. The lemon zest gives a punch of citrus aroma that elevates the popsicles. You can use fresh mint leaves as a cute garnish. They add a pop of color and a fresh taste. This simple list creates a refreshing summer treat that everyone will love. For the full recipe, check out the details above. - Combine 1 cup of water and 1/2 cup of granulated sugar in a medium saucepan. - Stir the mixture over medium heat until the sugar dissolves completely. This takes about 2-3 minutes. - Once dissolved, remove the saucepan from heat and let the syrup cool. - Take 2 cups of fresh cherries, pitting and halving them first. - Place the cherries in a blender. Blend them using a pulse action. You want a smooth blend but still some texture. Set the cherry puree aside. - In a large mixing bowl, combine the cooled simple syrup, 1 cup of freshly squeezed lemon juice, and the zest of 1 lemon. - Add half of the blended cherries into the bowl. Stir well to mix everything together. - Pour the mixture into popsicle molds and fill them halfway. - Layer the reserved cherry puree on top. Then, fill the molds with the lemonade mixture, leaving a little space at the top for expansion. - Insert popsicle sticks into the molds and place them in the freezer. Let the popsicles freeze for at least 4-6 hours, or until solid. For a complete list of details, check the Full Recipe. To make smooth cherry lemonade popsicles, start with the cherries. Use fresh cherries whenever you can. Cut them in half and remove the pits. This helps in blending them smoothly. When blending, pulse the cherries rather than blending them continuously. This keeps some tiny pieces, adding nice texture. For the lemonade base, mix the cooled simple syrup, lemon juice, and zest well. This ensures even flavor in every bite. When pouring the mixture into molds, fill them halfway first. Then, add a layer of cherry puree. Make sure to leave some space at the top for the popsicles to expand while freezing. This layering makes each popsicle look pretty and adds depth of flavor. Serving your cherry lemonade popsicles can be fun! I like to place them on a wooden board for a rustic look. Add fresh mint leaves around the popsicles for a pop of color. You can also drizzle a little extra cherry puree on top for a fancy touch. These popsicles pair well with other summer treats. Try serving them with a scoop of vanilla ice cream or alongside fresh fruit salad. You can even create a fun popsicle bar. Set out toppings like crushed nuts, coconut flakes, or sprinkles for everyone to enjoy. This adds a personal touch to your summer gatherings. For the full recipe, check out the [Full Recipe]. {{image_2}} You can play with flavors in these popsicles. Adding other fruits can make them even better. Try mixing in fresh strawberries or raspberries. These fruits pair well with cherries and add a nice twist. You can mash or blend them before adding to the mix. This way, you get a tasty blend of flavors in every bite. Another cool idea is to use herb-infused syrups. For example, mint or basil syrups can add a refreshing touch. Simply infuse your syrup with your favorite herb while it cools. Strain out the herbs before mixing it into the popsicle base. This adds a unique flavor that surprises your taste buds. If you want to make these popsicles sugar-free, it’s easy! Use natural sweeteners like honey or agave syrup. These options add sweetness without the sugar rush. You can also use stevia or monk fruit sweeteners for a low-calorie treat. Just adjust the amount to suit your taste. For those who need gluten-free options, you’re in luck! The recipe is already gluten-free. There are no flours or grains in the ingredients. Just make sure your sweeteners are also gluten-free. This way, everyone can enjoy a refreshing popsicle on a hot day. Check out the Full Recipe to get started on making your own Cherry Lemonade Popsicles! To keep your cherry lemonade popsicles fresh, proper storage is key. The best method is to use airtight containers or freezer bags. This prevents ice crystals from forming and keeps flavors intact. - Freezing Tips: - Allow popsicles to freeze fully for at least 4-6 hours. - Once frozen, remove them from molds and wrap each popsicle in plastic wrap. - Place wrapped popsicles in a container or a freezer bag. - Maintaining Flavor and Texture: - Store popsicles away from strong-smelling foods. They can absorb those odors. - Keep popsicles at a consistent freezing temperature. Avoid frequent opening of the freezer. Homemade cherry lemonade popsicles taste best when eaten fresh. For the best flavor, enjoy them within 2 months of making them. - Recommended Consumption Timeline: - For best taste, consume within 1 month. - If stored well, they can last up to 2 months. - Signs of Spoilage: - Watch for ice crystals forming on the popsicles. - If they appear discolored or have an off smell, it’s best to discard them. Cherry lemonade popsicles usually take about 4 to 6 hours to freeze. Several factors can affect this time. First, your freezer's temperature plays a big role. A colder freezer will freeze them faster. Second, the size of your popsicle molds matters. Larger molds take longer to freeze than smaller ones. Lastly, if the mixture is warmer when poured, it will take longer to solidify. To be safe, check them after 4 hours. If they are still soft, let them freeze for another hour. Yes, you can use frozen cherries in this recipe. Using frozen cherries can save time and provide a chilled treat. They are often picked at peak ripeness, meaning they still have great flavor. However, frozen cherries can be a bit mushy when thawed. This might change the texture of the popsicles. If you use frozen cherries, let them thaw slightly before blending. This way, you can blend them smoothly without extra ice. If you need a substitute for lemon juice, you have a few options. Lime juice works well and adds a similar tangy flavor. You can also use vinegar for a different taste, but use it sparingly. If you want a sweeter option, try orange juice. Keep in mind that each substitute will slightly change the flavor profile of your popsicles. Adjust the sugar to balance the sweetness and tartness when using these alternatives. You learned how to make refreshing cherry lemonade popsicles. We covered the ingredients, from fresh cherries to lemon juice. I walked you through step-by-step instructions, from making simple syrup to blending your mixture. We also explored tips for perfect texture and fun serving ideas. Lastly, I shared variations and storage methods for your popsicles. Enjoy your homemade treats and get creative with flavors. You’ll impress everyone with your popsicle skills this summer. Happy blending!](https://southerndishes.com/wp-content/uploads/2025/07/bc8d2cc2-8192-4c22-a4ac-ae81de616cdc.webp)
Looking for a cool treat this summer? Try my Cherry Lemonade Popsicles! They combine tart lemon and sweet cherries, making
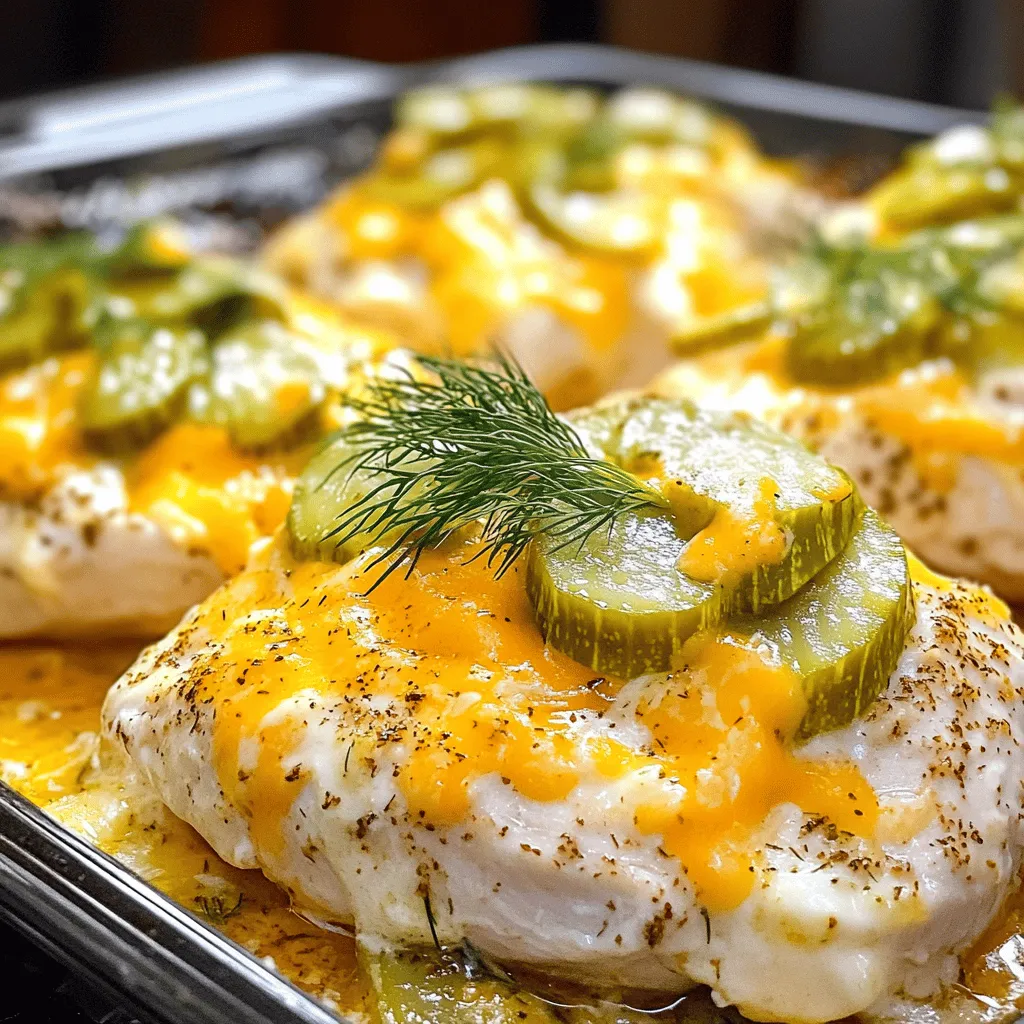
Craving a dish that combines the tangy delight of pickles with cheesy goodness? Look no further than my Cheesy Pickle
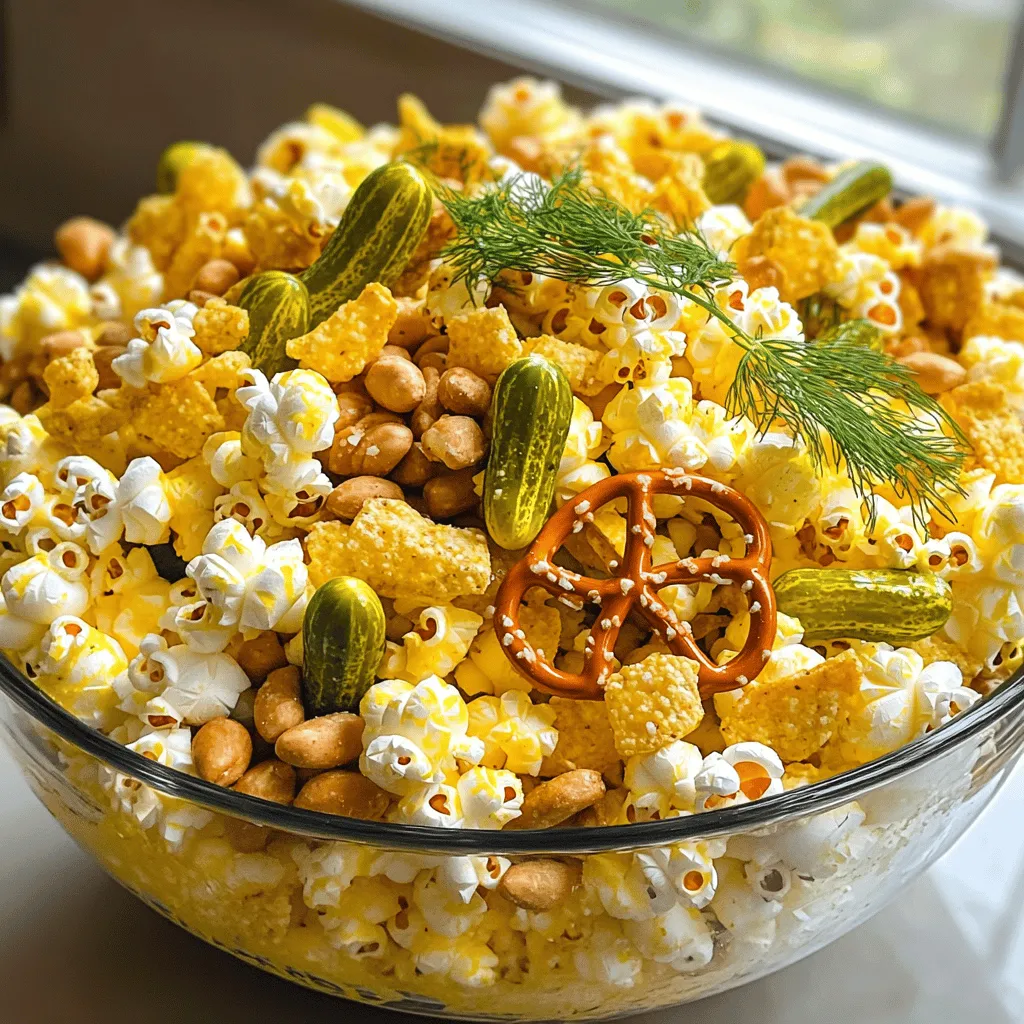
If you’re looking for a bold snack that packs a punch of flavor, you’ve found it! My Pickle Popcorn Snack
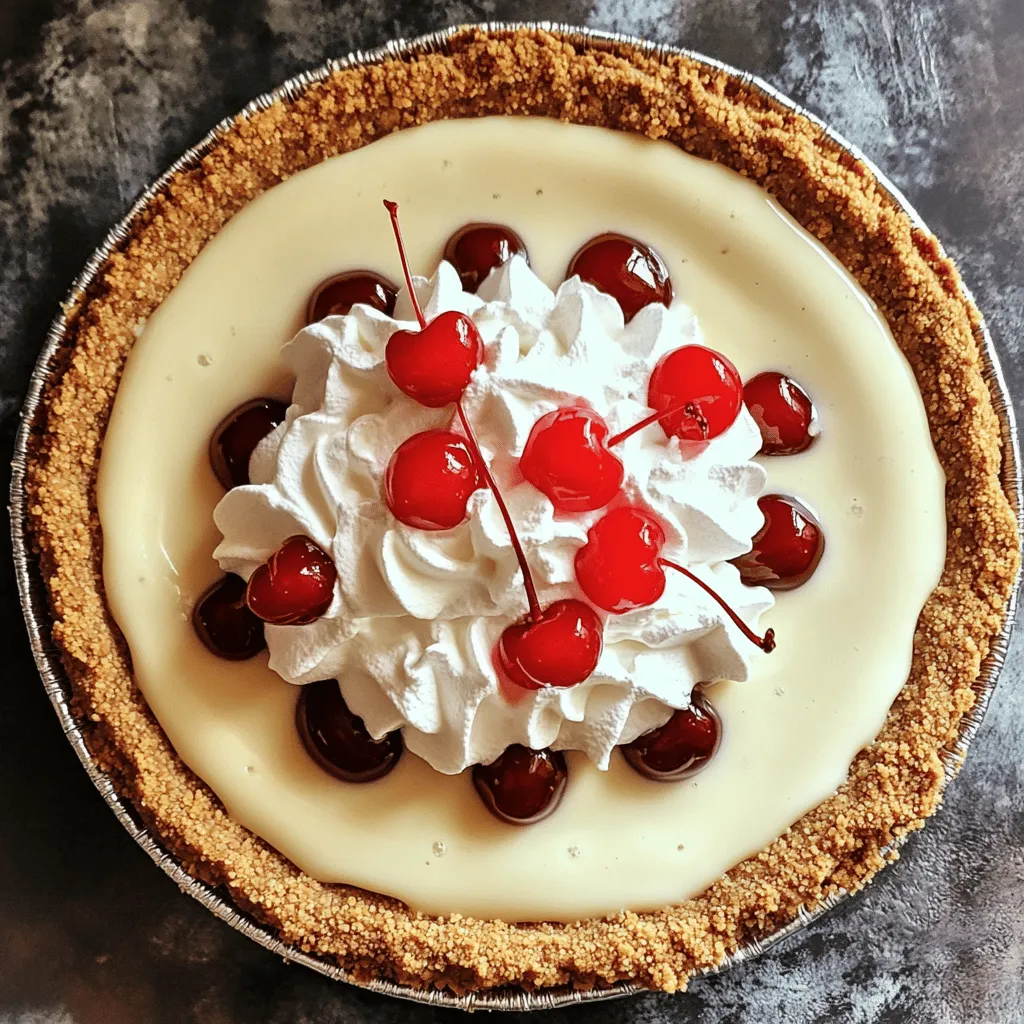
Are you ready to impress your friends with a sweet treat? This Cream Soda Milkshake Pie is not just tasty;

Craving a sweet yet healthy treat? You’ll love this Cherry Swirl Frozen Yogurt Bark! It’s easy to make and packed

Are you ready to try something bold and unique for dinner? Dill pickle pizza topped with spicy honey will blow
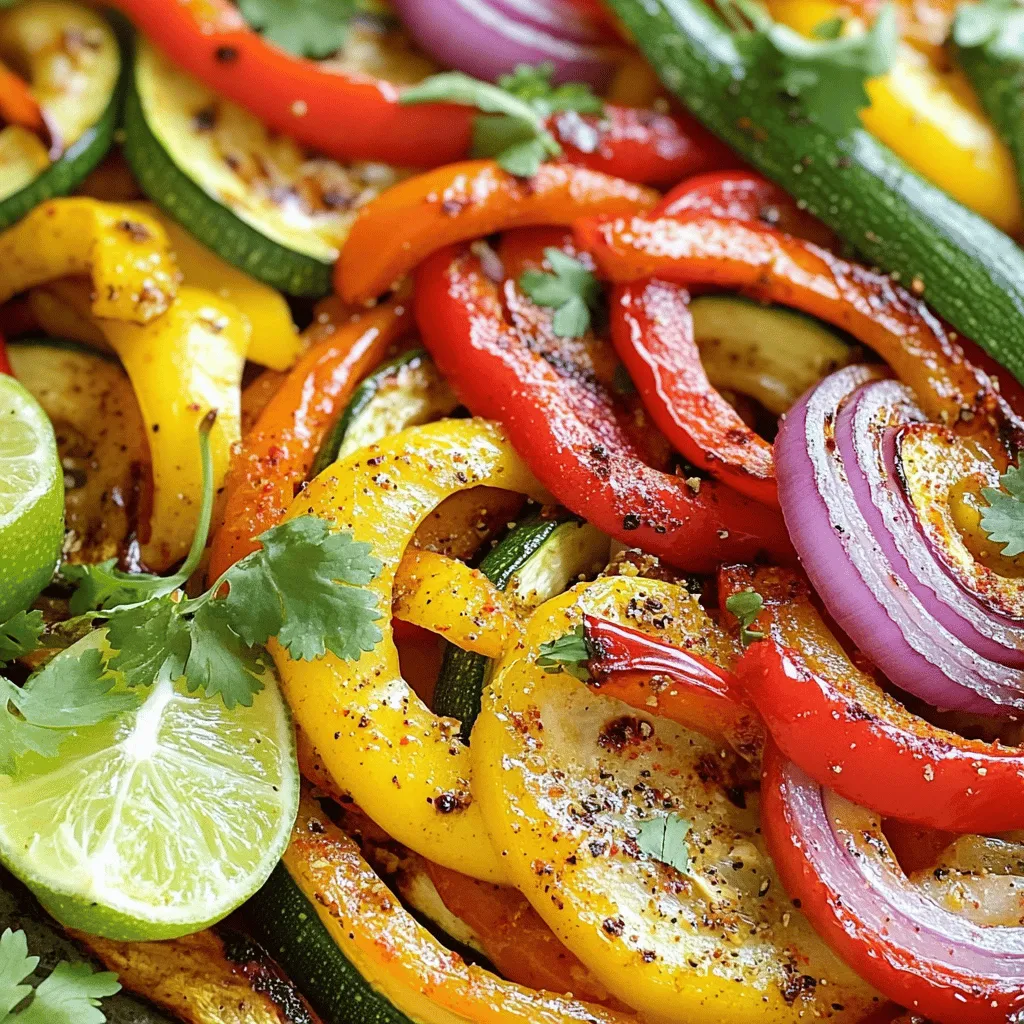
Looking for a quick, healthy meal that bursts with flavor? You’re in the right place! My Sheet Pan Fajita Veggies
