Skip to content
DisclaimerTerms Of UseGDPR PolicyCookie Policy

Southern Dishes

  • Home
  • Drinks
  • Appetizers
  • Dinner
  • Dessert
  • About
  • Contact
  • Privacy Policy
DisclaimerTerms Of UseGDPR PolicyCookie Policy

Isabella

To make classic deviled eggs, you need these simple ingredients: - 6 large eggs - 3 tablespoons mayonnaise - 1 teaspoon Dijon mustard - 1 teaspoon apple cider vinegar - 1/4 teaspoon smoked paprika - Salt and pepper to taste - 1 tablespoon fresh chives, finely chopped - A few dashes of hot sauce (optional) If you want to switch things up, try these substitutions: - Use Greek yogurt instead of mayonnaise for a healthier twist. - Swap Dijon mustard for yellow mustard for a milder flavor. - Replace apple cider vinegar with lemon juice for a fresh taste. - Try different spices like curry powder or garlic powder for unique flavors. To get the best eggs for your deviled eggs, consider these tips: - Choose eggs that are fresh and clean. Check for cracks. - Look for larger eggs for a better filling ratio. - Organic or free-range eggs often have richer yolks. - Buy eggs a week before you plan to boil them. Older eggs peel easier. Feel free to get creative with this recipe! Explore the full recipe to see how to make these delicious bites. To make classic deviled eggs, start with the right cooking method. Follow these steps: 1. Place the eggs in a pot. Cover them with cold water. 2. Heat the pot over medium-high heat. Bring the water to a boil. 3. Once boiling, cover the pot. Remove it from heat. 4. Let the eggs sit in the hot water for 9-12 minutes. 5. For softer yolks, choose 9 minutes. For firmer ones, go for 12 minutes. 6. After the time is up, move the eggs to an ice bath. This stops cooking and makes peeling easy. 7. Leave them in the ice bath for at least 5 minutes. Making the filling is simple and quick. Here’s how: 1. Peel the eggs gently. If needed, do this under running water. 2. Slice each egg in half lengthwise. 3. Scoop out the yolks into a mixing bowl. 4. Add 3 tablespoons of mayonnaise, 1 teaspoon of Dijon mustard, and 1 teaspoon of apple cider vinegar. 5. Mix in 1/4 teaspoon of smoked paprika, plus salt and pepper to taste. 6. Mash everything until it’s smooth and creamy. Adjust seasoning to your liking. 7. If you like a kick, add hot sauce to the mix. Now it's time to put your deviled eggs together: 1. Spoon the yolk mixture back into the egg whites. 2. For a fancy touch, use a piping bag to fill the halves. 3. Sprinkle the top with fresh chives and a dash of smoked paprika. 4. Serve them chilled or at room temperature for the best flavor. You can find the full recipe above! Making deviled eggs is fun, but mistakes can happen. Here are some to watch for: - Overcooking the eggs: This makes the yolks dry and greenish. Cook them just right. - Skipping the ice bath: This step cools the eggs fast and helps with peeling. Don't skip it! - Not seasoning well: Taste your yolk mixture. Adjust salt and pepper as needed for flavor. You can easily change up your deviled eggs. Here are some ideas: - Add spices: Try curry powder or chili powder for a kick. - Use different mustards: Honey mustard adds sweetness, while spicy mustard brings heat. - Mix in herbs: Fresh dill or basil can give your eggs a fresh taste. Peeling eggs can be tricky. Here are some tips to make it easier: - Use older eggs: Fresh eggs can stick. Buy them a week ahead. - Peel under water: This helps remove shells without tearing the egg. - Crack before peeling: Gently tap the egg to create small cracks all over. For detailed steps, check the Full Recipe for Classic Deviled Eggs with a Twist. {{image_2}} Deviled eggs are a classic dish, but you can make them even more fun. Here are three tasty variations to try. If you like heat, add hot sauce to your filling. Start with a few dashes and taste. You can always add more. Mix it in with the yolks, mayonnaise, and spices. This twist gives your deviled eggs a nice kick. Everyone will love the surprise! Avocado adds a rich creaminess to your deviled eggs. Simply replace half of the mayonnaise with mashed avocado. This makes the filling smooth and flavorful. Plus, it adds healthy fats. You can even add lime juice for a zesty touch. It’s a fresh take that’s sure to impress! Bacon and cheddar make everything better. Chop up crispy bacon and mix it into the yolk filling. Add shredded cheddar cheese for extra flavor. This combination gives your deviled eggs a savory twist. It’s a great way to elevate this classic dish. Feel free to mix and match these ideas. You can create your own unique versions too! For the full recipe, check out Classic Deviled Eggs with a Twist. To store leftover deviled eggs, place them in an airtight container. Make sure to keep them covered to prevent drying out. You can also use plastic wrap to cover the eggs. Keep the container in the refrigerator. Deviled eggs can last for up to three days when stored properly. To keep your deviled eggs fresh, avoid adding toppings until you serve them. Toppings can make the eggs soggy if they sit too long. If you use chives or paprika, wait until serving time to sprinkle them on. This keeps the presentation nice and fresh. I do not recommend freezing deviled eggs. The texture changes when eggs freeze and thaw. If you need to make them ahead, prepare the filling and store it separately. You can freeze the filling for up to a month. When ready, thaw it in the fridge overnight. Then, fill your egg whites just before serving. This keeps everything fresh and tasty. For the full recipe, check out Classic Deviled Eggs with a Twist. To make the best deviled eggs, start with fresh eggs. Cook them perfectly. Place the eggs in a pot and cover with cold water. Bring the water to a boil, then turn off the heat. Let the eggs sit for 9-12 minutes. This method helps avoid rubbery yolks. After cooking, cool the eggs in an ice bath. Peel them gently for smooth whites. Mix the yolks with mayonnaise, mustard, and spices. Adjust seasoning to your taste. Spoon or pipe the filling back into the whites for a nice look. Yes, you can make deviled eggs in advance. Prepare them up to a day before your event. Store them in the refrigerator. Keep them covered with plastic wrap or a lid. This helps them stay fresh. If you want, you can also prepare the filling ahead of time. Just keep it in a separate container until you are ready to fill the eggs. You can get creative with toppings for deviled eggs. Try crispy bacon bits for crunch. Fresh herbs like dill or cilantro add a fresh taste. Crumbled feta cheese gives a salty kick. For a spicy twist, add jalapeño slices or sriracha. You can also use pickled onions or capers for tangy flavor. The options are endless, so have fun with it! Green yolks happen when eggs cook too long. This produces a reaction between the iron in the yolk and sulfur in the white. The green color usually means the eggs are overcooked. To avoid this, cook your eggs for the right time. Using an ice bath after cooking helps too. Deviled eggs last about 2 to 3 days in the fridge. Store them in a covered container. Make sure they stay cool and don’t sit out for long. If you notice any off smell or change in texture, it’s best to toss them. Yes, there are low-calorie alternatives for deviled eggs. You can use Greek yogurt instead of mayonnaise. This cuts down on calories and adds protein. For a lighter touch, try mashed avocado. It gives a creamy texture and healthy fats. You can also skip the yolks and use just the whites for filling with your favorite spices. For the full recipe, check out the Classic Deviled Eggs with a Twist section. To make great deviled eggs, use the right ingredients and follow clear steps. From cooking eggs to mixing the perfect filling, each part matters. Avoid common mistakes to keep your eggs taste fresh. Feel free to try fun variations, like adding spicy or creamy flavors. Remember, proper storage keeps leftovers tasty longer. Deviled eggs can be simple or fancy, based on your choice. Enjoy making this classic dish for your next gathering!

Classic Deviled Eggs Easy Recipe for Any Occasion

Deviled eggs are a classic dish that shines at any gathering. Whether it’s a family meal or a party, these

- 1 cup rolled oats - 1/2 cup creamy peanut butter - 1/2 cup unsweetened cocoa powder - 1/2 cup honey or maple syrup - 1/4 cup coconut oil, melted - 1 teaspoon vanilla extract - 1/4 teaspoon salt - 1/2 cup chocolate chips (optional) - 1/4 cup shredded coconut (optional) How to measure rolled oats correctly: Use a dry measuring cup. Scoop the oats and level them off with a knife. This gives an accurate measurement for your cookies. Substitutions for peanut butter: You can use almond butter, sunflower seed butter, or cashew butter. Each will change the taste a little, but they will still hold the cookies together well. Importance of using organic cocoa powder: Organic cocoa powder has richer flavor. It also lacks harmful chemicals. This makes your cookies taste better and healthier. Choosing the right sweetener for flavor: Honey gives a floral sweetness. Maple syrup offers a warm, rich taste. Choose what you like best for your cookies. Each sweetener will change the flavor a bit, so try them out. For the Full Recipe, check out the detailed steps to create these delightful no-bake cookies. To start, gather your ingredients. In a medium saucepan, mix coconut oil, honey or maple syrup, cocoa powder, and salt. Turn the heat to low or medium. Stir the mixture constantly. This step is key. Make sure it melts fully and becomes smooth. If you skip the stirring, you can burn the mixture. Once it’s melted, remove it from the heat. Next, add peanut butter and vanilla extract. Stir until they blend well. This creates a creamy texture. After this, you’ll add the rolled oats. Mix them in until fully coated. If you want extra flavor, fold in chocolate chips or shredded coconut. This can make the cookies even better. Now it’s time to shape your cookies. You can use a cookie scoop or a spoon. A cookie scoop helps make uniform cookies. If you use a spoon, try to keep the size consistent. Shape each scoop into a cookie as you place it on the baking sheet. Line the sheet with parchment paper to prevent sticking. This will help them cool without mess. Once your cookies are shaped, it’s time to set them. Place the baking sheet in the fridge. Let the cookies chill for at least 30 minutes. This helps them firm up. After thirty minutes, check them for doneness. They should hold their shape but still be soft. If they look good, you’re ready to enjoy! For the best taste, store them in an airtight container in the fridge. - Overheating the mixture: Keep the heat low. If the mixture boils, it can change the texture. Stir constantly to ensure even melting. - Not allowing cookies to set: Patience is key! Let the cookies chill in the fridge for at least 30 minutes. This helps them firm up properly. - Adding nuts or dried fruits: You can mix in chopped nuts like walnuts or pecans. Dried fruits, like raisins or cranberries, can add a nice sweetness. - Experimenting with spices like cinnamon: A pinch of cinnamon can elevate the taste. It adds warmth and depth to your cookies. - Pairing with milk or ice cream: These cookies taste amazing with a glass of cold milk. They also pair well with ice cream for a tasty dessert. - Perfect occasions for serving: Serve these cookies at parties, picnics, or as an after-school snack. They are a hit with kids and adults alike. For the complete recipe, refer to the Full Recipe section. {{image_2}} You can change the flavors of these cookies to suit your taste. One fun twist is the coconut mocha version. Just add 1/4 cup of shredded coconut and a splash of brewed coffee to the mix. This will give your cookies a rich flavor with a hint of tropical sweetness. Another great option is to make Almond Joy-inspired cookies. For this, include 1/4 cup of chopped almonds and 1/4 cup of shredded coconut. The chocolate and nut combo makes a delightful treat. If you follow a vegan diet, you can easily adapt this recipe. Replace honey or maple syrup with agave syrup. Use a nut butter that is vegan-friendly, like almond butter. This way, you keep the cookies plant-based. For those needing gluten-free options, make sure to use gluten-free rolled oats. This small change allows you to enjoy the same great taste without any gluten. How you display your cookies can make them even more fun! Arrange them on a colorful platter and sprinkle some cocoa powder on top. This gives a nice touch and makes them look fancy. You can also use cookie cutters to shape the cookies. After dropping spoonfuls onto parchment paper, press them with a shaped cutter. This adds a playful twist, especially for kids or parties. Check out the Full Recipe for more ideas and details! To keep your no-bake chocolate oatmeal cookies fresh, use an airtight container. I suggest a glass jar or a plastic container with a tight lid. This method prevents air from drying them out. Place a piece of parchment paper between layers to stop sticking. For added freshness, keep the container in the fridge. If you want to save some cookies for later, freeze unformed dough. Scoop the dough into balls and place them on a baking sheet. Freeze for about an hour. Once firm, transfer the balls to a freezer bag. When you're ready to enjoy, thaw the cookies in the fridge overnight. This way, they taste fresh when served. In the fridge, these cookies last about one week. For the best flavor, eat them within the first few days. After that, they may lose some taste, but they will still be safe to eat. Enjoying them fresh gives the best chocolate and oat flavor experience! For the ultimate treat, serve them cold right from the fridge. You can use instant oats, but the cookies will change. Instant oats are smaller and softer. This means the cookies may not hold their shape as well. Rolled oats give a chewy texture and help the cookies stay firm. If you want the best result, stick with rolled oats. If your cookies are crumbly, don't worry. Add a bit more peanut butter or a splash of honey. Mix it well. If they are still crumbly, try pressing them together more firmly on the baking sheet. This will help them stick together better. Yes, these cookies can be a healthy treat! They have oats, which are good for digestion. Peanut butter adds protein and healthy fats. Cocoa powder is rich in antioxidants. Just be mindful of the sugar amount from honey or syrup. Enjoy them in moderation as a sweet snack. Absolutely! You can replace peanut butter with almond butter or sunflower seed butter. These will change the flavor slightly but will still bind the cookies well. You could also use applesauce for a lighter texture, but it may make the cookies softer. I love serving these cookies cold with a glass of milk. They also pair well with coffee or tea. You can even crumble them over yogurt for a tasty breakfast. Try placing them on a nice platter for a special touch. These cookies are easy to make and use simple, tasty ingredients. You learned the best ways to measure, enhance flavor, and avoid common mistakes. I shared tips for storage and freezing, so your treats last longer. Don’t forget to try fun variations and presentations! These cookies can fit any diet or occasion. Enjoy experimenting in the kitchen, and share your results with friends. You will impress everyone with your delicious creations. Happy baking!

No-Bake Chocolate Oatmeal Cookies Simple Treat

Craving a tasty treat that’s quick to make? No-bake chocolate oatmeal cookies are your answer! With simple ingredients like oats,

To make Maple Dijon Roasted Brussels Sprouts, gather these ingredients: - 1 pound Brussels sprouts, trimmed and halved - 3 tablespoons olive oil - 2 tablespoons pure maple syrup - 1 tablespoon Dijon mustard - 1 tablespoon apple cider vinegar - 1 teaspoon garlic powder - 1/2 teaspoon salt - 1/4 teaspoon black pepper - Optional: 1/4 cup pecans or walnuts, chopped These ingredients blend to create a sweet and savory dish that shines at any meal. If you need substitutions, there are great options. - You can swap olive oil for avocado oil for a different flavor. - Use honey instead of maple syrup for a different sweetness. - If you don’t have Dijon mustard, yellow mustard works too. - For a tangy twist, try balsamic vinegar in place of apple cider vinegar. These swaps keep the dish tasty while making it work for your pantry. Add-ins can elevate your Brussels sprouts. - Consider adding 1/4 cup of chopped pecans or walnuts for crunch. - You can toss in some dried cranberries for a sweet bite. - If you like spice, add a pinch of red pepper flakes for heat. These extras let you personalize the dish and make it your own. For the full recipe, check out the details above. Start by rinsing your Brussels sprouts under cold water. Trim off the tough ends and cut each sprout in half. This allows them to cook evenly. The smaller the pieces, the faster they cook. I like to choose sprouts that are firm and green. This ensures they have a great taste and texture. In a large bowl, add olive oil, pure maple syrup, Dijon mustard, and apple cider vinegar. Then sprinkle in garlic powder, salt, and black pepper. Whisk all these ingredients together until they blend well. This glaze gives your Brussels sprouts a sweet and tangy flavor. You can taste it to see if it needs more salt or sweetness. Preheat your oven to 400°F (200°C). Spread the Brussels sprouts on a baking sheet in a single layer. Make sure they have space to roast well. This helps them get crispy and brown. Roast them for 20 to 25 minutes. Stir them halfway through to ensure they cook evenly. Once they are golden brown and tender, they are ready. For extra crunch, you can add chopped nuts before roasting. For the full recipe, refer back to the top of the article. To get the best roast, start with fresh Brussels sprouts. Trim off the ends and cut them in half. This helps them cook evenly. Use a large baking sheet. Spread the sprouts out in one layer. Crowding the pan makes them steam instead of roast. Roast at 400°F for about 20-25 minutes. Stir halfway through for even browning. Look for a nice golden color to know they are done. Maple syrup adds sweetness, while Dijon mustard gives tang. The apple cider vinegar brings balance. Adjust these flavors to your taste. If you like it sweeter, add more maple syrup. If you want it tangier, add extra mustard. Taste the glaze before adding the sprouts. This way, you can tweak it to suit your palate. Serve these Brussels sprouts warm in a nice dish. You can drizzle a bit more maple syrup on top for extra flavor. Add chopped nuts like pecans or walnuts for crunch. A sprinkle of fresh herbs, like parsley, adds color and freshness. These sprouts pair well with roasted meats or can be a tasty side for a vegetarian meal. Try serving them alongside quinoa or rice for a complete dish. For the full recipe, check out the Maple Dijon Roasted Brussels Sprouts section. {{image_2}} You can easily make this dish vegan. Simply use maple syrup and Dijon mustard. Both are plant-based. You can also swap olive oil for avocado oil. This keeps the dish rich and tasty. For extra crunch, try adding nuts or seeds. Pecans and walnuts work well. You can also use sunflower seeds or pumpkin seeds. They add a nice nutty flavor. Just mix them in with the Brussels sprouts before roasting. Feel free to mix in seasonal vegetables. Carrots and sweet potatoes roast nicely with Brussels sprouts. You can also try cauliflower or butternut squash. These veggies add color and taste. Just cut them to match the size of the Brussels sprouts. This way, they cook evenly. For the full recipe, check out the Maple Dijon Roasted Brussels Sprouts section. To keep your Maple Dijon roasted Brussels sprouts fresh, let them cool first. Use an airtight container to store them. You can keep them in the fridge for up to four days. If you have a lot, consider dividing them into smaller containers. This helps you grab just what you need. When you're ready to enjoy leftovers, reheating is key. Preheat your oven to 350°F (175°C). Spread the Brussels sprouts on a baking sheet. Heat them for about 10-15 minutes, or until warm. This method keeps them crispy and delicious. You can also use a microwave, but they may lose some crunch. If stored correctly, Maple Dijon roasted Brussels sprouts last about four days in the fridge. If you freeze them, they can last up to three months. However, freezing may change their texture. I recommend enjoying them fresh for the best taste. For the full recipe, check the earlier section. Yes, you can prepare the Brussels sprouts ahead. Toss them with the maple Dijon glaze and store them in the fridge for up to one day. Just remember to roast them right before serving. This helps keep them fresh and tasty. Roasted Brussels sprouts go with many dishes. They pair well with: - Roast chicken - Grilled salmon - Quinoa salad - Pasta with garlic and olive oil These options complement the sweet and tangy flavors of the sprouts. Check for doneness by looking for a golden brown color. The outer leaves should be crispy, while the inside should be tender. You can also pierce them with a fork. If it goes in easily, they are ready. For best results, stir them halfway through cooking to ensure even roasting. For the full recipe, check out the Maple Dijon Roasted Brussels Sprouts section. This blog post covered how to make delicious Maple Dijon Roasted Brussels Sprouts. You learned about the ingredients, helpful tips, and cooking methods. Remember to try ingredient swaps and optional add-ins for variety. Perfect roasting and flavor balance can elevate your dish. Store leftovers properly for future meals. With these insights, you can confidently make and enjoy this dish on your own or with friends and family. Happy cooking!

Maple Dijon Roasted Brussels Sprouts Flavorful Dish

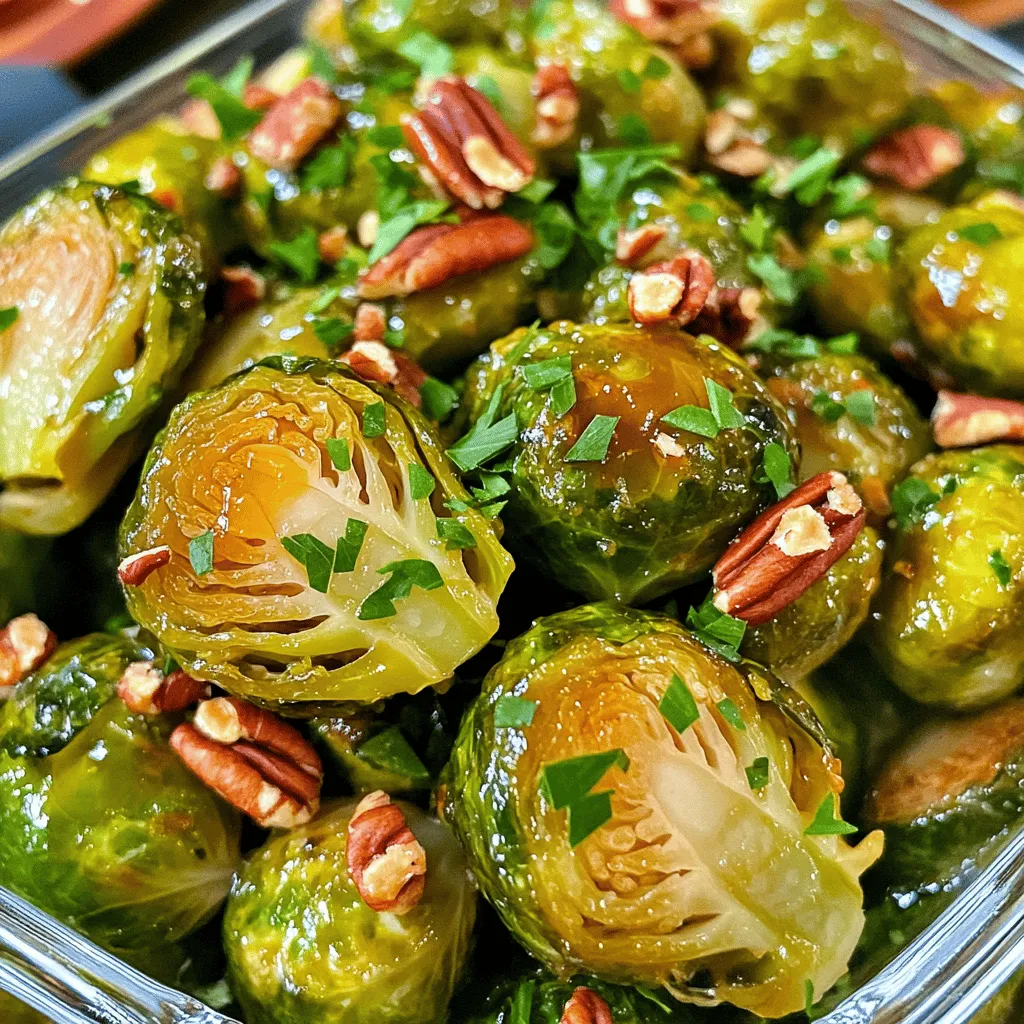
If you’re looking for a tasty side dish that’s easy to make, you’ve found it! My Maple Dijon Roasted Brussels

To make coconut macaroons, you need a few key items: - 2 ¾ cups sweetened shredded coconut - ½ cup sweetened condensed milk - 1 teaspoon vanilla extract - ¼ teaspoon almond extract - 2 large egg whites - Pinch of salt These ingredients work together to create the chewy, sweet texture that makes macaroons so special. The sweetened shredded coconut is the star here. It gives the macaroons their coconut flavor and chewy bite. The sweetened condensed milk adds richness and sweetness, which is key for this treat. You can add some fun twists to your macaroons: - ½ cup semi-sweet chocolate chips (for drizzling) - A pinch of citrus zest for a fresh touch - Chopped nuts for added crunch These options let you play with flavors. Drizzling chocolate on top adds a nice contrast to the coconut. Citrus zest can brighten the taste, while nuts give a different texture. If you lack an ingredient, here are some swaps: - Use unsweetened coconut for less sweetness. - Swap almond extract with more vanilla extract for a different flavor. - Aquafaba (chickpea water) can replace egg whites for a vegan version. These substitutions keep your macaroons tasty and allow you to work with what you have at home. Remember, the goal is to keep the chewy texture, so choose wisely! You can find the full recipe to guide you through the process. Start by gathering all your ingredients. You need 2 ¾ cups of sweetened shredded coconut, ½ cup of sweetened condensed milk, and two large egg whites. Also, grab 1 teaspoon of vanilla extract, ¼ teaspoon of almond extract, and a pinch of salt. If you want, get ½ cup of semi-sweet chocolate chips for drizzling. Preheat your oven to 325°F (160°C) and line a baking sheet with parchment paper. In a mixing bowl, add the shredded coconut, sweetened condensed milk, vanilla extract, and almond extract. Use a spatula to mix everything well. You want all the coconut to be coated evenly. This mixture creates the sweet, chewy base of your macaroons. In another large bowl, take the two egg whites and add a pinch of salt. Beat them with an electric mixer until soft peaks form. This step is key. The beaten egg whites will make your macaroons light and fluffy. Be careful not to overbeat; you just want soft peaks. Now, gently fold the beaten egg whites into the coconut mixture. Use a spatula, and be gentle to keep the fluffiness. Once combined, use a teaspoon or small ice cream scoop to drop mounds onto your baking sheet. Space them about 2 inches apart. Bake in your preheated oven for 15 to 20 minutes, or until the tops turn golden brown. After baking, take the macaroons out of the oven and let them cool for a few minutes. Then, transfer them to a wire rack to cool completely. If you want to add chocolate, melt the chocolate chips in a microwave-safe bowl. Heat in 20-second intervals, stirring in between until smooth. Once melted, drizzle the chocolate over your cooled macaroons. Allow the chocolate to set before enjoying these sweet treats. For the complete recipe, check out the Full Recipe section. To get that perfect texture in your coconut macaroons, follow these steps. Use fresh, sweetened shredded coconut for the best taste. The coconut should have a fine texture to help your macaroons hold together. When mixing, ensure every strand of coconut is coated evenly with the condensed milk. This gives a chewy and moist inside. Be gentle when folding in the whipped egg whites. This step adds volume, making your macaroons light and fluffy. Avoid overmixing your batter. If you mix too much, the eggs lose their air and your macaroons become dense. Another common mistake is using unsweetened coconut. This can make your treats taste bland. Check your oven temperature, too. An oven that is too hot may burn the macaroons before they cook through. Lastly, don't skip the cooling time. Cooling helps set their shape and flavor. Coconut macaroons shine on their own, but you can enhance them. Serve them with fresh fruit like strawberries or pineapple. This adds a nice tartness that balances the sweetness. For a fun twist, pair them with a scoop of vanilla ice cream. Drizzling melted chocolate is also an option. It adds a rich flavor and looks great. You can even make a dessert platter with coffee or tea for a delightful treat. For the full recipe, check out the detailed instructions above. {{image_2}} You can make a great twist on classic coconut macaroons by adding chocolate. To do this, simply melt semi-sweet chocolate chips. Once your macaroons cool, drizzle the chocolate on top. This adds a rich flavor that pairs well with the coconut. You can also dip the bottoms of the macaroons into melted chocolate for a more decadent treat. This variation is a crowd-pleaser and looks beautiful on any dessert table. If you want nut-free coconut macaroons, just skip the almond extract. The vanilla extract gives enough flavor on its own. You can also use a different extract, like coconut or lemon, to add a unique touch. Make sure to check labels if you're using any pre-made ingredients. Some sweetened condensed milk brands may have traces of nuts. Adding flavor boosts can make your macaroons shine. You can mix in citrus zests, like lemon or orange, for a fresh taste. Just a teaspoon will do. Spices like cinnamon or nutmeg can also add warmth to the flavor. For a tropical kick, consider adding a splash of rum extract. These small changes can turn a simple recipe into something special. For more ideas, check the Full Recipe for inspiration. To keep your coconut macaroons fresh, store them in an airtight container. It’s best to use a container that seals tightly. Place a piece of parchment paper between layers to prevent sticking. Store them at room temperature for the best taste and texture. Avoid direct sunlight or heat sources. This keeps the coconut macaroons soft and chewy. You can freeze coconut macaroons to enjoy later. First, let them cool completely. Then, place them in a single layer on a baking sheet. Freeze for about an hour until firm. After that, transfer them to a freezer-safe bag or container. Label the bag with the date. They can last in the freezer for up to three months. When ready to eat, thaw them in the fridge overnight or at room temperature. Coconut macaroons have a good shelf life. When stored correctly, they can last about a week at room temperature. If you store them in the fridge, they can last up to two weeks. Freezing extends their life much longer. The flavors remain intact, and they taste just as good when you thaw them. Enjoy your sweet treats at their best! For the full recipe, check the earlier sections. Yes, you can. To make coconut macaroons without egg whites, replace them with aquafaba. Aquafaba is the liquid from canned chickpeas. Use 3 tablespoons of aquafaba for each egg white. It works as a great binder and adds fluffiness. Just whip the aquafaba until it is frothy, similar to egg whites. Then, fold it into your coconut mixture. This method keeps your macaroons light and tasty without eggs. Coconut macaroons stand out because of their chewy texture and sweet flavor. Unlike other coconut desserts, macaroons use sweetened condensed milk for sweetness. This makes them moist and rich. They also contain egg whites, which help create a light, airy structure. Other desserts may use flour or milk, making them different in taste and texture. Macaroons have a unique mix of rich coconut flavor and a chewy bite that is hard to beat. To make coconut macaroons less sweet, use unsweetened shredded coconut. This will reduce the sugar level while still keeping that nice coconut flavor. You can also cut back on the sweetened condensed milk a bit. Try using only 1/3 cup instead of 1/2 cup. Another option is to add a pinch of salt to balance out the sweetness. These small changes can make your macaroons just right for your taste buds. For the full recipe and more tips, check out the [Full Recipe]. Coconut macaroons are simple yet tasty treats. We covered essential and optional ingredients, plus substitutions. I provided easy steps to mix, bake, and top them. You learned tips for perfect texture and common mistakes to avoid. We explored fun variations and smart storage methods for freshness. Enjoy making these delightful treats your way. Experiment and find your favorite version. Each batch can be unique and delicious. Happy baking!

Coconut Macaroons Easy Recipe for Sweet Treats

Are you ready to whip up a treat that’s sweet and simple? This easy coconut macaroons recipe will guide you

For this Garlic Parmesan Roasted Broccoli, gather these fresh items: - 1 lb fresh broccoli florets - 4 garlic cloves, minced - Juice of 1 lemon - Zest of 1 lemon - Fresh parsley, chopped (for garnish) These fresh ingredients bring life to the dish. The broccoli adds crunch, while the garlic gives a nice kick. Next, you’ll need some basic pantry items: - 4 tablespoons olive oil - ½ cup grated Parmesan cheese - 1 teaspoon red pepper flakes (optional) - Salt and pepper to taste These staples enhance the flavors of the broccoli. The olive oil helps everything roast nicely, while the cheese adds creaminess. To make this dish, you will need a few tools: - Large mixing bowl - Baking sheet - Parchment paper - Knife and cutting board These tools help you prepare and cook the broccoli easily. Using parchment paper makes cleanup a breeze. For the complete details on preparing this dish, check out the Full Recipe. First, we need to get our oven ready. Preheat it to 425°F (220°C). This step helps the broccoli roast perfectly. Next, take 1 pound of fresh broccoli florets and rinse them well. In a large mixing bowl, add the broccoli and 4 tablespoons of olive oil. Toss the broccoli until it’s well coated. Now, add 4 minced garlic cloves, 1 teaspoon of red pepper flakes (if you like some heat), salt, and pepper. Mix it all together again so every piece of broccoli is seasoned nicely. Once your broccoli is ready, spread it in a single layer on a baking sheet lined with parchment paper. This makes for easy cleanup later. Place the baking sheet in your hot oven. Roast the broccoli for about 15 to 20 minutes. Keep an eye on it. You want the edges crispy and the broccoli tender. When the broccoli is done roasting, take it out of the oven. Now it’s time for the fun part! Sprinkle ½ cup of grated Parmesan cheese over the hot broccoli. Put it back in the oven for another 3 to 5 minutes. This melts the cheese and gives it a nice golden color. After that, drizzle the juice and zest of 1 lemon over the broccoli. Toss it gently to mix everything. Finally, garnish with some chopped fresh parsley. This adds color and flavor. You can find the complete recipe [Full Recipe]. Enjoy your flavorful side dish! To get the best roasted broccoli, start with fresh florets. Fresh broccoli holds its shape and flavor well. Cut the florets into similar sizes. This way, they cook evenly. Use a large bowl to toss the broccoli with olive oil. Make sure each piece is coated. A single layer on the baking sheet helps them crisp up. Don’t overcrowd the pan; give each piece space to breathe. Seasoning is key to great flavor. I like to add garlic for a punch. Minced garlic releases its oils, giving the broccoli a nice aroma. Don’t forget salt and pepper; they bring out the taste. If you want a bit of heat, sprinkle in red pepper flakes. After roasting, drizzle lemon juice on top. The acid brightens the dish and balances the cheese. Garlic Parmesan roasted broccoli is versatile. You can serve it as a side or a main dish. Try it on top of pasta for a quick meal. You can also mix it into salads for added crunch. If you want, pair it with grilled chicken or fish. The flavors blend well together. For more ideas, check out the Full Recipe for inspiration. {{image_2}} If you want a change, you can swap the Parmesan cheese. Nutritional yeast gives a cheesy flavor without dairy. This option is great for vegan diets. You can also use Pecorino Romano for a sharper taste. Another alternative is crumbled feta, which adds a tangy twist. Just keep in mind that each cheese will change the dish's flavor. You can mix in other veggies for more color and taste. Carrots, bell peppers, or Brussels sprouts work well. Just chop them into similar sizes as the broccoli. This way, they roast evenly. Add them to the bowl with the broccoli at the start. You can also use cauliflower for a nice twist. Feel free to experiment with spices. Paprika or cumin can add warmth and depth. For a kick, add cayenne pepper or chili powder. If you like herbs, thyme or rosemary can bring fresh notes. Mix and match to find what you like best. Each spice will give your Garlic Parmesan Roasted Broccoli a unique flavor. You can find the full recipe [here](#). To keep your Garlic Parmesan Roasted Broccoli fresh, place it in an airtight container. Make sure it cools down first. Store it in the fridge for up to three days. If you want to enjoy it later, proper storage helps maintain its taste and texture. Reheating is easy. You can use the oven or microwave. For the oven, preheat to 350°F (175°C). Place the broccoli on a baking sheet and heat for about 10 minutes. If using a microwave, heat in 30-second intervals until warm. This keeps the broccoli crispy and delicious. If you want to freeze it, first, let it cool completely. Spread the broccoli in a single layer on a baking sheet. Freeze it for about two hours. Then, transfer it to a freezer bag. It can last up to three months in the freezer. When you are ready to eat, thaw in the fridge before reheating. For the full recipe, check out the complete guide. Yes, you can use frozen broccoli. However, fresh broccoli tastes better. Frozen broccoli has more water. This can make it soggy when cooked. If you use frozen, thaw it first. Pat it dry with a towel to remove excess water. This will help keep it crisp when roasting. Garlic Parmesan Roasted Broccoli pairs well with many dishes. You can serve it with grilled chicken or fish. It also complements pasta dishes. Try it with quinoa or rice for a healthy meal. This dish adds flavor and color to any plate. To make Garlic Parmesan Roasted Broccoli vegan, swap the cheese. Use a vegan cheese that melts well. Nutritional yeast is a great option too. It adds a cheesy flavor without dairy. You can also skip the cheese altogether for a lighter dish. This keeps the broccoli tasty and healthy. In this post, we discussed how to prepare Garlic Parmesan Roasted Broccoli. We covered fresh ingredients, pantry needs, and the tools that help you succeed. You learned step-by-step instructions, best practices for roasting, and fun variations. Remember, you can store leftovers easily and even make this dish vegan. With these tips, you will create a tasty dish every time. Enjoy your cooking and feel proud of your healthy meals!

Garlic Parmesan Roasted Broccoli Flavorful Side Dish

Are you ready to elevate your meals with a simple yet delicious side dish? Garlic Parmesan Roasted Broccoli is packed

- 2 ripe avocados - 300g spaghetti or any pasta of choice - 2 cloves garlic, minced - 1 cup fresh basil leaves - 2 tablespoons lemon juice - 3 tablespoons olive oil - 1/2 teaspoon red pepper flakes (optional) - Salt and pepper to taste - Grated parmesan cheese (for serving, optional) - Cherry tomatoes, halved (for garnish, optional) Ripe avocados are the star of this dish. They give a rich and creamy texture. Choose avocados that yield slightly when you press them. For pasta, spaghetti is great, but any kind works too. Fresh basil adds a nice touch. Garlic gives a punch of flavor. You can add red pepper flakes for a hint of heat. This creamy avocado pasta is not only tasty but also healthy. It has about 500 calories per serving. The dish is high in healthy fats from avocados. They contain fiber, which is good for digestion. Avocados are also rich in vitamins C, E, and K. They help improve heart health and skin. This recipe is vegan since it uses no animal products. You can also make it gluten-free by choosing gluten-free pasta. For those with nut allergies, this dish is safe. You can swap ingredients based on your needs. For the full recipe, check out the details above. Enjoy making this dish your own! To start, bring a large pot of water to a boil. Add a good amount of salt to the water. This step helps flavor the pasta. Once the water is boiling, add your pasta. I love using spaghetti, but feel free to choose your favorite type. Cook the pasta according to the package instructions until it is al dente. This means the pasta should be firm but not hard. To check, taste a piece. If it feels just right, you’re ready to move on. Don’t forget to save about one cup of the pasta water before draining. This water can help adjust your sauce later. While the pasta cooks, it’s time to make the avocado sauce. Take two ripe avocados and cut them in half. Remove the pit and scoop the flesh into a blender or food processor. Add minced garlic, fresh basil, lemon juice, olive oil, and red pepper flakes if you want a little heat. Blend everything until it is smooth and creamy. If it feels too thick, add a bit of the reserved pasta water. Taste the sauce and adjust the salt and pepper to fit your liking. Now, let’s mix everything together. In the same pot you used for the pasta, add the drained spaghetti. Pour the creamy avocado sauce over the pasta. Use tongs or a spoon to toss the pasta, ensuring it is well coated. If the sauce is too thick, add more pasta water until it reaches the right consistency. Serve your creamy avocado pasta right away. You can top it with extra salt, pepper, grated parmesan, and halved cherry tomatoes for a fresh touch. For the full recipe and more details, check out the [Full Recipe]. To keep your avocados fresh, use lemon juice. It slows down the browning. Store any leftover sauce in an airtight container. Press plastic wrap against the surface before sealing. This method helps keep air out. For the best texture, blend until creamy. Add a bit of pasta water if it's too thick. You want a smooth, silky sauce that clings to the pasta well. You can add extra flavor with a few simple ingredients. Try adding sun-dried tomatoes or olives for a savory kick. A sprinkle of feta cheese can also enhance the taste. Serve your creamy avocado pasta with fresh salad or garlic bread. A crisp side salad adds freshness and crunch. A good blender or food processor makes a big difference. These tools help achieve that perfect creaminess. If you don’t have one, a fork can work, but it takes longer. Cook your pasta and sauce at the same time. This way, you can mix them right when the pasta is hot. It helps the sauce stick better. Timing is key for the best creamy avocado pasta experience. {{image_2}} You can use many types of pasta for creamy avocado pasta. While spaghetti is a classic choice, feel free to try penne, fettuccine, or even gluten-free pasta. Gluten-free pasta made from brown rice or chickpeas works great and keeps the dish light. In addition, seasonal veggies can boost the dish's flavor. In summer, add fresh zucchini or cherry tomatoes. In winter, consider using roasted butternut squash for added sweetness. Adding proteins can change the dish completely. Grilled chicken or shrimp pairs well with the creamy sauce. Simply cook the protein and toss it with the pasta. If you like spice, try adding red pepper flakes. They add heat and depth to the dish. Adjust the amount to your taste, but start small to avoid overpowering the creamy flavor. Pair your creamy avocado pasta with vibrant salads. A simple arugula salad with lemon vinaigrette works wonders. You can also serve light dips, such as hummus or tzatziki, as appetizers. These sides balance the richness of the pasta and keep your meal exciting. To keep your creamy avocado pasta fresh, store it in an airtight container. This will help prevent it from browning and losing flavor. Place the pasta in the fridge within two hours of cooking. It will stay good for 2-3 days. Can you freeze creamy avocado pasta? Yes, but it is tricky. The avocado may change in texture. If you want to freeze it, store the sauce and pasta separately. Use a freezer-safe container for the sauce. It can last for up to a month in the freezer. When reheating, do it gently. Use low heat to avoid losing creaminess. Add a splash of olive oil or a little reserved pasta water. This helps bring back the smooth texture. For a fresh touch, add a sprinkle of fresh basil or a squeeze of lemon juice before serving. To make this dish vegan, swap the parmesan cheese with a plant-based alternative. You can use nutritional yeast for a cheesy flavor. Also, check that your pasta is egg-free. Many brands offer a great variety of vegan pasta options. Yes, you can use frozen avocado! When using frozen avocados, let them thaw in the fridge overnight. This helps maintain their texture. If you need to use them quickly, place them in a bowl of warm water for about 10 minutes. Blend them while they are still cold for a creamy sauce. If you don't have basil, try fresh parsley or cilantro. Both herbs add a nice flavor. Mint can also work, giving a unique twist. Experiment with flavors to find what you like best! Absolutely! Creamy avocado pasta is great for meal prep. Cook the pasta and sauce separately. Store them in airtight containers in the fridge. When you're ready to eat, mix them together, adding a splash of water to loosen the sauce. This way, you enjoy fresh-tasting pasta every time. For the full recipe, check out the complete guide. This blog post covered how to make creamy avocado pasta from start to finish. We discussed key ingredients, nutrition facts, and dietary options. You learned how to cook pasta perfectly and blend a smooth avocado sauce. We also explored tips to enhance flavor and variations to try. Finally, I shared how to store and reheat leftovers. Remember, this dish is both tasty and healthy. Enjoy experimenting with it and make it your own!

Creamy Avocado Pasta Vibrant and Flavorful Dish

Looking for a quick, tasty meal? Let me introduce you to creamy avocado pasta—a vibrant and flavorful dish that delights

- 1 lb chicken breast (cut into 1-inch cubes) - 1/4 cup honey - 1/4 cup Dijon mustard - 2 tablespoons olive oil - 2 tablespoons apple cider vinegar - 2 garlic cloves (minced) - 1 teaspoon paprika - Salt and pepper to taste - 1 bell pepper (cut into 1-inch pieces) - 1 red onion (cut into wedges) - Skewers (soaked in water if wooden) To make honey mustard chicken skewers, you need fresh ingredients. Chicken breast is the star. Cut it into bite-sized cubes. You want them small enough to cook well on a skewer but not too small. The honey and Dijon mustard mix gives a sweet and tangy flavor. Add olive oil for smoothness and apple cider vinegar for a little bite. Minced garlic adds a nice touch. Paprika brings warmth to the dish. Don’t forget salt and pepper for taste. Now, let’s talk about the veggies. Bell peppers add crunch and color. Red onions give sweetness when grilled. Soak your skewers if they are wooden. This keeps them from burning on the grill. For a full breakdown of how to combine these ingredients, check the Full Recipe. Ready to grill? Let’s move on! Start by grabbing a medium bowl. In this bowl, whisk together these ingredients: - 1/4 cup honey - 1/4 cup Dijon mustard - 2 tablespoons olive oil - 2 tablespoons apple cider vinegar - 2 minced garlic cloves - 1 teaspoon paprika - Salt and pepper to taste Make sure to mix well until it's smooth. This marinade gives your chicken flavor and helps it stay juicy. Once mixed, add the chicken cubes. Make sure each piece gets a nice coat of that tasty mix. Now, cover the bowl with plastic wrap. Place it in the fridge. Let the chicken marinate for at least 30 minutes. For even more flavor, you can leave it for up to 4 hours. The longer it sits, the better it tastes. Time to cook! First, preheat your grill or grill pan over medium heat. While it heats, take your soaked skewers. Thread the marinated chicken onto them. Alternate the chicken with pieces of bell pepper and onion. This adds color and taste. Once the grill is hot, place the skewers on it. Cook them for about 10-12 minutes. Turn them often. You want nice grill marks and the chicken should reach 165°F inside. After cooking, let the skewers rest for a few minutes. This helps the juices settle. Now you’re ready to enjoy your Honey Mustard Chicken Skewers! For the full recipe, check the section above. Marinating your chicken is key for great flavor. I recommend marinating for at least 30 minutes. If you have time, let it sit for up to four hours. This gives the chicken time to soak in the honey mustard mix. You can change the sweetness by adding more honey or adjusting the spice with extra mustard or paprika. Taste as you go to find your perfect balance. To ensure even cooking, preheat your grill to medium heat. This helps the chicken cook through without burning. Place the skewers on the grill and turn them every few minutes. This way, they cook evenly on all sides. For nice grill marks, avoid moving the skewers too much at first. Let them sit for a minute before flipping. When serving, arrange the skewers on a large platter. Garnish with fresh parsley for color. You can drizzle extra honey mustard sauce on top or serve it on the side for dipping. Pair these skewers with a fresh salad or grilled veggies for a tasty meal. Enjoy the mix of flavors and colors on your plate! For the full recipe, check out the Honey Mustard Chicken Skewers section. {{image_2}} You can switch out chicken for other proteins. Tofu is a great choice for a vegetarian option. Shrimp also works well and cooks quickly. When using shrimp, cook them for 3-5 minutes. If you choose beef or pork, adjust the cooking time to ensure they are fully cooked. Always check the internal temperature for safety. Feel free to add more veggies to your skewers. Zucchini, mushrooms, and cherry tomatoes are tasty choices. You can also use seasonal vegetables like asparagus in spring or squash in summer. Adding colorful veggies makes your dish more appealing. Get creative with the flavors! You can add fresh herbs like rosemary or thyme for a twist. If you want a spicy kick, try adding red pepper flakes. You can also swap the marinade for a teriyaki or barbecue sauce for a different taste. Each change gives a new spin to your honey mustard chicken skewers. Check out the Full Recipe for more ideas! To keep your honey mustard chicken skewers fresh, store them in an airtight container. This helps to lock in moisture and flavor. Place the skewers in the fridge within two hours of cooking. They will stay good for about 3 to 4 days. If you want to keep them longer, consider freezing. When it’s time to enjoy leftovers, reheat them gently. You can use the microwave or an oven. If using a microwave, place skewers on a microwave-safe plate. Heat in short bursts, checking often. For the oven, preheat to 350°F and bake for about 10 minutes. This method keeps them juicy. Avoid high heat, which can dry them out. Yes, you can freeze honey mustard chicken skewers. Make sure they are completely cool before freezing. Wrap them tightly in plastic wrap and then in aluminum foil. This helps prevent freezer burn. When you're ready to eat, thaw them in the fridge overnight. After thawing, reheat as mentioned above. Enjoy your meal, even from the freezer! For the complete recipe, check out the Full Recipe section. Cut the chicken breast into 1-inch cubes. This size helps them cook evenly. Use a sharp knife for clean cuts. Make sure your pieces are uniform for best results. If you have leftover chicken, save it for another meal. Yes, you can prepare these skewers in advance. Marinate the chicken up to 4 hours before grilling. Assemble the skewers and store them in the fridge. Just remember to cover them well. When ready, grill them straight from the fridge. These skewers pair well with many side dishes. Here are a few great options: - Fresh salad with greens - Grilled vegetables like zucchini or asparagus - Rice or quinoa for a filling side - Garlic bread for a tasty addition Feel free to mix and match! For the full recipe, check out the details above. This blog post shared a simple recipe for honey mustard chicken skewers. We covered every detail, from essential ingredients and step-by-step cooking instructions to tips for flavor and grilling. You learned how to marinate chicken perfectly and what vegetables enhance the taste. Remember, you can make these skewers unique by using different proteins or spices. Enjoy your cooking, and share your delicious results with family and friends. Happy grilling!

Honey Mustard Chicken Skewers Easy Grilling Recipe

Craving a delicious and easy grilling recipe? Look no further than Honey Mustard Chicken Skewers! This simple dish packs a

For the best s'mores dip, you need quality chocolate and marshmallows. I use: - 1 cup semi-sweet chocolate chips - 1 cup mini marshmallows The chocolate chips melt well and give a rich flavor. Mini marshmallows are perfect for that gooey topping. They toast nicely under heat and add sweetness. The crust holds everything together. It's simple to make. For the crust, gather: - ½ cup graham cracker crumbs - ¼ cup butter, melted - 1 teaspoon vanilla extract - Pinch of sea salt Mix the crumbs with melted butter, vanilla, and salt. This mix gives a nice, crunchy base. You can get creative with your dip. Here are some fun ideas: - Extra graham crackers for serving - Optional: chocolate sauce for drizzling Adding chocolate sauce on top boosts flavor. Extra graham crackers help scoop the warm dip. These extras make sharing more fun! For the full recipe, check out the [Full Recipe]. Start by preheating your oven to 450°F (230°C). This high heat helps the marshmallows brown nicely. While the oven heats up, grab a 9-inch skillet or a baking dish. Make sure it is clean and dry. This dish will hold your tasty S'mores dip. In a medium bowl, mix ½ cup of graham cracker crumbs with ¼ cup of melted butter. Add a pinch of sea salt to enhance the flavor. Stir until the crumbs look like wet sand. This helps the crust stick together. Next, press the mixture evenly into the bottom of your skillet or baking dish. Make sure it is flat and compact. Now, it's time to add the fun stuff! First, sprinkle 1 cup of semi-sweet chocolate chips evenly over the crust. Try to cover every spot for a rich taste. Then, pour 1 cup of mini marshmallows over the chocolate. Spread them out evenly. This way, each bite gets that gooey marshmallow goodness. Carefully place the skillet or baking dish in the preheated oven. Bake for about 5-7 minutes. Watch closely as the marshmallows turn golden brown and the chocolate melts. When done, remove it from the oven and let it cool for a couple of minutes. This will make it easier to serve. You can drizzle some chocolate sauce on top for extra flavor. Serve it warm with extra graham crackers for dipping. Enjoy! For the full recipe, check out the details above! To get that perfect golden marshmallow top, watch your oven closely. Bake at 450°F (230°C) for just 5-7 minutes. The heat will toast the marshmallows fast. Look for them to turn a lovely golden brown. This color shows that they are fluffy and warm inside. If you bake too long, they may burn. Keep an eye on them. You want that delicious toasted taste! Serve your S'mores Dip warm and gooey. Use extra graham crackers for dipping. You can also offer fruit like strawberries or bananas. These add a fresh touch to the sweet dip. For a fun twist, drizzle chocolate sauce over the top. This extra chocolate makes it even more tempting. Don't forget to keep spoons handy for easy scooping! You can tweak the ingredients to fit your taste. Use dark chocolate for a richer flavor. If you like it sweeter, try milk chocolate instead. Want a nutty flavor? Add crushed nuts on top before baking. For a twist, add peanut butter or caramel. Adjust the marshmallows too; mini or regular both work well. With these changes, your S'mores Dip will be just how you like it! For the full recipe, check out the details above. {{image_2}} You can switch up the chocolate for other flavors. Try using white chocolate for a sweet twist. Butterscotch chips give a fun, caramel-like taste. Peanut butter chips add a nutty flavor that many love. Mix and match your favorites for a new taste each time. Get creative with add-ins. Chopped nuts add crunch and flavor. Use crushed candy bars for a fun surprise. Try adding pretzel pieces for a salty crunch. You can even fold in some mini peanut butter cups for a rich treat. These add-ins can make your dip unique. Change the dip for seasons or holidays. For fall, add pumpkin spice to the chocolate layer. In winter, try peppermint extract for a cool flavor. For summer, mix in fresh berries for a fruity touch. You can even make a Halloween version with candy corn on top. These twists make your dip special for any occasion. For the full recipe, check the details above. After enjoying your s'mores dip, store any leftovers in an airtight container. Make sure to let it cool first to avoid condensation. You can keep it in the fridge for up to three days. If you want to keep it longer, freeze it in a freezer-safe container. Just remember to wrap it well. To reheat your s'mores dip, you have a few options. The best way is to use the oven. Preheat your oven to 350°F (175°C). Place the leftovers in an oven-safe dish. Heat for about 10-15 minutes until it’s warm and gooey again. You can also use the microwave. Heat in short bursts, stirring in between, until hot. For the best taste, eat your s'mores dip within three days when stored in the fridge. If frozen, it can last up to two months. Just make sure to label the container with the date. This way, you'll know when to enjoy it for the best flavor. Yes, you can make S'mores Dip ahead of time. Prepare the dip, but do not bake it. Cover the dish tightly and store it in the fridge. When you're ready to enjoy, bake it as directed. This method saves time and keeps your dip fresh. If you don’t have graham crackers, use these options: - Digestive biscuits - Vanilla wafers - Shortbread cookies These substitutes work well and still give a great crunch. To prevent burning, keep a close eye on the dip while it bakes. Bake at a lower temperature, like 400°F (200°C). You can also cover the dip with aluminum foil for part of the baking time. Remove the foil towards the end to get a nice golden top. Absolutely! You can use various chocolates, such as: - Milk chocolate - Dark chocolate - White chocolate Mix and match to create your favorite flavors. Each type will give a unique taste to your S'mores Dip. Remember, the Full Recipe is adaptable to your preferences! S'mores dip is a fun, easy treat to make at home. We covered the right ingredients, from chocolate to crust, and optional add-ins. You learned step-by-step instructions for baking and achieving a golden marshmallow top. I shared tips for serving and customizing flavors. Whether you make it for a party or just for fun, this dish brings joy. Store leftovers well, and you can enjoy it later. Let your creativity shine with variations to make each batch unique! Give it a try, and you won’t be disappointed!

S’mores Dip in the Oven Irresistible Dessert Recipe

Who doesn’t love a gooey, sweet treat that brings back memories of campfire nights? In this blog, I’m excited to

To make a tasty berry smoothie bowl, you need these simple ingredients: - 1 cup mixed berries (fresh or frozen: strawberries, blueberries, raspberries) - 1 banana, sliced - 1 cup unsweetened almond milk (or any milk of choice) - 1 tablespoon chia seeds - 1 tablespoon honey or maple syrup (optional, for sweetness) - 1/2 teaspoon vanilla extract These ingredients blend well to create a creamy base. The mixed berries bring bright flavors and colors. Bananas add creaminess and natural sweetness. Almond milk keeps it light and tasty. Chia seeds boost nutrition with fiber and protein. Vanilla extract enhances the flavor. If you like it sweeter, add honey or maple syrup. Now, let’s talk toppings! They make your smoothie bowl look pretty and add flavor. Here are my favorites: - Granola - Sliced kiwi - Coconut flakes - Extra berries - Mint leaves Granola adds crunch. Sliced kiwi gives a nice tartness and bright color. Coconut flakes bring a tropical twist. Extra berries add freshness. Mint leaves are a fun garnish that looks great! You can mix and match these toppings to make your bowl unique. With this recipe, you will have a bowl full of flavor and nutrition. For the full recipe, check out the Berry Bliss Smoothie Bowl. Blending the ingredients To start, gather your fresh or frozen mixed berries, banana, and almond milk. Add these to your blender. Then, toss in the chia seeds and vanilla extract. If you want some sweetness, add honey or maple syrup. Blend on high speed. Achieving the right consistency You want a smooth and creamy mix. If it feels too thick, don’t worry! Just add a splash more almond milk until it’s just right. A good smoothie should flow easily but still hold its shape in the bowl. Pouring into a bowl Once your smoothie is perfectly blended, pour it carefully into a bowl. The color should be bright and inviting. It’s the first step to making it look tasty! Arranging toppings for aesthetic appeal Now comes the fun part: adding toppings! Sprinkle granola on top. Add sliced kiwi and some extra berries for color. A few coconut flakes give a nice touch. Finish it off with mint leaves for a pop of green. This makes your smoothie bowl look like a work of art. Tips for serving immediately Serve the smoothie bowl right away. It tastes best fresh. If you wait too long, it might lose its lovely texture. Pairing with other breakfast items You can pair this bowl with a piece of toast or yogurt. A small side of nuts adds protein. This way, your breakfast is both filling and fun! To change the thickness of your smoothie, adjust the almond milk. If you want it thick, use less milk. For a thinner drink, add more almond milk. You can also choose between frozen and fresh ingredients. Frozen berries make a thicker blend while fresh berries keep it lighter. Do you want to boost flavor and nutrition? Add superfoods like chia seeds or protein powder. These small changes pack a big punch. You can also try different fruits. Adding mango or pineapple can make your smoothie taste tropical. Mixing fruits keeps it fun and fresh! A beautiful bowl makes your smoothie more inviting. Use creative topping combinations like granola, sliced kiwi, or coconut flakes. The more colors, the better! A decorative bowl makes it look fancy. You can even add mint leaves for a pop of green. Enjoy making your smoothie bowl a feast for the eyes as well as the tummy! For the full recipe, check out Berry Bliss Smoothie Bowl 🥥. {{image_2}} You can change the flavor of your smoothie bowl with different fruits. Try adding tropical fruits like mango or pineapple. These fruits bring a sweet, sunny taste. You can also mix in greens like spinach or kale. They add nutrition without changing the taste much. Your berry smoothie bowl will stay vibrant and colorful while getting a healthy boost. If you want vegan options, skip the honey or maple syrup. Use agave nectar instead. This keeps your bowl plant-based and tasty. For gluten-free topping ideas, go for nuts or seeds instead of granola. They add crunch and flavor while staying true to gluten-free diets. To make your smoothie bowl unique, try adding nut butters like almond or peanut. They give a creamy texture and rich taste. You can also sprinkle in spices like cinnamon or ginger. These will add warmth and depth to your bowl. Experiment with flavors to find your perfect mix. For a full recipe, check out the Berry Bliss Smoothie Bowl. You might have some smoothie left after your delicious breakfast. You can store it easily. - Refrigerating for short-term use: If you want to keep it for one day, pour the smoothie into a jar. Seal it well and place it in the fridge. Shake it before drinking. - Freezing for future enjoyment: For a longer storage option, freeze the leftover smoothie. Use ice cube trays to freeze small portions. Once frozen, pop them out and store in a bag. You can blend them later for a quick treat. To keep your berry smoothie bowl fresh, follow these tips: - Tips for storing toppings separately: Keep toppings in a separate container. This way, they stay crunchy and fresh. Add them just before serving to maintain texture. - Avoiding browning of bananas: If you use banana in your smoothie, it can brown quickly. To prevent this, store sliced bananas in lemon juice for a few minutes. This helps keep them looking fresh and tasty. If you need a milk substitute, you have many choices. Here are some options: - Coconut milk - Soy milk - Oat milk - Rice milk - Cashew milk These choices work well in your berry smoothie bowl. Each one adds a unique flavor and texture. For example, coconut milk makes it creamy, while oat milk provides a mild taste. Yes, you can prepare a berry smoothie bowl ahead of time. Here are some tips: - Blend your smoothie base and store it in the fridge. - Use an airtight container to keep it fresh. - You can make it the night before for a quick breakfast. For toppings, add them just before serving. This keeps them crisp and fresh. Smoothie bowls are quite healthy! They offer many benefits: - They are packed with vitamins and minerals from fruits. - Chia seeds add fiber and omega-3 fatty acids. - Using almond milk provides calcium without dairy. This berry smoothie bowl is a great way to start your day. It fuels your body with energy and nutrients. Enjoy the delicious mix of flavors while staying healthy! For the full recipe, check out the Berry Bliss Smoothie Bowl. This blog post covered how to make a delicious berry smoothie bowl. We discussed the main ingredients like mixed berries, banana, and almond milk. I shared tips for blending, serving, and great toppings that make it look appealing. Lastly, we explored variations, storage methods, and answered common questions. Smoothie bowls are fun and healthy. They allow for creativity, so don't fear to experiment. Enjoy your tasty creations and feel good knowing you're making a healthy choice.

Berry Smoothie Bowl Refreshing Healthy Breakfast Idea

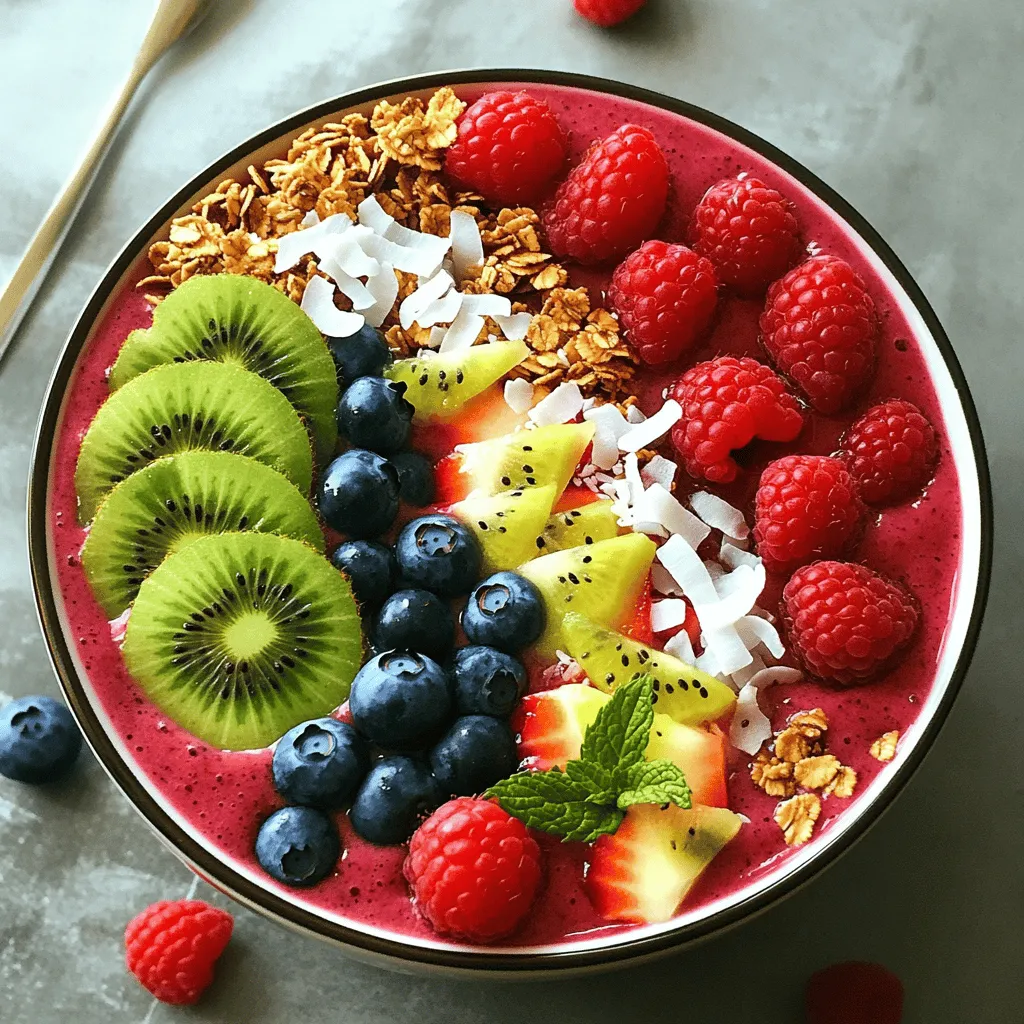
Start your day on a vibrant note with a Berry Smoothie Bowl! Packed with mixed berries, banana, and almond milk,

- 1 lb baby carrots or whole carrots (cut into sticks) - 1/4 cup freshly squeezed orange juice - 2 tablespoons honey - 1 tablespoon butter - 1/2 teaspoon ground cinnamon - 1/4 teaspoon nutmeg - Salt and pepper to taste - 1 tablespoon fresh parsley (for garnish) - Medium saucepan - Cutting board and knife - Measuring cups and spoons To make orange glazed carrots, you need simple and fresh ingredients. I like using baby carrots for their sweet taste and tender bite. If you choose whole carrots, cut them into sticks. Freshly squeezed orange juice adds brightness. Honey gives a nice sweetness. Butter adds richness to the glaze. Ground cinnamon and nutmeg bring warmth and depth. Don't forget salt and pepper to balance the flavors. Lastly, fresh parsley makes a lovely garnish. To prepare your ingredients, you need a few tools. A medium saucepan is essential for cooking the carrots and making the glaze. A cutting board and knife help you chop the carrots easily. Measuring cups and spoons ensure you get the right amounts for each ingredient. With these tools and ingredients, you can create a tasty side dish for any meal. Check out the Full Recipe for step-by-step instructions. To start, you need to prepare the carrots. If you choose whole carrots, first peel them with a vegetable peeler. Then, slice them into sticks about 1/4 inch thick. This size helps them cook evenly. For baby carrots, the job is even easier. Just wash them under cold water. There’s no need to peel or cut them. They are ready to go as they are. Next, it’s time to cook the carrots. Fill a medium saucepan with water and bring it to a boil. Once boiling, add the carrots. Cook them for about 5 to 7 minutes. You want them tender but still a bit crisp. To check if the carrots are done, poke one with a fork. It should go in easily but still have a little bite. If they are too soft, they may lose their nice texture. Now, let’s make the orange glaze. In the same saucepan, melt 1 tablespoon of butter over medium heat. Once melted, add 1/4 cup of freshly squeezed orange juice and 2 tablespoons of honey. Next, stir in 1/2 teaspoon of ground cinnamon and 1/4 teaspoon of nutmeg. Keep stirring until everything mixes well. Bring the glaze to a simmer. Simmer it for about 3 to 5 minutes until it thickens slightly. You want a nice, smooth glaze that coats the back of a spoon. Finally, it’s time to glaze the carrots. Add your drained carrots to the saucepan with the glaze. Cook them for another 5 minutes while gently stirring. This helps the glaze coat the carrots evenly. Once done, transfer the glazed carrots to a serving dish. For a pop of color, sprinkle 1 tablespoon of chopped fresh parsley on top. This adds freshness and makes your dish look lovely. For the full recipe, check the details above. Enjoy your tasty orange glazed carrots! To get the best glaze, cooking times matter. If you use baby carrots, boil them for 5-7 minutes. For whole carrots, cut them into sticks and cook for 8-10 minutes. This helps them stay crisp and bright. You can adjust the sweetness with honey. If you like it sweeter, add more honey. If you want it less sweet, use less. Remember, the orange juice already adds a nice touch of sweetness. Orange glazed carrots pair well with many main dishes. Try them with roasted chicken or grilled fish. They also work great with a cozy beef stew. For a special touch, serve the carrots on a colorful plate. A sprinkle of fresh parsley adds a nice pop of color. Overcooking is a common mistake. Carrots should be tender but still firm. Keep an eye on them while cooking. Balancing flavors is key. Too much spice can overpower the dish. Use just enough salt and pepper to enhance the sweetness. If you feel adventurous, add a pinch of ginger for extra zing. {{image_2}} You can switch up the sweetener if you want. Maple syrup works well. It adds a nice flavor. Brown sugar is another option. Both give the carrots a rich taste. You can also try different herbs and spices. Thyme or rosemary can add depth. They pair well with the orange flavor. A pinch of ginger can bring a spicy kick. Experiment to find what you like best! Want to make this dish vegan? Simply swap honey for agave syrup. It gives the same sweetness without the honey. If you need a gluten-free option, there’s good news! The recipe is naturally gluten-free. Just make sure all ingredients are gluten-free. This way, everyone can enjoy them! Get creative with your carrots! You can add other veggies for color and taste. Try green beans or peas. They blend well with the orange glaze. For family gatherings or holiday dinners, serve these carrots in a nice bowl. Add some extra parsley on top for a pop of green. You can even put them on a large platter with other sides. This makes your table look festive and inviting! To store leftover orange glazed carrots, place them in an airtight container. This keeps them fresh. You can refrigerate them for up to four days. If you want to keep them longer, freezing is an option. When reheating, avoid losing texture. You can warm them on the stove over low heat. Stir gently to keep the glaze intact. Aim for a temperature of 165°F for best results. This ensures they are safe to eat and delicious. You can freeze orange glazed carrots, but they may lose some texture. To freeze, place them in a freezer-safe bag. Remove as much air as possible. When ready to eat, defrost in the fridge overnight. Reheat them gently on the stove or in the microwave. This method helps maintain flavor and quality. To balance the sweetness, cut back on honey. You can also add a splash of vinegar, like apple cider vinegar. This will bring a nice tang to the dish. Another idea is to add spices like black pepper or cayenne pepper. They can help cut through the sweetness and give the dish more depth. Yes, you can use frozen carrots! They are handy and save time. Frozen carrots are often blanched, so they cook quicker than fresh ones. Keep in mind they may be softer. If you prefer a firmer bite, reduce the cooking time. Presentation matters! Use a white serving dish for contrast. Arrange the carrots in a circular pattern for a nice look. Sprinkle fresh parsley on top for color. This adds a pop of green and makes the dish more inviting. You can prepare them a day before. Just cook the carrots and glaze them. Then, store them in an airtight container in the fridge. When ready to serve, reheat them on the stove. Add a splash of water to prevent them from drying out. Absolutely! Orange glazed carrots are great for meal prep. They keep well in the fridge and taste good reheated. You can pair them with many dishes, making them a versatile side. Just store them in single-serving containers for easy access during the week. Orange glazed carrots are a simple, tasty dish. You learned about the key ingredients, like carrots and orange juice. I shared step-by-step instructions for prepping, cooking, and glazing. Tips helped you avoid common mistakes and achieve the perfect flavor. You can also explore variations to suit your taste or diet. These carrots are great for any meal. Their vibrant color and sweet taste can brighten up your table. Enjoy making and serving this dish at gatherings or weeknight dinners. Happy cooking!

Flavorful Orange Glazed Carrots Simple and Tasty Recipe

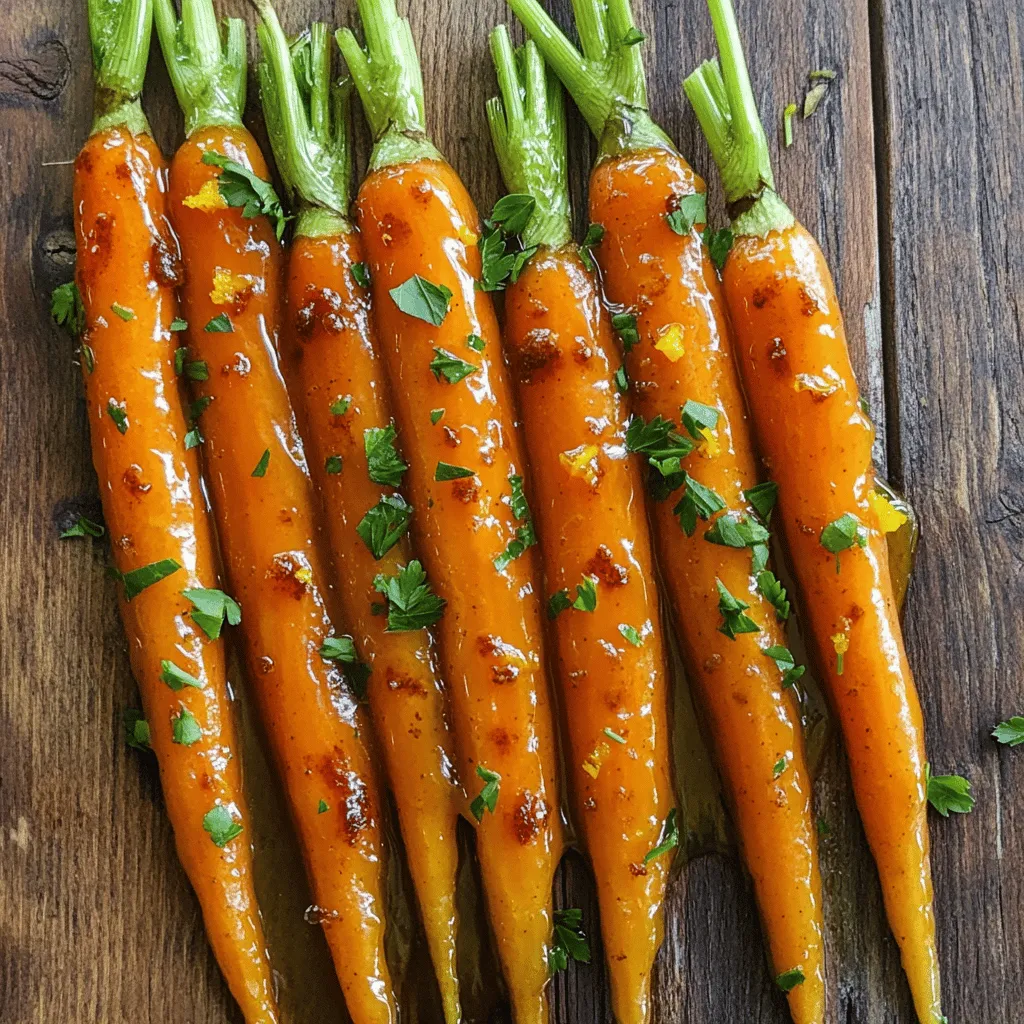
Looking for a side dish that bursts with flavor and is easy to make? Try my delicious orange glazed carrots!

Older posts
Newer posts
← Previous Page1 … Page95 Page96 Page97 … Page122 Next →

dsad

© 2025 Southern Dishes • Built with GeneratePress

Our Policies

  • Copyright Policy
  • Cookie Policy
  • GDPR Policy
  • Privacy Policy
  • Disclaimer
  • Terms Of Use

More Information

  • Home
  • About
  • Contact
  • Appetizers
  • Dessert
  • Dinner
  • Drinks
©2025, Southern Dishes About Back To Top