Skip to content
DisclaimerTerms Of UseGDPR PolicyCookie Policy

Southern Dishes

  • Home
  • Drinks
  • Appetizers
  • Dinner
  • Dessert
  • About
  • Contact
  • Privacy Policy
DisclaimerTerms Of UseGDPR PolicyCookie Policy

Isabella

- 1 can (15 oz) chickpeas - 2 tablespoons olive oil - 4 cups mixed salad greens - Cherry tomatoes, cucumber, and red onion - Tahini and lemon juice for dressing - Paprika, garlic powder, salt, and pepper - Fresh parsley for garnish The key to this salad lies in the ingredients. First, we use chickpeas for protein. They bring a nice texture and flavor. Rinsing and draining them well helps achieve a great crisp. Next, the olive oil adds richness. It also helps the chickpeas season well. Toss them with spices like paprika and garlic powder for a flavorful kick. Mixed salad greens are essential for freshness. I like a mix of spinach, arugula, and kale. They add crunch and vibrant color. Cherry tomatoes and cucumber add juiciness and crunch. Red onion gives a nice bite. For the dressing, tahini and lemon juice create a creamy texture. Finally, don't forget the garnishes! Fresh parsley brightens the salad. It also adds a fresh herbal note. You can find the full recipe to make this Crispy Chickpea Salad easily at home. First, rinse and drain your can of chickpeas. This step is key. It removes the thick liquid that can make your salad soggy. Next, spread the chickpeas on a paper towel. Pat them dry to get rid of extra moisture. This helps them crisp up nicely later. Now, in a bowl, add 2 tablespoons of olive oil. Pour in 1 teaspoon of paprika, 1/2 teaspoon of garlic powder, and salt and pepper to taste. Toss the chickpeas in this mix until they are fully coated. This seasoning gives them a great flavor. Preheat your oven to 400°F (200°C). This high heat helps the chickpeas turn crispy. Spread the seasoned chickpeas on a baking sheet lined with parchment paper. Make sure they are in a single layer for even cooking. Bake the chickpeas for 25-30 minutes. Check them halfway through and shake the pan. This helps them cook evenly and get crispy all over. You want them golden brown and crunchy. While the chickpeas bake, prepare your salad. In a large bowl, combine 4 cups of mixed greens with cherry tomatoes, diced cucumber, and thinly sliced red onion. This mix adds color and crunch. In a small bowl, whisk together 2 tablespoons of tahini and 1 tablespoon of lemon juice. Add a splash of water to thin the dressing. Keep whisking until you reach your desired consistency. If it’s too thick, just add more water. Once the chickpeas are done, let them cool for a few minutes. Then, add them to the salad bowl. Top it all with sliced avocado and drizzle the tahini dressing over everything. Toss gently to mix. Be careful not to mash the avocado. And that’s it! You now have a fresh and flavorful crispy chickpea salad. For the full recipe, check out the details provided above! To get crispy chickpeas, you need to start with dry ones. After rinsing them, dry them well. You can use a paper towel or let them air dry. This step is key! If the chickpeas have moisture, they won’t crisp up nicely. For baking, I recommend preheating your oven to 400°F (200°C). This high heat helps them turn golden brown. Bake the chickpeas for about 25-30 minutes. Don’t forget to shake the pan halfway through. This ensures even cooking and crispiness. This salad shines with fresh ingredients. I love serving it with crusty bread or pita chips. These pair well with the salad’s flavors. If you want a heartier meal, try adding grilled chicken or shrimp. They complement the crispy chickpeas perfectly. Chickpeas are a powerhouse of nutrition. They are high in protein and fiber. This makes them great for your health. The mixed greens add vitamins and minerals. You get a good dose of iron and calcium too. A serving of this salad has about 350 calories. This includes all the fresh veggies and the tahini dressing. It's a filling meal without being heavy. Enjoying this salad is a great way to eat healthy! {{image_2}} You can easily add protein to your crispy chickpea salad. Consider grilled chicken, tofu, or feta cheese. Grilled chicken offers a savory flavor that pairs well with chickpeas. Tofu gives a nice plant-based option that absorbs flavors. Feta adds a tangy creaminess that enhances taste. Including more protein makes this salad filling and nutritious. It turns a light dish into a complete meal. To brighten up the salad, think about adding spices or herbs. Cumin or coriander can give a warm touch. Fresh herbs like basil or mint add a fresh taste. You can also play with dressings. Try a zesty vinaigrette for a tangy twist. Or use yogurt-based dressings for creaminess. Each option can change the flavor profile, keeping your salad exciting. Adjusting your salad for the seasons keeps it fresh. In spring, add asparagus or radishes for crunch. Summer is perfect for ripe peaches or berries. In fall, swap in roasted sweet potatoes or squash. Winter greens like kale can add hearty texture. These changes not only enhance taste but also make use of fresh, local produce. You can enjoy this salad all year long by mixing it up! For the full recipe, visit the Crispy Chickpea Delight Salad 🥗 section. To keep your crispy chickpea salad fresh, store it in an airtight container. This helps lock in flavors and moisture. You can use glass or plastic containers with tight lids. If you plan to eat it later, keep the chickpeas separate. This prevents them from getting soggy. To reheat chickpeas without losing their crunch, use an oven. Set it to 350°F (175°C) and spread the chickpeas on a baking sheet. Heat them for about 10 minutes. Avoid using the microwave, as it may make them soft. Always store the dressing separately. This keeps your salad fresh and tasty. Your salad will stay good in the fridge for about 2-3 days. The chickpeas can last a bit longer, around 5 days. Look for signs of spoilage like a bad smell or slimy texture. If you see any of these signs, it's best to toss it out. Enjoy your crispy chickpea salad while it's fresh! For the full recipe, check out the Crispy Chickpea Delight Salad. Yes, this salad is almost vegan already! To make it fully vegan, you can use a few simple swaps. First, ensure you use a plant-based dressing instead of any dairy-based options. The tahini in the recipe is vegan-friendly, but if you add cheese, skip it or choose a plant-based one. The chickpeas, greens, and veggies are all vegan. This means you can enjoy this fresh and flavorful dish without any animal products. If you have an allergy to sesame or just don’t have tahini, don’t worry! You can use sunflower seed butter or almond butter instead. Both options give a creamy texture. You can also blend cashews with water until smooth. This offers a similar taste and feel. Each of these substitutes works well in the dressing. Just adjust the amount of lemon juice to keep the balance. This salad is naturally gluten-free! The main ingredients, like chickpeas and fresh vegetables, do not contain gluten. Just make sure to check any packaged items you use, like tahini, to ensure they are gluten-free. If you want to add grain, quinoa is a great choice. It’s gluten-free and adds a nice texture. Enjoy this salad without worry about gluten! For the full recipe, visit [Full Recipe]. This blog post gave you a complete guide to a crispy chickpea salad. You learned the main ingredients needed, how to prepare and bake chickpeas, and tips for achieving the perfect crunch. We also discussed variations for taste and nutrition, plus how to store leftovers properly. Remember, this salad is not only delicious but also healthy. Feel free to customize it to fit your preferences. Enjoy creating your own version of this dish!

Crispy Chickpea Salad Fresh and Flavorful Delight

Looking to add a fresh twist to your meals? This Crispy Chickpea Salad packs a punch of flavors and textures

When you want to make stuffed acorn squash, you need fresh and tasty ingredients. Here’s what you will need: - 2 medium acorn squashes - 1 cup quinoa, rinsed - 2 cups vegetable broth - 1 cup black beans, drained and rinsed - 1 cup corn, fresh or frozen - 1 red bell pepper, diced - 1 small onion, chopped - 2 cloves garlic, minced - 1 teaspoon cumin - 1 teaspoon smoked paprika - Salt and pepper to taste - 2 tablespoons olive oil - Fresh cilantro, for garnish - Optional: crumbled feta or goat cheese for topping Using high-quality ingredients makes a big difference. The squash offers a sweet and nutty flavor, while the quinoa adds protein and texture. The black beans and corn bring color and a hearty feel. This combination creates a dish that is not only healthy but also very delicious. You can find the full recipe for this delightful dish in the section above. First, preheat your oven to 400°F (200°C). This temperature helps the squash cook evenly and become tender. Next, take your acorn squashes and cut them in half from stem to base. Use a spoon to scoop out the seeds, creating a nice bowl for the filling. Brush the insides with olive oil, then sprinkle with salt and pepper. This simple seasoning brings out the natural sweetness of the squash. Place the halves cut-side down on a baking sheet. Roast them in the oven for 25-30 minutes, or until they are tender when pierced with a fork. While the squash roasts, it’s time to cook the quinoa. In a medium saucepan, combine 1 cup of rinsed quinoa with 2 cups of vegetable broth. Using broth instead of water adds great flavor. Bring this mixture to a boil over medium heat. Once it boils, reduce the heat to low, cover the pot, and let it simmer for about 15 minutes. When done, the quinoa should be fluffy, and all the broth will be absorbed. This step is crucial for texture. Now, let’s add depth to our dish with some sautéed veggies. In a large skillet, heat 2 tablespoons of olive oil over medium heat. Add the chopped onion and minced garlic. Sauté them until the onions turn translucent, which takes about 3-4 minutes. This brings out their sweet flavor. Next, add in the diced red bell pepper, corn, and black beans. Sprinkle in the cumin, smoked paprika, salt, and pepper. Cook this mixture for another 5 minutes, stirring occasionally. Once everything is tender, mix in the cooked quinoa. Stir until all the veggies and quinoa are well combined. This blend of flavors makes the stuffing truly delightful. For the full recipe, check out Autumn Bliss: Stuffed Acorn Squash. To get the best texture from your acorn squash, roast it for 25 to 30 minutes at 400°F. This time allows the squash to become tender and sweet. You want it soft enough to scoop out the flesh easily. For fluffy quinoa, you need to rinse it first. This step removes excess starch. Then, cook it in vegetable broth instead of water. Bring the broth to a boil, then reduce heat and cover. Let it simmer for about 15 minutes. When done, fluff it with a fork for that perfect texture. Herbs and spices can elevate your dish. Consider using: - Fresh thyme - Chopped sage - A pinch of red pepper flakes for heat These flavors mix well with the sweet acorn squash. For cheese, crumbled feta or goat cheese adds creaminess. Sprinkle it on top just before the last bake. It melts nicely and adds a wonderful tang. For an attractive display, serve the stuffed acorn squashes on a rustic wooden board. Drizzle some extra olive oil over them. A sprinkle of fresh cilantro adds a bright touch. You can also pair them with a colorful salad for contrast. If you want to explore the full process, check out the Full Recipe for detailed steps and tips. {{image_2}} You can make stuffed acorn squash even more fun! Try different veggies for the filling. Sweet potatoes, spinach, or mushrooms work great. You can also mix in nuts like walnuts or pecans. They add crunch and flavor. If you want a different grain, use brown rice or farro instead of quinoa. Each grain gives a unique taste. Want to add some protein? You can include cooked meats like chicken or turkey. Shredded beef also pairs well with the squash. If you prefer plant-based options, consider adding lentils or chickpeas. They are healthy and fill you up. Just mix them in with the veggies for a tasty boost. Spice things up with global ingredients! Try adding curry powder for an Indian twist. You can also use taco seasoning for a Mexican vibe. If you love Mediterranean flavors, add olives and sun-dried tomatoes. Each option brings a new taste and makes your stuffed acorn squash exciting. For the full recipe, check out the Autumn Bliss: Stuffed Acorn Squash. After enjoying your stuffed acorn squash, you want to store leftovers right. Place any unused squash in an airtight container. Keep it in the fridge for up to four days. If you want to save it longer, freeze the filling separately. To freeze, let the filling cool completely. Then, pack it in a freezer-safe bag or container. It can last for up to three months. When it’s time to enjoy your leftovers, reheating is key. For the best results, use an oven. Preheat it to 350°F (175°C). Place the stuffed squash in a baking dish. Cover it with foil to keep moisture in. Heat for about 20 minutes or until warmed through. If you prefer a microwave, heat it in short bursts. This way, you keep the squash from getting soggy. Enjoy your flavorful delight just as you made it! For the full recipe, check out the detailed cooking steps. Yes, you can prep stuffed acorn squash in advance. First, cook the quinoa and sauté the veggies. Then, fill the acorn squash halves but do not bake them yet. Store the stuffed squashes in the fridge for up to two days. When ready to serve, just bake them at 400°F (200°C) for about 20-25 minutes. To check if your acorn squash is done, look for a golden-brown color on the outside. It should feel soft when you poke it with a fork. If the fork goes in easily, your squash is ready. You can also gently press the skin; it should give a little. Stuffed acorn squash pairs well with several side dishes. Consider serving a simple green salad with a light vinaigrette. You can also enjoy it with roasted Brussels sprouts or a warm grain salad. For a heartier option, serve it alongside garlic bread or a creamy soup. These options complement the flavors without overwhelming them. This recipe for stuffed acorn squash brings simple, healthy ingredients together. You learned about roasting squash, cooking quinoa, and sautéing veggies. We also discussed tips for texture, flavor boosts, and attractive serving ideas. With so many variations and storage tips, you can customize this dish to fit your taste and lifestyle. Enjoy trying different spins on this recipe, and don’t forget to explore new flavors. This dish is both fun to make and delicious to eat.

Stuffed Acorn Squash with Quinoa Flavorful Delight

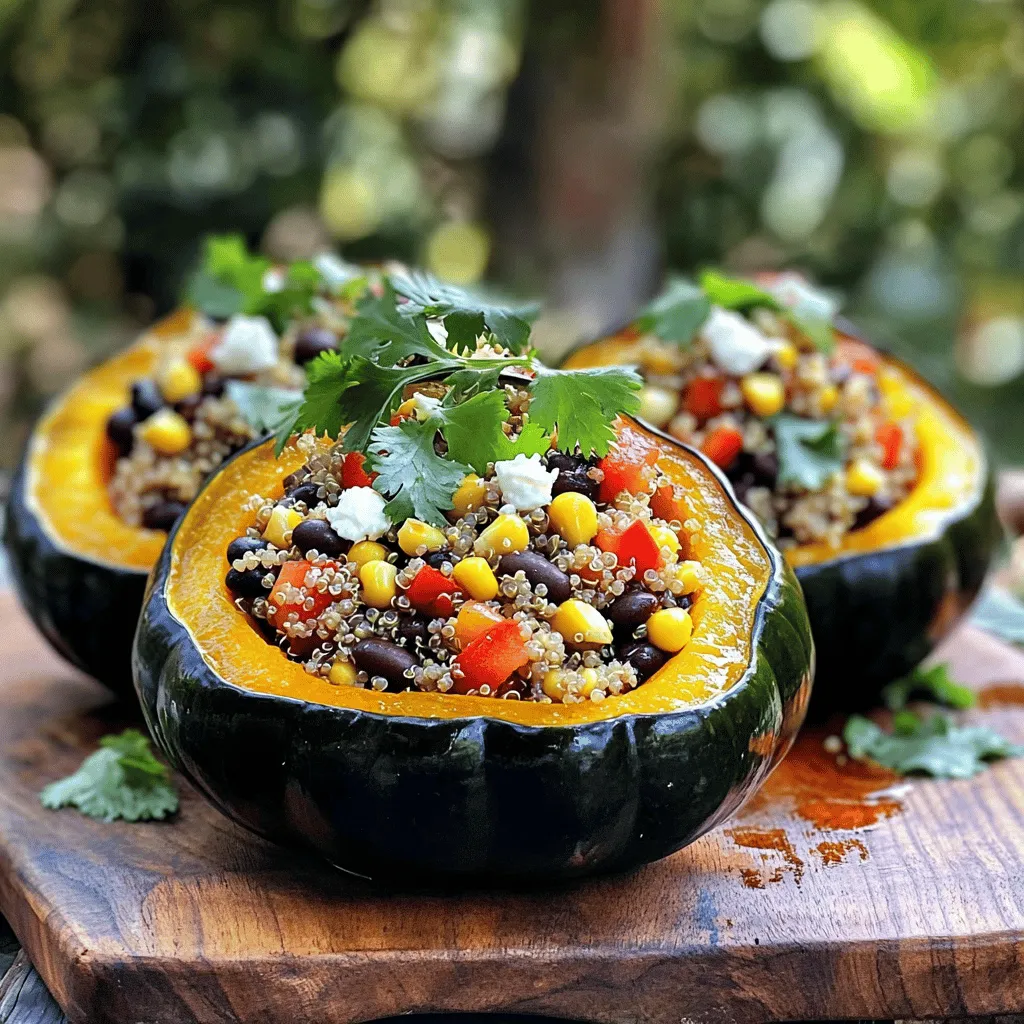
Looking for a tasty and healthy meal? Stuffed Acorn Squash with Quinoa packs a flavorful punch! This dish combines wholesome

- 1 ½ cups all-purpose flour - 1/2 cup granulated sugar - 2 teaspoons baking powder - 1/2 teaspoon baking soda - 1/4 teaspoon salt - 1/4 cup poppy seeds - 1 cup buttermilk - 1/4 cup vegetable oil - 2 large eggs - Zest of 1 lemon - Juice of 1 lemon - 1 teaspoon vanilla extract These ingredients create a bright and flavorful muffin. Each one plays a key role. The flour gives structure. The sugar adds sweetness. Baking powder and soda help the muffins rise. Salt enhances flavors. Poppy seeds add a nice crunch and visual appeal. If you want dairy-free muffins, try almond milk or oat milk instead of buttermilk. For a gluten-free option, use a gluten-free flour mix. This way, you can still enjoy these tasty muffins without worry. Each muffin has about 150 calories, 22 grams of carbs, 6 grams of fat, and 3 grams of protein. These values can help you keep track of your diet. Enjoying a lemon poppy seed muffin can fit in many meal plans. For the full recipe, check the recipe section above. It walks you through each step to make these muffins perfectly. 1. Preheating the oven: Start by preheating your oven to 375°F (190°C). This step is key for even baking. 2. Preparing the muffin tin: Line a muffin tin with paper liners or lightly grease it with non-stick spray. This helps the muffins come out cleanly. 1. Combining dry ingredients: In a large bowl, whisk together 1 ½ cups of all-purpose flour, 1/2 cup of granulated sugar, 2 teaspoons of baking powder, 1/2 teaspoon of baking soda, 1/4 teaspoon of salt, and 1/4 cup of poppy seeds. Mix these ingredients well to ensure they are evenly distributed. 2. Mixing wet ingredients: In another bowl, combine 1 cup of buttermilk, 1/4 cup of vegetable oil, 2 large eggs, the zest of 1 lemon, the juice of 1 lemon, and 1 teaspoon of vanilla extract. Stir until all the wet ingredients blend smoothly. 1. Filling the muffin cups: Pour the wet mixture into the dry ingredients. Gently fold them together until just combined. Fill each muffin cup about 2/3 full with the batter. 2. Baking time and doneness check: Place the muffin tin in the preheated oven. Bake for 18-20 minutes. Check if they are done by inserting a toothpick into the center of a muffin. If it comes out clean, they are ready. Let the muffins cool in the tin for about 5 minutes before moving them to a wire rack. For the complete recipe, refer to the Full Recipe link. To make the best lemon poppy seed muffins, start by mixing wisely. Use a gentle hand when combining wet and dry ingredients. Overmixing makes muffins tough. You want a light and fluffy texture. The batter should be slightly lumpy, and that’s okay! The ideal muffin should be soft and moist. It should rise well and have a golden color. The poppy seeds should add a nice crunch, too. Trust me, you’ll love the balance of flavors. One common mistake is overbaking. Keep an eye on the time. Check your muffins around 18 minutes. Insert a toothpick in the center; it should come out clean. If you bake too long, they will dry out. Another mistake is not preheating the oven. Always preheat your oven to 375°F. This helps your muffins rise properly. A warm oven gives even cooking and a nice crust. Using the right tools helps a lot. Here’s what you need: - Muffin tin - Paper liners or non-stick spray - Large mixing bowls - Whisk for blending - Toothpick for checking doneness With these tools, you can make great muffins every time. Follow the tips, and you’ll impress everyone with your baking skills! For the Full Recipe, check the earlier section. {{image_2}} You can easily mix up the flavors of your lemon poppy seed muffins. Try adding blueberries or raspberries for a fruity twist. Just fold in about a cup of fresh berries into the batter. They add color and taste. You can also use almond extract instead of vanilla. This swap gives a rich, nutty flavor that pairs well with lemon. If you want to make vegan muffins, replace the eggs with flax eggs. Mix one tablespoon of ground flaxseed with three tablespoons of water. Let it sit until it thickens. For low-sugar options, use a sugar substitute like monk fruit or stevia. This keeps the muffins sweet without the extra sugar. You can change your muffins for the holidays, too. Add spices like cinnamon or nutmeg for a warm flavor in fall. For spring, mix in some fresh herbs like basil. These ideas keep your muffins fun and fresh all year. To keep your lemon poppy seed muffins fresh, store them at room temperature. Use an airtight container. This will help them stay soft for about three days. If you want to enjoy them longer, put them in the fridge. However, this may dry them out a bit. For best results, wrap each muffin in plastic wrap before placing them in a container. You can freeze your muffins to save them for later. First, let them cool completely. Then, wrap each muffin tightly in plastic wrap. Place the wrapped muffins in a freezer bag or a container. They will last for up to three months in the freezer. When you're ready to eat one, just take it out and let it thaw at room temperature. To reheat your muffins, use the oven or the microwave. If using the oven, preheat it to 350°F (175°C). Place the muffins on a baking sheet and heat for about 5-10 minutes. This method helps keep them moist. If you're in a hurry, the microwave works too. Heat for 10-15 seconds, but watch them closely to avoid drying out. Enjoy your warm, tasty muffins! To stop muffins from sticking, you have a few options. You can use paper liners in the muffin tin. If you prefer not to use liners, grease the tin well with non-stick spray or butter. Make sure to coat every part of the cup. This creates a barrier that stops sticking. Allow the muffins to cool for a few minutes before removing them from the tin. Yes, you can make these muffins ahead of time! They store well at room temperature for a day or two. If you want to keep them longer, store the muffins in the fridge for up to a week. You can also freeze them for up to three months. Just be sure to wrap them tightly in plastic wrap or use an airtight container. To check if your muffins are done, insert a toothpick into the center of one. If it comes out clean or with a few crumbs, they are ready. If the toothpick has wet batter on it, give them a few more minutes. Keep an eye on them to avoid overbaking. Lemon poppy seed muffins last about two days at room temperature. If stored in the fridge, they can stay fresh for about a week. When frozen, they last up to three months. Just remember to let them cool completely before storing. Absolutely! Fresh lemons are a great choice. They add bright flavor and zest. To use fresh lemons, simply juice them and grate the zest. One medium lemon usually gives you enough juice and zest for this recipe. Fresh lemon juice enhances the taste of your muffins. For the full recipe, check out the detailed section above. You'll find all the steps and ingredients to make these tasty muffins. We covered the key ingredients needed for lemon poppy seed muffins. I shared tips on substitutions and detailed baking steps. You learned ways to ensure perfect muffins and explored tasty variations. Remember, successful baking takes practice. Follow these steps, avoid common errors, and enjoy your delicious muffins. With these insights, you’re ready to create and share delightful treats!

Lemon Poppy Seed Muffins Tasty and Easy Recipe

Lemon poppy seed muffins are a delightful treat you can easily make at home. Their bright, citrusy flavor and soft

- 1 cup rolled oats - 1 cup almond milk (or any milk of choice) - ½ cup canned pumpkin puree - 1 tablespoon chia seeds - 1 tablespoon maple syrup - 1 teaspoon pumpkin spice mix - ¼ teaspoon vanilla extract - Pinch of salt - Optional toppings: chopped nuts, dried cranberries, yogurt, or additional maple syrup You can use different types of milk. Oat milk, soy milk, or coconut milk all work well. If you want a sweetener, try honey or agave nectar. For spice blends, mix cinnamon, nutmeg, and ginger for a tasty twist. Rolled oats are rich in fiber. They help with digestion and keep you full. Pumpkin is great for your skin and packed with vitamins. Chia seeds add extra fiber and healthy fats. They also help with hydration as they absorb liquid. This dish is not only tasty but also good for your body. You will feel great after eating it! - Combine all ingredients in a bowl. - Stir until creamy consistency is achieved. For this recipe, I first take a medium bowl and add rolled oats, almond milk, and pumpkin puree. Next, I mix in chia seeds, maple syrup, pumpkin spice, vanilla extract, and a pinch of salt. The fun part is stirring it all together. I make sure everything blends well. You want a smooth and creamy texture. - Transfer to jars or containers. - Refrigerate overnight. Once the mixture is ready, I divide it into jars or containers with lids. I leave a little space at the top for toppings later. Then, I seal the jars and place them in the fridge overnight. This helps the oats soak up the flavors and get soft. - How to add toppings. - Recommendations for serving. In the morning, I stir the oats again to mix things up. Then, I love to add toppings for extra flavor. Chopped nuts, dried cranberries, and yogurt work great. A drizzle of maple syrup makes it even sweeter. You can enjoy your pumpkin spice overnight oats cold or heat them up in the microwave. They are a delicious and easy way to start the day! For the full recipe, check out the section above. You can prepare pumpkin spice overnight oats in advance. This dish is great for busy mornings. Best practices for meal prep include making a few jars at once. You can store them in the fridge for up to five days. This way, you always have a healthy meal ready to go. To get the right texture, adjust the liquid amounts. If you like thicker oats, use less almond milk. For creamier oats, add a splash more milk. You can also add a bit of yogurt to make them extra smooth. To make your oats even better, try adding nuts or fruits. Walnuts, pecans, or sliced bananas work well. You can also mix in different spices. Try adding a bit of nutmeg or cardamom for a twist. This keeps your oats exciting and full of flavor. You can find the full recipe for these delicious oats above. {{image_2}} You can mix things up with your pumpkin spice overnight oats. - Chocolate pumpkin spice oats: Add 2 tablespoons of cocoa powder. This gives a rich taste. The chocolate pairs well with pumpkin spice. It’s a fun twist you will love. - Apple cinnamon variation: Swap the pumpkin for ½ cup of unsweetened applesauce. Add 1 teaspoon of cinnamon. This creates a warm, cozy flavor. It’s perfect for fall mornings. You can adjust the recipe to fit your needs. - Vegan and gluten-free options: Use almond milk or oat milk for a vegan choice. Ensure the oats are certified gluten-free. This way, everyone can enjoy this dish. - Low-sugar alternatives: Replace maple syrup with stevia or erythritol. This helps cut sugar without losing taste. Adjust the amount to suit your sweetness level. Make your oats reflect the season with simple changes. - Using seasonal fruits as toppings: In spring, try fresh berries. In summer, use sliced peaches or cherries. In winter, top with pomegranate or oranges. Each season brings new flavors. - Adjusting spices with the seasons: Use nutmeg and cinnamon in fall. In spring, try cardamom or ginger. Changing spices keeps your oats exciting and fresh. For the complete recipe, check out the Full Recipe. To keep your pumpkin spice overnight oats fresh, use airtight containers. Glass jars work well because they don’t absorb flavors. You can also use plastic containers with tight lids. Store them in the fridge right after making them. This keeps them cool and tasty. You can freeze overnight oats if you want to make them last longer. To freeze, place the oats in freezer-safe containers. Leave some space at the top for expansion. When you want to eat them, take the oats out and let them thaw overnight in the fridge. This way, they stay creamy and delicious. In the fridge, pumpkin spice overnight oats last for about three to five days. If you see any mold or off smells, it's best to toss them. Fresh oats will smell sweet and pumpkiny, so trust your senses. Enjoy them while they are at their best! To prepare pumpkin spice overnight oats, follow these simple steps: 1. Gather your ingredients: rolled oats, almond milk, pumpkin puree, chia seeds, maple syrup, pumpkin spice, vanilla, and salt. 2. In a bowl, mix the rolled oats and almond milk. 3. Add the pumpkin puree, chia seeds, maple syrup, pumpkin spice, vanilla, and salt to the bowl. 4. Stir until everything combines into a creamy mix. 5. Pour the mixture into jars or containers, leaving space for toppings. 6. Seal the jars and put them in the fridge overnight. 7. When you are ready to eat, stir and add your favorite toppings. This method makes it easy to enjoy a tasty breakfast. For the full recipe, check out the details above. Yes, you can use water instead of milk. However, using water may make the oats less creamy. Milk adds richness and flavor. You can also try different types of milk. Almond milk, soy milk, or oat milk are great choices. They can give your oats a unique taste. Just remember, if you use water, you may want to add more flavor with extra spices or sweeteners. Soaking the oats is key to the texture. You should soak them for at least four hours. This allows the oats to absorb the liquid. However, soaking overnight gives the best results. The oats will be soft and ready to eat in the morning. If you are short on time, four hours will still work. Just plan ahead to enjoy a delicious breakfast! Pumpkin spice overnight oats are simple and fun to make. You need just a few ingredients, easy steps, and simple storage tips. I shared different variations and substitutes that keep your oats tasty. Plus, I highlighted their health benefits. Feel free to explore flavors and tweak recipes to fit your taste. Enjoying these oats can be a delicious way to mix breakfast and nutrition. Now, go ahead and get creative with your pumpkin spice overnight oats!

Pumpkin Spice Overnight Oats Tasty and Nutritious Dish

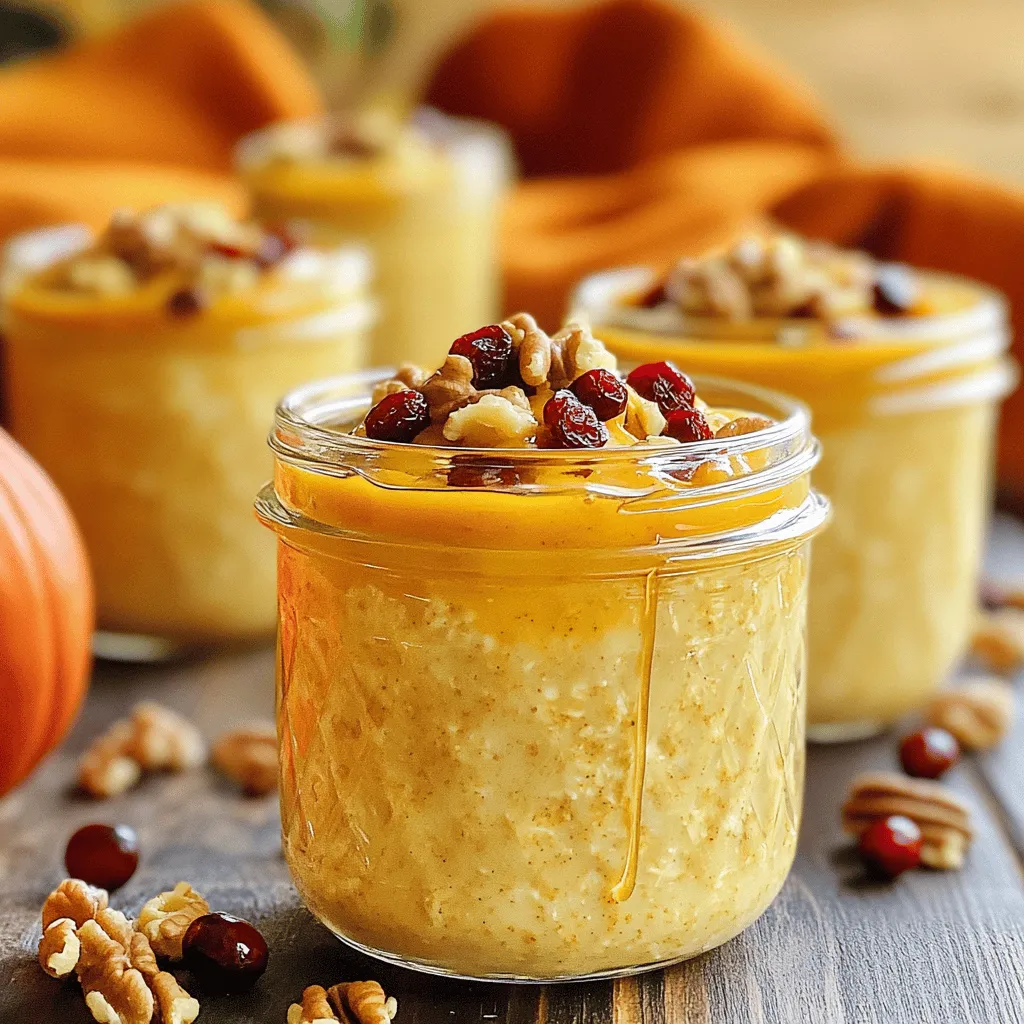
Are you ready to kick-start your mornings with a delicious twist? I’ve got the perfect recipe for you: Pumpkin Spice

To make a tasty zucchini noodle stir fry, you need a few key items. Here’s a list of what I use: - 2 medium zucchinis, spiralized into noodles - 1 red bell pepper, sliced - 1 cup snap peas - 1 carrot, julienned - 1/2 onion, thinly sliced - 3 cloves garlic, minced - 1 tablespoon ginger, grated - 3 tablespoons soy sauce (or tamari for gluten-free) - 1 tablespoon sesame oil - 1 tablespoon olive oil - 1 tablespoon sesame seeds - 2 green onions, chopped, for garnish - Salt and pepper, to taste These ingredients work together to give you bright colors and bold flavors. The zucchini noodles provide a nice base, while the other veggies add crunch and sweetness. You can also add more to your stir fry for extra flavor. Here are some ideas: - Mushrooms for an earthy taste - Broccoli florets for added crunch - Spinach or kale for more greens - Cooked chicken, shrimp, or tofu for protein - Chili flakes for some heat Feel free to mix and match according to your taste. These add-ins can make your dish even more fun and flavorful! I prefer using fresh ingredients whenever possible. Fresh veggies have better flavor and texture. However, frozen vegetables can save time and are convenient. If you choose frozen, make sure to thaw and drain them first. This helps keep your stir fry from getting soggy. You can still make a great dish with frozen veggies, but fresh ones will shine more in this recipe. For the full recipe, you can check the main article. Enjoy your cooking! To start, you need zucchini noodles. I use a spiralizer for this. It makes perfect, thin noodles. If you don’t have one, a vegetable peeler works too. Just peel long strips. Aim for about two medium zucchinis. This will give you enough noodles for four servings. Now, let’s cook! Heat olive oil in a large skillet over medium heat. Add the thinly sliced onion and sauté for two minutes. The onion should look a bit clear. Then, toss in minced garlic and grated ginger. Stir them for about 30 seconds until they smell so good! Next, add red bell pepper, snap peas, and carrot. Stir-fry the veggies for 3 to 4 minutes. They should soften but still be a bit crisp. After that, add your zucchini noodles, soy sauce, and sesame oil. Mix everything well! Cook for 2 to 3 minutes more. You want those noodles warm but not mushy. Keep them al dente for the best bite. Once everything is mixed, taste it! Add salt and pepper if you want. A sprinkle of sesame seeds makes it look good too. Serve your stir fry in shallow bowls. Garnish with chopped green onions for color. Want a fresh twist? Add a lime wedge on the side. For the full recipe, check out the recipe above. Enjoy your tasty and easy zucchini noodle stir fry! When making zucchini noodle stir fry, some mistakes can ruin the dish. One big mistake is overcooking the zucchini noodles. Zucchini cooks fast. If you cook them too long, they become mushy. Instead, aim for a quick stir-fry. This keeps them firm and tasty. Another mistake is cutting your veggies unevenly. If you cut them in different sizes, they won’t cook at the same rate. Make sure all the pieces are similar in size. This way, they cook evenly and taste great. Different vegetables need different cooking times. For soft veggies like bell peppers and snap peas, cook for about 3 to 4 minutes. They should be tender but still crisp. For harder veggies like carrots, you may need to cook them a minute or two longer. If you add protein like chicken or shrimp, make sure it cooks fully. Use a meat thermometer. Chicken should reach 165°F, while shrimp should turn pink. Always adjust your cooking time based on what you add. To boost flavor, consider adding a splash of rice vinegar or lime juice. This gives a tangy kick. You can also add a teaspoon of chili paste for heat. If you like nuts, sprinkle in some chopped peanuts or cashews for crunch. For depth, add a bit of sesame oil. It gives a lovely nutty taste. Experiment with fresh herbs, like basil or cilantro, for freshness. These secret ingredients can take your stir fry from good to great. For the complete dish, check the Full Recipe. Enjoy cooking! {{image_2}} You can easily add protein to your zucchini noodle stir fry. Chicken is a great option. Dice it into small pieces and cook it first. This way, the chicken stays juicy. If you prefer plant-based options, try tofu. Firm tofu works best. Press it to remove extra water, then cube it. Sauté it until golden brown. Shrimp is another tasty choice. Add shrimp to the skillet after the veggies. Cook until they turn pink. Each protein adds a unique flavor, making your dish even better. This dish is very flexible. You can make it vegetarian or vegan without losing flavor. Simply omit any animal protein. You can also add more vegetables. Try adding broccoli, mushrooms, or bell peppers. These give great texture and nutrition. For a vegan twist, replace soy sauce with tamari or coconut aminos. Both options keep it tasty and gluten-free. Don’t forget to check your ingredients for any hidden animal products. If you like heat, add some spice! You can use red pepper flakes or sriracha. Both bring a kick to the dish. Start with a small amount. You can always add more if you want it spicier. Another great idea is to use fresh chili peppers. Slice them thin and toss them in with the garlic. This gives the dish a fresh, spicy flavor. Experiment with different spices to find your perfect blend. Each addition can make your stir fry unique and exciting. For the full recipe, check out the details above. When you have leftover zucchini noodle stir fry, store it in an airtight container. This keeps it fresh. Place the stir fry in the fridge. It can last for 3 to 4 days. Make sure it's cooled before sealing it. This helps avoid moisture build-up, which can make it soggy. Reheating zucchini noodles is easy. Use a skillet on medium heat. Add a splash of olive oil. This helps prevent sticking. Toss in the stir fry and heat for about 3 to 5 minutes. Stir often to ensure even warming. You can also microwave it. Just cover it loosely and heat in 30-second intervals, stirring in between. Freezing zucchini noodles is a bit different. You can freeze them, but it's best to blanch first. Boil the noodles for 1 to 2 minutes. Then, cool them in ice water. This helps keep their texture. Drain and pat them dry. Place in a freezer bag, removing as much air as possible. They can last for up to 3 months in the freezer. When you're ready to use them, just thaw and cook as you like. For the full recipe of zucchini noodle stir fry, check back to the main content. The best way to spiralize zucchini is to use a spiralizer. It turns zucchini into fun noodles. You can also use a vegetable peeler for thin strips if you lack a spiralizer. Just hold the zucchini firmly and peel it into long, thin pieces. This technique gives you a great base for stir-fry. Yes, you can use other noodles if you like. Rice noodles, soba noodles, or even egg noodles work well. Just remember that using regular noodles will change the dish’s flavor and texture. You can mix and match to find what you love best. For a healthier option, try whole grain or veggie-based noodles. To keep zucchini noodles from getting soggy, you must remove excess water. After spiralizing, sprinkle salt on the noodles and let them sit for about 10 minutes. This draws out moisture. Pat them dry with a paper towel before cooking. Cook them briefly in the stir-fry to maintain a firm texture. Follow the Full Recipe for the best results. In this guide, we explored the essential and optional ingredients for zucchini noodle stir fry. I shared step-by-step instructions to prepare and cook your dish. We also discussed tips to avoid common mistakes and ways to add protein for variety. Finally, you learned how to store and reheat your leftovers effectively. Cooking with zucchini noodles can be fun and tasty. With these tips, you can create a dish that impresses and satisfies. Enjoy your delicious meal!

Zucchini Noodle Stir Fry Flavorful and Easy Recipe

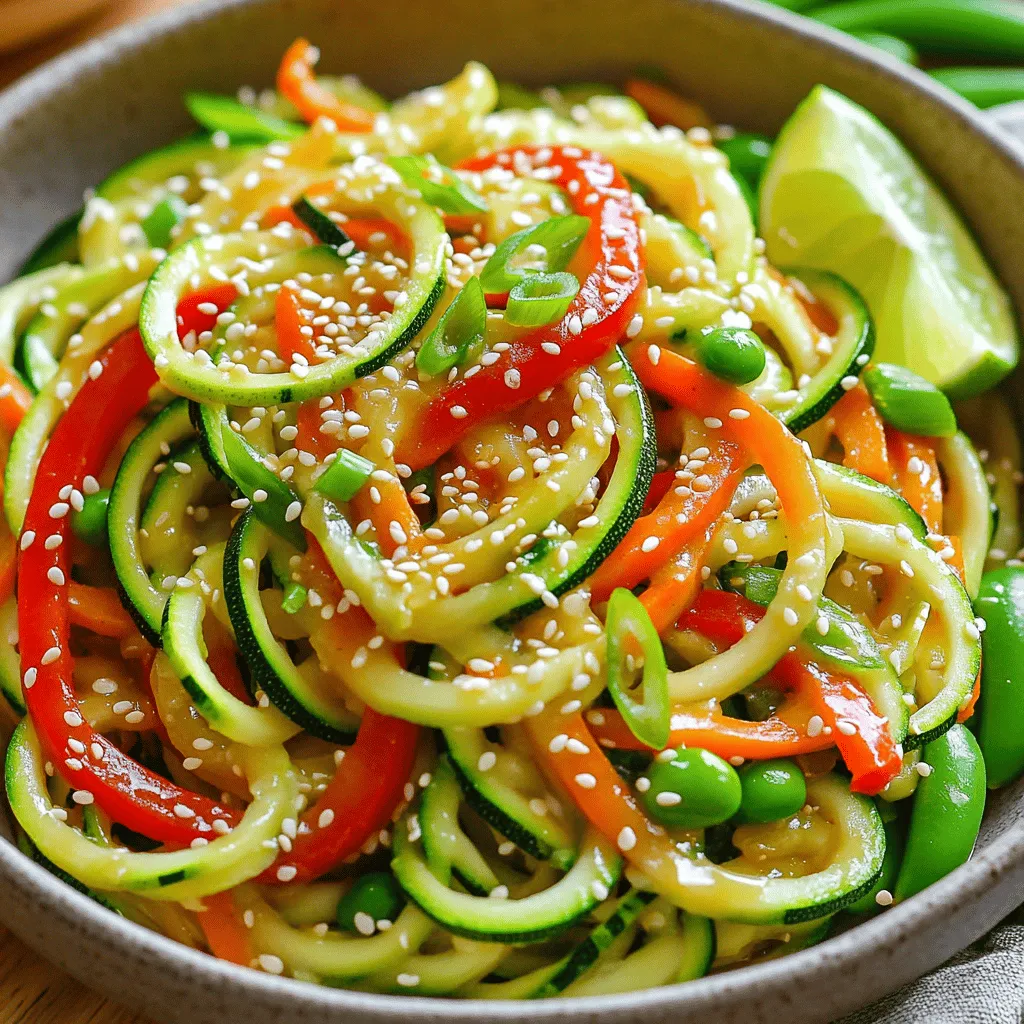
Are you ready to enjoy a flavorful meal that’s quick and fun to make? My Zucchini Noodle Stir Fry recipe

To make this easy spinach artichoke dip, you need a few key items. Here’s the list: - 1 cup fresh spinach, chopped - 1 cup canned artichoke hearts, drained and chopped - 1 cup cream cheese, softened - 1/2 cup sour cream - 1/2 cup mayonnaise - 1 cup shredded mozzarella cheese - 1/4 cup grated Parmesan cheese - 1 teaspoon garlic powder - 1/2 teaspoon onion powder - Salt and pepper, to taste These ingredients create a creamy and flavorful dip that everyone will love. You can change the dip based on your taste. Here are some fun ideas: - Add chopped jalapeños for some heat. - Mix in some cooked and crumbled bacon for a smoky taste. - Use different cheeses like cheddar or feta for a twist. - Try adding herbs like dill or parsley for freshness. Feel free to get creative and make it your own! To whip up this dip, you’ll need some basic tools. Here’s what you’ll want to have: - A large mixing bowl for combining ingredients. - A baking dish for the oven. - A spatula or spoon for mixing. - An oven mitt for safe handling. Having these tools will make your cooking process smooth and fun. For the full recipe, check out the details above! First, you need to gather your ingredients. Here’s what you’ll need: - 1 cup fresh spinach, chopped - 1 cup canned artichoke hearts, drained and chopped - 1 cup cream cheese, softened - 1/2 cup sour cream - 1/2 cup mayonnaise - 1 cup shredded mozzarella cheese - 1/4 cup grated Parmesan cheese - 1 teaspoon garlic powder - 1/2 teaspoon onion powder - Salt and pepper, to taste - Tortilla chips or sliced veggies, for serving Make sure your cream cheese is soft. This helps it mix well. In a large bowl, mix the cream cheese, sour cream, and mayonnaise. Use a fork or spoon to blend until smooth. Then, add in the chopped spinach and artichokes. Mix it well so every bite has flavor. Next, sprinkle in the mozzarella, Parmesan, garlic powder, onion powder, and season with salt and pepper. Stir again until everything is combined. Now, transfer the dip into a baking dish. Spread it out evenly. Preheat your oven to 350°F (175°C) and bake the dip for 20-25 minutes. You want it hot, bubbly, and golden on top. After baking, let it cool for a bit. Serve warm with tortilla chips or fresh veggies. For an extra touch, sprinkle some Parmesan or fresh herbs on top. Enjoy your creamy spinach artichoke delight! For the full recipe, check out the section above. To make the best spinach artichoke dip, focus on freshness. Use fresh spinach when possible. This gives your dip a bright taste. Drain your artichokes well to avoid a watery mix. Mix the cream cheese until it is smooth. This helps everything blend well. Bake it until the top is golden. This adds a nice crunch. Serve it warm for the best flavor. Many people make a few common mistakes. Do not overcook the dip. It should be hot but not dry. Be careful with the salt. You can add more, but taste first. Using low-quality cheese will hurt the flavor. Stick to good brands. If you forget to drain the artichokes, your dip may be soggy. Spices can make your dip shine. Garlic powder adds a great kick. Onion powder gives depth. Try a pinch of cayenne for heat. A little lemon juice brightens the flavor. Fresh herbs like basil or parsley can also add freshness. Mix these in before baking for a tasty twist. For the full recipe, check out the link provided. {{image_2}} You can make a low-fat spinach artichoke dip. Use low-fat cream cheese and Greek yogurt. This swap keeps the creaminess while cutting calories. You can also reduce cheese amounts. Use simple seasonings to add flavor without extra fat. This way, you still enjoy a tasty dip without guilt. To make a vegan version, replace cream cheese with cashew cream or tofu. Use coconut yogurt instead of sour cream. For cheese, try nutritional yeast for a cheesy flavor. This dip stays creamy and delicious. You can add lemon juice for a zesty kick. It's a fun way to enjoy this dish while keeping it plant-based. Cheese lovers can amp up the flavor. Add extra mozzarella or a blend of cheeses. Try pepper jack for a spicy twist or gouda for smokiness. Mixing in cream cheese with feta can give a tangy taste. You can also sprinkle some cheese on top before baking for a bubbly, golden surface. These changes make each bite even more delightful. For the full recipe, check out the Creamy Spinach Artichoke Delight section. To store your leftover dip, let it cool first. Then, scoop it into an airtight container. Make sure to seal it well. This helps keep the dip fresh and tasty. You can store it in the fridge for up to three days. When you want to eat it again, just follow the reheating steps below. When you're ready to enjoy your dip again, preheat your oven to 350°F (175°C). Scoop the dip into a baking dish. Cover it with foil to keep it moist. Bake for about 15 minutes. If you want a crispy top, remove the foil for the last five minutes. You can also reheat it in the microwave. Use a microwave-safe bowl and heat in short bursts. Stir in between to ensure even warming. If you want to save your dip for later, freezing works well. Pack the cooled dip into a freezer-safe container. Leave some space at the top, as it will expand when frozen. You can freeze it for up to three months. When you're ready to eat it, thaw it in the fridge overnight. Then, reheat it as explained above. Enjoy this creamy goodness whenever you like! You can find the full recipe for this delicious dip above. Spinach artichoke dip lasts about 3 to 4 days in the fridge. Make sure to store it in an airtight container. This keeps it fresh longer. If you want to check if it’s still good, look for any odd smells or colors. Yes, you can make spinach artichoke dip ahead of time. Prepare the dip and store it in the fridge. You can bake it right before serving. This makes it a great option for parties or gatherings. Just remember to bake it until hot and bubbly before serving. You can serve spinach artichoke dip with many tasty options. Tortilla chips are a classic choice. Other good options include pita bread, sliced veggies, or crackers. Each gives a nice crunch and pairs well with the creamy dip. You can also try serving it with toasted bread for a warm touch. For a fun twist, add fresh herbs or extra cheese on top! In this post, we explored the key ingredients for spinach artichoke dip and how to make it. You learned essential tools and step-by-step guides for preparation and baking. We shared tips for perfection, common mistakes, and ways to enhance flavor. Variations let you customize it to your taste, while storage advice ensures it stays fresh. Remember, cooking is about having fun. Enjoy making this dish however you like it. You'll impress everyone with your tasty creation.

Easy Spinach Artichoke Dip Simple and Tasty Recipe

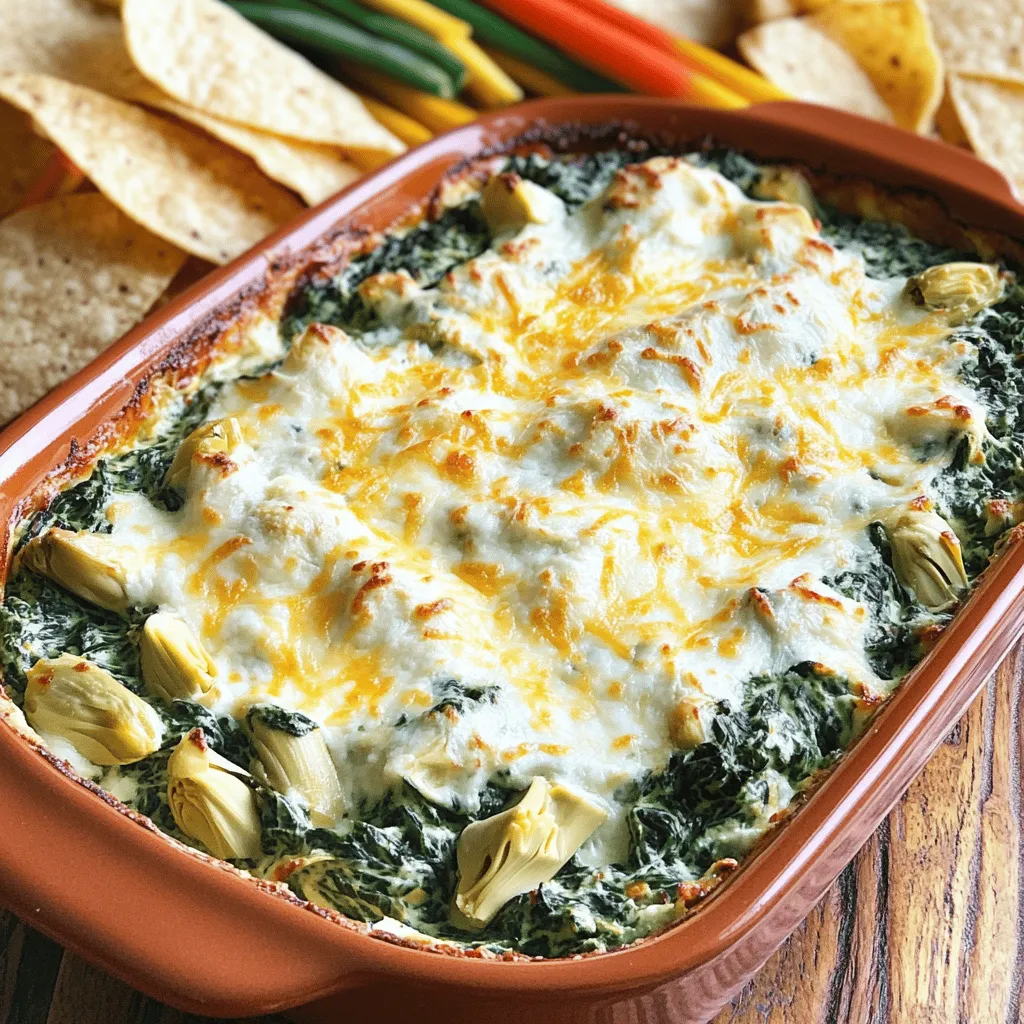
Looking for a quick and tasty dip that will wow your guests? You’ve found it! This Easy Spinach Artichoke Dip

To make Instant Pot Chicken Tikka Masala, you need these key ingredients: - 2 lbs boneless, skinless chicken thighs, cut into bite-sized pieces - 1 cup plain yogurt - 3 tablespoons tikka masala spice blend - 1 tablespoon ginger-garlic paste - 1 tablespoon olive oil - 1 medium onion, finely chopped - 1 can (14 oz) crushed tomatoes - 1 cup coconut milk - 1 teaspoon garam masala - Salt to taste - Fresh cilantro, chopped (for garnish) These ingredients come together to create rich flavors and a creamy sauce. Spices make this dish special. The tikka masala spice blend adds warmth and depth. The ginger-garlic paste gives a fresh kick. Garam masala adds a final touch of fragrance. Each spice plays a role in building flavor. Garnishes add color and freshness. I love using fresh cilantro. It brightens the dish and adds a burst of flavor. You can also serve this dish with a side of basmati rice or warm naan. These options help soak up that delicious sauce. Start by mixing yogurt, tikka masala spice blend, and ginger-garlic paste in a bowl. Add 2 lbs of boneless, skinless chicken thighs cut into bite-sized pieces. Make sure the chicken is well coated in the marinade. Cover the bowl and let it marinate for at least 30 minutes. If you can, marinate overnight for even more flavor. Next, turn on your Instant Pot and set it to Sauté mode. Pour in 1 tablespoon of olive oil and let it heat. Once the oil is hot, add 1 medium onion, finely chopped. Sauté the onion until it turns golden brown, which takes about 5 to 7 minutes. This step adds a sweet and rich base to your dish. Now, add the marinated chicken to the Instant Pot, including all the marinade. Stir it well with the sautéed onions. Then, pour in 1 can of crushed tomatoes and 1 cup of coconut milk. Add 1 teaspoon of garam masala and salt to taste. Mix everything together. Cancel the Sauté mode and close the lid. Set the valve to sealing and cook on Manual or Pressure Cook mode for 10 minutes. After cooking, let the pressure release naturally for 10 minutes, then quick release any remaining pressure. Open the lid, stir gently, and adjust seasoning if needed. For the full recipe, check out the detailed instructions. Enjoy your meal! To make your chicken tikka masala shine, marinate your chicken well. Mix yogurt, tikka masala, and ginger-garlic paste in a bowl. Add the chicken and coat every piece. I suggest marinating for at least 30 minutes. For the best taste, let it marinate overnight. This extra time allows the chicken to soak up all the flavors. Want to change how spicy your dish is? Start with the tikka masala blend. If you like it mild, use less spice. If you prefer it hot, add more. You can also add chopped green chilies for heat. Taste the sauce before serving. If it is too spicy, add a bit of coconut milk to balance it. A thick sauce is key to a great chicken tikka masala. If your sauce is too thin, try a few tricks. First, let it cook longer with the lid off to reduce it. You can also mix in some cornstarch. To do this, mix 1 tablespoon of cornstarch with water and stir it in. This will help the sauce become creamy and delicious. {{image_2}} If you want a vegetarian dish, try using paneer. Paneer is a fresh cheese common in Indian cooking. Just cut 1 pound of paneer into cubes. Follow the same recipe. You can skip the marination step, as paneer cooks quickly. Sauté the paneer with onions until golden. Then, mix it into the sauce. This option is rich and filling. Adding vegetables boosts the nutrition of your meal. Vegetables like bell peppers, peas, or spinach work well. Chop them into small pieces. Add them to the pot along with the chicken. They will cook nicely in the sauce. This not only adds color but also flavor. You can also use frozen veggies for convenience. You can try different proteins for variety. Substitute chicken with shrimp, beef, or tofu. If using shrimp, cook for just 5 minutes under pressure. For beef, cut it into small pieces and cook for 15 minutes. Tofu can be added like paneer. Each protein brings a unique taste to the dish. Feel free to experiment to find your favorite version. For the full recipe, check out the main article. Store your Chicken Tikka Masala in an airtight container. It stays fresh for up to four days in the fridge. Allow it to cool down before sealing. This helps avoid moisture buildup. When ready to eat, check for any off smells. If it smells fine, it’s good to go! You can freeze Chicken Tikka Masala for up to three months. Use freezer-safe containers or bags for best results. Make sure to leave some space for expansion. Label the containers with the date. This way, you know how long it has been frozen. To reheat, thaw it in the fridge overnight first. You can then use a microwave or stovetop. Heat on low and stir often to avoid burning. If it seems dry, add a splash of water or coconut milk. This will help restore its creamy texture. Yes, you can make Chicken Tikka Masala without an Instant Pot. You can use a regular pot on the stove. Start by marinating the chicken like in the Instant Pot recipe. Sauté the onions and then add the marinated chicken. Cook it on low heat until the chicken is tender. This method takes longer but gives great flavor. In the Instant Pot, it takes about 10 minutes to cook Chicken Tikka Masala under pressure. However, the total time includes marinating the chicken and the time to build and release pressure. Overall, plan for about 40 minutes. This includes prep time and natural release. Chicken Tikka Masala pairs well with basmati rice. You can also serve it with naan bread for dipping. Adding a side of cucumber salad or yogurt raita helps balance the spices. Consider serving it with a fresh herb garnish, like cilantro, for added flavor. For a complete meal, include a vegetable dish, such as sautéed spinach. For the Full Recipe, check the complete instructions above. This guide covered key ingredients and steps to make Chicken Tikka Masala in your Instant Pot. We explored spices, cooking methods, and even tasty variations like a vegetarian option. Remember to marinate the chicken well for great flavor. Use my tips for adjusting spices and thickening the sauce to suit your taste. Now you can enjoy this dish any time. Just store leftovers right for happy meals later. Enjoy making this delicious dish!

Instant Pot Chicken Tikka Masala Easy and Delicious Meal

Are you ready for a quick and tasty meal? My Instant Pot Chicken Tikka Masala is the answer! It’s simple

- 4 large bell peppers (any color) - 1 cup quinoa, rinsed - 2 cups vegetable broth - 1 can black beans, drained and rinsed - 1 cup corn (fresh, frozen, or canned) - 1 small red onion, diced - 2 cloves garlic, minced - 1 teaspoon cumin - 1 teaspoon chili powder - 1 teaspoon smoked paprika - Salt and pepper to taste - 1 cup diced tomatoes (canned or fresh) - 1 cup shredded cheese (cheddar or a vegan alternative) - Fresh cilantro or parsley for garnish When making stuffed bell peppers, I focus on fresh ingredients. The bell peppers come in many colors and each adds its own flair. Choose ones that are firm and unblemished. For the filling, I like quinoa as it packs protein and fiber. Rinsing quinoa beforehand helps remove a bitter taste. Vegetable broth adds flavor and moisture to the quinoa. Black beans bring a hearty texture and nutrients. Corn adds sweetness, while diced tomatoes contribute juiciness. For seasoning, I use red onion and garlic for depth, plus cumin, chili powder, and smoked paprika for warmth. Salt and pepper balance flavors. Cheese, whether cheddar or a vegan option, gives a creamy finish. After stuffing, a sprinkle of fresh cilantro or parsley adds a pop of color and freshness. You can find the full recipe to guide you through the cooking process. - Preheat the oven to 375°F (190°C). - Prepare the bell peppers by cutting tops, removing seeds, and membranes. First, you need to get the oven hot. This helps the peppers cook evenly. Next, cut the tops off your bell peppers. Be careful! Remove all seeds and membranes inside. You want them clean so they can hold the filling. Place the peppers upside down in a baking dish. This way, they won’t tip over while baking. - Bring vegetable broth to a boil, add quinoa, cover, and reduce to a simmer for 15 minutes. Now, let's get the quinoa ready. In a medium pot, bring your vegetable broth to a boil. This broth adds flavor to the quinoa. Once boiling, add 1 cup of rinsed quinoa. Cover the pot and turn down the heat to a simmer. Let it cook for about 15 minutes. When done, fluff the quinoa with a fork. Set it aside for later. - Sauté diced onion and minced garlic until translucent. - Stir in black beans, corn, diced tomatoes, and spices for 5 minutes. In a large skillet, add a splash of olive oil over medium heat. Add the diced onion and minced garlic. Cook them for about 3 to 4 minutes until they are soft and see-through. This step makes the onions sweet and the garlic fragrant. Then, stir in black beans, corn, diced tomatoes, and your spices. Mix everything well and cook for another 5 minutes. This step warms the filling and blends the flavors. - Combine quinoa with the sautéed mixture and half of the cheese. - Stuff the bell peppers, packing the filling gently. Now it’s time to mix things up! In a big bowl, combine your cooked quinoa with the sautéed mixture. Add half of the shredded cheese to this mix. This cheese will melt and make the filling extra tasty. After mixing well, take your stuffed bell peppers and fill them. Pack the filling gently but firmly. You want them full but not overflowing. - Pour water into the baking dish, cover with foil, and bake for 25-30 minutes. - Uncover, sprinkle remaining cheese, and bake for an additional 10 minutes. Next, pour a bit of water into the bottom of your baking dish. This keeps the peppers moist. Cover the dish with foil and bake for 25 to 30 minutes. After that, take off the foil and sprinkle the rest of the cheese on top. Bake for another 10 minutes until the cheese is bubbly and golden. Just watch them closely! For the full recipe, check out the details above. Enjoy making this bright and tasty meal! - Ensure quinoa is rinsed to remove bitterness. - Adjust cooking time based on pepper size; larger peppers may require more time. When cooking quinoa, rinsing is key. It washes away the saponins that can give a bitter taste. For best results, rinse it under cool water in a fine mesh strainer until the water runs clear. This simple step can make a big difference in flavor. Also, remember that larger bell peppers hold more filling. They might need a few extra minutes in the oven to cook fully. Keep an eye on them. - Use mozzarella or Monterey Jack for a different taste. - Explore vegan cheese alternatives for a dairy-free version. Cheese adds a creamy texture and rich flavor to your stuffed peppers. Mozzarella melts nicely and has a mild taste. Monterey Jack also works well, offering a bit more flavor. If you prefer a dairy-free meal, try vegan cheese. Many options melt just like regular cheese and taste great! - Use brown rice instead of quinoa for a different texture. - Add other vegetables like zucchini or spinach for added nutrition. Quinoa is great, but brown rice can change the texture and flavor. It gives a hearty bite. You can also boost nutrition by adding more veggies. Zucchini or spinach mix well with the filling. Just chop them finely and stir them in. This way, you can create a meal packed with nutrients and flavor. {{image_2}} You can make stuffed bell peppers heartier by adding ground turkey or beef. This boosts the protein content and adds a savory flavor. Just brown the meat in the skillet before mixing it into the filling. This simple step makes the dish more filling and satisfying. If you prefer a meatless option, replace black beans with lentils or chickpeas. Both choices give great texture and taste. You can also add vegetables like mushrooms or eggplant to the filling. This not only adds flavor but also makes the dish even healthier. Feel free to mix and match your favorite vegetables. For those on a gluten-free diet, use gluten-free grains like brown rice or millet instead of quinoa. You can also switch to vegan cheese to keep the dish dairy-free. This way, everyone can enjoy a delicious stuffed pepper meal without worry. Store stuffed bell peppers in an airtight container for up to 4 days. This keeps them fresh and tasty. When stored properly, the flavors blend well, enhancing the dish. Freeze individually wrapped peppers for up to 3 months. This method helps preserve their taste and texture. To enjoy them later, thaw in the fridge before reheating. This slow thawing keeps the peppers juicy and delicious. Reheat in the oven for best results. Set your oven to 350°F (175°C) and bake for about 15 minutes. This method revives the flavors and melts the cheese nicely. If you're short on time, use a microwave for quick warming. Just heat for 2-3 minutes, checking to ensure they're hot throughout. The peppers should be tender, and the cheese should be bubbly and golden. This means the filling is hot and ready to eat. When you cut into a pepper, the inside should feel soft but not mushy. Yes, prepare the filling and stuff the peppers a day in advance, and refrigerate until ready to bake. This makes dinner prep easy. Just pop them in the oven when you’re ready! Pair with a side salad, garlic bread, or steamed vegetables for a complete meal. You can also add rice or quinoa on the side for extra carbs. Yes, feel free to use mini peppers, poblano, or sweet peppers as an alternative. Each type adds its own unique flavor. Using different colors also makes for a pretty plate! Stuffed bell peppers are easy to make and full of flavor. This recipe blends quinoa, beans, and spices for a healthy dish. You can customize it with meats, veggies, or cheese. Remember to store leftovers in the fridge or freezer for later. These peppers are not just satisfying; they're fun to make and share. Get creative with your ingredients and enjoy! Your cooking skills will shine.

Stuffed Bell Peppers with Quinoa Delightful Meal

Are you ready to make a delicious and healthy meal? Stuffed bell peppers with quinoa are the perfect dish for

To make a tasty Vegetable Lo Mein, gather these items: - 8 oz lo mein noodles - 2 tablespoons sesame oil - 1 cup broccoli florets - 1 bell pepper, thinly sliced (any color) - 1 carrot, julienned - 1 cup snap peas - 4 green onions, chopped - 3 cloves garlic, minced - 1-inch piece ginger, grated - 3 tablespoons soy sauce - 1 tablespoon oyster sauce (vegetarian version) - 1 tablespoon hoisin sauce - Salt and pepper to taste - Sesame seeds for garnish Using fresh vegetables makes your lo mein colorful and full of flavor. I love adding: - Broccoli for crunch and nutrients. - Bell peppers add sweetness and color. - Carrots provide a nice texture. - Snap peas bring a lovely snap. - Green onions give a great bite. Feel free to mix and match your favorites. Use seasonal veggies for the best taste. You need some basic tools to make your Vegetable Lo Mein. Here’s what I recommend: - A large skillet or wok for even cooking. - A pot for boiling noodles. - A sharp knife for slicing veggies. - A cutting board for safe prep. With these tools and ingredients, you can create a dish that shines. For the full recipe, check out the details above. Enjoy your cooking! First, gather your lo mein noodles. Measure out 8 ounces for this dish. Bring a pot of water to a boil. Add the noodles, cooking them according to the package instructions. This usually takes about 3 to 5 minutes. Taste them to see if they are just right. Drain the noodles and set them aside. Toss them in 1 tablespoon of sesame oil. This helps to keep them from sticking. Next, get your large skillet or wok. Heat the remaining 1 tablespoon of sesame oil over medium-high heat. Add 3 cloves of minced garlic and 1-inch grated ginger. Cook these for about 1 minute until you smell their nice aroma. Now, add your vegetables: 1 cup of broccoli florets, 1 thinly sliced bell pepper, 1 julienned carrot, and 1 cup of snap peas. Stir-fry these for about 5 to 7 minutes. You want them to be tender but still a bit crisp. Once your vegetables are ready, add the cooked lo mein noodles to the skillet. Toss in 4 chopped green onions as well. Now it's time for flavor! Pour in 3 tablespoons of soy sauce, 1 tablespoon of vegetarian oyster sauce, and 1 tablespoon of hoisin sauce. Stir-fry everything together for another 3 to 4 minutes. Make sure all the noodles and veggies are well coated in sauce. Finally, season with salt and pepper to taste. Serve your delicious Vegetable Lo Mein hot, garnished with sesame seeds. For full details, check the Full Recipe. To get the best lo mein noodles, start with boiling water. Use plenty of water to keep the noodles from sticking. Cook them for about 3-4 minutes until they are al dente. Drain the noodles and toss them with a bit of sesame oil. This step keeps them from clumping together. Flavoring your lo mein is all about the sauce. Use soy sauce, oyster sauce, and hoisin sauce to create a rich taste. You can adjust these sauces based on your liking. Add fresh garlic and ginger for an aromatic kick. If you want more heat, toss in some red pepper flakes. Serve your Vegetable Lo Mein hot and fresh. Garnish with sesame seeds and green onions for a nice touch. You can add a side of spring rolls or dumplings for extra flavor. This meal pairs well with a light salad or steamed vegetables. Check the Full Recipe for more details on preparation and serving. {{image_2}} You can boost your Vegetable Lo Mein by adding protein. Chicken, shrimp, or tofu work well. Cook your chosen protein in the skillet before adding vegetables. This step gives the dish extra flavor. For a vegan option, use firm tofu. Just cube it and sauté until golden. If you need a gluten-free meal, use rice noodles instead of lo mein noodles. They have a similar texture and taste great. Be sure to check your sauces for gluten. Tamari is a great gluten-free soy sauce option. This way, everyone can enjoy the dish. To make a low-carb version, skip the noodles and use zucchini noodles or cauliflower rice. Spiralize zucchini for a fun twist. Cauliflower rice adds volume and keeps the dish light. Toss in vegetables like bell peppers and snap peas for crunch. This keeps the meal satisfying without the carbs. For the complete recipe, check out the [Full Recipe]. To keep your Vegetable Lo Mein fresh, store it in an airtight container. Make sure it cools down first. This way, you prevent moisture buildup. Place it in the fridge if you plan to eat it within three days. If you want it to last longer, consider freezing. When you're ready to enjoy leftovers, reheat them gently. Use a skillet over medium heat for the best results. Add a splash of water or soy sauce to keep it moist. Stir often to heat evenly. You can also use a microwave, but cover the bowl to keep the steam in. If you choose to freeze your Vegetable Lo Mein, let it cool completely first. Portion it into freezer-safe bags or containers. Remove as much air as possible to prevent freezer burn. It can last up to three months in the freezer. Just thaw it overnight in the fridge before reheating. Enjoy your delicious meal whenever you want with these simple storage tips! To make Vegetable Lo Mein vegetarian, use plant-based sauces. In this dish, we already use vegetarian oyster sauce and soy sauce. If you want a deeper flavor, add more hoisin sauce. All the veggies, like broccoli and bell pepper, are naturally vegetarian. You can enjoy a colorful and tasty meal without meat. If you can't find lo mein noodles, you have options. You can use spaghetti or thin rice noodles. These substitutes cook quickly and still taste great. You can also try zoodles, made from zucchini, for a low-carb option. The key is to cook them until they are just right. Yes, you can prepare Vegetable Lo Mein in advance. Cook the noodles and veggies, then store them separately. When you're ready to eat, just mix them together and heat. This helps keep the noodles from getting mushy. You can also enjoy leftovers. They will still taste great the next day. For the full recipe, check out the Veggie Delight Lo Mein. You learned about making delicious Vegetable Lo Mein. We covered all the key ingredients needed. I explained how to cook the noodles and veggies step by step. You got great tips for perfecting your dish and ideas for fun variations. Lastly, I shared how to store and reheat your Lo Mein. With this guide, you can create a tasty meal that fits your needs. Enjoy your cooking adventure!

Vegetable Lo Mein Flavorful and Easy Recipe Guide

Welcome to my flavorful and easy guide to Vegetable Lo Mein! If you crave a quick, tasty meal packed with

- 2 pounds russet potatoes - 4 cloves of garlic - 1/2 cup unsalted butter - 1 cup heavy cream To make creamy garlic mashed potatoes, start with russet potatoes. They have a fluffy texture that mashes well. Use fresh garlic for a bold flavor. Unsalted butter adds richness, while heavy cream provides that creamy texture. - 1/2 cup sour cream - Salt and pepper to taste - 1/4 cup fresh chives for garnish Sour cream gives a nice tang to the potatoes. Don’t forget salt and pepper to boost the taste. Fresh chives not only add color but also a mild onion flavor. You can find the full recipe for these creamy garlic mashed potatoes in the recipe section. To start, peel and cube the russet potatoes. Aim for 1-inch pieces for even cooking. Next, take four cloves of garlic and crush them. This step will release the garlic's strong flavor into the potatoes. Fill a large pot with cold water and add the cubed potatoes and crushed garlic. Sprinkle in a generous pinch of salt. Bring the water to a boil over medium-high heat. Once boiling, lower the heat to a simmer. Cook the potatoes for about 15 to 20 minutes. You want them fork-tender. After that, drain the potatoes and garlic in a colander. Return them to the pot and let them steam for a few minutes. This helps get rid of extra moisture. In a separate saucepan, melt half a cup of unsalted butter over low heat. Mix in one cup of heavy cream until warmed through. Now, grab a potato masher or ricer. Mash the potatoes and garlic to your desired smoothness. Gradually pour in the warm butter and cream mixture. Stir continuously until creamy and fluffy. Finally, fold in half a cup of sour cream and season with salt and pepper to taste. For a nice touch, transfer the mashed potatoes to a serving dish and sprinkle with freshly chopped chives. For the complete recipe, refer to the [Full Recipe]. To make creamy garlic mashed potatoes, warm ingredients are key. When you use warm butter and cream, they blend better. This helps create a smooth and fluffy mash. I suggest using either a potato masher or a ricer. A potato masher gives a more rustic feel, while a ricer makes them ultra-smooth. Both tools work well, so pick what you like. Tasting your mash is essential. Start with a pinch of salt. Mix well and taste. You can always add more salt if needed. I recommend using sea salt for its clean flavor. Kosher salt also works great. Each type brings a different taste, so choose what you prefer. Remember, seasoning can make or break your dish! Don’t be afraid to experiment a little. You want those creamy garlic mashed potatoes to shine! For the full recipe, check out the details above. {{image_2}} You can add roasted garlic for a deeper flavor. Roasting garlic brings out its sweetness. Simply wrap whole garlic bulbs in foil and roast them until soft. Squeeze the cloves into the potatoes when mashing. This gives your dish a rich and mellow garlic taste. Incorporating herbs like rosemary or thyme can elevate your mashed potatoes. Chop fresh herbs finely and mix them in as you mash. Rosemary adds a woodsy flavor, while thyme brings a hint of earthiness. Both herbs work well and enhance the overall taste. Using buttermilk instead of heavy cream is a great way to add tang. Buttermilk can make your mashed potatoes lighter. Simply replace the heavy cream with buttermilk in the recipe. You’ll enjoy a creamy texture with a pleasant twist. For vegan variations, consider dairy-free alternatives. Almond milk or coconut cream can work wonders. They provide creaminess without dairy. Make sure to choose unsweetened options to avoid any odd flavors. These swaps keep your mashed potatoes delicious and accessible to everyone. For the full recipe, check the main section. To keep your creamy garlic mashed potatoes fresh, store leftovers in an airtight container. Make sure the container is sealed well to avoid air exposure. Place the potatoes in the fridge right after they cool to room temperature. They can last up to three days this way. When it's time to reheat, scoop the desired amount into a pot. Add a splash of cream or milk to keep them moist. Heat over low flame, stirring often until warm. If you want to save mashed potatoes for later, freezing is a great option. First, let the mashed potatoes cool completely. Then, transfer them to a freezer-safe container or bag. Be sure to remove as much air as possible from the bag. Label it with the date. Frozen mashed potatoes can last up to two months. To thaw, place the container in the fridge overnight. If you're in a hurry, you can use the microwave on defrost mode. Once thawed, reheat the potatoes in a pot. Add a bit of cream or butter to restore their creamy texture. Stir gently until they are heated through. This method keeps them delicious and smooth! For the full recipe, check the details above. Yes, you can use other types of potatoes. Some popular options are Yukon Gold or red potatoes. These potatoes have a creamy texture and a slightly different flavor. When choosing a potato, consider the starch content. High-starch potatoes, like russets, yield fluffier mashed potatoes. Waxy potatoes, like red ones, are denser and may result in a creamier mash. You can make mashed potatoes ahead of time! First, prepare the mashed potatoes as usual. Once done, cool them to room temperature. Then, cover the dish tightly with plastic wrap and store it in the fridge. When ready to serve, reheat them on the stove or in the oven. Add a splash of cream or milk to keep them moist. Creamy garlic mashed potatoes pair well with many dishes. They are perfect with roasted meats, like chicken or beef. You can also serve them alongside grilled vegetables for a lighter meal. For a rich experience, try them with a savory gravy or mushroom sauce. They complement rich dishes wonderfully and add a comforting touch to any meal. For the full recipe, check the details above! Creamy garlic mashed potatoes are simple and rich in flavor. You need just a few key ingredients, like russet potatoes and garlic, to create this dish. Follow the steps to get the right texture and taste. Don’t forget to explore variations for extra flair! Store leftovers well or freeze them for future meals. With these tips, you’ll impress everyone with your mashed potatoes. Enjoy every bite of this comfort food classic.

Creamy Garlic Mashed Potatoes Flavorful and Easy Recipe

Are you ready to elevate your comfort food game? In this post, I’ll share my easy and delicious recipe for

Older posts
Newer posts
← Previous Page1 … Page87 Page88 Page89 … Page123 Next →

dsad

© 2025 Southern Dishes • Built with GeneratePress

Our Policies

  • Copyright Policy
  • Cookie Policy
  • GDPR Policy
  • Privacy Policy
  • Disclaimer
  • Terms Of Use

More Information

  • Home
  • About
  • Contact
  • Appetizers
  • Dessert
  • Dinner
  • Drinks
©2025, Southern Dishes About Back To Top