Skip to content
DisclaimerTerms Of UseGDPR PolicyCookie Policy

Southern Dishes

  • Home
  • Drinks
  • Appetizers
  • Dinner
  • Dessert
  • About
  • Contact
  • Privacy Policy
DisclaimerTerms Of UseGDPR PolicyCookie Policy

Isabella

- Ripe avocados: Use two ripe avocados. They need to be soft but not brown. This gives the pudding a smooth, creamy texture. - Unsweetened cocoa powder: You need 1/4 cup of cocoa powder. This adds rich chocolate flavor without extra sugar. - Sweetener options: I recommend 1/4 cup of pure maple syrup or honey. You can adjust this to your taste. - Milk alternatives: Add 1/4 cup of almond milk or any milk you like. This helps blend everything smoothly. - Flavor enhancers: A teaspoon of vanilla extract adds depth. A pinch of sea salt brightens the flavors. - Fresh fruits: Sliced strawberries or bananas work great. They add color and freshness. - Nuts and seeds: Chopped nuts like walnuts or almonds add crunch. Chia seeds are a healthy option too. - Healthy add-ins: Consider coconut flakes or a dash of cinnamon for extra flavor. You can find the Full Recipe at the beginning of this article. - Cutting and scooping avocados: Start by cutting each avocado in half. Remove the pit carefully. Use a spoon to scoop the green flesh into your blender or food processor. Ripe avocados are best for a creamy texture. - Adding ingredients to the blender: Next, add the unsweetened cocoa powder, maple syrup, almond milk, vanilla extract, and a pinch of sea salt. These ingredients will blend well with the avocado, creating a rich taste. - Blending to desired consistency: Blend the mixture until it is smooth and creamy. You may need to scrape down the sides a few times to mix everything well. The goal is to have a thick, velvety pudding. - Adjusting sweetness: After blending, taste the pudding. You can add more maple syrup or cocoa powder if you want it sweeter or richer. This is your chance to make it perfect for your taste. - Transferring to serving bowls: Once you love the taste, scoop the pudding into serving bowls. Make sure each bowl has enough for a good serving. - Chilling before serving: Cover the bowls with plastic wrap and place them in the fridge. Let the pudding chill for at least 30 minutes. This helps the flavors mix and the pudding to firm up. For the full recipe, check out the details on how to make this delicious treat. To make your chocolate avocado pudding truly creamy, choose ripe avocados. They should feel soft when you press gently. If they are hard, let them ripen for a few days. When blending, start at a low speed. Gradually increase the speed until it is smooth. This step helps avoid lumps. If you see lumps, blend longer or scrape the sides of the bowl. For a fun presentation, use clear cups to show off the rich color of the pudding. Top each serving with fresh sliced strawberries. This adds a nice pop of color and flavor. You can also sprinkle coconut flakes or chopped nuts on top for crunch. Pair your pudding with a dollop of whipped cream or a scoop of vanilla ice cream. This creates a delightful contrast to the pudding's rich taste. Avocados are packed with healthy fats. They provide heart-healthy monounsaturated fats, which can help lower bad cholesterol. Here is a quick breakdown of the nutrition in this pudding: - Calories: About 150 per serving - Fat: 11g (mostly healthy fats from avocados) - Carbohydrates: 15g - Fiber: 5g - Protein: 2g This pudding is not only tasty but also a nutritious choice. Enjoy guilt-free, knowing you’re treating yourself well! For the full recipe, check out the earlier section. {{image_2}} To make this dessert vegan, swap out honey for pure maple syrup. This keeps it plant-based and just as sweet. You can also use almond milk or any non-dairy milk. For flavor add-ins, try a tablespoon of almond butter or a dash of espresso. Both enhance the chocolate taste and add depth. If you want to cut back on sugar, use less maple syrup. Start with two tablespoons and taste often. You can also replace maple syrup with mashed bananas or dates. These options add natural sweetness without refined sugar. They keep the pudding creamy and delicious. Want to spice things up? Add a pinch of cinnamon or cayenne pepper. These spices make the pudding warm and unique. You can also mix in other fruits like bananas or berries. Puree them with the chocolate avocado mix for a fruity twist. Each bite becomes a new experience! For the full recipe, check the details above. To store leftovers, place the chocolate avocado pudding in an airtight container. This keeps it fresh and prevents it from absorbing other smells in your fridge. If you want to keep it extra smooth, cover the surface with plastic wrap, pressing it down gently to avoid air pockets. This helps reduce browning and keeps the pudding creamy. Enjoy it within three days for the best taste. Yes, you can freeze chocolate avocado pudding! Just scoop it into a freezer-safe container. Leave some space at the top, as the pudding may expand when frozen. It can last for up to three months in the freezer. When you want to enjoy it again, simply move it to the fridge to thaw overnight. For a quicker option, let it sit at room temperature for about an hour. After thawing, stir it well to regain that creamy texture. Chocolate avocado pudding has a rich, creamy texture. It feels smooth in your mouth. The taste is a lovely blend of chocolate and avocado. You might notice a hint of sweetness from the maple syrup. It’s not too sweet, which makes it a perfect treat. The cocoa gives it a deep chocolate flavor. You can also add toppings like strawberries or nuts for extra fun. Yes, you can use different types of chocolate. Dark chocolate brings a bold flavor. It pairs well with the creaminess of avocado. Milk chocolate is sweeter and has a lighter taste. You can mix and match to find your favorite. If you want a richer dessert, go for dark chocolate. For a sweeter treat, use milk chocolate. Chocolate avocado pudding lasts about three to five days in the fridge. To keep it fresh, make sure to cover it well. Use plastic wrap or a sealed container. If you see any browning on top, just stir it in. This dessert is best eaten cold. It’s a great option for meal prep. Try to enjoy it within the week for the best taste. You learned how to make chocolate avocado pudding. We covered key ingredients, like ripe avocados and cocoa powder. You also saw how to blend it for the best creamy texture. Toppings like fruits and nuts can add fun and flavor. This pudding gives you healthy fats and delicious taste. You can adjust recipes to match your needs. Whether you serve it fresh or store it, this treat fits many diets. Enjoy your creamy dessert guilt-free and share it with others!

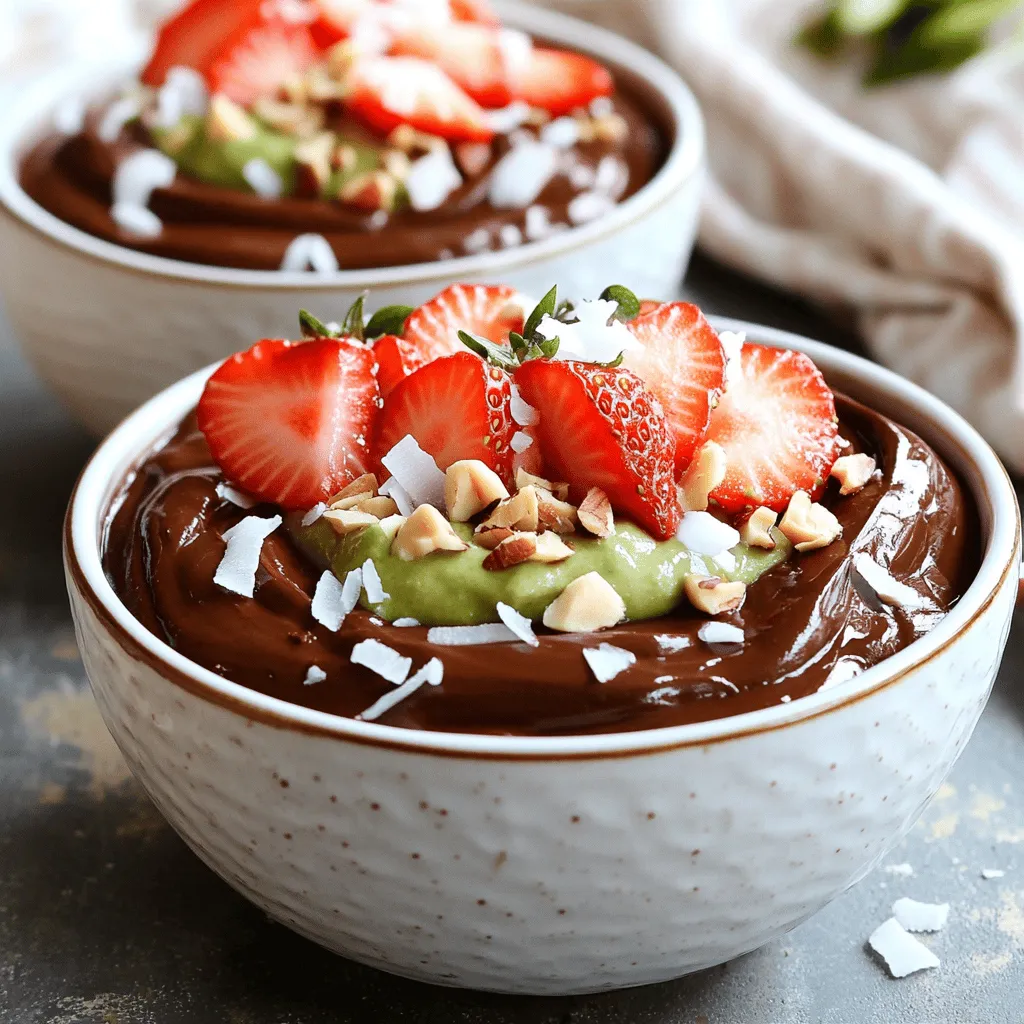
Chocolate Avocado Pudding Tasty and Healthy Dessert

Looking for a dessert that’s both tasty and healthy? Try my Chocolate Avocado Pudding! This rich and creamy treat hides

To make the teriyaki salmon bowls, you will need: - 2 salmon fillets - 1/4 cup soy sauce - 2 tablespoons honey - 1 tablespoon rice vinegar - 1 teaspoon sesame oil - 1/2 tablespoon grated ginger - 1 garlic clove, minced - 2 cups cooked brown rice - 1 cup broccoli florets - 1 carrot, julienned - 1/2 cup edamame (shelled) - 1 tablespoon sesame seeds - Green onions, thinly sliced for garnish If you lack some ingredients, here are some great swaps: - Salmon fillets: Use trout or chicken. - Soy sauce: Coconut aminos or tamari work well. - Honey: Maple syrup can be a sweet choice. - Rice vinegar: Apple cider vinegar is a good stand-in. - Sesame oil: Olive oil or canola oil can replace it. - Broccoli: You can use green beans or snap peas instead. - Edamame: Try chickpeas for a different protein. This dish is not just tasty; it's also nutritious! Here’s a quick look: - Calories per serving: About 500 - Protein: 35g - Carbohydrates: 60g - Fat: 15g - Fiber: 8g These numbers can vary based on your ingredient choices. For a balanced meal, the mix of protein, healthy fats, and fiber is great! Feel free to check the Full Recipe for more details on how to make these bowls. First, gather all your ingredients. You need: - 2 salmon fillets - 1/4 cup soy sauce - 2 tablespoons honey - 1 tablespoon rice vinegar - 1 teaspoon sesame oil - 1/2 tablespoon grated ginger - 1 garlic clove, minced - 2 cups cooked brown rice - 1 cup broccoli florets - 1 carrot, julienned - 1/2 cup shelled edamame - 1 tablespoon sesame seeds - Green onions, thinly sliced Next, make the teriyaki sauce. In a small bowl, whisk together the soy sauce, honey, rice vinegar, sesame oil, grated ginger, and minced garlic. This sauce adds rich flavor to the dish. Now, marinate the salmon. Place the fillets in a shallow dish and pour half of the teriyaki sauce over them. Let them sit for at least 15 minutes. This step helps the fish soak up the flavors. While the salmon marinates, cook the vegetables. Steam the broccoli and carrots until they are just tender, about 5-7 minutes. You can use a steaming basket or microwave. Set them aside after cooking. Next, heat a skillet over medium-high heat. Once it’s hot, add the marinated salmon. Discard any leftover marinade. Cook the salmon for about 4-5 minutes on each side. It is done when it flakes easily with a fork. Now, it’s time to assemble your bowls. Start with a base of brown rice in each bowl. Arrange the steamed broccoli, carrots, and edamame on top. Place the cooked salmon fillets next. Drizzle the remaining teriyaki sauce over the bowls. Finally, sprinkle sesame seeds and garnish with sliced green onions. For a beautiful touch, consider using a bamboo mat for serving. For the complete recipe, check out the Full Recipe. Enjoy your vibrant and tasty teriyaki salmon bowls! To make great teriyaki sauce, use fresh ingredients. Combine soy sauce, honey, rice vinegar, sesame oil, grated ginger, and minced garlic. Whisk them together well. Adjust the sweetness by adding more honey if you like it sweeter. For a thicker sauce, simmer it on low heat until it thickens. This makes it stick to your salmon and veggies. Cook salmon at medium-high heat for the best texture. If you want crispy skin, start skin-side down. Cook it for about 4-5 minutes per side. The salmon is done when it flakes easily with a fork. Be careful not to overcook it, or it will dry out. Use a meat thermometer; the ideal temperature is 145°F. When serving, start with a base of brown rice. Layer on the steamed broccoli, carrots, and edamame. Place the salmon on top for a nice look. Drizzle extra teriyaki sauce over the whole bowl. Finish with sesame seeds and sliced green onions. This adds flavor and a pop of color. For a fun twist, serve with chopsticks! For the Full Recipe, check the previous section. {{image_2}} If you want a meat-free meal, try tofu! Use firm tofu for the best texture. Press it to remove extra water, then cube it. Marinate the tofu in the same teriyaki sauce. Cook it until golden brown in a pan. You can also use tempeh or seitan for extra flavor and protein. Salmon is great, but many other proteins work well too. Chicken thighs or breasts are tasty and easy to cook. Just cut them into bite-sized pieces and marinate like the salmon. Shrimp is another quick option. Cook it for about 2-3 minutes per side until pink. For a unique twist, try beef or pork. Just slice thinly and marinate for a bold flavor. You can boost the taste in many ways. Add crushed red pepper for heat. A sprinkle of lime juice adds brightness. Experiment with fresh herbs like cilantro or basil for a fresh touch. For a richer taste, mix in some peanut butter or hoisin sauce into the teriyaki. These tweaks can make your dish more exciting and fun! If you want to follow a complete guide, check out the Full Recipe for more ideas. You can keep leftover teriyaki salmon bowls in an airtight container. Make sure to cool them first. Place them in the fridge for up to three days. Keep the salmon, rice, and veggies together for best flavor. To reheat, use the microwave for quick warmth. Place the bowl in a microwave-safe dish and cover it. Heat for one to two minutes. Stir halfway to ensure even warming. You can also use a skillet on low heat. This method helps keep the salmon moist. If you want to freeze them, separate the salmon from the rice and veggies. Place each in freezer bags or containers. You can freeze the salmon for up to three months. The rice and veggies can freeze for about one month. When ready to eat, thaw in the fridge overnight before reheating. Enjoy your meal without waste! Yes, you can use frozen salmon. Just thaw it first. Place it in the fridge overnight. If you need it fast, you can run it under cold water for about 30 minutes. This will help keep the texture nice and flaky after cooking. If you want a change, try quinoa or cauliflower rice. Quinoa adds a nutty taste and is full of protein. Cauliflower rice is low in carbs and very light. You can also use white rice if that’s what you have on hand. To make the dish gluten-free, use tamari instead of soy sauce. Tamari is a gluten-free soy sauce that gives you the same rich flavor. Check your other ingredients too, like rice vinegar, to ensure they are gluten-free. You can find the Full Recipe for Teriyaki Salmon Bowls in the article above. It has all the steps and tips for making this tasty dish. A fresh salad pairs well with Teriyaki Salmon Bowls. You can make a simple cucumber salad with rice vinegar and sesame oil. It adds a nice crunch and balances the meal. Steamed or grilled vegetables also work great! This blog post covered the key ingredients for teriyaki salmon, including substitutes and nutrition facts. I shared step-by-step cooking instructions, tips for perfect sauce and salmon, and suggested variations for all diets. I also provided storage tips and answered common questions. Now, you have the tools to make an amazing teriyaki salmon dish. Enjoy experimenting with flavors and techniques. Your kitchen is ready for great meals!

Teriyaki Salmon Bowls Flavorful and Easy Recipe Guide

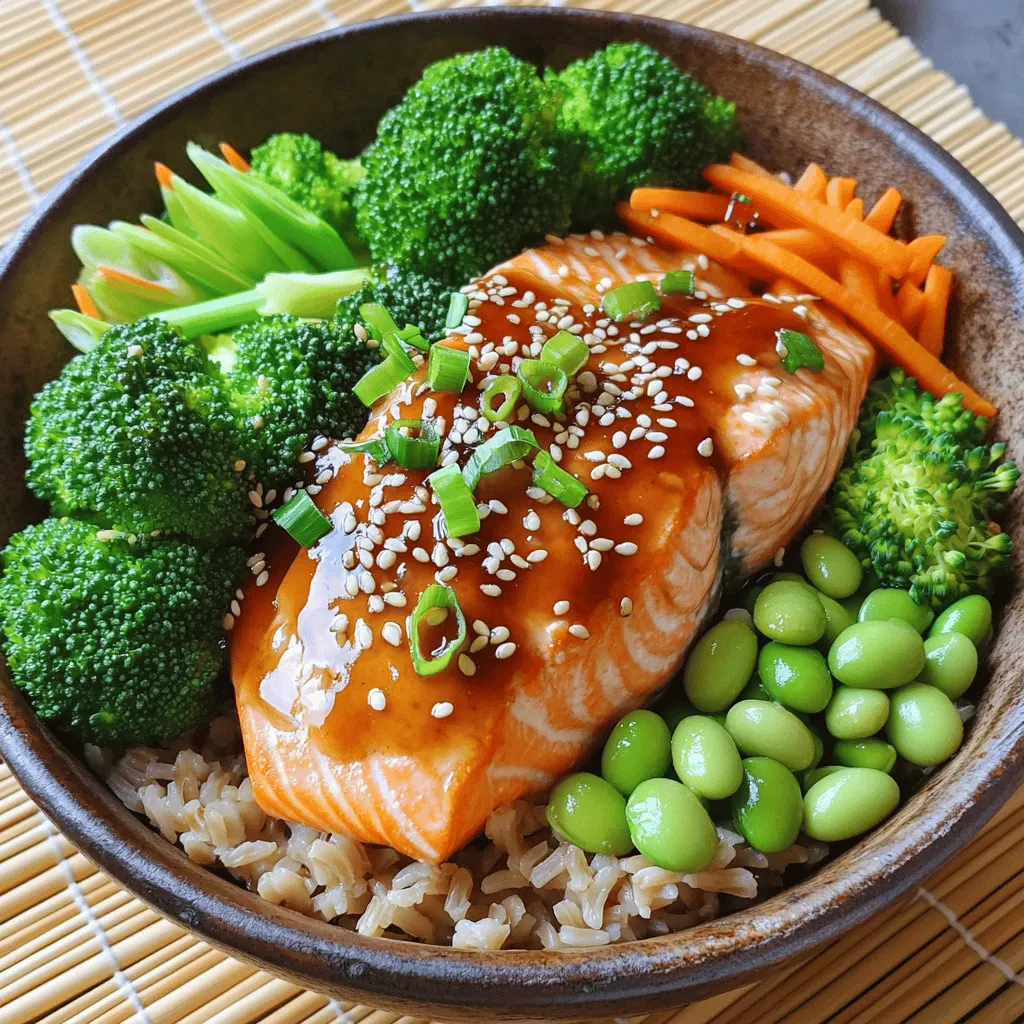
Are you ready to enjoy a mouthwatering dinner? My Teriyaki Salmon Bowls are both flavorful and easy to make. In

To make balsamic roasted Brussels sprouts, you need the following items: - 1 pound Brussels sprouts, trimmed and halved - 3 tablespoons balsamic vinegar - 2 tablespoons olive oil - 1 tablespoon honey or maple syrup - 2 cloves garlic, minced - Salt and pepper to taste - 1/4 cup feta cheese, crumbled (optional) - 1/4 cup toasted walnuts or pecans, chopped (optional) These ingredients give the dish its rich flavor and texture. The Brussels sprouts shine when roasted, while the balsamic vinegar adds a sweet and tangy kick. Olive oil helps with the roasting, making the sprouts crispy and golden. Honey or maple syrup balances the flavors, while garlic adds depth. For customization, think about adding feta cheese or nuts. They bring in extra creaminess or crunch. Feel free to adjust the salt and pepper to your liking. You can explore these options to make the dish truly your own. To find the complete cooking steps, check the Full Recipe. 1. Preheat the oven to 425°F (220°C). This step is key for crisping the sprouts. 2. Mix the balsamic glaze. In a large bowl, combine: - 3 tablespoons balsamic vinegar - 2 tablespoons olive oil - 1 tablespoon honey or maple syrup - 2 cloves garlic, minced - Salt and pepper to taste Whisk these ingredients until smooth. This glaze adds a sweet and tangy flavor. 3. Coat the Brussels sprouts. Take 1 pound of Brussels sprouts, trimmed and halved. Add them to the bowl with the glaze. Toss well so each sprout is evenly coated. This ensures every bite is flavorful. 1. Arrange on the baking sheet. Spread the coated Brussels sprouts on a baking sheet. Place them cut side down. This helps them caramelize better. 2. Cooking time and temperature guidelines. Roast the sprouts in the preheated oven for 20-25 minutes. They should turn golden brown and crisp. 3. Tips for flipping for even cooking. Stir the sprouts halfway through cooking. This promotes even roasting and prevents sticking. Check for doneness by piercing a sprout with a fork; it should be tender. For the full recipe, look for more detailed instructions. Enjoy your tasty side dish! When choosing Brussels sprouts, look for bright green ones. They should feel firm and have tight leaves. Avoid any that are yellow or wilted. For storage, keep them in the fridge. They stay fresh for about a week. Place them in a plastic bag or container with holes. This allows air to circulate. To get that nice caramelization, spread the sprouts in a single layer. Place them cut side down on the baking sheet. This helps them brown better. Roast at 425°F (220°C) for 20-25 minutes. If you want more flavor, add a pinch of salt or a dash of pepper. You can also drizzle more balsamic vinegar just before serving. Adjust the sweetness by adding more honey or maple syrup if needed. This makes the dish perfect for your taste. {{image_2}} You can change the flavor of balsamic roasted Brussels sprouts easily. Try adding different glazes. For example, mix balsamic vinegar with soy sauce for a savory twist. You can also use maple syrup instead of honey for a sweeter taste. For a spicy kick, add crushed red pepper flakes. If you want a vegetarian or vegan version, skip the honey. Use agave syrup or leave it out. The flavor will still shine through. You can even make a tangy orange glaze by adding orange juice and zest to the balsamic. Toppings can really enhance your Brussels sprouts. I love to sprinkle crumbled feta cheese on top. It adds a creamy and salty touch. Nuts like toasted walnuts or pecans give a nice crunch. They also add healthy fats and protein. For a complete meal, consider adding protein. Grilled chicken or chickpeas work well. Simply toss them with the Brussels sprouts before roasting. This way, you create a hearty dish that satisfies everyone. You can find the full recipe for balsamic roasted Brussels sprouts to explore more variations and ideas! To keep leftover balsamic roasted Brussels sprouts fresh, store them in the fridge. Place them in an airtight container. They will last for up to three days. If you want to keep them longer, freezing is a good option. Use a freezer-safe bag or container. They can last for up to three months in the freezer. When reheating, you want to keep the texture nice. The best way is to use the oven. Preheat it to 350°F (175°C). Spread the sprouts on a baking sheet and warm for about 10-15 minutes. This will help them stay crispy. You can also use the microwave, but they may get soft. For a quick meal, serve leftovers over a salad or grain bowl. They add great flavor and crunch! For the detailed recipe, check out the Full Recipe. Yes, you can use frozen Brussels sprouts. They are convenient and save time. However, they may have a softer texture when cooked. Fresh Brussels sprouts provide a better crunch and flavor. If you use frozen, roast them for a bit longer. This helps them crisp up. To make balsamic roasted Brussels sprouts ahead, follow these steps: - Prep the sprouts: Trim and halve them. - Make the glaze: Mix balsamic vinegar, olive oil, and spices in a bowl. - Combine: Toss the sprouts in the glaze and store in the fridge. - Roast: When ready to eat, spread them on a baking sheet and roast. You can roast them straight from the fridge. This dish tastes great fresh out of the oven! Balsamic roasted Brussels sprouts pair well with many dishes. Try serving them with: - Grilled chicken or fish for a protein boost. - Quinoa or rice for a hearty meal. - A fresh salad for extra greens. - Pasta for a unique twist. These combinations make a complete meal that everyone will enjoy. For the full recipe of balsamic roasted Brussels sprouts, check out the detailed recipe here: [Balsamic Glazed Brussels Sprouts Delight](#). In this post, we covered how to make balsamic roasted Brussels sprouts from scratch. You learned about the ingredients you need and how to prepare and roast them perfectly. We discussed tips for freshness and suggested tasty variations. Storing and reheating leftovers is also easy. Balsamic roasted Brussels sprouts can be a delightful side or even a main dish. With the right techniques, you can enjoy a flavorful and healthy meal every time. Follow these steps, and you’ll impress everyone at the table. Enjoy your cooking!

Balsamic Roasted Brussels Sprouts Flavorful Side Dish

Looking for a side dish that steals the show? Balsamic Roasted Brussels Sprouts are your answer! This easy recipe transforms

For a vibrant Lemon Basil Pesto Pasta, you need: - 2 cups fresh basil leaves - 2 cloves garlic, minced - Zest of 1 lemon - Juice of 1 lemon - 12 oz spaghetti or your choice of pasta These fresh ingredients give your dish its bright flavor. Fresh basil is key. It adds a sweet and peppery taste that makes the dish pop. You will also need these pantry staples: - 1/2 cup pine nuts (lightly toasted) - 1/2 cup grated Parmesan cheese - 1/2 cup extra-virgin olive oil - Salt and pepper to taste The pine nuts give a nice crunch and a nutty flavor. Parmesan adds creaminess that pairs well with the lemon. To make your dish look even better, consider these garnishes: - Cherry tomatoes, halved - Extra basil leaves The cherry tomatoes add a splash of color and sweetness. Extra basil leaves make a lovely finishing touch. For the full recipe, check the details above. To make the pesto, start by gathering your fresh basil leaves, toasted pine nuts, minced garlic, and grated Parmesan cheese. Place these in a food processor. Pulse the mixture until it's finely chopped. Next, add the lemon zest, lemon juice, and a pinch of salt and pepper. With the processor running, slowly pour in the olive oil. You want it to mix well but still be slightly chunky. Taste it and adjust the salt and pepper if needed. This vibrant pesto gives you a fresh and zesty flavor. Now, let’s cook the pasta. Fill a large pot with water and add a good amount of salt. Bring it to a boil. Once boiling, add your spaghetti or your favorite pasta. Cook it according to the package instructions until it's al dente. Before draining, reserve about one cup of the pasta water. This water will help mix the pesto later. Drain the pasta and set it aside. In a large mixing bowl, combine the drained pasta and the fresh pesto. Toss it well to coat the pasta evenly. If the mixture seems too thick, add some of the reserved pasta water a little at a time. This will help achieve the right consistency. Once everything is mixed, it’s time to serve. Plate the pasta into bowls and garnish with halved cherry tomatoes and extra basil leaves. This adds a pop of color and flavor. Enjoy your Lemon Basil Pesto Pasta! For the complete recipe, check out the Full Recipe. To store homemade pesto, place it in an airtight container. You can use a glass jar or a plastic tub. Cover the surface with a thin layer of olive oil. This oil layer helps prevent browning. Seal the lid tightly. Homemade pesto can last up to one week in the fridge. If you want to keep it longer, freezing is a great option. Pour the pesto into ice cube trays. Once frozen, transfer the cubes to a freezer bag. This way, you can use small amounts when needed. Cooking pasta is simple, but timing is key. Start with a large pot of salted water. The water should taste like the sea. Bring the water to a rolling boil before adding the pasta. Stir the pasta right after you add it. This helps prevent sticking. Check the package for cooking time and taste the pasta a minute early. You want it al dente, which means firm but tender. Reserve some pasta water before draining. This starchy water can help combine the pesto with the pasta later. You can enhance your lemon basil pesto pasta with extra flavors. Consider adding some roasted vegetables like bell peppers or zucchini. They add texture and a bit of sweetness. For protein, grilled chicken or shrimp work well. You can also add a hint of spice with red pepper flakes. If you like a zing, a bit of lemon juice can brighten the dish. Don’t forget to garnish with fresh cherry tomatoes and basil leaves. They not only taste great but make the dish look beautiful too. For the full recipe, check the recipe section above. {{image_2}} If you can't find pine nuts, don't worry! You can use other nuts. Walnuts, almonds, or cashews work well. They all add a nice crunch. Just toast them lightly for a better taste. You can also use seeds like sunflower or pumpkin seeds for a nut-free option. Experiment with different nuts to find your favorite flavor! For a gluten-free version, choose gluten-free pasta. Many brands offer great options made from rice, quinoa, or lentils. They cook quickly and taste delicious. Be sure to check cooking times, as they may differ from regular pasta. You can enjoy the same lemon basil pesto with these alternatives! Want to make your meal heartier? Add protein! Grilled chicken or shrimp pairs great with this dish. You can also use chickpeas for a plant-based option. Just toss them in with the pasta and pesto. This adds flavor and makes the dish more filling. Enjoy your Lemon Basil Pesto Pasta in a new way! For the complete cooking guide, check the Full Recipe. To keep leftover pesto fresh, store it in an airtight container. Press plastic wrap directly on the surface of the pesto. This helps reduce air exposure and keeps it bright green. You can also drizzle a thin layer of olive oil over the top. This creates a barrier that helps prevent browning. When you're ready to use leftover pesto, avoid the microwave. Heat it gently in a pan over low heat. Stir it often to keep it smooth. If it thickens, add a splash of water or olive oil. This will help bring it back to a nice consistency. Freezing pesto is a great way to save it for later. Pour the pesto into ice cube trays. Freeze until solid, then transfer the cubes to a freezer bag. Label the bag with the date. Pesto can last up to six months in the freezer. When you need some, just pop out a cube and thaw it. For the full recipe, check out the Lemon Basil Pesto Pasta section above. Yes, you can swap basil for other herbs. Try parsley, cilantro, or mint. Each herb gives a different taste. Mint adds a fresh twist, while cilantro gives a vibrant flavor. Experiment to find your favorite mix. Lemon basil pesto is very versatile. You can use it on grilled chicken or fish for added flavor. Spread it on sandwiches for a tasty twist. Mix it with cream cheese for a dip. You can even drizzle it on veggies or salads. Homemade pesto stays fresh for about one week in the fridge. Store it in an airtight jar to keep it fresh. You can also add a layer of olive oil on top. This helps seal in the flavor and color. You now know how to make a tasty pesto pasta dish. We covered fresh ingredients and pantry staples. I showed you step-by-step ways to cook and mix. You learned tips for storage and cooking pasta just right. We explored tasty variations and how to keep your leftovers fresh. In closing, making this dish is fun and easy. Enjoy the fresh flavors, and don’t hesitate to try your own twists!

Lemon Basil Pesto Pasta Fresh and Flavorful Dish

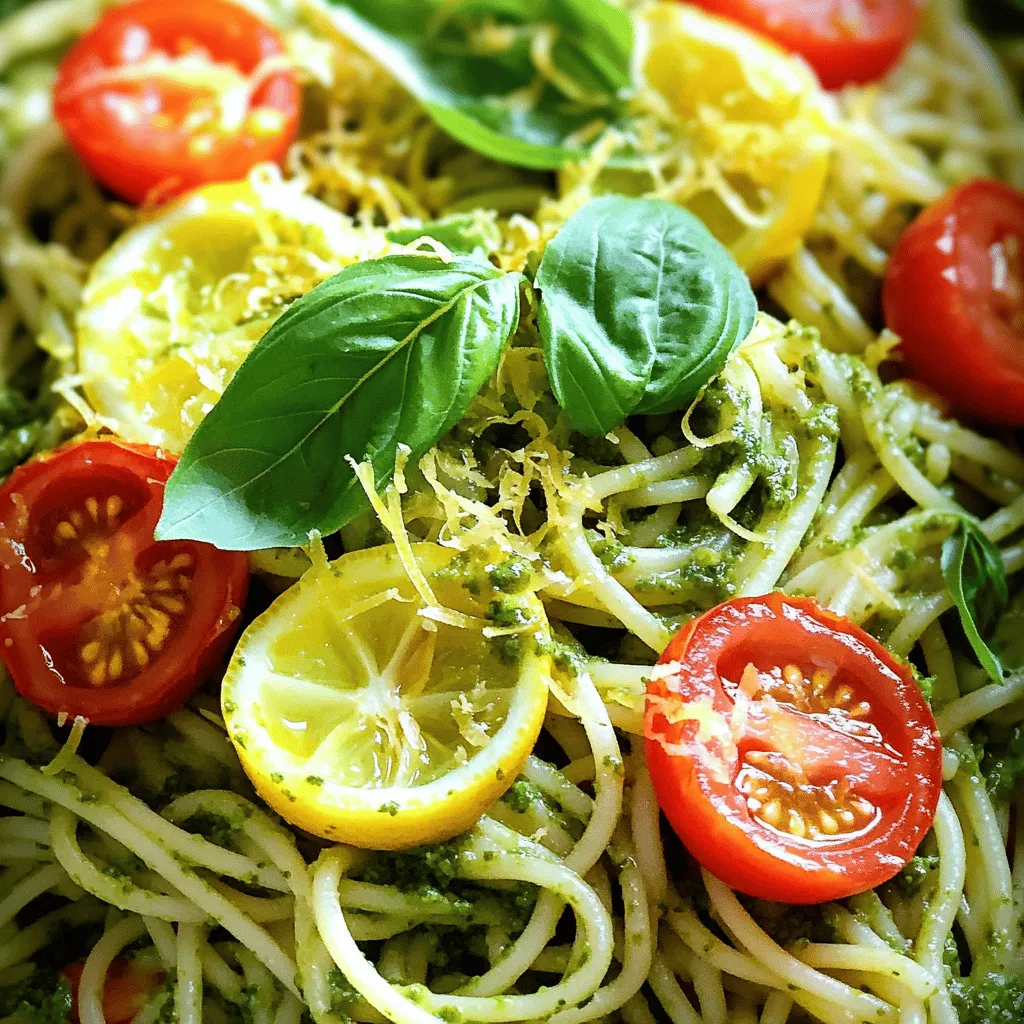
Looking for a fresh and zesty dish? Let me introduce you to Lemon Basil Pesto Pasta! This vibrant meal packs

- Fresh corn details - Use 4 ears of corn, husked. Pick corn that feels firm and heavy. Fresh corn has sweet kernels that pop when you bite into them. - Spices and seasonings - Gather 2 tablespoons of olive oil, 1 teaspoon of chili powder, 1/2 teaspoon of smoked paprika, and 1/2 teaspoon of garlic powder. Add salt and pepper to taste. These spices create a bold flavor that brightens up the corn. - Optional garnishes - For an extra touch, consider 1/2 cup of crumbled feta cheese. It adds creaminess and a salty kick. Fresh cilantro or parsley can be used as a garnish to enhance the dish’s look. You can find the Full Recipe to guide you through the cooking process. How to prep the corn First, husk the corn. Remove all the green leaves and silk. Rinse each ear under cold water. Shake off any extra water. This keeps the corn clean for grilling. Making the marinade In a small bowl, mix the olive oil, chili powder, smoked paprika, garlic powder, salt, and pepper. Stir well until all the spices blend together. This marinade gives the corn its bold flavor. Grilling instructions Preheat your grill to medium-high heat. Brush each ear of corn with the chili marinade. Make sure all sides are covered. Place the corn on the grill. Grill each ear for about 10-12 minutes. Turn the corn every few minutes to get even char marks. Ideal grilling temperature Medium-high heat works best for grilling corn. This temperature helps the corn cook through while getting those lovely grill marks. Timing for perfect corn Keep an eye on the corn while grilling. After about 10-12 minutes, it should turn golden brown. Check for grill marks and tenderness. Once done, remove the corn from the grill. Drizzle fresh lime juice over it right before serving. For a little extra flavor, sprinkle feta cheese on top if you like. Enjoy your chili lime grilled corn! Check the Full Recipe for more details. To really boost the flavor of your chili lime grilled corn, consider these spice variations: - Cayenne pepper adds heat. - Cumin gives a warm, earthy note. - Lime zest brightens the taste. I recommend grilling the corn over medium-high heat. This heat level gives a nice char without burning it. Turn the corn frequently for even cooking. Aim for about 10-12 minutes until it’s golden brown. Chili lime grilled corn pairs well with many dishes. Here are a few ideas: - Serve alongside grilled meats like chicken or steak. - Use it as a topping for tacos. - Add it to salads for extra crunch. This dish shines at summer barbecues and picnics. It’s a fun side for gatherings or family dinners. It’s also great for game days or casual get-togethers. For the full recipe, check out the details above. {{image_2}} You can change the flavor of your chili lime grilled corn easily. A few spicy options can kick it up a notch. Try adding cayenne pepper or crushed red pepper flakes to the marinade. This makes the corn fiery and exciting. You can also use a spicy seasoning blend. This can add depth and heat to each bite. For a fresh twist, try herb-infused options. Mix in some chopped fresh herbs like basil or oregano. These herbs can brighten up the dish and add a new taste. You can also use a mix of Italian herbs for a fun change. This adds a fragrant touch and makes it unique. If you need vegan adjustments, it’s simple. Just skip the feta cheese and use olive oil for the marinade. You can also add nutritional yeast for a cheesy flavor. This keeps your dish tasty without dairy. For gluten-free options, the recipe is already safe. All the ingredients are naturally gluten-free. Just make sure your chili powder and any other spices do not contain gluten. This way, everyone can enjoy this grilled corn delight. You can find the full recipe for chili lime grilled corn above. After enjoying your chili lime grilled corn, store any leftovers in the fridge. Wrap the corn in plastic wrap or place it in an airtight container. This keeps the corn fresh and tasty for up to three days. If you want to save it longer, consider freezing it. To freeze, cut the corn off the cob and place it in a freezer bag. Remove as much air as possible before sealing. Frozen corn can last for up to three months. Reheating grilled corn is simple. The best method is to use the grill again. Preheat the grill to medium heat. Place the corn back on the grill for about 5 minutes, turning occasionally. This warms the corn and brings back its charred flavor. If you don’t want to grill, you can microwave it. Wrap the corn in a damp paper towel and heat for about one minute. Check if it’s warm enough, and heat more if needed. Enjoy your delicious corn just like when it was fresh! How to choose the best corn for grilling? Look for fresh corn with bright green husks. The kernels should be plump and firm. If the silk at the top is brown, that's fine. Just avoid any dry or brown husks. Sweet corn is best for grilling. It adds great flavor to your dish. Can I make this recipe ahead of time? Yes, you can prepare the corn and the marinade ahead of time. Husk the corn and store it in the fridge. You can also mix the marinade and keep it in a sealed container. Just brush the marinade on the corn right before grilling it. What can I use besides feta cheese? If you want a different taste, try queso fresco or goat cheese. You can even skip cheese for a lighter option. Fresh herbs like cilantro or parsley can add flavor as well. How to deal with leftover marinade? If you have leftover marinade, store it in a sealed container in the fridge. You can use it on other grilled veggies or meats. Just remember, do not reuse marinade that touched raw corn. Can this recipe be made on a stovetop grill pan? Yes, you can use a stovetop grill pan. Just heat it over medium-high heat and follow the same grilling time. The corn will get nice grill marks and flavor, just like on an outdoor grill. This blog post covered how to make chili lime grilled corn. We discussed fresh ingredients, including spices, and various garnishes. You learned step-by-step prep and cooking tips for grilling. I shared ways to enhance flavor and offered serving ideas. Variations for different tastes and dietary needs were included, plus storage and reheating tips. To sum it up, grilling corn can be fun and easy. Try these tips to elevate your dish for any occasion. Enjoy your delicious grilled corn!

Chili Lime Grilled Corn Flavorful Summer Delight

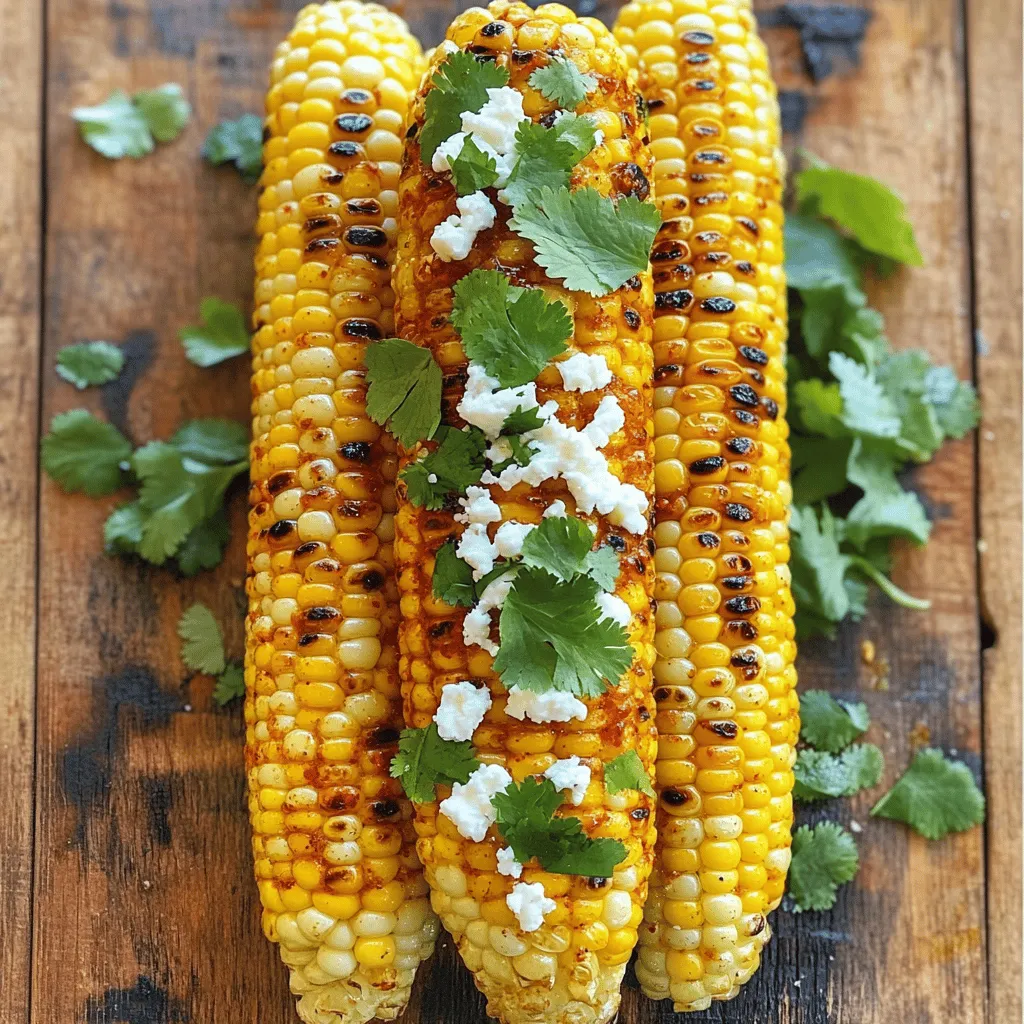
Get ready to enjoy a summer treat with my Chili Lime Grilled Corn recipe! This dish packs a punch with

- 1 large head of cauliflower - 2 cups shredded cheddar cheese - 1 cup cream cheese - 1/2 cup milk - 1 teaspoon garlic powder - 1/2 teaspoon onion powder - 1/4 cup grated Parmesan cheese - Fresh parsley, chopped This cheesy cauliflower bake uses simple ingredients. You start with a large head of cauliflower. I love using fresh cauliflower for the best taste. It adds a nice crunch. Shredded cheddar cheese is key for flavor. I use two cups, but feel free to add more. Cream cheese makes the dish creamy and rich. One cup is enough to bind everything. You can add optional ingredients to boost flavor. Milk helps thin the mix. Garlic powder and onion powder give it a nice kick. They add depth without much work. For toppings, grated Parmesan cheese adds a salty bite. I sprinkle it on top before baking. Fresh parsley not only looks nice but adds freshness. It’s a great way to finish the dish. You can find the full recipe in the main article. - Preheat your oven to 375°F (190°C). - Steam the cauliflower florets for about 5–7 minutes. They should be tender but firm. Steaming helps to keep the cauliflower's nutrients intact. I like to steam until they are bright white. This makes the dish look fresh and appetizing. - In a large mixing bowl, combine 1 cup of softened cream cheese, 1/2 cup of milk, 1 teaspoon of garlic powder, 1/2 teaspoon of onion powder, and 1/2 teaspoon of paprika. Add salt and pepper to taste. Mix until smooth. - Stir in 1 1/2 cups of shredded cheddar cheese until it blends well. This cheese mixture is creamy and full of flavor. The spices add depth, making the dish even better. - Gently fold in the steamed cauliflower florets. Ensure each piece gets coated in the cheese mixture. I love this part because you can see the cauliflower transform into something special. - Pour the cauliflower mixture into a greased baking dish. Spread it out evenly. - Top with the remaining 1/2 cup of shredded cheddar cheese and 1/4 cup of grated Parmesan cheese. This topping creates a rich, golden crust when baked. - Bake for 25–30 minutes. Watch for the cheese to bubble and turn golden brown. The aroma fills the kitchen, and you’ll know it’s almost ready. Once it’s out, let it cool for a few minutes. It’s a great comfort dish that everyone will love. For the full recipe, check out the earlier section. To make your Cheesy Cauliflower Bake even tastier, try adding spices. I love using: - 1 teaspoon garlic powder - 1/2 teaspoon onion powder - 1/2 teaspoon paprika These spices bring warmth and depth to the dish. You can also add herbs like thyme or oregano for freshness. For cheese, I recommend using: - Sharp cheddar cheese for a strong flavor - Gruyère cheese for a nutty taste - Mozzarella cheese for creaminess Mixing different cheeses adds layers of flavor. Want a lighter version? Use low-fat cream cheese and low-fat milk. This cuts calories without losing taste. You can also boost nutrients by adding vegetables. Try mixing in: - Spinach for iron - Broccoli florets for extra crunch - Carrots for sweetness These veggies make your dish colorful and healthy. Steaming cauliflower is simple. Place chopped florets in a pot with a bit of water. Cover and steam for 5–7 minutes until tender. This keeps the cauliflower firm and flavorful. Avoid overcooking! If you cook it too long, it can turn mushy. You want it slightly crisp before mixing it with cheese. This keeps your dish from getting watery and helps it bake perfectly. {{image_2}} Adding bacon to your cheesy cauliflower bake brings great flavor. The salty, smoky taste pairs well with the cheese and cauliflower. Use crispy, cooked bacon bits. You can add about 1 cup to the cheese mixture. This will make your dish even more special. When you add bacon, reduce the salt in the recipe. Bacon is already salty, so you want to avoid an overly salty dish. Keep an eye on the bake time as well. If you notice the bacon browning quickly, cover it with foil. This helps prevent burning while the cheese melts. For a vegan version, you can swap out the cheese and cream. Use plant-based cheese shreds and vegan cream cheese. Coconut milk or almond milk works well in place of regular milk. These swaps keep the dish creamy and delicious. Adjust cooking times slightly. You may need to bake a bit longer for the cheese to melt. Check it often, and remove it once the cheese is bubbly. This way, you'll get that tasty vegan comfort without losing flavor. To make sure your dish is gluten-free, check all your ingredients. Many pre-packaged cheese products are safe, but read the labels. Use gluten-free breadcrumbs if you want a crunchy topping. If you want to add a crust, consider using ground nuts or gluten-free oats. These add texture and taste without gluten. Just spread them over the top before baking to get a nice crunch. Enjoy your cheesy cauliflower bake, knowing it fits your diet! To store your leftover cheesy cauliflower bake, let it cool first. Place it in an airtight container. Make sure to keep it in the fridge. It will stay good for about three to five days. Always check for any signs of spoilage before eating. If you want to reheat it, try using an oven for the best results. This keeps the cheese nice and melty. If you want to save some for later, freezing works well. First, let the dish cool completely. Then, cut it into portions. Wrap each piece tightly in plastic wrap. Place the wrapped pieces in a freezer bag. This will help keep the flavors fresh. You can freeze it for up to three months. When you are ready to enjoy it again, take a piece out. Let it thaw in the fridge overnight. For reheating, put it in the oven at 350°F (175°C) until heated through. This usually takes about 20 minutes. You can add a little extra cheese on top if you like it extra cheesy. 1. Preheat your oven to 375°F (190°C). 2. Steam the cauliflower florets for 5–7 minutes. They should be tender but firm. 3. Mix softened cream cheese, milk, garlic powder, onion powder, paprika, salt, and pepper until smooth. 4. Add 1 1/2 cups of shredded cheddar cheese to the mixture. Stir well. 5. Gently fold in the steamed cauliflower until coated. 6. Pour the mixture into a greased baking dish. Spread it evenly. 7. Top with the remaining cheddar cheese and grated Parmesan cheese. 8. Bake for 25–30 minutes until the cheese is bubbly and golden. 9. Let it cool for a few minutes before serving. 10. Garnish with fresh parsley. This will help you create a cheesy delight that everyone loves. For the full recipe, check out the detailed instructions above. Yes, you can prepare the Cheesy Cauliflower Bake ahead of time. Here’s how: - Steam the cauliflower and make the cheese mixture. - Combine them and pour into the baking dish. - Cover the dish with plastic wrap and store it in the fridge. - You can bake it later when you're ready. Just add a few extra minutes to the baking time. This method saves time and adds ease to your meal prep. This dish pairs well with many side items. Here are a few ideas: - Roasted chicken or turkey for a hearty meal. - A fresh garden salad for a light touch. - Garlic bread for a comforting addition. - Steamed broccoli for extra veggies. These options complement the creamy flavors of the bake nicely. Enjoy! This article explored how to make a delicious Cheesy Cauliflower Bake. We covered the main and optional ingredients, including simple toppings. You learned step-by-step instructions for preparation, mixing, baking, and helpful tips. I shared ideas for variations, like adding bacon or making it vegan. Finally, we discussed storage tips to keep leftovers fresh. This dish is easy to make, and you can customize it. Enjoy your tasty creation and feel free to experiment!

Cheesy Cauliflower Bake Deliciously Easy Comfort Dish

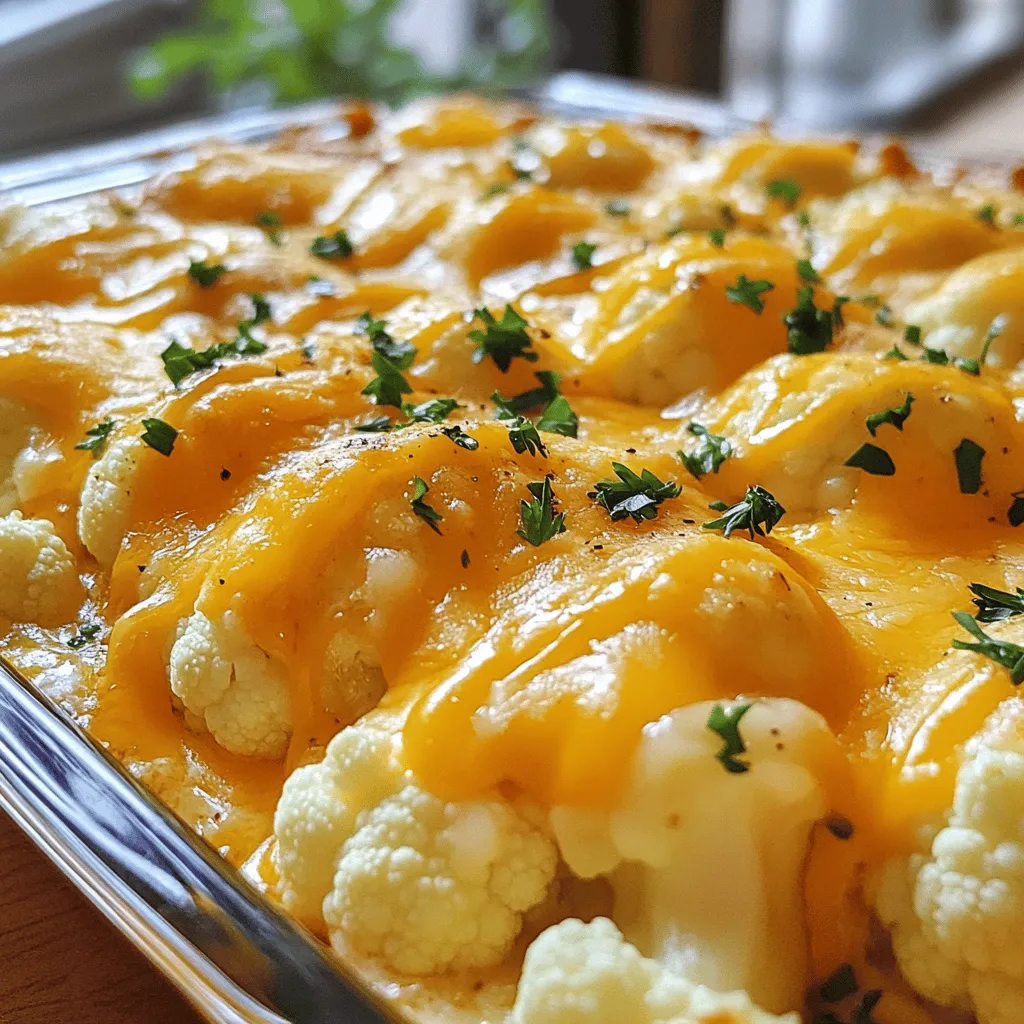
Are you ready to discover a dish that brings comfort and cheesy joy? My Cheesy Cauliflower Bake is a quick

- 2 pounds chicken wings - 1/4 cup honey - 1/4 cup hot sauce - 2 tablespoons soy sauce - 1 tablespoon apple cider vinegar - 1 tablespoon garlic powder - 1 teaspoon onion powder - 1/2 teaspoon smoked paprika - Salt and pepper to taste - 1 tablespoon sesame seeds - 2 green onions, chopped These ingredients come together to create a perfect blend of sweet and spicy. The chicken wings are the star of the show, offering a meaty base. Honey adds a touch of sweetness that balances the heat from the hot sauce. You can use your favorite hot sauce, like Sriracha or something with a kick. Soy sauce gives depth, while apple cider vinegar adds a nice tang. The seasonings are simple but powerful. Garlic powder and onion powder enhance the flavor. Smoked paprika adds a hint of smokiness that makes these wings unforgettable. Garnishing with sesame seeds and green onions not only makes the dish look good but also adds texture and crunch. The combination of these ingredients will make your taste buds dance. For the full recipe, check the complete instructions. Enjoy crafting these wings for your next game day! - First, preheat your oven to 425°F (220°C). - Line a baking sheet with aluminum foil for easy cleanup. - Place a wire rack on top of the baking sheet to help the wings crisp up. - In a large bowl, mix together the honey, hot sauce, soy sauce, apple cider vinegar, garlic powder, onion powder, smoked paprika, salt, and pepper. - Whisk the sauce until it blends well. - Add the chicken wings to the bowl and toss until they are fully coated with the sauce. - Next, arrange the wings in a single layer on the wire rack. - Make sure they are not touching each other for even cooking. - Bake the wings in the oven for about 30 to 35 minutes. - Turn the wings halfway through cooking to get an even golden color. - Once the wings are done, take them out of the oven. - Toss them in any extra sauce you have for added taste. - Finally, sprinkle sesame seeds and chopped green onions on top for a great garnish. For the full recipe, check the complete instructions above! - Ensure wings are patted dry. This step helps them crisp up nicely. - Use a wire rack for crispiness. It allows air to flow around the wings. - Adjust hot sauce for spiciness. You can add more or less based on your taste. - Marinate wings for extra flavor. Letting them sit in the sauce boosts taste. - Arrange on a platter with garnishes. Sprinkle sesame seeds and green onions on top for color. - Serve with side dips. Blue cheese or ranch dressing complements the wings well. For the full recipe, check the earlier section. {{image_2}} You can change the sauce for fun flavors. Try different hot sauces like BBQ or Teriyaki. Each sauce brings a unique taste to your wings. You can also add fruit purees. Mango or pineapple gives the wings a sweet twist. This can balance the heat and add freshness. You have choices when cooking your wings. Grilling adds a smoky flavor and nice char. Baking is easy and makes wings crispy. You can use an Instant Pot for fast cooking. An air fryer works well too, giving wings a nice crunch without much oil. If you need to avoid gluten, use gluten-free soy sauce. It works just as well in the sauce. For honey, you can use maple syrup as a substitute. It keeps the sweetness but adds a different flavor. These options make the dish fit your needs while keeping it tasty. For the full recipe, check out the details above! To store leftover wings, first let them cool. Place them in an airtight container. This keeps the wings fresh for up to four days. You can also cover them tightly with plastic wrap. I recommend using glass or plastic containers with lids. They help prevent spills and keep your fridge clean. If you want to save wings for later, freezing is a great option. Place the cooled wings in a freezer-safe bag. Squeeze out as much air as possible before sealing. This helps prevent freezer burn. You can freeze them for up to three months. When you're ready to eat, thaw wings in the fridge overnight. For quicker thawing, place them in cold water for about an hour. To reheat wings, the oven works best. Preheat your oven to 350°F (175°C). Place the wings on a baking sheet and heat for 15-20 minutes. This keeps them crispy. You can also use an air fryer for a quick method. Heat them at 375°F (190°C) for about 10 minutes. This method keeps the skin nice and crunchy. For added flavor, toss them in a bit of sauce before reheating. For the full recipe, check out the details above and enjoy your wings! Yes, you can make sweet and spicy chicken wings in advance. Cook them fully, then let them cool. Store them in the fridge for up to two days. When you're ready to eat, reheat them in the oven for 10-15 minutes at 375°F (190°C). This keeps them crispy and tasty. To make crispy wings, start by patting them dry with paper towels. This removes moisture. Use a wire rack on your baking sheet. This allows air to circulate around the wings as they cook. Bake them at a high temperature, around 425°F (220°C), and turn them halfway through. This gives you that golden, crunchy texture. The best way to check if chicken wings are fully cooked is to use a meat thermometer. The internal temperature should reach 165°F (74°C). If you don’t have a thermometer, check if the juices run clear when you cut into the wing. No pink meat should be visible. Sweet and spicy chicken wings go well with many sides. Some great options include: - Celery sticks - Carrot sticks - Blue cheese dressing - Ranch dressing - Potato wedges - Coleslaw These sides balance the heat and add crunch. You can easily adjust the sweetness and spiciness. To make wings sweeter, add more honey. If you want them spicier, increase the hot sauce. Taste the sauce before coating the wings. This way, you can find the perfect balance for your taste buds. Try using different hot sauces for unique flavors. You learned how to make sweet and spicy chicken wings using simple ingredients. We covered everything from preparation to cooking methods and variations. These wings are delicious and fun to customize. Don’t forget the tips for storage and reheating so that you enjoy every bite later. Whether you grill, bake, or change the sauce, you can create something great. Enjoy your tasty wings, and share your results with friends!

Sweet and Spicy Chicken Wings Flavorful Game Day Dish

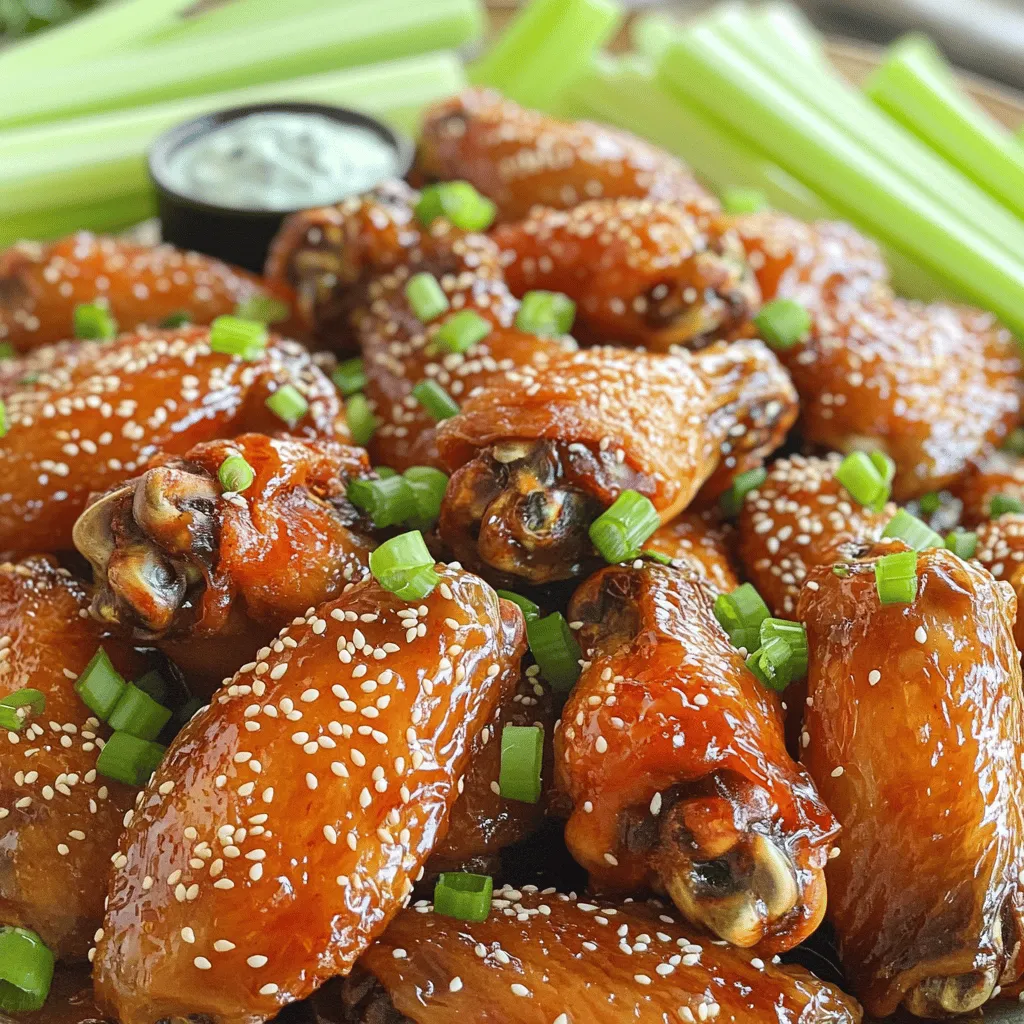
Get ready for game day with my Sweet and Spicy Chicken Wings! These wings bring the perfect mix of sweetness

To make a tasty classic coleslaw, you need fresh and crisp ingredients. Here’s what you’ll need: - 4 cups green cabbage, finely shredded - 1 cup carrots, grated - 1/2 cup red cabbage, finely shredded - 1/2 cup mayonnaise - 2 tablespoons apple cider vinegar - 1 tablespoon Dijon mustard - 1 tablespoon sugar - Salt and pepper to taste - 1/4 cup green onions, sliced (for garnish) These simple ingredients create a mix of textures and flavors. The green and red cabbage add crunch and color. The carrots bring a touch of sweetness. The dressing ties everything together, making it creamy and tangy. You can find the full recipe at the end. Enjoy the process of making this delightful dish! Mixing cabbage and carrots Start by shredding the green cabbage. Use a sharp knife or a box grater. Aim for thin strips. Next, grate the carrots. You want them to match the cabbage in size. I like to use a mix of green and red cabbage for color and crunch. In a large mixing bowl, combine 4 cups of green cabbage, 1 cup of grated carrots, and 1/2 cup of finely shredded red cabbage. Toss them to mix evenly. Making the dressing In a separate bowl, make the dressing. Whisk together 1/2 cup of mayonnaise, 2 tablespoons of apple cider vinegar, 1 tablespoon of Dijon mustard, and 1 tablespoon of sugar. Add salt and pepper to taste. Mix until smooth. This dressing brings all the flavors together. Combining the ingredients Pour the dressing over the cabbage and carrot mix. Gently toss everything together. You want all the veggies to be coated with the dressing. This step is key to a tasty coleslaw. Adjusting seasoning Taste your coleslaw. If it needs more flavor, add more salt, pepper, or sugar. You can adjust it to your liking. This step ensures your coleslaw is perfect for your palate. Chilling the coleslaw Cover the coleslaw and place it in the fridge. Let it chill for at least 30 minutes. This allows the flavors to meld. The cabbage will soften just a bit, making it more enjoyable. Before serving, give it another quick toss. You can garnish with 1/4 cup of sliced green onions for a pop of color. For the full recipe and more details, check out the Crunchy Classic Coleslaw section. - Choosing the right cabbage: For classic coleslaw, green cabbage works best. It gives a nice crunch. You can mix in red cabbage for color and extra flavor. - Using fresh ingredients: Fresh veggies make a big difference. Use crisp, bright cabbage and carrots. Check for any bruises or soft spots. The fresher, the better! - Making ahead for better flavor: Coleslaw tastes great when made ahead. Let it chill in the fridge for at least 30 minutes. This time lets the flavors mix well. - Adjusting sweetness and acidity: Not everyone likes the same taste. Some may want it sweeter, while others prefer a tangy taste. Start with the recipe and tweak it. Add a pinch more sugar or vinegar until it suits your taste. These tips will help you craft the perfect coleslaw. Use these ideas while making the Full Recipe to ensure tasty results! {{image_2}} You can switch up the main ingredients for classic coleslaw. Using Greek yogurt instead of mayonnaise cuts calories and adds protein. It gives a tangy taste that many enjoy. Consider adding diced apples or raisins for a sweet twist. This can make your slaw more fun and flavorful. The crunch of apples or the chewiness of raisins adds texture, too. You can also incorporate spices like celery seed. This spice adds a nice hint of flavor without overwhelming the dish. It’s a simple way to make your coleslaw unique. You can change your coleslaw to match the seasons. In spring, try adding radishes. They add a peppery bite that pairs well with the crunch of cabbage. For summer, consider using colorful peppers. Red, yellow, or orange peppers not only taste great but also make your dish look vibrant. This slaw can be a hit at summer barbecues. In fall, use shredded Brussels sprouts instead of cabbage. This gives a different flavor and makes your coleslaw feel cozy. It’s a great way to use seasonal produce in your cooking. For the complete recipe, check out the Full Recipe section. To keep your classic coleslaw fresh, store it in the fridge. Use an airtight container for best results. This helps keep the vegetables crisp and the flavors bright. Place the coleslaw in the coldest part of your fridge, usually near the back. How long does coleslaw last? If stored correctly, it should last about three to five days. However, the crunchiness may fade over time. Check for any signs of wilting or off smells before serving. Can you freeze coleslaw? Freezing coleslaw is not the best option. The texture of cabbage can change when frozen. If you must freeze it, do so without the dressing. When ready to eat, thaw it in the fridge and mix in fresh dressing. This keeps your coleslaw tasty and enjoyable. For the complete coleslaw experience, try the Full Recipe. What is the difference between coleslaw and slaw? Coleslaw uses cabbage as the main base. Slaw can use other veggies too. For example, you might find slaw made with carrots or broccoli. Both are crunchy and fresh, but coleslaw is a specific type of slaw. Can I make coleslaw without mayonnaise? Yes, you can! Use yogurt or a vinaigrette instead. Yogurt adds creaminess, while vinaigrette keeps it light. Both options taste great and lighten up the dish. How do I make my coleslaw crunchy? Start with fresh veggies. Shred the cabbage and carrots just before mixing. You can also add ingredients like nuts or seeds for extra crunch. Letting it chill in the fridge helps too. What dishes pair well with coleslaw? Coleslaw goes well with BBQ dishes, burgers, and fried chicken. It also complements tacos and sandwiches. The crunch balances out rich flavors, making every bite tasty. You can find the full recipe for crunchy classic coleslaw in the previous section. You’ve learned how to make classic coleslaw with simple steps and fresh ingredients. We covered the key ingredients, preparation tips, and tasty variations. Remember to store your coleslaw properly to keep it fresh. Feel free to experiment with flavors that suit your taste. Coleslaw is a versatile side dish that can fit any meal. Enjoy your crunchy, creamy creation at your next gathering!

Classic Coleslaw Simple Steps for Tasty Perfection

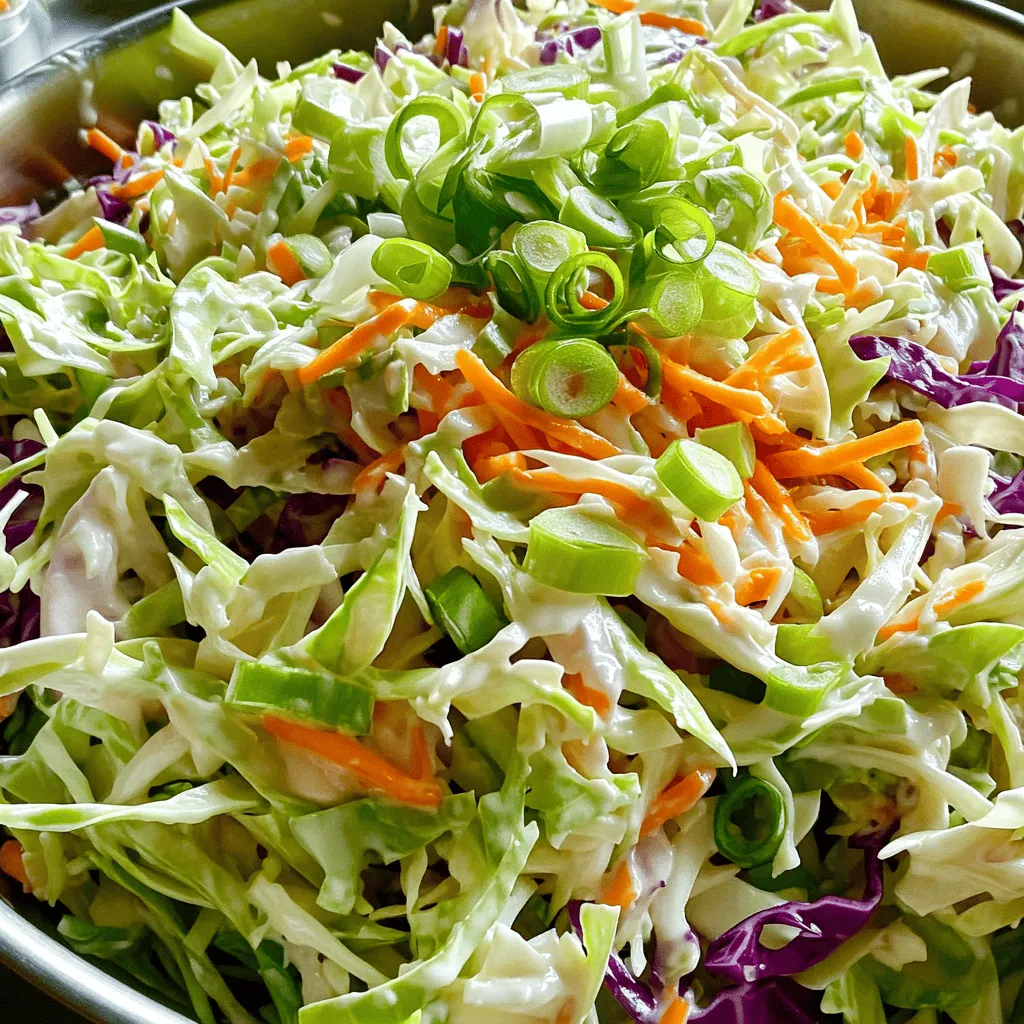
Are you ready to master the art of classic coleslaw? In just a few simple steps, you’ll create a crunchy,

For a delicious Lemon Dill Salmon Foil Packet, you need the following ingredients: - 4 salmon fillets (about 5-6 oz each) - 2 tablespoons olive oil - 2 tablespoons fresh dill, chopped (or 1 tablespoon dried dill) - 1 lemon, thinly sliced - 1 cup cherry tomatoes, halved - 1 cup asparagus, trimmed and cut into 2-inch pieces - 2 cloves garlic, minced - Salt and pepper to taste - Aluminum foil This list ensures your meal is fresh and vibrant. Salmon fillets are the star. They provide protein and healthy fats. Olive oil adds richness and helps the flavors blend. Fresh dill brings a bright, herbal note that pairs well with the lemon. Lemon slices brighten the dish, adding zest and a tangy flavor. Cherry tomatoes add sweetness and a pop of color. Asparagus gives a nice crunch and a healthy green touch. Garlic infuses a savory aroma. Remember to season with salt and pepper for balance. Finally, you’ll need aluminum foil. It keeps everything sealed and steams the salmon and veggies perfectly. For the full recipe, check out the detailed instructions. Enjoy your cooking! - First, preheat your grill to medium-high heat. If using an oven, set it to 400°F (200°C). - Next, cut out four sheets of aluminum foil. Each should be about 12x15 inches. Lay them flat on your workspace. - In a small bowl, mix together 2 tablespoons of olive oil, minced garlic, chopped dill, salt, and pepper. This mixture adds a lot of flavor. - Now, place one salmon fillet in the center of each foil sheet. Drizzle the olive oil mix over each fillet. - Top each fillet with thin lemon slices, halved cherry tomatoes, and asparagus pieces. This adds great color and taste. - Season with a bit more salt and pepper if you like extra flavor. - To seal the packets, fold the sides of the foil over the salmon and vegetables. Then, fold up the ends tightly to keep everything inside. - Place the sealed foil packets on the grill or in the oven. Cook them for about 15 to 20 minutes. The salmon should be cooked through and flake easily with a fork when done. - When ready, carefully open the packets. Be careful of the hot steam! Serve right away and enjoy. You can garnish with more fresh dill if you want. For the full recipe, check [Full Recipe]. Grilling and oven cooking both work well for lemon dill salmon foil packets. The grill adds a nice smoky flavor. It also gives the salmon a slight char. Oven cooking is great for a more controlled heat. You can use it year-round, no matter the weather. For the perfect salmon texture, aim for a cooking time of 15 to 20 minutes. The salmon should flake easily with a fork when done. If you want to check for doneness, use a meat thermometer. The ideal internal temperature is 145°F (63°C). While dill and lemon shine in this recipe, feel free to experiment. You can add herbs like thyme or basil for extra flavor. A pinch of red pepper flakes can give it a nice kick. If you want a sweeter taste, try adding honey or maple syrup. Adjust the flavor by using different citrus fruits. Lime or orange can bring a fun twist. Mixing in some capers or olives can also enhance the taste. For side dishes, roasted potatoes or a fresh salad pair well with salmon. You can also serve it over a bed of quinoa or rice for a hearty meal. Presentation is key! When you open the foil packets, let the steam escape. Arrange the salmon and veggies on a plate for a colorful display. Garnish with extra lemon slices and dill for a beautiful touch. For the full recipe, visit the link to make your own lemon dill salmon foil packets! {{image_2}} You can change the veggies in your lemon dill salmon foil packets. Try bell peppers or zucchini for a twist. Both add color and taste. You can also use green beans if you want a crunch. If you want to switch up the fish, salmon is great, but it’s not the only option. Trout or tilapia works well too. These fish have a mild flavor that pairs nicely with lemon and dill. Adding citrus can brighten your dish even more. Try orange slices or lime for a unique touch. These flavors blend well with dill and add a fresh burst. You can also explore other herbs. Basil or parsley can change the taste profile. They add new notes that can surprise your taste buds. Experimenting with flavors can make each meal special. You can use foil packets or a baking dish. Both methods work well, but foil packets keep things juicy. They also make cleanup easy, which I love! If you want a one-pan meal, use the same ingredients in a skillet. Just sauté everything together for a quick dish. This method works well if you’re short on time but still want a tasty meal. For the full recipe, check out the complete instructions provided earlier. To keep your Lemon Dill Salmon Foil Packets fresh, let them cool first. Place them in airtight containers. This keeps air out and helps prevent spoilage. You can store them in the fridge for up to three days. Use a marker to label the date so you know when to eat them. When it’s time to enjoy leftovers, the best way to reheat salmon foil packets is in the oven. Preheat the oven to 350°F (175°C). Place the foil packets on a baking sheet. Heat for about 10-15 minutes. This method keeps the salmon moist and flavorful. Avoid using the microwave. It can make the salmon rubbery and dry. You can freeze Lemon Dill Salmon Foil Packets for later use. To freeze, wrap them tightly in plastic wrap, then in aluminum foil. This double wrap protects against freezer burn. They can last up to three months in the freezer. When you’re ready to eat, transfer the packets to the fridge to thaw overnight. Reheat as mentioned above. Enjoy your tasty meal anytime! Yes, you can use frozen salmon! Just make sure to thaw it first. You can do this in the refrigerator overnight or use the quick method in cold water. This helps the salmon cook evenly. After thawing, pat the salmon dry. This step helps the seasoning stick better and prevents excess water in your foil packets. Cook the salmon for 15-20 minutes. If you use a grill, heat it to medium-high. If you bake, set your oven to 400°F (200°C). To check if it’s done, look for the salmon to flake easily with a fork. The center should be opaque but still moist. Avoid overcooking, as that can make it dry. Yes, you can prepare the foil packets ahead of time. Just assemble them and keep them in the fridge for up to 24 hours. When you are ready to cook, follow the same instructions. This makes it easy to enjoy a healthy meal without much fuss. For the best flavor, cook them fresh but prepping in advance saves time! You now know how to make a delicious salmon foil packet meal. We covered the best ingredients, preparation steps, and cooking tips. You can even mix and swap ingredients to suit your taste. Remember to follow proper storage methods for leftovers and reheating. Salmon foil packets are handy for quick meals or fancy dinners. Enjoy trying out this simple, tasty dish! Your kitchen adventure awaits.

Lemon Dill Salmon Foil Packets Flavorful and Easy Meal

If you’re looking for a quick, tasty meal, try my Lemon Dill Salmon Foil Packets. This dish blends fresh salmon

To make mango salsa chicken, you need a few key ingredients. The star of the show is the chicken. Here’s what you’ll need: - 4 boneless, skinless chicken breasts - 1 ripe mango, diced - 1 red bell pepper, finely chopped - 1 small red onion, finely chopped - 1 jalapeño, deseeded and minced - 2 tablespoons fresh cilantro, chopped - 2 tablespoons lime juice These fresh ingredients create a bright and tasty dish. Next, let’s talk about the seasoning and marinade. These add depth to the chicken. Here’s what you will need: - 1 tablespoon olive oil - 1 teaspoon garlic powder - 1 teaspoon ground cumin - Salt and pepper to taste These simple spices enhance the flavor of the chicken. You can also add optional garnishes, like extra cilantro or lime wedges, for a fun touch. For the full recipe, check out the cooking instructions! First, preheat your grill or stovetop grill pan over medium heat. This step is key to getting those nice grill marks. While the grill heats up, prepare a simple seasoning rub. In a small bowl, mix together olive oil, garlic powder, ground cumin, salt, and pepper. This rub will add great flavor to the chicken. Next, take your chicken breasts and coat them evenly with the seasoning mixture. Make sure every inch of chicken is covered. This helps to lock in moisture and flavor during cooking. Now it's time to grill. Place the seasoned chicken on the grill and cook for about 6-7 minutes on each side. You want the chicken to get that beautiful golden color. It's important to check the internal temperature. Use a meat thermometer to ensure it reaches 165°F (75°C). This keeps the chicken safe to eat. Once the chicken is done, remove it from the grill. Let it rest for 3-5 minutes. This helps the juices redistribute for a tender bite. While the chicken cooks, prepare the mango salsa. Start by dicing the ripe mango, red bell pepper, red onion, and jalapeño. Add these to a medium bowl. Then, mix in chopped cilantro and lime juice. Add a pinch of salt to balance the flavors. Stir gently to combine. Taste your salsa and adjust if needed. If you want more heat, add more jalapeño. If it needs more zing, a splash of lime juice works wonders. For the complete recipe, check the Full Recipe section. Enjoy the burst of flavors in every bite! To make the most of your Mango Salsa Chicken, start by prepping your grill. Clean the grill grates well. This step keeps the chicken from sticking. Brush some oil on the grates. It helps create those lovely grill marks. To avoid dryness, use a meat thermometer. Cook the chicken until it reaches 165°F (75°C). Let the chicken rest for a few minutes after grilling. This step locks in the juices and keeps the meat tender. Adjust the spice levels to fit your taste. If you like heat, add more jalapeño. For a milder dish, use less spice. You can also add a bit of chili powder for extra warmth. Fresh herbs make a big difference. Try adding chopped basil or mint to the salsa. These herbs give the dish a bright, fresh taste. You can even switch up the cilantro for a new twist. Want more tips? Check the Full Recipe for more details on making this dish shine! {{image_2}} You can switch up the protein in this dish. Grilled shrimp makes a great choice. Shrimp cooks quickly and pairs well with mango salsa. Just marinate it like the chicken. Tofu is another awesome option. It absorbs flavors well. Use firm tofu for the best texture. Cut it into cubes and grill until golden. You can also try baking or pan-searing for variety. These methods give a nice crust and keep the inside moist. While mango is the star of this salsa, feel free to experiment. Pineapple adds a sweet twist. Papaya offers a lovely tropical flavor too. You can also mix in other vegetables. Diced cucumber brings a refreshing crunch. Chopped tomatoes can enhance the salsa's color and taste. Don't hesitate to try different herbs. Mint or basil can offer a unique flavor profile. Each change can make this dish exciting every time you make it. For the full recipe, check the main section above. After enjoying your mango salsa chicken, store leftovers right. Place them in an airtight container. Refrigerate them within two hours to keep them safe. The chicken stays fresh for up to three days. If you want to save them longer, freezing is a good option. Wrap the chicken tightly in plastic wrap and then foil. This helps prevent freezer burn. You can freeze the salsa too. Just keep it in a separate container. It will last up to three months in the freezer. When it's time to enjoy leftovers, reheating is key. The best method is to use an oven. Preheat it to 350°F (175°C). Place the chicken on a baking sheet and cover it with foil. Heat for about 15-20 minutes. This keeps the chicken moist. If you want to reheat the salsa, do it on the stove over low heat. Stir gently until warm. Avoid microwaving the salsa, as it can lose flavor and texture. Keeping the chicken and salsa warm together helps maintain their delicious taste. How long to marinate chicken for extra flavor? I recommend marinating the chicken for at least 30 minutes. This gives the flavors time to soak in. You can also marinate it longer, up to four hours, for a stronger taste. However, avoid marinating for more than 24 hours to keep the chicken tender and juicy. Can I use frozen chicken breasts? Yes, you can use frozen chicken breasts. Just be sure to thaw them completely before cooking. You can thaw chicken overnight in the fridge or use the microwave. Once thawed, follow the same steps as in the Full Recipe. Best side dishes to serve with Mango Salsa Chicken Mango Salsa Chicken pairs well with many sides. Here are some tasty options: - Rice or quinoa for a hearty base - Grilled vegetables for added color and flavor - A fresh green salad to balance the meal - Tortilla chips with guacamole for a fun crunch Pairing with beverages for a complete meal For drinks, I suggest light and refreshing options. Here are a few ideas: - A crisp white wine like Sauvignon Blanc - Iced tea with a splash of lime - Sparkling water with fruit slices for a non-alcoholic choice - A light beer, like a pilsner, can also complement the dish well Mango Salsa Chicken is easy and fun to make. We covered the main ingredients, including chicken and fresh produce. I shared tips for grilling to ensure juicy chicken every time. You learned how to create a flavorful mango salsa and ways to switch up the recipe. Proper storage and reheating techniques keep your meal tasting fresh. Now, you can enjoy this bright, tasty dish and impress your friends or family. Remember, cooking is about creativity—experiment and make it your own!

Mango Salsa Chicken Flavorful Grilled Delight

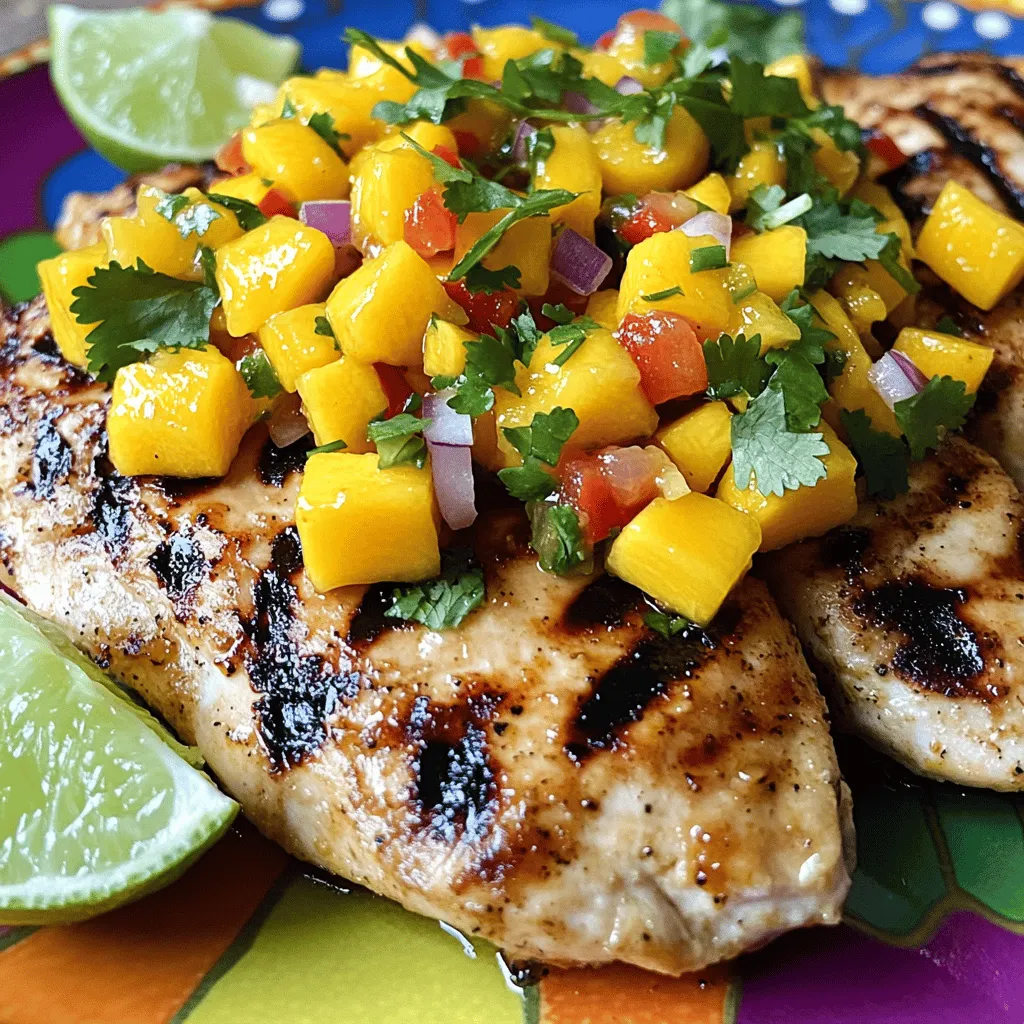
Get ready to wow your taste buds with Mango Salsa Chicken! This vibrant dish combines juicy chicken breasts with a

Older posts
Newer posts
← Previous Page1 … Page84 Page85 Page86 … Page123 Next →

dsad

© 2025 Southern Dishes • Built with GeneratePress

Our Policies

  • Copyright Policy
  • Cookie Policy
  • GDPR Policy
  • Privacy Policy
  • Disclaimer
  • Terms Of Use

More Information

  • Home
  • About
  • Contact
  • Appetizers
  • Dessert
  • Dinner
  • Drinks
©2025, Southern Dishes About Back To Top