Skip to content
DisclaimerTerms Of UseGDPR PolicyCookie Policy

Southern Dishes

  • Home
  • Drinks
  • Appetizers
  • Dinner
  • Dessert
  • About
  • Contact
  • Privacy Policy
DisclaimerTerms Of UseGDPR PolicyCookie Policy

Isabella

For a tasty herbed quinoa salad, you need simple and fresh ingredients. Here’s what you will need: - 1 cup quinoa, rinsed and drained - 2 cups vegetable broth or water - 1 cup cherry tomatoes, halved - 1 cucumber, diced - 1 small red onion, finely chopped - 1 bell pepper (any color), diced - 1 cup fresh parsley, chopped - 1/2 cup fresh mint leaves, chopped - 1 lemon, juiced - 3 tablespoons olive oil - Salt and pepper to taste - Feta cheese, crumbled (optional) These ingredients work well together. The quinoa gives you a great base, while the veggies add crunch and color. You can change your salad with optional ingredients. Here are a few ideas to make it your own: - Avocado for creaminess - Chickpeas for extra protein - Corn for sweetness - Spinach for more greens Feel free to mix and match. This salad is very flexible! Every ingredient brings its own health benefits. Here’s a quick look at what they offer: - Quinoa: A great source of protein and fiber. - Cherry tomatoes: Packed with vitamins and antioxidants. - Cucumber: Hydrating and low in calories. - Red onion: Full of vitamins and good for heart health. - Bell pepper: High in Vitamin C and adds sweetness. - Parsley: Good for digestion and full of vitamins. - Mint: Aids digestion and adds a refreshing taste. - Lemon: Provides vitamin C and enhances flavor. - Olive oil: Healthy fats that are good for your heart. - Feta cheese (optional): Adds calcium and flavor. This herbed quinoa salad is not just tasty, but also good for you! For the full recipe, check out the section above. To start, measure one cup of quinoa. Rinse it well under cold water. This step removes any bitter taste. Next, put the rinsed quinoa in a medium saucepan. Add two cups of vegetable broth or water. Turn the heat to medium-high and bring it to a boil. Once it boils, reduce the heat to low. Cover the pan and let it simmer for about 15 minutes. You want the quinoa to absorb all the liquid. After 15 minutes, remove the pan from heat. Let it sit, still covered, for five more minutes. This step helps the quinoa become fluffy. Then, use a fork to fluff it up and let it cool to room temperature. In a large mixing bowl, combine the cooled quinoa with fresh veggies. Start by adding one cup of halved cherry tomatoes. Then, add one diced cucumber, one finely chopped red onion, and one diced bell pepper. The colors and textures will make the salad pop. Next, chop one cup of fresh parsley and half a cup of fresh mint leaves. Add these herbs to the bowl. They bring a bright taste to the salad. Gently mix everything together until well combined. For the dressing, grab a small bowl. Whisk together the juice of one lemon and three tablespoons of olive oil. Season with salt and pepper to taste. Mix it well until everything is blended. Now, pour the dressing over the quinoa salad. Gently toss the salad until all ingredients are coated. If you like, sprinkle crumbled feta cheese on top. This adds a creamy touch. For the full recipe, check the details above. Enjoy your fresh and flavorful herbed quinoa salad! To fluff quinoa, let it rest after cooking. After you remove it from heat, keep the lid on for 5 minutes. This step helps the grains to settle. Then, use a fork to gently stir. This method separates the grains. Fluffy quinoa makes your salad light and easy to eat. To keep herbs fresh, store them properly. Rinse the herbs gently in cool water. Then, dry them using a paper towel. For parsley and mint, place them in a jar with water, like flowers. Cover the tops with a plastic bag and keep them in the fridge. This trick keeps them fresh longer. You can also freeze herbs in ice cube trays with a bit of water. This way, they are ready for your next meal! Serve your herbed quinoa salad in a big bowl for sharing. You can also divide it into smaller plates for guests. Garnish with extra herbs and a lemon wedge. This adds color and gives a fresh touch. For a heartier meal, pair it with grilled chicken or chickpeas. Enjoy this salad cold or at room temperature. It’s perfect for picnics or lunch! For the full recipe, check the instructions above. {{image_2}} You can add protein to your Herbed Quinoa Salad. Chickpeas are a great choice. They add fiber and make the salad heartier. Just rinse and drain a can of chickpeas. Toss them in with your other ingredients. If you prefer meat, grilled chicken works well too. Cook the chicken first, then chop it into pieces. Add it to the salad for a tasty boost. This makes the dish even more filling. While parsley and mint are classic, you can mix it up. Basil adds a sweet flavor. Dill gives a fresh taste. You might also enjoy cilantro for a zesty change. Use what you love or what you have. Each herb will change the salad’s taste. Experiment and find your favorite mix. You can also change the veggies based on the season. In summer, add fresh corn or zucchini. In fall, try roasted sweet potatoes or butternut squash. These seasonal vegetables add color and flavor. They also make your salad more fun and unique. Get creative and use what you find fresh at the market. For the full recipe, check out the Herbed Quinoa Salad section above. To keep your herbed quinoa salad fresh, store it in the fridge. Place the salad in a sealed container. Make sure it cools to room temperature before sealing. This helps to prevent extra moisture buildup. The salad tastes best when enjoyed within three days. Use airtight glass containers for best results. They keep flavors locked in and prevent odors. Plastic containers work too, but glass is more eco-friendly. If you plan to store it for a while, choose a container that fits the amount of salad you have. You usually don’t need to reheat quinoa salad. It tastes great cold. If you prefer it warm, heat it gently on the stovetop. Add a splash of olive oil or broth to help it heat evenly. Stir often to avoid burning. Enjoy your herbed quinoa salad fresh or warm! Yes, you can make this salad ahead of time. I often prepare it a day before serving. This way, the flavors blend better. Just store it in the fridge in an airtight container. When you’re ready to serve, give it a quick toss. Add more dressing if needed. If you need a substitute for quinoa, try brown rice or couscous. Both options work well. Brown rice takes longer to cook, but it adds a nice texture. Couscous cooks quickly and absorbs flavors well. You can also use farro or bulgur for a different taste. Herbed Quinoa Salad stays fresh for about 3 to 5 days in the fridge. Make sure to keep it in a sealed container. If you notice any changes in smell or color, it's best to discard it. For longer freshness, you can keep the dressing separate until serving. This blog post covered the key components for a tasty herbed quinoa salad. We discussed essential and optional ingredients, along with their nutritional benefits. You learned how to cook quinoa perfectly, mix ingredients, and prepare a flavorful dressing. We shared tips for fluffing quinoa and preserving herbs. Various protein options and seasonal veggies can add excitement to your dish. Finally, storage and reheating tips ensure freshness. Enjoy your herbed quinoa salad, knowing it is healthy and simple to make!

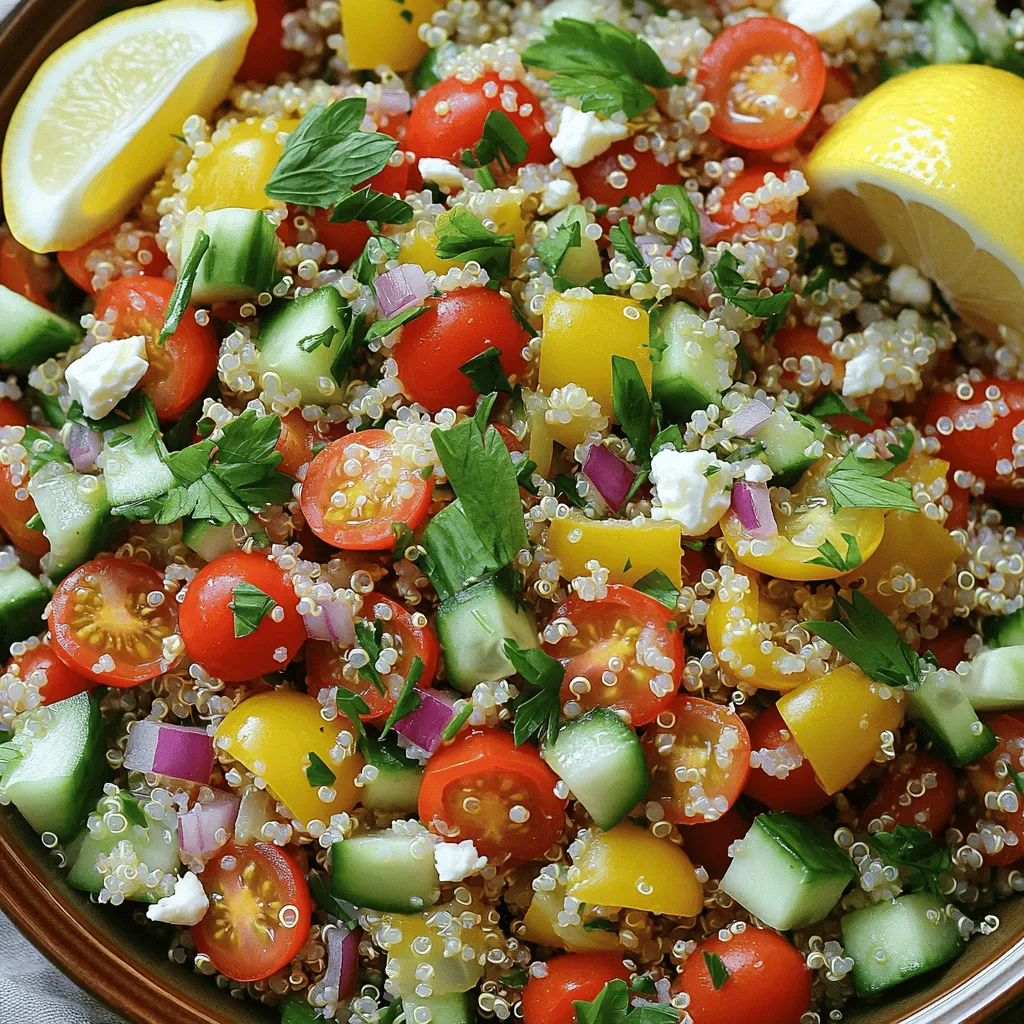
Herbed Quinoa Salad Fresh and Flavorful Recipe

Are you ready to elevate your meal game? This Herbed Quinoa Salad is fresh, colorful, and packed with flavor. It’s

- 4 boneless, skinless chicken thighs - 1 cup homemade or store-bought basil pesto - 1 cup cherry tomatoes, halved - 1 cup mozzarella cheese, shredded - 1 tablespoon olive oil - Salt and pepper to taste - Fresh basil leaves for garnish - Balsamic glaze (optional for drizzling) - Baking dish - Aluminum foil - Measuring cups and spoons In this recipe, chicken thighs steal the show. They stay juicy and tender during baking. You can use homemade or store-bought basil pesto. The pesto adds a great flavor that pairs well with the chicken. Cherry tomatoes bring a sweet burst, while mozzarella cheese adds creaminess. You will also need some olive oil to keep the chicken moist. A touch of salt and pepper enhances all the flavors. Fresh basil leaves make a lovely garnish. If you want, drizzle balsamic glaze on top for extra flavor. Make sure you have a good baking dish to hold everything. Aluminum foil helps the chicken cook evenly. Measuring cups and spoons keep your ingredients precise. This dish is simple yet full of flavor. Gather your ingredients and equipment, and let’s get cooking! For the complete recipe, check out the Full Recipe. - Preheat your oven to 375°F (190°C). - Take a baking dish and drizzle olive oil. Spread it evenly across the bottom. - Season both sides of the chicken thighs with salt and pepper. - Place the seasoned chicken in the baking dish. - Spread the pesto generously over each chicken piece. - Cover the dish with aluminum foil and bake for 25 minutes. - After 25 minutes, carefully remove the foil. - Sprinkle the shredded mozzarella cheese over the chicken. - Return the dish to the oven and bake uncovered for 15 more minutes. - Make sure the chicken hits 165°F (75°C) and the cheese is bubbly. - Take it out of the oven and let it rest for a few minutes. - Garnish with fresh basil leaves and drizzle balsamic glaze if you like. You can find the full recipe to guide you through each step. To get juicy baked chicken, set your oven to 375°F (190°C). Cook the chicken thighs for about 25 minutes covered with foil. This keeps the moisture in. After that, remove the foil and add cheese for 15 more minutes. Check that the chicken reaches 165°F (75°C). This ensures it is safe to eat and packed with flavor. You can choose between homemade or store-bought pesto. Homemade pesto often has fresher flavors. You can make it with fresh basil, garlic, nuts, and olive oil. If you use store-bought, pick a high-quality brand for the best taste. Feel free to mix in other herbs like parsley or cilantro for a twist. You can also add spices like red pepper flakes for heat. To make your dish look great, garnish with fresh basil leaves. This adds a nice touch of color. You can drizzle balsamic glaze on top for extra flavor and a glossy finish. Serve the baked pesto chicken with sides like rice or a simple salad. This adds balance to your meal and makes it more filling. For the full recipe, check out the [Full Recipe]. {{image_2}} You can switch proteins or veggies in this recipe. Try using chicken breasts, turkey, or even tofu for a plant-based option. If you want a lighter dish, use zucchini or eggplant instead of chicken. For cheese, there are great dairy-free options. Look for almond or cashew-based cheeses. These melt well and add flavor without dairy. Adding spices can take your dish to the next level. Try garlic powder, red pepper flakes, or Italian seasoning. These spices enhance the pesto and give your chicken a nice kick. You can also customize the sauces. A squeeze of lemon juice brightens the flavors. For a twist, use sun-dried tomato pesto or even a spicy harissa sauce. Meal prep is easy with baked pesto chicken. You can make a big batch and store it in the fridge. Just divide it into containers for quick lunches or dinners. If you have leftovers, get creative! Chop the chicken and toss it into salads or wraps. You can also serve it over pasta or rice for a hearty meal. Check out the Full Recipe for more details! To store your baked pesto chicken, let it cool first. Place leftovers in an airtight container. This keeps the chicken moist and prevents odors from mixing. You can store it in the fridge for up to four days. You can also freeze baked pesto chicken. Cut it into portions for easy meals later. Wrap each piece in plastic wrap and place them in a freezer-safe bag. This helps prevent freezer burn. When you’re ready to eat, thaw it overnight in the fridge. To reheat, warm it in the oven at 350°F (175°C) until hot. Baked pesto chicken is perfect for meal prep. Cook a big batch on the weekend. You can serve it with rice, pasta, or salad throughout the week. For family-friendly storage, try using individual containers. This makes it easy to grab a meal for busy days. To check if the chicken is fully cooked, use a meat thermometer. The safe internal temperature for chicken is 165°F (75°C). Insert the thermometer into the thickest part of the thigh. If it reads 165°F, your chicken is ready. Cooking to this temperature ensures the chicken is safe to eat and juicy. Yes, you can use frozen chicken thighs. However, the cooking time will change. Frozen chicken takes longer to cook. Add about 10-15 minutes to the baking time. Always check the internal temperature to ensure it reaches 165°F. Baked pesto chicken pairs well with many sides. Here are some great options: - Roasted vegetables - Garlic bread - A fresh green salad - Quinoa or rice - Mashed potatoes These sides complement the flavors of the chicken and make a complete meal. For the full recipe, check out the detailed cooking instructions. This blog post covered the ingredients, steps, and tips for making baked pesto chicken. You learned about the main ingredients like chicken thighs, basil pesto, and mozzarella cheese. I also shared storage tips for leftovers and ways to customize the dish. Enjoying a delicious meal is simple when you have the right recipe. With these steps, you'll impress your family and friends. Keep experimenting with flavors and enjoy every bite!

Baked Pesto Chicken Juicy and Flavorful Dish

Looking for a quick and tasty meal? You’ve come to the right place! This Baked Pesto Chicken dish is juicy,

- 4 large sweet potatoes, peeled and cubed - 1/2 cup brown sugar - 1/4 cup maple syrup - 1/2 cup unsalted butter, softened - 1 teaspoon vanilla extract - 1/2 teaspoon cinnamon - 1/4 teaspoon nutmeg - 1/2 teaspoon salt - 1/2 cup milk (or almond milk for a dairy-free option) To make a great sweet potato casserole, you need sweet potatoes. They are the star of the dish. Choose large, firm ones for the best flavor. Brown sugar and maple syrup give it a sweet touch. They balance the natural earthiness of the sweet potatoes. Butter adds creaminess, while milk helps create a smooth texture. - 1 cup mini marshmallows - 1/2 cup pecans, chopped - Spices and flavorings like vanilla or nutmeg For a fun twist, add mini marshmallows on top. They melt and become gooey and sweet. Chopped pecans give a nice crunch. They also add a rich, nutty taste. You can use extra spices like vanilla or nutmeg to make it even better. This sweet potato casserole is simple to make. You can check the full recipe for a delicious experience. To make your sweet potato casserole vegan, you can use plant-based substitutes. Instead of butter, try coconut oil or vegan margarine. For milk, almond milk works well. You can also swap the brown sugar for coconut sugar. This keeps the flavor rich while staying plant-friendly. To enhance the flavor, add a dash of maple syrup and a hint of almond extract. These small changes can really boost the dish. You can also fold in chopped pecans for crunch and texture. This vegan version remains just as tasty as the classic. If you need a gluten-free casserole, you can easily modify the recipe. All the ingredients in the main recipe are naturally gluten-free. Just make sure the butter and any toppings are certified gluten-free. This will help you avoid any issues while baking. Creating a safe baking environment is key. Clean your workspace and use clean tools to prevent cross-contamination. This way, everyone can enjoy your delicious casserole worry-free. To store leftovers, let the casserole cool down first. Then, cover it tightly with plastic wrap or foil. Place it in the fridge. It will stay fresh for up to four days. If you want to save it longer, consider freezing it. For freezing, use an airtight container. You can also wrap it in foil before placing it in a freezer bag. This will help prevent freezer burn. It can last up to three months when frozen. When you’re ready to eat leftovers, reheat them in the oven. Preheat to 350°F (175°C) and cover your casserole with foil. This helps maintain texture and flavor. Bake for about 20 minutes or until heated through. You can also use the microwave for quick reheating. Just use a microwave-safe dish and cover it loosely. Heat in short bursts, stirring in between, until warm. This keeps the sweet potatoes creamy and delicious. Sweet potato casserole shines on its own, but adding sides makes it better. Try these pairings: - Complementary Side Dishes: - Roasted Brussels sprouts add a crunchy texture. - Green bean casserole brings a classic touch. - A fresh salad with vinaigrette balances the sweetness. - Cornbread is great for a comforting, southern feel. - Beverage Recommendations: - A light white wine, like Sauvignon Blanc, works well. - Apple cider adds a nice fall flavor. - Herbal tea can be a warm, cozy option. Sweet potato casserole fits many occasions perfectly. Here are some great times to serve it: - Holiday Gatherings: - Thanksgiving is the classic time for sweet potato casserole. - Christmas dinner is another favorite occasion. - Easter brunch can include this dish for a twist. - Family Dinners and Potlucks: - Bring it to family gatherings for a warm dish everyone loves. - Potlucks are perfect for sharing this crowd-pleaser. - Make it for a cozy Sunday dinner with the family. Sweet potato casserole is versatile and delicious, making it a go-to dish for many events. For the full recipe and more details, check the Full Recipe section. {{image_2}} Each serving of sweet potato casserole holds about 250 calories. The sweet potatoes add fiber and vitamins. Brown sugar and maple syrup give it sweetness and energy. Butter contributes fat, while milk adds protein and creaminess. Here is a quick look at the main ingredients: - 4 large sweet potatoes - 1/2 cup brown sugar - 1/4 cup maple syrup - 1/2 cup unsalted butter - 1/2 cup milk This mix makes it a tasty dish that fills you up. Sweet potatoes are rich in vitamins A and C. They also provide fiber, which helps digestion. These nutrients support your immune system and skin health. Sweet potatoes are low on the glycemic index. This means they won’t spike your blood sugar. They also have antioxidants, which fight free radicals in the body. Choosing sweet potatoes is a smart choice for your health! You can use margarine or coconut oil instead of butter. Both give a similar texture and flavor. They are good options for dairy-free diets. Yes, you can prepare it a day before. Make the mixture, then cover it and place it in the fridge. You can bake it the next day. Just add a few extra minutes to the baking time. You can skip the marshmallows for a less sweet taste. Top it with chopped nuts, like pecans or walnuts, for crunch. Another option is to use a mix of brown sugar and cinnamon for a flavorful topping. This sweet potato casserole recipe is simple and delicious. Here’s what you need: - 4 large sweet potatoes, peeled and cubed - 1/2 cup brown sugar - 1/4 cup maple syrup - 1/2 cup unsalted butter, softened - 1 teaspoon vanilla extract - 1/2 teaspoon cinnamon - 1/4 teaspoon nutmeg - 1/2 teaspoon salt - 1/2 cup milk (or almond milk for a dairy-free option) - 1 cup mini marshmallows - 1/2 cup pecans, chopped Now, let’s jump into the steps: 1. Preheat your oven to 350°F (175°C). 2. Boil water in a large pot. Add the cubed sweet potatoes. Cook for 15-20 minutes until tender. Drain and cool. 3. In a big bowl, mix the sweet potatoes, brown sugar, maple syrup, softened butter, vanilla extract, cinnamon, nutmeg, salt, and milk. Mash until smooth and creamy. 4. Pour the sweet potato mix into a greased 9x13 inch baking dish. Spread it evenly. 5. Top with mini marshmallows and chopped pecans. 6. Bake for 25-30 minutes. Look for golden brown marshmallows and bubbly edges. 7. Let it cool for a few minutes before serving. This dish serves 8 and takes about 55 minutes total. Enjoy the sweet flavors and creamy texture of this sweet potato casserole! Sweet potato casserole is a crowd-pleaser you can make with ease. We covered key ingredients, from sweet potatoes to toppings like marshmallows and pecans. I provided step-by-step instructions to guide you through preparation and baking. With tips to avoid common mistakes and variations for vegans and those avoiding gluten, you have the tools to customize your dish. Enjoy sweet potato casserole at holidays or family dinners, and feel good about its health benefits. Try it out, and make it your own!

Sweet Potato Casserole Flavorful and Simple Recipe

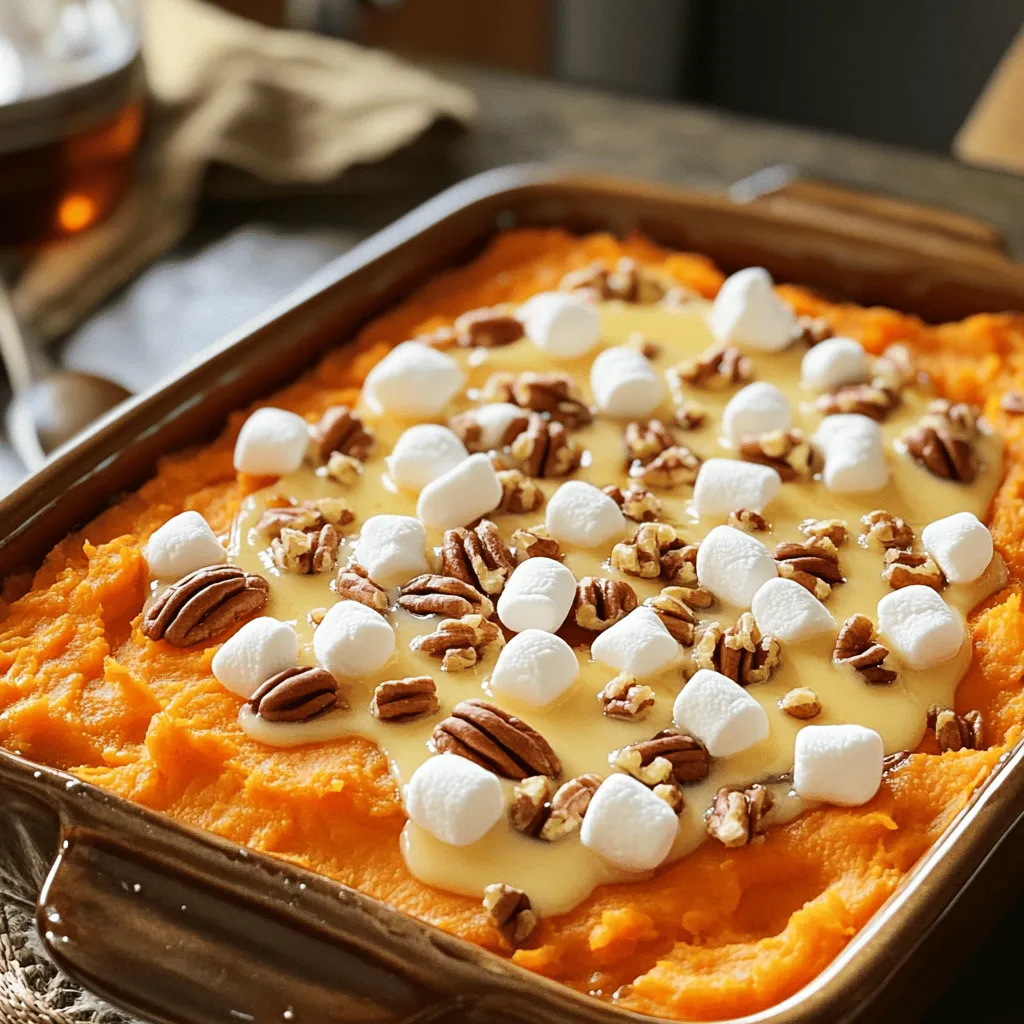
Are you ready to whip up a delicious sweet potato casserole? This flavorful and simple recipe is perfect for any

- 1 can (15 oz) chickpeas, rinsed and drained - 1/4 cup plain Greek yogurt (or vegan yogurt) - 4 slices whole grain bread - Lettuce leaves, for serving - 1 tablespoon Dijon mustard - 1 tablespoon lemon juice - 1/2 teaspoon garlic powder - 1/2 teaspoon onion powder - 1/4 teaspoon cumin - Salt and pepper to taste - 1/2 cup diced celery - 1/4 cup diced red bell pepper - 2 green onions, chopped - Optional: 1/4 cup chopped fresh parsley or cilantro for garnish I love using chickpeas in my salad sandwiches. They are packed with protein and fiber. For this recipe, start with one can of chickpeas. Rinse and drain them. This step helps remove excess sodium. Next, I mix in Greek yogurt. It adds creaminess and tang. You can use vegan yogurt if you prefer. Then, grab your whole grain bread. I like to use four slices. It gives the sandwich a nice base. Now, let’s talk seasonings. I add one tablespoon of Dijon mustard for a zesty kick. The lemon juice brightens the flavors. Garlic powder and onion powder give depth. Don't forget a touch of cumin. It warms the dish up. Always taste and adjust with salt and pepper. For crunch, I add diced celery and red bell pepper. They provide a fresh bite. Finally, chop two green onions for a mild onion flavor. If you love herbs, throw in some parsley or cilantro. It makes the sandwich pop! You can find the full recipe at the end of this article. Enjoy making your delicious chickpea salad sandwich! First, take your can of chickpeas. Rinse and drain them well. Then, place them in a bowl. Use a fork or a potato masher to mash the chickpeas. You want them mostly broken down but still a bit chunky. This gives your salad a nice texture. Next, add in the plain Greek yogurt, Dijon mustard, lemon juice, garlic powder, onion powder, cumin, salt, and pepper. Mix everything well until it becomes creamy and smooth. Now, it’s time to add some crunch! Fold in the diced celery, red bell pepper, and chopped green onions. These veggies add color and flavor. Make sure they are evenly mixed in. After this, taste your mixture. If it needs more flavor, adjust the seasoning with extra salt or pepper. If you like a bit of crunch, lightly toast your whole grain bread slices. This step is optional but gives a nice bite. Now, take two slices of your bread. Spread a generous amount of the chickpea mixture on each slice. Top it with fresh lettuce leaves for a crisp finish. Finally, place the other slices of bread on top. Slice the sandwich in half and enjoy your healthy meal! You can find the full recipe for this tasty dish in the previous section. To make a great chickpea mixture, aim for a creamy yet textured blend. You want some chunks for a nice bite. Use a fork or a potato masher to break down the chickpeas. This method helps keep some texture. Mashing by hand gives you control over how smooth or chunky it gets. To boost flavor, try different spices or herbs. Add a pinch of smoked paprika or fresh dill for a twist. If you like heat, a few drops of hot sauce can add a kick. Experimenting with flavors keeps each sandwich exciting. Don't be afraid to adjust based on your taste! Pair your chickpea salad sandwich with a side salad or crunchy chips. This combo balances flavors and textures well. For a lighter meal, serve the sandwich open-faced. Just spread the chickpea mixture on one slice of bread and add your toppings. This way, you enjoy all the flavors without feeling too full. {{image_2}} You can easily make this sandwich vegan. Simply swap Greek yogurt with vegan yogurt. This change still keeps it creamy and delicious. You can also add mashed avocado for an extra layer of creaminess. Avocado pairs wonderfully with chickpeas and brings healthy fats to your meal. If you need a gluten-free choice, don’t worry! Use gluten-free bread instead of whole grain. You can also skip the bread and use lettuce wraps. This option keeps your meal light and fresh while still full of flavor. Want to change up the taste? Try adding roasted red peppers or olives for a salty kick. These ingredients add depth and richness to the sandwich. You can also experiment with fresh herbs like dill or basil. Herbs can brighten the flavor and make your sandwich even more exciting. You should store leftover chickpea mixture in an airtight container. This helps keep it fresh. You can enjoy it within 3 days for the best taste. After 3 days, it may lose its flavor and crunch. Can the chickpea mixture be frozen? Yes, it can! To freeze, place the mixture in a freezer-safe bag. Remove as much air as you can before sealing. When you want to use it, take it out and thaw it in the fridge overnight. You can then reuse it for sandwiches or wraps. To keep your sandwich fresh, keep the bread separate from the filling. This stops the bread from getting soggy. You can store the ingredients in a way that maintains their crunchiness. For example, pack the chickpea mix in one container and the bread in another. This way, each bite remains delightful! It takes only 10 minutes to prepare a Chickpea Salad Sandwich. The prep time is quick, making it perfect for busy days. You can enjoy a tasty meal in no time! Yes, you can make the chickpea mixture ahead of time. Just prepare the filling and store it in the fridge. This way, you can assemble your sandwich fresh when you're ready to eat. It stays good for about three days. You can serve many sides with your chickpea salad sandwich. Here are some ideas: - A fresh green salad with vinaigrette - Crispy potato chips or veggie chips - Sliced cucumbers or carrot sticks - A bowl of fruit salad These sides add color and taste to your meal, making it more enjoyable. You learned how to create a delicious chickpea salad sandwich. We covered key ingredients, step-by-step instructions, and tips for flavor. You can easily modify the recipe based on your preferences, whether you're vegan, gluten-free, or looking for new flavors. Remember to store leftovers properly to keep them fresh. This sandwich is a tasty, nutritious option for any meal. Enjoy experimenting with your own variations and serving suggestions!

Chickpea Salad Sandwich Flavorful and Healthy Meal

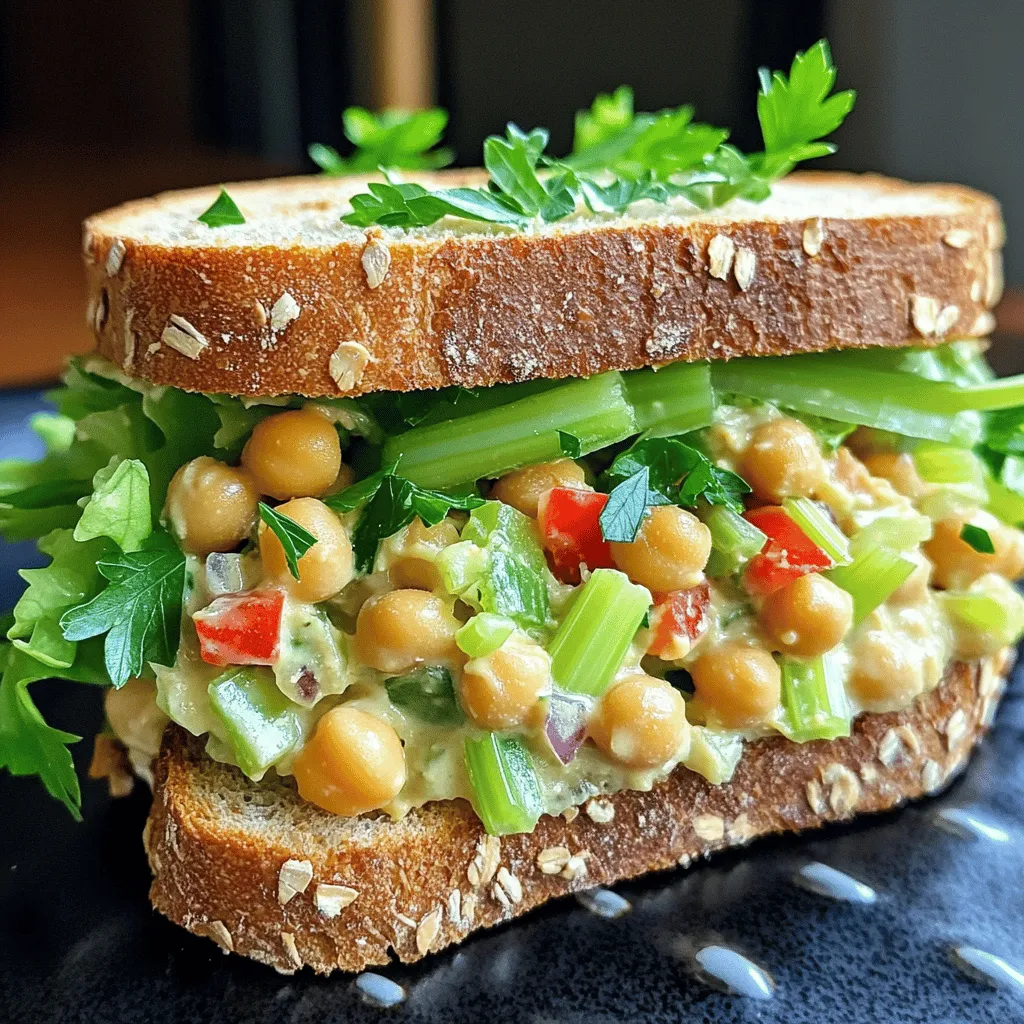
Looking for a quick, tasty, and healthy meal? You’ve found it! This Chickpea Salad Sandwich recipe combines creamy chickpeas with

To make these tasty chocolate hazelnut spread cookies, gather the following items: - 1 cup all-purpose flour - 1/4 cup unsweetened cocoa powder - 1/2 teaspoon baking soda - 1/4 teaspoon salt - 1/2 cup unsalted butter, softened - 1/2 cup brown sugar, packed - 1/4 cup granulated sugar - 1 large egg - 1 teaspoon vanilla extract - 1/2 cup chocolate hazelnut spread (like Nutella) - 1/2 cup chopped hazelnuts (toasted optional) - Sea salt flakes for topping You can swap some ingredients for different flavors or diets. Use whole wheat flour if you want more fiber. For a gluten-free version, try almond flour or a gluten-free blend. If you prefer less sugar, reduce the brown or granulated sugars. You can also use coconut sugar for a different taste. If you have nut allergies, use sun butter instead of hazelnuts. Always choose fresh ingredients for the best taste. Look for flour that is finely ground and cocoa powder that is rich and dark. When buying butter, choose unsalted for better control over your salt levels. For hazelnuts, go for whole, raw nuts if you can. Toast them lightly before adding them to enhance their flavor. Lastly, pick a high-quality chocolate hazelnut spread. This will make your cookies taste even better. For the full recipe, check out the detailed instructions above. Start by gathering your ingredients. You will need flour, cocoa powder, baking soda, and salt. In a medium bowl, whisk these dry ingredients together. This step helps mix everything evenly. Next, take a large bowl. Cream the softened butter, brown sugar, and granulated sugar together. Use an electric mixer for about two to three minutes. The mixture should become light and fluffy. Now, beat in one large egg and a teaspoon of vanilla extract. Mix well until everything is combined. Gradually add the dry mix to the wet mix. Keep the mixer on low speed until just combined. Finally, gently fold in the chocolate hazelnut spread and chopped hazelnuts. Make sure the spread is well distributed throughout the dough. Preheat your oven to 350°F (175°C). While it heats, line a baking sheet with parchment paper. Using a cookie scoop or a tablespoon, drop heaping spoonfuls of dough onto the sheet. Leave about two inches between each cookie. This space helps them bake evenly. Before you bake, sprinkle a pinch of sea salt flakes on top of each cookie. This small touch adds a nice flavor contrast. Bake in the oven for 10 to 12 minutes. The edges should be set, but the centers will still be soft. This helps the cookies stay chewy. Once baked, remove the cookies from the oven. Let them cool on the baking sheet for about five minutes. This step helps them firm up a bit. After that, transfer the cookies to a wire rack. Let them cool completely there. For a lovely presentation, serve the cookies on a rustic wooden board. Drizzle extra chocolate hazelnut spread over the top. Dust with powdered sugar for an elegant touch. These steps make your cookies look as good as they taste. Enjoy every bite! To make the best cookies, start with room temperature butter. Cold butter makes it hard to mix. Use a mixer to blend the butter and sugars. This step adds air, giving your cookies a nice rise. Use a cookie scoop for even dough balls. It helps cookies bake evenly. For soft centers, do not overbake your cookies. They should look set around the edges but soft in the middle. Check them at the 10-minute mark. Remove them while they still look a bit underbaked. They will continue to cook on the baking sheet. Accurate measurements are key for great cookies. Use a kitchen scale for precision. If you don’t have one, use dry measuring cups. Spoon flour into the cup without packing it down, then level it off. This method keeps your cookies from being too dense. Follow the [Full Recipe] closely for the best results. {{image_2}} You can switch up the nuts in these cookies. Try using walnuts or pecans for a new taste. You can even add chocolate chips. The mix of hazelnuts and chocolate chips adds more texture. Use dark, milk, or white chocolate for fun. This keeps every bite exciting and full of surprises! Want to make these cookies gluten-free? It’s easy! Swap the all-purpose flour for a gluten-free blend. Look for a blend that has a good mix of flours. This way, you still get a soft cookie. Check that the chocolate hazelnut spread is gluten-free too. It’s simple and still delicious! You can boost the flavor in these cookies! Add a pinch of cinnamon or espresso powder to the dough. These spices mix well with chocolate and hazelnuts. You can also try adding orange zest for a citrus kick. These little changes can make a big difference in taste. Don't be afraid to experiment and find your favorite flavor! To keep your cookies fresh, place them in an airtight container. This helps them stay soft. You can also add a slice of bread inside the container. The bread keeps the cookies moist. Store the container at room temperature. Avoid exposure to heat and sunlight. Freezing cookies extends their life. First, let the cookies cool completely. Then, place them in a single layer on a baking sheet. Freeze for about an hour. Once firm, move them to a freezer-safe bag. Label the bag with the date. You can freeze cookies for up to three months. When you want a warm cookie, preheat your oven to 350°F (175°C). Place the frozen or chilled cookie on a baking sheet. Heat for about 5-8 minutes. For extra gooeyness, add a small scoop of chocolate hazelnut spread on top before warming. Enjoy your cookie, fresh and warm! Yes, you can use other chocolate spreads. Brands like peanut butter or almond butter work great too. Each spread will give a unique taste to the cookies. Experiment and find your favorite! Look for a set edge and a soft center. The cookies should look slightly puffy. They will firm up as they cool. Trust your eyes; every oven is different! If you need a nut substitute, try walnuts or pecans. You can also skip nuts altogether. To add crunch, use chocolate chips instead. Yes, you can make the dough ahead. Chill it in the fridge for up to 3 days. Just scoop and bake when you’re ready! If the dough is sticky, add a little more flour. Mix in small amounts until you reach the right texture. The dough should be soft but not overly sticky. Store cookies in an airtight container. They will stay fresh for up to a week. For longer storage, freeze them. Whole wheat flour can be used but may change the texture. The cookies might be denser, so use a blend of all-purpose and whole wheat for a lighter result. If you don’t have baking soda, you can use baking powder. Use three times the amount of baking powder as baking soda. The cookies may rise more but will still taste good. Yes, these cookies are safe for kids. They are a fun treat and kids love the chocolate hazelnut flavor. Just watch out for any nut allergies! You can find the full recipe for Chocolate Hazelnut Delight Cookies in the recipe section above. It will guide you through every step to bake these delicious treats. This blog post covered all you need to make great cookies. We looked at key ingredients, how to prep and bake your dough, and tips for perfect texture. I shared fun variations to try and how to store your cookies for the best taste. Remember, measuring helps with baking success. Enjoy creating your cookies and don’t hesitate to experiment. They will taste even better with your personal touch! Happy baking!

Chocolate Hazelnut Spread Cookies Delight Every Bite

If you love cookies and hazelnut spread, then you’re in for a treat! Imagine soft, chewy cookies infused with rich

- 1 ½ cups all-purpose flour - ½ cup granulated sugar - 1 teaspoon baking powder - ½ teaspoon baking soda - ¼ teaspoon salt - Zest and juice of 1 large lemon - ½ cup unsalted butter, melted - 2 large eggs - ½ cup buttermilk (or milk + ½ tablespoon vinegar) - 1 teaspoon vanilla extract - 1 cup fresh blueberries (or frozen, do not thaw) - Optional: Coarse sugar for topping When I make lemon blueberry muffins, I start with the dry ingredients. I mix flour, sugar, baking powder, baking soda, and salt. This gives the muffins their structure. The wet ingredients come next. I love the bright flavor from the lemon zest and juice. They make the muffins fresh and zesty. I melt unsalted butter for richness. I then add eggs, buttermilk, and vanilla extract. The butter makes the muffins moist and fluffy. Buttermilk adds tang and helps them rise. For the add-ins, I use fresh blueberries if I can. They burst with juice when baked. If fresh ones aren't available, frozen blueberries work too. Just don't thaw them. I often sprinkle coarse sugar on top for a sweet crunch. This recipe is simple and quick. You can find the full recipe above. Enjoy these muffins fresh from the oven! First, we need to preheat the oven. Set it to 375°F (190°C). This step is key for even baking. Next, prepare the muffin tin. Use paper liners or grease it with cooking spray. This keeps your muffins from sticking. Now, let’s combine the dry ingredients. In a big bowl, whisk together: - 1 ½ cups all-purpose flour - ½ cup granulated sugar - 1 teaspoon baking powder - ½ teaspoon baking soda - ¼ teaspoon salt Make sure everything is mixed well. In another bowl, we will whisk the wet ingredients. Combine: - Zest and juice from 1 large lemon - ½ cup melted unsalted butter - 2 large eggs - ½ cup buttermilk (or milk mixed with vinegar) - 1 teaspoon vanilla extract Whisk until everything is smooth. Pour the wet mixture into the dry bowl. Gently fold them together. Be careful not to overmix; a few lumps are okay. Now, it’s time to add the blueberries. Gently fold in 1 cup of fresh or frozen blueberries. Make sure they are mixed evenly. Scoop the batter into the muffin tin, filling each cup about ¾ full. If you want a sweet crust, sprinkle some coarse sugar on top. Bake the muffins for 18 to 22 minutes. To check if they are done, insert a toothpick into the center. If it comes out clean, your muffins are ready! Let them cool in the tin for 5 minutes. Then, transfer them to a wire rack. Enjoy your Lemon Blueberry Muffins! For the full recipe, check out the details above. To make sure your muffins turn out great, avoid overmixing. When you mix the batter, do it just enough to combine the ingredients. A few lumps are okay. Overmixing can make your muffins tough. The temperature of your ingredients matters too. Use room temperature butter and eggs. This helps them blend better and gives your muffins a nice rise. Always use fresh ingredients for the best taste. Fresh blueberries will burst with flavor. If you use frozen, do not thaw them first. This keeps the muffins moist. You can also experiment with toppings. Adding a sprinkle of coarse sugar gives a sweet crunch. You might try nuts or a lemon glaze for added flavor. One common mistake is not letting the muffins cool properly. Let them cool in the tin for five minutes. Then, move them to a wire rack. This prevents sogginess and helps them stay fluffy. Be careful with substitutions. If you swap the buttermilk for regular milk, add vinegar to mimic the acidity. This is important for texture and flavor. For the full recipe, check out the recipe section. {{image_2}} You can easily adapt this recipe for different diets. Here’s how: - Vegan lemon blueberry muffins: Replace eggs with flax eggs. Use plant-based milk and butter. This keeps the muffins moist and fluffy. - Gluten-free options: Swap all-purpose flour for a gluten-free blend. Make sure it has a good binding agent like xanthan gum. These changes ensure great texture and taste. You can mix up the flavors in your lemon blueberry muffins: - Adding nuts or seeds: Walnuts or chia seeds add a nice crunch. They also boost nutrition in your muffins. - Other fruits to incorporate: Try adding raspberries or strawberries. These fruits pair well with lemon and blueberries. They add a twist to the classic flavor. Adjust the recipe for seasonal freshness: - Adjusting for different berry varieties: In summer, use blackberries or fresh strawberries. In winter, consider dried fruits like cranberries. Each season offers unique flavors. - Incorporating spices like cinnamon or nutmeg: A sprinkle of cinnamon adds warmth. Nutmeg gives a lovely depth. This small change can elevate the taste of your muffins. Explore the [Full Recipe] to see how these variations can come to life in your kitchen! Store your lemon blueberry muffins at room temperature for the best taste. Place them in a container with a lid. This keeps them soft and fresh. If you want to store them longer, use the fridge. Just make sure to wrap them well. They can dry out quickly in the fridge. Use airtight containers or resealable bags. This helps prevent air from making the muffins stale. If you have a lot of muffins, you can stack them in layers. Just place parchment paper between layers to avoid sticking. You can freeze your muffins for later enjoyment. First, let them cool completely. Then, wrap each muffin tightly in plastic wrap. After that, put them in a freezer-safe bag or container. Squeeze out as much air as possible. This way, they stay fresh for up to three months. When you are ready to eat one, take it out of the freezer. Let it thaw in the fridge overnight or on the counter for a few hours. You can also warm it up in the oven for a few minutes. Enjoy your muffins fresh and tasty! For the full recipe, check out the delicious details above. To make your muffins fluffy, follow these tips: - Use fresh baking powder and baking soda. - Beat the eggs well to trap air. - Do not overmix the batter; mix until just combined. - Let the batter rest for 10 minutes before baking. These simple steps help create a light texture. Yes, you can use frozen blueberries! Just remember: - Do not thaw them before adding to the batter. - This helps prevent the batter from turning blue. - Add them directly from the freezer for best results. Using frozen blueberries can add a nice chill to your muffins. If you don’t have buttermilk, you can use: - Milk with ½ tablespoon of vinegar mixed in. - Plain yogurt thinned with a little water. - Sour cream mixed with water until smooth. These options keep the batter moist and tasty. Yes, you can double the recipe! Here’s how: - Simply use twice the amount of each ingredient. - Make sure your mixing bowl is large enough. - Bake in batches if your oven can’t fit all the muffins. Doubling is perfect for sharing or for a big breakfast! This post covered key ingredients, easy steps, and tips for perfect lemon blueberry muffins. Remember to measure carefully and avoid overmixing. Try using fresh ingredients for the best taste. You can also explore different flavors or dietary needs. Storing muffins properly will keep them fresh for longer. Feel free to experiment and make this recipe your own. Happy baking!

Lemon Blueberry Muffins Simple and Tasty Recipe

Welcome to a delightful baking adventure! Today, I’ll show you how to make Lemon Blueberry Muffins that are both simple

- Firm tofu - Fresh vegetables: - Broccoli - Bell peppers - Snap peas - Carrot - Red onion - Garlic - Ginger To start, you need firm tofu. This type holds its shape well when cooked. Next, gather fresh vegetables. I love using broccoli, colorful bell peppers, snap peas, carrot, and red onion. These add great taste and crunch. Garlic and ginger boost the flavor too. They make your dish smell amazing! - Sesame oil - Soy sauce or tamari - Sesame seeds - Salt - Pepper For cooking, sesame oil gives a nice nutty taste. You can use soy sauce or tamari for seasoning. This adds a savory touch to your stir fry. Don’t forget sesame seeds! They add crunch and look great on top. Lastly, season with salt and pepper to make the flavors pop. - Cooked rice - Quinoa - Optional garnishes: fresh herbs Serve your stir fry over cooked rice or quinoa. This makes a filling meal. You can add fresh herbs as garnishes. Cilantro or green onions add a fresh note. For the full recipe, check the details above. Enjoy your colorful and tasty vegetable stir fry with tofu! To start, press the tofu. This step helps remove excess moisture. Wrap the block of firm tofu in a clean kitchen towel. Place a weight on top. Let it sit for about 15-20 minutes. After pressing, cut the tofu into bite-sized cubes. This helps it cook evenly. Next, heat 1 tablespoon of sesame oil in a large non-stick skillet or wok over medium-high heat. Add the cubed tofu to the pan. Sauté the tofu for 5-7 minutes. You want it to be golden brown on all sides. Once cooked, remove the tofu from the skillet and set it aside. This gives the tofu a nice texture. In the same skillet, add the other tablespoon of sesame oil. Next, toss in the sliced red onion, minced garlic, and grated ginger. Stir-fry these for about 2 minutes. You want the onion to become translucent. Then, add the broccoli florets, bell peppers, snap peas, and julienned carrot. Stir-fry these vegetables for about 5-7 minutes. You should aim for tender-crisp veggies that keep their bright color. After the veggies are ready, return the cooked tofu to the skillet. Drizzle soy sauce over your stir-fry. Toss everything gently to mix it well. Cook for an extra 1-2 minutes to heat through. Finally, season with salt and pepper to taste. For a delightful crunch, sprinkle sesame seeds on top. Serve the stir-fry over bowls of cooked rice or quinoa. This makes for a hearty and satisfying meal. For more detailed instructions, check the Full Recipe. To get the best texture in your tofu, start by pressing it. Pressing removes moisture, which helps the tofu crisp up. Wrap the tofu in a clean kitchen towel and place a weight on top. Let it sit for about 15-20 minutes. After pressing, cut it into small cubes. Sauté the tofu in sesame oil over medium-high heat. Cook until golden brown on all sides. This simple technique gives you a crispy outside and a soft inside. To keep your veggies bright and crunchy, cook them quickly. Stir-frying is the best method. Heat your oil in a hot skillet. Add the hardest vegetables first, like carrots and broccoli. Cook for a few minutes before adding softer ones, like bell peppers and snap peas. Stir-fry for about 5-7 minutes. This helps retain their color and keeps them crisp. Always keep an eye on them to avoid overcooking. You can boost the flavor of your stir fry in many ways. Add fresh herbs, like basil or cilantro, at the end. They add a burst of freshness. You can also try different sauces. Instead of just soy sauce, add a splash of chili sauce for heat. A drizzle of rice vinegar adds tang. Experiment with these flavors to find what you love. {{image_2}} You can mix and match your veggies. Use what you like or what’s fresh. - Zucchini adds a nice crunch. - Mushrooms bring a rich flavor. - Baby corn adds fun texture. - Spinach or kale gives extra nutrients. Try seasonal veggies too! In spring, use asparagus. In fall, add squash. Each choice makes your stir fry special. If you want to switch up the protein, don’t worry! Tofu is great, but there are other options. - Tempeh offers a nutty taste and firm texture. - Chicken is a classic choice for meat lovers. - Shrimp cooks quickly and adds a seafood twist. - Chickpeas make it hearty and filling for vegans. Feel free to experiment with these proteins. They can change the whole dish. If you need gluten-free, tamari is your friend! It’s a tasty substitute for soy sauce. - Tamari has a similar flavor without the gluten. - Always check labels to avoid hidden gluten. This way, everyone can enjoy your delicious stir fry. Make it work for you and your friends! To keep your vegetable stir fry fresh, store leftovers in an airtight container. Place it in the fridge within two hours of cooking. This helps keep the flavors bright and the texture good. Use the leftovers within three to four days for the best taste. If you want to keep it longer, freezing is a great option. When you want to reheat your stir fry, use a skillet over medium heat. This method helps keep the tofu and veggies crisp. Add a splash of water or broth to the pan to create steam. Stir it often for about five minutes until everything is hot. This keeps your meal tasty and prevents it from drying out. Yes, you can freeze vegetable stir fry with tofu! First, let it cool completely. Then, pack it in a freezer-safe container or bag. Remove as much air as possible. You can freeze it for up to three months. When ready to eat, thaw in the fridge overnight. Reheat on the stove or microwave for a quick meal. Enjoy your delicious stir fry again! This vegetable stir fry with tofu lasts about 3 to 5 days in the fridge. Store it in an airtight container. Make sure it cools down before sealing. This way, the tofu keeps its texture and flavor. Yes, you can make this dish ahead of time. Cook the stir fry, let it cool, and store it in the fridge. You can prep the tofu and vegetables a day before. Just keep them separate until you're ready to cook. This helps keep everything fresh. You can mix and match the vegetables. Try adding zucchini, mushrooms, or spinach. You can also switch the tofu for tempeh or chicken for a different taste. For a spicy kick, add sliced jalapeños or chili flakes. The options are endless! Yes, this recipe is fully vegan. It uses tofu, fresh veggies, and plant-based sauces. You can enjoy it without worrying about animal products. It's a great choice for anyone looking to eat more plant-based meals. You can find the full recipe for the vegetable stir fry with tofu within this article. It includes all the steps and tips to make your cooking easy and fun. This post outlined how to make a delicious tofu stir-fry. I covered the key ingredients and how to prepare them. You learned tips for cooking tofu and vegetables perfectly. I shared variations to suit your taste and dietary needs. In conclusion, this stir-fry is tasty, easy, and versatile. Use this guide to create your own version. Enjoy cooking and experimenting with flavors!

Vegetable Stir Fry with Tofu Flavorful Easy Meal

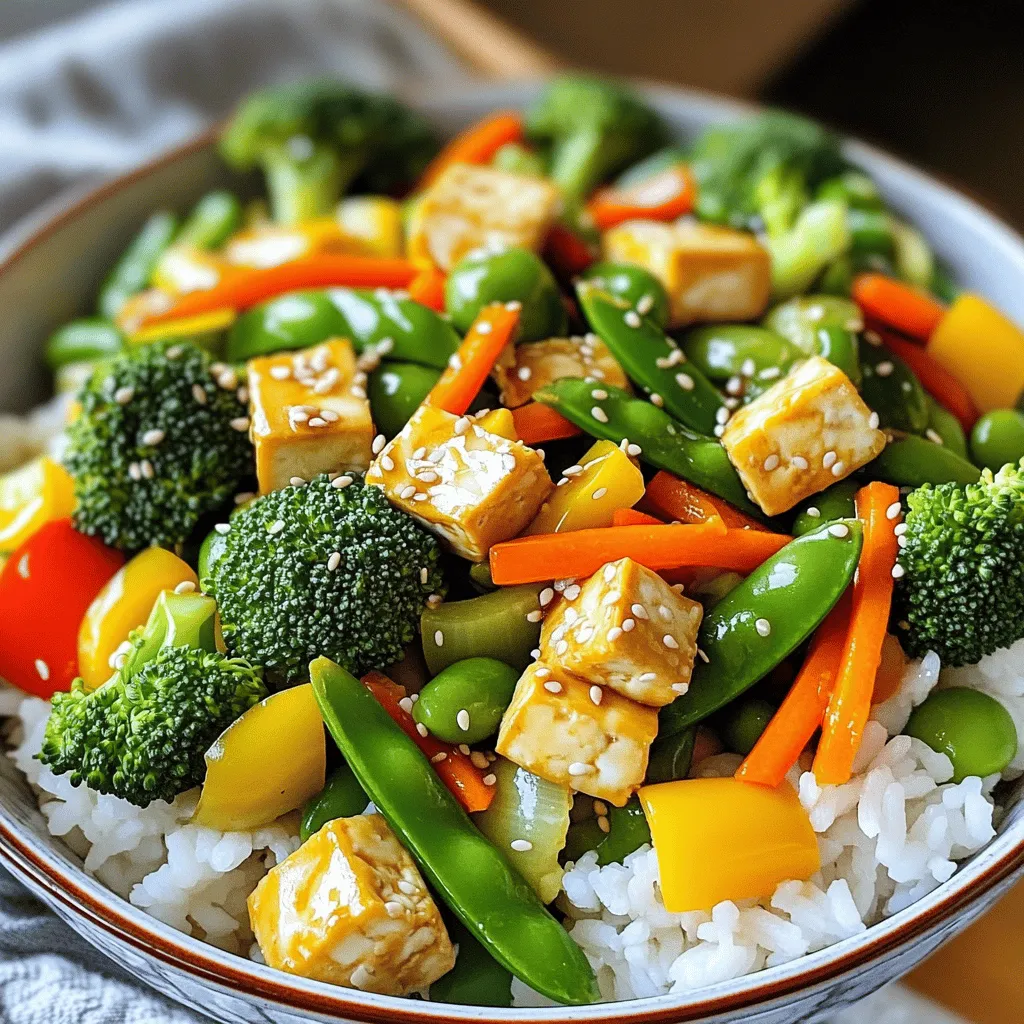
Are you ready to whip up a quick and tasty meal? My Vegetable Stir Fry with Tofu is the perfect

Here’s what you need to make herb roasted chicken thighs: - 4 bone-in, skin-on chicken thighs - 1 tablespoon olive oil - 2 cloves garlic, minced - 1 tablespoon fresh rosemary, finely chopped - 1 tablespoon fresh thyme leaves - 1 tablespoon fresh parsley, finely chopped - Zest of 1 lemon - Salt and pepper to taste - 1 cup cherry tomatoes, halved - 1 lemon, sliced into rounds Each ingredient adds its own flavor. The chicken thighs are juicy and full of taste. The olive oil helps the skin crisp up nicely. Fresh herbs make every bite burst with flavor. Garlic provides a warm, rich taste. Lemon zest adds a bright note that balances the dish. Cherry tomatoes roast well and add sweetness. You can easily adjust the amount of herbs based on your taste. Use more or less garlic if you love it, or skip it for a milder flavor. The lemon slices not only look nice but add more tang when you eat them. For the full recipe, check out the section below. Enjoy cooking! - Preheat the oven to 425°F (220°C). - In a small bowl, mix olive oil, garlic, rosemary, thyme, parsley, lemon zest, salt, and pepper. This creates a flavorful herb paste. - Pat the chicken thighs dry with paper towels. Drying the skin makes it crispy. - Rub the herb paste all over the chicken. Make sure to get it under the skin for more flavor. - Place the chicken thighs in a large baking dish, skin side up. - Scatter the halved cherry tomatoes and lemon slices around the chicken. This adds color and flavor. - Roast for 30-35 minutes. The chicken should be golden and crispy. Check the internal temperature; it should reach 165°F (75°C). - After roasting, let the chicken rest for 5 minutes before serving. This keeps it juicy. For the full recipe, check the [Full Recipe]. To get that perfect crispy skin, start with dry chicken. I pat the chicken thighs dry with paper towels. This step helps remove moisture. Next, use a good amount of salt on the skin. Salt draws out more moisture while cooking. Place the chicken skin-side up in the oven. High heat is key, so roast at 425°F (220°C). This heat crisps the skin nicely. For maximum flavor, marinate the chicken for at least one hour. You can even marinate overnight for deeper flavor. Use a mix of herbs, garlic, and olive oil for the best taste. The herbs I like the most are rosemary, thyme, and parsley. They add fresh, bright notes to the chicken. Presentation matters! Serve the chicken on a large platter. Surround it with roasted cherry tomatoes and lemon slices. This makes the dish pop with color. Drizzle the pan juices over the chicken before serving. This adds extra flavor and makes it look appealing. For the full recipe, check out the recipe section above. {{image_2}} You can switch up the herbs in this recipe. If you want a different taste, try using basil or oregano. These herbs give a fresh flavor. You can also use dried herbs if fresh ones are not available. Just remember, dried herbs are stronger, so use less. For a spicy kick, add some crushed red pepper flakes. Experimenting with herbs lets you make the dish your own. Roasting vegetables with chicken adds more flavor. You can add carrots, bell peppers, or zucchini. Chop them into chunks and toss them with olive oil and salt. This makes a colorful side. You can use any veggies you like. Just make sure they cook well with the chicken. They will soak up the tasty juices from the chicken. You can use an air fryer for a quicker option. Set it to 400°F (200°C) and cook the chicken for about 25 minutes. This makes the skin crispy. A slow cooker is another choice. Cook on low for 6 hours or high for 3 hours. This keeps the chicken very juicy. Both methods offer unique textures and flavors. For the full recipe, check out the detailed instructions above! To store leftovers, let the chicken cool first. Place it in an airtight container. This keeps it fresh and safe to eat. Store the chicken in the fridge for up to four days. If you want to keep it longer, consider freezing. To freeze cooked chicken thighs, wrap each piece tightly in plastic wrap. Then, place them in a freezer-safe bag. Remove as much air as you can. Label the bag with the date. This way, the chicken stays good for up to three months. When ready to eat, thaw the chicken thighs in the fridge overnight. For reheating, use the oven for best results. Preheat your oven to 350°F (175°C). Place the chicken in a baking dish with a bit of broth or water. Cover it with foil to keep the moisture in. Heat for about 20-25 minutes, or until warmed through. This keeps the chicken juicy and tasty. For more details, check the Full Recipe for the perfect herb roasted chicken thighs. To check if the chicken is done, use a meat thermometer. Insert it into the thickest part of the thigh. The safe internal temperature for chicken is 165°F (75°C). Look for clear juices running from the chicken. If the juices run clear, the chicken is likely ready. Always let the chicken rest for a few minutes after cooking. This helps the juices settle, keeping it moist. Yes, you can use chicken breasts. However, thighs are juicier and more flavorful. If you choose breasts, reduce cooking time. Chicken breasts often cook faster than thighs. They will need about 25-30 minutes at the same oven temperature. Adjust the herb paste amount, as you may need less for smaller pieces. Herb roasted chicken thighs taste great with many sides. Here are some tasty options: - Roasted vegetables like carrots, zucchini, and bell peppers - Creamy mashed potatoes or garlic mashed potatoes - A fresh green salad with lemon vinaigrette - Rice pilaf with herbs and nuts - Crusty bread to soak up the pan juices These sides make a complete meal and complement the chicken’s flavors perfectly. For more ideas, check the Full Recipe. This article covered a tasty herb-roasted chicken recipe. You learned how to prep, season, and roast chicken thighs for crispy skin. We explored storage tips and cooking variations to suit your taste. Remember, you can swap herbs or add veggies for extra flavor. Experimenting will lead to delicious results. Enjoy making this dish for your family and friends!

Herb Roasted Chicken Thighs Juicy and Flavorful Delight

If you want a dinner that’s both juicy and packed with flavor, try my Herb Roasted Chicken Thighs. These golden-brown

- 4 large ripe peaches, peeled and sliced - 1 tablespoon lemon juice - 1/4 cup brown sugar - 1 teaspoon vanilla extract - 1 cup rolled oats - 1/2 cup all-purpose flour - 1/3 cup granulated sugar - 1 teaspoon ground cinnamon - 1/4 teaspoon salt - 1/2 cup cold unsalted butter, cubed Gathering these ingredients is the first step to making a peach crumble dessert. Start with ripe peaches. They should be soft and fragrant. The lemon juice keeps the peaches fresh and bright. Brown sugar adds sweetness and depth. Vanilla extract enhances all the flavors. For the crumble, rolled oats give it a nice texture. All-purpose flour binds everything together. Granulated sugar adds sweetness, while ground cinnamon brings warmth. A little salt balances the flavors. The cold butter is key. It creates a flaky topping that contrasts with the juicy peaches. This simple list helps you prepare for a tasty treat. For the full recipe, follow the steps that come next. - Step 1: Preheat the oven and prepare your baking dish First, set your oven to 350°F (175°C). This is the perfect temperature for baking your crumble. Next, take a 9x9 inch baking dish and grease it lightly with butter or cooking spray. This will help the crumble not stick. - Step 2: Combine the peach filling ingredients In a large bowl, add the sliced peaches. Pour in the lemon juice, brown sugar, and vanilla extract. You want to mix this gently. Make sure the peaches are coated well. Once mixed, pour the peach filling into your greased baking dish. - Step 3: Prepare the crumble topping In another bowl, combine the rolled oats, all-purpose flour, granulated sugar, ground cinnamon, and salt. Mix these dry ingredients well. Then, take the cold, cubed butter and add it to the bowl. You can use a pastry cutter or your fingers. Mix until the mixture looks like coarse crumbs. - Step 4: Bake and let cool Now, sprinkle the crumble topping evenly over the peach filling in the baking dish. Place it in your preheated oven. Bake for 25-30 minutes. You know it’s done when the topping is golden brown and the peaches are bubbly. Once baked, take it out and let it cool slightly before serving. For the full recipe, check out the details above. Enjoy your peach crumble dessert warm, maybe with a scoop of ice cream! - Choosing the best peaches: Look for ripe, firm peaches. They should smell sweet. Use yellow or white peaches for great flavor. Avoid any bruised or soft spots. - How to achieve a crispy crumble topping: Mix the butter into the dry ingredients well. Use cold butter for a flaky texture. Don’t over-mix; it should look like coarse crumbs. Bake until golden for the best crunch. - Serving suggestions for enhanced flavor: Serve the crumble warm with vanilla ice cream. A scoop adds creaminess and balance. You can also top it with fresh mint leaves for a pop of color. A drizzle of caramel sauce makes it even better. For a twist, try it with yogurt instead of ice cream. For the full recipe, check out the details in the earlier section. Enjoy your cooking! {{image_2}} You can make your peach crumble even more fun with a few easy twists. First, consider adding nuts. Chopped pecans or walnuts add great crunch and flavor. You can mix them into the topping or sprinkle them on top of the peach layer. Another way to change it up is by using other fruits. Berries, like blueberries or raspberries, work well with peaches. They add a tartness that balances the sweetness. You can also try mixing in apples or plums for a unique taste. If you want a healthier version, think about using alternative sweeteners. Honey or maple syrup can replace sugar. These options give a different flavor and are often less processed. You could also use coconut sugar for a richer taste. For those needing gluten-free options, swap all-purpose flour for almond flour or oat flour. Both work nicely in the crumble topping. You can also use gluten-free oats to keep the recipe safe for everyone. Don't forget to check out the Full Recipe for more details! After enjoying your peach crumble, you may have some leftovers. Storing them properly keeps them fresh and tasty. - Storing leftovers in the fridge: Place the crumble in an airtight container. This helps keep it moist. Store it in the fridge for up to three days. Make sure to cover it well to avoid drying out. - Freezing peach crumble dessert: If you want to save it for a later date, freezing works great. First, let the crumble cool completely. Then, wrap it tightly in plastic wrap. After that, place it in a freezer-safe container or bag. It can last up to three months in the freezer. - Best methods for reheating: For the best taste, reheat in the oven. Preheat your oven to 350°F (175°C). Place the crumble in an oven-safe dish. Heat for about 15-20 minutes until warm. You can also use the microwave. Heat individual servings for about one minute, checking if it’s hot enough. These storage tips will help keep your peach crumble dessert ready for your next sweet craving. For a full recipe, check out the details above. Can I use frozen peaches? Yes, you can use frozen peaches. Just thaw them first. Drain any excess juice to avoid a soggy crumble. This keeps the dessert tasty and helps it bake well. How do I know when the crumble is done? You can tell the crumble is done when it turns golden brown. The peaches should also bubble up around the edges. Keep an eye on it during the last few minutes to avoid burning. Is it necessary to peel the peaches? Peeling the peaches is not a must, but it helps the texture. The skin can add a slight bitterness. If you prefer a smooth bite, go ahead and peel them. For added fiber, you can leave the skin on. For the complete recipe, check the Full Recipe section. Peach crumble is a simple yet delicious dessert. We covered key ingredients and easy steps to prepare it. I shared tips for picking the best peaches and how to get a crisp topping. Variations can make this dish even better. You can add nuts or use healthier sweeteners. Remember to store leftovers well to keep them fresh. This dessert is sure to please at any gathering. Enjoy the process and the tasty result of your hard work.

Peach Crumble Dessert Simple and Tasty Delight

If you love juicy peaches and a crunchy topping, then you’ll adore this Peach Crumble Dessert! It’s simple to make

To make these tasty S'mores Bars, you need simple staples. Here’s what you will need: - 1 ½ cups graham cracker crumbs - ½ cup unsalted butter, melted - ½ cup brown sugar, packed - 1 cup mini marshmallows - 1 cup semi-sweet chocolate chips - ½ cup creamy peanut butter - ½ teaspoon vanilla extract - A pinch of salt These ingredients blend together to create that classic S'mores flavor we all love. The graham crackers give a crunchy base, while the chocolate and marshmallows add sweetness and gooeyness. Want to kick your S'mores Bars up a notch? Consider these tasty add-ins: - A handful of crushed nuts, like walnuts or pecans, for crunch - A sprinkle of sea salt on top for a sweet-salty twist - Drizzle some caramel sauce for extra sweetness - Swap in dark chocolate chips for a richer flavor These options can help you personalize your bars and make them even more fun. Have dietary restrictions? Don’t worry! You can still enjoy these bars. Here are some swaps: - Use gluten-free graham crackers to make it gluten-free - Replace butter with coconut oil for a dairy-free option - Choose vegan chocolate chips to keep it plant-based - Use almond or sunflower seed butter instead of peanut butter if you have nut allergies These substitutions ensure everyone can enjoy the delight of S'mores Bars. For the full recipe, check out the earlier section! Start by preheating your oven to 350°F (175°C). This step warms your oven for even baking. Next, grab a 9x9 inch baking pan. You can grease it with butter or line it with parchment paper. Lining the pan makes it easier to remove the bars later. In a medium bowl, mix 1 ½ cups of graham cracker crumbs, ½ cup of melted unsalted butter, and ½ cup of packed brown sugar. Stir well until it forms a crumbly mixture. This is the base of your s'mores bars. Now, press this mixture firmly into the bottom of your prepared pan. Make sure it is even and compact. Bake this crust for 8 to 10 minutes. You want it to be lightly golden. After baking, let it cool a bit before moving to the next step. Next, melt ½ cup of creamy peanut butter in a microwave-safe bowl for about 30 seconds. Once melted, stir in ½ teaspoon of vanilla extract and a pinch of salt. Drizzle this peanut butter mixture over the cooled graham cracker crust. Spread it out evenly. Now, sprinkle 1 cup of mini marshmallows and 1 cup of semi-sweet chocolate chips on top. Gently press them into the peanut butter layer. Bake the bars for another 10 to 12 minutes. Look for golden marshmallows and melted chocolate. Once they are ready, let the bars cool completely before slicing them into squares. For the full recipe, refer to the earlier section. Enjoy your homemade s'mores bars! To melt chocolate, use a microwave or a double boiler. If using a microwave, place chocolate chips in a bowl. Heat for 30 seconds, then stir. Repeat until smooth. Be careful not to overheat, or it will seize. For marshmallows, you can melt them on the stovetop. Heat them slowly in a pot over low heat. Stir often until they are gooey but not burnt. The crust should be firm but not hard. Press the graham cracker mix evenly into the pan. Bake it just until golden brown. This step keeps the bars from being soggy. When adding mini marshmallows, press them down gently. This helps them stick to the crust and not float away during baking. One common mistake is using cold chocolate. Always let it reach room temperature before melting. Another mistake is not cooling the crust enough. If the crust is too hot, it can melt the chocolate and marshmallows. Lastly, don’t skip the salt. A pinch enhances the flavors of chocolate and peanut butter. For the full recipe, check the details above and start your s'mores adventure! {{image_2}} You can make gluten-free s'mores bars easily. Use gluten-free graham crackers instead of regular ones. Make sure to check the brand for gluten-free labels. The rest of the recipe stays the same. The taste will still be sweet and delicious, even without gluten. Want a vegan twist? Swap out the butter for coconut oil. Use dairy-free chocolate chips and vegan marshmallows. These simple changes make a tasty treat for everyone. You can still enjoy gooey chocolate and marshmallow flavors without any animal products. Let’s get creative! You can add flavors to your s'mores bars. Try mixing in crushed cookies, like Oreos, for a fun crunch. You can also add nuts for a little bite. Want a twist? Use flavored chocolate, like mint or orange, for a new taste. The options are endless! If you want the full recipe, check it out in the ingredients section. To keep your s'mores bars fresh, store them in an airtight container. This helps prevent them from drying out. You can place parchment paper between layers to avoid sticking. Make sure to store them in a cool, dry place. Avoid heat sources that can melt the chocolate or marshmallows. When stored correctly, s'mores bars last about a week. If you keep them in the fridge, they can stay fresh for up to two weeks. Just remember that chilling can change the texture. The chocolate may become firmer, and the marshmallows might get a bit chewy. You can freeze s'mores bars for longer storage. First, cut them into squares. Wrap each piece tightly in plastic wrap. Then, place them in a freezer-safe bag or container. They can last up to three months in the freezer. When you’re ready to eat them, let them thaw in the fridge or at room temperature. You can also warm them in the microwave for a few seconds for that fresh-baked taste. For the full recipe, check out the earlier section. Yes, you can use homemade graham crackers in your S'mores Bars. They add a fresh, tasty twist. Just make sure they are finely crushed. This will help them mix well with the butter and sugar. Homemade crackers can also let you control the flavors and sweetness. The best chocolate for S'mores Bars is semi-sweet chocolate. It balances the sweetness of the marshmallows and graham crackers. Dark chocolate is another great option if you want a richer taste. Milk chocolate is sweeter and works well too. Use what you like best! To make S'mores Bars without peanut butter, simply skip that step. You can replace it with an extra layer of chocolate. Melt more chocolate chips and drizzle them on the crust before adding marshmallows. This keeps the bars creamy and delicious. Use the Full Recipe for more guidance! You now have all the tools to make delicious s'mores bars. We covered key ingredients, recipes for various diets, and practical tips for success. Remember, perfecting this treat involves careful melting and texture management. Whether you go classic or try a unique variation, don't fear mistakes. Keep practicing! Store your bars well to enjoy them longer. Now, gather your ingredients and start baking. You’ll impress yourself and others with these treats!

S’mores Bars Delightful Chocolate and Marshmallow Treat

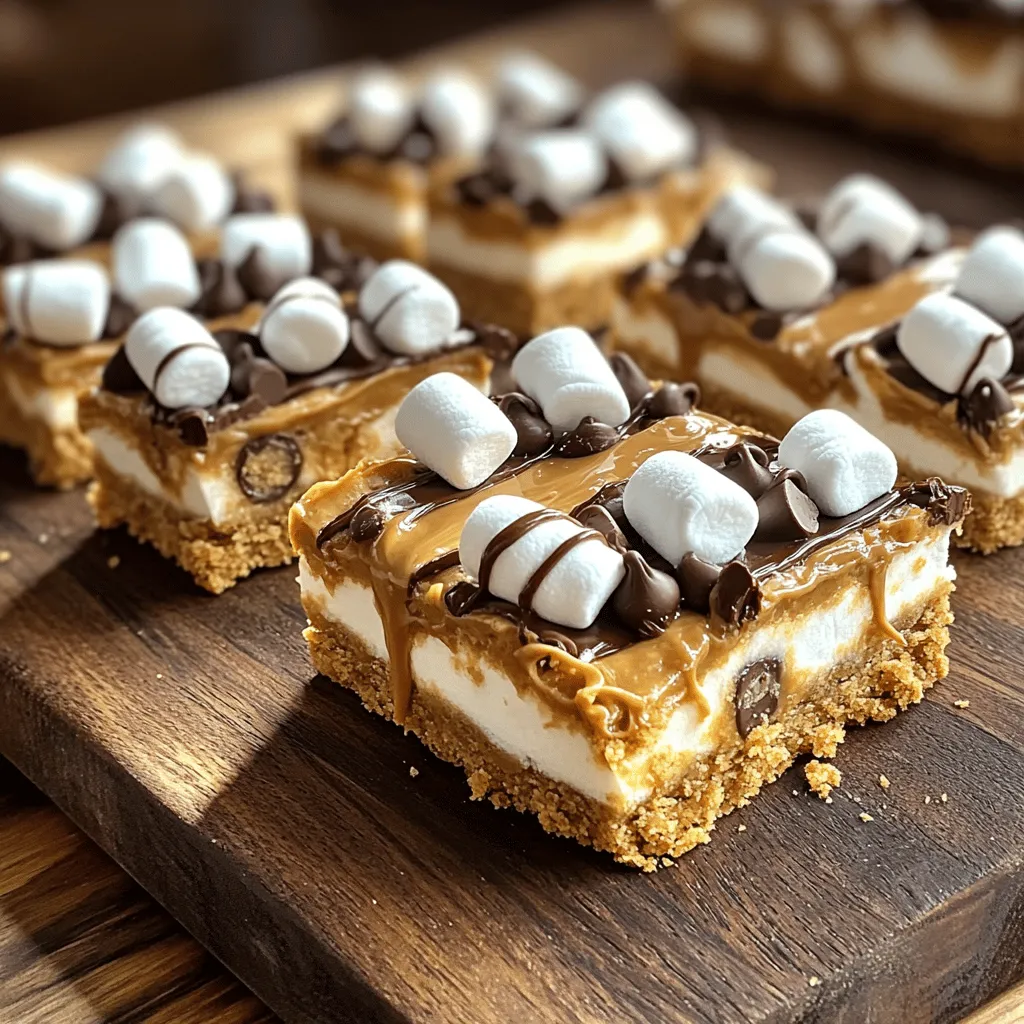
S’mores bars blend rich chocolate and gooey marshmallows in a tasty treat. You can enjoy this easy dessert anytime—even without

Older posts
Newer posts
← Previous Page1 … Page82 Page83 Page84 … Page123 Next →

dsad

© 2025 Southern Dishes • Built with GeneratePress

Our Policies

  • Copyright Policy
  • Cookie Policy
  • GDPR Policy
  • Privacy Policy
  • Disclaimer
  • Terms Of Use

More Information

  • Home
  • About
  • Contact
  • Appetizers
  • Dessert
  • Dinner
  • Drinks
©2025, Southern Dishes About Back To Top