Skip to content
DisclaimerTerms Of UseGDPR PolicyCookie Policy

Southern Dishes

  • Home
  • Drinks
  • Appetizers
  • Dinner
  • Dessert
  • About
  • Contact
  • Privacy Policy
DisclaimerTerms Of UseGDPR PolicyCookie Policy

Isabella

To make a delightful raspberry swirl cheesecake, you will need the following ingredients: - 1 ½ cups graham cracker crumbs - ½ cup unsalted butter, melted - 2 tablespoons sugar - 16 oz cream cheese, softened - 1 cup sugar - 1 teaspoon vanilla extract - 3 large eggs - 1 cup sour cream - 1 cup fresh raspberries - 2 tablespoons raspberry jam Each ingredient plays a key role in creating the creamy texture and fruity flavor. The graham cracker crumbs create a crunchy base. The melted butter binds the crumbs together, making a firm crust. The cream cheese is the star of the show; it gives the cheesecake its rich and smooth texture. Sugar sweetens the cheesecake. You can adjust the amount to fit your taste. Vanilla extract adds warmth and depth. Eggs help it set, giving it a soft yet stable structure. Sour cream enhances the creaminess and provides a slight tang. Raspberries bring a burst of flavor. They add color and a sweet-tart contrast. Raspberry jam helps to intensify that fruity flavor while making the swirling easy. This combination of ingredients makes the cheesecake truly special. For the full recipe, you can refer to the [Full Recipe]. - Preheat the oven to 325°F (163°C). - In a bowl, mix 1 ½ cups of graham cracker crumbs, ½ cup of melted unsalted butter, and 2 tablespoons of sugar. - Press this mixture firmly into the bottom of a 9-inch springform pan to form the crust. Bake for 10 minutes, then cool it completely. - In a large bowl, beat 16 oz of softened cream cheese until it is very smooth. - Gradually add 1 cup of sugar and 1 teaspoon of vanilla extract, mixing well. - Add 3 large eggs one at a time, mixing after each egg. Then, gently fold in 1 cup of sour cream until just mixed. - In a small bowl, mash 1 cup of fresh raspberries with a fork. Mix in 2 tablespoons of raspberry jam until smooth. - Pour half of the cheesecake batter over the cooled crust. Then, dollop half of the raspberry mixture on top. - Use a knife or toothpick to swirl the raspberry into the batter gently. - Add the remaining cheesecake batter and dollop the rest of the raspberry mix on top. Swirl again for a pretty marbled effect. Enjoy making this treat! For the complete recipe, check the Full Recipe section above. To achieve a creamy texture, start with room-temperature cream cheese. This helps blend smoothly. Always mix at low speed to avoid air bubbles. Too much air makes cracks possible. To avoid cracks on the surface, do not overmix. Overmixing adds air, which can cause cracks while baking. Also, bake slowly at a lower temperature. This helps the cheesecake set evenly. Cooling is essential for a flawless finish. After baking, turn off the oven and crack the door. Let the cheesecake cool in the oven for an hour. Then, refrigerate for at least four hours. Creating the perfect swirl takes practice. Start by dolloping your raspberry mixture onto the cheesecake batter. Use a knife or toothpick to swirl gently. Don’t overdo it; a little goes a long way. Tools that help with swirling include a toothpick or a skewer. These let you control the swirl better. You can also use a butter knife for larger swirls. Timing is key for best results. Swirl just before baking. If you wait too long, the mixture will blend too much. A vibrant swirl makes your cheesecake stand out. For the full recipe, check out the Raspberry Swirl Cheesecake section. {{image_2}} You can swap raspberries for other berries. Strawberries and blueberries work great! Each berry gives a unique flavor. Strawberries add sweetness, while blueberries add a mild tartness. Mixing berries can create a fun twist. Think about what you love most. This lets you play with taste and color in your cheesecake. Want to change the flavor? Add chocolate or lemon zest for a new spin. Chocolate brings a rich depth, while lemon zest adds brightness. You can also try different crusts. Instead of graham crackers, use crushed cookies, like Oreos or gingersnaps. These small changes can make your cheesecake special and exciting. How you serve raspberry swirl cheesecake matters. I recommend adding fresh whipped cream on top. A drizzle of chocolate sauce or raspberry sauce is also a nice touch. Fresh mint leaves can brighten up your plate. You can even pair it with a scoop of vanilla ice cream. These choices make each slice even more delightful! For the complete process of making this delicious dessert, check out the Full Recipe. To keep your raspberry swirl cheesecake fresh, store it in the fridge. Place it in an airtight container. If you don't have one, wrap it tightly in plastic wrap. This method keeps the cheesecake moist and prevents it from absorbing odors. A springform pan is great for storage if you can't find a container. Just cover it with plastic wrap. If you want to slice it before storing, use a glass or ceramic dish. These materials help maintain flavor and texture. You can freeze your cheesecake! It freezes well and stays tasty for up to three months. To freeze, let the cheesecake cool completely. Wrap it in plastic wrap, then foil. This double layer prevents freezer burn. When you’re ready to eat, move it to the fridge for a night to thaw. Enjoy your creamy and delightful treat! For the full recipe, check out the Raspberry Swirl Cheesecake section. Cheesecake texture comes from key factors. The amount of cream cheese affects density. More cream cheese creates a denser cake. Mixing method also matters. Overmixing introduces air and can make it lighter. Eggs add structure, but too many can also lead to a lighter cake. Baking time is crucial; underbaking can leave it soft, while overbaking makes it dense. I suggest using room temperature ingredients for the best blend. This helps create that creamy, smooth texture we all love. Homemade cheesecake can last about a week in the fridge. Store it in an airtight container to keep it fresh. Look for signs of spoilage, like an off smell or a change in texture. If you see any cracks or water forming on top, it’s best to toss it. Always check the cheesecake before serving. If you want to keep it longer, freeze it! It can last up to three months in the freezer. Yes, you can use frozen raspberries! They work well in this recipe. Just make sure to thaw them first. Drain any extra liquid before mixing them in to avoid a watery cheesecake. When you mash them, they will blend nicely with the raspberry jam. This can add a great flavor and color to your swirl. Just remember, the texture may be a bit different than fresh raspberries, but the taste will still be delicious. This blog post covered all you need for a perfect raspberry swirl cheesecake. We explored the key ingredients, step-by-step instructions, and helpful tips. You learned how to make a creamy cheesecake with a beautiful raspberry swirl. Remember the variations and storage tips for best results. Enjoy making this treat for friends or family. Cheesecake is always a hit! Try different flavors to keep it fun. Your baking journey can be delicious and rewarding. Happy baking!

Raspberry Swirl Cheesecake Creamy and Delightful Treat

Get ready to treat yourself with a delightful Raspberry Swirl Cheesecake! This creamy dessert combines rich cheesecake and fresh raspberries

To make the best mini cheesecake bites, you need the following ingredients: - 8 oz cream cheese, softened - 1/2 cup granulated sugar - 1 tsp vanilla extract - 1 large egg - 1/4 cup sour cream - 1 tbsp lemon juice - 1/2 cup graham cracker crumbs - 2 tbsp melted butter - Fresh berries (optional, for topping) - Whipped cream (optional, for serving) Each ingredient plays a key role in our mini cheesecake bites. The cream cheese gives that rich and creamy texture. Granulated sugar adds sweetness, while vanilla extract gives flavor. The egg helps set the filling, and sour cream adds a nice tang. Lemon juice brightens the taste. For the crust, graham cracker crumbs and melted butter combine for a crunchy base. You can top your cheesecake bites with fresh berries or whipped cream for extra flair. This recipe makes about 24 mini cheesecake bites, perfect for parties or a sweet treat. For the full recipe, check out the details above. Enjoy making these delightful no-bake treats! 1. Preheat the oven and prepare muffin pan Start by preheating your oven to 325°F (160°C). Line a mini muffin pan with paper liners. This makes it easy to remove the bites later. 2. Making the crumb crust In a bowl, combine the graham cracker crumbs and melted butter. Mix until the crumbs look like wet sand. This crust adds a nice crunch to your cheesecake bites. 3. Baking the crust Press about 1 teaspoon of the crumb mixture into each muffin liner. Bake the crusts for 5 minutes. Let them cool slightly before adding the cheesecake filling. 1. Mixing cream cheese and sugar In a larger bowl, beat the softened cream cheese and granulated sugar until the mix is smooth and creamy. This is the base of your filling and needs to be well-blended. 2. Adding flavorings and other ingredients Add the vanilla extract, egg, sour cream, and lemon juice to the cream cheese mix. Keep mixing until everything is combined and smooth. This step gives your cheesecake a rich flavor. 1. Filling the crusts with cheesecake mixture Spoon the cheesecake filling into each cooled crust. Fill each about 3/4 full. This ensures they have room to rise slightly during baking. 2. Baking time and techniques to avoid cracking Bake the mini cheesecakes for 15-18 minutes. The centers should be set but still a bit jiggly. After baking, turn off the oven and leave the bites inside for another 5-10 minutes. This helps avoid cracks on the surface. Enjoy these mini cheesecake bites! They are a fun treat for any occasion. For the complete recipe, check out the [Full Recipe]. Using room temperature ingredients is very important. When cream cheese is soft, it mixes better. This makes your cheesecake smooth and creamy. If it’s cold, you will get lumps. Always take your cream cheese out ahead of time. Let it sit for about 30 minutes before you start. To prevent cracks during baking, keep the oven door closed. This helps keep the heat steady. After baking, turn off the oven but leave the cheesecakes inside. This gradual cooling helps avoid cracks. Remember, a little jiggle in the center is okay! It will firm up in the fridge. You can serve mini cheesecakes in many fun ways. Arrange them on a colorful platter for parties. Use small dessert cups or jars for a unique touch. Top with fresh berries for a pop of color. Whipped cream adds a nice touch too. For pairing ideas, think about flavors that match. A cup of coffee or tea goes well with these bites. You can also try serving them with chocolate sauce or fruit compote. Presentation is key, so get creative and enjoy these treats! {{image_2}} You can easily change the flavor of your mini cheesecakes. For chocolate mini cheesecakes, add 1/4 cup of cocoa powder to the cream cheese mix. This gives a rich and creamy chocolate taste. For fruit-flavored cheesecakes, use pureed fruit. Strawberry and blueberry are great options. Just add 1/2 cup of pureed fruit to the filling. This adds both flavor and color to your treats. You can switch up the crust if you want. A cookie crust is simple and delicious. Crush Oreo cookies and mix them with melted butter. Use this mix instead of graham cracker crumbs for a tasty twist. If you need gluten-free options, use gluten-free graham crackers or ground nuts. Almond flour works well too, giving a nice nutty flavor to the crust. Toppings can make your mini cheesecakes pop. Fresh fruit toppings are always a hit. Try strawberries, blueberries, or raspberries for a fresh touch. Chocolate ganache is another great option. You can make it by melting chocolate with heavy cream. Drizzle this over your cheesecake bites for a rich finish. Caramel sauce is another sweet touch that pairs well with any flavor. For the full recipe, check the details above and enjoy these mini cheesecake bites! To keep your mini cheesecake bites fresh, refrigeration is key. Place them in an airtight container. You can store them in the fridge for up to five days. Make sure they are completely cool before you store them. This helps maintain their texture. If you want to keep them longer, freezing is a great option. Wrap each cheesecake bite in plastic wrap. Then, place them in a freezer bag or container. They can last for up to two months in the freezer. Just remember to label your container with the date! When you are ready to eat your frozen mini cheesecakes, thaw them properly. Take them out of the freezer and let them sit in the fridge overnight. This helps them thaw slowly and stay creamy. For the best taste, serve them cold or at room temperature. If you prefer them slightly warm, pop them in a microwave for a few seconds. Just be careful not to overheat them. Enjoy these delightful no-bake treats straight from the fridge or after a gentle warming! How many mini cheesecake bites does this recipe yield? This recipe makes 24 mini cheesecake bites. They are perfect for sharing at parties or enjoying at home. Can I make mini cheesecake bites in advance? Yes, you can make these bites a day ahead. Just store them in the fridge. They will taste even better after chilling overnight. What can I use as a substitute for sour cream? You can use Greek yogurt or cream cheese instead of sour cream. Both options will keep the bites creamy and delicious. Where can I buy pre-made mini cheesecake bites? You can find pre-made mini cheesecake bites at many grocery stores. Check the frozen dessert aisle or your local bakery. Mini cheesecake bites are easy to make and taste great. You start with simple ingredients like cream cheese, sugar, and lemon juice. After preparing the crust and filling, you bake them to perfection. To avoid cracks, keep your ingredients at room temperature. You can get creative with flavors and toppings to suit any occasion. These bites store well in the fridge or freezer, so they’re perfect for parties. With this guide, you now have the tools to impress anyone with your mini cheesecakes. Enjoy making, sharing, and savoring your delicious treats!

Mini Cheesecake Bites Delightful No-Bake Treat Recipe

Are you ready to indulge in a tasty treat that needs no baking? Mini cheesecake bites are delicious, easy to

To create the perfect lemon blueberry pound cake, you need the following ingredients: - 1 ¾ cups all-purpose flour - 1 teaspoon baking powder - ½ teaspoon baking soda - ¼ teaspoon salt - 1 cup unsalted butter, softened - 1 ½ cups granulated sugar - 4 large eggs - 1 tablespoon lemon zest - 2 tablespoons lemon juice - 1 teaspoon vanilla extract - 1 cup fresh blueberries Each ingredient plays a key role in the flavor and texture of the cake. The all-purpose flour gives structure, while baking powder and baking soda help it rise. The butter adds richness, and sugar sweetens the cake. Eggs bind everything together, and lemon zest and juice bring a bright flavor. Fresh blueberries add juicy bursts of sweetness. For a lovely finish, you can use these optional ingredients for a glaze: - ½ cup powdered sugar - 1 tablespoon lemon juice This glaze adds a sweet and tangy touch. Mixing powdered sugar with lemon juice creates a smooth, shiny topping. You can drizzle it over the cake once it cools. This extra step enhances the lemon flavor and makes the cake look beautiful. For the full recipe, check out the details in the recipe section. 1. First, preheat your oven to 350°F (175°C). This helps the cake rise well. 2. Next, grease and flour a 9x5 inch loaf pan. This prevents sticking. 3. In a medium bowl, whisk together the flour, baking powder, baking soda, and salt. Set this aside to mix later. 1. In a large bowl, cream the softened butter and granulated sugar together. Use an electric mixer for about 3-5 minutes until it looks light and fluffy. 2. Add the eggs one at a time, mixing well after each. Then, mix in the lemon zest, lemon juice, and vanilla extract until everything is combined. This helps the flavors blend. 1. Gradually add the dry ingredients to the wet mixture. Stir gently until just combined. Be careful not to overmix, as this can make the cake tough. 2. Now, fold in the fresh blueberries gently. This keeps them from breaking apart. 3. Pour the batter into the prepared loaf pan. Smooth the top with a spatula. 4. Bake in the preheated oven for 50-60 minutes. Check with a toothpick; it should come out clean. 5. After baking, let the cake cool in the pan for about 10 minutes. Then transfer it to a wire rack to cool completely. 6. For the glaze, mix powdered sugar and lemon juice in a small bowl until smooth. Drizzle it over the cooled cake. Allow the glaze to set for about 15 minutes before slicing. For the full recipe, check out the ingredients and instructions listed above. Enjoy your delicious lemon blueberry pound cake! To make a great lemon blueberry pound cake, you must mix it just right. Avoiding overmixing is key. Overmixing adds too much air and can make the cake tough. Stir the batter gently until the ingredients blend. This will keep your cake tender and moist. Checking for doneness is easy. Use a toothpick. Insert it into the center of the cake. If it comes out clean, the cake is ready. If not, give it a few more minutes. Each oven is a bit different, so keep an eye on your cake. Using fresh versus frozen blueberries can change the taste. Fresh blueberries tend to burst and spread their flavor throughout the cake. They also add a nice texture. Frozen blueberries can work too, but rinse and dry them first. This helps avoid too much juice in the batter. Adjusting the lemon flavor can make your cake special. If you want a stronger lemon taste, add more lemon zest or juice. Start with an extra half tablespoon of lemon juice. Taste as you go, and find the balance that you enjoy. For more details, check out the Full Recipe for Lemon Blueberry Pound Cake. {{image_2}} You can change the taste of your lemon blueberry pound cake easily. Adding nuts, like walnuts or almonds, gives a crunchy texture. Chopped nuts mix well with the soft cake. You can also try different fruits. Raspberries or blackberries add a twist. These berries bring their own unique flavor. They pair nicely with lemon. Feel free to mix and match fruits for fun flavors. Glazes can change how the cake looks and tastes. You can make a simple lemon glaze with powdered sugar and lemon juice. This sweet and tangy glaze fits well with the cake's flavor. You can also try a cream cheese glaze for a richer taste. It adds a creamy texture. Serving suggestions are just as fun. You can serve the cake with whipped cream or fresh fruit. This adds freshness and color. You might even want to sprinkle some lemon zest on top for a bright finish. These choices make your pound cake special. For the full recipe, check out the complete instructions earlier. After you slice your lemon blueberry pound cake, store it in an airtight container. This keeps the cake moist and fresh. You can also wrap it tightly in plastic wrap. If you want to refrigerate it, use a cake dome or a sealed bag. This helps prevent the cake from drying out in the fridge. If you have more cake than you can eat, consider freezing it. Wrap slices in plastic wrap and then foil. This extra layer protects the cake from freezer burn. Place the wrapped slices in a freezer bag. You can keep the cake frozen for up to three months. When ready to eat, thaw it in the fridge overnight or at room temperature for a few hours. At room temperature, lemon blueberry pound cake lasts about three days. Keep it in a cool, dry spot. If you see any signs of mold or a change in smell, it’s time to toss it. When stored in the fridge, the cake can last up to a week. Check for dryness or any off smells to ensure it’s still good. A fresh slice should smell lemony and sweet, with a burst of blueberry flavor. Enjoy your delicious cake while it’s still fresh! Can I substitute ingredients (gluten-free options, vegan, etc.)? Yes, you can! For a gluten-free option, use a gluten-free flour blend. Make sure it has xanthan gum for structure. For a vegan version, use plant-based butter and flax eggs. To make a flax egg, mix one tablespoon of ground flaxseed with three tablespoons of water. Let it sit for five minutes to thicken. How do I know when the cake is done baking? To check for doneness, insert a toothpick in the center. If it comes out clean or with a few crumbs, the cake is ready. You can also gently press the top; it should spring back. If it leaves an indention, it needs more time. Can I make this recipe in advance? Absolutely! You can bake the cake a day ahead. Let it cool and wrap it tightly in plastic wrap. Store it at room temperature. You can also freeze the cake for up to three months. Just wrap it well to prevent freezer burn. Best beverages to enjoy with the cake This cake pairs well with a range of drinks. Try it with a cup of hot tea or coffee. For a refreshing choice, enjoy it with iced lemonade. A glass of sweetened almond milk also complements the flavors nicely. Ideas for complementary desserts You can serve this pound cake with fresh whipped cream or vanilla ice cream. A scoop of lemon sorbet adds a nice zing. For a fun twist, try fresh fruit salad on the side. It adds color and extra flavor. For the complete recipe, check out the Full Recipe section! You learned how to make a delicious lemon blueberry pound cake. We covered the essential ingredients and optional glaze for added sweetness. You discovered step-by-step instructions for preparing the batter and baking the cake to perfection. I shared tips to enhance flavor and avoid common mistakes. Don’t forget variations, like adding nuts or different fruits. Lastly, I provided helpful storage info and answered common questions. Now, you can impress your friends and family with this tasty treat! Enjoy your baking adventure and savor every bite!

Lemon Blueberry Pound Cake Simple and Delicious Recipe

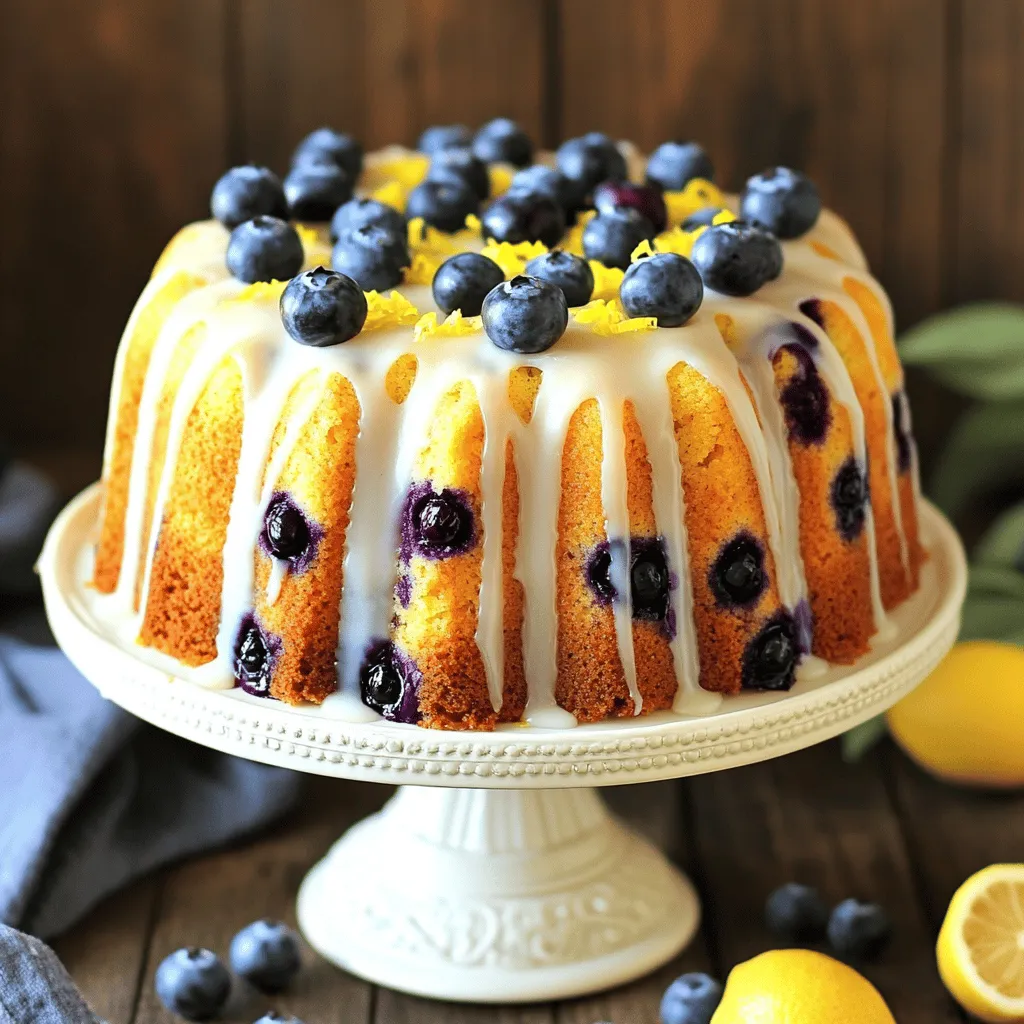
If you crave a treat that’s both zesty and sweet, you’ll love this Lemon Blueberry Pound Cake! This simple and

To make Funfetti Cake Batter Dip, you'll need these simple ingredients: - 1 cup all-purpose flour, heat-treated - 1 cup powdered sugar - 1/2 cup unsalted butter, softened - 1/4 cup granulated sugar - 1 teaspoon vanilla extract - 1/4 cup milk (adjust for desired consistency) - 1/2 cup rainbow sprinkles - 1/4 teaspoon salt Possible substitutions for dietary needs include: - Use gluten-free flour for a gluten-free version. - Replace unsalted butter with coconut oil for a dairy-free option. - You can swap powdered sugar with a sugar alternative to cut calories. You can make your dip even more fun by adding extra flavors! Here are some ideas: - Chocolate chips: Mix in mini chocolate chips for a sweet twist. - Peanut butter: Add a couple of tablespoons of peanut butter for a nutty taste. - Flavored extracts: Try almond or coconut extract to change the flavor profile. - More sprinkles: Up the sprinkle game with themed colors for holidays or parties. These add-ins can enhance your Funfetti Cake Batter Dip and make it even more unique. Enjoy experimenting! To make Funfetti Cake Batter Dip, start with the mixing process. First, grab a large mixing bowl. Add the softened butter, powdered sugar, and granulated sugar. Use an electric mixer on medium speed. Mix until the blend is creamy and fluffy. This step is key for a light dip. Next, add the heat-treated flour and salt to the bowl. Mix again until everything is well combined. This helps avoid lumps. Pour in the vanilla extract and milk. Adjust the milk to get the right consistency. You want it smooth but not runny. Keep mixing until all is well incorporated. Finally, add the rainbow sprinkles. Gently fold them in with a spatula. Make sure they are evenly spread throughout the dip. This will give your dip a fun look and taste. Now it’s time to transfer your dip. Use a spatula to scoop the dip into a serving bowl. Smooth the top for a nice finish. Once done, chill the dip in the refrigerator. Let it sit for at least 30 minutes. This chilling time helps the flavors meld together. Before serving, check the dip's texture. If it’s too thick, you can add a little more milk. Stir gently to mix. Serve this dip with graham crackers, pretzels, or fresh fruit. Add more sprinkles on top for a festive touch. Enjoy this sweet and fun treat! For the complete recipe, check the Full Recipe section. To get the right texture for your Funfetti Cake Batter Dip, you may need to adjust the milk. Start with 1/4 cup of milk. If the dip feels too thick, add more milk, one tablespoon at a time. Mix after each addition. You want it smooth and easy to dip. Common mistakes include using cold butter or adding too much flour. Cold butter does not mix well. It can lead to lumps. Also, be sure to use heat-treated flour. Regular flour can be unsafe to eat raw. Serving your dip in a fun way makes it more inviting. Use a colorful bowl to show off the dip’s bright colors. You can also layer the dip in a clear glass. This adds some flair and lets guests see the sprinkles. For garnishes, sprinkle more rainbow sprinkles on top. You can also add whipped cream for a fluffy touch. Serve with a variety of dippers. Try graham crackers, pretzels, or fresh fruit for a tasty mix. Each option adds a new flavor to this fun treat. {{image_2}} You can easily change the flavor of Funfetti Cake Batter Dip. For a chocolate twist, mix in cocoa powder or melted chocolate. This gives the dip a rich taste. If you love vanilla, use vanilla bean paste instead of extract. This adds a deeper flavor. You can also try seasonal sprinkles. For holidays, use red and green sprinkles for Christmas or pastel colors for Easter. This makes your dip festive and fun. If you need gluten-free options, you can use gluten-free flour. Just ensure it is heat-treated. For a vegan version, substitute the butter with a plant-based butter. You can use almond milk or another non-dairy milk in place of regular milk. These swaps keep the dip tasty while meeting dietary needs. You can still enjoy a fun treat with these adaptations. To keep your Funfetti Cake Batter Dip fresh, refrigerate it right away. Place it in an airtight container. This helps prevent the dip from drying out or picking up other smells from the fridge. I recommend using glass or plastic containers with tight lids. If you are using a bowl, cover it tightly with plastic wrap. This keeps the dip creamy and tasty. Can you freeze Funfetti Cake Batter Dip? Yes, you can! However, the texture may change a little. If you decide to freeze it, place the dip in a freezer-safe container. Leave some space at the top because it may expand when frozen. When you want to enjoy it again, thaw it in the fridge overnight. After thawing, give it a good stir. You may need to add a splash of milk to get the right consistency. Serve it with your favorite dippers like graham crackers or fruit. Enjoy every bite of this sweet treat! What if I don’t have heat-treated flour? You can make your own heat-treated flour. Spread regular flour on a baking sheet. Bake it at 350°F for about 5-10 minutes. Let it cool before using it in the dip. This will kill any bacteria and make it safe to eat raw. How long can the dip last in the fridge? The dip can last up to five days in the fridge if stored in an airtight container. Just make sure to keep it covered. If you notice any change in smell or texture, it's best to toss it. What are the best dippers for this dip? I love serving this dip with graham crackers, pretzels, and fresh fruit. You can also try vanilla wafers or animal crackers. Each option adds a fun crunch and flavor that pairs well with the sweet dip. Can it be served as a cake frosting alternative? Yes! This dip can be a fun twist on traditional frosting. Spread it on cupcakes or layer it in a cake. Just keep in mind that it is sweeter than regular frosting, so a little goes a long way! You now have all the tools to make the perfect Funfetti Cake Batter Dip. We covered the ingredients, from measurements to substitutions. You learned how to mix, chill, and serve for the best results. We explored tips for achieving the right texture and creative presentation ideas. You can customize flavors and adapt for diets, too. Remember, the right storage keeps your dip fresh for days. Whether you enjoy it with friends or alone, this dip is a treat. Dive in and make your next gathering a hit!

Funfetti Cake Batter Dip Easy and Tasty Treat

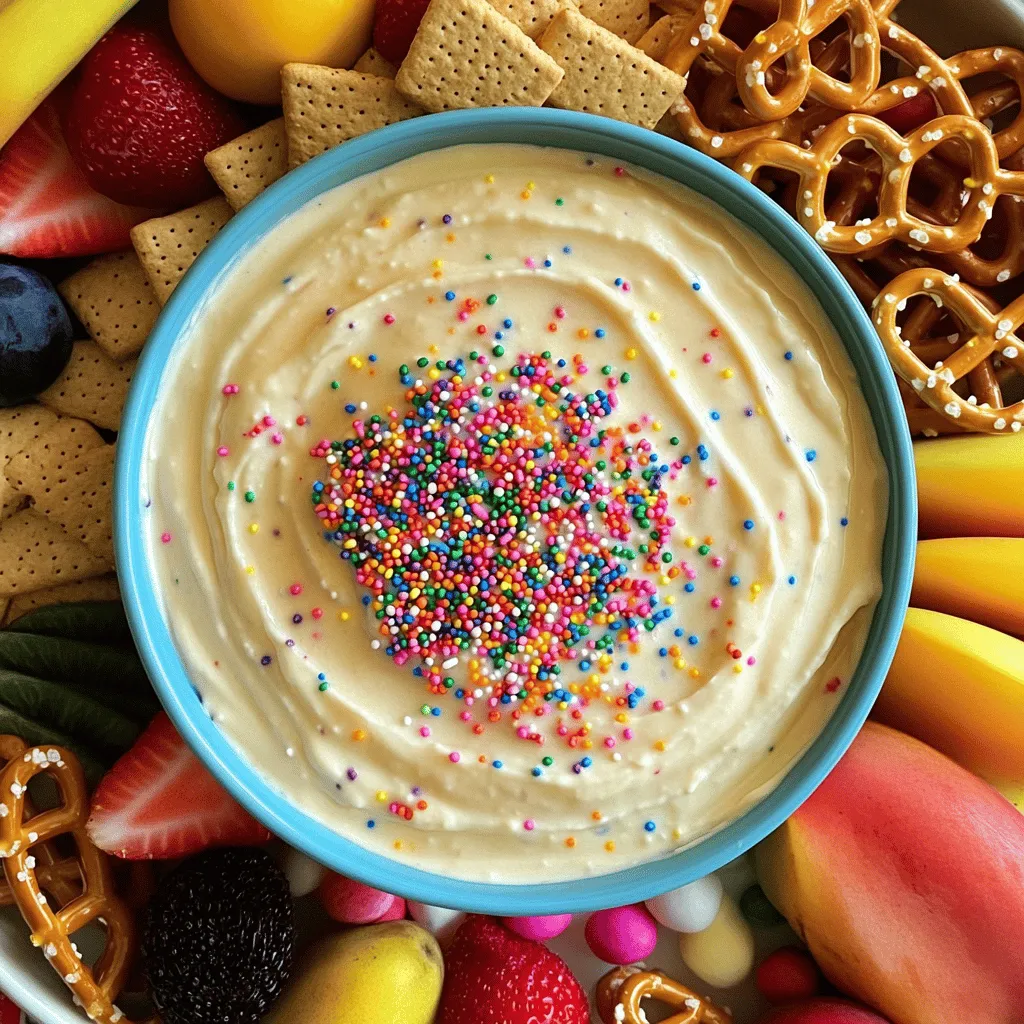
Are you ready to take your dessert game to the next level? Funfetti Cake Batter Dip is a tasty treat

To create a delightful Strawberry Shortcake Trifle, you’ll need the following ingredients: - 2 cups fresh strawberries, hulled and sliced - 4 tablespoons sugar, divided - 1 teaspoon vanilla extract - 1 cup heavy whipping cream - 1/2 cup powdered sugar - 1 cup angel food cake, cut into bite-sized pieces - 1 cup Greek yogurt (plain or vanilla) - Fresh mint leaves for garnish (optional) These simple ingredients come together to make a tasty treat. Fresh strawberries bring sweetness and flavor. The sugar helps enhance the taste of the strawberries. Vanilla extract adds a nice touch to the whipped cream. Heavy cream and powdered sugar create a light, fluffy texture. The angel food cake adds a soft base. Greek yogurt gives a creamy layer. Lastly, mint leaves offer a pop of color and freshness. Don’t forget to check out the Full Recipe for a step-by-step guide! - Start with 2 cups of fresh strawberries, hulled and sliced. - In a medium bowl, combine strawberries with 2 tablespoons of sugar. - Stir gently to coat the berries. - Let the mixture sit for 15 minutes to release juices. This step makes the strawberries sweet and juicy. The sugar helps to draw out their natural flavor. You'll see the berries swim in their own syrup, making them perfect for our trifle. - In another bowl, add 1 cup of heavy whipping cream. - Add 2 tablespoons of powdered sugar to the cream. - Use a hand mixer to whip the cream until soft peaks form. - Add 1 teaspoon of vanilla extract and mix well. Whipping cream is simple yet crucial for our dessert. Soft peaks mean the cream holds its shape but is still light. The vanilla adds a lovely flavor, enhancing the overall taste of the trifle. - Grab a large glass trifle bowl or individual serving glasses. - Start with a layer of angel food cake pieces at the bottom. - Spoon Greek yogurt over the cake pieces. - Add a generous layer of the macerated strawberries, juice included. - Top it off with a layer of whipped cream. Repeat the layering process until you finish all ingredients. Always end with whipped cream on top. This creates a beautiful, fluffy finish. Don’t forget to check out the Full Recipe for more details. To achieve soft peaks, chill your mixing bowl and beaters first. This helps the cream whip better. Start by pouring the heavy cream into the bowl. Whip the cream on medium speed. Watch it closely. Stop when soft peaks form. This means the cream holds its shape but is still smooth. Avoid over-whipping by stopping the mixer as soon as you see soft peaks. If you whip too long, it turns into butter. That’s not what we want for our trifle. If you see grainy bits, you've gone too far. For even layers, use a spatula to spread each layer flat. Start with cake at the bottom, then yogurt, strawberries, and whipped cream. Make each layer about the same thickness for nice looks. You can serve the trifle in different dishes. Clear glass bowls show off the layers well. You can also use small glasses for single servings. This makes it fun for guests and easy to serve. To store leftover trifle, cover it tightly with plastic wrap. This keeps it fresh and stops it from drying out. You can keep it in the fridge for up to two days. For best results, eat the trifle soon after making it. The layers stay fresh and tasty. If you have to keep it longer, think about freezing. However, freezing can change the texture of the whipped cream and fruit. {{image_2}} You can make simple swaps to this recipe. For a different twist, use other berries. Blueberries or raspberries work great and add color. You can also use sponge cake instead of angel food cake. Sponge cake gives a denser bite, which some may prefer. To elevate your trifle, try adding lemon zest. It brightens the flavor and adds a fresh taste. You can also incorporate chocolate shavings or nuts. They bring a nice crunch and richness that pairs well with the cream. Make your trifle fit the season or holiday. For Christmas, add crushed peppermint for a festive touch. In summer, try using peaches or cherries for a fruity delight. Each season offers unique fruits, so get creative! You can always find a new twist for this classic dessert. For the full recipe, check the earlier sections. To keep your trifle fresh, use a glass or plastic container with a tight lid. This helps keep out air and moisture. If you store it well, it lasts up to three days in the fridge. The layers may mix a bit, but the taste will still be great. You can freeze trifle, but the texture may change. To freeze it, place it in an airtight container. Make sure to leave some space at the top, as it may expand. When you want to eat it, thaw it overnight in the fridge. Enjoy it within two days after thawing for the best taste. If you want to try the full recipe, check it out now! Serve Strawberry Shortcake Trifle in clear glass dishes. This lets everyone see the beautiful layers. You can use individual cups or a large trifle bowl. Both options work great! To add flair, drizzle some syrup from the strawberries on top. This adds color and flavor. You can also garnish with fresh mint leaves. This makes your trifle look even more appealing. Yes, you can prepare the trifle ahead of time. You can layer it a few hours before serving. Just keep it in the fridge. This helps the flavors mix well. I suggest making it no more than 24 hours in advance. If you layer it too early, the cake might get soggy. Strawberry Shortcake Trifle lasts about 2 to 3 days in the fridge. Store it in an airtight container. This helps keep it fresh. If you notice any separation of layers, it’s still safe to eat. However, the texture may change. Enjoy it while it’s fresh for the best taste! In this blog post, we covered the tasty layers of the Strawberry Shortcake Trifle. You learned about the key ingredients, simple steps to prepare, and helpful tips for perfecting your dessert. I also shared variations to keep your trifle exciting. This dessert is easy, fun, and perfect for any gathering. With a little prep and creativity, your trifle can shine. Enjoy making your own version and delighting your friends and family!

Strawberry Shortcake Trifle Delightful Layered Dessert

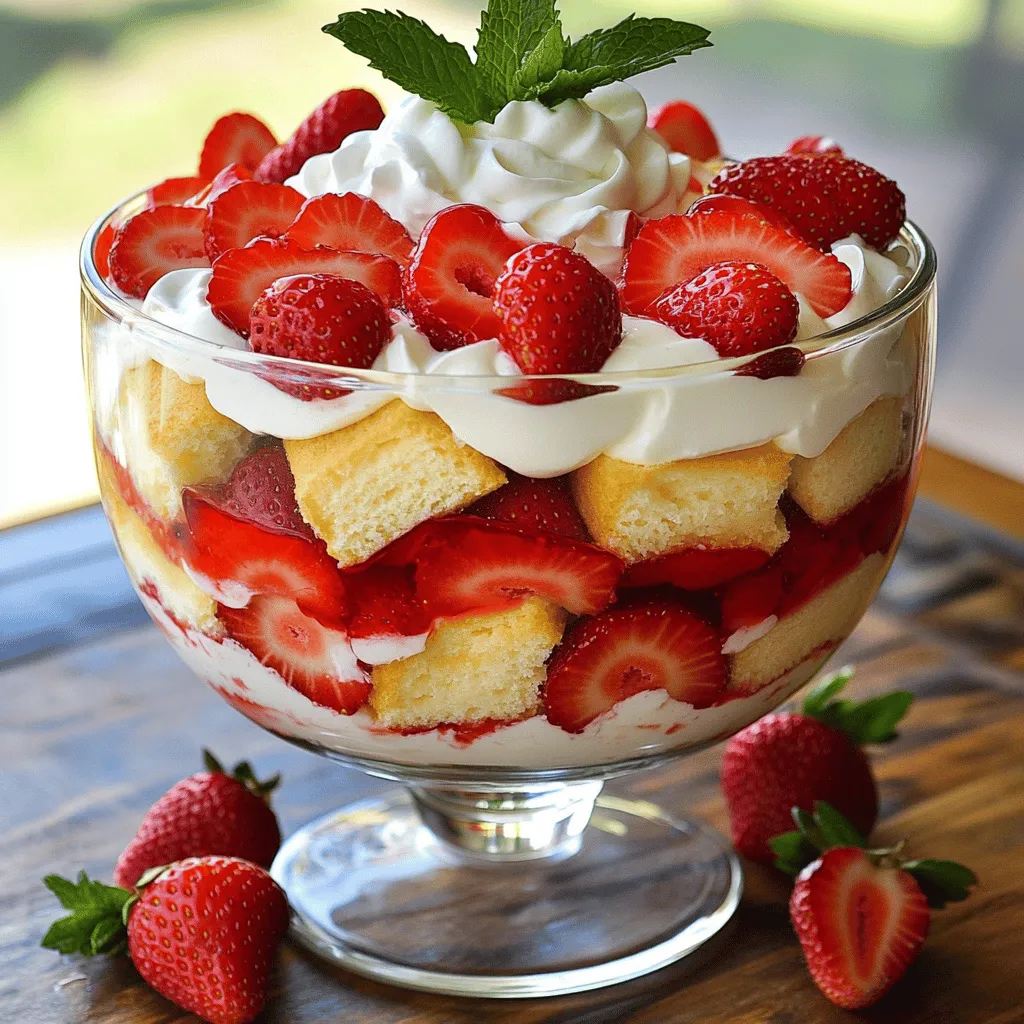
If you love sweet, fresh desserts, you’ve got to try my Strawberry Shortcake Trifle. This layered delight mixes juicy strawberries,

To create the perfect pineapple upside-down cake, you need some key ingredients. Each one plays an important role in making this treat delicious and fun to bake. Here’s what you’ll need: - 1 cup all-purpose flour - 1 teaspoon baking powder - 1/2 teaspoon baking soda - 1/4 teaspoon salt - 1/2 cup unsalted butter, softened - 1 cup brown sugar, packed - 2 large eggs - 1 teaspoon vanilla extract - 1/2 cup milk - 1 can (20 oz) sliced pineapple, drained (reserve juice) - Maraschino cherries, for garnish - 1/4 cup shredded coconut (optional, for added crunch) Each ingredient adds flavor and texture. The butter gives richness, while the brown sugar creates a lovely caramel flavor. The pineapple adds a tropical twist, and the cherries make it look pretty. If you want a bit more crunch, consider adding shredded coconut. Always remember to measure your ingredients correctly. This ensures the cake rises nicely and has the right texture. For the full recipe, follow the steps carefully to enjoy a delightful dessert. - First, preheat your oven to 350°F (175°C) and prepare your cake pan. You can grease and flour a 9-inch round cake pan or use non-stick spray. - Next, in a medium bowl, mix the dry ingredients. Combine 1 cup of all-purpose flour, 1 teaspoon of baking powder, 1/2 teaspoon of baking soda, and 1/4 teaspoon of salt. Set this aside. - In a large mixing bowl, cream together the softened butter and 1 cup of packed brown sugar. Beat until the mixture is light and fluffy. - Now, add 2 large eggs, one at a time, mixing well after each addition. Then, stir in 1 teaspoon of vanilla extract. - Begin adding the flour mixture to the butter mixture. Alternate this with 1/2 cup of milk. Start and end with the flour mixture. Mix until just combined. - Pour a small amount of the reserved pineapple juice into the bottom of the prepared cake pan. - Arrange the drained pineapple slices in a single layer on the bottom. Place a maraschino cherry in the center of each pineapple slice. If you like, sprinkle 1/4 cup of shredded coconut over the pineapples for added texture. - Gently pour the cake batter over the pineapples, spreading it evenly with a spatula. - Bake in the preheated oven for 35 to 40 minutes. Check with a toothpick; it should come out clean. - Once baked, let the cake cool in the pan for about 10 minutes. Carefully invert the cake onto a serving plate, so the pineapple side is facing up. Enjoy your delightful pineapple upside down cake! For more details, check the Full Recipe. To ensure your cake is fully baked, you want it to rise and turn golden brown. The edges will pull away from the pan slightly as it bakes. To check for doneness, use a toothpick. Insert it in the center of the cake. If it comes out clean, your cake is ready. If it has batter on it, bake for a few more minutes. Serving suggestions can elevate your cake. Top it with fresh whipped cream or a scoop of vanilla ice cream. Both add a rich touch. For visual appeal, garnish the cake with coconut and mint leaves. This adds color and texture, making your cake look even more inviting. One common mistake is overmixing the batter. This can make your cake dense. Mix until just combined to keep it light and fluffy. Not greasing the pan properly can also lead to trouble. Always grease or use non-stick spray. This ensures your cake comes out easily without sticking. For the full recipe, check out the Tropical Pineapple Upside Down Delight. {{image_2}} You can easily change the flavor of your pineapple upside down cake. Try adding other fruits. Peaches or cherries work well. They add a sweet twist. You can also use nuts or coconut on top. Nuts give a nice crunch, and coconut adds a tropical feel. Mix and match to find your favorite combo. If you need a gluten-free cake, you can still enjoy this treat. Use almond flour or a gluten-free mix instead of regular flour. Be sure to check if the mix contains xantham gum. This helps with texture. Also, keep a close eye on the baking time. Gluten-free cakes can bake faster, so check for doneness early. You can serve this cake in many fun ways. A drizzle of caramel or chocolate sauce makes it extra special. You can also add fresh whipped cream or vanilla ice cream. This cake is great for brunch or dessert. It’s a hit at gatherings. Serve it warm for the best taste! For the full recipe, check out the Tropical Pineapple Upside Down Delight ! To keep your pineapple upside down cake fresh, store it in an airtight container. This will prevent it from drying out. If you don't have a container, wrap it tightly with plastic wrap. Make sure it's at room temperature before you cover it. You can freeze this cake for later enjoyment. First, let the cake cool completely. Then, wrap it well in plastic wrap. Place it in a freezer-safe bag or container. For best results, use it within three months. When you’re ready to eat it, thaw the cake in the fridge overnight. This keeps it moist and tasty. Your pineapple upside down cake can stay fresh for about 3 to 4 days at room temperature. If you keep it in the fridge, it can last up to a week. Look for signs that it has spoiled, like a sour smell or mold. If you see these, it’s best to toss it. Enjoy your delicious treat while it’s fresh! Pineapple Upside Down Cake has a rich history. It first appeared in the early 1900s. Canned pineapple became popular in the United States during this time. People used it in many sweet dishes. The cake gained fame at the 1925 Pineapple Festival in Hawaii. It became a staple in American homes after World War II. The bright, sweet flavor and easy prep made it a hit. Yes, you can make this cake ahead of time. Bake the cake and let it cool completely. Wrap it tightly in plastic wrap. Store it in the fridge for up to three days. You can also freeze the cake for up to three months. Just remember to thaw it in the fridge overnight before serving. This method keeps it fresh and tasty. If your cake turns out soggy, don’t worry. You can improve its texture. First, check if it was underbaked. Next time, bake it a bit longer. If it is baked but still soggy, let it cool completely. Then, slice it and toast the pieces in a toaster or oven. This will give it a nice crispness. Serve it warm with ice cream for best results. You can get creative with your toppings! Here are some fun ideas: - Fresh sliced strawberries or peaches - Chopped nuts like walnuts or pecans - Cream cheese frosting for a rich twist - Chocolate chips for a sweet surprise - A drizzle of caramel or chocolate sauce Feel free to mix and match to find your favorite flavor combination. For a full recipe, check out the Tropical Pineapple Upside Down Delight. This blog post shared how to make a delicious Pineapple Upside Down Cake. You learned about the ingredients, step-by-step instructions, and tips to avoid common mistakes. I also discussed fun variations and storage methods to keep your cake fresh. Remember, baking is fun and offers room for creativity. Try different fruits or toppings to make it your own. Enjoy your time in the kitchen and share this treat with friends and family. Happy baking!

Pineapple Upside Down Cake Scrumptious and Simple Recipe

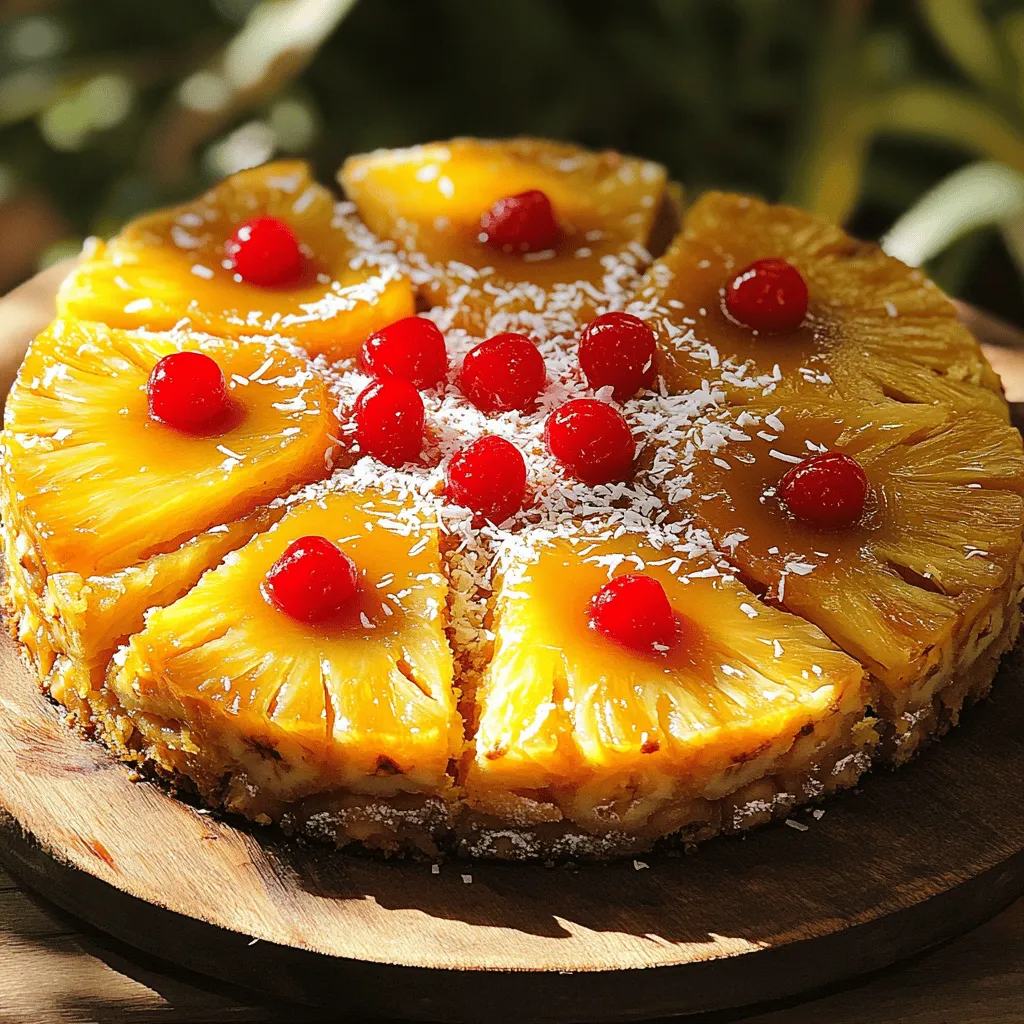
Ready to wow your friends and family with a classic dessert? This Pineapple Upside Down Cake is scrumptious and simple

To make No Bake Lemon Icebox Pie, you need these ingredients: - 1 cup graham cracker crumbs - 1/2 cup unsalted butter, melted - 1/2 cup granulated sugar - 1 can (14 oz) sweetened condensed milk - 1/2 cup fresh lemon juice (about 3-4 lemons) - Zest of 1 lemon - 1/4 teaspoon salt - 1 cup heavy whipping cream - 2 tablespoons powdered sugar - Extra lemon zest for garnish (optional) You can swap some ingredients if needed. For graham cracker crumbs, use crushed cookies or oats. If you want a lighter pie, use low-fat cream cheese instead of heavy cream. For sweetness, try honey or maple syrup in place of granulated sugar. You can also use dairy-free options like coconut cream for a vegan version. Using fresh ingredients always gives the best flavor. Fresh lemons make the pie bright and zesty. However, if you are short on time, store-bought lemon juice works too. Just check for a pure product without added sugars. For the crust, store-bought graham cracker crusts are convenient but may lack the homemade touch. Making your crust from scratch allows you to control the taste. By following these tips, you can make this pie your own while keeping it delicious. For the full recipe, check out the complete instructions to create this easy dessert. 1. Make the crust: In a medium bowl, mix graham cracker crumbs and melted butter. Stir until well combined. Press this mixture into a 9-inch pie dish. Make sure it is firm and even. Place the crust in the fridge for 15 minutes to set. 2. Prepare the filling: In a clean bowl, whisk together sweetened condensed milk, lemon juice, lemon zest, granulated sugar, and salt. Mix until smooth. The acidity from the lemon will thicken it a bit. 3. Whip the cream: Take another bowl and add heavy whipping cream and powdered sugar. Use an electric mixer to beat it until you see stiff peaks. This gives the pie a light texture. 4. Combine mixtures: Gently fold the whipped cream into the lemon mixture. Be careful not to lose the fluffiness of the whipped cream. You want a creamy, light filling. 5. Fill the crust: Pour the lemon filling into your chilled graham cracker crust. Use a spatula to smooth the top. 6. Chill the pie: Cover the pie with plastic wrap and place it in the fridge. Let it chill for at least 4 hours or overnight if you can. This helps the pie set perfectly. 7. Serve: Once set, take it out of the fridge. If you want, sprinkle some extra lemon zest on top for a bright touch. I recommend checking out video tutorials online. Watching someone make the pie can really help. You can see how the mixture looks at each step. This adds a fun layer to learning. Look for videos that show the folding technique too. It’s a key part to keep the filling light. - Not chilling the crust: Skipping this step can make the crust fall apart when you cut the pie. Always chill it! - Overmixing the whipped cream: Be gentle when folding. Overmixing can turn it into butter, and we want it fluffy. - Using old lemons: Fresh lemons give the best flavor. Check for firmness and scent before using them. - Skipping the chill time: Patience is key! Don’t rush the chilling. It helps the pie set well, ensuring a great texture. This No Bake Lemon Icebox Pie is easy and fun to make! Follow these steps, and you will impress everyone with your skills. For more details, check out the Full Recipe. To get the best texture, use cold heavy cream. Chill your mixing bowl too. This helps the cream whip up nicely. When folding the whipped cream into the lemon mix, do it gently. You want to keep that airy lightness. If you mix too hard, your filling can become flat. Lemon is bright, but you can add more! Try mixing in some lime juice for a twist. You can also add a bit of vanilla extract to the lemon mix. For a sweeter pie, add a touch more sugar. Fresh herbs like mint can also brighten the flavor. Experiment and find your favorite! Serve this pie straight from the fridge. It’s cool and refreshing. For fun, use chilled plates to keep it extra cold. You can add a sprig of mint or extra lemon zest on top for style. Present each slice with a dollop of whipped cream for a treat. Explore different garnishes to make it your own. {{image_2}} You can change the crust for your No Bake Lemon Icebox Pie. Instead of graham crackers, use crushed cookies like Oreos or vanilla wafers. You can also try a nut crust made from almonds or pecans for a gluten-free option. Each crust gives a different flavor and texture. Experiment to find your favorite! Want to add more fun to your pie? Mix in fresh berries like blueberries or raspberries. You can also add shredded coconut for a tropical twist. Just fold them in gently with the lemon mix. This not only makes the pie colorful but adds a burst of flavor too! You can make this pie fit your dietary needs. For a vegan version, use coconut cream instead of heavy cream. Swap sweetened condensed milk with coconut milk and a thickener like cornstarch. For gluten-free, use a gluten-free cookie for the crust. These swaps keep the taste delicious while fitting your diet. Check out the Full Recipe for more ideas! To keep your No Bake Lemon Icebox Pie fresh, store it in the fridge. Cover it well with plastic wrap. This helps prevent it from absorbing other flavors in the fridge. For best taste, eat it within three days. You don’t need to reheat this pie. It tastes best cold. Just slice and serve straight from the fridge. If you want it softer, let it sit at room temperature for a few minutes before serving. You can freeze this pie if you want to save some for later. Wrap it tightly in plastic wrap and then in aluminum foil. This keeps it safe from freezer burn. It can last up to two months in the freezer. When ready to eat, thaw it in the fridge overnight. Do not refreeze after thawing. Enjoy the refreshing taste! For the full recipe, check out the steps above. No Bake Lemon Icebox Pie lasts about 3 to 5 days in the fridge. Keep it covered to stay fresh. The pie tastes best within the first few days. After that, the crust might get soggy. Yes, you can use bottled lemon juice. However, fresh juice has a better taste. Fresh lemons give the pie a bright flavor. If you use bottled juice, pick a brand that is 100% lemon juice. You can use crushed cookies or even vanilla wafers instead of graham crackers. You could also try crushed pretzels for a salty twist. Just make sure to adjust the butter and sugar as needed. The pie should feel firm when you gently shake it. The top will look slightly jiggly, but not too much. If it holds its shape when you slice it, it’s set. Chill it longer if it seems too soft. Absolutely! This pie is great for making ahead. You can prepare it a day or two in advance. Just make sure to cover it well in the fridge. This allows the flavors to blend nicely. For the best texture, serve it chilled after it has set. For the full recipe, check out the No Bake Lemon Icebox Pie instructions above. We've covered the essential ingredients for your No Bake Lemon Icebox Pie, from lists to swaps. I shared step-by-step instructions, so you can avoid common mistakes. Additionally, I offered tips for the best texture, flavor, and fun variations. Finally, I provided storage tips to keep your pie fresh. With this knowledge, you can make a delicious pie that everyone will love. Enjoy your baking adventure!

No Bake Lemon Icebox Pie Easy and Fun Dessert Recipe

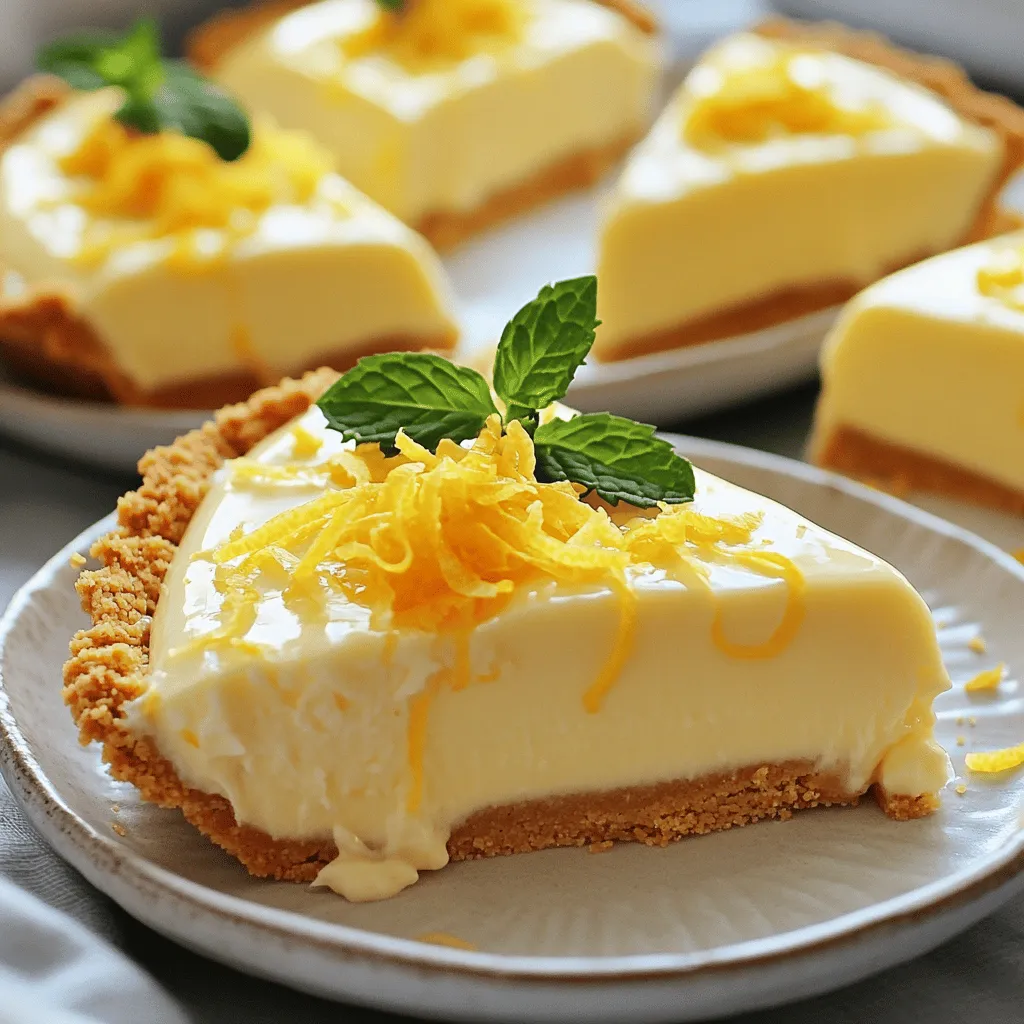
Do you want a simple and tasty dessert? Look no further than this No Bake Lemon Icebox Pie! It’s a

To make classic red velvet cupcakes, gather these key ingredients: - 1 ½ cups all-purpose flour - 1 cup granulated sugar - 1 tsp baking soda - 1 tsp cocoa powder - 1 tsp salt - 1 cup vegetable oil - 1 cup buttermilk, room temperature - 2 large eggs, room temperature - 2 tbsp red food coloring - 1 tsp vanilla extract - 1 tsp white vinegar For the cream cheese frosting, you'll need: - 8 oz cream cheese, softened - ½ cup unsalted butter, softened - 4 cups powdered sugar - 1 tsp vanilla extract The quality of your ingredients matters. Use fresh, high-quality items for the best taste. For flour, choose unbleached all-purpose flour. This gives a nice texture. Use real butter for the cream cheese frosting to enhance the flavor. Fresh buttermilk is key to a moist cupcake. Check that your eggs are room temperature for better mixing. If you don’t have buttermilk, mix 1 cup of milk with 1 tbsp lemon juice or vinegar. Let it sit for five minutes. For the red food coloring, you can use beet juice for a more natural option. If you need a dairy-free option, try almond milk or coconut milk with vinegar. For the frosting, a non-dairy cream cheese works well too. You can even use Greek yogurt for a tangy twist. For the full recipe, check out the detailed steps to create these delightful treats. Start by preheating your oven to 350°F (175°C). This step is key for even baking. Line a muffin pan with cupcake liners. Use colorful liners to make your cupcakes pop! In a large mixing bowl, sift together the dry ingredients. Add 1 ½ cups of all-purpose flour, 1 cup of granulated sugar, 1 tsp of baking soda, 1 tsp of cocoa powder, and 1 tsp of salt. Mixing these well helps ensure that each cupcake is fluffy and sweet. In another bowl, whisk together the wet ingredients. Combine 1 cup of vegetable oil, 1 cup of buttermilk, and 2 large eggs. Then, add 2 tbsp of red food coloring, 1 tsp of vanilla extract, and 1 tsp of white vinegar. This mixture gives the cupcakes their rich color and flavor. Gradually add the wet mixture to the dry ingredients. Stir gently until just combined. Be careful not to overmix; a few lumps are fine. Overmixing can make your cupcakes tough. Carefully divide the batter into the cupcake liners, filling each about 2/3 full. Bake for 18-20 minutes. A toothpick should come out clean when inserted in the center. After baking, let the cupcakes cool in the pan for 5 minutes. Then, transfer them to a wire rack to cool completely. To make the cream cheese frosting, beat together 8 oz of softened cream cheese and ½ cup of softened butter until smooth. Gradually add 4 cups of powdered sugar and mix until fluffy. Once the cupcakes have cooled, frost them generously. Use a piping bag for a fun design or a knife for a rustic look. Enjoy these delightful treats! For the complete recipe, check the [Full Recipe]. To get that bright red color, use high-quality red food coloring. The right brand makes a big difference. I recommend using gel food coloring instead of liquid. Gel gives a deeper, richer hue. Always add it to your wet ingredients for even mixing. If your batter looks more brown than red, just add a bit more coloring until you reach your desired shade. Keep your cupcakes fresh by storing them in an airtight container. Place a piece of parchment paper between layers to avoid sticking. They stay good for up to three days at room temperature. If you want to keep them longer, freeze them. Just wrap each cupcake in plastic wrap and place them in a freezer bag. They can last up to three months in the freezer. One common mistake is overmixing the batter. This can make your cupcakes tough. Mix just until combined, and it's okay if there are a few lumps. Another mistake is not measuring ingredients properly. Make sure you use the right tools for measuring flour and sugar. Too much of either can change the texture. Lastly, don’t skip the cooling step. Frosting warm cupcakes can lead to a melty mess! For the best results, let them cool completely before frosting. {{image_2}} You can make gluten-free red velvet cupcakes easily. Just swap regular flour for gluten-free flour. Use a blend that works for baking. Make sure it has xanthan gum; this helps with texture. The taste will stay rich and delicious. Cream cheese frosting is classic, but you can try more. A chocolate ganache adds a rich twist. For a lighter taste, use whipped cream or vanilla buttercream. You can even add a hint of peppermint or almond extract. Each choice gives a new flavor to your cupcakes. Get creative with your cupcakes by adding special items. Chopped nuts, like pecans or walnuts, add a nice crunch. You can also mix in chocolate chips for a sweet surprise. For toppings, consider sprinkles or edible glitter for fun. Fresh berries on top can bring a fruity touch. These options make your cupcakes unique and fun! To keep your red velvet cupcakes fresh, store them in an airtight container. This will help them maintain moisture and flavor. Place a piece of wax paper under the lid to absorb any excess moisture. Keep the container at room temperature for up to three days. If you need to store them longer, consider refrigeration. Freezing is a great way to save cupcakes for later. First, let the cupcakes cool completely. Wrap each cupcake in plastic wrap, then place them in a freezer-safe bag. Label the bag with the date. You can freeze them for up to three months. When you're ready to enjoy, just thaw them in the fridge overnight. To reheat leftover cupcakes, set your oven to 350°F (175°C). Unwrap the cupcakes and place them on a baking sheet. Heat for about 5-7 minutes, just until warm. If you want to refresh the frosting, add a dollop of cream cheese frosting on top after reheating. Enjoy your delicious cupcakes warm! For the full recipe, check out the Classic Red Velvet Cupcakes with Cream Cheese Frosting. Red velvet cupcakes stand out due to their vibrant red color and subtle cocoa flavor. They have a soft, moist crumb that sets them apart from regular chocolate cupcakes. The combination of buttermilk and vinegar creates a unique tangy taste that complements the sweetness well. Their rich, velvety texture is perfect for pairing with cream cheese frosting, which adds another layer of flavor. Yes, you can use different food coloring. However, red food coloring is traditional for red velvet cupcakes. If you want to experiment, try using natural colors like beet juice for a more organic option. Just remember, the final color will change the look, but the taste remains delicious. The key is to maintain the right balance in your batter for the perfect cupcake. If you overmix your cupcake batter, the texture may become dense. To fix this, you can try adding a small amount of milk or buttermilk to loosen it up. Stir gently to blend. If you have not baked the batter yet, you can also start over with fresh ingredients. Remember, mix just until combined for the best results. Absolutely! Mini cupcakes are a fun twist on the classic recipe. Just fill mini cupcake liners about halfway with batter. Bake them for about 10 to 12 minutes. Check with a toothpick to see if they are done. The smaller size makes them perfect for parties or a sweet treat without guilt. These cupcakes stay fresh for about three days at room temperature. Store them in an airtight container to keep them moist. If you want to keep them longer, you can freeze them for up to three months. Just make sure to frost them after thawing for the best flavor. Enjoy these delightful treats anytime! Don't forget to check the Full Recipe for all the details. You now have all the details to make great red velvet cupcakes. We covered the ingredients and their quality. Plus, you learned how to prep and bake them. Remember to avoid common mistakes to get the best results. Explore variations like gluten-free options and different frostings to keep snacks exciting. Don’t forget how to store and freeze your cupcakes for later. Now, go ahead and create that perfect treat for yourself or friends!

Classic Red Velvet Cupcakes Irresistible and Easy Recipe

Craving something sweet and special? Classic Red Velvet Cupcakes are perfect for any occasion! I’ll guide you through an easy

- 2 boneless, skinless chicken breasts - 2 cups fresh broccoli florets - 4 cloves garlic, minced - 1/4 cup chicken broth - 2 tablespoons soy sauce - 1 tablespoon honey - 1 tablespoon olive oil - 1 teaspoon cornstarch - Salt and pepper to taste The right ingredients make the dish shine. You need fresh chicken and bright broccoli. Minced garlic adds a punch of flavor. Chicken broth brings depth to the sauce. Soy sauce adds savory notes. Honey balances the flavors with sweetness. Olive oil gives richness, and cornstarch can thicken the sauce if you like. Don’t forget salt and pepper for seasoning. - Cooked brown rice or quinoa These bowls shine when served over brown rice or quinoa. Both options are healthy and filling. They soak up the garlic sauce well. You can also switch it up with other grains if you want. - Red pepper flakes for added flavor Red pepper flakes are a great option for those who like heat. A sprinkle on top adds color and a spicy kick. It makes the dish even more exciting. Enjoy the burst of flavor with every bite! {{ingredient_image_1}} To start, grab a bowl. Mix 1 tablespoon of soy sauce, honey, salt, and pepper. Add the chicken breasts and coat them well. Let the chicken marinate for at least 30 minutes. For a deeper flavor, you can marinate it for up to 2 hours. This step makes the chicken juicy and tasty. Next, fill a pot with water and bring it to a boil. Add the fresh broccoli florets and blanch them for 2-3 minutes. You want them bright green and a bit tender. As soon as they are done, transfer the broccoli to a bowl of ice water. This stops the cooking and keeps the color. Drain the broccoli and set it aside. Now, let’s make the garlic sauce. Heat olive oil in a saucepan over medium heat. Add 4 cloves of minced garlic and sauté for about 30 seconds. You want it fragrant but not burned. Pour in the chicken broth and the rest of the soy sauce. If you like a thick sauce, mix 1 teaspoon of cornstarch with cold water. Add this to the sauce and let it simmer for 2-3 minutes. It should thicken slightly. Time to grill! Preheat your grill or grill pan to medium-high heat. Place the marinated chicken on the grill. Cook for about 6-7 minutes on each side. You want the internal temperature to reach 165°F (75°C). Once cooked, let the chicken rest for a few minutes before slicing. This keeps it juicy. Now it’s time to build your bowls. Start with a base of cooked brown rice or quinoa. Place sliced grilled chicken on one side and arrange the blanched broccoli on the other. Drizzle the garlic sauce generously over the chicken and broccoli. This adds flavor and moisture. For a spicy kick, sprinkle red pepper flakes on top if you like. Serve these bowls warm and enjoy the mix of flavors and textures. This dish is not only delicious but also healthy and filling. Marinating chicken adds flavor. Mix soy sauce, honey, salt, and pepper in a bowl. Coat the chicken breasts well. Let them soak for at least 30 minutes. For more taste, marinate up to 2 hours. This helps the flavors seep into the meat. You can cook broccoli in different ways. Blanching is quick and brightens the color. Just boil for 2-3 minutes. Then, cool it in ice water to stop cooking. You can also steam the broccoli. This keeps its nutrients and flavor. Roasting gives it a nice crispness. Toss it with olive oil and roast at 400°F for 15-20 minutes. The garlic sauce is easy to change. Add herbs like basil or thyme for a fresh twist. A pinch of red pepper flakes gives heat. You could also try adding lemon zest for brightness. If you want a richer taste, mix in a bit of sesame oil. These simple changes can make your dish unique. Pro Tips Marination Time: For maximum flavor, let the chicken marinate for at least 1 hour. This allows the flavors to penetrate the meat more deeply. Blanching Broccoli: Blanching the broccoli helps to maintain its vibrant color and crisp texture. Don’t skip the ice bath! Perfect Grilling: Ensure your grill is preheated properly. This helps to achieve nice grill marks and prevents the chicken from sticking. Customize Sauce Thickness: If you prefer a thinner sauce, skip the cornstarch. For a thicker sauce, be sure to mix the cornstarch well to avoid lumps. {{image_2}} You can switch out the chicken for other proteins. Tofu is a great option for a plant-based meal. Simply press and cube firm tofu. Marinate it like you would the chicken and grill it. Shrimp also works well and cooks quickly. Just toss them on the grill for a few minutes. Both options add unique flavors to your bowl. Broccoli shines in this dish, but you can mix in other veggies. Try adding bell peppers for sweetness or snap peas for crunch. Carrots offer a pop of color and sweetness too. You can even toss in some spinach or kale for extra greens. The more veggies, the better! While garlic sauce is tasty, you can explore other flavors. Ginger sauce adds a spicy kick and pairs well with chicken. Teriyaki sauce brings a sweet and savory twist. You can also try a spicy chili sauce for some heat. Each sauce gives your bowl a new vibe and taste. To store leftovers, let the bowls cool to room temperature. Place the chicken and broccoli in an airtight container. Add extra garlic sauce in a small jar. Store everything in the fridge. These bowls last for 3 to 4 days. When ready to eat, just pull them out and enjoy! To freeze, package the chicken and broccoli separately. Use freezer-safe bags or containers. Squeeze out air to prevent freezer burn. They can stay frozen for up to 3 months. When you want to eat, thaw them in the fridge overnight. This keeps the chicken tender and the broccoli bright. For the best results, reheat in the microwave or on the stove. If using the microwave, warm in short bursts. Check every minute to avoid overcooking. On the stove, heat on low, stirring often. This helps keep the chicken juicy and the broccoli crisp. Enjoy your meal once it’s heated through! To make this recipe gluten-free, use tamari instead of soy sauce. Tamari is a gluten-free soy sauce that offers the same great taste. Also, check your chicken broth label to ensure it is gluten-free. Yes, you can use frozen broccoli. It saves time and is easy to use. However, frozen broccoli may lose some crunch. Fresh broccoli has a better texture and flavor. If you use frozen, just thaw and drain it well before cooking. If you need a substitute for honey, try maple syrup or agave nectar. Both add sweetness without changing the dish too much. You can also use brown sugar. Just mix it with a little water to create a syrup. Check the chicken’s internal temperature with a meat thermometer. The safe temperature is 165°F (75°C). If you don’t have a thermometer, cut the chicken in the thickest part. The meat should be white with no pink. In this blog post, I shared a simple, tasty recipe featuring chicken and broccoli. You learned how to marinate the chicken, prepare the broccoli, and make a flavorful garlic sauce. I offered tips for customizing the dish and storage ideas for leftovers. The recipe is versatile and easy, perfect for busy days. You can also switch proteins or veggies to suit your taste. Enjoy making this healthy meal that's quick and satisfying!

Grilled Chicken Broccoli Garlic Sauce Bowls Delight

Are you craving a quick and tasty meal that’s packed with flavor? Look no further! My Grilled Chicken Broccoli Garlic

- 1 lb chicken tenders - 1 cup buttermilk - 1 cup all-purpose flour - 1/2 cup breadcrumbs (preferably panko) - 2 teaspoons garlic powder - 1 teaspoon onion powder - 1 teaspoon paprika - 1/2 teaspoon salt - 1/2 teaspoon black pepper - Cooking spray - Optional garnish: Fresh parsley, chopped - Air fryer - Mixing bowls - Whisk - Measuring cups and spoons - Cooking spray bottle To make these chicken tenders, you need fresh chicken tenders as the base. The buttermilk adds moisture and flavor. It helps the chicken stay juicy inside. The flour and breadcrumbs create a crunchy outside. I like using panko because it provides extra crispiness. Gather your spices too. Garlic powder gives depth, while onion powder adds sweetness. Paprika offers a hint of warmth and color. Salt and pepper enhance all the flavors. For tools, an air fryer is a must. It cooks the chicken quickly and evenly. Mixing bowls help you combine the buttermilk and spices. A whisk ensures your dry ingredients mix well. Finally, use measuring cups and spoons for accuracy. With these ingredients and tools ready, you can move on to the fun part: cooking! Check out the full recipe for detailed steps. First, grab your chicken tenders. Place them in a mixing bowl and pour in one cup of buttermilk. This step is key. The buttermilk makes the chicken juicy and tender. Let the tenders soak for at least 30 minutes. You can let them marinate for up to two hours if you want more flavor. Next, we need to make the coating. In another bowl, mix one cup of all-purpose flour, half a cup of panko breadcrumbs, and your spices. Use two teaspoons of garlic powder, one teaspoon of onion powder, one teaspoon of paprika, half a teaspoon of salt, and half a teaspoon of black pepper. Make sure the spices blend well. An even mix gives each tender great flavor. Now, it’s time to cook! Preheat your air fryer to 400°F (200°C). This usually takes about five minutes. While it heats, take each chicken tender from the buttermilk. Let any extra buttermilk drip off. Then, coat each tender in the flour and breadcrumb mix. Ensure they are fully covered. Place them in the air fryer basket without overlapping. If needed, cook them in batches. Lightly spray the tenders with cooking spray to help them crisp. Cook the chicken tenders for 10 to 12 minutes. Flip them halfway through for even cooking. They should turn golden brown and reach an internal temperature of 165°F (74°C). Once done, remove them from the air fryer and let them sit for a few minutes before serving. For an added touch, sprinkle chopped fresh parsley on top. Enjoy your crunchy and flavorful dish! For the complete process, check out the Full Recipe. To make your chicken tenders extra crunchy, use panko breadcrumbs. Panko gives that perfect crisp. Before cooking, lightly spray the tenders with cooking spray. This helps create a golden crust. Don’t overcrowd the air fryer basket. If you stack the tenders, they won’t cook evenly. For best results, cook them in batches. Always check the internal temperature. The chicken should reach 165°F or 74°C to be safe to eat. Want to boost the taste? Try adding spices like cayenne for heat. You can also marinate the chicken with different herbs. This simple step adds depth and flavor. For the full recipe, check the detailed instructions! {{image_2}} You can change the texture of your chicken tenders by trying different coatings. Use crushed cornflakes or nuts for a unique crunch. Both options add a nice twist to the classic taste. If you want gluten-free tenders, swap regular flour for a gluten-free flour mix. This will still give you a tasty and crispy coating. Want to spice things up? Add hot sauce to the buttermilk when marinating the chicken. This will give your tenders a nice spicy kick. You can also try different seasoning blends. Cajun and Italian mixes can make your chicken tenders exciting. Experiment with these flavors to find your favorite. Pair your chicken tenders with fun dipping sauces. Honey mustard and ranch are great choices. They add extra flavor and make each bite enjoyable. You can also serve the tenders alongside fresh salads or fried vegetables. These sides balance the meal and add color to your plate. To keep your air fryer chicken tenders fresh, store them in an airtight container. They will last for up to 3 days. Let them cool down before sealing. This ensures they stay crispy and tasty. When you're ready to enjoy leftovers, reheat them in the air fryer. This method keeps them crispy. If you don’t have an air fryer, use your oven. Set it to a low temperature to gently warm them up. If you want to save time, freeze uncooked coated tenders. They make quick meals later. When you're ready to cook, just take them out of the freezer. Cook them straight from frozen but add some extra time to make sure they are done. For the full recipe, check out the details above! Check for an internal temperature of 165°F (74°C). Use a meat thermometer for accuracy. This ensures your chicken is safe to eat and juicy. Overcooking can make them dry, so keep an eye on the time. Yes, adjust cooking time for frozen tenders. Increase the cooking time by a few minutes. Always check the internal temperature as well. Using frozen tenders makes for a quick meal option. Recommended sides include fries, coleslaw, or veggies. You can also serve them with a salad for a lighter meal. Dipping sauces like honey mustard or ranch are great choices. They enhance the flavor and add fun to your meal. Yes, follow similar coating and seasoning but adjust temperatures and time. Preheat your oven to 425°F (220°C). Bake for about 20-25 minutes, flipping halfway. The result may not be as crispy as the air fryer, but they will still be delicious. For the full recipe, check out the details above! In this post, I covered how to create crispy air fryer chicken tenders. You need simple ingredients like chicken, buttermilk, and spices. I shared tips for flavor and texture and even offered variations. Remember to check the doneness for perfect results. These tenders are easy to make and great for meals. Enjoy this simple recipe and have fun experimenting with flavors!

Air Fryer Chicken Tenders Crunchy and Flavorful Dish

Are you ready to enjoy a crunchy and flavorful dish that’s quick and easy? These Air Fryer Chicken Tenders transform

Older posts
Newer posts
← Previous Page1 … Page76 Page77 Page78 … Page125 Next →

dsad

© 2025 Southern Dishes • Built with GeneratePress

Our Policies

  • Copyright Policy
  • Cookie Policy
  • GDPR Policy
  • Privacy Policy
  • Disclaimer
  • Terms Of Use

More Information

  • Home
  • About
  • Contact
  • Appetizers
  • Dessert
  • Dinner
  • Drinks
©2025, Southern Dishes About Back To Top