Skip to content
DisclaimerTerms Of UseGDPR PolicyCookie Policy

Southern Dishes

  • Home
  • Drinks
  • Appetizers
  • Dinner
  • Dessert
  • About
  • Contact
  • Privacy Policy
DisclaimerTerms Of UseGDPR PolicyCookie Policy

Isabella

- 4 boneless, skinless chicken breasts - 1 packet (1 oz) ranch dressing mix - 1 cup cream cheese, softened - 1 cup chicken broth - 1 can (15 oz) cream of chicken soup - 1 cup shredded cheddar cheese - 1 cup frozen peas (optional) - ½ teaspoon garlic powder - Salt and pepper to taste - Fresh parsley for garnish To make Creamy Ranch Crockpot Chicken, gather these simple ingredients. You will need chicken breasts as the main protein. They cook well and stay juicy in the crockpot. Next, the cream cheese adds a rich flavor and smooth texture. It blends nicely with the ranch dressing mix. Together, these create a creamy sauce. You should also have chicken broth and cream of chicken soup. They enhance the dish's flavor and keep the chicken moist. Don't forget the seasonings! Garlic powder, salt, and pepper add depth to the taste. You can adjust these to your liking. Lastly, shredded cheddar cheese gives the dish a cheesy finish. If you want to add a pop of color and nutrition, toss in some frozen peas. This dish is easy to prepare and uses ingredients you may already have at home. You can make a delicious meal without much fuss! {{ingredient_image_1}} Seasoning the Chicken Start by placing the chicken breasts in your slow cooker. Sprinkle them with salt, pepper, and garlic powder. This simple blend adds great flavor. Mix it well to cover each piece. Mixing the Creamy Sauce In a medium bowl, combine the cream cheese, chicken broth, ranch dressing mix, and cream of chicken soup. Stir until it becomes smooth and creamy. This sauce is the star of your dish. Once mixed, pour the creamy sauce over the seasoned chicken. Cooking Time on Low vs High Cover the slow cooker with its lid. You can cook on low for 6-7 hours or on high for 4-5 hours. Cooking on low gives a more tender result. Check the chicken to ensure it is fully cooked and tender before moving on. Shredding the Chicken About 30 minutes before you plan to serve, use two forks to shred the chicken right in the pot. This method keeps all the flavors locked in. Adding Cheese and Peas Next, stir in the shredded cheddar cheese and frozen peas if you like them. Mix it well, and let it cook for another 30 minutes on low. This will melt the cheese and heat the peas through. Adjusting Seasoning Finally, taste the dish before serving. Add more salt and pepper if needed. This extra step makes sure it tastes just right. Serve hot and enjoy your creamy ranch goodness! - Ensuring Even Cooking: Cut chicken into similar sizes. This helps it cook at the same speed. Place the chicken in a single layer. Don’t stack pieces too high. This allows heat to reach all parts. - Avoiding Dry Chicken: Use enough liquid in the pot. The cream cheese and broth help keep the chicken moist. Cook on low if you have time. Low heat gives juicy results. - Additional Seasonings: Add herbs like thyme or rosemary for extra taste. A squeeze of lemon juice can brighten flavors. Try a pinch of paprika for a smoky touch. - Suggested Garnishes: Fresh parsley adds color and freshness. You can also sprinkle crispy bacon bits for crunch. Serve with sliced green onions for a nice bite. - Recommended Crockpot Models: Look for a 6-quart model for this recipe. Brands like Hamilton Beach and Crock-Pot are reliable. A programmable model is great for busy cooks. - Must-Have Cooking Utensils: Use a sturdy pair of forks to shred the chicken. A mixing bowl helps combine the creamy sauce. Keep measuring cups handy for precise ingredients. Pro Tips Use Fresh Herbs: Adding fresh herbs like thyme or dill can elevate the flavor of your dish and add a refreshing touch. Make It Spicy: If you enjoy a bit of heat, consider adding red pepper flakes or a splash of hot sauce to the cream cheese mixture. Meal Prep Friendly: This dish is great for meal prep! You can double the recipe and store leftovers in the fridge for up to 4 days. Serve with Sides: Pair this creamy ranch chicken with rice, mashed potatoes, or a fresh salad for a complete meal. {{image_2}} Chicken Breast Alternatives You can use different cuts of chicken. Thighs add more flavor and moisture. You can also try using turkey breasts. They work well too. Just remember to adjust cooking time for different cuts. Dairy-Free Options If you want a dairy-free dish, swap cream cheese for a non-dairy cream. Use coconut milk or a cashew cream. Both add creaminess without dairy. Check for dairy-free ranch dressing mixes for flavor. Adding Vegetables You can easily add veggies to this dish. Carrots, bell peppers, and broccoli work great. They add color and nutrients. Just toss them in the slow cooker with the chicken. Spicy Kick Variants For a spicy twist, add red pepper flakes or hot sauce. Stir in jalapeños for heat. You can also use spicy ranch dressing mix. Adjust to your taste, and enjoy the extra flavor. Side Dishes This chicken pairs well with many sides. Try mashed potatoes, steamed rice, or a fresh salad. These options soak up the creamy sauce and add balance to your meal. Serving Over Rice or Pasta Serve this dish over rice or pasta for a filling meal. The sauce makes everything delicious. It’s perfect for a cozy dinner with family or friends. To keep your Creamy Ranch Crockpot Chicken fresh, follow these steps: - Refrigeration Guidelines: Place leftovers in an airtight container. Store in the fridge for up to four days. Make sure the chicken cools down before sealing. This keeps bacteria away and maintains flavor. - Freezing Tips: You can freeze this dish for longer storage. Use freezer-safe bags or containers. It stays good for three months. Thaw in the fridge overnight before reheating. To enjoy your leftovers again, follow these methods: - Best Methods for Reheating: The microwave works well for quick reheating. Use a microwave-safe dish and cover it. Heat in short bursts, stirring in between. You can also reheat on the stove over low heat. Stir often to prevent sticking. - Ensuring Quality and Flavor Preservation: Add a splash of chicken broth while reheating. This helps keep the dish moist and flavorful. Taste and adjust seasoning if needed. Fresh parsley on top revives the dish's look and taste. Yes, you can use frozen chicken breasts in this recipe. Cooking from frozen is easy in a crockpot. Just add the frozen chicken to the pot, and season it as usual. The cooking time will be longer. Cook on low for about 8 to 9 hours, or on high for about 5 to 6 hours. Check that the chicken reaches 165°F to ensure it is safe to eat. To make Creamy Ranch Crockpot Chicken healthier, you can use low-fat alternatives. Swap regular cream cheese for low-fat cream cheese. You can also use low-sodium chicken broth, which reduces the salt content. For a lighter dish, add more vegetables like spinach or broccoli. These options help cut calories without losing flavor. This dish pairs well with many sides. You can serve it over rice or pasta for a filling meal. Mashed potatoes or a fresh green salad also work nicely. Consider adding crusty bread to soak up the creamy sauce. These sides balance the rich flavors and make your meal even better. This blog post covers all you need for creamy ranch crockpot chicken. You learned about key ingredients, step-by-step cooking, and tips for perfect results. I shared ways to swap ingredients for different flavors and how to store leftovers. With these methods, you can enjoy a tasty meal while keeping it simple. Use these insights to create your own delicious versions. I hope you're excited to try it out!

Creamy Ranch Crockpot Chicken Easy and Flavorful Dish

If you’re craving a warm, easy dish, my Creamy Ranch Crockpot Chicken is perfect for you. This flavor-packed meal combines

- 2 cups cherry tomatoes, halved - 1 cucumber, diced - 1 bell pepper (any color), diced - ½ red onion, thinly sliced Fresh vegetables create the heart of a Healthy Greek Salad. Cherry tomatoes add a pop of color and sweetness. Cucumbers bring a refreshing crunch. Bell peppers give a nice crunch and a subtle sweetness. Red onion adds a sharp bite. Together, they form a vibrant mix, making your salad visually appealing and nutritious. - 1 cup Kalamata olives, pitted - 1 cup feta cheese, crumbled - 2 tablespoons fresh oregano, chopped Next, we add Kalamata olives for a briny flavor. Feta cheese gives a creamy texture and salty taste. Fresh oregano brings a fragrant, herbal note. These ingredients elevate the salad, making it a true Mediterranean delight. You can use the Full Recipe to see how to combine all these flavors perfectly. - 3 tablespoons extra virgin olive oil - 1 tablespoon red wine vinegar (optional, for tanginess) - Salt and pepper to taste The dressing binds everything together. Extra virgin olive oil adds richness and healthy fats. Red wine vinegar provides a nice tang. Seasoning with salt and pepper enhances all the flavors. A well-made dressing is key to a delicious Healthy Greek Salad. 1. Start by washing your fresh vegetables. Clean the cherry tomatoes, cucumber, bell pepper, and red onion. 2. Next, chop the cherry tomatoes in half. Dice the cucumber and bell pepper into small pieces. Slice the red onion thinly. 3. In a large bowl, combine all these chopped vegetables. Add the Kalamata olives and crumbled feta cheese. 4. Sprinkle the fresh oregano over the mixture. This adds a great flavor. 1. In a separate small bowl, pour in the extra virgin olive oil. 2. If you want some tanginess, add the red wine vinegar. 3. Use a whisk to mix the olive oil and vinegar together. Season with salt and pepper to taste. 4. Drizzle the dressing over the salad in the large bowl. 1. Now, gently toss the salad. Be careful not to break the feta too much. 2. Taste the salad to see if you need more salt or pepper. Adjust as needed. For the full recipe, check out the detailed instructions provided. Enjoy your healthy Greek salad! What nutrients are in tomatoes? Tomatoes are packed with vitamins C and K. They also contain potassium and folate. These nutrients help your body in many ways. They support your immune system and keep your skin healthy. What are the benefits of cucumbers and bell peppers? Cucumbers are mostly water, which keeps you hydrated. They also provide fiber, aiding digestion. Bell peppers are rich in vitamins A and C. They can boost your eye health and improve your skin. What is the nutritional profile of feta cheese? Feta cheese is lower in fat than many other cheeses. It has protein, calcium, and vitamin B12. These nutrients support strong bones and muscles. What are the health benefits of Kalamata olives? Kalamata olives are full of healthy fats. They contain antioxidants that help protect your cells. These olives may also lower the risk of heart disease. Why are healthy fats important? Healthy fats are vital for your body. They provide energy and help absorb vitamins. Olive oil supports heart health and can lower cholesterol. What are the antioxidant properties of olive oil? Olive oil has many antioxidants. These compounds fight inflammation and protect your body from damage. Using olive oil in your salad adds flavor and health benefits. For a full recipe, check out the Colorful Mediterranean Bliss Salad. {{image_2}} To make your Greek salad even healthier, add more colors. Use a variety of vegetables and herbs. Try adding spinach, radishes, or colorful bell peppers. Each color gives different nutrients. You can also use fresh herbs like parsley or mint for extra flavor. Using organic ingredients is a great choice too. Organic veggies often have more nutrients and fewer chemicals. You can find organic options at most stores or local farmers' markets. Preventing crumbling feta is key. To keep the feta intact, add it last. Toss the salad gently after adding the dressing. This helps keep the texture just right. Balancing ingredient ratios is also important. Aim for equal parts of each ingredient. This way, every bite is full of flavor and texture. If you like more olives or feta, adjust to your taste. Serving bowls can make a big difference. Use a large, shallow bowl to show off your salad. This allows guests to see all the vibrant colors. Garnish with whole olives or a sprinkle of oregano on top. A wedge of lemon on the side adds a nice touch. Enhancing visual appeal is easy. Use bright colors and fresh herbs to catch the eye. A beautiful salad not only tastes good but looks great too. Enjoy serving this colorful Mediterranean bliss! For the full recipe, check out the [Full Recipe]. For a vegan Greek salad, you can skip the feta cheese. Use marinated tofu or avocado for creaminess. This keeps it rich and delicious. You can also add more herbs for flavor. If you need a gluten-free option, you’re in luck! The classic ingredients are already gluten-free. Just make sure your olives and dressing do not have gluten. Always check labels to be safe. Want to add protein? Grilled chicken works great. It adds heartiness to your salad. If you prefer plant-based protein, try chickpeas. They are filling and nutritious. You can also get creative with dressings. A lemon-based dressing adds a fresh zing. For a creamier touch, use yogurt dressing. Both options enhance the salad's flavor, making it even more enjoyable. In summer, try adding zucchini or avocados. They bring a nice texture and taste. You’ll feel refreshed with each bite. As fall approaches, consider using roasted vegetables. Roasted bell peppers or sweet potatoes add warmth. It’s a cozy twist on the classic Greek salad. For the full recipe, check the details above! To keep your Healthy Greek Salad fresh, store each ingredient separately. This stops the veggies from getting soggy. You can use airtight containers for this. Glass containers work well since they do not absorb smells. Meal prepping makes your week easy. Chop the vegetables in advance and store them in containers. You can add the olives and feta cheese later. Dress the salad just before serving. This keeps everything crisp and tasty. Your salad stays fresh in the fridge for up to three days. After this, it may start to lose its crunch. Watch for signs of spoilage, like a slimy texture or off smells. If you see these, it’s best to toss the salad. Enjoy your Healthy Greek Salad while it’s fresh! You can find the Full Recipe above. Yes, you can prep this salad ahead of time. Here are some tips to keep it fresh: - Chop veggies: Cut the tomatoes, cucumber, and bell pepper a few hours before serving. - Store separately: Keep the dressing in a jar until you are ready to eat. - Add cheese last: Feta cheese should be added just before serving to keep it from getting soggy. If you need a substitute for feta cheese, here are some great options: - Tofu: Crumbled firm tofu can mimic feta’s texture. - Nutritional yeast: This adds a cheesy flavor without dairy. - Vegan feta: Many brands offer dairy-free feta made from nuts or soy. Yes, you can make a low-carb Greek salad! Here are some suggestions: - Reduce tomatoes: Use less cherry tomatoes to cut down on carbs. - Skip the olives: While tasty, they add extra carbs; you can leave them out. - Load on veggies: Add more cucumbers and bell peppers for bulk without carbs. For the full recipe, check out the detailed instructions above. This blog post covered how to create a vibrant Greek salad. We explored the fresh vegetables and essential ingredients that make this dish shine. I shared steps for preparation, dressing, and final touches. You learned about the many health benefits of using these ingredients. Remember, you can adjust flavors and textures to suit your taste. Meal prep and storage tips help keep your salad fresh. Enjoy experimenting with variations to keep it exciting. A Greek salad can be a healthy, tasty addition to any meal.

Healthy Greek Salad Fresh and Flavorful Delight

Looking for a simple yet delicious meal? You’ve found it! My Healthy Greek Salad is a fresh and flavorful delight

- 4 large bell peppers (red, yellow, green, or a mix) - 1 cup quinoa, rinsed - 2 cups vegetable broth - 1 can (15 oz) black beans, rinsed and drained - 1 cup corn (fresh or frozen) - 1 cup cherry tomatoes, halved - 1 teaspoon cumin - 1 teaspoon smoked paprika - 1 teaspoon garlic powder - Salt and pepper to taste - 1 cup shredded cheese (cheddar or a plant-based alternative) - Fresh cilantro for garnish - 1 tablespoon olive oil - Juice of 1 lime - Ground meat (beef, turkey, or chicken) - Rice or other grains - Additional spices (chili powder, oregano) These ingredients create a vibrant and tasty dish. The bell peppers serve as a colorful base. They add crunch and sweetness, making every bite enjoyable. Quinoa packs in protein and fiber. It also absorbs flavors well, making it a perfect filling. Black beans add creaminess and a nice contrast to the peppers. Corn brings a bit of sweetness and texture. Cherry tomatoes add freshness. The spices—cumin, smoked paprika, and garlic powder—create depth of flavor. You can customize your dish by adding ground meat or rice. This lets you tailor the recipe to your taste. Each ingredient works together to create a balanced, hearty meal. For the full recipe, visit the section above. Preheat your oven to 375°F (190°C). This helps the peppers cook evenly. Next, cut the tops off the bell peppers. Remove all seeds and membranes. Brush the outside with olive oil. Place the peppers upright in a baking dish. Now, let’s cook the quinoa. In a medium pot, bring two cups of vegetable broth to a boil. Add one cup of rinsed quinoa to the pot. Reduce the heat to low. Cover and let it simmer for about 15 minutes. When it’s done, the liquid should absorb, and the quinoa will be fluffy. Remove it from the heat. In a large bowl, mix the cooked quinoa with the filling ingredients. Add one can of rinsed black beans, one cup of corn, and one cup of halved cherry tomatoes. Sprinkle in one teaspoon of cumin, one teaspoon of smoked paprika, and one teaspoon of garlic powder. Squeeze in the juice of one lime. Season with salt and pepper to taste. Mix it well. Now, spoon the quinoa mixture into each bell pepper. Pack it tightly to fit all the filling. Top with the remaining cheese for extra flavor. Cover the baking dish with aluminum foil. Bake the peppers for 25 minutes. This helps them soften. After 25 minutes, remove the foil. Bake for another 10 to 15 minutes. This makes the cheese melt and turn golden. To check if they are done, poke a pepper with a fork. If it's soft but holds its shape, they are ready. Let the peppers cool for a few minutes. Garnish with fresh cilantro before serving. Enjoy your flavorful stuffed bell peppers! For the complete recipe, see the Full Recipe section. Choosing the right bell peppers makes a big difference. Colors like red, yellow, and green each have unique tastes. Red peppers are sweet and ripe. Yellow peppers are mild and slightly sweet. Green peppers have a fresh and slightly bitter flavor. When selecting peppers, look for ones that are firm and shiny. A good pepper should feel heavy for its size. Pay attention to shape as well; a bell pepper should have a nice, round bottom. This shape helps it stand upright when you fill it. To make a great filling, balance flavors and textures. Mix soft and crunchy ingredients. For example, combine quinoa with black beans and corn. This mix gives a nice chew. When it comes to spice, you can easily adjust the heat. If you like it mild, keep the spices light. If you enjoy a kick, add more cumin or chili powder. Start with small amounts, taste, and adjust as needed. This way, you can create a filling just right for you. Serving your stuffed peppers can be fun and creative. Pair them with simple sides like a green salad or some crusty bread. You can also serve them with a tasty sauce, like salsa or a yogurt dip, for added flavor. For presentation, place the peppers on a colorful plate. Garnish with fresh cilantro or a sprinkle of cheese on top. This makes the dish look vibrant and inviting. For the full recipe, you can find it in the earlier sections of the article. {{image_2}} For a veggie-packed meal, try quinoa mixed with colorful vegetables. You can use zucchini, spinach, or even diced carrots. This adds crunch and nutrition. To make it creamier, explore different cheese options. You can use cheddar or a plant-based cheese. Both melt well and add flavor. If you want more protein, add ground meat to your filling. Ground beef, turkey, or chicken works great. Brown the meat first, then mix it with your other ingredients. For a high-protein vegetarian option, try adding tofu or lentils. They both soak up flavors well and make your meal hearty. To spice things up, think about global flavors. For a Mexican twist, add black beans, corn, and taco seasoning. Top with salsa or avocado for extra zest. For a Mediterranean style, mix in feta cheese, olives, and herbs like oregano. Both variations turn simple stuffed peppers into exciting dishes. You can find the full recipe for these stuffed bell peppers to get started on your flavor journey! After enjoying your stuffed bell peppers, let them cool. Cooling them down helps prevent bacteria growth. Place the peppers in an air-tight container. This keeps them fresh and tasty for later. Store them in the fridge. They will stay good for about 3 to 5 days. To freeze stuffed peppers, wrap each one tightly in plastic wrap. This keeps moisture out and prevents freezer burn. Place the wrapped peppers in a freezer bag or container. They can last for up to 3 months in the freezer. When ready to eat, remove them from the freezer. Thaw them in the fridge overnight. Reheat in the oven at 350°F (175°C) for about 25 minutes. You can also microwave them for a quicker option. Making stuffed peppers ahead of time is easy. Prepare the filling and stuff the peppers. You can store them in the fridge for up to 2 days before cooking. For safe reheating, heat them until they’re hot throughout. That means the center should reach 165°F (74°C). You can also bake them again or use the microwave. This method helps save time on busy days. For the full recipe, refer to the section above. To avoid crunchy bell peppers, cook them for the right time. Bake them covered for the first part. This softens them. After 25 minutes, remove the cover to let the tops brown. You can also simmer the peppers briefly before filling. A quick boil can help, too. Yes, you can use other grains. While I love quinoa for its texture, rice works great too. Couscous is another fun option. You can even try farro or barley. Each grain brings its own taste. Experiment to find your favorite! If you're looking for cheese swaps, try nutritional yeast for a cheesy flavor. Dairy-free cheese options are tasty too. You can use cashew cream for a creamy texture. Another choice is to skip cheese entirely and add more spices for flavor. Stuffed peppers can last about 3 to 5 days in the fridge. Store them in an airtight container. Check for any signs of spoilage, like a sour smell or slimy texture. If they look or smell off, it’s best to toss them. Stuffed bell peppers are a tasty and versatile dish. We covered the ingredients, preparation, and ways to customize. You can adjust flavors, use different grains, or even add proteins. Plus, we discussed smart tips for serving and storing leftovers. These stuffed peppers are not just great for dinner but also perfect for meal prep. Enjoy experimenting with flavors that fit your taste. With these easy steps, you'll create a dish that pleases everyone at the table.

Stuffed Bell Peppers Loaded with Flavorful Goodness

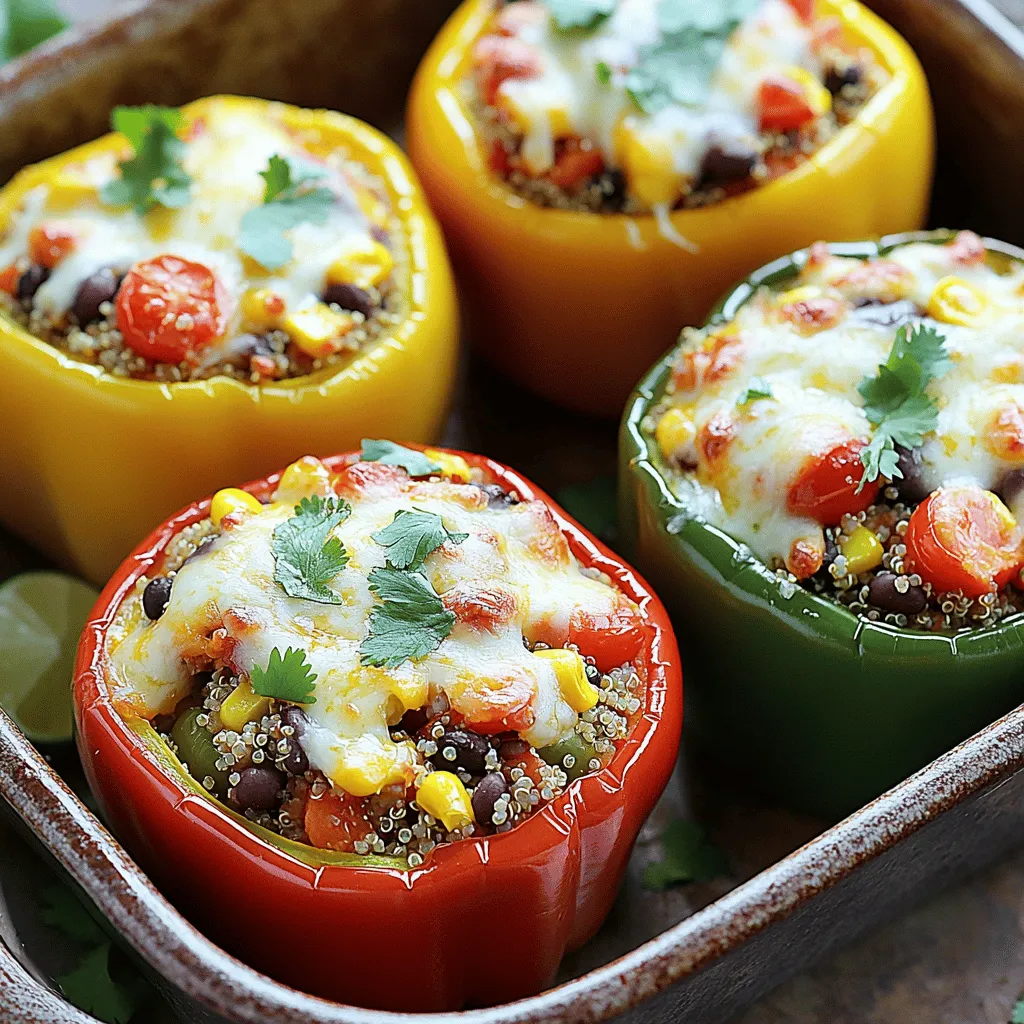
Get ready to delight your taste buds with my stuffed bell peppers recipe, loaded with flavorful goodness! These colorful peppers

- 1 pre-made pizza dough - 1 cup cooked chicken, shredded - 1/2 cup BBQ sauce (your choice of flavor) - 1 cup mozzarella cheese, shredded - 1/2 cup red onion, thinly sliced - 1/2 cup sweet corn, canned or boiled - 1/4 cup fresh cilantro, chopped - 1 teaspoon olive oil - Salt and pepper to taste Gather these ingredients before you start. This makes cooking easier and more fun. The pre-made pizza dough saves time, letting you focus on flavor. Shredded chicken works great here. You can use leftovers or a rotisserie chicken. Choose your favorite BBQ sauce; it adds the main flavor. Mozzarella cheese gives a nice melt and stretch. Red onions add a crisp bite, while sweet corn brings a touch of sweetness. Fresh cilantro adds a bright finish. Olive oil helps keep the crust crisp. Don’t forget salt and pepper to enhance all the flavors. For the full recipe, check out BBQ Bliss Chicken Pizza. You’ll love how simple these ingredients come together for a delicious meal. - First, preheat your oven to 475°F (245°C). If you have a pizza stone, place it in the oven. - In a bowl, mix the shredded chicken with half of the BBQ sauce. Add salt and pepper to taste. Stir until the chicken is well coated. - Roll out the pre-made pizza dough on a floured surface. Make it as thick as you like. If using a pizza stone, put the dough on a piece of parchment paper. - Brush the dough lightly with olive oil. This keeps it from getting soggy. - Spread the remaining BBQ sauce over the dough. Leave a small edge for the crust. - Evenly add the BBQ chicken mixture on top of the sauce. - Sprinkle the shredded mozzarella cheese over the chicken. Then, add the thin slices of red onion and sweet corn. - Bake the pizza for 12 to 15 minutes. Look for a golden brown crust and bubbling cheese. - Once done, take the pizza out of the oven. Add the chopped cilantro on top for a fresh touch. - Let it cool for a minute before slicing it up. Enjoy your BBQ chicken pizza! This recipe is simple and full of flavor. If you want the full recipe, check it out [here](#). To make a great pizza, you need the right heat. Preheat your oven to 475°F (245°C). This hot oven creates a crispy crust. If you have a pizza stone, place it inside as the oven heats. It helps the bottom cook evenly. If you don’t have a stone, a baking sheet works well too, but the crust may be softer. Want to add more taste? Try these toppings: - Sliced jalapeños for heat - Pineapple chunks for sweetness - Bacon bits for crunch If you like your BBQ sauce spicy, mix in some hot sauce. This gives your pizza an extra kick. Taste your sauce first, then adjust it to your liking. How you serve your pizza matters! Serve it on a wooden cutting board for a rustic look. For an eye-catching touch, drizzle extra BBQ sauce around the pizza. It adds flavor and color. You can also sprinkle fresh cilantro on top for a pop of green. These little details make your BBQ chicken pizza look even more inviting. Enjoy every bite! {{image_2}} You can swap chicken for pulled pork or tofu. Both options bring unique tastes. Pulled pork adds a smoky flavor, while tofu provides a great plant-based choice. For a veggie option, consider a mix of beans or roasted veggies. These choices keep your pizza fun and fresh! Don’t just stick to mozzarella! Try using cheddar or gouda for a richer taste. They melt well and add depth to your pizza. If you need a dairy-free option, many stores sell good dairy-free cheese. These can work just as well and taste amazing! Seasonal produce can add a twist to your BBQ chicken pizza. In summer, use fresh zucchini or bell peppers. These veggies add great crunch and color. Using what's in season makes your pizza taste even better and supports local farms. Look for fresh ingredients at your market for the best flavors. To keep your BBQ chicken pizza fresh, place it in an airtight container. You can also wrap it in plastic wrap or aluminum foil. This method keeps the moisture in and stops the pizza from drying out. Store it in the fridge for up to four days. After that, the taste and texture may change. When it’s time to eat your leftovers, you want them hot and crispy. The oven is the best choice for reheating. Preheat it to 375°F (190°C). Place the pizza on a baking sheet and heat for about 10 minutes. This method keeps the crust nice and crunchy. You can use the microwave, but the pizza may get soggy. If you choose this method, heat it in 30-second bursts until warm. This way, you avoid overcooking it. Freezing pizza is easy. You can freeze it before or after baking. To freeze before baking, wrap the assembled pizza tightly in plastic wrap. Then, place it in a freezer bag. It can last up to three months this way. If you want to freeze leftovers, wait for them to cool first. Wrap each slice in plastic wrap and place them in a freezer-safe container. When you’re ready to eat, thaw the pizza in the fridge overnight. Then, reheat it in the oven for the best texture. For the full recipe, check out the details above! Yes, you can make your own pizza dough. It gives you fresh taste and control. Here are some tips: - Use all-purpose flour for a nice texture. - Mix flour, water, yeast, and salt in a bowl. - Knead the dough for about 5-10 minutes until smooth. - Let it rise for at least an hour in a warm place. - Roll it out to your preferred thickness. Homemade dough is fun and adds a personal touch to your BBQ chicken pizza. The BBQ sauce you choose matters. It adds a lot of flavor to your pizza. Here are some recommendations: - Sweet BBQ sauce pairs well with chicken. - Spicy BBQ sauce gives a kick if you like heat. - Tangy sauces add a nice zing. - Try a smoky BBQ sauce for a deeper flavor. Pick a sauce that matches your taste. You can even mix two types for fun. Absolutely! You can make your BBQ chicken pizza your own. Here are some fun topping ideas: - Add bell peppers for crunch and color. - Use jalapeños for extra spice. - Try pineapples for a sweet contrast. - Experiment with different cheeses like cheddar or gouda. Get creative! Make it just how you like it. Each topping changes the flavor and makes it special. This blog post covers everything you need for delicious BBQ chicken pizza. We explored the key ingredients and shared step-by-step instructions, ensuring your pizza turns out perfect. I also included helpful tips for the best crust and ideas for fun variations. Remember, you can easily adjust flavors and toppings to suit your taste. Enjoy your cooking journey and impress your friends with your pizza-making skills. Happy pizza baking!

BBQ Chicken Pizza Bursting with Flavorful Goodness

Looking to treat your taste buds? BBQ Chicken Pizza is a fun and tasty dish you can make at home!

- 1 lb boneless, skinless chicken breasts - Assorted bell peppers (red, yellow, green) - 1 red onion - Olive oil and fajita seasoning To make these fajitas tasty, start with fresh chicken. I like using 1 lb of boneless, skinless chicken breasts. Slice them into thin strips for even cooking. Next, grab assorted bell peppers. I use red, yellow, and green for color and flavor. A red onion adds sweetness and depth to the dish. Don't forget the olive oil and fajita seasoning. The oil helps everything cook evenly and adds flavor. You can use store-bought seasoning or make your own. - Lime juice - Fresh cilantro - Tortillas and toppings (sour cream, guacamole, etc.) For a zesty kick, consider adding lime juice. It brightens up the flavors and makes the dish pop. Fresh cilantro is great for garnish. It adds a fresh taste and looks pretty too. You can serve these fajitas with warm tortillas. Add toppings like sour cream or guacamole for extra creaminess. This makes a fun meal for everyone! If you want the complete details, check the Full Recipe. 1. Preheat your oven to 425°F (220°C). This hot temperature helps cook everything fast. 2. Grease a large sheet pan with cooking spray or olive oil. This step keeps your food from sticking. 3. In a big bowl, add the sliced chicken, red, yellow, and green bell peppers, and red onion. These veggies give color and taste. 4. Drizzle three tablespoons of olive oil over the mixture. This oil helps the food cook well. 5. Sprinkle two tablespoons of fajita seasoning, plus a pinch of salt and pepper. Mix it all together until everything looks coated. 1. Spread the chicken and veggie mix evenly on the greased sheet pan. Make sure they’re not piled up. 2. Bake in your hot oven for 20-25 minutes. Check if the chicken is cooked through and the veggies are tender and slightly charred. This gives them a nice flavor. 3. The aroma during baking will make your kitchen smell amazing! 1. When you take the pan out, squeeze fresh lime juice over your fajitas. This adds a bright taste. 2. Garnish with chopped cilantro for a fresh touch. 3. Serve hot with warm tortillas on the side. You can add toppings like sour cream, guacamole, shredded cheese, or salsa. Enjoy your meal with friends and family! For the full recipe, check out the detailed instructions. To ensure even cooking for chicken and veggies, cut them into similar sizes. This helps them cook at the same rate. I recommend slicing chicken into thin strips. For the veggies, aim for thin slices as well. This way, every bite is tender and juicy. To achieve the best char on vegetables, spread them out in a single layer on the pan. Crowding the pan leads to steaming instead of roasting. I like to toss the veggies in oil and seasoning before baking. This gives them a lovely flavor and color. Choosing the right chicken cut for fajitas is key. I prefer boneless, skinless chicken breasts for their tenderness. They cook quickly and soak up flavor well. Thighs are another option. They stay juicy and add a richer taste. For fajita seasoning, store-bought blends work great. Look for ones that have strong flavors. If you want to make your own, combine chili powder, cumin, garlic powder, and paprika. This mix gives your fajitas a nice kick. Pairing suggestions for side dishes include rice, beans, or a fresh salad. These sides balance the flavors of the fajitas. You can also serve them with chips and salsa for a fun touch. For leftovers, I suggest making fajita bowls. Just layer the chicken and veggies over rice or quinoa. You can also wrap them in tortillas for a quick lunch. They stay tasty and satisfying. You can find the Full Recipe in the previous sections. {{image_2}} You can easily swap the chicken for steak or shrimp. Both options work well. Steak gives a rich flavor, while shrimp cooks fast. If you choose shrimp, reduce the baking time to about 10-15 minutes. For a vegetarian twist, use black beans or tofu. Tofu absorbs flavors well and adds protein. Just make sure to press the tofu to remove excess water before cooking. Want more heat? Adjust the fajita seasoning. You can add cayenne pepper or chili powder for a kick. If you prefer milder fajitas, use less seasoning. Also, consider adding spicy toppings. Jalapeños, hot sauce, or a zesty chipotle cream can spice things up. Try serving fajitas as bowls instead of in tortillas. Add rice or quinoa for a filling meal. This method is fun and lets you layer flavors. Another option is using lettuce wraps. They are low-carb and fresh. Just fill the leaves with the chicken and veggies, then add your favorite toppings. For the full recipe, check out the complete instructions. After you enjoy your sheet pan fajitas, store any leftovers right away. First, let them cool to room temperature. Then, place the fajitas in an airtight container. This keeps them fresh and tasty. In the fridge, they last about 3 to 4 days. Just remember to label the container with the date, so you know when to eat them. When you're ready to eat your leftovers, reheating is easy. You can use the microwave, oven, or stovetop. For the microwave, place the fajitas on a plate and heat them for 1-2 minutes. If you prefer the oven, spread them on a sheet pan and bake at 350°F for about 10 minutes. To keep the flavor and texture, add a splash of water before reheating. This helps keep them moist and delicious. If you want to save some fajitas for later, freezing is a great option. First, let the cooked fajitas cool completely. Then, place them in freezer-safe bags or containers. Remove as much air as possible before sealing. You can freeze them for up to 3 months. When you’re ready to eat, thaw them in the fridge overnight. Reheat as mentioned above, and enjoy your fajitas again! To cut chicken for fajitas, slice it against the grain. This helps keep the meat tender. Aim for strips about half an inch thick. The thinner, the better. This size cooks evenly and absorbs flavors well. Always use a sharp knife for clean cuts. Yes, you can make Sheet Pan Fajitas in advance. Prepare the chicken and veggies the night before. Store them in the fridge until you are ready to cook. This saves you time on busy days. Just remember to add the seasoning right before cooking for maximum flavor. Sheet Pan Fajitas pair well with many sides. Consider serving them with: - Spanish rice - Refried beans - Corn on the cob - A fresh salad - Chips and salsa You can also enjoy them with drinks like iced tea or margaritas. You can create your own fajita seasoning. Start with basic spices like: - Chili powder - Cumin - Garlic powder - Onion powder Add salt and pepper to taste. For more heat, include cayenne pepper. Mix and match spices to find your perfect blend. You can use frozen vegetables, but they may not cook the same. Frozen veggies often release extra water. This can make your fajitas soggy. If you use frozen, cook them a bit longer to get rid of moisture. Fresh veggies give a better texture and flavor, so use them if you can. The blog post covered how to make tasty sheet pan fajitas. We started with essential ingredients like chicken, peppers, and onion. I shared clear steps for prep and cooking. You learned tips for perfecting your fajitas and how to store leftovers. I also explored ingredient and protein variations. Fajitas are easy to make and fun to customize. Enjoy your cooking, and don’t forget to experiment!

Sheet Pan Fajitas Quick and Flavorful Dinner Recipe

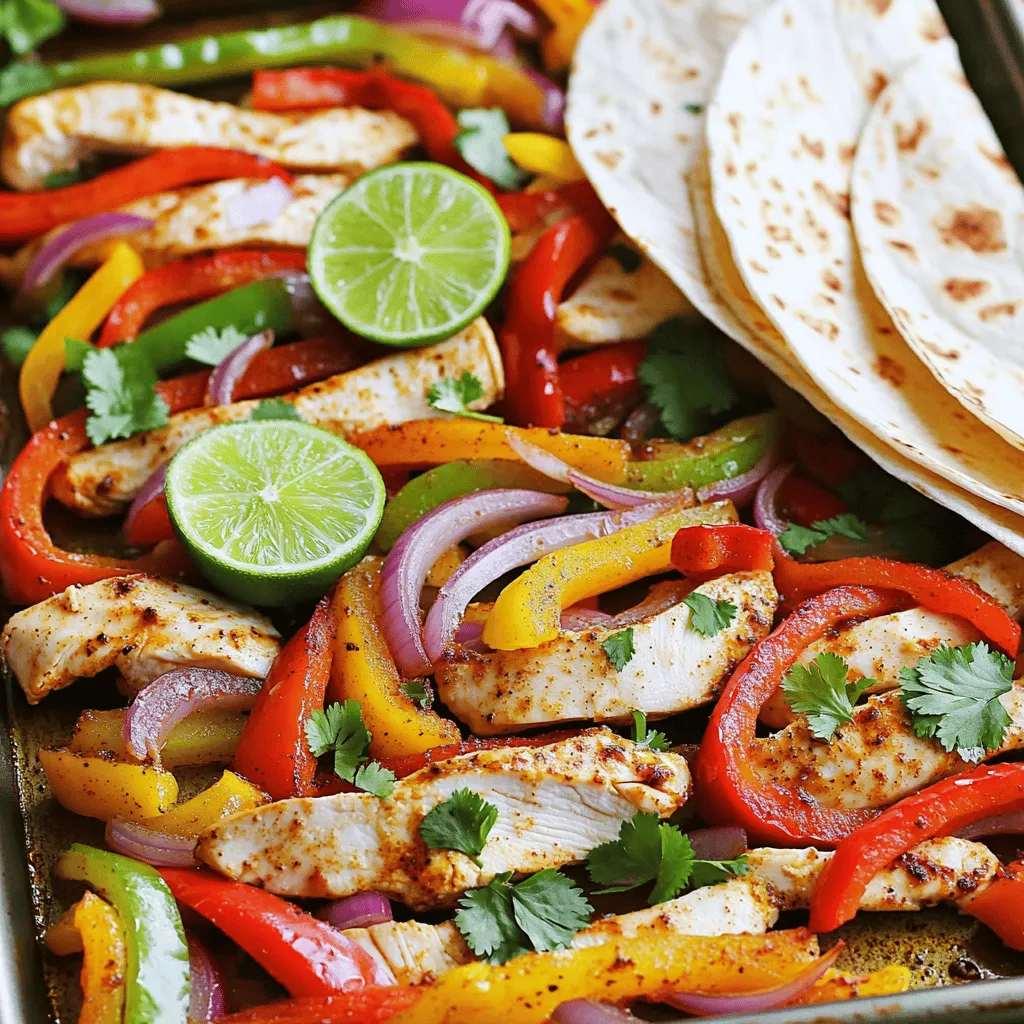
Looking for a quick and tasty dinner idea? Try my Sheet Pan Fajitas! This simple recipe mixes juicy chicken, colorful

- 1 cup quinoa - 2 cups vegetable broth - 1 can (15 oz) chickpeas, drained and rinsed - 1 medium sweet potato, diced - 1 cup kale, chopped These five main ingredients create a base for your Vegan Buddha Bowl. Quinoa serves as a great source of protein and fiber. Cooking it in vegetable broth adds flavor and depth. Chickpeas pack in more protein and give a nice texture. Sweet potatoes offer sweetness and vitamins, while kale adds crunch and nutrients. - 1 avocado, sliced - 1/2 cup cherry tomatoes, halved - 1/4 cup red cabbage, thinly sliced - Fresh cilantro These garnishes add color and taste to your bowl. Avocado brings creaminess and healthy fats. Cherry tomatoes add a burst of freshness, while red cabbage gives a nice crunch. Fresh cilantro can brighten up the flavor even more. - 2 tablespoons tahini - 2 tablespoons lemon juice - 1 tablespoon maple syrup - 1 teaspoon garlic powder - 1 teaspoon smoked paprika - Salt and pepper to taste The dressing ties everything together. Tahini adds richness, while lemon juice gives it zing. Maple syrup adds a hint of sweetness. Garlic powder and smoked paprika add depth and warmth. Adjust salt and pepper to your taste. For the full recipe, you can explore the vibrant Vegan Buddha Bowl . To start, rinse 1 cup of quinoa under cold water. This step removes any bitter taste. Next, bring 2 cups of vegetable broth to a boil in a medium saucepan. Add the rinsed quinoa to the boiling broth. Lower the heat and cover the pot. Cook for about 15 minutes. The quinoa will absorb all the broth and become fluffy. After cooking, remove it from the heat and let it sit for 5 minutes before fluffing it with a fork. This gives you that perfect texture. While the quinoa cooks, it's time to roast the sweet potatoes. Preheat your oven to 425°F (220°C). Dice one medium sweet potato into small cubes. Toss these cubes on a baking sheet with olive oil, garlic powder, smoked paprika, salt, and pepper. For a tasty twist, you can also add a pinch of chili powder for some heat. Roast them for 20-25 minutes. Flip them halfway to ensure they cook evenly. The sweet potatoes should be golden brown and fork-tender when done. Now comes the fun part—assembling your Buddha bowl! Start by dividing the fluffy quinoa into two serving bowls. Next, layer the roasted sweet potatoes, chickpeas, chopped kale, sliced avocado, halved cherry tomatoes, and thinly sliced red cabbage over the quinoa. I love to arrange these in sections for a colorful look. Finally, drizzle the tahini dressing over the top. To make the dressing, whisk together tahini, lemon juice, maple syrup, and a splash of water in a small bowl. Garnish with fresh cilantro for an extra pop of flavor. Enjoy your vibrant Vegan Buddha Bowl! For the full recipe, check out the details provided earlier. Mixing colors and textures makes your bowl fun and tasty. Aim for a rainbow! Use bright veggies like red cabbage, green kale, and purple sweet potatoes. This not only looks good but also boosts nutrition. Each color packs different vitamins. For protein, chickpeas are great. They add texture and creaminess. You can also use tofu or edamame for variety. These options keep you full and strong. Meal prep saves time. Cook a big batch of quinoa at once. Store it in the fridge for up to a week. You can also roast sweet potatoes early. Just reheat when ready to eat. Pre-cooking your ingredients makes meals quick. Chop veggies and store them in containers. This way, they are ready when you need them. Don’t be afraid to add more spice! Garlic powder and smoked paprika are great starts. But you can try curry powder for a twist. Each spice brings its own flavor, so mix and match. For dressings, tahini is a favorite, but you can switch it up. Try a peanut sauce or a simple lemon vinaigrette. Just keep it light and fresh. For more ideas, check the Full Recipe for tips on creating your own unique bowl. {{image_2}} You can create themed Buddha bowls to explore different flavors. For a Mediterranean-inspired bowl, use couscous or farro as your base. Top it with roasted red peppers, olives, and artichoke hearts. A drizzle of lemon-tahini dressing will tie all the flavors together. For an Asian-inspired bowl, switch to brown rice or soba noodles. Add edamame, shredded carrots, and snap peas. A soy sauce and sesame oil dressing will give it a zesty kick. These themes let you enjoy global tastes in every bite. Try different grains to keep things fresh. If you want a nutty flavor, use farro or barley. For a gluten-free option, quinoa or brown rice works well. Each grain brings its own texture and taste. You can also switch out veggies based on what you have. Instead of sweet potatoes, try roasted butternut squash or beets. For greens, spinach or arugula can add a nice touch. Mixing and matching keeps your Buddha bowl exciting and unique. Seasonal ingredients can create special bowls. In summer, use fresh corn, zucchini, and cherry tomatoes. These vibrant colors and flavors make a light and refreshing meal. In winter, think hearty and warm. Use roasted root veggies like carrots and parsnips. Add some warm lentils for protein and a cozy feel. Adjusting your bowl to the seasons makes it even more enjoyable. For the full recipe, check out the Vibrant Vegan Buddha Bowl. - Store leftovers in an airtight container. - Keep in the fridge for up to 4 days. - Make sure to cool the food before sealing. - You can freeze quinoa and sweet potatoes. - Chickpeas also freeze well for later use. - Thaw overnight in the fridge before using. - Use the microwave for quick reheating. - Heat on medium power to avoid sogginess. - For best texture, reheat in an oven at 350°F (175°C) for 10-15 minutes. If you need a substitute for quinoa, try these grains: - Brown rice - Farro - Barley - Millet - Couscous Each grain has its own taste and texture. Brown rice is chewy, while farro has a nutty flavor. Barley adds a hearty bite, and millet is fluffy. Couscous cooks very fast and is light. These options keep your bowl healthy and tasty. Yes, you can create a nut-free Vegan Buddha Bowl with these simple swaps: - Use seeds like sunflower or pumpkin instead of nuts. - Replace tahini with sunflower seed butter or omit it. These changes keep the flavor while making the dish safe for nut allergies. To boost protein in your bowl, consider these options: - Add more chickpeas or black beans. - Include lentils, which cook quickly. - Top with hemp seeds, which are rich in protein. - Use a dollop of hummus for extra flavor and protein. Adding these ingredients can help you feel full and satisfied. A Vegan Buddha Bowl is packed with nutrients. It offers: - High fiber from quinoa and vegetables, promoting digestive health. - Protein from chickpeas and other legumes, supporting muscle health. - Healthy fats from avocado, aiding in nutrient absorption. - Vitamins and minerals from kale and sweet potatoes, boosting overall health. Each bowl is a balanced meal that fuels your body with energy and nutrients. For a full recipe, check out the Vibrant Vegan Buddha Bowl . This blog post covered how to create a delicious Vegan Buddha Bowl. We discussed key ingredients like quinoa, sweet potatoes, and chickpeas. You learned step-by-step methods for cooking and assembling your bowl. I shared tips for balancing flavors and saving time. You can even switch it up with themed bowls and seasonal ingredients. Remember to store leftovers properly to enjoy them later. With these insights, you can create tasty, healthy meals that fit your needs. Enjoy making your perfect bowl!

Vegan Buddha Bowl Flavorful and Healthy Delight

Looking for a tasty and healthy meal? Discover the Vegan Buddha Bowl, a colorful and nutritious delight packed with flavor!

- 1 medium head of cauliflower, grated into rice-sized pieces - 2 tablespoons sesame oil - 2 cloves garlic, minced - 1 small onion, diced - 1 cup mixed vegetables (carrots, peas, bell peppers) - 2 eggs, beaten - 3 tablespoons soy sauce (or tamari for gluten-free) - 1 green onion, sliced - Salt and pepper to taste - Optional: 1 teaspoon chili flakes for heat These ingredients make a bright and tasty dish. Each one adds flavor and texture. You can swap cauliflower for broccoli rice if you like. Zucchini can work too. Instead of sesame oil, try olive oil for a lighter taste. If you don’t have soy sauce, coconut aminos is a great choice. Cauliflower is low in calories and high in nutrients. It has fiber, which helps with digestion. This veggie is rich in vitamins C and K, aiding your immune system. Using cauliflower instead of rice lowers carbs, making this dish friendly for many diets. Plus, it’s a great way to get more veggies into your meals! For the full recipe, check out the instructions to prepare this delicious dish. First, you need to prepare the cauliflower. Take a medium head of cauliflower and grate it. You can use a box grater or a food processor. Aim for rice-sized pieces. This step is key to making your fried rice. Set the grated cauliflower aside for later. Next, grab a large skillet or wok. Heat 2 tablespoons of sesame oil over medium heat. Once hot, add 2 cloves of minced garlic and 1 small diced onion. Sauté these for about 2-3 minutes. You want the onion to become soft and clear. Then, stir in 1 cup of mixed vegetables. You can use carrots, peas, and bell peppers. Cook these for another 3-4 minutes until they are tender. Now it's time to combine everything in the skillet. Push the vegetables to one side of the pan. Pour 2 beaten eggs into the other side. Scramble the eggs until they are fully cooked. After that, mix the eggs with the vegetables. Add the grated cauliflower to the skillet next. Pour in 3 tablespoons of soy sauce. Stir everything well and cook for an additional 5-7 minutes. You want the cauliflower to be tender but still a bit crunchy. Season with salt, pepper, and optional chili flakes for heat. Finally, toss in the sliced green onion, and stir again for a fresh finish. Serve your cauliflower fried rice hot and enjoy! You can find the full recipe if you need more details. To make your cauliflower fried rice shine, start with fresh cauliflower. Fresh cauliflower has a crisp bite and a mild taste. Use sesame oil for a nutty flavor that lifts the dish. Garlic and onion add depth, so don’t skip them. Sauté these until they smell great. If you want more taste, add some ginger. For the best texture, ensure the cauliflower is grated finely. If it's too chunky, it won't cook evenly. When you fry the cauliflower, keep it moving in the pan. This will help it brown slightly and stay crisp. Avoid overcooking; you want it tender but still crunchy. One common mistake is using too much liquid. Adding too much soy sauce can make it soggy. Another mistake is not prepping your ingredients first. If you chop as you cook, things may burn. Lastly, don’t forget to taste! Adjust salt and pepper to make it just right. For the full recipe, check out the instructions above. {{image_2}} You can make Cauliflower Fried Rice even better by adding protein. Chicken, shrimp, or tofu work great. Just cook the protein before adding it to the skillet. For chicken, use diced pieces. For shrimp, use small, peeled shrimp. For tofu, press it to remove water, then cube it. Each option adds flavor and makes the dish heartier. You can also use cooked beans for a plant-based option. If you want a vegetarian or vegan meal, skip the eggs. You can replace them with silken tofu. Just blend it until smooth and add it when mixing in the cauliflower. This keeps the dish creamy without using eggs. You could also add nutritional yeast for a cheesy flavor. Mixing in other veggies makes this dish colorful and tasty. Try adding broccoli, spinach, or zucchini. These vegetables not only add nutrients but also enhance the dish's texture. You can swap in whatever veggies you have, making it a flexible recipe. Just keep in mind to chop them small for even cooking. For the full recipe, check out the [Full Recipe]. After you enjoy your cauliflower fried rice, store leftovers in an airtight container. Let it cool down first. Place it in the fridge. It stays fresh for about 3 to 5 days. Make sure to label the container with the date. This way, you will know when to eat it again. To reheat your cauliflower fried rice, use a skillet or microwave. If using a skillet, heat it on medium. Add a splash of water or oil to keep it moist. Stir often until it's hot. If using a microwave, cover it with a lid or wrap. Heat for 1 to 2 minutes, checking every 30 seconds. Both methods will bring back its tasty flavor. You can freeze cauliflower fried rice for later meals. First, cool it completely. Then, pack it in a freezer-safe bag or container. Remove as much air as possible. It can last for about 2 to 3 months in the freezer. To enjoy, thaw it overnight in the fridge. Reheat it as mentioned before. This way, you can have a healthy meal anytime! For the complete recipe, check out the Full Recipe. Yes, you can make Cauliflower Fried Rice ahead of time. It stores well in the fridge for about three days. Just keep it in an airtight container. When you want to eat it, simply reheat in a skillet over medium heat. This saves time on busy days. Yes, Cauliflower Fried Rice can be gluten-free. Use tamari instead of soy sauce. Tamari is a great option for those with gluten sensitivities. Always check your ingredient labels to ensure they are gluten-free. This way, you can enjoy a tasty dish without worry. To add spice, use chili flakes when cooking. Mix in about one teaspoon for a nice kick. You can also add fresh chopped chili peppers. Another option is to drizzle some hot sauce on top before serving. Adjust the spice to your taste for a delightful heat. For the complete recipe and more tips, check the Full Recipe section. In summary, we explored cauliflower fried rice, including its ingredients, cooking steps, and tips. I shared ways to customize the dish, from adding proteins to substituting ingredients. Proper storage and reheating methods ensure you enjoy leftovers. Remember, avoiding common mistakes will enhance your cooking. Cauliflower fried rice is healthy and adaptable, making it a fantastic choice for meals. Dive in, experiment, and enjoy this tasty dish in many ways.

Cauliflower Fried Rice Tasty and Healthy Delight

Looking for a delightful dish that’s both tasty and healthy? Cauliflower fried rice is your answer! This colorful meal is

To make classic banana bread, you need: - 3 ripe bananas, mashed - 1/3 cup melted coconut oil - 1/2 cup brown sugar - 1 large egg, beaten - 1 teaspoon vanilla extract - 1 teaspoon baking soda - Pinch of salt - 1 1/2 cups all-purpose flour - 1/2 cup chopped walnuts or pecans - 1/4 teaspoon cinnamon (optional) You can enhance your banana bread with: - Chocolate chips for sweetness - Dried fruit like raisins or cranberries - Coconut flakes for a tropical twist - Nutmeg for a warm spice flavor Running low on an ingredient? Here are some swaps: - Replace coconut oil with melted butter. - Use granulated sugar instead of brown sugar. - Swap all-purpose flour for whole wheat flour for a healthier option. - For a vegan version, use flaxseed meal mixed with water instead of the egg. These tips will help you customize your banana bread to fit your taste! For the full recipe, check the main section. Gather all your ingredients first. You want to have everything ready. For this recipe, you will need: - 3 ripe bananas, mashed - 1/3 cup melted coconut oil - 1/2 cup brown sugar - 1 large egg, beaten - 1 teaspoon vanilla extract - 1 teaspoon baking soda - Pinch of salt - 1 1/2 cups all-purpose flour - 1/2 cup chopped walnuts or pecans - 1/4 teaspoon cinnamon (optional) Make sure your bananas are very ripe. The more brown spots, the better. They will add sweetness and flavor to your bread. Start by preheating your oven to 350°F (175°C). Grease a 9x5 inch loaf pan or line it with parchment paper. In a large bowl, mix the mashed bananas with the melted coconut oil. Stir until they combine well. Next, add the brown sugar and mix again. Then, pour in the beaten egg and vanilla extract. Mix until everything blends. Now, add the baking soda and salt. Stir well. If you like, sprinkle in the cinnamon for extra flavor. Gradually add the flour. Stir gently until just mixed. It’s okay to have some lumps; don’t overmix. Finally, fold in the chopped walnuts or pecans. Pour the batter into the prepared loaf pan. Smooth the top with a spatula. Bake in your preheated oven for 50-60 minutes. Check for doneness by inserting a toothpick in the center. If it comes out clean, your bread is ready. After baking, let the banana bread cool in the pan for about 10 minutes. Then, transfer it to a wire rack to cool completely. Slice the banana bread and serve it warm. You can add a pat of butter for extra flavor. To make it even better, toast the slices for a crunchy treat. For a beautiful presentation, sprinkle some chopped nuts on top. For the full recipe, visit the link provided. When making banana bread, it’s easy to make a few errors. Here are some common mistakes: - Using unripe bananas: Always use ripe bananas. They should be brown and soft. - Overmixing the batter: Mix just until combined. Lumps are okay. Overmixing makes it tough. - Incorrect oven temperature: Check your oven’s heat with a thermometer. An incorrect temp can ruin your bread. Moisture is key for great banana bread. Here are tips to keep it moist: - Use ripe bananas: They add natural sweetness and moisture. - Add coconut oil: This oil keeps the bread soft and adds flavor. - Don’t overbake: Check with a toothpick. Remove the bread when it’s just done. Baking banana bread needs the right conditions. Here’s what to consider: - Oven placement: Place your loaf pan in the center of the oven. This helps it bake evenly. - Humidity: If your kitchen is humid, you might need to adjust baking time. Keep an eye on it. - Pan type: Use a light-colored metal pan. Dark pans can cause the bottom to burn. These tips will help you bake the best banana bread. For a full recipe, check out the deliciously nutty banana bread recipe. {{image_2}} You can mix in fun ingredients to change up your banana bread. Try adding chocolate chips for a sweet twist. Dried fruit, like cranberries or raisins, adds a chewy texture. You can also fold in shredded coconut for a tropical touch. Nuts like walnuts or pecans give a nice crunch. Don't be afraid to get creative with these add-ins! Want to shake things up? You can swap out the vanilla extract for almond extract for a different flavor. Instead of brown sugar, try using maple syrup for a unique taste. If you love spices, add a dash of nutmeg along with the cinnamon. These small tweaks can make your banana bread special and unique. If you prefer smaller portions, consider making mini loaves or muffins. Use a mini loaf pan or a muffin tin to bake smaller treats. Bake mini loaves for about 30-40 minutes and muffins for 18-20 minutes. These bite-sized versions are perfect for sharing or for a quick snack. Plus, they look cute on a plate! You can find the full recipe for the classic banana bread above. To keep your banana bread fresh, wrap it tightly in plastic wrap. This helps keep moisture in. Store it at room temperature for up to three days. If you want to keep it longer, the fridge is not the best choice. It may dry out. Instead, use an airtight container or a resealable bag. Freezing is a great option if you have extra banana bread. First, let it cool completely. Then, wrap it well in plastic wrap and aluminum foil. This double layer protects it from freezer burn. You can freeze banana bread for up to three months. When ready to eat, just thaw it in the fridge overnight. To enjoy your banana bread warm, slice off a piece. Place it in the toaster for a few minutes. You can also use a microwave. Heat it for about 10-15 seconds. If you like it crispy, try reheating it in the oven at 350°F (175°C) for about 10 minutes. Enjoy it with a pat of butter or a sprinkle of nuts for extra flavor. Your bananas should be very ripe. Look for bananas with brown spots on the skin. The riper the bananas, the sweeter they taste. Overripe bananas are soft and easy to mash. This helps create a moist banana bread. If your bananas are still yellow, let them sit for a few days. They will ripen quickly. Yes, you can use whole wheat flour. It adds a nice nutty flavor. You may need to add a bit more liquid to the mix. Whole wheat flour can make your bread denser. For lighter bread, mix half all-purpose flour and half whole wheat flour. This way, you enjoy the health benefits without losing texture. If your banana bread is too dry, try a few things. First, check your baking time. Baking it for too long can dry it out. Next, add extra mashed banana next time. This will boost moisture. If it's already baked, serve slices with butter or cream cheese. You can also reheat slices in the microwave for a few seconds to soften them. For the next batch, follow the Full Recipe closely for best results. You now have all the tools to make great banana bread. We covered essential ingredients, tasty add-ins, and smart tips to avoid mistakes. I shared easy steps for perfect mixing and baking too. Remember to check your bananas for ripeness and use proper storage methods. With these insights, you can make banana bread that everyone loves. Enjoy experimenting with flavors and variations! Happy baking!

Classic Banana Bread Irresistible Recipe and Tips

Are you ready to bake the best banana bread ever? This classic recipe is simple, delicious, and perfect for using

- 1 ½ cups rolled oats - ½ cup almond butter - ¼ cup honey or maple syrup - ½ cup chopped mixed nuts (almonds, walnuts, cashews) - ¼ cup sunflower seeds - ¼ cup dried cranberries or raisins - ½ teaspoon vanilla extract - A pinch of salt - Optional: ½ cup dark chocolate chips In my experience, the right mix of ingredients is key. Rolled oats form the base, giving the bars a hearty texture. Almond butter adds creaminess and healthy fats. Honey or maple syrup provides sweetness, but you can adjust this to your taste. Chopped mixed nuts bring crunch and flavor, while sunflower seeds add a lovely nutty taste. Dried cranberries or raisins can sweeten each bite. The vanilla extract enhances the overall flavor. A pinch of salt balances the sweetness. If you want a treat, toss in dark chocolate chips. - Calories per serving: About 150 calories - Macronutrient breakdown: - Protein: 4g - Fats: 7g - Carbs: 20g Each serving packs a punch of nutrition. You get healthy fats from nuts and almond butter, plus energy from oats. This makes granola bars a great snack for busy days. 1. Preheat your oven to 350°F (175°C). 2. Line an 8x8 inch baking pan with parchment paper. Leave some paper hanging over the edges. This makes it easy to lift the bars out later. 3. In a large bowl, mix together the rolled oats, chopped nuts, sunflower seeds, dried cranberries, and a pinch of salt. Stir well to combine. 1. In a small saucepan, heat the almond butter and honey over low heat. Stir until smooth and combined. 2. Remove the saucepan from heat and add the vanilla extract. Mix it in well. 3. Pour the warm almond butter mixture over the dry ingredients in the bowl. Stir it all together until evenly coated. If you like chocolate, fold in the dark chocolate chips now. 1. Transfer the mixture to the prepared baking pan. Use a spatula to press it down firmly. This helps the bars stick together. 2. Bake in the oven for 15–20 minutes. Look for golden edges; this means they are done. 3. Let the granola bars cool in the pan for about 10 minutes. Then, lift them out using the parchment paper. 4. Allow them to cool completely on a wire rack before slicing them into bars. For the full recipe, don’t forget to check out the Crunchy Nutty Homemade Granola Bars recipe! To get the best granola bars, it’s key to press the mixture down firmly. This helps the bars hold their shape. When you spread the mixture into the pan, use a spatula to pack it tight. This step is vital if you want chewy bars. For baking, keep an eye on the time. Bake at 350°F (175°C) for 15–20 minutes. Look for golden edges. If they are too light, they may crumble. A little golden color means they are just right. Want to add some fun flavors? Think about spices like cinnamon or nutmeg. You can also try adding a dash of cocoa powder for a chocolatey twist. If you want more sweetness, use different liquids. Agave nectar or maple syrup can change the taste and keep it natural. When it’s time to serve, stack the bars on a nice plate. You can drizzle some extra almond butter or honey on top for flair. For on-the-go snacks, wrap each bar in parchment paper. Tie it with twine for a cute touch. This makes them easy to grab and enjoy anywhere! {{image_2}} When you make homemade granola bars, the options are endless. You can change the nuts, seeds, sweeteners, and add-ins. This makes each batch unique and fun. If you want to switch things up, try using different nuts. Instead of almonds and walnuts, you can use cashews or pecans. Both add a nice crunch and flavor. You can also add seeds like chia seeds or flaxseeds. They boost nutrition and add healthy fats. Chia seeds can help bind the bars, while flaxseeds give a nutty taste. You don’t have to stick with honey or maple syrup. Try using agave syrup or brown rice syrup instead. These sweeteners have different flavors but still work well. Remember to adjust the amount to fit your taste. If you want less sweetness, you can use less sweetener. Just make sure the bars still hold together. Adding fruits or coconut flakes is a great way to customize your bars. Dried fruits like apricots or mangoes add sweetness. Coconut flakes give a tropical twist and chewy texture. You can even add protein powder for an extra boost. This makes your snack more filling and nutritious. Mix and match these options to find your perfect blend. For the full recipe, check the section above. To keep your homemade granola bars fresh, use airtight containers. This keeps air out and moisture in. Avoid using plastic wrap, as it allows air to enter. I recommend storing the bars at room temperature. This way, they stay crunchy and tasty. If you want to save some for later, freezing is a great option. Cut the bars into pieces before freezing. Wrap each bar tightly in plastic wrap. Place them in a freezer bag for extra protection. To enjoy, just take a bar out and let it thaw on the counter. It takes about an hour to be ready. These bars stay fresh for a week at room temperature. You can keep them in the fridge for up to two weeks. If you freeze them, they last for about three months. Check for any signs of spoilage, like a bad smell or mold, before eating. If they look or smell off, it’s best to toss them. Enjoy your homemade granola bars! Yes, you can make homemade granola bars gluten-free. Use gluten-free oats instead of regular oats. Always check the labels to ensure they meet gluten-free standards. You can also add gluten-free seeds, nuts, and dried fruits. For added flavor, try using coconut flakes or gluten-free protein powder. Homemade granola bars can last about one week at room temperature. Store them in an airtight container to keep them fresh. If you want them to last longer, you can refrigerate them. They may last up to two weeks in the fridge. Yes, you can use other nut butters. Peanut butter, cashew butter, or sunflower seed butter all work well. Each nut butter adds its own flavor. Peanut butter gives a strong taste, while cashew butter is milder. Experiment to find which flavor you like best! In this post, we explored making easy granola bars with simple steps and tasty ingredients. From the right mix of oats and nuts to baking tips, you can create your snacks. Remember to try different nuts and sweeteners for your flavor. Store them properly for lasting freshness. With these ideas, you can enjoy healthy snacks any time. Get creative and have fun while making your granola bars!

Homemade Granola Bars Simple and Nutritious Snack

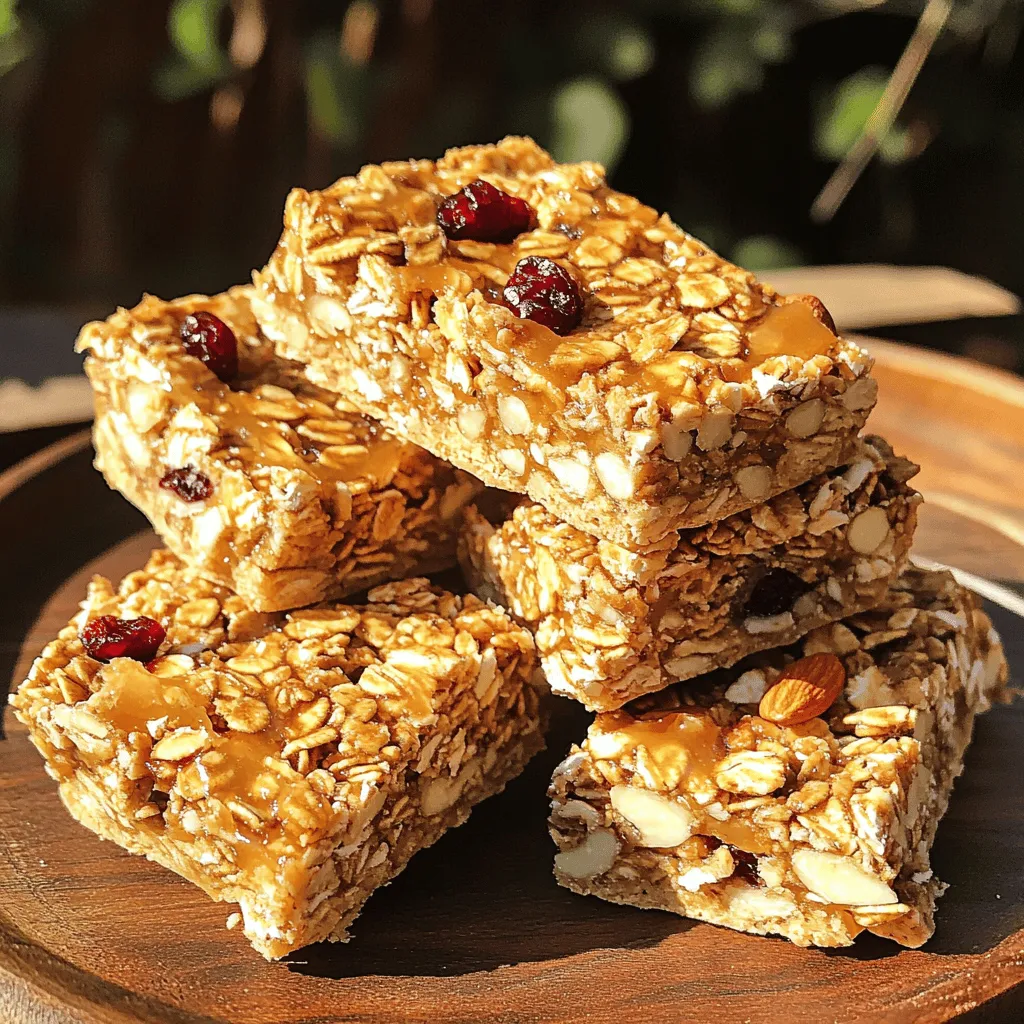
Looking for a snack that’s tasty and healthy? Homemade granola bars are the answer! With simple ingredients like oats, nuts,

To make Parmesan crusted zucchini chips, you need: - 2 medium zucchinis, sliced into thin rounds - 1 cup grated Parmesan cheese - 1 cup breadcrumbs (panko preferred for extra crunch) - 1 teaspoon garlic powder - 1 teaspoon onion powder - 1 teaspoon dried oregano - 1/2 teaspoon salt - 1/2 teaspoon black pepper - 2 large eggs, beaten - Olive oil spray Each ingredient plays a key role in flavor and texture. The zucchini gives a fresh taste. The Parmesan cheese adds salty richness. Breadcrumbs provide that sought-after crunch. Garlic and onion powders boost the flavor. Oregano adds a nice herbal note, while salt and pepper bring out the best in your chips. Eggs help the coating stick, ensuring each bite is flavorful. Olive oil spray gives that golden, crispy finish. Feel free to mix things up! Here are a few ideas: - Cheese Swap: Use mozzarella or cheddar for a different flavor. - Herbs: Try thyme or rosemary instead of oregano for a twist. - Spice It Up: Add cayenne pepper for some heat. - Nut Coating: Substitute breadcrumbs with crushed nuts for extra crunch. - Seasonal Veggies: Use eggplant slices for a different veggie experience. For the full recipe, you can refer to the section above. First, gather your ingredients. You need two medium zucchinis, grated Parmesan cheese, and breadcrumbs. I like using panko for extra crunch. You'll also need garlic powder, onion powder, dried oregano, salt, and black pepper. Grab two large eggs and some olive oil spray too. Now, preheat your oven to 425°F (220°C). Line a baking sheet with parchment paper. This makes cleanup easy. In a shallow bowl, mix the Parmesan cheese, breadcrumbs, garlic powder, onion powder, oregano, salt, and pepper. Stir it well so every bite is tasty. In another bowl, beat the eggs until they are nice and smooth. Take each zucchini slice and dip it into the eggs. Make sure it’s fully coated. Then, place it into the breadcrumb mixture. Press down gently so the mix sticks to the zucchini. Place the coated zucchini chips in a single layer on the baking sheet. Leave some space between each chip. For extra crispiness, give them a light spray of olive oil. This helps them brown and crisp up nicely. Bake the chips in the preheated oven for 15-20 minutes. You want them golden brown and crispy. Keep an eye on them, so they don’t burn. When they are ready, pull them out and let them cool for a few minutes before serving. To keep your zucchini chips crispy, follow a few simple tips. First, slice the zucchini thinly and evenly. This helps them cook at the same rate. Second, make sure you coat each slice well with the breadcrumb mixture. Press firmly so it sticks. Using panko breadcrumbs is key for crunch. Also, don’t overcrowd the baking sheet. If the chips are too close, they will steam instead of crisp up. Lastly, a light spray of olive oil before baking will help achieve that perfect crunch. Now you’re ready to enjoy your delicious Parmesan Crusted Zucchini Chips! For the full recipe, check out the section above. To boost the flavor of your Parmesan crusted zucchini chips, try these tips: - Add herbs: Fresh herbs like thyme or basil can enhance the taste. - Use different cheeses: A mix of Parmesan and Pecorino Romano gives a nice twist. - Spice it up: Add a pinch of cayenne pepper for some heat. - Season your breadcrumbs: Mix your breadcrumbs with Italian seasoning for extra flavor. Avoid these errors for the best results: - Too thick slices: Cut your zucchini too thick, and they won’t crisp up. Aim for 1/4-inch rounds. - Skipping the egg wash: This step helps the coating stick. Don’t skip it! - Overcrowding the pan: Place your zucchini chips in a single layer. Crowding can lead to sogginess. Here are some serving ideas to impress your guests: - Add dips: Serve with marinara or a cool yogurt dip for a delicious contrast. - Garnish well: Fresh herbs like parsley or basil add color and flavor. - Serve warm: These chips taste best fresh out of the oven. Enjoy them right away! - Create a platter: Arrange them on a colorful plate to make a stunning display. For the full experience, check out the Full Recipe. {{image_2}} You can change the flavor of these zucchini chips easily. Add spices like smoked paprika for a smoky kick. For a spicy version, mix in cayenne pepper or chili powder. You might also try adding herbs like thyme or rosemary for a fresh touch. Want a cheesy twist? Mix in some shredded cheddar or mozzarella with the Parmesan. This makes the chips even more tasty! If you need a gluten-free option, swap out the breadcrumbs. Use gluten-free panko to keep that crunch. You can also use crushed nuts, like almonds or walnuts, as a coating. They add a nice nutty flavor. Make sure to check the labels on all ingredients to ensure they are safe and gluten-free. You can get creative with seasonal veggies. Try eggplant, squash, or sweet potatoes instead of zucchini. Just slice them thin like zucchini. Each veggie brings its own flavor and texture to the dish. If you want a fun twist, use different types of cheese based on the season. In winter, use a sharp cheese; in summer, go for something milder. This keeps your dish fresh and exciting. Check out the Full Recipe for more ideas! After making Parmesan crusted zucchini chips, let them cool. Place them in an airtight container. They will stay fresh in the fridge for about 2 to 3 days. To keep them crispy, avoid stacking the chips. You want to prevent them from getting soggy. If you want to store the chips for longer, freezing is a great option. First, cool the chips completely. Then, place them in a single layer on a baking sheet. Freeze them for about an hour. Once frozen, transfer the chips to a freezer bag. They can stay in the freezer for up to 3 months. Make sure to label the bag with the date. To bring back the crunch, reheat the zucchini chips in the oven. Preheat the oven to 400°F (200°C). Spread the chips in a single layer on a baking sheet. Bake for 5 to 7 minutes until they are warm and crispy again. Avoid using the microwave, as it can make them soggy. Enjoy your tasty snack just like when they were fresh! For the full recipe, check out the detailed instructions above. Parmesan crusted zucchini chips last for about 3 days in the fridge. To store them, place the chips in an airtight container. Keep them in a cool area. They may lose some crunch over time, but they still taste great. Reheat them in the oven for a few minutes to regain some crispiness. Yes, you can use other cheeses. Cheddar or mozzarella work well. These cheeses add a different flavor and texture. If you like a stronger taste, try using aged gouda or pecorino. Just keep the same amounts as the Parmesan to get the right crunch and taste. You can serve these chips with many dips. Marinara sauce is a classic choice. Ranch dressing or yogurt dip also pairs nicely. For a fresh twist, try a lemon herb dip. The flavors blend well and add excitement to each bite. For a fun touch, serve them on a colorful platter with fresh herbs. This makes your dish pop visually and adds extra flavor. For the full recipe, check the earlier section. In this guide, we explored the essential ingredients, steps, tips, and variations for making Parmesan crusted zucchini chips. We discussed measurements, preparation, and cooking to ensure perfect crispiness. We also covered storage and answered common questions. Remember, the right ingredients and techniques lead to great taste. Enjoy experimenting with flavors and serving your chips creatively!

Parmesan Crusted Zucchini Chips Crispy and Flavorful

Looking for a tasty snack that’s both crispy and flavorful? Parmesan crusted zucchini chips are your answer! They’re easy to

Older posts
Newer posts
← Previous Page1 … Page71 Page72 Page73 … Page126 Next →

dsad

© 2025 Southern Dishes • Built with GeneratePress

Our Policies

  • Copyright Policy
  • Cookie Policy
  • GDPR Policy
  • Privacy Policy
  • Disclaimer
  • Terms Of Use

More Information

  • Home
  • About
  • Contact
  • Appetizers
  • Dessert
  • Dinner
  • Drinks
©2025, Southern Dishes About Back To Top