Skip to content
DisclaimerTerms Of UseGDPR PolicyCookie Policy

Southern Dishes

  • Home
  • Drinks
  • Appetizers
  • Dinner
  • Dessert
  • About
  • Contact
  • Privacy Policy
DisclaimerTerms Of UseGDPR PolicyCookie Policy

Isabella

To make your Chicken Fajita Rice Bowls, gather these key ingredients: - 1 lb chicken breast, sliced into thin strips - 1 tablespoon olive oil - 1 bell pepper (red or yellow), sliced - 1 small onion, sliced - 1 teaspoon chili powder - 1 teaspoon cumin - ½ teaspoon garlic powder - ½ teaspoon smoked paprika - Salt and pepper to taste - 2 cups cooked brown rice - 1 cup black beans, drained and rinsed - ½ cup corn (fresh or canned) - 1 avocado, sliced - ¼ cup fresh cilantro, chopped - Lime wedges for serving You can make your bowls even better with these optional ingredients: - Sour cream for creaminess - Queso fresco for a cheesy touch - Jalapeños for some heat - Cherry tomatoes for freshness - Shredded cheese for more flavor Don't have everything? Here are some simple swaps: - Use chicken thighs instead of breast for a juicier taste. - Swap olive oil with avocado oil for a different flavor. - Replace black beans with pinto beans if you like. - Choose quinoa instead of rice for a protein boost. - Use lime juice if you don't have fresh limes. These ingredients make your Chicken Fajita Rice Bowls tasty and fun. Enjoy the process of mixing flavors in your kitchen! Check out the Full Recipe for more details. Gather your ingredients before you start cooking. This makes the process smooth and fun. You will need: - 1 lb chicken breast, sliced into thin strips - 1 tablespoon olive oil - 1 bell pepper (red or yellow), sliced - 1 small onion, sliced - 1 teaspoon chili powder - 1 teaspoon cumin - ½ teaspoon garlic powder - ½ teaspoon smoked paprika - Salt and pepper to taste - 2 cups cooked brown rice - 1 cup black beans, drained and rinsed - ½ cup corn (fresh or canned) - 1 avocado, sliced - ¼ cup fresh cilantro, chopped - Lime wedges for serving Wash and slice the vegetables first. This keeps the colors fresh and bright. Next, slice the chicken into thin strips. Thin pieces cook faster and soak up the spices better. Heat a large skillet over medium-high heat. Add the olive oil and let it warm up. Carefully place the sliced chicken in the skillet. Sprinkle the chili powder, cumin, garlic powder, smoked paprika, salt, and pepper over the chicken. Cook for 5-7 minutes, stirring gently. You want the chicken to be brown and cooked through. After the chicken is ready, add the bell pepper and onion to the skillet. Cook for another 4-5 minutes. Stir often until the veggies are tender and slightly charred. This adds great flavor to your dish. While the chicken and veggies cook, divide the cooked brown rice into bowls. You can use any rice you like. Brown rice adds a nice nutty taste. Once the chicken and vegetables are cooked, it’s time to plate. Spoon the chicken and veggie mix over the rice in each bowl. Then, add the black beans and corn on top. This makes the bowls colorful and filling. Finally, garnish each bowl with sliced avocado and chopped cilantro. Don’t forget to squeeze some lime juice over everything. It adds a zesty kick. Serve with lime wedges on the side for extra flavor. Enjoy your tasty Chicken Fajita Rice Bowls! To make great chicken fajitas, use a hot skillet. This helps to sear the chicken quickly. Cut the chicken into thin strips. This ensures it cooks evenly. Season the chicken well before cooking. The spices add flavor. When you add the veggies, keep them crisp. Sauté just until they are tender. This adds texture to your bowl. Want to make your bowl even better? Try adding a few slices of jalapeño for heat. You can also add fresh lime juice for extra zing. A sprinkle of cheese can add creaminess. If you love spice, consider a dash of hot sauce. Fresh herbs like cilantro brighten up the dish. Store any leftovers in an airtight container. This keeps the flavors fresh. You can keep them in the fridge for up to three days. When reheating, add a splash of water or broth. This helps to keep the chicken moist. For longer storage, freeze the chicken fajita rice bowls. They can last up to three months in the freezer. Enjoy the Full Recipe for Chicken Fajita Rice Bowls to make this delightful dish! {{image_2}} You can easily make this dish vegetarian or vegan. Instead of chicken, try using tofu or tempeh. Both absorb flavors well and give a nice texture. For a vegan twist, skip the cheese and sour cream. Use avocado or cashew cream for creaminess. You can also add more veggies, like zucchini or mushrooms, for extra taste. Toppings make your Chicken Fajita Rice Bowls fun and unique. Here are some ideas: - Fresh salsa - Shredded cheese - Sour cream or Greek yogurt - Sliced jalapeños - Chopped green onions - Lime wedges Feel free to mix and match toppings as you like. They can add great flavor and color. You can switch up the rice for variety. While brown rice works well, try these options: - White rice for a lighter taste - Quinoa for added protein - Cauliflower rice for a low-carb meal - Cilantro-lime rice for a fresh twist Each option brings its own flavor and texture to the dish. Choose what fits your mood! Check out the Full Recipe for more details on making these tasty bowls. Store any leftover chicken fajita rice bowls in an airtight container. Make sure the bowl cools down first. Place it in the fridge for up to three days. If you want to keep it longer, consider freezing it. To reheat, take the chicken fajita rice bowls from the fridge. You can use a microwave or a skillet. If using a microwave, heat for 1-2 minutes until warm. Stir halfway for even heating. If using a skillet, warm over medium heat for about 5 minutes. Add a splash of water to keep it moist. To freeze, place the cooled bowls in freezer-safe bags. Remove as much air as you can. Label the bags with dates. They can stay frozen for up to three months. When ready to eat, thaw in the fridge overnight before reheating. This keeps the flavors fresh. Yes, you can use any meat you like. Try beef, pork, or shrimp. Each option adds its unique flavor. Just remember to adjust cooking times. Cook beef until it’s no longer red. For pork, make sure it reaches 145°F. Shrimp cooks fast, so just sauté until it turns pink. You can pair these bowls with many sides. Try tortilla chips for crunch. A simple green salad adds freshness. Guacamole and salsa are great dips. You can also serve them with grilled veggies or a corn salad. These sides brighten the meal and add texture. Meal prepping is easy with this recipe. Cook a big batch of chicken and veggies. Divide them into containers. Add cooked rice to each container. Top with black beans and corn. Store them in the fridge for up to four days. Just heat and enjoy when you’re ready. For the full recipe of Chicken Fajita Rice Bowls, check out the original recipe above. It guides you through each step to make these bowls delicious and satisfying. This article covered all you need for Chicken Fajita Rice Bowls. We explored key ingredients, cooking steps, and tips for the best results. I shared ideas for variations and ways to store leftovers. Remember, you can customize this dish to fit your taste. Experiment with different toppings or proteins. Enjoy cooking, and have fun making this meal your own!

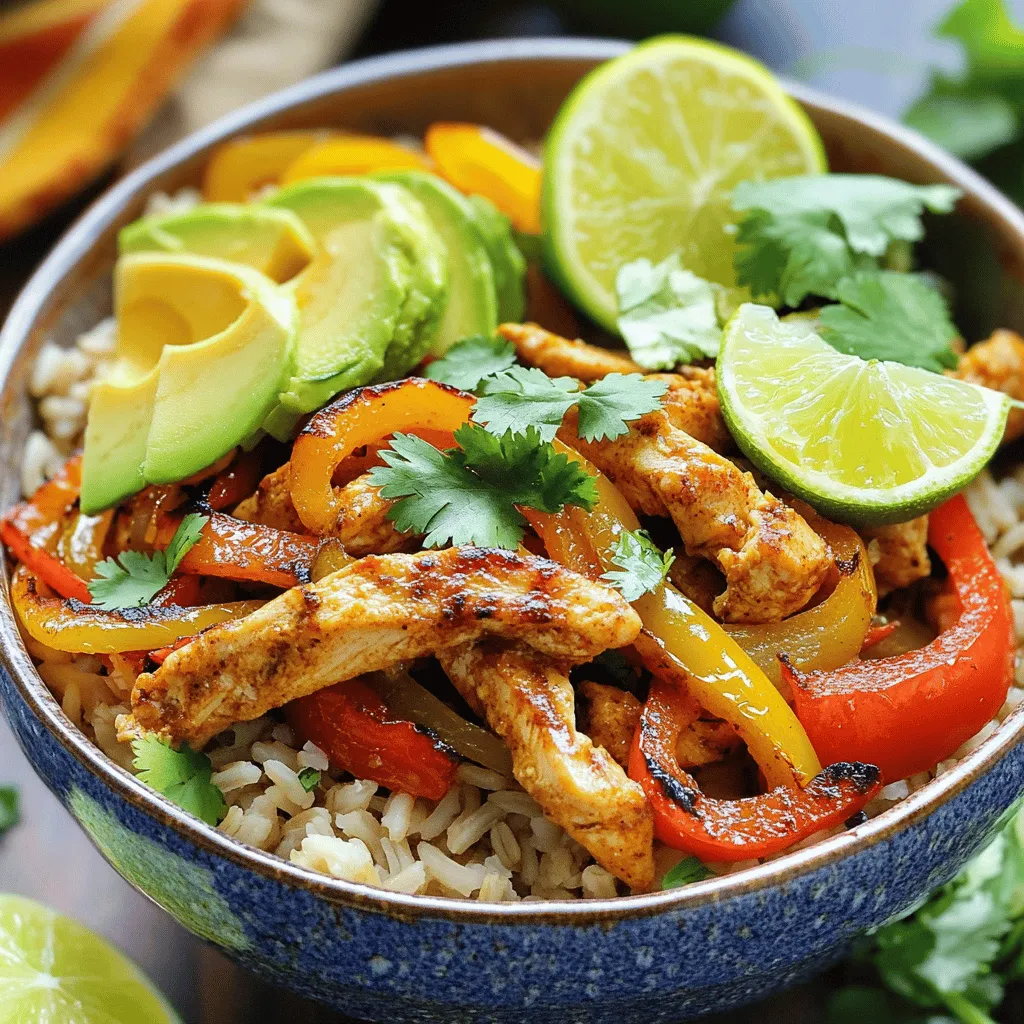
Satisfying Chicken Fajita Rice Bowls Quick and Easy

Want a tasty, easy meal? These Chicken Fajita Rice Bowls are just what you need! In this post, I’ll share

- Zucchini (3 medium, spiralized) - Bell peppers (1 cup, sliced) - Broccoli florets (1 cup) - Snap peas (1 cup) - Carrot (1, julienned) - Garlic (3 cloves, minced) - Sesame oil (3 tablespoons) - Soy sauce (2 tablespoons) - Honey or maple syrup (1 tablespoon) - Crushed red pepper flakes (1 teaspoon, optional) In this dish, the main stars are the fresh veggies. Zucchini noodles replace pasta, making this meal light and healthy. You can spiralize the zucchini with ease. It gives a fun twist to your dinner while keeping it low-carb. The bell peppers add a splash of color and sweetness. Broccoli brings a nice crunch and nutrients. Snap peas are a great addition for their crispness. The julienned carrot adds a hint of sweetness. Fresh garlic gives a nice kick and aroma that fills your kitchen. You can use three cloves for a bold flavor, but feel free to adjust it to your taste. Now, let's talk about the sauces. Sesame oil gives a nutty taste. It pairs well with soy sauce, which adds saltiness. Honey or maple syrup adds a touch of sweetness that balances the dish. If you like heat, a teaspoon of crushed red pepper flakes will spice things up. This recipe is simple and quick. You can find the full recipe details to guide you through the steps. Enjoy creating this colorful and tasty stir fry! To make zucchini noodles, you can spiralize them with a spiralizer. This tool creates long, noodle-like strands. If you don't have a spiralizer, use a vegetable peeler. Simply peel the zucchini to make thin strips. Both methods work well, so choose what you have. First, heat 2 tablespoons of sesame oil in a large skillet or wok over medium-high heat. Add minced garlic and grated ginger. Stir for about 30 seconds until you smell their aroma. Next, toss in sliced bell peppers, broccoli florets, snap peas, and julienned carrot. Stir-fry these veggies for 4 to 5 minutes. You want them tender but still crisp. Now, add the spiralized zucchini noodles to the skillet. Pour in the soy sauce and honey (or maple syrup). If you like heat, add crushed red pepper flakes. Mix everything well. Cook for an additional 2 to 3 minutes. The zucchini noodles should be warm but still firm. This keeps them from getting soggy. Turn off the heat and drizzle the last tablespoon of sesame oil over the stir fry. Toss everything again to coat. You can find the full recipe [here](#). To keep your zucchini noodles from getting soggy, salt them. After spiralizing, sprinkle salt over the noodles and let them sit for 10 minutes. This draws out moisture. Pat the noodles dry with a clean towel before cooking. For a perfect al dente texture, cook them only for a few minutes. Add them last to the stir fry. This way, they heat up without becoming mushy. To boost flavor, consider adding spices like garlic powder or onion powder. A splash of rice vinegar can add a nice tang. You can also use sauces like teriyaki or hoisin for a different twist. For a complete meal, add protein like chicken, shrimp, or tofu. Cook the protein first, then set aside. Add it back to the stir fry before serving. A good skillet or wok makes a big difference. I recommend using a non-stick skillet for easy cooking. A wok helps with even heat and quick cooking. You’ll also need a spiralizer for your zucchini noodles. If you don’t have one, a vegetable peeler works well too. A sturdy cutting board and sharp knife are must-haves for all your chopping needs. For the full recipe, check out the Zesty Zucchini Noodle Stir Fry. {{image_2}} You can add protein to your zucchini noodle stir fry. Options include chicken, shrimp, or tofu. For chicken, cut it into small pieces. Cook it for 5-7 minutes before adding veggies. Shrimp cooks fast, needing only 3-4 minutes. If using tofu, press it to remove water. Cook it until golden, about 5-6 minutes. Feel free to swap or add veggies. Carrots, bell peppers, and snap peas work well. You can try mushrooms, zucchini, or spinach too. In summer, use fresh corn or tomatoes. In winter, choose root vegetables like squash or sweet potatoes. The key is to keep the colors bright and flavors fresh. To make this dish gluten-free, use tamari instead of soy sauce. This simple swap keeps the flavor intact. For a vegan version, replace honey with maple syrup. You can also skip any animal products altogether. Enjoy this dish while keeping it healthy and tasty! To keep your Zucchini Noodle Stir Fry fresh, store leftovers in an airtight container. Place it in the fridge right away. This dish stays good for about 3 days. After that, the zucchini may get too soft. You can freeze this stir fry, but it needs care. First, let it cool completely. Then, pack it in a freezer-safe container. Make sure to remove as much air as you can. It will last for about 2 months in the freezer. When you’re ready to eat, thaw it overnight in the fridge. Reheat in a skillet over low heat. This helps keep the texture nice. For quick meals, you can prep this dish ahead of time. Spiralize the zucchinis and chop the veggies a day before. Store them in separate containers. Keep the sauce in another container. This way, everything stays fresh. When you’re ready to cook, just combine and stir-fry! This method saves you time and keeps flavors bright. If you don’t have a spiralizer, you can still make zucchini noodles. Use a vegetable peeler to create thin strips. You can also use a box grater to shred the zucchini. Both methods work well and give you a fun noodle shape. Yes, you can use frozen vegetables. However, they may make the dish a bit soggy. Frozen veggies often lose some crunch and flavor. If you use them, cook them less than fresh vegetables. This helps keep a nice texture in your stir fry. Zucchini noodles are low in carbs and calories. They are high in vitamins and fiber. This makes them a great choice for a healthy meal. They also help you feel full without adding extra calories. Zucchini noodles are a perfect swap for traditional pasta. To boost flavor, add fresh herbs like basil or cilantro. You can also use soy sauce or tamari for saltiness. Try adding a splash of rice vinegar for tang. For heat, sprinkle in crushed red pepper flakes. These simple tips will take your stir fry to the next level. You now have everything you need to create a delicious zucchini noodle stir fry. We covered main ingredients, step-by-step cooking, and helpful tips. Remember to balance the flavors with sauces and consider adding proteins to boost nutrition. You can easily adapt the recipe to fit your taste. Keep leftovers fresh and enjoy meal prep for quick meals later. With this guide, you can impress anyone with your cooking skills and enjoy healthy eating. Dive into your stir fry adventure today!

Zucchini Noodle Stir Fry Flavorful and Easy Recipe

Looking for a quick, tasty meal that’s both healthy and satisfying? Try my Zucchini Noodle Stir Fry! This easy recipe

- 8 ounces rice noodles - 1 cup shredded carrots - 1 cup red bell pepper, thinly sliced - 1 cup cucumber, julienned - 1 cup edamame, shelled - 1/2 cup green onions, chopped - 1/2 cup chopped cilantro - 1/4 cup crushed peanuts (for garnish) To create this Thai Peanut Noodle Salad, start with rice noodles. They are light and soak up flavors well. Fresh vegetables add crunch and color. I love using carrots, red bell peppers, cucumbers, and edamame. Green onions and cilantro give it a fresh taste. For the peanut dressing, you will need peanut butter, soy sauce, lime juice, maple syrup, sesame oil, garlic, and ginger. This mix creates a rich and tangy flavor that pairs perfectly with the noodles and veggies. - Crushed peanuts - Additional cilantro - Lime wedges Garnishing your salad adds a pop of color and extra crunch. Crushed peanuts bring texture, while extra cilantro gives a fresh burst. A squeeze of lime brings added zing to every bite. - Alternative vegetables - Different nut butters - Gluten-free options Feel free to swap vegetables based on your taste. You can try bell peppers, snap peas, or even zucchini. If you have nut allergies, use sunbutter or tahini instead of peanut butter. For gluten-free options, choose rice noodles made from rice flour. These swaps keep your salad fresh and exciting. For the full recipe, check out the detailed instructions. To start, cook the rice noodles. Follow the package instructions closely. This usually takes about 4 to 6 minutes. Drain the noodles when done, and rinse them under cold water. This step stops the cooking and cools them down. Set the noodles aside in a large bowl. Next, chop the fresh veggies. Use a sharp knife for ease. I recommend cutting the red bell pepper into thin strips. Cut the cucumber into long, thin pieces. Shred the carrots finely. Combine all the veggies in a large mixing bowl. Toss them gently to mix well. Good knife skills make for a nice presentation. Always cut evenly for a beautiful look. Now it’s time to whip up that peanut dressing. In a separate bowl, combine the peanut butter, soy sauce, lime juice, maple syrup, sesame oil, minced garlic, and grated ginger. Whisk these ingredients together until smooth. If the dressing feels too thick, add water little by little. Keep whisking until you reach a smooth, pourable consistency. Once your dressing is ready, add the cooked noodles to the veggie mix. Pour the dressing over everything. Toss until the noodles and veggies are well coated. For the full recipe, check the details above. Enjoy your tasty Thai peanut noodle salad! To make the best Thai Peanut Noodle Salad, focus on noodle texture. Cook rice noodles until soft but not mushy. Rinse them with cold water to stop cooking. This keeps them firm. Next, think about your vegetables. Use fresh, crisp veggies for a great crunch. Shredded carrots add sweetness, while cucumber gives a refreshing bite. Bell peppers bring color and flavor. To boost flavors, consider adding fresh herbs. Cilantro brings brightness, while mint adds a cool touch. You can also sprinkle in some crushed red pepper for heat. When it comes to ingredients, fresh is best. Fresh ginger and garlic pack more punch than dried. If you use dried ingredients, cut back on the amount. You can make this salad ahead of time. Just store the dressing separately. Mix everything when you’re ready to eat. This keeps the noodles and veggies fresh. For leftovers, store them in an airtight container in the fridge. They last about three days. Before serving, toss in extra dressing to refresh flavors. For the full recipe, check out the detailed instructions above. {{image_2}} You can easily make this salad vegan or vegetarian. Just use maple syrup instead of honey. For a low-carb option, swap rice noodles for spiralized zucchini or shirataki noodles. These swaps still give you a tasty dish without the carbs. If you want to spice things up, try adding chili flakes or sriracha to the dressing. This gives a sweet and spicy kick. You can also swap local ingredients. For example, use local nuts instead of peanuts. This adds a unique flavor that tells a story of your region. When serving, think about how to impress your guests. Use a large bowl for a family-style meal or individual plates for a more refined look. Garnish with extra cilantro and crushed peanuts for color. You can pair this salad with grilled chicken, shrimp, or tofu for added protein. This combination makes it filling and delicious. Check out the Full Recipe for more ideas on how to customize your dish! You can store Thai Peanut Noodle Salad in the fridge for up to three days. To keep it fresh, use an airtight container. This helps prevent moisture loss and keeps the salad crisp. If you have leftovers, make sure to separate the dressing from the salad. This keeps the noodles and veggies from getting soggy. I don’t recommend freezing the entire salad. The fresh veggies lose their crunch and texture when thawed. However, you can freeze any leftover peanut dressing. Pour it into a freezer-safe container and store it for up to three months. When you are ready to use it, let it thaw in the fridge overnight. To keep your Thai Peanut Noodle Salad fresh, store it in the fridge right after you make it. Use fresh, crisp vegetables. If you can, chop them just before serving. When reheating, use a microwave on low heat. Heat only until warm, not hot, to protect the salad's texture. For best results, enjoy the salad cold! Thai Peanut Noodle Salad is a bright and fresh dish. It features rice noodles tossed with crisp veggies. The salad is topped with a rich peanut dressing. This dressing adds depth and creaminess. Each bite bursts with flavor and texture. The mix of colors makes it a feast for the eyes. This salad is perfect for warm days or as a side dish. Yes, you can make this salad ahead of time! I recommend making it up to a day in advance. Keep the dressing separate until you serve. This way, the noodles and veggies stay fresh and crisp. If you plan to store leftovers, use an airtight container. The salad will last in the fridge for up to three days. If you need an alternative to rice noodles, try these options: - Soba noodles: These buckwheat noodles add a nutty flavor. - Udon noodles: These thick wheat noodles provide a chewy texture. - Zucchini noodles: A great gluten-free choice that adds freshness. For gluten-free substitutes, use gluten-free rice noodles. They offer the same great taste without gluten. In this blog post, we explored making a delicious Thai Peanut Noodle Salad. We discussed key ingredients like rice noodles, fresh veggies, and the tasty peanut dressing. You learned how to cook noodles, prepare vegetables, and mix the dressing correctly. Finally, remember that creativity is key. Feel free to tweak flavors, try new veggies, or adjust for dietary needs. Enjoy your salad fresh or as a meal prep. With these tips, you can confidently make a fantastic dish every time!

Thai Peanut Noodle Salad Fresh and Flavorful Delight

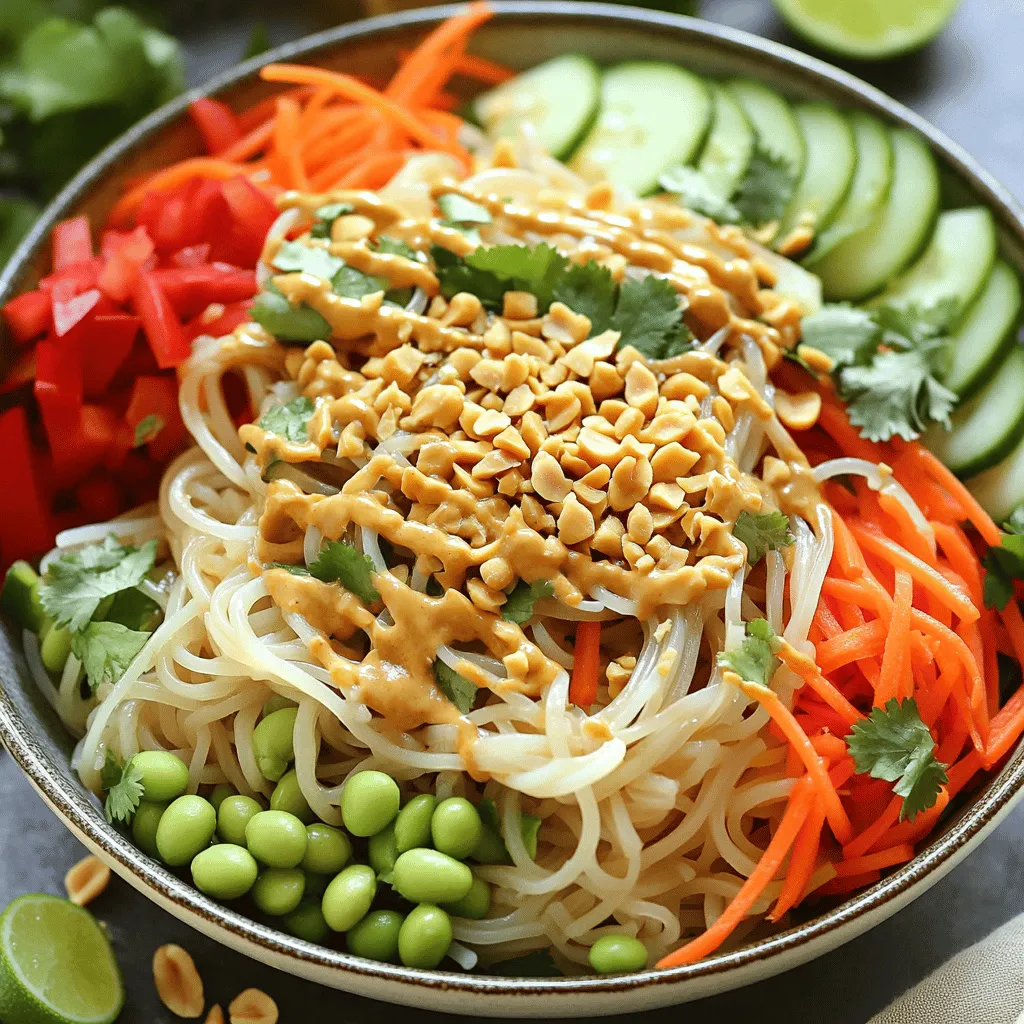
Are you ready to have your taste buds sing? Thai Peanut Noodle Salad is a fresh and flavorful delight that’s

To make Lemon Garlic Butter Shrimp, you need a few key items. Here’s what to gather: - 1 pound large shrimp, peeled and deveined - 4 tablespoons unsalted butter - 4 cloves garlic, minced - Juice and zest of 1 large lemon - 1 teaspoon red pepper flakes (optional) - Salt and pepper to taste - 2 tablespoons fresh parsley, chopped - Lemon wedges for serving These ingredients create a rich and zesty flavor. The shrimp soak up the garlic and lemon, making them taste amazing. You can spice up your dish with a few optional items. Consider these fun add-ins: - Cherry tomatoes for sweetness - Spinach for added nutrition - A splash of white wine for depth These extras can change the dish slightly. They add color and flavor, making it even better. To complete your meal, pair your shrimp with the right sides. Here are some tasty options: - Steamed rice for a filling base - Garlic bread to soak up the sauce - A fresh green salad for crunch These sides balance the rich shrimp. They round out the meal and make it even more satisfying. You can find the full recipe to get started right away! Start by gathering all your ingredients. You will need: - 1 pound large shrimp, peeled and deveined - 4 tablespoons unsalted butter - 4 cloves garlic, minced - Juice and zest of 1 large lemon - 1 teaspoon red pepper flakes (optional) - Salt and pepper to taste - 2 tablespoons fresh parsley, chopped - Lemon wedges for serving Make sure your shrimp are cleaned and ready to go. Mince the garlic and zest the lemon. This prep makes cooking easier and faster. Heat a large skillet over medium heat. Add the butter and let it melt. Once melted, toss in the minced garlic. Sauté the garlic for about 1 minute. You want it fragrant, but not brown. Next, add the shrimp to the skillet in a single layer. Season them with salt, pepper, and red pepper flakes if you like a little heat. Cook the shrimp for 2-3 minutes. Do not stir them right away. Watch them turn pink on one side. After that, flip the shrimp and cook for another 2-3 minutes until they are fully pink and opaque. While they cook, squeeze in the lemon juice and add the zest. Stir gently to coat all the shrimp in the lemony goodness. Once the shrimp are done, take the skillet off the heat. Sprinkle the fresh parsley over the top for color and flavor. Serve the shrimp right away. Pair them with lemon wedges for an extra zesty kick. Enjoy this dish with some rice, pasta, or a crisp salad to make it a full meal. For the full recipe, check out the [Full Recipe]. To cook shrimp just right, follow these steps: - Use large shrimp for a nice bite. - Always thaw frozen shrimp before cooking. - Pat the shrimp dry with a paper towel. This helps them cook evenly. - Cook shrimp in a single layer in the pan. This ensures they cook well. - Don’t crowd the pan. If you add too many shrimp, they’ll steam instead of sear. When you cook shrimp, watch them closely. They only need a few minutes on each side. As they cook, they turn pink. Once they look pink and opaque, they are done. Remove them from heat right away to avoid overcooking. To amp up the flavor, try these tips: - Add a splash of white wine when cooking. This gives a nice depth. - Include fresh herbs like thyme or basil for added flavor. - For a bit of heat, sprinkle in more red pepper flakes or add diced jalapeños. - A drizzle of olive oil can add a nice richness too. You can also finish the dish with a sprinkle of lemon zest. This gives a fresh burst of flavor. If you’re missing an ingredient, here are some swaps: - Use olive oil instead of butter for a lighter option. - Swap fresh parsley with fresh cilantro or dill for a new twist. - If you don’t have lemon, lime juice works well too. - For garlic lovers, you can add garlic powder for an extra kick. These substitutions keep your dish tasty while allowing for flexibility in your kitchen. For the full recipe, check out the recipe section! {{image_2}} You can turn Lemon Garlic Butter Shrimp into a tasty pasta dish. Cook your favorite pasta, like spaghetti or fettuccine. Toss the cooked pasta with the shrimp and sauce from the pan. The butter and lemon juice create a wonderful sauce that clings to the noodles. Top with extra parsley and some grated cheese for added flavor. This dish is a quick meal that feels fancy! Make tacos with your shrimp for a fun twist. Use warm corn or flour tortillas. Fill each tortilla with shrimp and drizzle with the garlic butter sauce. Add fresh toppings like cabbage, avocado, or salsa for crunch and flavor. A squeeze of extra lemon juice brightens each bite. These tacos are perfect for lunch or a casual dinner. For a smoky flavor, try grilling the shrimp. Marinate the shrimp in the lemon garlic butter sauce for about 30 minutes. Thread the shrimp onto skewers, leaving space between each piece. Grill the skewers on medium heat for about 2-3 minutes per side. This method gives the shrimp a nice char and enhances the flavors. Serve with a fresh salad or over rice for a delightful meal. You can find the full recipe for Lemon Garlic Butter Shrimp to get started! To store leftovers, let the shrimp cool down first. Place them in an airtight container. Make sure to cover the shrimp well to prevent air from getting in. Store the container in the fridge. Your shrimp will stay fresh for up to three days. When you're ready to eat the leftovers, reheating is easy. You can use a pan or the microwave. If you use a pan, heat it over low to medium heat. Add a little butter or oil to keep it moist. For the microwave, place the shrimp in a safe dish and cover it. Heat in short bursts, checking often. This keeps the shrimp from getting tough. You can also freeze the shrimp if you want to save some for later. First, let the cooked shrimp cool completely. Then, place them in a freezer-safe bag or container. Squeeze out as much air as you can. This helps prevent freezer burn. They can stay frozen for up to two months. When you’re ready to eat them, thaw the shrimp in the fridge overnight. Reheat them gently to enjoy their flavor again. For the complete recipe, check out the Full Recipe link. Cooking shrimp is quick and easy. It usually takes about 5 to 6 minutes. You cook them until they turn pink. If they curl into a C shape, they are done. Overcooking makes them tough. Keep an eye on them while they cook! Yes, you can use frozen shrimp! Just thaw them first. To thaw, place them in cold water for about 15-20 minutes. After that, peel and devein them if needed. Frozen shrimp can taste just as good as fresh ones. They are a great time-saver! You have many options for sides! Here are some ideas: - Cooked rice or quinoa - Pasta with olive oil or lemon - Steamed vegetables like broccoli or asparagus - A fresh green salad - Crusty bread for dipping in the sauce Each of these pairs well with the rich flavors of the shrimp. You can mix and match to fit your meal. Don't forget to check the Full Recipe for details! In this blog post, we covered how to make lemon garlic butter shrimp. We discussed main ingredients, optional add-ins, and sides that pair well. You learned the step-by-step cooking process, plus tips for perfect shrimp. We shared delicious variations, from pasta to tacos. Lastly, I outlined storage tips for leftovers and answered common questions. Enjoy crafting this dish, and don’t hesitate to experiment with flavors! You can make this meal your own. Happy cooking!

Lemon Garlic Butter Shrimp Savory and Simple Recipe

If you love quick and tasty meals, you need to try this Lemon Garlic Butter Shrimp recipe. It’s simple, savory,

- 1 large head of cauliflower - 1 cup sharp cheddar cheese - 1/2 cup cream cheese - 1/2 cup sour cream - 1/2 cup green onions, chopped - 1/2 cup cooked turkey bacon or plant-based bacon - Spices: garlic powder, onion powder, smoked paprika - Optional toppings: 1/4 cup breadcrumbs When I create the Loaded Cauliflower Casserole, I start with fresh ingredients. You need a large head of cauliflower for this dish. Cauliflower serves as a great base. It has a mild taste and absorbs flavors well. Next, I pick sharp cheddar cheese. It gives a nice, bold flavor that pairs well with the creaminess of cream cheese and sour cream. The cream cheese adds richness, while the sour cream brings a tangy note. Green onions add brightness. They also give a pop of color. I love to sprinkle them on top, too. If you want a little crunch, try adding turkey bacon or a plant-based option. Spices are key to bringing out the flavors in this dish. Garlic powder and onion powder are must-haves. They add depth and warmth. A hint of smoked paprika gives a subtle smokiness that elevates the taste. If you want a crunchy topping, breadcrumbs are a great choice. They create a nice contrast to the creamy casserole. You can find the Full Recipe for a complete guide to making this delicious dish. First, bring a large pot of salted water to a boil. Once the water is boiling, add the cauliflower florets. Boil them for about 5 to 7 minutes. You want them fork-tender but not mushy. Drain the florets well and set them aside. In a mixing bowl, combine the softened cream cheese, sour cream, garlic powder, onion powder, salt, and pepper. If you like a bit of smokiness, add the smoked paprika, too. Mix everything until it is smooth and creamy. This will be the flavorful base of your casserole. Now, grab your greased baking dish. Start by layering the cooked cauliflower at the bottom. Next, add half of the chopped green onions and half of the cooked turkey bacon. Pour the cream cheese mixture over the top and spread it evenly. This mixture will add richness to every bite. Sprinkle the sharp cheddar cheese on top. Then, add the rest of the green onions and turkey bacon. If you want a bit of crunch, sprinkle the breadcrumbs on top. Bake the casserole in your preheated oven at 375°F for 25 to 30 minutes. You will know it's done when the cheese is bubbly and lightly golden. Let it cool for a few minutes before serving. For the full recipe, check the details above. To get the best texture in your loaded cauliflower casserole, cook the cauliflower until tender. Boil the florets for about 5-7 minutes. They should be easy to pierce with a fork but not mushy. This way, they keep their shape in the casserole. If you like a crunchy topping, consider adding breadcrumbs. Mix them with a bit of olive oil and spices for extra flavor. This creates a delightful contrast to the creamy filling. For added flavor, experiment with spices. Try adding smoked paprika, cumin, or even chili powder. These spices can make the dish stand out. If you want to change the cheese, use gouda or mozzarella for different tastes. You can also swap turkey bacon for plant-based bacon or add more veggies like spinach or bell peppers. When serving, try garnishing with fresh herbs. Chopped parsley or basil adds a nice touch. You can also sprinkle extra green onions on top. For sides, pair it with a fresh salad or roasted vegetables. This adds color and nutrition to your meal. The combination will make the dish look inviting and delicious. Enjoy the process of making this loaded cauliflower casserole! {{image_2}} You can make this dish vegetarian by using plant-based bacon. This will give you great flavor without meat. You can also add more veggies. Try bell peppers, spinach, or mushrooms. These add texture and nutrients. Mixing in different vegetables makes the dish even more colorful and fun. If you want to keep it low-carb, focus on the ingredients. Use full-fat cheese and skip the breadcrumbs. This keeps your carbs low while still tasting great. Adjusting serving sizes is key. Keep your portions small to stay within your carb limit. You can enjoy this dish without the guilt. Cheese is a big part of this casserole. You can try different kinds, like gouda or mozzarella. Each cheese brings its own taste. Adding herbs can also change the flavor. Consider fresh parsley, basil, or chives. They add a burst of freshness that makes the dish shine. For the full recipe, check out the details above. After you enjoy your loaded cauliflower casserole, save the leftovers. First, let the dish cool down. Then, transfer it to an airtight container. This keeps it fresh and tasty. You can store it in the fridge for up to 4 days. Just make sure to cover it well to avoid drying out. If you want to keep it longer, you can freeze the casserole. Cut it into portions for easy use. Wrap each piece tightly in plastic wrap. Then, place them in a freezer bag. This helps prevent freezer burn. You can freeze it for up to 3 months. To reheat, take a portion out the night before. Let it thaw in the fridge. When ready, place it in the oven at 350°F (175°C) for about 20-25 minutes. Cover it with foil to keep it moist. If you want, you can remove the foil for the last few minutes to crisp the top. Enjoy your loaded cauliflower casserole anytime! For the full recipe, check the section above. You can prepare this casserole a day in advance. Cook the cauliflower and mix the cream cheese blend. Layer the ingredients in the dish, but don’t bake it yet. Cover it and store in the fridge overnight. When ready, bake it straight from the fridge. You might need to add a few extra minutes to the baking time. Yes, you can use frozen cauliflower. However, it’s best to thaw it first. Drain any excess water to avoid a soggy casserole. You may need to adjust the cooking time. Cook the frozen florets only until they are tender, about 4-5 minutes, as they may cook faster. If you need a substitute for cream cheese, try using Greek yogurt or ricotta cheese. Cottage cheese blended until smooth also works well. These alternatives give a nice creaminess. They may change the flavor slightly, but they still taste great in this dish. Yes, this recipe can be gluten-free! Just ensure your breadcrumbs are gluten-free. You can also leave out the breadcrumbs if you prefer. The casserole still tastes delicious without them. Enjoy this tasty dish without any worries about gluten. This blog post shared easy steps to create a delicious cauliflower casserole. We covered the main ingredients, from cauliflower to cheese and spices. You learned how to prepare, assemble, and bake the dish for the best taste. I also provided tips for perfect texture and flavor, along with storage advice. Try different variations to suit your taste. Enjoy cooking and sharing this tasty meal with friends and family!

Loaded Cauliflower Casserole Savory and Simple Dish

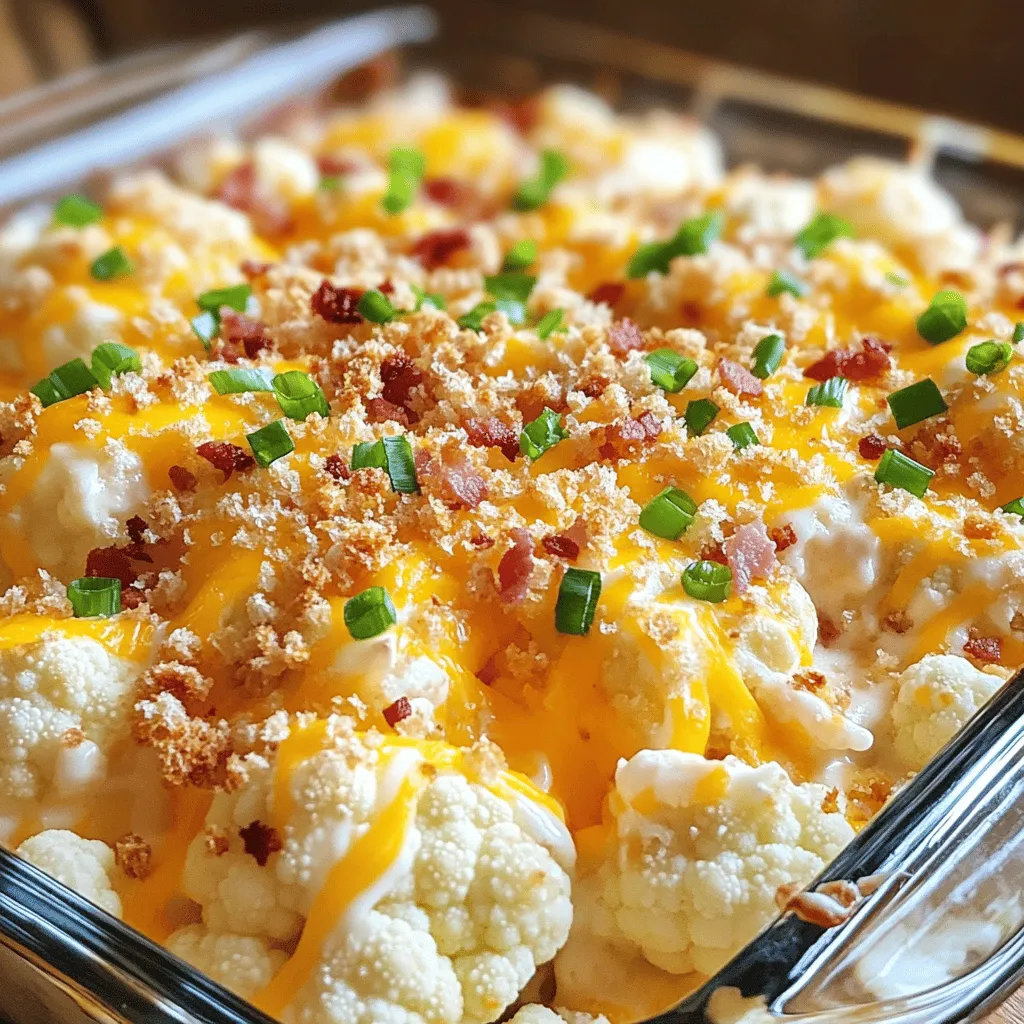
Looking for a comfort food that’s both tasty and simple? Let me introduce you to Loaded Cauliflower Casserole—a creamy, cheesy

To make Garlic Parmesan roasted potatoes, you need simple yet tasty ingredients. - 1.5 lbs baby potatoes, halved: Baby potatoes are small and tender. Their skins hold flavor well and give a nice texture. - 4 tablespoons olive oil: Olive oil adds richness and helps the potatoes roast evenly. - 4 cloves garlic, minced: Garlic brings a bold flavor. It caramelizes, giving a sweet, savory taste to the dish. Herbs and seasonings make your dish pop. - 1 tablespoon dried thyme: Thyme gives an earthy note that pairs well with potatoes. - 1 tablespoon dried rosemary: Rosemary adds a fragrant touch and enhances the overall flavor. - Salt and black pepper to taste: Salt brings out all the flavors, while black pepper adds a gentle heat. Garnishes can elevate your dish. - Fresh parsley, chopped (for garnish): Parsley adds a fresh color and brightness. - Additional cheese variations: You can use different cheeses like cheddar or mozzarella for a twist. These ingredients come together to create a simple yet delicious side dish. To see the full recipe, check out the [Full Recipe]. First, let's prep the potatoes. You want to use baby potatoes for this dish. They are small and cook evenly. Start by washing them well. Then, cut each potato in half. This helps them roast faster. Next, grab a large mixing bowl. In this bowl, combine the halved potatoes, olive oil, and minced garlic. The olive oil makes the potatoes crispy. Add dried thyme and rosemary for flavor. Don't forget to season with salt and black pepper. Toss everything together until the potatoes are well coated. Now it's time to roast. Preheat your oven to 425°F (220°C). This high temperature gives the potatoes a nice golden color. Once the oven is hot, take a baking sheet. Spread the seasoned potatoes in a single layer on the sheet. Make sure they have space around them. This helps them brown well. Roast the potatoes for about 25 minutes. Stir them halfway through for even cooking. You want them to be golden brown and fork-tender. After roasting, it's time for the cheese. Remove the baking sheet from the oven. Sprinkle the grated Parmesan cheese evenly over the hot potatoes. This cheese adds a rich flavor. Return the baking sheet to the oven for another 5 to 7 minutes. Watch closely as the cheese melts and gets crispy. When done, take the baking sheet out and let it cool for a few minutes. Garnish with fresh chopped parsley for a pop of color. For the full recipe, check out the details above. Enjoy your Garlic Parmesan Roasted Potatoes! To get the best Garlic Parmesan roasted potatoes, space is key. When you spread the potatoes on the baking sheet, make sure they are not touching. This helps them cook evenly and get crispy. If they are too close, they will steam instead of roast. Oven temperature matters too. Preheat your oven to 425°F (220°C). A hot oven helps the outside get golden brown. Always check the temperature with an oven thermometer if you can. This way, you ensure your oven heats correctly. After cooking, let your potatoes cool completely. Once cooled, transfer them to an airtight container. This keeps them fresh and tasty. Store in the fridge for up to three days. When reheating, use the oven for the best results. Preheat your oven to 375°F (190°C). Spread the potatoes on a baking sheet and heat for about 10-15 minutes. This method keeps them crispy. You can also microwave them, but they may not stay as crunchy. Feel free to mix things up with herbs. Instead of thyme and rosemary, try using oregano or basil. These simple changes can give a new flavor twist. You can also swap the cheese. If you want a different taste, use mozzarella or feta. This gives a fun twist to classic Garlic Parmesan roasted potatoes. Each variation adds its own special touch to this easy side dish. For the full recipe, check out the [Full Recipe]. {{image_2}} Garlic Parmesan roasted potatoes go well with many main dishes. They are great with grilled chicken. The crispy edges balance the juicy meat. You can also serve them with steak or pork chops. The rich flavors of garlic and cheese enhance the savory proteins. For a lighter option, pair these potatoes with fish. Salmon or tilapia works nicely. The freshness of the fish complements the hearty potatoes. Adding some green veggies brightens your plate. Try steamed broccoli or sautéed green beans. Their crunch and color create a fun contrast. Serving your garlic Parmesan roasted potatoes well makes them more appetizing. Use a large, shallow bowl to display the potatoes. It helps show off their golden color. If you want to impress, try using individual plates. This is perfect for dinner parties or special events. Garnishing adds a nice touch. Sprinkle fresh parsley on top just before serving. It gives a pop of color and freshness. You can also add more grated cheese for extra flavor. Garlic Parmesan roasted potatoes fit into many meal plans. You can make them ahead of time and reheat them. They are perfect for family dinners or potlucks. For a larger meal, serve them with a big salad. This adds freshness and balances the meal. You can also use these potatoes as a side for holiday gatherings. They are sure to be a hit at any occasion. Check out the Full Recipe to make these tasty potatoes your new favorite side dish! Garlic Parmesan roasted potatoes are tasty and filling. Each serving has about 200 calories. The macronutrient breakdown includes: - Carbohydrates: 30g - Protein: 5g - Fat: 8g These numbers can change based on the amount of oil or cheese you use. Potatoes are more than just delicious; they are also packed with nutrients. They provide: - Vitamin C: Great for your immune system. - Potassium: Helps with muscle and nerve function. Garlic is another superstar. It has compounds that may boost heart health. Plus, herbs like thyme and rosemary add flavor and antioxidants. They can help reduce inflammation in your body. If you want to lower carbs, try using cauliflower instead of potatoes. It still gives a nice texture. For those who need gluten-free options, this recipe is already safe. Just make sure all your seasonings are gluten-free. Enjoy your garlic Parmesan roasted potatoes worry-free! For the full recipe, check the earlier section. How can I make them crispy? To make your garlic Parmesan roasted potatoes crispy, use high heat. Preheat your oven to 425°F (220°C). Spread the potatoes out on the baking sheet. Give them space to roast evenly. Stir them halfway through cooking. This helps them brown better. Also, adding Parmesan cheese toward the end ensures it gets crispy. Can I use other types of potatoes? Yes, you can use other types of potatoes. Russet potatoes work well. They become fluffy inside. Yukon Gold potatoes have a creamy texture. You can even try sweet potatoes for a twist. Just adjust the cooking time as needed. Can I make this dish vegan? Yes, you can easily make this dish vegan. Replace Parmesan cheese with nutritional yeast or a vegan cheese alternative. Use olive oil as your fat source. This keeps the flavor but removes dairy. What to do with leftovers? Leftovers can be stored in an airtight container. They will last for about three days in the fridge. To reheat, use an oven or air fryer. This helps keep them crispy. You can also toss them into a salad for a tasty addition. Why are my potatoes soggy? Soggy potatoes usually mean they are too crowded on the baking sheet. Make sure they have enough space. Also, check the oven temperature. If it's too low, they won't crisp up. Finally, tossing them in oil can help prevent sogginess. How to tell when they are done baking? To check if your potatoes are done, use a fork. They should be fork-tender and golden brown. You can also look for a crispy layer of cheese on top. If they need more time, put them back in the oven for a few more minutes. This blog post covered how to make Garlic Parmesan Roasted Potatoes. We discussed key ingredients like baby potatoes, olive oil, and garlic. I shared step-by-step instructions, tips for perfect roasting, and how to store leftovers. We also explored serving ideas and the nutritional benefits of the main ingredients. In summary, these potatoes are easy to make and delicious. You can customize them to fit your taste. Enjoy your cooking and have fun experimenting!

Garlic Parmesan Roasted Potatoes Easy Side Dish Recipe

Looking for a tasty side dish that’s easy to make? Garlic Parmesan Roasted Potatoes are your answer! This simple recipe

- Chicken and seasonings - 4 boneless, skinless chicken breasts - Salt and pepper to taste - Herbs and flavor enhancers - 2 tablespoons olive oil - 3 cloves garlic, minced - Zest and juice of 2 large lemons - 1 teaspoon dried oregano - 1 teaspoon dried thyme - 1 teaspoon dried basil - 1/4 cup chicken broth (or low-sodium broth) - Additional components for garnish - Fresh parsley, chopped When you gather these ingredients, you set the stage for a bright and tasty meal. The chicken breasts provide a great base, while the lemon and herbs add a fresh kick. I love using fresh garlic for that wonderful aroma. The olive oil helps the chicken cook nicely without sticking. Using dried herbs like oregano, thyme, and basil is key. They bring depth without overpowering the dish. The chicken broth adds moisture and flavor to the sauce. Don't forget the parsley! It not only looks nice but gives a fresh taste at the end. This recipe is simple and quick, perfect for a busy day. You can find the full recipe and more tips to make this dish shine! Preparing the chicken: Start by patting the chicken breasts dry with paper towels. This step helps the chicken sear better. Next, season both sides with salt and pepper. This simple seasoning brings out the chicken's flavor. Heating oil in the skillet: In a large skillet, heat 2 tablespoons of olive oil over medium-high heat. You want the oil hot but not smoking. This heat level helps create a nice crust on the chicken. Searing the chicken breasts: Once the oil is ready, add the chicken breasts to the skillet. Sear them for about 5-6 minutes on each side. Look for a golden-brown color. This shows they are cooked well. Remove the chicken from the skillet and set it aside. Sautéing garlic: In the same skillet, lower the heat to medium. Add 3 cloves of minced garlic. Sauté for about 1-2 minutes until you smell the garlic. Make sure it does not burn. Burnt garlic can ruin the dish's taste. Adding lemon and herbs: Now, add the zest and juice of 2 large lemons, along with 1 teaspoon each of oregano, thyme, and basil. Pour in 1/4 cup of chicken broth too. Stir everything well. This mixture creates a bright, zesty sauce. Simmering the chicken in the sauce: Return the seared chicken to the skillet. Let it simmer in the lemon-herb sauce for about 3-4 minutes. This allows the chicken to soak up the flavors. Flip them halfway to ensure they get coated. Garnishing and serving suggestions: Once done, remove the skillet from the heat. Garnish with freshly chopped parsley. This adds a pop of color and flavor. Serve it warm with your favorite sides. Enjoy this flavorful and simple meal! For detailed instructions, check the Full Recipe. To boost the taste of your skillet lemon herb chicken, start with great seasoning. Use fresh herbs when possible. They add bright flavors that dried herbs cannot match. If using dried herbs, remember to crush them in your hand before adding. This helps release their oils. Marinating the chicken is another key step. A simple mix of lemon juice, olive oil, and herbs works wonders. Let the chicken sit in this mix for at least 30 minutes. For deeper flavor, marinate for a few hours or overnight. This makes the chicken juicy and packed with taste. Getting the chicken texture just right is vital. Always dry the chicken with paper towels before cooking. This helps achieve that perfect golden crust. Heat your skillet until it is hot before adding the chicken. Sear each side for about 5-6 minutes until golden brown. For perfect doneness, use a meat thermometer. Chicken should reach an internal temperature of 165°F. This ensures it is safe to eat while remaining juicy and tender. When it comes to sides, consider fresh veggies or a light salad. Roasted asparagus or garlic mashed potatoes pair nicely with the chicken. A simple green salad with vinaigrette adds a nice crunch. For drinks, a chilled glass of white wine works well. Try a Sauvignon Blanc or a light Pinot Grigio. If you prefer non-alcoholic options, serve sparkling water with lemon slices. This complements the dish's bright flavors. For the full recipe, check out the complete guide on skillet lemon herb chicken. {{image_2}} You can switch up the herbs in your Skillet Lemon Herb Chicken. Try fresh rosemary, dill, or cilantro for a new taste. Each herb brings its own flair to the dish. If you want a milder flavor, use parsley or chives. For proteins, chicken breasts work well, but you can also use thighs. They add more moisture and flavor. If you prefer, try pork chops or even tofu for a plant-based option. Just adjust the cooking time to fit the protein you choose. To make this recipe gluten-free, ensure your chicken broth is certified gluten-free. Most brands offer this option. You can also use vegetable broth for a vegetarian spin. If you are on a low-carb or keto diet, skip the broth and use a bit of water. This keeps the dish flavorful without the carbs. You can also serve it over zucchini noodles or cauliflower rice for a tasty low-carb meal. These adjustments will keep your Skillet Lemon Herb Chicken delicious and diet-friendly. After enjoying your skillet lemon herb chicken, store any leftovers in the fridge. Use an airtight container to keep it fresh. This dish lasts about 3 to 4 days when stored properly. Always check for signs of spoilage before eating. If the chicken has an off smell or a slimy texture, it's best to toss it. You can freeze skillet lemon herb chicken to enjoy later. First, let the chicken cool completely. Then, wrap it tightly in plastic wrap and place it in a freezer bag. Remove as much air as possible to prevent freezer burn. This chicken can last up to 3 months in the freezer. When you are ready to eat it, thaw the chicken in the fridge overnight. To reheat, place it in a skillet over low heat. Add a splash of chicken broth to keep it moist. This method helps maintain flavor and texture. Enjoy your meal again without losing any of the tasty goodness! How long does it take to cook chicken in a skillet? It takes about 12 to 15 minutes to cook chicken in a skillet. First, sear it for 5 to 6 minutes on each side. Then, let it simmer in the sauce for a few minutes. Can I use boneless thighs instead of breasts? Yes, you can use boneless thighs. They add a rich flavor and stay moist. Just adjust the cooking time slightly, as thighs may need a bit longer. What can I substitute for chicken broth? If you don’t have chicken broth, use vegetable broth or water. You can also add a splash of white wine for added flavor. How to fix overcooked chicken? To fix overcooked chicken, make a sauce. Use butter and broth to moisten it. Serve it with a flavorful sauce to add moisture back in. Can I double the recipe for a larger serving? Yes, you can double the recipe. Just make sure to use a larger skillet or cook in batches. This keeps the chicken from overcrowding and helps it cook evenly. How to adjust cooking time for thicker chicken breasts? For thicker breasts, increase cooking time by a few minutes per side. Use a meat thermometer to check when it reaches 165°F (75°C). What other herbs can I use for this recipe? You can use fresh herbs like rosemary or dill instead of dried ones. They add a fresh taste and enhance the dish's flavor. What to do if I don't have fresh parsley? If you don’t have fresh parsley, try using dried parsley or a mix of fresh cilantro or basil. They will still add a nice touch to the dish. Tips for reheating leftovers without drying out the chicken To reheat leftovers, use low heat. Add a splash of broth to keep it moist. Cover the skillet to trap steam and prevent drying out. This guide gave you the key steps to make a tasty skillet lemon herb chicken. We covered everything from essential ingredients to cooking methods, making it easy for you to follow. Remember, seasoning is key, and don’t shy away from trying different herbs or proteins. With the right techniques and tips, you can enjoy this dish to its fullest. Whether you’re saving leftovers or experimenting with variations, the joy of cooking is in your hands. Happy cooking!

Skillet Lemon Herb Chicken Flavorful and Simple Meal

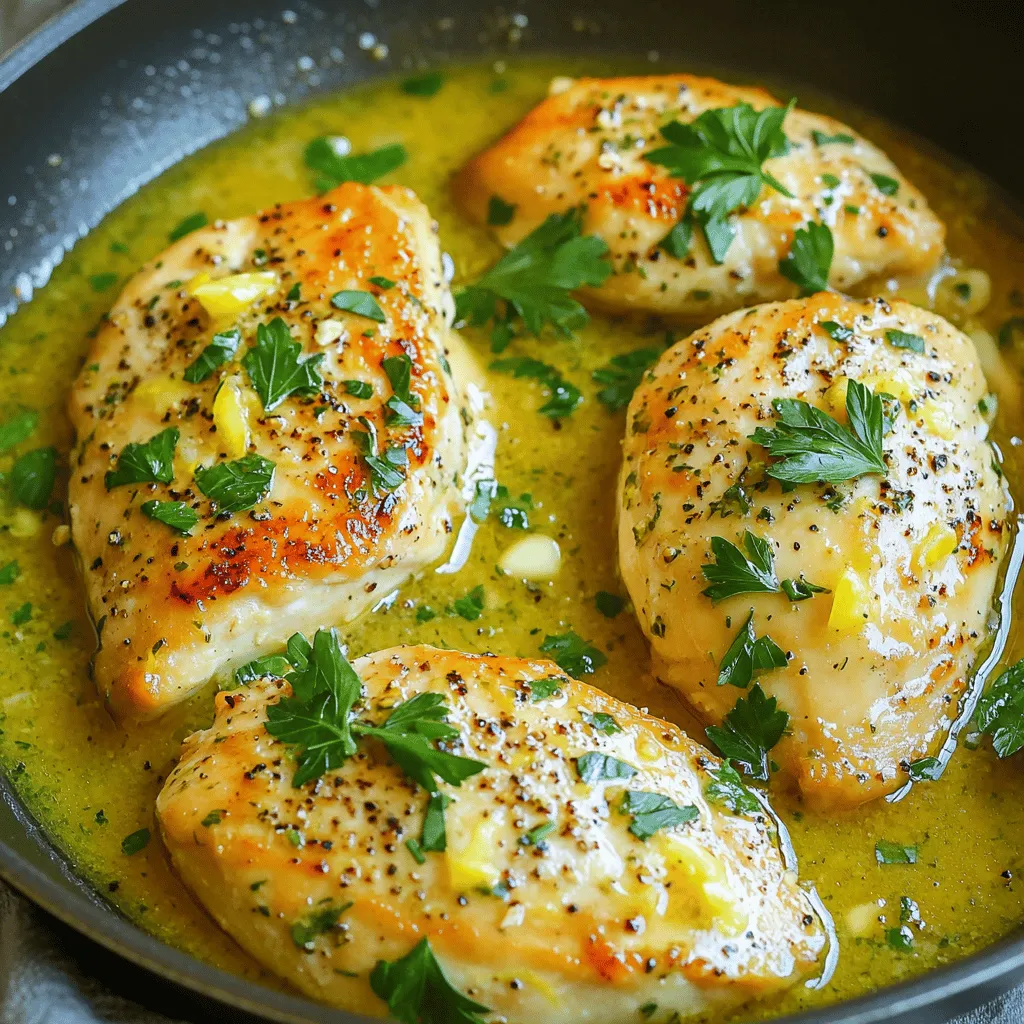
Looking for a tasty and easy meal? My Skillet Lemon Herb Chicken is just what you need! This dish combines

- 2 cups cooked rotini pasta - 2 cups cooked chicken breast, shredded - 2 cups Alfredo sauce - 1 cup broccoli florets, steamed - 1 cup shredded mozzarella cheese - 1/2 cup grated Parmesan cheese - 1 teaspoon garlic powder - 1 teaspoon Italian seasoning - Salt and pepper to taste - Fresh parsley, chopped To make an Easy Chicken Alfredo Bake, gather these ingredients. You need rotini pasta, cooked chicken, and Alfredo sauce. These three form the base of your dish. The pasta gives a nice bite, while the chicken provides protein. The creamy Alfredo sauce brings it all together. Next, add broccoli for a pop of color and nutrition. Cheese makes everything better. Use mozzarella for meltiness and Parmesan for a sharp flavor. For seasoning, garlic powder and Italian seasoning will boost the taste. Don’t forget salt and pepper to round it all out. Finally, fresh parsley adds a lovely touch. This recipe is simple yet full of flavor. You can find the Full Recipe at the beginning of the article. 1. Preheat the oven to 350°F (175°C). This step is key for even baking. 2. Prepare your baking dish by greasing it lightly. This prevents sticking. 3. In a large bowl, mix the cooked rotini pasta, shredded chicken, and Alfredo sauce. 4. Add the steamed broccoli, garlic powder, Italian seasoning, salt, and pepper. Stir well until everything is coated. 1. Next, transfer the mixture into your greased baking dish. Spread it out evenly. 2. Cover the dish with aluminum foil. This helps keep moisture in during the first part of baking. 3. Bake for 20 minutes in the preheated oven. This warms everything through. 1. After 20 minutes, remove the foil. This lets the cheese get bubbly and golden. 2. Bake for an additional 10 to 15 minutes. Keep an eye on it until the top looks nice and brown. 3. After baking, let it sit for 5 minutes. This helps the dish set. 4. Before serving, garnish with chopped fresh parsley. It adds color and flavor. For the complete recipe, refer to the Full Recipe. Choosing the right pasta is key. I love rotini for its curves. The sauce clings well to every twist. You can also try penne or fusilli if you like. These shapes add fun texture to the dish. To make your homemade Alfredo sauce, start with butter and cream. Melt 1 stick of butter in a pan. Slowly stir in 1 cup of heavy cream. Add garlic and cheese next. Use grated Parmesan for the best taste. Keep stirring until it’s smooth. This sauce will make your bake rich and creamy. Pair your meal with a fresh salad or garlic bread. A simple Caesar salad works well here. It adds crunch and brightness to the dish. For portion sizes, serve about 1 cup per person. Use a large spoon to help with serving. Garnish each plate with chopped parsley for color. One common mistake is overbaking the dish. This can make it dry and tough. Watch the oven closely during the last 15 minutes. Bake just until the cheese is bubbly and golden. Be careful with ingredient substitutions. Using low-fat cheese can change the flavor. Stick to full-fat cheese for a richer taste. If you swap chicken for sausage, it will give a different feel to the dish. Always taste as you go to keep flavors balanced. {{image_2}} You can change the pasta type in your Chicken Alfredo Bake. Try penne, fusilli, or even gluten-free pasta. Each type offers a unique texture. If you want, you can swap out chicken for shrimp or vegetables. Shrimp adds a nice seafood twist. For a veggie option, use bell peppers, zucchini, or mushrooms. Both options make it fresh and fun. If you need gluten-free options, choose gluten-free pasta. Many brands offer great choices that taste good. For a dairy-free version, use coconut milk or almond milk in your sauce. There are also dairy-free cheese options available. These swaps help keep the dish tasty while meeting your dietary needs. To add a kick, try spices like red pepper flakes or smoked paprika. These spices give your dish a new flavor layer. You can also mix in extra vegetables. Spinach, peas, or asparagus make great additions. They not only boost nutrition but also add color and flavor. Experiment with these ideas to find your perfect Chicken Alfredo Bake. For the complete recipe, check out the Full Recipe. To keep your Easy Chicken Alfredo Bake fresh, store leftovers properly. Place them in an airtight container. This helps to lock in the flavor and moisture. If you keep it in the fridge, it will last for about 3 to 4 days. Just make sure to let it cool first before sealing. When it’s time to enjoy leftovers, reheating is key. Use the oven for best results. Preheat it to 350°F (175°C). Place the pasta in an oven-safe dish and cover with foil. This keeps the moisture in. Bake for about 15 to 20 minutes. Check to make sure it’s heated through. Freezing is a great choice for future meals. Allow the dish to cool completely. Then, cut it into portions and wrap each piece in plastic wrap. Place the wrapped portions in a freezer-safe bag. You can keep it in the freezer for up to 3 months. When you’re ready to eat, take a portion out and thaw it overnight in the fridge. To reheat, place it in the oven at 350°F (175°C) for about 25 to 30 minutes. This ensures it heats evenly. Now you can enjoy your Easy Chicken Alfredo Bake anytime! Check out the Full Recipe for more details. Can I use store-bought Alfredo sauce? Yes, using store-bought Alfredo sauce works well. It saves time and still tastes great. Just pour it over your pasta and chicken mixture. If you want, you can add some herbs for extra flavor. Is it possible to make this dish in advance? Absolutely! You can prepare this dish a day ahead. Just mix everything and store it in the fridge. When you are ready to bake, just pop it in the oven. This makes it a perfect meal for busy days. How do I make this recipe healthier? To make this dish healthier, try using whole grain pasta. You can also add more veggies like spinach or bell peppers. For a lighter sauce, use a low-fat Alfredo option or make your own with less cream. Can I prepare it without chicken? Yes, you can make this dish without chicken. Use cooked mushrooms or tofu as a protein swap. You can also load it up with more veggies. This keeps the dish tasty and filling. What’s the best way to customize flavors? You can customize flavors easily! Add spices like red pepper flakes for heat. Fresh herbs like basil or oregano can brighten the dish. Mix in different cheeses for a richer taste. How many servings does this recipe yield? This recipe yields about six servings. It’s great for family meals or feeding guests. If you have leftovers, they make tasty lunches too. In this blog post, I shared how to create an Easy Chicken Alfredo Bake. You learned about essential ingredients like rotini pasta, chicken, and Alfredo sauce. We explored ways to enhance flavor with broccoli and cheeses. I also outlined steps for baking, tips for best results, and common mistakes to avoid. Try different pasta or proteins to customize your dish. By following these tips, your Chicken Alfredo Bake can become a family favorite. Enjoy cooking and make it your own!

Easy Chicken Alfredo Bake Simple and Tasty Meal

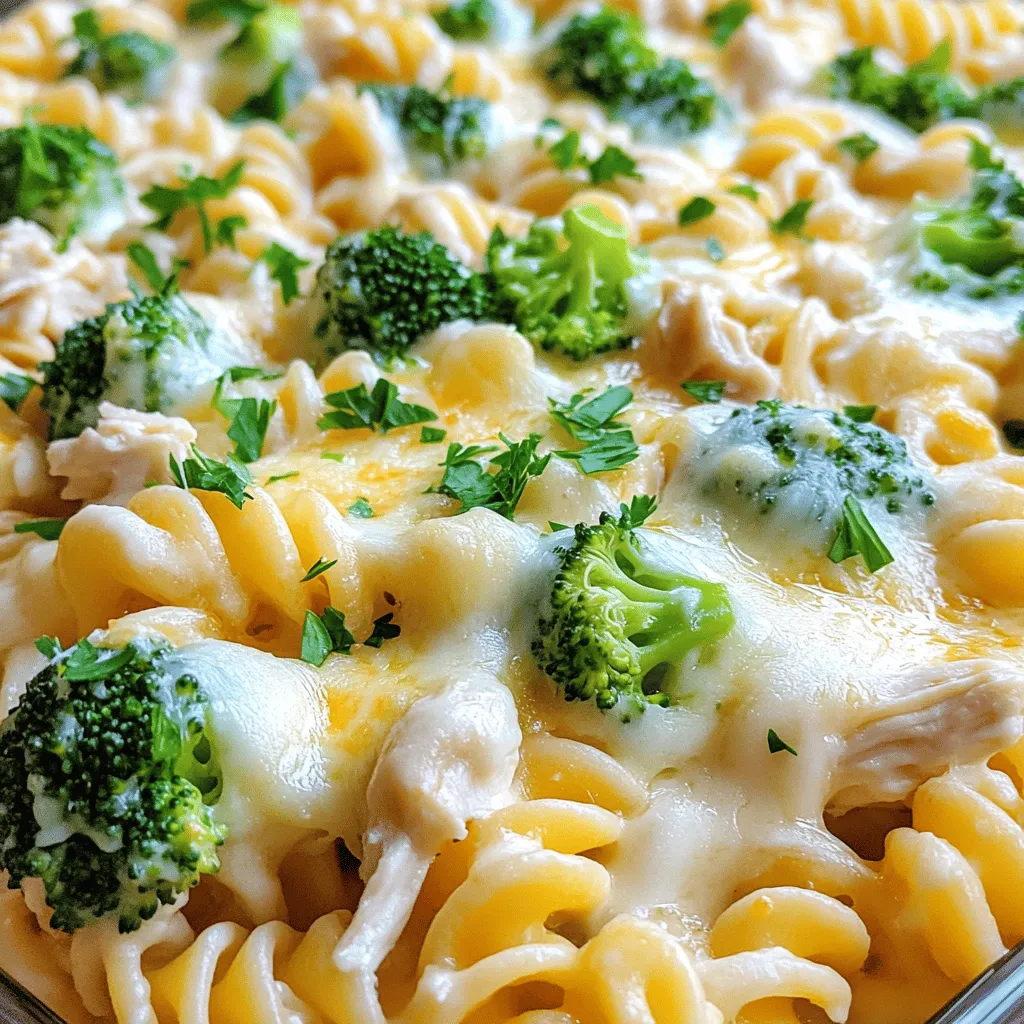
Looking for a quick and tasty dinner? My Easy Chicken Alfredo Bake is just the answer! With only a few

To make a classic chicken pot pie, gather these key ingredients: - 2 cups cooked chicken, shredded - 1 cup carrots, diced - 1 cup peas (fresh or frozen) - 1 cup potatoes, diced (optional) - 1/2 cup celery, diced - 1/3 cup butter - 1/3 cup all-purpose flour - 2 cups chicken broth - 1 cup whole milk - 1 teaspoon dried thyme - 1 teaspoon garlic powder - Salt and pepper to taste - 1 package (2 crusts) refrigerated pie crusts or homemade pie crust - 1 egg, beaten (for egg wash) You will need some basic tools to make this dish: - Large skillet - Mixing spoon - Pie dish (9-inch) - Measuring cups and spoons - Knife and cutting board - Rolling pin (if making crust from scratch) Using fresh, high-quality ingredients makes a big difference. Here are some tips: - Use rotisserie chicken or homemade chicken for the best flavor. - Choose fresh vegetables for a brighter taste and better texture. - Opt for unsalted butter to control the salt level in your dish. - For a richer filling, use whole milk rather than low-fat options. These choices will enhance your chicken pot pie, making it a truly comforting meal. Check out the Full Recipe for detailed steps. To begin, gather all your ingredients. This makes cooking easier. You will need: - 2 cups cooked chicken, shredded - 1 cup carrots, diced - 1 cup peas (fresh or frozen) - 1 cup potatoes, diced (optional) - 1/2 cup celery, diced - 1/3 cup butter - 1/3 cup all-purpose flour - 2 cups chicken broth - 1 cup whole milk - 1 teaspoon dried thyme - 1 teaspoon garlic powder - Salt and pepper to taste - 1 package (2 crusts) refrigerated pie crusts or homemade pie crust - 1 egg, beaten (for egg wash) Chop the vegetables into small pieces. This helps them cook evenly. Shred the chicken into bite-sized bits. If you use rotisserie chicken, make sure to remove the skin. Now, heat a large skillet over medium heat. Add the butter and let it melt. Once melted, toss in the carrots, celery, and optional potatoes. Cook this mix for about 5-7 minutes until it softens slightly. This step adds flavor and texture. Next, stir in the shredded chicken and peas. Add thyme, garlic powder, salt, and pepper. Mix it well. Now, sprinkle the flour over the mixture. Stir to coat everything, cooking for 2 more minutes. This forms a roux that thickens the filling. Slowly pour in the chicken broth and milk. Stir constantly until the mixture thickens and bubbles. Remove from heat. Set it aside to cool slightly. Unroll one pie crust into a 9-inch pie dish. Make sure it fits well. Then, pour the chicken filling into the crust. Spread it evenly. Next, place the second pie crust over the filling. Seal the edges by crimping with your fingers or using a fork. Don’t forget to cut a few slits in the top crust. This allows steam to escape while baking. Brush the top crust with the beaten egg for a nice golden finish. Preheat your oven to 425°F (220°C). Once ready, place your pot pie in the oven. Bake for 30-35 minutes or until the crust turns golden brown. Keep an eye on it to prevent burning. After baking, let the pot pie rest for about 10 minutes. This helps the filling set. When you slice it, the filling stays in place. Serve it warm, and enjoy your comforting meal. For the full recipe, check the earlier section. A flaky crust makes your chicken pot pie shine. Here are some tips to help you achieve that perfect texture: - Use cold butter. Cold butter makes the crust flaky. - Don’t overwork the dough. Mix just until it forms a ball. - Chill the dough. Let it rest in the fridge for at least 30 minutes. - Roll out gently. Use light pressure to keep the layers intact. Learning from mistakes helps you improve. Here are common pitfalls to watch out for: - Skipping the pie crust chill. This can lead to a tough crust. - Overfilling the pie. Too much filling can make it spill over. - Not sealing the edges properly. This can cause leaks during baking. - Baking without slits. Always cut slits for steam to escape. A thick filling keeps your pot pie from being soupy. Here’s how to do it right: - Use flour to create a roux. Cook flour with butter for a few minutes. - Add liquids slowly. Stir while adding chicken broth and milk. - Cook until bubbling. Let it bubble for a few minutes to thicken. - Check consistency. If too thin, add more flour mixed with water. For a full recipe, check out the Comforting Chicken Pot Pie. It’s easy and delicious! {{image_2}} You can switch up the protein in your pot pie. Instead of chicken, try turkey. It works great. You can also use beef for a hearty twist. If you have leftover roast, this is a good use. Just shred or cube it and add it to the filling. Fish is another fun choice. Salmon or cod can give a fresh taste. If you want a meat-free option, you can make a tasty vegetarian pot pie. Start with the same base of veggies like carrots, peas, and celery. Add mushrooms for a rich flavor. You can also include lentils for protein. They add a nice texture. Use vegetable broth instead of chicken broth for the sauce. This keeps it hearty and satisfying. Get creative with your flavors! You can add herbs like rosemary or parsley for a fresh taste. A splash of white wine can enhance the filling's depth. For a spicy kick, try adding a dash of hot sauce or red pepper flakes. You could even mix in some cheese, like cheddar or Gruyère, for creaminess. These little changes can make your dish unique and exciting. For the full recipe and more ideas, check out the Comforting Chicken Pot Pie. After you make your chicken pot pie, let it cool first. Cover it with plastic wrap or foil. You can store it in the fridge for up to three days. If you want to save a slice for later, just make sure it’s sealed well. This keeps it fresh and tasty. To freeze your chicken pot pie, allow it to cool completely. Wrap it tightly with plastic wrap, then cover it with aluminum foil. This helps prevent freezer burn. It can stay in the freezer for up to two months. When you're ready to eat it, thaw it in the fridge overnight before baking. To reheat, preheat your oven to 350°F (175°C). Place the pot pie on a baking sheet. Cover it with foil to keep the crust from burning. Bake for about 25 to 30 minutes, or until it's hot inside. If you want a crispier crust, remove the foil for the last 10 minutes of baking. Enjoy your comforting chicken pot pie just like the first day! To make a gluten-free chicken pot pie, swap regular flour for a gluten-free blend. Use gluten-free pie crusts too. You can find these at most grocery stores. Be sure to check labels for any hidden gluten. Yes, rotisserie chicken works great! It saves time and adds flavor. Just shred the meat and mix it into your filling. This makes the cooking process much faster. Chicken pot pie pairs well with a fresh salad or roasted vegetables. You can also serve it with mashed potatoes or steamed green beans. These sides balance the richness of the pie. Homemade chicken pot pie lasts about 3 to 4 days in the fridge. Store it in an airtight container to keep it fresh. Reheat individual slices in the oven for the best taste. No, you don’t need to cover the pot pie while baking. Leaving it uncovered allows the crust to become golden and crispy. Just watch it closely to prevent over-browning. Chicken pot pie is a dish that warms the heart. The mix of chicken, veggies, and sauce in a flaky crust makes it so good. Here are the ingredients you will need: - 2 cups cooked chicken, shredded - 1 cup carrots, diced - 1 cup peas (fresh or frozen) - 1 cup potatoes, diced (optional) - 1/2 cup celery, diced - 1/3 cup butter - 1/3 cup all-purpose flour - 2 cups chicken broth - 1 cup whole milk - 1 teaspoon dried thyme - 1 teaspoon garlic powder - Salt and pepper to taste - 1 package (2 crusts) refrigerated pie crusts or homemade pie crust - 1 egg, beaten (for egg wash) Now, let’s go through the steps to make this dish. 1. Preheat your oven to 425°F (220°C). This helps cook the pie evenly. 2. Melt the butter in a large skillet over medium heat. Add the carrots, celery, and potatoes. Cook for 5-7 minutes until they begin to soften. 3. Now, add the shredded chicken, peas, thyme, garlic powder, salt, and pepper. Stir until mixed well. 4. Sprinkle the flour over the mixture. Stir to coat and cook for 2 more minutes. This forms a roux. 5. Slowly add the chicken broth and milk, stirring all the time until it thickens and bubbles. Then, take it off the heat. 6. Unroll one pie crust into a 9-inch pie dish. Pour the chicken filling into the crust. 7. Place the second pie crust over the filling. Seal the edges by crimping with your fingers. Cut a few slits in the top to let steam escape. 8. Brush the top crust with the beaten egg for a golden finish. 9. Bake for 30-35 minutes, or until the crust is golden brown. 10. Let it rest for 10 minutes before slicing. This helps the filling set. This comforting chicken pot pie recipe serves 6. Serve warm on plates with fresh parsley for color. Enjoy this classic dish with a light salad for a complete meal. We explored how to make a comforting chicken pot pie. You learned about essential ingredients and useful tools. Preparation, cooking, and baking steps guide you to a perfect dish. I shared tips for a flaky crust and common pitfalls to avoid. We also looked at tasty variations and smart storage ideas. Now, with these insights and techniques, you can create a delightful pot pie. Enjoy the process and savor the rewards of your cooking!

Classic Chicken Pot Pie Easy and Comforting Recipe

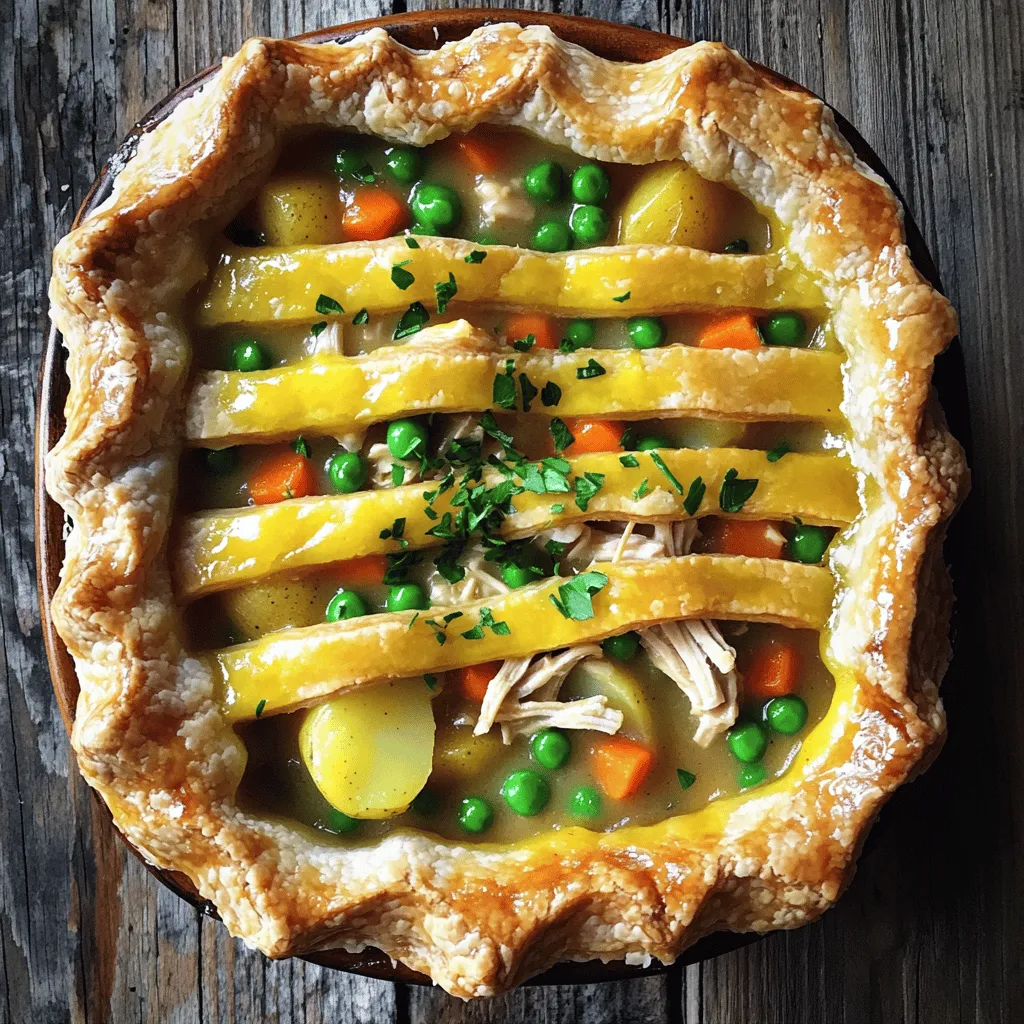
Are you ready to make the perfect classic chicken pot pie? This easy and comforting recipe will become your favorite

When you're ready to make Garlic Butter Shrimp Pasta, gather these ingredients. They are simple yet full of flavor. - 8 oz spaghetti or linguine - 1 lb large shrimp, peeled and deveined - 4 tablespoons unsalted butter - 4 cloves garlic, minced - 1 teaspoon red pepper flakes (adjust to taste) - 1 lemon, juiced and zested - 1/4 cup fresh parsley, chopped - Salt and pepper to taste - 1/2 cup cherry tomatoes, halved - Grated Parmesan cheese for serving (optional) These ingredients create a dish that’s quick and satisfying. The shrimp brings protein, while the pasta serves as a perfect base. Garlic adds depth, and lemon gives a fresh zing. You can add cherry tomatoes for a pop of color and flavor. If you love cheese, sprinkle Parmesan on top when serving. For the full recipe, check out the detailed instructions to make this dish shine! To start, boil some water in a large pot. Add a few pinches of salt to the water. Then, cook 8 oz of spaghetti or linguine according to the package instructions. Once the pasta is cooked al dente, save about 1 cup of the pasta water. Drain the pasta and set it aside. Next, take a large skillet and melt 4 tablespoons of unsalted butter over medium heat. As the butter melts, add 4 cloves of minced garlic and 1 teaspoon of red pepper flakes. Sauté this mixture for about 1-2 minutes. Keep an eye on the garlic; you don’t want it to burn. This step fills your kitchen with a lovely aroma. Now, add 1 lb of large shrimp to the skillet. Season the shrimp with salt and pepper to taste. Cook the shrimp for about 2-3 minutes on each side. They should turn pink and opaque when they are done. This means they are perfectly cooked and ready for the next step. After the shrimp are cooked, stir in 1/2 cup of halved cherry tomatoes along with the juice and zest of 1 lemon. Cook this mixture for another 2-3 minutes. You want the tomatoes to soften a bit. Then, add the drained pasta to the skillet. Toss everything together gently. If the mix seems dry, pour in some of the reserved pasta water until you reach the desired consistency. It should look glossy and inviting. - To get the best flavor, avoid burning the garlic. Cook it gently. - Adjust the red pepper flakes to control how spicy you want your dish. Start small. - Use fresh shrimp for the best taste. Frozen shrimp can be watery. - Reserve some pasta water. This helps make the sauce creamy and smooth. - Serve the dish right away for the best texture. It tastes best fresh. - Garnish with chopped parsley and grated Parmesan cheese. This adds color and flavor. For a full experience, check out the [Full Recipe]. {{image_2}} You can easily switch some ingredients to match your needs. For a healthier option, use zucchini noodles instead of pasta. Zucchini noodles add veggies and cut carbs. If you prefer, you can swap shrimp for chicken or other seafood. Chicken breast works well and cooks quickly too. These swaps keep the dish fun and fresh. Want to take your dish to the next level? Try adding white wine to the sauce. This gives a rich flavor that makes every bite special. You can also toss in spinach or asparagus for more veggies. These greens add color and nutrients to your meal, making it even better. Feel free to experiment with other pasta types. Fettuccine or penne work great in this dish. They hold the sauce nicely and add a unique twist. Each pasta type changes the texture and look of your meal. So, try them all and see which you like best. For the complete recipe, check out the Full Recipe. To store leftover Garlic Butter Shrimp Pasta, place it in an airtight container. Make sure the pasta cools down first. This helps keep the flavors fresh. The best containers are glass or BPA-free plastic. They seal well and help save space in your fridge. When you reheat your pasta, use a skillet or microwave. For a skillet, add a splash of water or extra butter. Heat on low to avoid drying it out. If using a microwave, cover the dish with a damp paper towel. This adds moisture while heating. You may need to add more sauce or pasta water if it looks dry. Garlic Butter Shrimp Pasta lasts about 3 to 4 days in the fridge. Always check for signs it has gone bad. If it smells sour or has a strange color, it’s best to throw it away. Fresh pasta is always the tastiest, so enjoy it while it’s at its best! For the Full Recipe, check the above section. Making Garlic Butter Shrimp Pasta takes about 25 minutes. You spend 10 minutes prepping and 15 minutes cooking. This quick dish is perfect for busy nights. Yes, you can prepare it in advance. Cook the pasta and sauce, then store them separately. Keep the pasta in the fridge for up to two days. When ready to eat, just reheat the sauce and combine. This keeps the pasta from getting soggy. I recommend a fresh side salad or garlic bread. A light Caesar salad adds a nice crunch. You could also serve steamed veggies for a healthy touch. These sides balance the rich flavors of the pasta. Absolutely! You can use gluten-free pasta. Look for options made from rice or quinoa. They work well with the sauce and shrimp. This way, everyone can enjoy the dish. A nice white wine enhances the meal. Try a crisp Sauvignon Blanc or a light Pinot Grigio. They complement the shrimp’s flavors. Enjoying a glass with your meal makes it even better! You now have all the tools to create Garlic Butter Shrimp Pasta. We covered key ingredients, step-by-step cooking methods, helpful tips, and storage information. You can customize this dish with various ingredients and enjoy it your way. Whether you follow the recipe closely or make your own tweaks, your meal will be delicious. Try it out and impress friends or family with your cooking skills. Enjoy the bright flavors of garlic, lemon, and shrimp in every bite!

Garlic Butter Shrimp Pasta Quick and Flavorful Dish

Are you ready to impress your taste buds with a dish that’s both quick and packed with flavor? Garlic Butter

Older posts
Newer posts
← Previous Page1 … Page69 Page70 Page71 … Page127 Next →

dsad

© 2025 Southern Dishes • Built with GeneratePress

Our Policies

  • Copyright Policy
  • Cookie Policy
  • GDPR Policy
  • Privacy Policy
  • Disclaimer
  • Terms Of Use

More Information

  • Home
  • About
  • Contact
  • Appetizers
  • Dessert
  • Dinner
  • Drinks
©2025, Southern Dishes About Back To Top