Skip to content
DisclaimerTerms Of UseGDPR PolicyCookie Policy

Southern Dishes

  • Home
  • Drinks
  • Appetizers
  • Dinner
  • Dessert
  • About
  • Contact
  • Privacy Policy
DisclaimerTerms Of UseGDPR PolicyCookie Policy

Isabella

To make a delicious mango chili limeade, gather these main ingredients: - 2 ripe mangoes, peeled and diced - 1/4 cup fresh lime juice (about 2-3 limes) - 1-2 tablespoons agave syrup (adjust to taste) - 2 cups cold water - 1 small red chili, finely minced (adjust to spice preference) - A pinch of salt These ingredients blend together to create a sweet and zesty drink. The mango gives it a rich taste, while the lime adds brightness. The chili gives it an exciting kick. You can add more flavors to your mango chili limeade with these options: - Ginger, grated (for warmth) - Coconut water (for a tropical twist) - Other fruits, like pineapple or lime (for extra flavor) Try these to make your drink even more special. Each one offers a unique taste that pairs well with mango. Garnishes make your drink look nice and add flavor. Consider these options: - Lime slices for a fresh look - Chili slices for an extra kick - Fresh mint leaves for a pop of color These garnishes not only enhance the visual appeal but also add a burst of flavor. They make your mango chili limeade look fancy and inviting. For the full recipe, check out the details to create this refreshing drink. To make Mango Chili Limeade, start by gathering your ingredients. You will need ripe mangoes, lime juice, agave syrup, cold water, a small red chili, salt, and some fresh herbs for garnish. This drink is quick to prepare and full of flavor. First, peel and dice your mangoes. Then, in a blender, combine the diced mangoes with lime juice, agave syrup, cold water, and a pinch of salt. Blend everything until smooth and frothy. If you like a smoother drink, strain the mixture through a fine mesh sieve. This step is optional, but it helps remove any pulp. Next, stir in the finely minced chili. This adds a spicy kick to the drink. Let the mixture sit for about 10 minutes. This resting time allows the flavors to mix well. After that, taste your limeade. You can adjust the sweetness or spice by adding more agave syrup or chili if needed. When ready to serve, pour the limeade over ice in tall glasses. Garnish each glass with lime slices, chili slices, and fresh mint leaves. This not only looks nice but also adds extra flavor. For the full recipe, refer to the earlier section. Enjoy your refreshing summer beverage! To get the right sweetness, start with ripe mangoes. They add a natural sweetness that shines through. I recommend using 1 to 2 tablespoons of agave syrup at first. Blend it in and taste as you go. If it needs more sweetness, add a little more syrup. Remember, you can always add more but can't take it out! When it comes to spice, start small. I use one small red chili in my recipe. If you want it spicier, add more chili little by little. Let the limeade sit for about 10 minutes after mixing. This time lets the flavors blend well. Always taste before serving. Adjust the spice to match your taste. Serve the Mango Chili Limeade over ice in tall glasses. Add lime slices and chili slices for a colorful touch. A sprig of fresh mint on top gives a nice pop. The mint also adds a fresh aroma. You can prepare your glasses ahead of time. This way, when guests arrive, you can pour and enjoy right away. For the full recipe, check out the details above. {{image_2}} You can change the fruit in your limeade to mix things up. Try using pineapple, peach, or even strawberries. Each fruit brings its own taste and vibe. If you pick a sweeter fruit, you may need less sweetener. Be bold and experiment with your favorite fruits! Do you like it hot? You can adjust the spice level. Use more chilies for a stronger kick. If you want it mild, use less or skip the chilies. You can also try different chilies, like jalapeños or serranos, for unique heat levels. Remember, start small and taste as you go. Looking for a different sweetness? Swap agave for honey or maple syrup. You can also use stevia or coconut sugar for a healthier option. Just keep in mind, each sweetener has a different flavor, so choose one that matches your taste. Adjust the amount to find what works best for you. For the full recipe of this refreshing drink, check out the Full Recipe section! To store leftover Mango Chili Limeade, pour it into a clean jar or container. Make sure to seal it tightly. Keep it in the fridge. This helps the drink stay fresh. Enjoy it within two days for the best taste. Mango Chili Limeade is best cold. It does not need reheating. If you want to enjoy it warm, try adding hot water. This drink tastes great chilled. Its shelf life in the fridge is about two days. After that, the flavors might change. You can freeze Mango Chili Limeade for later use. Pour it into ice cube trays or freezer-safe bags. Leave some space in containers for expansion. When ready to enjoy, thaw it in the fridge. You can blend the frozen cubes into smoothies too. This way, you can enjoy summer flavors anytime! You can find the full recipe to make it fresh again. Mango Chili Limeade comes from Latin American flavors. The mix of sweet mango and spicy chili is common in many dishes. People love to mix fruits with spices in this region. This drink captures that spirit well. It combines freshness with a kick. You can enjoy it as a refreshing drink on hot days. Yes, you can make Mango Chili Limeade vegan. The recipe is already vegan-friendly. It uses mango, lime, and agave syrup as sweeteners. Just ensure that the chili you use is also vegan. This drink is safe for anyone who avoids animal products. You can sip it without worry. To reduce the spiciness, use less chili in the recipe. Start with just a small amount. You can always add more if you want extra heat later. Another way is to strain the drink. This removes some of the chili bits. You can also add more mango or lime juice to balance the spice. Enjoy your drink just the way you like it! Mango Chili Limeade combines sweet, spicy, and tangy flavors for a refreshing drink. We covered its main and optional ingredients, along with garnishes to make it pop. I shared easy steps for blending and infusing flavors, plus tips for sweetness and spice adjustment. You can also explore fruit variations and learn how to store leftovers effectively. Enjoy this drink at your next gathering! It’s fun, easy to make, and always a hit. Just remember to adjust the spice and sweetness to suit your taste.

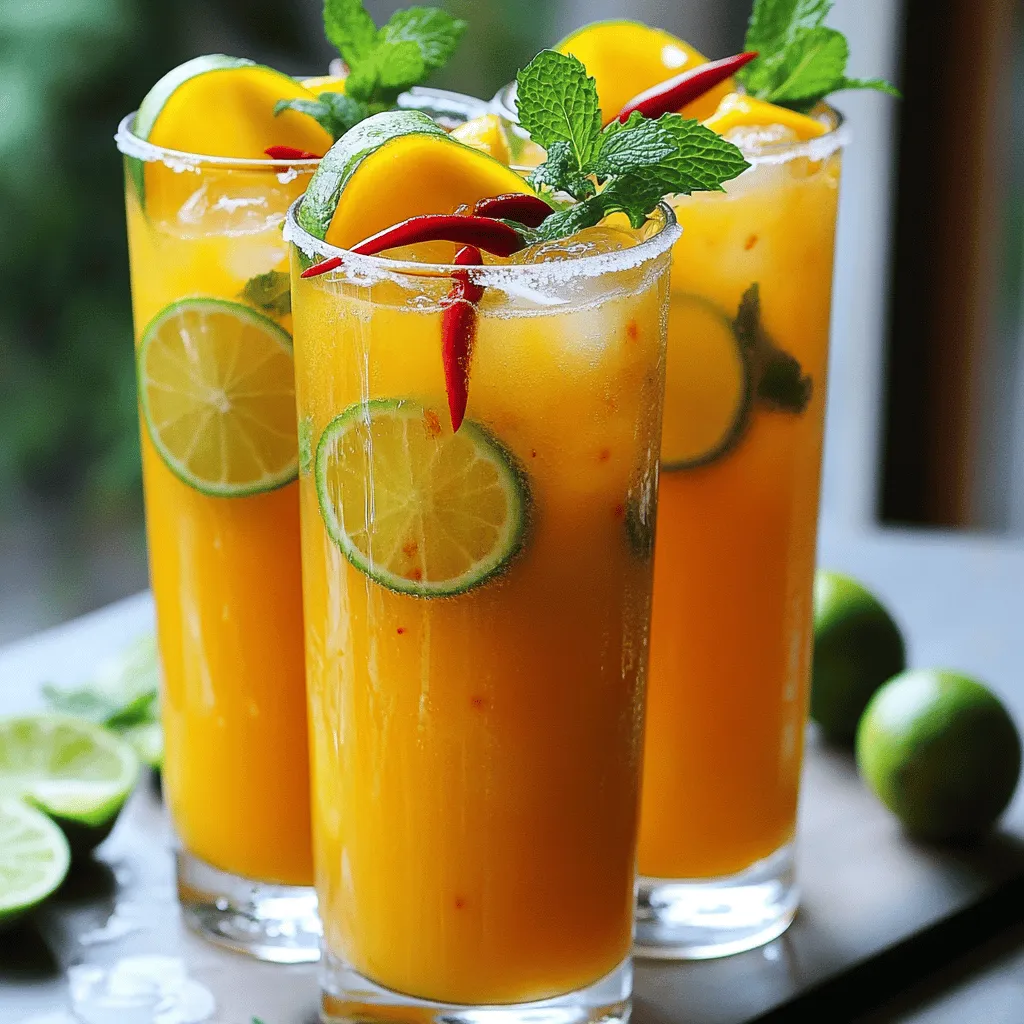
Mango Chili Limeade Refreshing Summer Beverage Recipe

Looking for the perfect drink to cool off this summer? Try my tasty Mango Chili Limeade! It combines sweet mango,

- 2 medium apples (preferably Granny Smith) - 1 banana (frozen) - 1 cup vanilla yogurt - 1 cup milk (dairy or plant-based) - 2 tablespoons caramel sauce (plus extra for drizzling) - Whipped cream (optional) - Apple slices and cinnamon for garnish The key to a great Caramel Apple Pie Smoothie starts with fresh ingredients. I love using Granny Smith apples. Their tartness balances the sweetness of the banana and caramel. You will need two medium apples. Peel and chop them before blending. A frozen banana adds a creamy base. It also gives your smoothie a nice chill. For a rich texture, use one cup of vanilla yogurt. This ingredient adds creaminess and flavor. You can choose dairy or plant-based yogurt based on your preference. Next, you’ll need one cup of milk. Almond, oat, or cow's milk all work well here. The milk helps blend everything smoothly. Now, let’s talk about toppings. I recommend two tablespoons of caramel sauce. Drizzle some on top for extra sweetness. Whipped cream is optional but adds a lovely finish. Don't forget the apple slices and a sprinkle of cinnamon. They not only taste great but also make your smoothie look stunning. For the full recipe, check out the complete instructions. Enjoy creating this delicious fall treat! - Combine chopped apples, frozen banana, yogurt, and milk in a blender. - Blend until smooth. Start by peeling and chopping your apples. I love using Granny Smith apples for their tartness. Next, take a frozen banana. It adds creaminess and sweetness to your smoothie. Add these to your blender along with yogurt and milk. Blend everything until it turns smooth. You want a nice, creamy base for your smoothie. - Mix in caramel sauce, cinnamon, nutmeg, and ice cubes. - Blend until creamy and fully integrated. Now comes the fun part—adding flavors! Pour in the caramel sauce for that sweet touch. Sprinkle in cinnamon and nutmeg for warmth. Toss in ice cubes for a chill. Blend again until everything is creamy and well mixed. Those spices will make your kitchen smell like fall! - Adjust sweetness with more caramel sauce if desired. - Pour into glasses and top with whipped cream and a drizzle of caramel. After blending, taste your smoothie. If you want it sweeter, add a bit more caramel sauce. Once you're happy, pour it into glasses. For a special touch, top each glass with whipped cream and a drizzle of caramel. You can also garnish with apple slices and a sprinkle of cinnamon. This makes your smoothie not just tasty, but beautiful too! For the full recipe, check out the details above. To make your Caramel Apple Pie Smoothie shine, choose the right apples. I suggest using Granny Smith apples. They bring a nice tartness that balances well with sweetness. Look for apples that are firm and free from bruises. They should smell fresh and fruity. For yogurt, you can use vanilla yogurt for creaminess. If you're dairy-free, try coconut or almond yogurt. Milk is another key player. Dairy milk works well, but almond, oat, or cashew milk are great options too. These choices add their unique flavors while keeping it smooth. To get the best texture, add your ingredients in the right order. Start with the soft items like yogurt and milk. Then, add the harder items like apples and frozen banana. This helps the blender work better. Blend until smooth, but don’t rush it. Using frozen fruit makes your smoothie creamier. A frozen banana is perfect for this. You can freeze apple chunks too. This trick helps keep your smoothie cold without diluting it. Garnishing your smoothie makes it look special. Top it with whipped cream for a treat. Drizzle extra caramel sauce on top for a sweet touch. Sprinkle some cinnamon for an extra kick. For serving, glassware can make a difference. Use tall glasses to show off those layers. You can also add apple slices on the rim for a cute look. This adds a fresh touch and makes it fun to drink. {{image_2}} You can make your Caramel Apple Pie Smoothie even better. Try adding a scoop of protein powder. This gives you extra nutrition and makes it filling. You can also mix in other fruits. Pears and peaches work well and add new flavors. Want to make this recipe vegan? Use plant-based yogurt and milk. You can also skip the caramel sauce for a dairy-free option. For a healthier version, try reducing sugar. Use natural sweeteners like honey or maple syrup instead. Do you prefer a thicker smoothie? Add more frozen banana or ice cubes. If you want a thinner smoothie, just add more milk. You can also switch up the milk type. Almond milk or oat milk can change the flavor and texture, too. To store leftover smoothie in the fridge, pour it into a tight container. Make sure to seal it well. It stays fresh for about one day. When you are ready to drink, shake or stir it well. If you want to freeze smoothie portions, use ice cube trays. Pour the smoothie into the trays and freeze until solid. Once frozen, pop the cubes into a bag. They can last for up to three months in the freezer. To refresh a previously frozen smoothie, let it sit in the fridge overnight. You can also blend it again with a splash of milk. This helps bring back its creamy taste. You can get creative with leftover smoothie. Try pouring it over oatmeal for breakfast. It adds flavor and nutrients. You can also mix it into pancake batter. It gives your pancakes a tasty twist. For a fun treat, freeze small portions in popsicle molds. Enjoy your smoothie in a new way! Can I use frozen apples in this smoothie recipe? Yes, you can use frozen apples! They make the smoothie cold and thick. Just peel and chop them first for a smoother blend. How can I make this smoothie ahead of time? You can prep this smoothie in advance! Blend all the ingredients, then store it in the fridge for up to a day. Just give it a quick stir before drinking. Is it possible to make this without yogurt? Yes, you can skip the yogurt. Use extra banana or a plant-based milk instead. This will still give your smoothie a creamy texture. What is the calorie count per serving? This smoothie has about 300 calories per serving. The apples and banana add natural sweetness and nutrition. Is this smoothie a good source of fiber? Yes, it is! The apples and banana provide a good amount of fiber. This helps with digestion and keeps you full longer. What can I substitute for caramel sauce? If you want a different flavor, try maple syrup or honey. These options still give a sweet touch to your smoothie. Can I use other sweeteners instead of sugar? Absolutely! You can use agave syrup or stevia as a sweetener. Adjust the amount to fit your taste. For the full recipe, check out the detailed instructions above. This blog post shared a fun smoothie recipe using apples, bananas, yogurt, and milk. I detailed steps for blending, added tips on ingredient choices, and offered variations. You can create a tasty drink that's healthy and easy to make. Whether you're garnishing for a party or adjusting for dietary needs, these tips ensure success. Enjoy crafting your smoothie and don't hesitate to experiment. Each blend can be your new favorite drink!

Caramel Apple Pie Smoothie Delicious Fall Flavor Treat

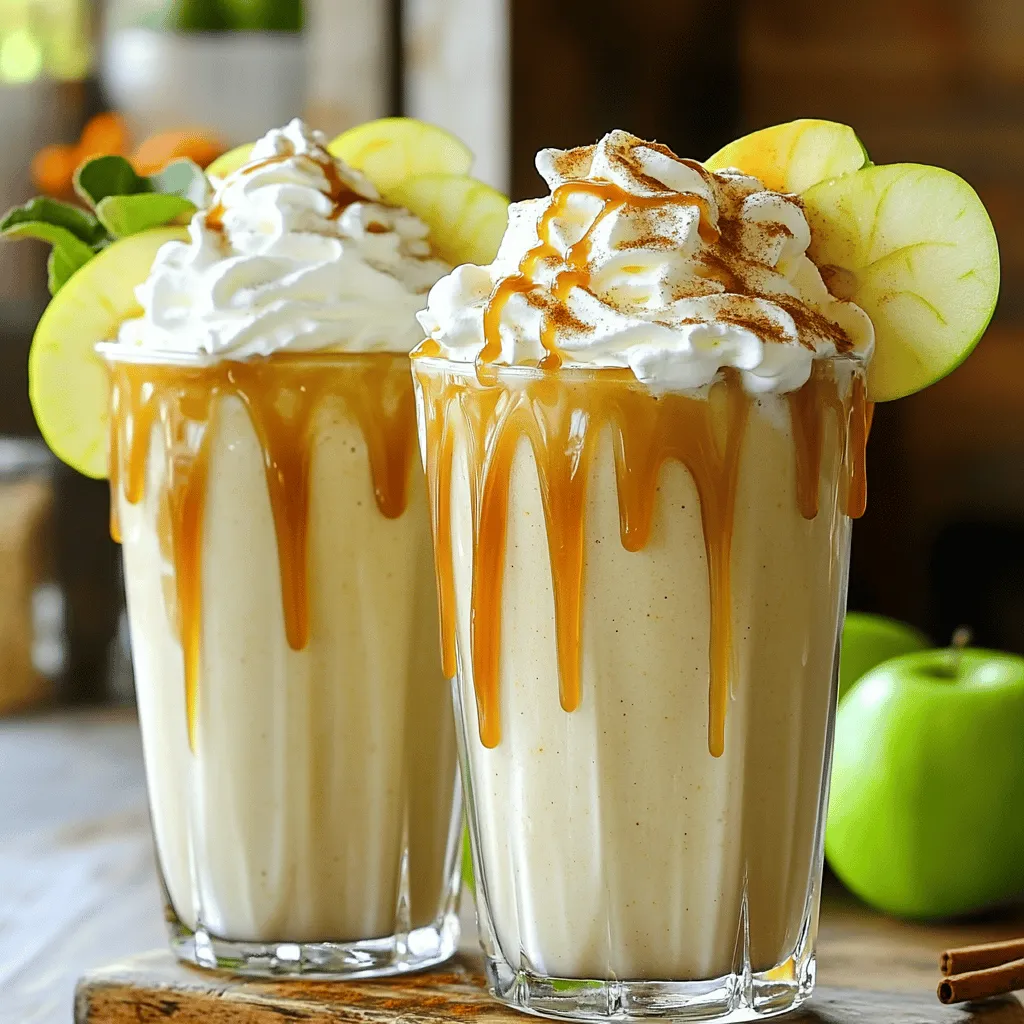
Fall is here, and with it comes the warm, cozy flavors of caramel apple pie! I’m excited to share my

- 2 large cucumbers, peeled and roughly chopped - 1/4 cup freshly squeezed lime juice (about 2-3 limes) - 3 tablespoons agave syrup (adjust to taste) - 4 cups cold water - A pinch of salt - Lime slices and cucumber slices for garnish - Fresh mint leaves for garnish Cucumber Lime Agua Fresca is a simple and tasty drink. You only need a few fresh ingredients. First, cucumbers are the star here. They add a cool and refreshing taste. Next, lime juice brings a nice tangy flavor. Agave syrup adds sweetness to balance the tartness. Cold water helps blend everything together. A pinch of salt is key; it enhances all the flavors. For garnishes, lime and cucumber slices look pretty. They also add extra flavor. Fresh mint leaves can give a burst of freshness. You can choose to use them or keep it simple. This recipe is perfect for hot days. It’s easy to make and fun to drink. You can find the full recipe details below to get started! 1. Blend cucumbers and water until smooth. Start by peeling and roughly chopping your cucumbers. Place them in a blender with cold water. Blend until the mixture is smooth and green. 2. Strain the mixture through a fine mesh sieve. Take a fine mesh sieve and place it over a large pitcher. Pour the cucumber blend into the sieve. Use the back of a spoon to press and extract as much liquid as you can. Discard any pulp left in the sieve. 1. Add lime juice, agave syrup, and salt. Once you have your cucumber juice, add the freshly squeezed lime juice. Then, pour in the agave syrup and a pinch of salt. 2. Stir to dissolve the syrup. Mix everything well. Stir until the agave syrup dissolves completely. Taste the mix. If you like it sweeter, add more agave syrup to your liking. 1. Refrigerate to meld flavors. Cover the pitcher and place it in the refrigerator for at least 30 minutes. This helps the flavors blend together nicely. 2. Serve over ice with garnishes. When ready to serve, fill glasses with ice. Pour the chilled cucumber lime agua fresca over the ice. Garnish with lime slices and cucumber slices for a fresh touch. If you want, add fresh mint leaves for extra flavor. For the detailed recipe, check the Full Recipe. Enjoy your refreshing summer drink! To balance flavors, use agave syrup. Start with three tablespoons. Stir it in well. Taste the agua fresca after mixing. If it’s not sweet enough, add more syrup. This drink should be refreshing, not overly sweet. Agave syrup blends well with lime’s tartness. Remember, sweetness can depend on the cucumbers. Some are sweeter than others. Adjust based on your taste. You can prepare cucumber lime agua fresca in advance. Make it a few hours before serving. This allows flavors to meld perfectly. Store it in the fridge until you’re ready to serve. Just remember to give it a good stir before pouring. If you want to make it the night before, that’s fine too. Just keep it covered in the fridge. Pair this drink with light meals. It goes great with tacos, salads, or grilled chicken. Serve it at summer parties or picnics. The coolness of the drink complements warm weather. You can also serve it at brunch with fresh fruit. For a fun twist, add some sparkling water. This adds a bubbly texture that many love. {{image_2}} You can add fun flavors to your Cucumber Lime Agua Fresca. Fresh herbs like mint or basil brighten the drink. Just toss in a handful when blending for a fresh twist. You can also use fruits like watermelon or pineapple. These additions make the drink even more refreshing! If you want a lighter drink, swap agave syrup for a low-calorie sweetener. Options like stevia or monk fruit work well. They add sweetness without the extra calories. Just remember to adjust the amount to taste, as some sweeteners are stronger than agave. Mixing in other fruits can create unique flavors. Try adding strawberries, mangoes, or even peaches. Each fruit brings a different taste and color. Blend them with the cucumber for a fresh, fruity drink. Feel free to experiment and find your favorite mix! For the full recipe, check out the details above. After making Cucumber Lime Agua Fresca, store any leftovers in a clean pitcher. Cover it tightly with a lid or plastic wrap. This keeps the drink fresh and tasty. Always chill it in the fridge. Cold drinks are best on hot days! You can freeze Cucumber Lime Agua Fresca for long-term storage. Pour it into ice cube trays or freezer-safe containers. Leave some space at the top for expansion. When you’re ready to enjoy it again, thaw it in the fridge overnight. You can also blend the frozen cubes into smoothies. Cucumber Lime Agua Fresca lasts about 3 to 5 days in the fridge. After that, the flavors may fade. If you notice any off smells or changes in color, it’s best to toss it. Enjoy it while it’s fresh for the best taste! Cucumber lime agua fresca is a cool drink made from fresh cucumbers and lime juice. This drink comes from Mexico, where it is popular on hot days. The word "agua fresca" means "fresh water." It’s light, refreshing, and perfect for summer. You can enjoy it at picnics or family gatherings. The taste is a mix of sweet, tangy, and crisp flavors. This drink is also very hydrating, making it a great choice when it's hot outside. You can use bottled lime juice if you need to. However, fresh lime juice tastes better and has more flavor. Fresh limes give a bright, zesty kick that enhances the drink. Bottled juice often lacks the same freshness. If you want to make the best cucumber lime agua fresca, I recommend using fresh limes. It only takes a few minutes to squeeze them. The taste difference is worth it. To make more servings, you can easily scale the recipe up. If you want to double the recipe, just double all the ingredients. For example, use 4 cucumbers, 1/2 cup of lime juice, and 8 cups of water. You can also make less by cutting the amounts in half. Just remember to keep the same proportions. This way, the drink will still taste great. You can find the full recipe for cucumber lime agua fresca to help with the measurements. This blog post covered how to make a refreshing Cucumber Lime Agua Fresca. We explored the easy steps, from blending cucumbers to serving chilled with garnishes. You learned tips for adjusting sweetness and ways to store your drink. Don't forget, you can mix in other fruits or herbs for fun twists. This drink is perfect for hot days or gatherings. Enjoy making it and impress your friends with your skills!

Cucumber Lime Agua Fresca Refreshing Summer Drink

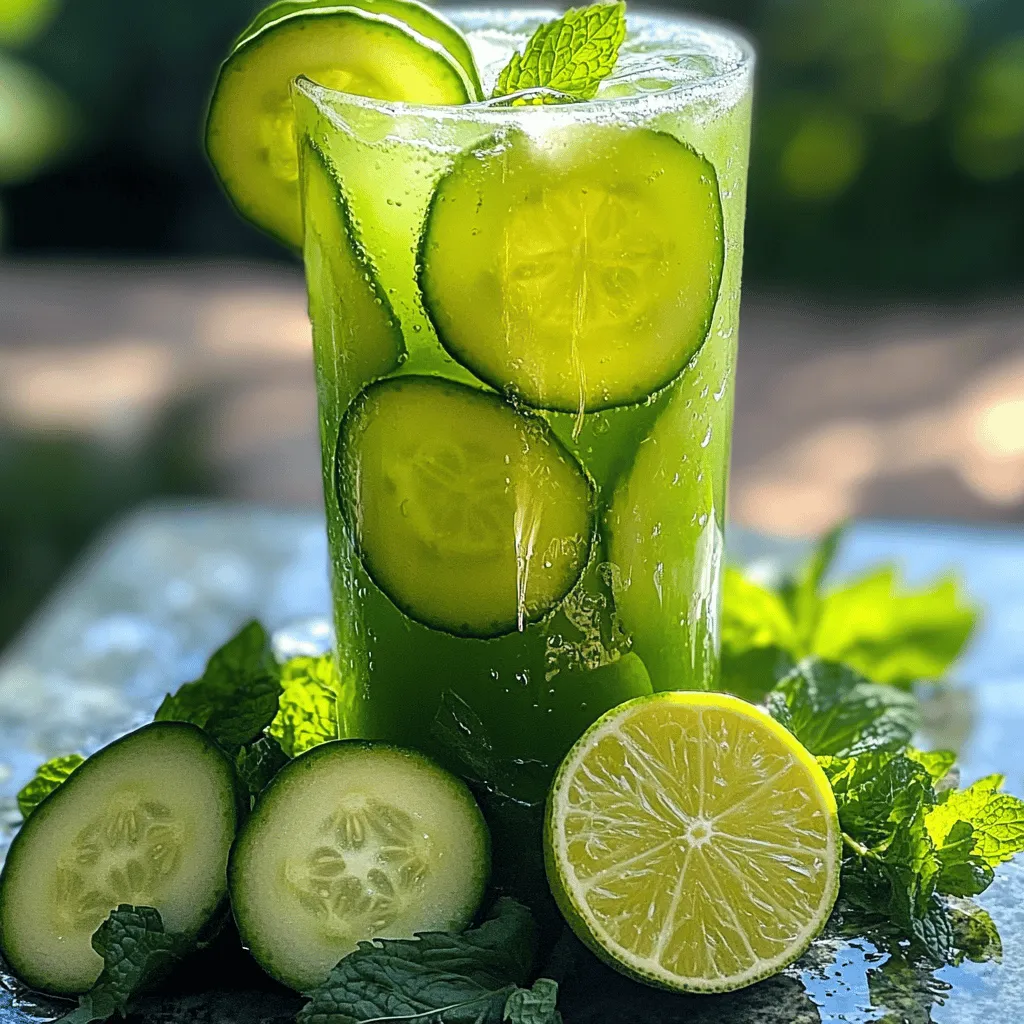
Looking for a cool drink to beat the heat? Cucumber Lime Agua Fresca is the perfect choice! This refreshing summer

- 1 cup fresh or frozen raspberries - 1 cup milk (dairy or non-dairy) - ½ cup white chocolate chips - 1 cup ice cubes - 1 tablespoon honey or maple syrup - Whipped cream for topping - Fresh raspberries and white chocolate shavings for garnish When measuring, use a set of dry and liquid measuring cups. For sticky items like honey, use a liquid measuring cup for easy pouring. For dry ingredients, fill the cup and level it off with a knife. This method keeps your measurements accurate. You can switch out white chocolate chips for dark chocolate or even milk chocolate. If you want a vegan option, use almond, oat, or coconut milk. Maple syrup works great but feel free to use agave nectar if you prefer. Fresh raspberries can be swapped for strawberries or blueberries, bringing a new twist to your frappe. This is the [Full Recipe] for the Raspberry White Chocolate Frappe, where you can find all details for making this sweet treat. Enjoy! First, gather all your ingredients for the Raspberry White Chocolate Frappe. You will need: - 1 cup fresh or frozen raspberries - 1 cup milk (dairy or non-dairy) - ½ cup white chocolate chips - 1 cup ice cubes - 1 tablespoon honey or maple syrup - Whipped cream for topping - Fresh raspberries and white chocolate shavings for garnish Make sure your raspberries are washed if they are fresh. If you use frozen ones, there's no need to thaw them. Measure out the milk and white chocolate chips. Keep everything close by for easy access. Now it’s time to blend your ingredients. In a blender, combine the raspberries, milk, white chocolate chips, ice cubes, and honey or maple syrup. Blend on high until the mixture is smooth and creamy. If you like a thicker frappe, add more ice and blend again. Next, taste your frappe. If you want it sweeter, add a bit more honey or syrup. Blend again briefly to mix. This step is key. You want the perfect balance of flavors. Pour the frappe into tall glasses, leaving some space at the top. This space is for the whipped cream. Add a generous dollop of whipped cream on each glass. It makes the drink look fancy and taste even better! Finally, add a few fresh raspberries on top. Sprinkle white chocolate shavings for that extra touch. Trust me, this makes your frappe even more delightful. Enjoy your homemade Raspberry White Chocolate Frappe! For full details, check the Full Recipe. To get the right texture for your Raspberry White Chocolate Frappe, start with the ice. Use one cup of ice cubes. If you want it thicker, add more ice. Blend the ingredients until smooth. If it’s too thick, add a little milk. Blend again until you reach your desired creaminess. You can add more flavors to this frappe. Try a splash of vanilla extract for warmth. A few mint leaves can bring a fresh twist. If you like extra sweetness, add more honey or maple syrup. Just blend it all together. Always taste your mixture before serving. Adjusting flavors helps you create your perfect drink. Serving your frappe can be fun! Use tall glasses to show off the colors. Top with whipped cream for a creamy layer. Add fresh raspberries on top for a pop of color. White chocolate shavings are a great final touch. They add an elegant look and flavor. Use a straw or a spoon for easy sipping. Enjoy your beautiful drink! {{image_2}} You can easily make a dairy-free or vegan version of this frappe. Use almond, soy, or oat milk instead of regular milk. The white chocolate chips can be swapped for dairy-free chips. This change keeps the creamy taste and sweetness while making it suitable for those who avoid dairy. You can switch the raspberries for other fruits based on the season. Strawberries, blueberries, or even peaches work well. Each fruit brings its own unique flavor. For a tropical twist, try mango or pineapple. Just remember to adjust the sweetness if needed! Want to add a little more flavor? Try adding a touch of mint or vanilla extract. A few mint leaves in the blender can give it a fresh taste. A splash of vanilla can enhance the sweet notes from the white chocolate. These simple additions can transform your frappe into a new delight. If you have some Raspberry White Chocolate Frappe left over, store it in the fridge. Use an airtight container to keep it fresh. It will stay good for about one day. After that, the texture may change. When you are ready to enjoy it again, give it a good shake or stir. You can freeze the frappe if you want to save it longer. Pour the leftover frappe into ice cube trays or freezer-safe bags. This way, you can use it later in smoothies or other drinks. It can last up to three months in the freezer. When you’re ready to use it, just blend the cubes with a bit of milk for a quick treat. Reheating is not the best option for this drink. If you try it, use a low heat setting. Heat it slowly in a pot or microwave. Be careful not to boil it, as this can change the flavor. If you want it cold again, blend it with some ice instead. This will bring back its refreshing taste and texture. If you want to skip white chocolate, try using yogurt. Greek yogurt adds creaminess and tang. You can also use vanilla bean paste. This gives a sweet flavor without the chocolate. If you like dark chocolate, use dark chocolate chips instead. They add a rich taste and a fun twist. Yes, you can make the frappe ahead of time! Blend the ingredients and store it in the fridge for up to two hours. If you want to keep it longer, freeze it. Pour it into ice cube trays. When ready, blend the frozen cubes with a little milk. This makes a great quick treat! You can easily change how sweet your frappe is. Add more honey or maple syrup for extra sweetness. If it’s too sweet, balance it with a splash of lemon juice. This will brighten the flavors. Taste as you go to get it just right! For more ideas, check the Full Recipe. This blog post shared how to make a delicious raspberry frappe. You learned about key ingredients, measurement tips, and substitutions. We covered step-by-step instructions for preparing, blending, and serving your drink. Tips for perfect consistency and flavor enhancements will help you along the way. Explore the variations for dietary needs and seasonal tastes. Finally, remember proper storage and reheating tips. Enjoy your frappe and get creative with it!

Raspberry White Chocolate Frappe Delightful Treat

Looking for a cool, tasty treat? The Raspberry White Chocolate Frappe is just the thing! This delightful drink blends fresh

For a tasty Jamaican curry chicken, you need the following main items: - 2 lbs chicken thighs, cut into bite-sized pieces - 1 onion, chopped - 3 cloves garlic, minced - 1-inch piece ginger, grated - 1 bell pepper, chopped (green or yellow) - 1 can (14 oz) coconut milk - 1 cup chicken broth - 2-3 sprigs fresh thyme - 1-2 Scotch bonnet peppers, whole (adjust for heat preference) - Salt and pepper to taste - 2 tablespoons vegetable oil These ingredients work together to create a rich, flavorful dish. The chicken thighs stay juicy, while the coconut milk adds creaminess. The right spices make Jamaican curry chicken special. You will use: - 2 tablespoons Jamaican curry powder - 1 teaspoon allspice - 1 teaspoon smoked paprika These spices give the dish warmth and depth. The Jamaican curry powder brings a unique flavor, while allspice adds a hint of sweetness. To make your meal even better, consider these garnishes and sides: - Fresh cilantro or parsley for garnish - Fluffy white rice or traditional Jamaican rice and peas These extras add color and freshness to your plate. The rice soaks up the delicious sauce, making every bite perfect. {{ingredient_image_1}} Start by marinating the chicken. Take 2 lbs of chicken thighs and cut them into bite-sized pieces. In a large bowl, mix the chicken with 2 tablespoons of Jamaican curry powder. Add 1 teaspoon of allspice and 1 teaspoon of smoked paprika. Season with salt and pepper to taste. Toss everything well. Cover the bowl and let it sit for at least 30 minutes. This step boosts the flavor of your chicken. Next, heat 2 tablespoons of vegetable oil in a large pot over medium heat. Add 1 chopped onion, 3 minced garlic cloves, and 1 inch of grated ginger. Stir and sauté for about 3-4 minutes. You want the onions to turn translucent. This base adds depth to your dish. Now, it's time to brown the chicken. Increase the heat to medium-high. Add the marinated chicken to the pot. Cook for about 5-7 minutes, stirring often. After the chicken is browned, add 1 chopped bell pepper. Then pour in a 14 oz can of coconut milk and 1 cup of chicken broth. Toss in 2-3 sprigs of fresh thyme and 1-2 whole Scotch bonnet peppers. Bring this mixture to a simmer. Reduce the heat to low and cover the pot. Let it simmer for 30-40 minutes. Stir occasionally to mix the flavors. Check for tenderness; the chicken should be fully cooked. Adjust the seasoning with more salt and pepper, if needed. If you want extra heat, poke the Scotch bonnet to release more flavor. Before serving, remove the Scotch bonnet and thyme sprigs. Serve your Jamaican curry chicken in deep bowls over fluffy white rice or traditional rice and peas. Enjoy the vibrant flavors! To boost the flavor of your Jamaican curry chicken, marinate the chicken well. Use Jamaican curry powder, allspice, and smoked paprika. Mix these spices with salt and pepper. Allow the chicken to sit in this spice mix for at least 30 minutes. If you have more time, let it marinate for a few hours or overnight. This step makes the chicken tasty and tender. Scotch bonnet peppers add a unique heat to your dish. If you like spice, use one or two whole peppers. For less heat, use a single pepper and keep it whole. You can also poke holes in the pepper before adding it to the pot. This helps release more heat during cooking. Always taste your dish before serving. You can remove the pepper if it is too spicy. Cooking time is key for tender chicken. After browning, simmer the chicken for 30 to 40 minutes. This slow cooking allows the chicken to absorb all the flavors. Stir occasionally to prevent sticking. Check if the chicken is fully cooked. It should be tender and juicy. If you want, use a meat thermometer. The chicken should reach 165°F for safety. Pro Tips Marination Magic: Allow your chicken to marinate for a few hours or overnight for deeper flavor absorption. Heat Control: Adjust the number of Scotch bonnet peppers according to your heat tolerance. Remember, you can always add more spice, but it’s hard to take it away! Texture Matters: For a creamier sauce, blend a portion of the coconut milk before adding it to the pot. This will enhance the overall texture of your curry. Garnish Game: Fresh herbs like cilantro or parsley not only add color but also elevate the dish's flavor profile. Don’t skip this step! {{image_2}} You can switch out chicken for other proteins. Goat meat is a popular choice in Jamaica. It adds a rich flavor that many love. If you prefer plant-based options, try tofu. Firm tofu works well and absorbs all the spices. Make sure to marinate it just like chicken. This way, it picks up that amazing Jamaican taste. You can easily make this dish vegan or vegetarian. Instead of chicken, use chickpeas or jackfruit. Both options take on flavors well. For the base, keep the coconut milk and spices. Add more veggies like carrots, zucchini, or spinach for texture and color. These additions will make the dish hearty and satisfying. Get creative with your vegetables and spices. You can add potatoes or sweet potatoes for extra starch. Carrots add sweetness and color, too. If you like it spicy, add more Scotch bonnet peppers or a dash of cayenne. For a different twist, try adding turmeric or coriander. These spices enhance the flavor and give a unique taste to your curry. Store any leftover Jamaican curry chicken in an airtight container. Place it in the fridge. It will stay fresh for about three to four days. Make sure it cools down before sealing. This helps keep the flavor intact. You can freeze Jamaican curry chicken for longer storage. Use a freezer-safe container or bag. It will last for about three months in the freezer. Label the bag with the date. This way, you’ll know when to use it. To reheat, take the curry out of the fridge or freezer. If frozen, let it thaw overnight in the fridge. Then, heat it in a pot over medium heat. Stir often to avoid burning. You can also use the microwave. Heat it in short bursts, stirring in between. Make sure it’s hot all the way through before serving. Enjoy your flavorful meal again! Jamaican Curry Chicken has roots in Indian cooking. Indian workers brought curry to Jamaica in the 19th century. The dish blends Indian spices with local ingredients. Many Jamaicans enjoy this dish with rice or peas. It reflects Jamaica’s rich culture and history. You can taste the mix of flavors in every bite. Yes, you can use other curry powders. Each type has a unique flavor and heat level. Try Thai or Indian curry powder for a different taste. Just remember to adjust the amount as needed. Jamaican curry powder has a distinct flavor, so keep that in mind. Experimenting can lead to delicious results. Jamaican Curry Chicken pairs well with rice. Fluffy white rice absorbs the sauce nicely. Rice and peas is another great choice. The creaminess of coconut milk complements the rice. You can also serve it with fried dumplings or plantains. These options add texture and flavor to your meal. Don’t forget to garnish with fresh herbs for extra flavor! Jamaican curry chicken is a delicious dish full of bold flavors. We explored its key ingredients and spices, and discussed how to marinate and sauté for the best results. You learned tips to adjust the heat and ensure tender chicken. If you want to vary your dish, try different proteins or add extra veggies. Store any leftovers correctly for later enjoyment. Enjoy your cooking, and may your Jamaican curry chicken inspire many meals.

Jamaican Curry Chicken Flavorful and Easy Meal Guide

If you’re craving a dish that’s bursting with flavor, look no further than Jamaican Curry Chicken. This meal is not

- 1 cup sushi rice - 1 ¼ cups water - 1 tablespoon rice vinegar - 1 teaspoon sugar - ¼ teaspoon salt - 8 oz sushi-grade tuna, diced - 1 tablespoon sriracha (adjust to taste) - 1 tablespoon mayonnaise The main ingredients are essential for a tasty bowl. Sushi rice acts as the base. Use high-quality sushi-grade tuna for the best flavor and safety. The sriracha and mayonnaise mixture adds creaminess with a kick. This blend makes the tuna shine. - 1 avocado, sliced - 1 cucumber, thinly sliced - 2 green onions, chopped - 1 tablespoon sesame seeds - Nori strips for garnish - Soy sauce for drizzling These toppings elevate your bowl. Avocado adds creaminess, while cucumber offers a refreshing crunch. Green onions and sesame seeds give extra flavor and texture. Nori strips bring a fun, crispy touch. Don’t forget a drizzle of soy sauce for depth. - Medium saucepan - Mixing bowls - Serving dishes You need a medium saucepan to cook the rice. Mixing bowls help you combine ingredients easily. Serving dishes make your bowl look appealing. Having the right tools makes cooking more enjoyable. Make sure to gather everything before you start. To start, rinse the sushi rice well. Place it in a bowl and cover it with cold water. Swirl it around and drain. Repeat this about three to four times until the water runs clear. This step removes excess starch, keeping the rice fluffy. Next, cook the rice. Combine one cup of rinsed rice with 1 ¼ cups of water in a medium saucepan. Bring the mixture to a boil over medium-high heat. Once it boils, reduce the heat to low. Cover the pan and let it simmer for 18 minutes. After that, remove the pan from heat and let it sit covered for another 10 minutes. This resting time is key for perfect rice. Now, season your rice. In a small bowl, mix one tablespoon of rice vinegar, one teaspoon of sugar, and ¼ teaspoon of salt. Stir until dissolved. Transfer the cooked rice to a large bowl. Gently fold in the vinegar mixture. Allow the rice to cool to room temperature before using it in the bowl. Now, let’s prepare the spicy tuna. In a separate bowl, combine 8 oz of diced sushi-grade tuna with one tablespoon of sriracha and one tablespoon of mayonnaise. Stir gently to coat the tuna evenly. You can adjust the amount of sriracha based on how spicy you want the dish. This mixture adds a bold flavor to your sushi bowl. Time to assemble your sushi bowl! Start by distributing the cooled sushi rice into serving bowls. Make sure to pack the rice evenly at the bottom. Next, top each bowl with a generous portion of the spicy tuna mixture. Now, arrange your toppings. Place slices of avocado and thin cucumber next to the tuna. This adds freshness and crunch to the dish. Finally, finish with garnishes. Sprinkle chopped green onions and sesame seeds over the bowls. You can also add strips of nori for an extra crunch. Drizzle with soy sauce just before serving for that perfect umami kick. Enjoy your delicious creation! For the complete recipe, check [Full Recipe]. To achieve perfect sushi rice, start by rinsing the rice well. Rinse it under cold water until the water is clear. This step removes excess starch, which helps the rice stay fluffy. You should rinse it about three to four times. Next, cook the rice in a medium saucepan. Combine one cup of rinsed rice with 1 ¼ cups of water. Bring it to a boil, then lower the heat. Cover and simmer for 18 minutes. After cooking, let it sit for an extra 10 minutes. This resting time helps the rice absorb any remaining moisture. To avoid mushy rice, make sure not to overcook it. Keep an eye on the water level while it cooks. If you find the rice too soft, try using less water next time. The goal is to have each grain separate and tender. When making the spicy tuna, you can adjust the spice to suit your taste. Start with one tablespoon of sriracha. If you want more heat, add more sriracha a little at a time until it's perfect for you. Mixing in mayonnaise helps mellow the spice, creating a creamy texture. You can also add a dash of soy sauce for an extra umami kick. To enhance the flavor, consider adding ingredients like lime juice or sesame oil. These add brightness and depth to your tuna mix. A pinch of salt can also elevate the overall taste. Creating an appealing sushi bowl is all about layering. Start with a base of sushi rice. Then, add a generous scoop of spicy tuna on top. Arrange avocado slices and cucumber artfully on the side. This not only looks great, but it also allows each ingredient's flavor to shine. For garnishing, sprinkle chopped green onions and sesame seeds on top. This adds color and crunch. Finally, add nori strips for texture and visual appeal. Drizzling soy sauce just before serving adds a glossy finish. {{image_2}} You can switch out tuna for salmon. Salmon brings a rich flavor and is easy to find. Tofu is a great choice for a plant-based meal. It absorbs flavors well and adds a nice texture. You can also try shrimp or crab for a different taste. These proteins can change the whole vibe of your bowl. Feel free to get creative with your toppings! You can add carrots, radishes, or bell peppers for extra crunch. Try shredded cabbage or baby spinach for more color and nutrients. For sauces, think about adding ponzu or a spicy mayo drizzle. These will add layers of flavor and make your bowl unique. If you need a gluten-free option, use tamari instead of soy sauce. This keeps your bowl safe for those with gluten sensitivity. For a vegan or vegetarian version, skip the fish and use marinated tofu. You can also use chickpeas for added protein. These options let everyone enjoy the delicious flavors of the sushi bowl. For the full recipe, check out the Spicy Tuna Sushi Bowl recipe. To keep your spicy tuna sushi bowl fresh, store leftovers in the fridge. Use an airtight container. This helps prevent odors and keeps the tuna safe. The sushi rice stays fresh for about three days. The spicy tuna mix can last one to two days. Always check for signs of spoilage before eating. Reheating sushi rice can be tricky. The best method is to steam it. This keeps the rice moist. For tuna, avoid reheating. Fish should be eaten cold after cooking. If necessary, use it in a different recipe or toss it if it looks off. Always follow safety rules with refrigerated fish. You can freeze sushi rice, but it may change texture. Wrap it tightly in plastic wrap and place it in a freezer bag. Sushi-grade tuna can also be frozen. Wrap it well and freeze for up to two months. To thaw, place it in the fridge overnight. Never thaw at room temperature to keep it safe. A Spicy Tuna Sushi Bowl is a bright and fresh meal. It features sushi rice topped with spicy tuna. You can also add avocado, cucumber, and green onions. The dish combines textures and flavors. The creamy avocado and crunchy cucumber balance the heat of the tuna. Sushi bowls are easy to customize for any taste. You can control the heat easily. Start with one tablespoon of sriracha. Taste the tuna mixture before adding more. If you prefer less spice, use less sriracha. You can also add a bit of mayonnaise for creaminess. It helps tone down the heat. For more spice, add a pinch of chili flakes or a dash of hot sauce. Yes, you can prepare sushi rice in advance. Cook it a few hours before serving. Let it cool at room temperature. Store it in an airtight container. The rice stays good for up to two days in the fridge. For best results, use the rice within one day. Reheat it gently before serving. To sum up, we explored creating a Spicy Tuna Sushi Bowl. You learned about key ingredients like sushi rice and tuna. We also discussed toppings, tools, and easy step-by-step instructions. Remember to perfect your rice and adjust the spice to your liking. There are endless variations, whether you prefer salmon or tofu. Plus, we covered storage tips to keep your bowl fresh. Enjoy making your sushi bowl and customizing it to your taste. Happy cooking!

Spicy Tuna Sushi Bowl Flavorful and Simple Recipe

Are you craving a delicious yet simple meal? This Spicy Tuna Sushi Bowl is the perfect answer! With fresh sushi-grade

To make Taco Stuffed Bell Peppers, gather these main ingredients: - 4 large bell peppers (any color) - 1 lb ground turkey or beef - 1 can (15 oz) black beans, rinsed and drained - 1 cup corn (canned or frozen) - 1 cup diced tomatoes (canned or fresh) - 1 packet taco seasoning - 1 cup cooked rice (white or brown) - 1 cup shredded cheese (cheddar or Mexican blend) - 1/4 cup fresh cilantro, chopped (optional) - Salt and pepper to taste - 1 tablespoon olive oil These ingredients combine to create a tasty meal that is also colorful. The bell peppers add crunch and sweetness, while the ground turkey or beef provides protein. The beans and corn enhance the texture, and the spices bring it all together. You can make this recipe your own by adding optional ingredients. Here are some ideas: - Chopped onions for extra flavor - Jalapeños for a spicy kick - Avocado or guacamole for creaminess - Sour cream or Greek yogurt for topping Feel free to mix and match based on your taste. Each ingredient adds its unique flair to the dish. If you have dietary needs, don't worry! You can make easy swaps: - Use quinoa instead of rice for a gluten-free option. - For a vegetarian version, replace meat with lentils or mushrooms. - Swap cheese for a dairy-free alternative if needed. These adjustments keep the dish healthy while still being delicious. Always check ingredient labels to ensure they meet your needs. Start by preheating your oven to 375°F (190°C). While the oven heats, take your bell peppers and slice off the tops. Make sure to remove the seeds and membranes inside. This step helps the peppers cook evenly. Use a brush to lightly coat the outside of the peppers with olive oil. Place them upright in a baking dish. This will help them hold their filling later. In a large skillet, heat over medium. Add 1 pound of ground turkey or beef. Cook until browned, stirring often. After cooking, drain any fat from the pan. Next, add the taco seasoning to the meat. Include black beans, corn, diced tomatoes, and cooked rice. Stir everything well and let it simmer for about 5 minutes. This allows the flavors to mix nicely. Season the mixture with salt and pepper to your taste. Grab your prepared bell peppers. Spoon the taco meat mixture into each pepper, making sure to pack it tightly. Do not leave empty space inside. Once filled, top each pepper with shredded cheese. This will create a delicious, melty topping. Cover the baking dish with aluminum foil and bake for 25-30 minutes. After that, remove the foil and bake for an extra 10-15 minutes. The cheese should be bubbly, and the peppers will be tender. After baking, let the peppers cool for a few minutes. For some extra flavor, sprinkle chopped cilantro on top before serving. Check out the Full Recipe for complete details. To make your taco stuffed bell peppers shine, choose fresh, firm peppers. This helps them hold their shape. When you cut off the tops, leave enough pepper to form a nice cup. Make sure to remove all the seeds and membranes for a clean bite. Always pre-cook your filling. This lets flavors blend and ensures even cooking. Pack the filling tightly into the peppers. This will help them stay intact while baking. One common mistake is not seasoning the filling. Taste your mixture before stuffing. Add salt, pepper, or extra taco seasoning if needed. Avoid overfilling the peppers. Too much filling can spill out during cooking. Another mistake is undercooking the peppers. Make sure they bake until tender. This makes for a better texture in every bite. To boost flavor, try using smoked paprika or cumin in the filling. These spices add warmth. For crunch, mix in diced onions or bell peppers. You can also add a squeeze of lime juice before serving. This brightens the flavors. Top with fresh cilantro for a burst of color and taste. If you want a creamy texture, add sour cream or avocado on top. This adds richness and balances the spices. For the full recipe, check out the detailed instructions. {{image_2}} For a vegetarian version, swap the meat with quinoa or lentils. Use the same spices. You can also add more beans like pinto or kidney for extra protein. Veggies like zucchini, mushrooms, or spinach add great flavor and color. This keeps it hearty and satisfying while still being healthy. If you love heat, add sliced jalapeños to the filling. You can mix fresh jalapeños with the meat or beans. For more spice, top with pepper jack cheese instead of cheddar. This will give your taco stuffed bell peppers a nice kick. Just be careful not to overdo it, unless you really enjoy the heat! Want to try new flavors? Think outside the box! Use taco seasoning from different countries. For a Mediterranean twist, add feta cheese and olives. You can mix in some cooked couscous too. For an Asian flavor, use soy sauce, ginger, and sesame oil. These twists keep your meals exciting and fun. Experiment with these ideas to make taco stuffed bell peppers your own. For specific instructions, check out the Full Recipe. After you enjoy your taco stuffed bell peppers, store any leftovers in the fridge. First, let them cool completely. Then, place them in an airtight container. This helps keep them fresh. You can store them for up to three days. To freeze taco stuffed bell peppers, follow these steps. First, let the peppers cool entirely. Wrap each pepper tightly in plastic wrap. Then, place them in a freezer-safe bag or container. This keeps them safe from freezer burn. You can freeze them for up to three months. When ready to eat, just thaw in the fridge overnight. Reheating taco stuffed bell peppers is simple. You can use the oven, microwave, or stovetop. For the oven, preheat to 350°F (175°C). Place the peppers in a baking dish and cover with foil. Heat for about 20 minutes. For the microwave, place a pepper on a plate. Heat for 2-3 minutes, checking for warmth. On the stovetop, place a pepper in a pan over low heat. Cover and cook for about 5-7 minutes. Always ensure the pepper is hot throughout before serving. For the full recipe, check out the complete guide! Yes, you can prepare Taco Stuffed Bell Peppers ahead of time. You can stuff the peppers and store them in the fridge for up to 24 hours. When you're ready to eat, just bake them straight from the fridge. This saves time and helps the flavors blend. For the filling, ground turkey or beef works best. Both meats absorb flavors well and add richness. Ground turkey is leaner, while beef gives a heartier taste. You can also use ground chicken or plant-based meats for a healthier twist. To make Taco Stuffed Bell Peppers gluten-free, check the taco seasoning packet. Some brands add gluten. You can also make your own seasoning with spices like cumin, chili powder, and paprika. As long as you use gluten-free ingredients, you’re all set! The ideal cooking temperature for stuffed peppers is 375°F (190°C). This temperature cooks the peppers evenly and melts the cheese nicely. It also allows the filling to heat through without burning the peppers. Taco Stuffed Bell Peppers pair well with many side dishes. You can serve them with a fresh salad, guacamole, or tortilla chips. Rice or quinoa also works well to soak up extra flavor. These sides enhance your meal and make it more filling. For the full recipe, check out the detailed instructions above! Taco stuffed bell peppers are fun to make and eat. You learned about the main and optional ingredients, plus how to prep, cook, and bake. We shared tips for perfect stuffing and fun variations to try. Storing leftovers and reheating them properly can save time later. Remember, cooking should be enjoyable. Use this recipe as a guide, and add your favorite twists. Your kitchen can be a place for creativity, so have fun with it!

Taco Stuffed Bell Peppers Flavorful and Easy Recipe

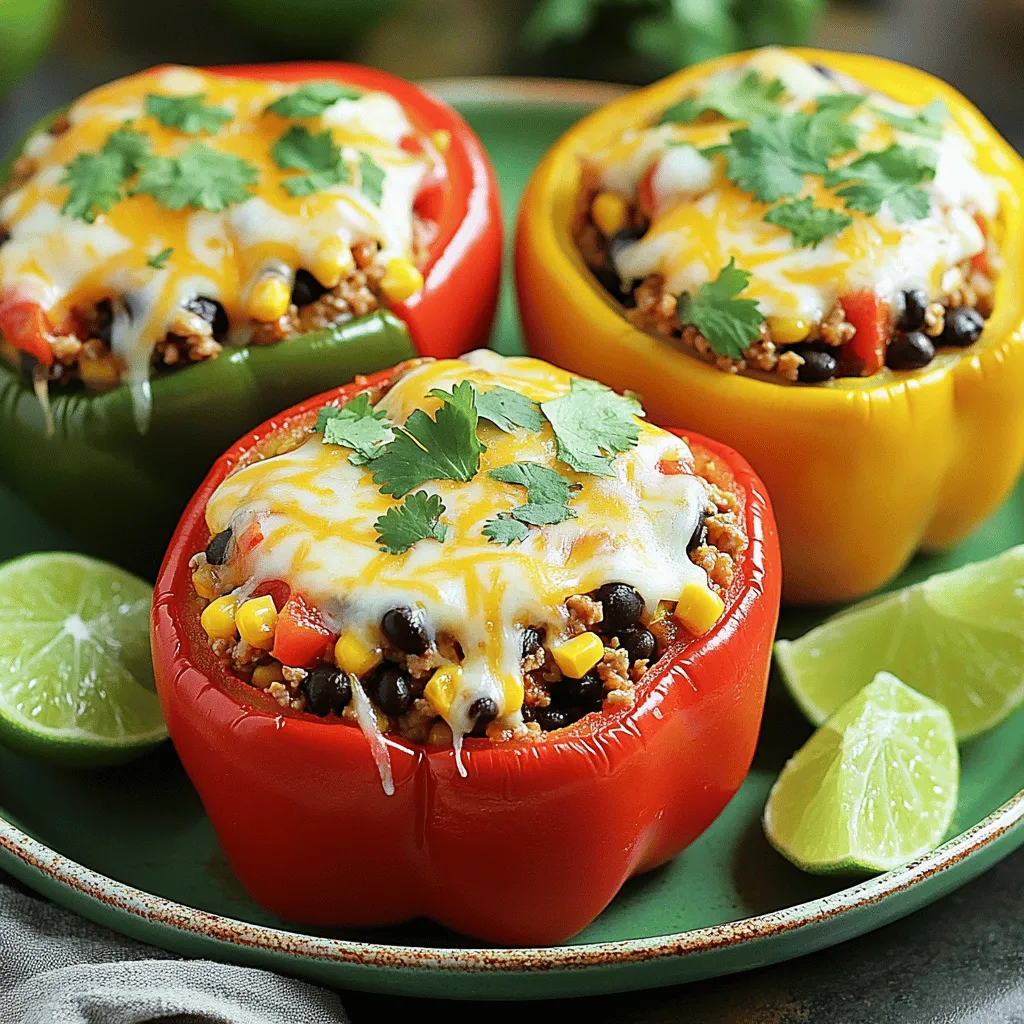
Are you ready to spice up your dinner routine? Taco stuffed bell peppers are a fun way to mix flavors

- 1 can (15 oz) chickpeas, drained and rinsed - 2 tablespoons olive oil - 1 teaspoon smoked paprika - 1 teaspoon cumin - 1/2 teaspoon garlic powder - Salt and pepper to taste - 2 cups cooked quinoa - 1 cup cherry tomatoes, halved - 1 cucumber, diced - 1 avocado, sliced - 2 cups mixed greens (spinach, kale, or arugula) I love using chickpeas in this bowl. They are rich in protein and fiber. The olive oil and spices add a nice flavor. I prefer smoked paprika for a bit of depth. Cumin gives it warmth, while garlic powder adds a nice touch. Quinoa is another star here. It’s a great base and is full of nutrients. I often use cooked quinoa as my starting point. Fresh veggies like cherry tomatoes, cucumbers, and avocado bring color and crunch. Mixed greens add freshness and balance the dish. - 1/4 cup tahini - 2 tablespoons lemon juice - Water (to thin the tahini dressing) - Fresh parsley, chopped (for garnish) I like to make a simple tahini dressing. Just mix tahini with lemon juice. Add water to make it smooth and pourable. This dressing ties the bowl together. Fresh herbs, like parsley, brighten it up. You can also add nuts or seeds for extra crunch. For more ideas, check out the Full Recipe. - Preheat your oven to 400°F (200°C). - Grab a baking sheet and line it with parchment paper. - Open the can of chickpeas, then rinse and drain them well. - In a bowl, toss the chickpeas with olive oil, smoked paprika, cumin, garlic powder, salt, and pepper. - Make sure each chickpea is coated in the oil and spices. - Spread the chickpeas out in a single layer on the baking sheet. - Roast them for about 25-30 minutes until they turn crispy and golden. - Toss them halfway through cooking for even crispiness. - In a serving bowl, start with a layer of cooked quinoa as your base. - Next, add mixed greens like spinach or kale on top of the quinoa. - Arrange the halved cherry tomatoes and diced cucumber next. - Slice the avocado and place it in the bowl too. - Once the chickpeas are ready, sprinkle them over the fresh veggies. - Drizzle the tahini dressing over the top and garnish with fresh parsley. For more detailed preparation, check the Full Recipe. Enjoy your tasty and nutritious meal! To get crispy chickpeas, start with dry chickpeas. Drain and rinse them well. Pat them dry with a kitchen towel. This step helps remove excess moisture. Next, use enough olive oil. It helps the spices stick and promotes crispiness. Spread them out on the baking sheet. Avoid crowding the chickpeas. This ensures they roast evenly. Roast at 400°F for 25-30 minutes. Toss halfway through for even cooking. To prevent sogginess, do not skip drying your chickpeas. If they are wet, they won’t crisp up. Another tip is to use a high-quality baking sheet. A heavy-duty sheet distributes heat better. Spice up your chickpeas with different seasonings. Try adding chili powder for heat. You can also mix in curry powder for a unique twist. If you love garlic, add more garlic powder. For the tahini dressing, you can switch things up too. Add a splash of soy sauce for umami. A pinch of cumin can enhance the flavor. For a fresh note, mix in some chopped herbs like cilantro or dill. For a stunning Buddha bowl, start with a colorful base. Layer your quinoa first. Next, arrange your mixed greens in a fan shape. Place the cherry tomatoes and cucumber artfully around the bowl. Add the avocado slices for a creamy touch. Finally, top it all with the crispy chickpeas. Drizzle the tahini dressing over everything. Garnish with fresh parsley. This adds color and makes it look appealing. Enjoy your Crispy Chickpea Buddha Bowl! For the complete recipe, check the Full Recipe section. {{image_2}} If you want to switch things up, try different proteins. You can use other beans, like black beans or kidney beans. They add great flavor and texture. If you prefer meat, grilled chicken works well too. Tofu is a fantastic plant-based option. It soaks up flavors and adds protein. Using seasonal ingredients makes your Buddha bowl fresher. In spring, add asparagus or peas. Summer is perfect for bell peppers and zucchini. In autumn, try roasted sweet potatoes or Brussels sprouts. Winter brings hearty greens like kale and collards. You can also add seasonal fruits, like berries in summer or apples in fall. They add a tasty twist. This recipe is easy to adapt. It fits both vegan and vegetarian diets. To keep it gluten-free, just ensure your quinoa is certified gluten-free. You can also skip the tahini dressing if you have a nut allergy. Just mix lemon juice with some olive oil for a simple dressing. These changes keep your meal tasty and healthy. To store leftovers, place the Buddha bowl in a sealed container. Keep it in the fridge for up to three days. For the best taste, eat it fresh. If you have extra chickpeas, store them in a separate container. They stay crispier this way. To keep ingredients fresh, try layering your bowl. Put the quinoa at the bottom, then veggies, and keep the dressing separate. This way, your meal stays tasty and crunchy. Yes, you can freeze the Buddha bowl! However, I recommend freezing only the chickpeas. Place them in a freezer-safe bag. They last for up to three months. To reheat for the best texture, bake the frozen chickpeas at 400°F (200°C) for about 10 minutes. This brings back their crispiness. Let the rest of the ingredients thaw in the fridge overnight before serving. Cooked components last in the fridge for about three to four days. If the chickpeas turn soft or mushy, it’s time to toss them. Look for any strange smells or color changes in your veggies. If they seem slimy or wilted, they are spoiled. Trust your senses to keep your meals safe. Making a Crispy Chickpea Buddha Bowl takes around 45 minutes. You spend about 15 minutes prepping the ingredients. The cooking time is about 30 minutes for the chickpeas. This includes mixing and roasting them until crispy. Yes, you can make this recipe ahead of time. Cook the chickpeas and quinoa in advance. Store them in separate containers in the fridge. When you’re ready to eat, just assemble your bowl. This helps save time on busy days. If you need a tahini substitute, you can use peanut butter or almond butter. They give a nice flavor too. You can also make a quick yogurt dressing. Just mix yogurt with lemon juice and a bit of olive oil. Both options work great! Yes, the Crispy Chickpea Buddha Bowl is healthy. Chickpeas are high in protein and fiber. Quinoa adds more protein and essential amino acids. The fresh veggies bring vitamins and minerals. This dish is balanced and good for your body. You’ve learned how to make a Crispy Chickpea Buddha Bowl, focusing on fresh ingredients and easy steps. We covered essential cooking tips to ensure your chickpeas are crispy, along with fun variations to suit your taste. Remember to store any leftovers properly to keep them fresh. This bowl not only tastes great but also supports a healthy lifestyle. Enjoy creating your bowl, mixing flavors, and experimenting with different ingredients!

Crispy Chickpea Buddha Bowl Nutritious Delight

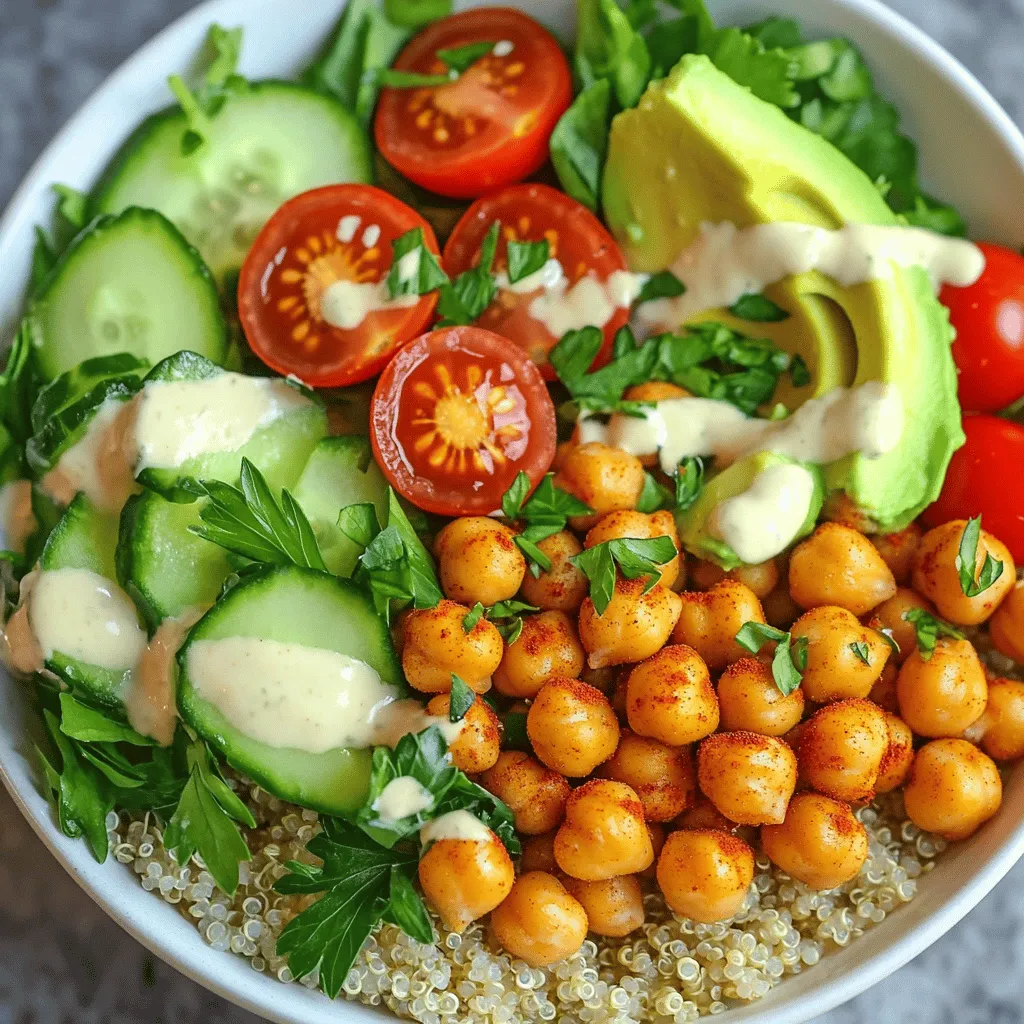
Looking for a tasty and healthy meal? Try my Crispy Chickpea Buddha Bowl! Packed with protein, fresh veggies, and crunchy

- Corn (4 ears, husked) - Cotija cheese (1/2 cup, crumbled) - Mayonnaise (1/4 cup) - Sour cream (2 tablespoons) - Chili powder (1 teaspoon) - Lime (1, juiced) - Fresh cilantro (1/4 cup, chopped) - Salt (1/4 teaspoon) - Black pepper (1/4 teaspoon) - Red onion (1/4 cup, finely diced) - Jalapeño (1, seeds removed and minced - optional for heat) In this salad, fresh corn shines. Use sweet, juicy ears for the best taste. I love grilling the corn, as it gives a nice char. This step adds a smoky flavor that pairs well with the creamy dressing. Cotija cheese is key. It adds a salty, crumbly texture. If you can’t find it, feta works too. The mayonnaise and sour cream mix makes the salad creamy and rich. Lime juice brightens the dish. The chili powder gives a mild kick that’s just right. Fresh cilantro adds color and a fresh taste. The red onion gives a nice crunch. If you want heat, add jalapeño. Just remember to remove the seeds for less spice. These ingredients blend well for a tasty, colorful salad. For the full recipe, check the details above. Enjoy this delightful dish at your next gathering! First, you need to preheat your grill or grill pan. Set it to medium-high heat. This step is key for getting those delicious char marks on the corn. Next, place the husked corn on the grill. Grill it for about 10 to 12 minutes. Turn the corn occasionally to ensure it cooks evenly. You want it to be slightly charred and tender. The grilling brings out a sweet, smoky flavor in the corn. Once the corn is cool enough to handle, cut the kernels off the cob. Use a sharp knife and a large bowl to catch all the kernels. This step is easy and fun! Now, let’s make the creamy dressing. In a small bowl, mix together the mayonnaise, sour cream, chili powder, lime juice, salt, and black pepper. Stir it well until everything is combined. This dressing adds a rich and tangy flavor to the salad. In the bowl with the corn, add the cotija cheese, chopped cilantro, diced red onion, and minced jalapeño if you like a little heat. Pour the creamy dressing over the corn mixture. Toss everything gently so it’s all coated well. Taste your salad and adjust the seasoning if needed. You may want more salt, pepper, or lime juice to suit your taste. Your Mexican street corn salad is now ready to enjoy! Serve it slightly warm or chilled. For extra flair, sprinkle some cotija cheese and cilantro on top. For the full recipe, check the details above. When picking corn, fresh is always best. Fresh corn has bright, green husks. The kernels should feel plump and firm. You can choose frozen corn if fresh is not available. Frozen corn is convenient and still tasty. To select ripe corn at the market: - Look for husks that are tightly wrapped. - Check for a sweet smell. - Press on the kernels; they should feel juicy and firm. Spice levels can change your salad's flavor. You can add jalapeño for heat. If you want it milder, use less or skip it. For other toppings or additions, consider: - Diced avocado for creaminess. - Black beans for extra protein. - Cherry tomatoes for a burst of color. You can serve this salad warm or chilled. Both ways taste great. If serving warm, enjoy it right after mixing. If serving chilled, let it sit in the fridge for a bit. For garnishing ideas, think about: - Extra cotija cheese on top. - Fresh cilantro sprinkled for color. - Lime wedges on the side for a zesty touch. For the full recipe, check out the complete guide! {{image_2}} To make the recipe vegan, you can substitute mayonnaise and sour cream. Use plant-based yogurt or cashew cream instead. These options keep the salad creamy and delicious. For cheese, cotija can be swapped out with vegan feta or nutritional yeast. This adds a nice salty flavor without dairy. Want to turn this salad into a full meal? Add grilled chicken or shrimp. Simply grill your protein choice, chop it, and mix it in. This boosts the protein and makes it more filling. You can also use canned black beans for a quick protein fix. They add fiber and work great with the corn. If you love fresh herbs, try using parsley or dill instead of cilantro. This brings a new flavor to the salad. You can also switch up the spices. Try cumin or smoked paprika for a different kick. These spices add depth and keep your taste buds happy. For the full recipe, check out the details above. To keep your Mexican street corn salad fresh, store it in the fridge. First, let it cool down to room temperature. After that, place it in an airtight container. This helps to lock in flavors and keep it safe. If you don’t have an airtight container, use plastic wrap tightly over a bowl. Your salad will last about 3 to 5 days in the fridge. Check for signs of spoilage before eating. If it smells sour or has a change in color, it’s better to throw it out. Mold is also a big red flag, so be careful! Reheating this salad can be tricky. You want to keep those fresh flavors intact. The best method is to use a microwave. Heat it for short bursts, about 15 seconds at a time. Stir in between to spread the heat. If you prefer, you can serve it cold or at room temperature. This keeps the taste delightful and fresh. For the full recipe, refer to the section above. If you don’t have cotija cheese, try feta cheese. Feta has a salty flavor and crumbly texture. Another option is queso fresco. It is milder and softer, making it a great substitute. You can also use grated Parmesan cheese for a different taste. Each of these cheeses will add a unique twist to your Mexican street corn salad. Yes, you can make this salad ahead of time. Prepare the corn and dressing, but wait to mix them until you are ready to serve. This keeps the salad fresh and crunchy. Store the corn and dressing in separate containers in the fridge. You can mix them together up to two days before serving. Just remember to taste and adjust seasoning again after mixing. Mexican street corn salad can be served warm or cold. If you prefer it warm, mix it right after grilling the corn. The heat enhances the flavors. For a chilled option, refrigerate it for at least 30 minutes. This allows the flavors to blend together nicely. Both ways are delicious, so it’s all about your personal choice! To make your salad less spicy, skip the jalapeño. You can also reduce the chili powder to suit your taste. If you still want some heat, use less than the recipe calls for. Adding a bit of extra sour cream can help mellow the spice too. It balances flavors and makes the salad creamy and delicious. This Mexican Street Corn Salad brings bold flavors and fun to any table. You learned about key ingredients like fresh corn, cotija cheese, and zesty lime juice. The step-by-step guide showed you how to prepare, mix, and customize the dish. You also discovered tips on choosing the best corn and adding your favorite proteins. Keeping the salad fresh and flavorful is easy with proper storage. Whether you serve it warm or cold, this dish will satisfy everyone. Enjoy making your own delicious version of Mexican Street Corn Salad!

Mexican Street Corn Salad Flavorful and Fresh Delight

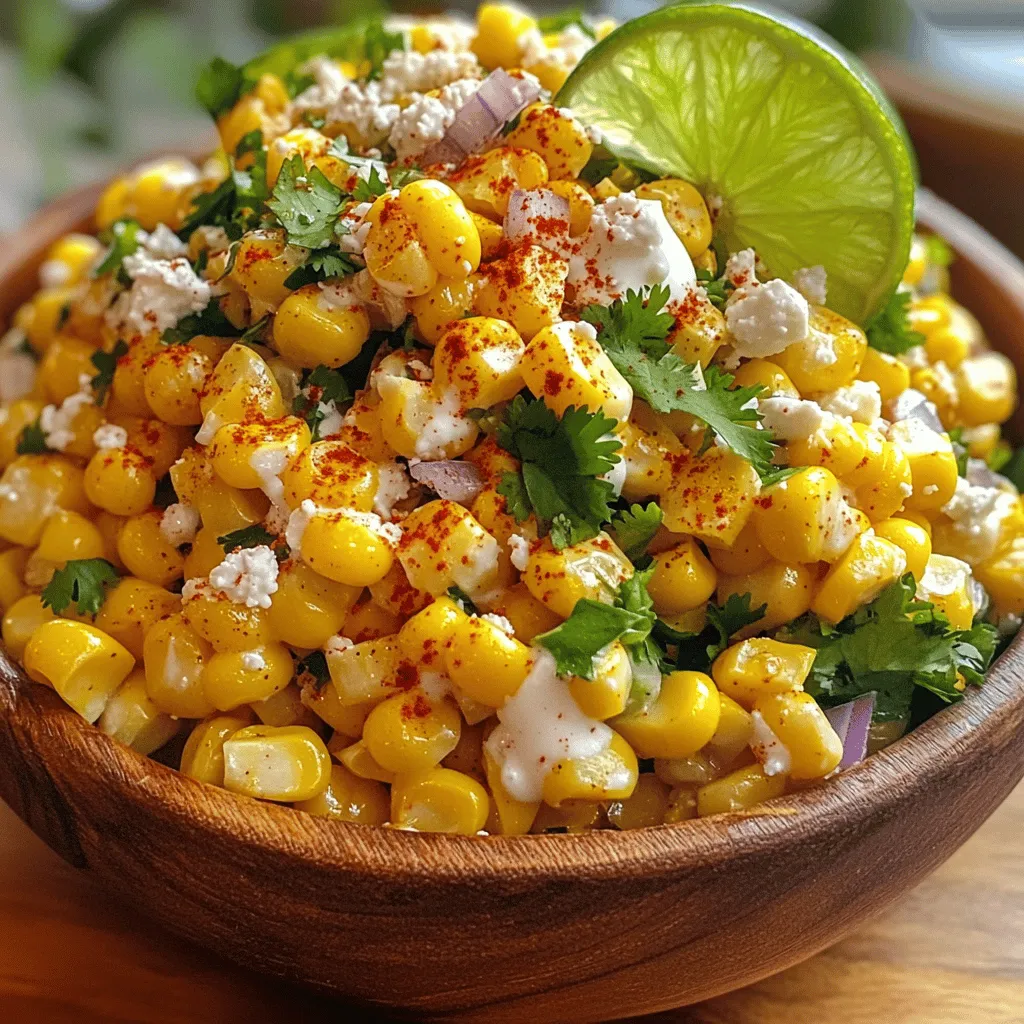
Are you ready to bring a burst of flavor to your table? This Mexican Street Corn Salad is a crowd-pleaser

- 1 medium head of cauliflower, cut into florets - 3 tablespoons olive oil - 4 cloves garlic, minced - 1 teaspoon smoked paprika - ½ teaspoon salt - ½ teaspoon black pepper - ¾ cup grated Parmesan cheese - 1 tablespoon chopped fresh parsley (for garnish) - Lemon wedges (for serving) The heart of Garlic Parmesan Roasted Cauliflower lies in its simple yet flavorful ingredients. When I prepare this dish, I always use a fresh head of cauliflower. It should be firm and bright. Cutting it into florets allows for even roasting and helps each piece soak in the flavors. I love using olive oil because it gives a rich taste. The minced garlic adds that fragrant punch, making your kitchen smell divine as it roasts. Smoked paprika brings a warm, smokey note that compliments the cheese and garlic perfectly. Salt and black pepper enhance the flavor without overpowering it. The star of the show, though, is the grated Parmesan. This cheese adds a creamy, savory touch that melts beautifully over the roasted cauliflower. I also sprinkle fresh parsley on top before serving. It adds a pop of color and freshness. And don’t forget the lemon wedges! They add a zesty twist that brightens the entire dish. For the full recipe, check the section above. This combination of ingredients creates a delicious and easy side dish that everyone will love. First, cut the cauliflower into florets. Aim for pieces that are about the same size. This helps them cook evenly. Use a sharp knife to slice the stem, then break off the florets. Don't worry if they are not perfect. Next, coat your florets with oil and spices. I suggest using a large bowl for this. Add olive oil, minced garlic, smoked paprika, salt, and pepper. Toss until each piece is well covered. An even coat means great flavor in every bite. Now, preheat your oven to 425°F (220°C). This step is key for the best texture. While the oven heats up, spread the cauliflower on a baking sheet. Line it with parchment paper for easy cleanup. Roast the cauliflower for 25 minutes. Halfway through, stir the florets. This helps them brown nicely on all sides. Keep an eye on them. You want tender but not mushy cauliflower. After 25 minutes, it's time to add the cheese. Take the baking sheet out and sprinkle the grated Parmesan over the hot cauliflower. Make sure to cover it well, but don’t pile it too thick. Pop the baking sheet back in the oven for an extra 5 minutes. This melts the cheese and gives it a lovely golden color. When done, check that the cauliflower is tender and the cheese is bubbly. Enjoy your Garlic Parmesan Roasted Cauliflower! You can find the Full Recipe above for more details. To get that nice, crisp texture, use parchment paper. It stops the cauliflower from sticking. You will love how easy it is to clean up afterward. Stir the cauliflower halfway through cooking. This helps it cook evenly, making it golden all over. To boost the taste, try adding a dash of lemon zest. It brightens up the dish. You can also sprinkle on some red pepper flakes for a spicy kick. Fresh herbs like thyme or rosemary work well too. For garnishes, sprinkle more fresh parsley on top. It adds color and freshness. This roasted cauliflower pairs great with grilled chicken or fish. It also works well with a hearty pasta dish. For sides, serve it with a simple salad or crusty bread. This way, you create a full meal that everyone will enjoy. {{image_2}} You can easily switch up the cheese in this dish. If you want a different taste, try using Pecorino Romano instead of Parmesan. This cheese has a strong flavor that adds a nice twist. For a creamier texture, consider using mozzarella cheese. It melts beautifully, giving a gooey finish. You can also mix cheeses. A blend of Parmesan and cheddar gives a rich flavor. Just keep the total amount close to ¾ cup. This way, you maintain the recipe's balance without changing the cooking time. If you like a kick, add red pepper flakes to the garlic and oil mix. Start with a pinch and taste as you go. This will make your dish more exciting. You can also use spicy garlic. It's a great way to deepen the flavor. Just chop some fresh spicy garlic and mix it in with the other ingredients. You don’t have to stick to just cauliflower. Combine it with other veggies like broccoli or bell peppers. This creates a colorful and healthy mix. Carrots and Brussels sprouts also work well. Just chop them into similar sizes for even cooking. You can make a mixed roasted veggie dish that is both tasty and nutritious. For the full recipe, check out the Garlic Parmesan Roasted Cauliflower preparation steps. To keep your Garlic Parmesan Roasted Cauliflower fresh, store it in airtight containers. This helps lock in moisture and flavor. Allow the cauliflower to cool completely before sealing it. This prevents condensation, which can make it soggy. You can keep it in the fridge for up to three days. When reheating, I recommend using an oven or an air fryer. Preheat your oven to 350°F (175°C). Spread the cauliflower on a baking sheet and heat for about 10 minutes. This method keeps the texture crisp. You can also use an air fryer for about 5 minutes at 350°F (175°C). Both methods help revive that tasty crunch. If you want to freeze your roasted cauliflower, let it cool first. Place the florets in a single layer on a baking sheet to freeze for a few hours. Then, transfer them to freezer bags. This prevents them from sticking together. For thawing, place the frozen cauliflower in the fridge overnight. When ready to eat, reheat it in the oven or air fryer for the best results. Roasting cauliflower takes about 30 minutes. First, cook it for 25 minutes at 425°F (220°C). This time gives the cauliflower a nice, tender texture and a golden brown color. After 25 minutes, sprinkle on the Parmesan cheese and roast for an extra 5 minutes. This last step melts the cheese and adds a crispy top layer. Yes, you can! To make garlic Parmesan roasted cauliflower vegan, replace the cheese with nutritional yeast. It gives a cheesy flavor without using dairy. For the oil, use a vegan option like avocado oil or coconut oil. These substitutes keep the dish tasty while meeting vegan needs. Garlic Parmesan roasted cauliflower works well with many dishes. It pairs nicely with grilled chicken or fish. You can also serve it alongside a hearty pasta dish. For a vegetarian option, try it with quinoa or a fresh salad. This dish adds great flavor and texture to any meal. For the full recipe, check out the details above. Roasting garlic Parmesan cauliflower is simple and delicious. The detailed steps make it easy to achieve great flavor. You can also customize it with spices and other veggies. Storing and reheating leftovers help keep your dish fresh for later. Remember, this dish pairs well with many meals, adding depth to your table. I hope you try it soon! Enjoy your tasty creation.

Garlic Parmesan Roasted Cauliflower Flavorful Delight

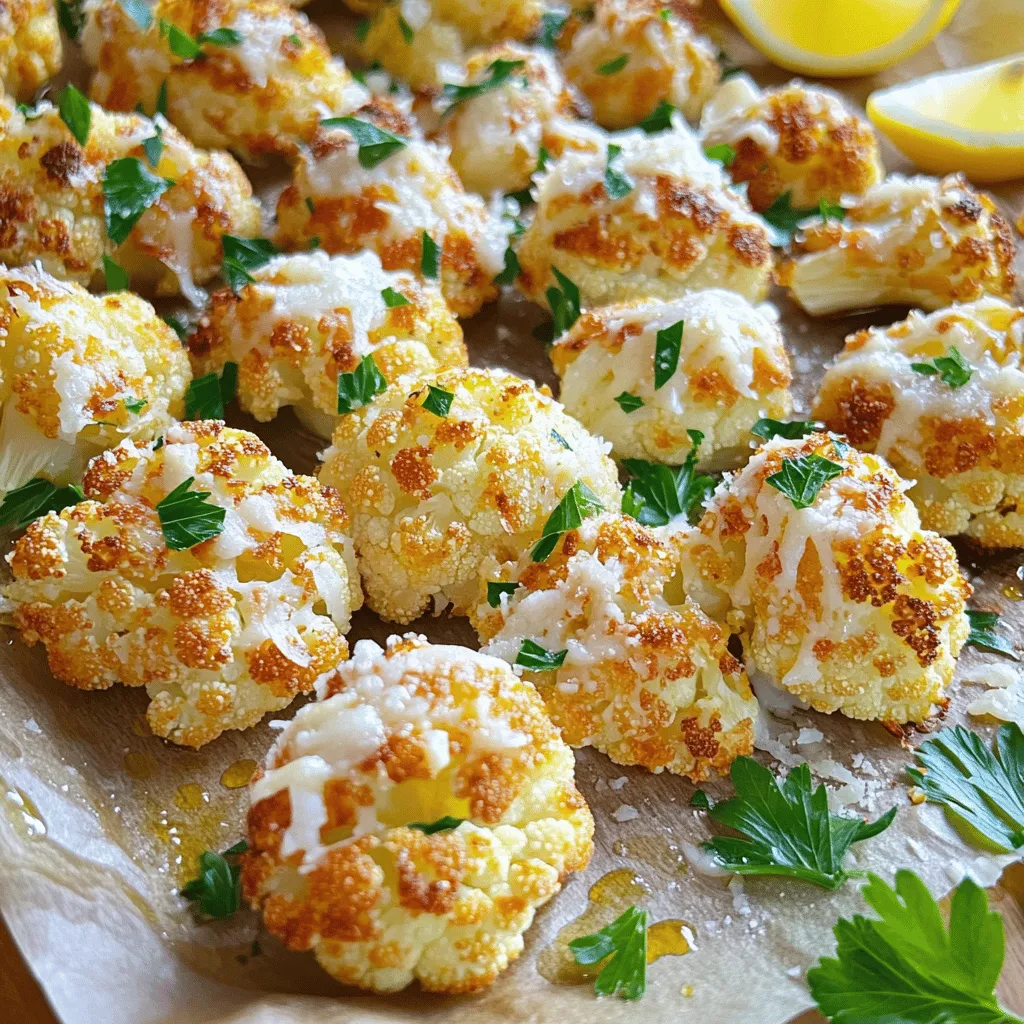
Are you ready to transform cauliflower into a flavorful delight? Garlic Parmesan Roasted Cauliflower is not just a dish; it’s

Older posts
Newer posts
← Previous Page1 … Page68 Page69 Page70 … Page127 Next →

dsad

© 2025 Southern Dishes • Built with GeneratePress

Our Policies

  • Copyright Policy
  • Cookie Policy
  • GDPR Policy
  • Privacy Policy
  • Disclaimer
  • Terms Of Use

More Information

  • Home
  • About
  • Contact
  • Appetizers
  • Dessert
  • Dinner
  • Drinks
©2025, Southern Dishes About Back To Top