Skip to content
DisclaimerTerms Of UseGDPR PolicyCookie Policy

Southern Dishes

  • Home
  • Drinks
  • Appetizers
  • Dinner
  • Dessert
  • About
  • Contact
  • Privacy Policy
DisclaimerTerms Of UseGDPR PolicyCookie Policy

Isabella

- Ripe mangoes - Fresh herbs and spices - Optional sweeteners and seasonings Fresh mango salsa is all about using bright, fresh ingredients. Ripe mangoes bring sweetness and a lovely texture. I always choose mangoes that feel soft but not mushy. Fresh herbs, like cilantro, add a burst of flavor. You can also use lime juice for zesty brightness. If you want more sweetness, honey is a great option. - Signs of ripeness - Popular mango varieties To pick the best mango, look for a slight give when you press it. A ripe mango has a sweet smell at the stem. The skin should have a mix of green and yellow. Some great mango varieties are Haden, Tommy Atkins, and Kent. Each offers a unique taste and texture. - Alternative peppers - Other add-ins for flavor You can spice things up by using different peppers. For a milder salsa, try a bell pepper. If you like heat, go for a serrano or habanero. Other tasty add-ins include diced avocado, pineapple, or even black beans. These options let you make the salsa your own. For the full recipe, check out the Tropical Delight Mango Salsa section. Start by preparing your ingredients. First, peel and dice the mangoes. Aim for small, even pieces. Next, finely chop the red onion. This adds a nice crunch and flavor. Then, dice the red bell pepper into similar-sized pieces. This keeps your salsa looking colorful and fresh. Don't forget the jalapeño! Use a seedless jalapeño to control the spice level. Removing the seeds helps keep the heat mild. If you want more heat, you can add a few seeds back in later. Now, let’s mix the salsa. In a large bowl, combine the diced mangoes, chopped red onion, and red bell pepper. Next, add the minced jalapeño. This brings a kick of flavor to your salsa. Then, toss in the chopped cilantro. The fresh herbs make a big difference. Squeeze the juice of two limes over the mixture. This adds brightness and balances the sweetness of the mangoes. If you like it a bit sweet, mix in a tablespoon of honey. Be gentle when you stir. You want to keep the mango pieces intact. Add salt and pepper to taste. This step is important to enhance the flavors. Let the salsa sit for at least 15 minutes. This allows the flavors to meld together beautifully. Fresh mango salsa pairs wonderfully with tortilla chips. It also complements grilled meats like chicken or fish. For a creative twist, try it on tacos. The sweetness of the mango contrasts well with spicy meats. You can also serve it over grilled fish for a tropical touch. For a beautiful presentation, use a colorful bowl. Garnish with extra cilantro and lime wedges. This makes the dish vibrant and inviting. Enjoy your fresh mango salsa! Adding acidity can brighten your salsa. Lime juice works well for this. It cuts through the sweetness of mango. If you prefer sweetness, use honey to balance the flavors. This mix creates a vibrant taste. Salt helps bring all the flavors together. A little pinch can make a big difference. To keep your salsa fresh, chop your ingredients just before serving. This keeps the colors bright and the texture crisp. Marinate the salsa for at least 15 minutes. This time allows the flavors to blend nicely. The waiting makes every bite more delicious. Use an airtight container for storing salsa. This keeps it fresh longer. Fresh mango salsa lasts for about three days in the fridge. If it starts to smell off, it’s best to toss it. Enjoy your salsa while it's still vibrant and tasty! {{image_2}} You can make mango salsa even better by adding tropical fruits. Pineapple brings a sweet and tangy flavor that pairs well with mango. Just chop fresh pineapple into small pieces and mix it with your salsa. This twist adds a fun crunch! Another great option is avocado. It gives a creamy texture, making the salsa richer. Dice a ripe avocado and fold it in gently. This addition balances the sweetness of the mango and adds healthy fats. You might also try different citrus fruits. Lime is classic, but orange or grapefruit can add unique flavors. Squeeze in some juice or add zest for a bright taste. Do you like heat? You can easily change the spice level of your salsa. If you want mild salsa, skip the jalapeño. Instead, use sweet bell peppers for crunch without the kick. For medium heat, keep the jalapeño but use less. Remove some seeds to tone it down. If you crave spice, add a serrano pepper or a habanero. Just remember to adjust to your taste! Different peppers can also change the flavor. Each pepper has its own heat and taste. Experiment with poblano or banana peppers for something new. To make a creamy avocado mango salsa, follow the same steps but add more avocado. Blend it with the mango for a smooth mix. This creates a dip-like consistency that’s perfect for chips. Fresh herbs can elevate this creamy salsa. Try adding basil or mint for a refreshing twist. These herbs bring a unique flavor that pairs well with avocado and mango. For the complete recipe and step-by-step instructions, check the Full Recipe above. To choose the best mangoes, look for these signs: - Color: Ripe mangoes have vibrant skin. They can be yellow, orange, or red, depending on the type. - Feel: Gently squeeze the mango. It should feel slightly soft but not mushy. - Smell: Ripe mangoes have a sweet, fruity aroma at the stem end. When I pick mangoes, I often check for a little give in the flesh. This means it's ready to eat. Avoid green or very hard mangoes as they won’t be sweet. Yes, you can make Fresh Mango Salsa ahead of time! Here are some tips: - Prep: Make the salsa up to 24 hours in advance. It tastes better after flavors blend. - Storage: Use an airtight container. This keeps the salsa fresh and prevents browning. - Refrigeration: Store it in the fridge. The cooler temperature helps maintain freshness. If you make it early, just give it a good stir before serving. This brings back the vibrant look! Fresh Mango Salsa pairs well with many dips and snacks. Here are some options: - Tortilla chips: Crunchy and salty, they are a classic choice. - Grilled meats: Serve it with chicken or fish for a tasty topping. - Tacos: Add it to your taco for a fresh kick. You can also spoon it over rice or serve it with crackers. The salsa adds a bright flavor wherever you use it. For the full recipe, check out the Tropical Delight Mango Salsa section! Fresh mango salsa bursts with color and taste. You need just a few simple ingredients: - 2 ripe mangoes, diced - 1 small red onion, finely chopped - 1 red bell pepper, diced - 1 jalapeño, deseeded and minced - 1/4 cup fresh cilantro, chopped - Juice of 2 limes - 1 tablespoon honey (optional for sweetness) - Salt and pepper to taste To make it, just chop the ingredients and mix them in a bowl. I suggest letting it sit for about 15 minutes. This helps the flavors blend nicely. Mango salsa is great for many occasions. Serve it at a barbecue, a picnic, or a family gathering. It pairs perfectly with tortilla chips or grilled meats. You can also add it to tacos or fish dishes for a fresh twist. Enjoy this vibrant and flavorful delight! Fresh mango salsa combines ripe mangoes with herbs, spices, and optional add-ins. You can choose the best mangoes by checking for ripeness and variety. The blog highlights preparation steps, mixing tips, and serving ideas to elevate your salsa experience. Explore variations for flavors and textures, adjusting heat as desired. In the end, making mango salsa is fun and fulfilling. Enjoy experimenting with ingredients and flavors for a fresh burst in your meals.

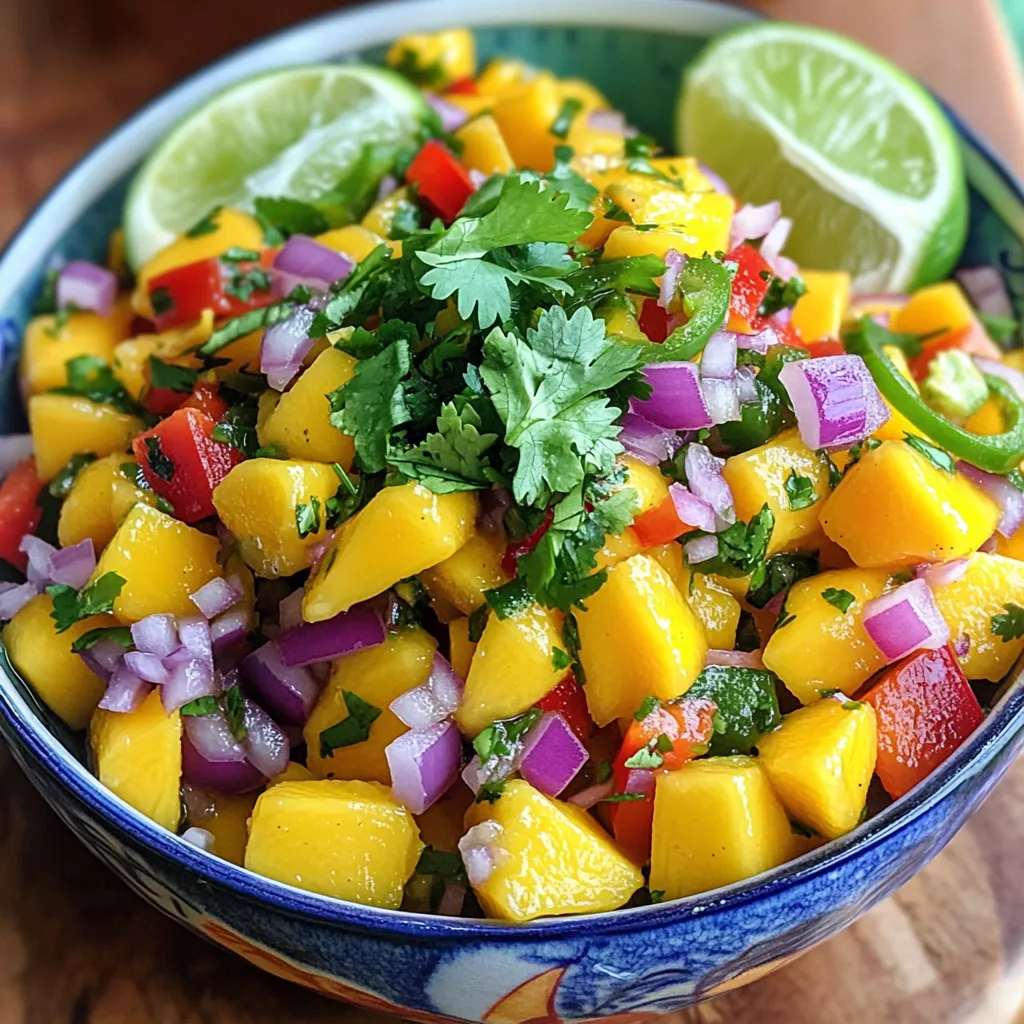
Fresh Mango Salsa Vibrant and Flavorful Delight

Are you ready to elevate your summer gatherings? Fresh Mango Salsa is the perfect blend of sweetness and zest that

- 1 cup fresh spinach, chopped - 1 cup canned artichoke hearts, drained and chopped - 1 cup cream cheese, softened - 1/2 cup sour cream - 1/2 cup mayonnaise - 1 cup shredded mozzarella cheese - 1/2 cup grated Parmesan cheese - 2 cloves garlic, minced - 1 teaspoon lemon juice - Salt and pepper to taste I love how simple this ingredient list is. Each element brings a unique taste to the dip. The fresh spinach adds a bright green color and a mild flavor. The artichoke hearts provide a tender texture and a subtle earthiness. Cream cheese gives that creamy base we all crave, while sour cream and mayonnaise add tang. - 1/4 teaspoon red pepper flakes for heat - Other optional toppings or spices If you want a spicy kick, add the red pepper flakes. You can also experiment with herbs like dill or chives. Maybe top with more cheese or breadcrumbs for a crunchy finish. These extras can make your dip pop! - Caloric breakdown per serving: about 200 calories - Nutritional benefits of key ingredients: This dip is rich in healthy fats and protein from the cheeses. Spinach offers vitamins A and K, which are good for your eyes and bones. Artichokes are high in fiber, helping with digestion. Enjoying this dip can be a tasty way to sneak in some nutrients! First, we need to preheat the oven to 350°F (175°C). This helps the dip cook evenly and become nice and bubbly. Next, grab a baking dish or an oven-safe skillet. You will use this to bake the dip later. Now, let’s mix the base ingredients. In a large mixing bowl, add the softened cream cheese, sour cream, and mayonnaise. Use a spatula to mix them until the mixture is smooth and creamy. This is the secret to a rich texture. Now, it’s time to add the star ingredients: spinach and artichokes. Add the chopped spinach and the drained artichoke hearts to the bowl. Next, toss in the minced garlic and lemon juice. If you like a bit of heat, add the red pepper flakes now. Stir everything together until well combined. After mixing those, fold in the mozzarella and Parmesan cheese. These cheeses give the dip its gooey, cheesy goodness. Finally, season the mixture with salt and pepper to taste. Transfer the mix into your prepared baking dish. Spread it evenly so it cooks well. Bake it in the preheated oven for about 20-25 minutes. Look for the dip to be hot and bubbly, with a lightly golden top. This is when it’s ready to come out. Once it’s done, let the dip cool for a few minutes. This helps avoid burning your tongue when you dive in. Enjoy this creamy treat with toasted baguette slices, tortilla chips, or fresh veggies. For an extra touch, sprinkle some more Parmesan cheese on top before baking. To make your dip creamier, swap half of the cream cheese for ricotta. This gives a light texture. You can also add a splash of heavy cream. Mix it in right before baking to get a smooth finish. Aim for a mix that is thick but still spreadable. The right blend keeps the dip from getting dry. To boost the flavor, add garlic powder or onion powder. A pinch of cayenne pepper can bring some heat. Fresh herbs like parsley or dill add freshness. For cheese, use a mix of mozzarella and cream cheese for creaminess. Gouda also brings a nice smoky flavor. Experimenting with cheese keeps things exciting. Serve your dip warm with toasted baguette slices or crispy tortilla chips. Fresh veggie sticks like carrots and celery provide a nice crunch. For a fun twist, try serving it in a bread bowl. This makes a great centerpiece for your table. A sprinkle of extra Parmesan on top looks nice and adds flavor. Enjoy this delicious dip at your next gathering! For a detailed guide on making this dish, check the Full Recipe. {{image_2}} To make this dip vegan, swap out dairy ingredients for plant-based options. Use vegan cream cheese instead of regular cream cheese. Replace sour cream with cashew cream or a plant-based yogurt. You can use vegan mayo for the mayonnaise. Finally, ensure the cheeses are dairy-free. You can find these at most grocery stores. You can easily make the dip gluten-free. All the main ingredients are already gluten-free. Just be sure to check the labels on your mayonnaise and any other add-ins. For serving, use gluten-free chips, veggie sticks, or rice crackers. This way, everyone can enjoy this tasty dip. You can add a twist to the classic recipe. Try adding cooked bacon for a savory touch. If you like spice, mix in diced jalapeños. You can also use different cheeses, like pepper jack, for a zesty flavor. Some people enjoy adding sun-dried tomatoes for a sweet and tangy taste. Each variation brings new joy to this simple dish. For the full recipe, check out the detailed steps to create your Spinach Artichoke Dip. Once you finish your dip, store it right away. Transfer the dip into an airtight container. This helps keep it fresh and tasty. Place the container in the fridge. The dip will stay good for about 3 to 4 days. If you want to store it longer, freezing is an option. To reheat, place the dip in a microwave-safe dish. Heat it in short bursts. Start with 30 seconds, then stir. Repeat until it is hot. This helps keep the dip creamy. Avoid overheating as it can dry out. If using an oven, cover the dish with foil to retain moisture. Heat at 350°F until warm. Yes, you can freeze your dip! First, let it cool completely. Then, scoop it into a freezer-safe container. Seal it tightly and label it with the date. The dip can last for up to three months. When ready to eat, thaw it overnight in the fridge. Reheat it as mentioned above for best results. Enjoy your creamy spinach artichoke delight again! You can serve many tasty items with Spinach Artichoke Dip. Here are some popular options: - Toasted baguette slices - Tortilla chips - Fresh vegetable sticks like carrots, celery, or bell peppers - Pita chips - Crackers These sides add great crunch and flavor. You can mix and match to please your guests. Spinach Artichoke Dip can last about 3 to 5 days in the fridge. To keep it fresh, store it in an airtight container. This helps avoid drying out or absorbing other odors. Always check for any off smells or changes in texture before eating. Yes, you can make Spinach Artichoke Dip ahead of time. Prepare it, then cover and refrigerate it for up to 24 hours. When you're ready to serve, reheat it in the oven. Bake at 350°F (175°C) until hot and bubbly. This makes it easy to enjoy without stress on party day. For the Full Recipe, refer back to our earlier sections. This blog post covered how to make a delicious Spinach Artichoke Dip. We explored ingredients, preparation steps, and handy tips to boost flavor and texture. You can also find variations for vegan and gluten-free diets. In conclusion, this dip is perfect for any occasion. Follow the steps and enjoy a tasty dish that your friends and family will love. Get creative and make it your own! Happy cooking!

Savory Spinach Artichoke Dip Flavorful Party Treat

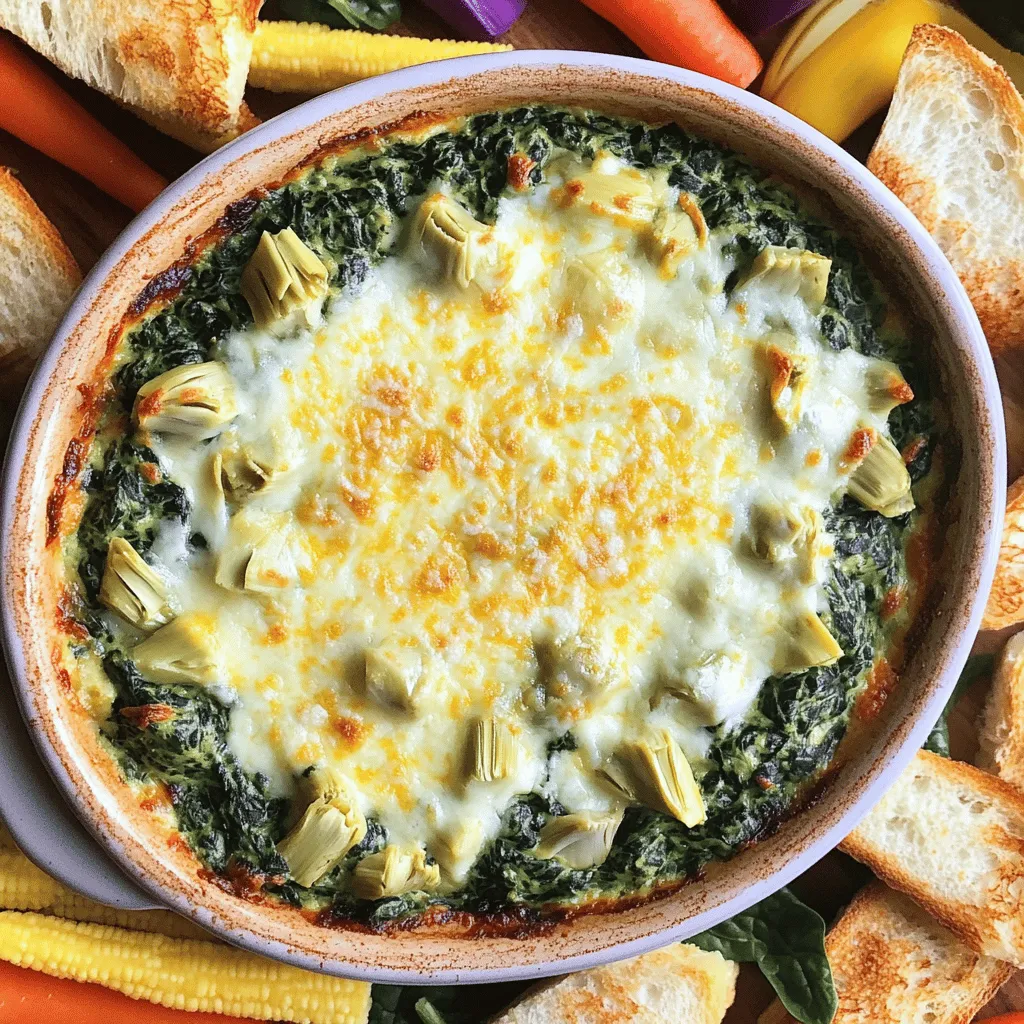
Are you ready to impress your friends at your next gathering? I’m excited to share my Savory Spinach Artichoke Dip,

To make a Peach Cobbler Mug Cake, you need simple ingredients. These items are easy to find and fun to use. Here’s a list of what you need: - 1/4 cup all-purpose flour - 1/4 cup granulated sugar - 1/4 teaspoon baking powder - 1/8 teaspoon salt - 1/4 cup milk - 2 tablespoons unsalted butter, melted - 1/4 teaspoon vanilla extract - 1 small peach, diced (or half a cup of canned peaches, drained) - 1 tablespoon brown sugar (for topping) - 1/2 teaspoon ground cinnamon (for topping) These ingredients work together to create a warm and sweet dessert. You can use fresh peaches when they are in season. If not, canned peaches work just as well. The choice of brown sugar and cinnamon adds a nice touch. For the full recipe, check out the detailed instructions. Enjoy making this quick and easy treat! To make your Peach Cobbler Mug Cake, follow these simple steps. You can have a warm treat in just a few minutes! 1. Combine dry ingredients in a mug Start by taking a microwave-safe mug. Add 1/4 cup of all-purpose flour, 1/4 cup of granulated sugar, 1/4 teaspoon of baking powder, and 1/8 teaspoon of salt. Mix these dry ingredients well with a fork. 2. Add milk, butter, and vanilla Next, pour in 1/4 cup of milk and 2 tablespoons of melted unsalted butter. Add 1/4 teaspoon of vanilla extract for flavor. Stir it all together until you have a nice, smooth batter. 3. Incorporate peach pieces Now, fold in your diced peach pieces. You can use one small fresh peach or half a cup of canned peaches, drained. Make sure the peach pieces are evenly mixed into the batter. 4. Prepare topping mixture In a small bowl, mix together 1 tablespoon of brown sugar and 1/2 teaspoon of ground cinnamon. This will be your sweet topping. Sprinkle this mixture over the top of the batter in your mug. 5. Microwave cooking instructions Place the mug in the microwave and cook on high for about 1 minute and 30 seconds. Keep an eye on it. If it rises too much, pause the microwave and let it settle. After cooking, let the mug cake cool for a minute before enjoying. It should be soft, fluffy, and warm. For the full recipe, check out the details! - Avoiding overflow in the microwave: To stop spills, use a large mug. A 12 oz mug works best. Watch it closely as it cooks. If it rises too fast, pause the microwave. Let it settle before cooking more. This keeps your microwave clean and your cake perfect. - Ensuring even mixing of ingredients: Mix dry ingredients well before adding wet ones. This helps prevent clumps. Scrape the sides of the mug to get all the flour. A smooth batter makes for a fluffy cake. Fold the peaches gently to keep them whole. - Adjusting cook time based on microwave wattage: Microwaves vary in power. If yours is stronger, check the cake after 1 minute. If it’s weaker, you may need 2 minutes. Always test with a toothpick. If it comes out clean, your mug cake is done. - Topping with ice cream or whipped cream: For a rich treat, add a scoop of vanilla ice cream. The cold cream blends well with the warm cake. Whipped cream is another great option. Both add sweetness and creaminess to each bite. - Garnishing with fresh peach slices: Fresh peach slices on top give a nice touch. They add color and a bit of crunch. They also enhance the peach flavor. This makes your mug cake look extra tempting! {{image_2}} You can switch up the fruit in your peach cobbler mug cake. Feel free to use apples or berries. Both options add a unique twist. Apples give a sweet and tart flavor. Berries, like blueberries or raspberries, add a burst of color and taste. You might even want to mix fruits. Try adding chocolate chips for a fun surprise. Their rich taste pairs well with any fruit. If you want a healthier version, consider using whole wheat flour. This swap boosts fiber and nutrients. Your cake will still taste great, but it will be better for you! You can also replace regular milk with nut milk. Almond or oat milk works well. These options make the mug cake dairy-free while keeping it creamy and delicious. To keep your Peach Cobbler Mug Cake fresh, store it in the fridge. Place it in an airtight container or cover the mug with plastic wrap. It will last for about three days. If you want to reheat it, pop it back in the microwave. Heat for about 15 to 20 seconds. Check if it is warm enough before enjoying it again. If you want to freeze your mug cake, let it cool first. Wrap it tightly with plastic wrap or foil. You can also use a freezer-safe container. The mug cake can stay in the freezer for up to a month. When you’re ready to eat it, take it out and let it thaw in the fridge overnight. You can also thaw it in the microwave. Heat it for 30 seconds or until soft. Enjoy your treat! You can store the mug cake in the fridge for up to two days. Cover it with plastic wrap to keep it fresh. If you want to enjoy it later, just warm it in the microwave for about 20 seconds. Yes, you can use frozen peaches! Just let them thaw first. Drain any extra juice to keep the mug cake from getting too soggy. They will still add great flavor. No microwave? No problem! You can bake the mug cake in a small oven-safe dish. Preheat the oven to 350°F (175°C). Bake for about 20 minutes or until a toothpick comes out clean. You can easily double the recipe. Just use a larger mug or dish. Be sure to adjust the cooking time. If using a microwave, cook in shorter bursts and check for doneness often. You learned how to make a delicious peach mug cake using simple ingredients. We covered key steps from mixing to microwaving. Remember to adjust cook times based on your microwave. Try topping it with ice cream or other fruits for variety. You can also store leftovers or freeze the cake for later. Enjoy experimenting with flavors and share this treat with friends. Mug cakes are quick, fun, and perfect for any peach lover!

Peach Cobbler Mug Cake Quick and Simple Dessert Treat

Are you craving something sweet and quick? This Peach Cobbler Mug Cake is your answer. In just minutes, you can

- 8 oz (230g) whole grain pasta (fusilli or penne) - 1 cup cherry tomatoes, halved - 1 cucumber, diced - 1/2 red onion, finely chopped - 1/2 cup Kalamata olives, pitted and halved - 1/2 cup crumbled feta cheese - 1/4 cup fresh parsley, chopped - 1/4 cup olive oil - 2 tablespoons red wine vinegar - 1 clove garlic, minced - 1 teaspoon dried oregano - Salt and pepper to taste Each ingredient plays a key role in the taste of Greek pasta salad. The whole grain pasta gives a hearty base. I love using fusilli or penne because they hold the dressing well. Cherry tomatoes add a burst of color and sweetness. Cucumbers bring a refreshing crunch that balances the flavors. Red onion adds a sharp bite. Kalamata olives give a briny taste and depth. Feta cheese adds creaminess and saltiness. Fresh parsley provides a bright note and a pop of green. Olive oil acts as the main dressing, while red wine vinegar adds tang. Garlic and oregano bring aromatic qualities, making every bite delicious. Calories per serving: Approximately 250 Macronutrients breakdown: - Carbohydrates: 35g - Protein: 8g - Fat: 10g Knowing the nutritional facts helps you enjoy this dish guilt-free. It’s packed with flavor and nutrients. The balance of carbs, protein, and healthy fats makes it a great meal option. You can swap whole grain pasta for gluten-free pasta. If you can’t find Kalamata olives, green olives work too. For a creamier texture, try goat cheese instead of feta. In summer, add bell peppers or zucchini for extra veggies. In fall, consider roasted butternut squash for a seasonal twist. Being flexible with ingredients keeps the salad fresh and fun! To cook pasta until al dente, bring a pot of water to a boil. Add a pinch of salt to the water. Then, add the whole grain pasta. Cook it according to the package instructions. This usually takes about 8 to 10 minutes. You want it firm but not hard. After cooking, drain the pasta in a colander. Rinse it with cold water right away. This stops the cooking and keeps the pasta from getting mushy. It also cools the pasta down for your salad. Now, it’s time to mix all the tasty ingredients. Start by placing the cooled pasta in a large mixing bowl. Next, add the halved cherry tomatoes, diced cucumber, finely chopped red onion, Kalamata olives, and crumbled feta cheese. To ensure even distribution, gently fold the ingredients together. You want every bite to have a mix of flavors. Be careful not to mash the tomatoes or cheese. Just a gentle toss will do. For the dressing, grab a small bowl. Whisk together the olive oil, red wine vinegar, minced garlic, dried oregano, salt, and pepper. Make sure everything blends well. Tasting the dressing is crucial. Adjust the salt and pepper as needed. A good dressing brings all the flavors together, so don’t skip this step. Now pour the dressing over the pasta and vegetable mix. Toss gently again until everything is well-coated. This is where the magic happens! If you want the full recipe, check out the Mediterranean Delight Pasta Salad. To make your Greek pasta salad pop, try adding herbs and spices. Fresh herbs like basil and mint can brighten the dish. You can also use dried herbs, such as oregano or thyme, for a stronger flavor. Fresh ingredients often taste better, but dried ones can work well too. If you have fresh tomatoes, use them instead of canned for a juicier bite. A squeeze of lemon juice can also add a nice zing. Serving style matters! Use a large bowl for a family-style meal or individual plates for a fancy touch. For a pop of color, sprinkle extra olives and parsley on top. You might even add a few slices of lemon or cucumber to the edge of the bowl. This makes the dish look fresh and inviting. Remember, we eat with our eyes first! To save time, prepare your ingredients ahead of time. Chop your veggies and herbs the night before. Store them in airtight containers to keep them fresh. If you have leftovers, store them in a sealed container in the fridge. This way, you can enjoy your salad later without fuss. Just give it a quick toss before serving to mix everything again. {{image_2}} You can change your Greek pasta salad with regional flavors. For an Italian twist, try adding sun-dried tomatoes and mozzarella. These ingredients add depth and richness. You can also mix in some basil for a fresh touch. If you want a Middle Eastern flair, add spices like cumin and sumac. These spices bring warmth and boldness. You can also include roasted vegetables for extra texture and taste. If you follow a vegan diet, swap feta cheese for a plant-based option. Nutritional yeast can provide a cheesy flavor without dairy. You can also add chickpeas for extra protein and fiber. For gluten-free options, choose gluten-free pasta made from rice or quinoa. These options are just as tasty and allow everyone to enjoy this dish. Seasonal ingredients can change your pasta salad. In summer, use bright cherry tomatoes and cucumbers. They are fresh and hydrating. In fall, consider roasted butternut squash and kale for a heartier dish. You can also add nuts or seeds for crunch. For festive presentations, serve in hollowed-out vegetables like bell peppers. This makes your dish visually appealing and fun to eat. Try out these variations to keep your Greek pasta salad exciting and fresh! For the full recipe, check out the Mediterranean Delight Pasta Salad. To keep your Greek pasta salad fresh, use an airtight container. Glass or plastic containers work well. If you have a lot of salad, divide it into smaller portions. This makes it easy to grab a quick meal. Before storing, let the salad cool to room temperature. This step helps avoid moisture buildup. When you're ready to eat, just take out what you need. To reheat, use a microwave for a quick warm-up. Stir it gently to heat evenly. In the fridge, your Greek pasta salad lasts about 3 to 5 days. Make sure to check for signs of spoilage. If the pasta looks mushy or the vegetables get slimy, it's time to toss it. A sour smell is also a clear sign that the salad has gone bad. Always trust your senses to keep food safe. Can you freeze Greek pasta salad? Yes, but it can change the texture. If you freeze it, use a freezer-safe container. Keep it sealed tightly to avoid freezer burn. When you're ready to eat, thaw it in the fridge overnight. This method helps maintain flavor. Avoid thawing at room temperature, as it can lead to spoilage. If you plan to freeze, consider leaving out the dressing. Add it after thawing for the best taste. To make Greek Pasta Salad vegetarian, simply skip any meat. Many flavors come from veggies and cheese. You can use more olives or add artichoke hearts. Toss in some roasted red peppers for a nice touch. The key is to keep the taste bold, so don’t hold back on herbs and spices. You can use many pasta types, but some work better. Whole grain pasta gives a nice nutty flavor. Fusilli or penne helps the dressing cling. If you prefer gluten-free, try brown rice pasta or quinoa pasta. Just cook it as directed and rinse with cold water. Greek Pasta Salad stays fresh for about three days in the fridge. To keep the flavors strong, cover it tightly. If you see any water pooling, just drain it before serving. The salad tastes even better after chilling, so let it rest for at least 30 minutes. For toppings, think about adding more texture and flavor. Chopped fresh dill or mint can brighten the dish. Toasted pine nuts add a nice crunch. You can also sprinkle more feta cheese or add sliced radishes for a peppery kick. These toppings enhance both taste and look. This blog post covered the delicious Greek pasta salad recipe, from ingredients to storage. You learned how to mix flavors, make a tasty dressing, and present the dish nicely. Don't forget the tips for storing or freezing your salad. Remember, this recipe is flexible. Try seasonal ingredients or dietary swaps to fit your needs. Enjoy making this salad, and share it with friends for a fresh, tasty meal!

Greek Pasta Salad Fresh and Flavorful Recipe Delight

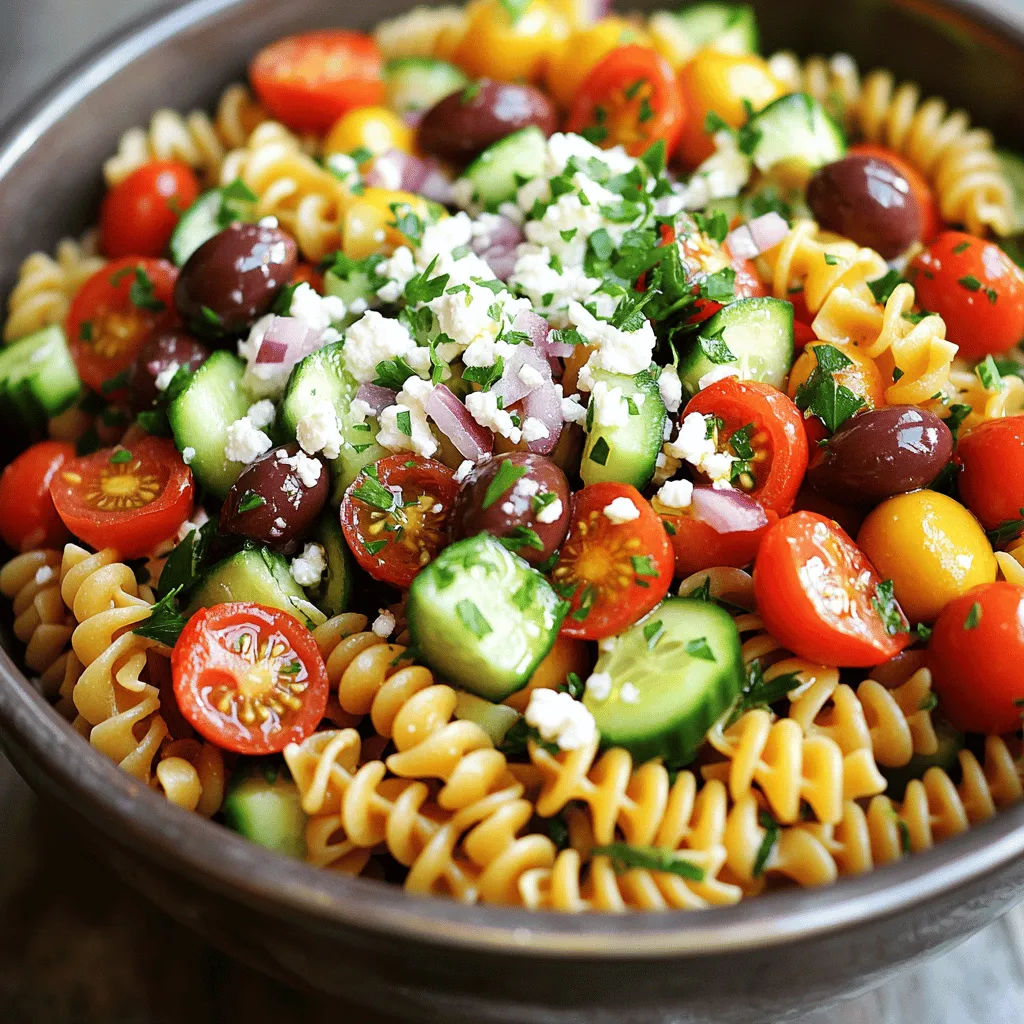
Greek Pasta Salad is a burst of color and flavor. You’ll learn how to mix fresh veggies, olives, and feta

To make Raspberry Lemonade Bars, you will need the following ingredients: - 1 cup all-purpose flour - 1/4 cup powdered sugar - 1/2 cup unsalted butter, melted - 2 large eggs - 1 cup granulated sugar - 1/4 cup fresh lemon juice (about 2 lemons) - 1 teaspoon lemon zest - 1 cup fresh raspberries (or frozen, thawed) - 1/2 teaspoon baking powder - Pinch of salt - Extra powdered sugar for dusting Each ingredient plays a key role in the flavor and texture of the bars. The flour forms the crust, while the butter adds richness. Eggs create the creamy filling, and the sugars sweeten everything. Fresh lemon juice and zest bring zesty brightness. Raspberries add a burst of flavor and color, making these bars a true delight. Make sure to use fresh lemons for the best taste. If you can't find fresh raspberries, frozen ones work too. Just thaw them and drain the excess water. This recipe combines all these elements for a refreshing summer treat. For the full recipe, see the instructions. Preheating the Oven Start by preheating your oven to 350°F (175°C). This step is key for baking. Mixing and Pressing Ingredients In a medium bowl, mix 1 cup of all-purpose flour with 1/4 cup of powdered sugar. Stir in 1/2 cup of melted unsalted butter until the mixture looks crumbly. Next, press this mixture evenly into the bottom of a greased or lined 8x8 inch baking dish. Baking the Crust Bake the crust for about 15 minutes. Look for it to be lightly golden. This crust will hold all the yummy filling. Whisking Eggs and Sugar While the crust bakes, whisk together 2 large eggs and 1 cup of granulated sugar in a bowl. Mix until it's well combined. Adding Lemon Juice and Zest Add in 1/4 cup of fresh lemon juice and 1 teaspoon of lemon zest. Also, mix in 1/2 teaspoon of baking powder and a pinch of salt. Keep mixing until the filling is smooth and ready for raspberries. Folding in Raspberries Gently fold in 1 cup of fresh raspberries. Be careful not to break them. You want the berries to stay whole for bursts of flavor. Pouring Filling over Crust Once the crust is done, remove it from the oven. Pour the raspberry-lemon filling over the hot crust and spread it evenly. Baking Time and Visual Cues Return the dish to the oven. Bake for 20-25 minutes, until the filling sets and the edges turn golden. You'll know it's done when a toothpick comes out clean. Cooling and Dusting After baking, take the bars out and let them cool in the dish on a wire rack. Once cool, dust the top with extra powdered sugar. This adds a sweet touch. Now, cut into squares and enjoy! For the full recipe, check out the details above. - Avoid Overmixing: When you mix the filling, do it gently. Overmixing can lead to a tough texture. You want a light and airy filling that melts in your mouth. - Correct Baking Temperature: Always preheat your oven to 350°F (175°C). This ensures even cooking. Use an oven thermometer if needed to check the heat. - Using Fresh vs. Frozen Raspberries: Fresh raspberries give a bright taste. If you use frozen, thaw and drain them first. This keeps the filling from being too watery. - Balancing Sweetness and Tartness: Adjust the sugar based on your taste. If you like it tangy, add a little more lemon juice. This gives a nice kick to the bars. - Plating Ideas: Serve the bars on a colorful plate. This makes them look even more inviting. Add fresh raspberries and lemon slices around them. - Garnishing Tips: Dust the top with powdered sugar for a sweet touch. A sprig of mint adds color and freshness. This makes your dessert pop! For more detailed steps, check out the Full Recipe. {{image_2}} Adding Other Fruits You can mix in other fruits to change the taste. Try using blueberries or strawberries. Both will add a new flavor twist. You can also use a mix of berries. This gives you a fun, colorful dessert. Just make sure the total fruit amount stays the same. Incorporating Herbs like Mint Adding fresh mint brings a delightful touch. Mint pairs well with lemon and raspberry. You can finely chop the mint leaves and fold them into the filling. This adds a refreshing note and makes your bars even tastier. Gluten-Free Options To make these bars gluten-free, swap the all-purpose flour. Use a gluten-free flour blend instead. Many work well and create a similar texture. Just ensure it has a binding agent for the best results. Vegan Adaptations For a vegan version, you can replace eggs with flax eggs. Mix one tablespoon of ground flaxseed with three tablespoons of water for each egg. Let it sit until it thickens. You can also use vegan butter instead of regular butter. This way, everyone can enjoy the bars! Pairing with Ice Cream or Whipped Cream These bars taste amazing with ice cream or whipped cream. A scoop of vanilla ice cream adds creaminess. Whipped cream gives a light texture. Both make the dessert feel extra special. Serving with Beverages Serve these bars with refreshing drinks. Lemonade or iced tea are perfect choices. Their flavors match well and enhance the whole experience. You can even make a fun drink with fresh raspberries. This way, you tie your dessert and drink together beautifully. For the complete recipe, check out the [Full Recipe]. - Refrigeration Tips: To keep raspberry lemonade bars fresh, store them in an airtight container. Place a piece of parchment paper between layers to prevent sticking. They can last in the fridge for about a week. - Freezing Options: You can freeze these bars for longer storage. Cut them into squares, wrap each piece in plastic wrap, and place them in a freezer bag. They keep well for up to three months. Just remember to label the bag with the date! - How Long Do They Last?: When stored properly, raspberry lemonade bars last up to one week in the fridge. If frozen, they can last up to three months. - Signs of Spoilage: Check for any off smells, discoloration, or mold. If you see any of these signs, it’s best to toss them out. - Best Methods for Enjoying Leftovers: If you prefer warm bars, reheat them in the oven. Set the oven to 350°F (175°C) and place the bars on a baking sheet for about 10 minutes. You can also enjoy them cold straight from the fridge! Yes, you can use bottled lemon juice. However, fresh juice tastes better. Fresh lemons have a bright flavor. Bottled juice often lacks this zing. If you use bottled juice, check the label for additives. You can tell by looking at the edges. They should be lightly golden and firm. The center should not jiggle when you shake the pan. A toothpick inserted in the center should come out clean. If you don’t have raspberries, you can use other fruits. Blueberries or strawberries work well too. You can also try blackberries or even chopped peaches. Just adjust the sweetness if needed. Yes, you can make these bars ahead of time. They stay fresh for a few days in the fridge. Store them in an airtight container for best results. You can also freeze them for longer storage. Just thaw them in the fridge before serving. Each bar has about 180 calories. They contain around 8 grams of fat and 23 grams of carbs. There is also about 1 gram of protein. For a full breakdown, check the [Full Recipe]. You learned how to make delicious raspberry lemonade bars step by step. From mixing the crust to baking the filling, each step is key for great bars. Don’t forget tips for the perfect texture and great serving ideas. You can even try fun variations and dietary options. Enjoy these sweet and tangy bars fresh or stored for later. They are a treat for any occasion. Happy baking!

Raspberry Lemonade Bars Refreshing Summer Dessert

Craving a sweet escape this summer? Look no further than these Raspberry Lemonade Bars! Bursting with tart lemon and sweet

Gathering your ingredients is the first step to making no-bake cheesecake bites. Here’s what you need: - 1 cup cream cheese, softened - 1/2 cup Greek yogurt - 1/4 cup powdered sugar - 1 teaspoon vanilla extract - 1 cup graham cracker crumbs - 4 tablespoons unsalted butter, melted - Fresh berries for topping - Optional toppings: chocolate or caramel sauce These ingredients create a creamy, rich filling and a sweet crust. The cream cheese and Greek yogurt give your bites a smooth texture. The powdered sugar adds just the right amount of sweetness. The graham cracker crumbs, mixed with melted butter, form a tasty crust. It’s the perfect base for the cheesecake filling. Fresh berries on top add a pop of color and flavor. Feel free to get creative with the toppings! You can drizzle chocolate or caramel sauce for a fun twist. Each ingredient plays a key role in making these treats easy and delicious. For the full recipe, check the complete guide. Enjoy the process! To make no-bake cheesecake bites, follow these simple steps. 1. Combine cream cheese, Greek yogurt, powdered sugar, and vanilla extract. In a mixing bowl, add 1 cup of softened cream cheese, 1/2 cup of Greek yogurt, 1/4 cup of powdered sugar, and 1 teaspoon of vanilla extract. Use an electric mixer to blend until smooth and creamy. This should take about 2-3 minutes. 2. Mix graham cracker crumbs with melted butter. In another bowl, combine 1 cup of graham cracker crumbs with 4 tablespoons of melted unsalted butter. Stir until the mixture looks like wet sand. 3. Line muffin tin and press crust mixture into liners. Take a mini muffin tin and line it with mini cupcake liners. Scoop about a tablespoon of the graham cracker mix into each liner. Press it down firmly to form a crust at the bottom. 4. Fill liners with cheesecake mixture. Spoon the cheesecake filling over the crusts in each muffin liner. Fill them until they are nearly full. Use a spatula to smooth the tops. 5. Refrigerate and set. Cover the muffin tin with plastic wrap. Place it in the fridge for at least 2 hours, or until the bites are set. Once they are ready, you can enjoy these tasty treats. For the full recipe, check out the details provided above. To make the best no-bake cheesecake bites, start with cream cheese at room temperature. This step helps it mix smoothly. An electric mixer works wonders here. It gives you a creamy and smooth texture. Adjust the sweetness to your taste. Some like it sweeter, while others prefer a mild flavor. For a stunning look, arrange your cheesecake bites on a decorative platter. This makes them pop! Add fresh berries on top for extra color and freshness. They not only taste great but also look amazing. You can drizzle chocolate or caramel sauce for a sweet touch. These little details make your treats shine at any gathering. {{image_2}} You can change up the flavor of your no-bake cheesecake bites easily. Here are some fun ideas: - Add lemon zest for a citrus twist: This brightens up the flavor and adds a fresh taste. - Incorporate chocolate chips or fruit puree: These additions make each bite exciting. You can use raspberries, strawberries, or even mango for a fruity flavor. - Try different crust options: Instead of graham crackers, use crushed Oreos or nuts for a unique crust. No-bake cheesecake bites are great for many occasions. They work well for: - Parties, picnics, or dessert tables: These bites make a lovely treat that everyone will enjoy. - Pair with coffee or a refreshing beverage: They taste great with a warm drink or a chilled drink on a hot day. Feel free to explore these options and make the bites your own! For the full recipe, check out the link above. Store your no-bake cheesecake bites in an airtight container. Place them in the fridge. They will stay fresh for about five days. If you want to keep them longer, you can freeze them. To freeze, wrap each bite in plastic wrap and place them in a freezer-safe bag. They can last up to three months in the freezer. Just remember to let them thaw in the fridge before serving. You do not need to reheat these bites. Serve them chilled for the best taste. Just take them out of the fridge and enjoy! They make a great treat for parties or family gatherings. For added flair, you can drizzle chocolate or caramel sauce on top before serving. This adds extra sweetness and makes them look pretty. How long do no-bake cheesecake bites last in the fridge? No-bake cheesecake bites last about 5 days in the fridge. Keep them in an airtight container. They taste great even after a few days, but they are best when fresh. Can I make these bites ahead of time? Yes, you can make these bites a day or two ahead. Just store them in the fridge. This makes them a great option for parties or gatherings. What are the best toppings for no-bake cheesecake bites? Fresh berries, like strawberries and blueberries, are perfect toppings. You can also drizzle chocolate or caramel sauce for extra flavor. Nuts or crushed cookies work well too. Why are my cheesecake bites not setting? If your cheesecake bites are not setting, it may be due to warm ingredients. Make sure cream cheese is softened, not hot. Also, allow enough time in the fridge to chill. How can I fix a runny cheesecake mixture? If your mixture is runny, add more cream cheese or a bit of powdered sugar. Blend it well, then chill again. This will help thicken it up for better bites. You learned how to make delicious no-bake cheesecake bites using simple ingredients. The steps are easy, and with a few tips, you can ensure success. Personalize these bites with your favorite toppings and flavors. This dessert is great for any event. Store them properly to keep them fresh. Enjoy making and sharing these treats that anyone can love!

No-Bake Cheesecake Bites Tasty and Simple Treat

Looking for a sweet treat that’s quick and easy? No-Bake Cheesecake Bites are the answer! With just a few simple

To create a tasty Thai peanut noodle salad, you need fresh and vibrant ingredients. Here’s what you'll need: - 8 oz rice noodles - 1 cup shredded carrots - 1 red bell pepper, julienned - 1 cup cucumber, thinly sliced - 1/2 cup red cabbage, shredded - 1/4 cup scallions, chopped - 1/4 cup fresh cilantro, chopped - 1/3 cup unsweetened peanut butter - 3 tablespoons soy sauce (or tamari for gluten-free) - 2 tablespoons honey or maple syrup - 2 tablespoons lime juice - 1 tablespoon sesame oil - 1 teaspoon sriracha (adjust for spice preference) - Crushed peanuts for garnish - Lime wedges for serving Each ingredient adds flavor, color, and texture to your dish. Rice noodles provide a soft base. Fresh veggies like carrots and bell peppers add crunch. The peanut dressing brings everything together with a rich, nutty taste. You can find the full recipe [here]. Enjoy the process of preparing this salad! It’s simple and healthy, making it a great choice for lunch or dinner. Start by boiling water in a large pot. Use enough water to cover the noodles. Once it boils, add the rice noodles. Cook them for about 6 to 8 minutes, or until they are just tender. Stir them a few times to keep them from sticking. After cooking, drain the noodles. Rinse them under cold water to stop the cooking process and to cool them down. Set them aside for later. While the noodles cook, chop your vegetables. For carrots, use a grater for thin shreds. Cut the red bell pepper into thin strips, called julienne. Slice the cucumber into thin rounds. Shred the red cabbage using a sharp knife or mandoline. Chop the scallions into small pieces. Finally, roughly chop the cilantro. Place all the chopped vegetables into a large mixing bowl and mix them well. In a separate bowl, make the peanut dressing. Add the peanut butter, soy sauce, honey (or maple syrup), lime juice, sesame oil, and sriracha. Whisk these ingredients together until they become smooth. If the dressing is too thick, you can add a tablespoon of warm water to thin it out. Taste the dressing and adjust it to your liking. Now it’s time to combine everything. Add the cooled noodles to the bowl of mixed vegetables. Pour the peanut dressing over the top. Gently toss the noodles and vegetables together. Make sure every piece is coated in the dressing. This step is key for great flavor! To serve, divide the salad into bowls. Top with crushed peanuts for a nice crunch. Add lime wedges on the side for extra zest. For a great presentation, serve the salad on a large, shallow platter. Arrange the noodles and vegetables in a circle. Sprinkle with crushed peanuts and fresh cilantro on top for a pop of color. Enjoy your meal warm or cold! For the full recipe, refer back to the earlier section. To make the best Thai peanut noodle salad, cook the rice noodles just right. Follow the package instructions closely. I suggest cooking them until they are al dente, not mushy. When done, drain and rinse the noodles with cold water. This stops the cooking and keeps them firm. Using fresh ingredients is key. Crisp vegetables add great flavor and texture. Choose vibrant carrots, bright bell peppers, and crunchy cucumbers. Freshness makes your salad pop! You can mix things up with the dressing. If you don’t have peanut butter, try almond or sunflower seed butter. Both work well and taste great! Adjust the spice level to fit your taste. Add more sriracha if you like heat. For less spice, use just a dash or skip it. You can also add a bit of ginger for extra flavor. Garnishing is an easy way to make your dish shine. Top the salad with crushed peanuts. This adds a crunchy texture. Sprinkle fresh cilantro on top for color. Choose the right serving dish for a nice look. A large, shallow platter works best. Arrange the noodles and veggies in a circular pattern. Place lime wedges around the edge for a bright touch. For the full recipe, check it out [here](Full Recipe). {{image_2}} You can easily turn this dish into a vegetarian delight. Adding tofu or tempeh gives protein and texture. Both options soak up the dressing well. For extra crunch, try adding roasted chickpeas. You can also swap in vegetables like zucchini or bell peppers instead of the usual ones. This keeps the salad fresh and exciting. If you want more protein, chicken or shrimp works great. Cooked chicken adds a savory flavor. Shrimp cooks quickly and brings a sweet taste. For a vegan option, consider edamame or seitan. These choices keep your meal filling and nutritious. For gluten-free eaters, choose rice noodles. They are easy to find and taste great. If you use soy sauce, opt for tamari instead. This keeps your dressing gluten-free too. Many brands offer gluten-free versions, so check labels. These swaps ensure everyone can enjoy this tasty salad. To keep your Thai Peanut Noodle Salad fresh, refrigerate it right away. Place leftovers in an airtight container. This helps keep the flavors and textures intact. You can store it in the fridge for up to three days. Recommended storage containers: - Glass containers with lids - BPA-free plastic containers - Mason jars for individual servings If you want to save your salad for later, freezing is a great option. However, keep in mind that fresh veggies may lose some crunch. You can freeze the noodles and the dressing separately for the best results. Freezing options: tips and techniques: - Portion the salad into freezer-safe bags. - Remove as much air as possible before sealing. - Label the bags with the date for easy tracking. Thawing and reheating instructions: - To thaw, place the bag in the fridge overnight. - Reheat the noodles in a pan with a splash of water, stirring gently. - Add fresh veggies after reheating to maintain their crispness. For the best eating experience, enjoy your Thai Peanut Noodle Salad fresh. But these storage tips will help you make the most of your delicious meal! For the complete recipe, check out the Full Recipe. To make this salad vegan, swap the honey with maple syrup. You will keep the other ingredients the same. The peanut butter, soy sauce, and fresh veggies are all vegan-friendly. This simple swap keeps the salad sweet and tasty. Yes, you can use other noodles! Rice noodles are great, but you can try: - Soba noodles - Udon noodles - Zucchini noodles for a low-carb option These alternatives add different textures and flavors. This salad pairs well with many dishes. Here are some options: - Grilled chicken or shrimp for added protein - Spring rolls for a fun appetizer - A light soup, like miso or vegetable soup These side dishes enhance your meal and make it more filling. The salad lasts about three days in the fridge. Store it in an airtight container. If you add the dressing, it may get soggy over time. To keep it fresh, store the dressing separately and mix it in before serving. Yes, you can make the dressing ahead of time! Store it in a jar with a lid. It will stay fresh for about one week in the fridge. Just give it a good shake before using it again. This way, you save time when preparing the salad. For the full recipe, check out the complete guide! This blog post covered how to make a tasty Thai Peanut Noodle Salad. You learned about the right ingredients, like rice noodles and fresh veggies. I shared simple steps for cooking and combining everything, plus tips for perfecting your dish. In conclusion, this salad is flexible and easy to customize. Enjoy experimenting with flavors and ingredients that suit your taste. Whether you choose chicken, tofu, or just veggies, you'll create a fun and healthy meal. Get ready to delight your friends and family with this delicious dish!

Thai Peanut Noodle Salad Simple and Healthy Delight

If you’re looking for a fresh and tasty meal, Thai Peanut Noodle Salad is your answer. This simple dish combines

- 12 oz fettuccine pasta - 2 boneless, skinless chicken breasts - 2 tablespoons olive oil - 1 cup heavy cream - 1 cup grated Parmesan cheese The main ingredients create the base of your Chicken Alfredo. Fettuccine pasta gives a nice, chewy texture. Chicken breasts add protein and flavor. Olive oil helps cook the chicken and adds richness. Heavy cream makes the sauce creamy and smooth. Parmesan cheese offers a salty, nutty flavor that ties everything together. - Salt and pepper - 3 cloves garlic, minced - 1 teaspoon Italian seasoning - Fresh parsley, chopped (for garnish) Seasoning brings life to your dish. Salt and pepper enhance the natural flavors. Minced garlic adds a delicious aroma and taste. Italian seasoning gives a blend of herbs, making the dish more vibrant. Finally, fresh parsley adds a touch of color and freshness as a garnish. For the full recipe, refer to the previous section. To start, bring a large pot of salted water to a boil. This step is key for flavor. Once boiling, add 12 ounces of fettuccine pasta. Cook it according to the package instructions, usually around 8-10 minutes. You want it al dente, which means it will be firm but not hard. After cooking, drain the pasta and set it aside. Don’t forget to keep about 1 cup of pasta water for later. While the pasta cooks, let’s prepare the chicken. Take two boneless, skinless chicken breasts and butterfly them. This means cutting them thin so they cook faster. Season both sides with salt and pepper to enhance the flavor. Now, heat 2 tablespoons of olive oil in a large skillet over medium-high heat. Once hot, add the chicken breasts. Cook them for about 6-7 minutes on each side or until they are golden brown. It's best to ensure they are cooked through. After cooking, remove the chicken and let it rest for a few minutes. Slice it into strips for easy serving. In the same skillet, add 3 cloves of minced garlic. Sauté it for about 1 minute until it smells great. Next, pour in 1 cup of heavy cream. Stir it well and let it simmer for 2-3 minutes. Now, we add flavor. Gradually whisk in 1 cup of grated Parmesan cheese. This will make the sauce creamy and rich. If it’s too thick, add some reserved pasta water until you reach your desired consistency. Sprinkle in 1 teaspoon of Italian seasoning for extra taste. Time to bring it all together! Add the cooked fettuccine to the Alfredo sauce. Toss it gently to coat the pasta evenly. Then, place the sliced chicken on top and mix it in. When serving, garnish with chopped fresh parsley and more Parmesan if you like. This adds a nice touch and a pop of color. Enjoy your easy Chicken Alfredo pasta! For more details, check the Full Recipe. To make your Easy Chicken Alfredo Pasta truly shine, use fresh herbs. Fresh parsley or basil adds a bright touch. You can also try experimenting with different cheeses. While Parmesan is classic, adding mozzarella or even a bit of goat cheese can create a unique taste. For a creamy sauce, add some reserved pasta water. This helps achieve the right consistency without making the sauce too thick. To avoid lumps in your sauce, whisk in the cheese gradually. This way, it melts evenly and integrates smoothly. Cooking chicken perfectly is key. Aim for about 6-7 minutes per side on medium-high heat. This ensures a golden crust and juicy meat. For pasta, follow package instructions for al dente. Remember to keep some pasta water handy for the sauce. You can find the full recipe for this dish to guide you through each step. {{image_2}} You can make Chicken Alfredo tastier by adding vegetables. Broccoli and spinach are great choices. Just steam the broccoli for a few minutes. You can toss it into the pasta at the end. Spinach wilts quickly. Add it in the last minute of cooking. Roasted red peppers add a smoky flavor. You can use jarred ones or roast fresh peppers. They will give your dish a nice color and taste. If you want a change, try shrimp Alfredo. Shrimp cooks fast and adds a sweet flavor. Just sauté shrimp in the same pan after cooking the chicken. You can also try vegetarian Alfredo. Use mushrooms or tofu instead of meat. Both options are tasty and healthy. For those needing gluten-free options, you can choose gluten-free pasta. Many brands now offer great options that taste good. For a lower-fat sauce, use half-and-half instead of heavy cream. You can also mix in some low-fat cheese. These swaps keep your dish creamy but lighter. To keep your Chicken Alfredo fresh, store it in an airtight container. Glass or plastic containers work well. Make sure to let the pasta cool before sealing it. This helps prevent moisture build-up. Place the leftovers in the fridge. They will stay good for about 3-4 days. When it’s time to enjoy your leftovers, you have two main options: microwave or stovetop. - Microwave: Place the pasta in a bowl. Cover it with a damp paper towel. Heat in short bursts, stirring in between, until warm. This helps keep it moist. - Stovetop: Heat a small amount of olive oil in a pan. Add the pasta and a splash of water to help with steam. Stir often until heated through. This method keeps the texture better. If you want to save your Chicken Alfredo for later, freezing is a great option. - How to properly freeze: Allow the pasta to cool completely. Then, scoop it into airtight freezer bags or containers. Remove as much air as possible. This helps prevent freezer burn. - Thawing and reheating instructions: To thaw, place the container in the fridge overnight. If you’re in a hurry, you can use the microwave on the defrost setting. Reheat using the stovetop method mentioned earlier for the best texture. To make Chicken Alfredo pasta from scratch, follow these steps: 1. Cook the Pasta: Boil salted water and cook 12 oz of fettuccine until al dente. 2. Prepare the Chicken: Butterfly two boneless, skinless chicken breasts and season with salt and pepper. 3. Sear the Chicken: Heat 2 tablespoons of olive oil in a skillet. Cook the chicken for 6-7 minutes on each side until golden. 4. Make the Alfredo Sauce: Sauté 3 minced garlic cloves in the same skillet. Add 1 cup of heavy cream and simmer. 5. Add Cheese and Seasoning: Whisk in 1 cup of grated Parmesan cheese until creamy. Stir in 1 teaspoon of Italian seasoning. 6. Combine Pasta and Sauce: Toss the cooked fettuccine in the sauce. Add the sliced chicken and mix well. 7. Serve: Plate and garnish with chopped parsley. For a full recipe, refer to the earlier sections. Yes, you can use milk instead of heavy cream. However, the sauce may not be as rich or thick. Milk will make a lighter sauce. If you want creaminess, try using half-and-half or a mix of milk and cream. This gives a balance between lightness and creaminess. For sides, consider: - Steamed Broccoli: Adds color and nutrition. - Garlic Bread: Perfect for mopping up sauce. - Caesar Salad: A classic pairing with creamy pasta. You can also serve a simple green salad with a light vinaigrette. This balances the richness of the Chicken Alfredo. You now have a complete guide to making Chicken Alfredo. We covered the main ingredients, step-by-step instructions, and helpful tips. I shared ways to enhance flavor and offered easy variations. When you follow these steps, your Chicken Alfredo will impress everyone. Remember to store leftovers properly for later enjoyment. Cooking can be fun and rewarding when you try new things in the kitchen. Enjoy your cooking journey!

Easy Chicken Alfredo Pasta Flavorful and Quick Meal

If you’re craving a tasty meal that won’t steal hours of your time, you’re in luck! This Easy Chicken Alfredo

- Chicken breasts - Olive oil and spices - Fresh vegetables - Pita bread or wraps For my chicken shawarma wraps, I love using simple, fresh ingredients. The main star is the chicken. I usually choose two large chicken breasts because they stay juicy during cooking. Next, I combine olive oil with spices for a flavorful marinade. I use cumin, coriander, paprika, turmeric, garlic powder, onion powder, and a little cayenne for heat. These spices give the chicken depth and warmth. Fresh vegetables are key. I like diced cucumbers, tomatoes, and thinly sliced red onion. These add crunch and lightness to the wraps. Finally, I use large pita bread or wraps as the base. They hold all the goodness inside and make eating easy. - Additional toppings (avocado, olives, etc.) - Alternative sauces (hummus, tzatziki) Customization makes these wraps even better. I often add toppings like creamy avocado or salty olives. They bring extra flavor and texture. You can also swap the sauce. Hummus adds a rich, nutty taste, while tzatziki offers a cool, refreshing touch. Feel free to mix and match to suit your taste. For the full recipe, check the section above. To make the chicken tasty, we need a good marinade. Start by mixing these ingredients in a bowl: - 2 tablespoons olive oil - 1 tablespoon ground cumin - 1 tablespoon ground coriander - 1 teaspoon paprika - 1 teaspoon turmeric - 1 teaspoon garlic powder - 1 teaspoon onion powder - ½ teaspoon cayenne pepper (optional) - Salt and pepper to taste This blend gives the chicken a nice flavor. Next, add the thinly sliced chicken breasts. Make sure each piece gets coated well. Cover the bowl and let it sit in the fridge for at least one hour. For the best taste, marinate it overnight. Now it’s time to cook the chicken! First, preheat your skillet over medium-high heat. Once hot, add the marinated chicken slices. Cook them for about 6-8 minutes. Stir the chicken often so it cooks evenly. Look for a slight char on the chicken; this adds more flavor. When it’s fully cooked, remove the skillet from the heat. While the chicken is cooking, prepare your toppings. Dice the cucumber and tomatoes, and slice the red onion. For the sauce, mix these in a small bowl: - 1 cup Greek yogurt - 2 tablespoons tahini - 1 tablespoon lemon juice - Salt and pepper to taste To wrap the shawarma, place a few spoonfuls of the chicken on a pita. Top it with the diced veggies and drizzle the yogurt-tahini sauce over everything. For a fresh touch, sprinkle chopped parsley on top. Next, fold up the bottom of the pita. Roll it tightly from one side to the other. Make sure all the fillings stay inside. Serve your delicious chicken shawarma wraps warm, and enjoy! For the full recipe, check the earlier section. Marinating your chicken is key to great flavor. I recommend marinating for at least one hour. For the best taste, let it sit overnight. This time allows the spices to soak in. You can also use different oils for extra flavor. Olive oil gives a nice taste, but you can try sesame oil for a twist. To get that perfect char on your chicken, preheat your skillet well. Start with medium-high heat. Cook the chicken in a single layer to avoid steaming. Stir occasionally to get even cooking. To keep your chicken juicy, avoid overcooking. Use a meat thermometer; it should reach 165°F for safe eating. When serving your shawarma wraps, presentation is key. Wrap them in parchment paper for easy handling. This also keeps them warm. Serve the wraps on a platter with extra yogurt-tahini sauce on the side. For garnishing, add fresh parsley on top for color. You can also sprinkle some diced tomatoes for a fresh look. {{image_2}} You can swap chicken for beef or lamb in your shawarma wraps. Both meats add rich flavors. If you choose beef, use flank or sirloin. For lamb, boneless shoulder works well. Cook the same way as chicken for great results. If you prefer a vegetarian twist, try marinated tofu or chickpeas. Both options soak up flavors beautifully. You can follow the same marinade and cooking steps as for chicken. Shawarma sauce is key to a great wrap. You can explore different sauces to spice things up. Try a zesty garlic sauce or a spicy harissa sauce. Both options add a kick to your wraps. To enhance flavor profiles, mix yogurt with herbs like dill or mint. You can also use a tahini-based sauce for a creamy texture. Adding lemon juice brightens any sauce, making it more refreshing. Shawarma wraps pair well with tasty side dishes. Serve them with a simple salad or roasted vegetables. You can also add fries or rice for a more filling meal. For meal prep, pack the wraps in containers for quick lunches. Make extra sauce for dipping. This way, you can enjoy your shawarma wraps throughout the week. Check out the Full Recipe for more ideas! To keep your chicken shawarma wraps fresh, follow these steps. First, allow your wraps to cool completely. This will help prevent moisture build-up. Wrap each shawarma in plastic wrap or foil. Place them in an airtight container or a resealable bag. Store the container in the fridge. Your wraps will stay fresh for up to three days. If you want to freeze your wraps, wrap them tightly in plastic wrap and then in aluminum foil. This extra layer helps prevent freezer burn. You can freeze them for up to three months. When you’re ready to eat, thaw them in the fridge overnight. Reheat in an oven at 350°F for about 15-20 minutes. Enjoy them warm and tasty! Chicken shawarma wraps can last in the fridge for about three days. After that, the flavor and texture may decline. Always check for signs of spoilage. If you see any unusual smell, discoloration, or slimy texture, it’s best to toss them out. Safety first! Enjoy your delicious shawarma wraps within the recommended time for the best taste. To make chicken shawarma wraps, start with the marinade. Mix olive oil, cumin, coriander, paprika, turmeric, garlic powder, onion powder, cayenne, salt, and pepper in a bowl. Add thinly sliced chicken and coat well. Let it sit in the fridge for at least an hour. This helps the flavors blend. Preheat a skillet over medium-high heat. Cook the marinated chicken for 6-8 minutes until it’s done and slightly charred. Next, prepare the sauce by mixing Greek yogurt, tahini, and lemon juice. Season it with salt and pepper for taste. To wrap your shawarma, take pita bread or wraps, add the chicken, diced cucumber, tomatoes, and sliced red onion. Drizzle the yogurt-tahini sauce on top. Roll it tightly and enjoy. You can find the full recipe for more details. Yes, you can make shawarma wraps ahead of time. Marinate the chicken the night before. This saves time on busy days. Once cooked, store the chicken in an airtight container in the fridge. You can also prep the veggies and sauce ahead. Just keep them separate until you are ready to eat. It’s best to assemble the wraps right before serving. This keeps the pita fresh and crisp. Chicken shawarma tastes great with many sauces. The classic option is yogurt-tahini sauce. It adds creaminess and tang. Other great choices include garlic sauce and spicy harissa. For a fresh twist, try a zesty lemon-garlic sauce. You can also use hummus for a smooth texture. Each sauce will add a unique flavor to your wrap, so feel free to get creative! In this post, we explored how to make tasty chicken shawarma wraps at home. We covered essential ingredients like chicken, fresh veggies, and olive oil. You learned step-by-step instructions for marinating and cooking the chicken. I shared tips to make your wraps shine, including sauce variations and storage tips. Now it’s time to enjoy your delicious creation. Cooking can be fun and rewarding. With these easy steps, you can impress family and friends with your shawarma wraps. Happy cooking!

Irresistible Chicken Shawarma Wraps Easy and Flavorful

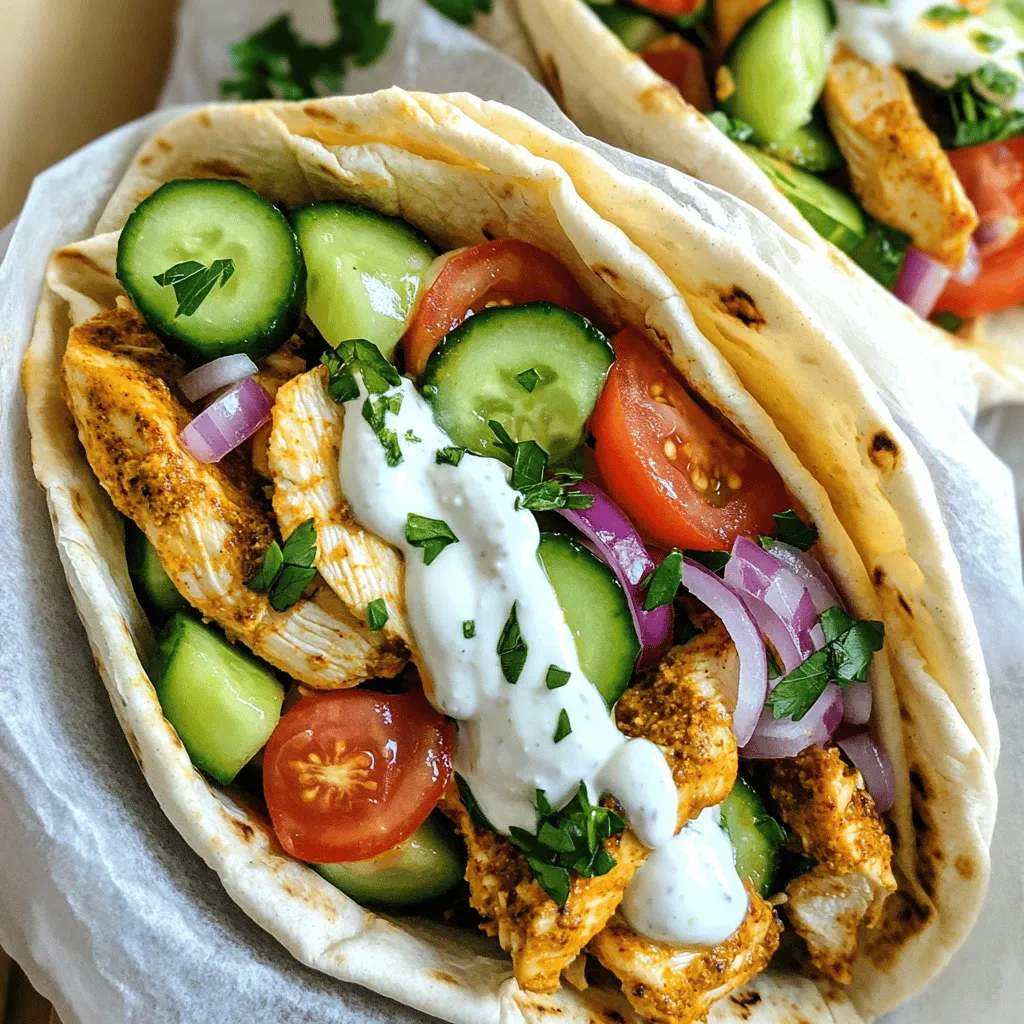
If you’re craving a meal that’s both easy and bursting with flavor, look no further than chicken shawarma wraps! With

A classic Greek salad shines with fresh, vibrant ingredients. Here’s a closer look: - Fresh vegetables: Use ripe tomatoes, crisp cucumbers, sweet bell peppers, and sharp red onions. These add crunch and color to your salad. Freshness is key for the best flavor. - Importance of high-quality feta: Feta cheese gives the salad its signature taste. Choose a creamy, tangy feta for the best flavor. Look for cheese made from sheep's milk for authenticity. - Choosing the right olives: Kalamata olives are the traditional choice. They add a rich, briny flavor. Look for olives that are plump and firm for the best texture. Adding a few more ingredients can enhance your Greek salad: - Extra vegetables: Try adding thinly sliced radishes or shredded carrots. These add more crunch and a hint of sweetness. - Alternative cheese options: If you want to switch it up, consider using goat cheese or a mild mozzarella. These can give your salad a unique twist. A simple dressing can make or break your salad: - Basic vinaigrette recipe: Mix together extra virgin olive oil, red wine vinegar, and dried oregano. This dressing is light but flavorful. It complements the veggies well. - The role of oregano and herbs: Oregano is a must in Greek salads. It adds a warm, earthy flavor. Fresh herbs like parsley can also brighten the dish and add freshness. This classic Greek salad combines simple ingredients to create a delightful and colorful dish. For the full recipe, check out the Mediterranean Bliss Greek Salad. This Greek salad takes just 15 minutes to prep. You will need a large salad bowl, a small bowl for the dressing, and a whisk. Fresh ingredients matter. The better your veggies and cheese, the tastier your salad will be. 1. First, combine the diced tomatoes, cucumber, bell pepper, and red onion in the large bowl. 2. Gently toss these vegetables to mix them well. 3. Then, add the crumbled feta cheese and Kalamata olives on top of the veggies. 4. In the small bowl, whisk together olive oil, red wine vinegar, dried oregano, salt, and pepper. This is your dressing. 5. Pour the dressing over the salad, coating all the ingredients lightly. 6. Now, using gentle tosses, combine everything. Be careful not to mash the feta cheese. 7. Taste your salad. Adjust seasoning with more salt or pepper if needed. 8. Finally, garnish with fresh parsley leaves for an extra burst of flavor and color. Make your salad pop with color. Use a large, shallow bowl for a beautiful presentation. Pair it with grilled chicken or fish for a complete meal. This salad shines next to pita bread and hummus too. Enjoy your Mediterranean bliss! Check out the Full Recipe for more details. To make your Greek salad shine, use seasonal vegetables. Fresh produce adds bright flavors and textures. Look for ripe tomatoes and crisp cucumbers. They make a big difference in taste. Serve your salad chilled for the best experience. Cold ingredients keep everything fresh and crunchy. Don't overmix your salad. Toss gently to keep the feta intact. Overmixing can turn your salad into a mushy mess. Also, don't skimp on seasoning. A little salt and pepper can elevate the overall flavor. Taste as you go to find the perfect balance. Adjust the salad for dietary needs. Add grilled chicken for protein or chickpeas for a vegetarian twist. You can also swap feta with avocado or a dairy-free cheese. Feel free to get creative! Try adding fruits like watermelon or berries for a sweet touch. Explore different herbs, like basil or mint, to change the flavor profile. For the full recipe, check out the Mediterranean Bliss Greek Salad. {{image_2}} You can make Greek salad even better by adding proteins. Grilled chicken or shrimp gives it a boost of flavor and makes it heartier. If you want a vegetarian or vegan salad, swap out the feta for tofu or avocado. Both options keep the salad fresh and tasty. Each area of Greece has its own style of Greek salad. In Crete, they might add barley or use different local herbs. The islands often include capers or seaweed. Each twist brings new flavors, so don’t hesitate to use what you find in your local market. Combining Greek salad with dishes from nearby cultures can create fun new tastes. For example, adding roasted red peppers or artichokes gives a Mediterranean flair. You can even use different dressings, like tahini or lemon-based ones, to change the taste. Simple swaps can make your Greek salad unique and exciting. For the full recipe of a Classic Greek Salad, check out the Mediterranean Bliss Greek Salad! To keep your Greek salad fresh, follow these steps: - Place leftovers in an airtight container. - Store in the refrigerator for up to three days. - Avoid mixing in dressing until you serve. This keeps the veggies crisp. Watch for signs of spoilage. If the salad smells sour or looks slimy, it's best to toss it out. Fresh salads lose their crunch over time. Generally, you should not heat Greek salad. Heating changes the texture and taste. However, if you have leftover ingredients, try these ideas: - Make a pasta salad by mixing with cooked pasta. - Add to an omelet for a fresh twist. - Toss with roasted vegetables for a warm dish. These options keep the flavors bright without losing the salad’s charm. If you want to make Greek salad ahead of time, here’s how: - Chop vegetables and store them separately from the dressing. - Use small containers for easy portioning. - Glass containers work best, as they don’t absorb odors. Preparing in bulk saves time during busy weeks. Just mix and dress when you’re ready to eat. You can find the full recipe to guide you in your meal prep! A Classic Greek Salad is fresh and colorful. It typically includes: - 4 large ripe tomatoes, diced - 1 cucumber, peeled and diced - 1 bell pepper (red or yellow), diced - 1 red onion, thinly sliced - 200g feta cheese, crumbled - A handful of Kalamata olives - 1/4 cup extra virgin olive oil - 2 tablespoons red wine vinegar - 1 teaspoon dried oregano - Salt and pepper to taste - Fresh parsley leaves for garnish These ingredients work together to create a bright, tasty dish. The tomatoes and cucumbers give it crunch, while feta adds creaminess. The olives provide a salty note that perfectly balances the flavors. Yes, you can make Greek Salad in advance. However, it is best to store the dressing separately. This keeps the vegetables crisp. You can mix the salad and dressing when ready to serve. For storage, use an airtight container. The salad can last in the fridge for up to two days. Just check for freshness before eating. If you see any slimy vegetables, it is best to toss them. Greek Salad pairs well with many dishes. Here are some great options: - Grilled chicken or fish - Pita bread with hummus - Roasted vegetables - Quinoa or couscous These sides add protein and fiber. They also help create a balanced meal. I love serving Greek Salad with grilled meats for a satisfying dinner. For a lighter option, enjoy it with pita and hummus for a quick lunch. For the full recipe, check out the Mediterranean Bliss Greek Salad! This blog post took you through the key ingredients of a classic Greek salad. We discussed the importance of using fresh vegetables, quality feta, and the right olives. You learned about optional add-ins, dressings, and expert tips for perfecting your salad. Variations allow for exciting twists, and we covered proper storage, reheating, and meal prep. Now, you can create a delicious, vibrant Greek salad that reflects your taste. Enjoy experimenting with flavors and ingredients, and make this dish your own!

Classic Greek Salad Flavorful and Fresh Recipe Guide

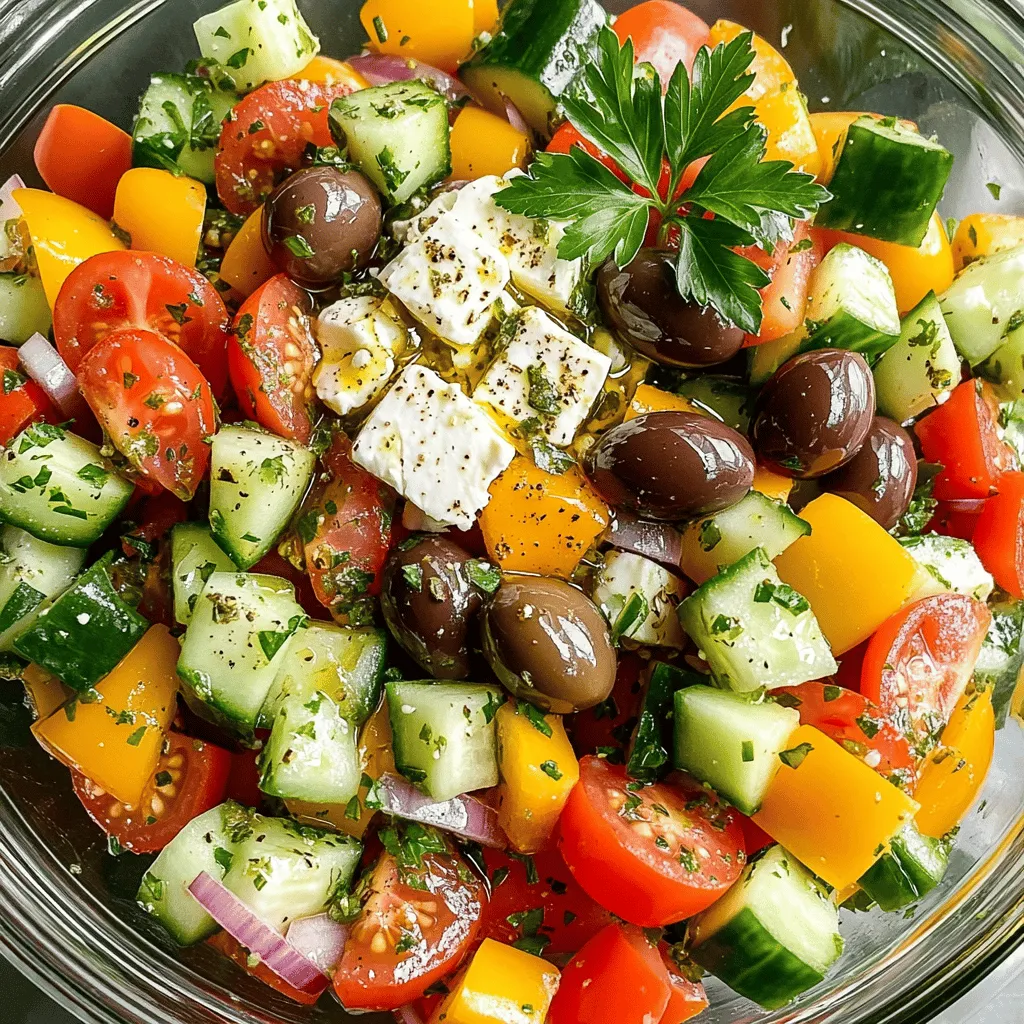
Are you ready to create a fresh and tasty Classic Greek Salad? This guide has everything you need to know!

Older posts
Newer posts
← Previous Page1 … Page64 Page65 Page66 … Page127 Next →

dsad

© 2025 Southern Dishes • Built with GeneratePress

Our Policies

  • Copyright Policy
  • Cookie Policy
  • GDPR Policy
  • Privacy Policy
  • Disclaimer
  • Terms Of Use

More Information

  • Home
  • About
  • Contact
  • Appetizers
  • Dessert
  • Dinner
  • Drinks
©2025, Southern Dishes About Back To Top