Skip to content
DisclaimerTerms Of UseGDPR PolicyCookie Policy

Southern Dishes

  • Home
  • Drinks
  • Appetizers
  • Dinner
  • Dessert
  • About
  • Contact
  • Privacy Policy
DisclaimerTerms Of UseGDPR PolicyCookie Policy

Isabella

To make this dish, gather these simple items: - 1 pound large shrimp, peeled and deveined - 1 bunch asparagus, trimmed - 3 tablespoons olive oil - 3 cloves garlic, minced - Zest and juice of 1 lemon - 1 teaspoon dried oregano - 1 teaspoon paprika - Salt and pepper to taste - Fresh parsley, chopped (for garnish) You can swap ingredients to fit your taste. If you don't have shrimp, try chicken or tofu. Asparagus can be replaced with green beans or broccoli. For olive oil, you can use avocado oil. If you want a different flavor, try fresh herbs like basil or thyme instead of dried oregano. You can also change the spice level by adding chili flakes or cayenne pepper. When picking shrimp, look for ones that smell fresh, not fishy. The shells should be shiny and firm. Choose shrimp that are pink or gray, with a smooth texture. For asparagus, select bright green stalks. They should be firm, not limp. Avoid any with soft tips or blemishes. Fresh asparagus often has a sweet smell, which is a good sign of quality. First, you need to preheat your oven to 425°F (220°C). This high heat helps the shrimp and asparagus cook nicely. While the oven warms up, grab a large baking sheet. You can line it with parchment paper or lightly grease it. This will prevent sticking and make cleanup easier. In a large bowl, mix together three tablespoons of olive oil, three minced garlic cloves, the juice and zest of one lemon, one teaspoon of dried oregano, one teaspoon of paprika, and some salt and pepper. Stir this well to combine all the flavors. Add in one pound of peeled and deveined shrimp. Toss the shrimp in the marinade until they are fully coated. Let them sit for about 15 minutes. This step is crucial. It helps the shrimp soak up all that zesty flavor. While the shrimp marinates, prepare the asparagus. Trim the ends and spread them on one side of the baking sheet. Season with a little salt, pepper, and a drizzle of olive oil. After the shrimp has marinated, place them on the other side of the baking sheet in a single layer. Bake everything in the preheated oven for 10 to 12 minutes. The shrimp should turn pink and opaque, while the asparagus should be tender yet crisp. Once done, remove the pan from the oven. You can garnish with fresh chopped parsley for a lovely finish. To avoid overcooking shrimp, keep a close eye on them. Shrimp cook fast. They turn pink and opaque in about 10 to 12 minutes. If you cook them too long, they become rubbery. A good tip is to stop cooking when they curl into a C shape. This shows they are just right. Always check them a minute or two early. For tender asparagus, start with fresh stalks. Look for bright green color and firm texture. Trim the ends before cooking. This helps them absorb the marinade better. When baking, place them on one side of the sheet pan. This gives them room to cook evenly. Bake until they are crisp but tender, about 10 to 12 minutes. To boost the flavor, try adding fresh herbs. Basil, thyme, or dill work well with shrimp. You can also add a pinch of red pepper flakes for some heat. Lemon zest adds brightness, too. If you love garlic, add more minced cloves to the marinade. Experiment with your favorite spices to make this dish your own. {{image_2}} You can easily change this dish by adding other veggies. Bell peppers add a sweet crunch. Zucchini brings a nice, soft texture. Just chop them up and toss them with the shrimp and asparagus. They will soak up the lemon herb flavors. You can use any vegetables you like. Carrots, broccoli, or cherry tomatoes also work well. Make it colorful and fun! Want to make this meal heartier? Try adding quinoa or rice. Cook the grains separately first. Then, spread them on the baking sheet. Place the shrimp and asparagus on top. The shrimp juices will mix with the grains. This adds flavor and makes it filling. It’s a great way to enjoy a complete meal in one pan. You can spice up your dish with different seasonings. If you love heat, add some cayenne pepper or red pepper flakes. For a smoky flavor, use smoked paprika instead of regular. You can also try fresh herbs like basil or cilantro for a twist. Experiment with flavors to find what you love best. Each change makes this dish unique and exciting! After enjoying your meal, let leftovers cool down. Place them in an airtight container. This keeps shrimp and asparagus fresh. Store the container in the fridge. Your leftovers will last for up to three days. When it's time to eat again, reheating is easy. Use a skillet on low heat for the best results. This warms the shrimp without overcooking. Stir gently to heat evenly. You can also use the microwave. Heat in short bursts to avoid rubbery shrimp. Freezing shrimp and asparagus is simple. First, let them cool completely. Then, place them in freezer-safe bags. Remove as much air as possible. This helps prevent freezer burn. They can stay frozen for up to three months. When ready to eat, thaw in the fridge overnight before reheating. Yes, you can use frozen shrimp. Just make sure to thaw them first. Place them in the fridge overnight or run them under cold water for quick thawing. Once thawed, pat them dry with a paper towel. This step helps the shrimp absorb the marinade better. You can serve this dish with many sides. Here are some ideas: - Rice: White or brown rice pairs well. - Quinoa: A healthy grain option that adds protein. - Salad: A fresh green salad adds crunch. - Bread: Garlic bread or crusty rolls can soak up the juices. Feel free to mix and match based on what you like. To keep shrimp juicy, follow these tips: - Marinate properly: Let the shrimp soak in the marinade for at least 15 minutes. - Don’t overcook: Bake them just until they turn pink and opaque. - Use high heat: Cooking at 425°F (220°C) helps lock in moisture fast. By using these steps, you will enjoy perfectly tender shrimp every time. This blog post covered how to make a delicious sheet pan meal with shrimp and asparagus. We talked about the best ingredients, how to marinate shrimp, and tips for keeping it tender. I shared ways to add flavors, vary the dish, and store leftovers. Remember, fresh veggies and good seasoning make your meal great. With these tips, you will impress everyone at the table. Enjoy cooking and experimenting with flavors in your kitchen!

Sheet Pan Lemon Herb Shrimp & Asparagus Delight

If you’re craving a quick and tasty meal, look no further! My Sheet Pan Lemon Herb Shrimp & Asparagus Delight

- 1 cup orzo pasta - 2 tablespoons olive oil - 3 cloves garlic, minced - 4 cups vegetable broth - 1 cup heavy cream - 1 cup grated Parmesan cheese The main ingredients for this dish come together to create a rich and creamy meal. Orzo is small and cooks quickly. It absorbs flavors well, making it perfect for this recipe. Olive oil adds a nice depth of flavor, while garlic gives a warm aroma. Vegetable broth keeps the dish light and adds richness. Heavy cream makes it creamy and luxurious, and Parmesan cheese brings in a salty kick. - 1 teaspoon dried Italian herbs - Salt and pepper to taste - 1 cup fresh spinach (or arugula) - ½ cup cherry tomatoes, halved To enhance the flavor, I use dried Italian herbs. They add warmth and complexity. Fresh spinach or arugula adds color and nutrition. Cherry tomatoes provide a juicy pop of flavor. Salt and pepper balance the dish, bringing all the flavors together. - Fresh basil leaves For a fresh touch, garnish with basil leaves. They add a lovely aroma and bright flavor. This simple addition elevates the dish and makes it more visually appealing. - Heating the olive oil Start by placing a large pot or deep skillet on the stove. Turn the heat to medium and add 2 tablespoons of olive oil. Let the oil heat for a minute. You want it hot but not smoking. - Sautéing the garlic Next, add 3 cloves of minced garlic to the pot. Stir it around for 1 to 2 minutes. Watch closely so it does not burn. The garlic should smell great and turn lightly golden. - Toasting the orzo Now, it’s time to add 1 cup of orzo pasta. Stir the orzo in the pot for about a minute. This toasting step adds a nice flavor to the pasta. - Adding vegetable broth Pour in 4 cups of vegetable broth. Bring this mix to a boil. Once it boils, reduce the heat to a simmer. Cover the pot and let it cook for about 10 minutes. Stir occasionally until the orzo is tender but still firm. - Incorporating heavy cream and cheese Remove the lid and stir in 1 cup of heavy cream and 1 cup of grated Parmesan cheese. Mix it well until the dish is creamy and smooth. The cheese should melt nicely into the mix. - Adding spinach and tomatoes Fold in 1 cup of fresh spinach and ½ cup of halved cherry tomatoes. The spinach will wilt quickly, and the tomatoes will warm through. This adds color and nutrition to your dish. - Seasoning and garnishing Finally, season with salt and pepper to taste. Garnish with fresh basil leaves for a pop of flavor. Your One Pot Creamy Garlic Parmesan Orzo is now ready to serve! Enjoy the rich, creamy goodness. To make your orzo creamy, keep the heat low when you add cream. If the heat is too high, the cream may curdle. Stir gently to mix in the cream with the cheese. This helps create a smooth texture. I suggest using a wooden spoon for better mixing. You can boost flavors with fresh herbs like thyme or parsley. They add a nice touch. Try adding a pinch of red pepper flakes for heat. If you want to swap out Parmesan, consider using goat cheese or feta. Both will give a unique twist. If you like your orzo firmer, cut the cooking time by a minute. For a softer texture, add a few extra minutes. When cooking for more people, just double the ingredients. Adjust the broth to ensure the orzo cooks evenly. {{image_2}} You can easily change the flavor of your orzo. Adding proteins like chicken or shrimp makes it heartier. Simply cook the protein first, then add the orzo and broth. If you want a vegetarian dish, use mushrooms or chickpeas. Both options add great taste and texture. If you need dairy-free options, swap heavy cream with coconut milk or cashew cream. These add creaminess without dairy. For gluten-free adjustments, use gluten-free orzo. Many brands offer tasty gluten-free pasta that cooks well in this dish. Using seasonal vegetables can make this dish exciting. In spring, add asparagus or peas. In fall, try butternut squash or kale. Changing garnishes with fresh herbs like parsley or thyme can also enhance the dish. They add color and fresh flavor, making it even more appealing. To store leftovers, let the orzo cool first. Place it in an airtight container. It will keep well in the fridge for about three to four days. Always label the container with the date. This way, you can track how long it has been stored. You can freeze One Pot Creamy Garlic Parmesan Orzo if you want to save some for later. Divide it into smaller portions and place them in freezer-safe bags. Try to remove as much air as possible. It will stay good for up to three months. To thaw, move the orzo to the fridge overnight before reheating. This helps keep its creamy texture. For the best taste and texture, reheat the orzo on the stove. Add a splash of vegetable broth or cream to the pot. This helps restore the creaminess. Stir over medium heat until warmed through. You can also use a microwave, but be careful not to overheat it. Heat in short bursts, stirring in between, to avoid drying it out. To make this dish, follow these steps: 1. Heat 2 tablespoons of olive oil in a large pot over medium heat. 2. Add 3 cloves of minced garlic and sauté for 1-2 minutes. 3. Stir in 1 cup of orzo pasta and toast for 1 minute. 4. Pour in 4 cups of vegetable broth and bring to a boil. 5. Once boiling, lower the heat, cover, and simmer for 10 minutes. 6. Remove the lid and stir in 1 cup of heavy cream. 7. Add 1 cup of grated Parmesan cheese and 1 teaspoon of dried Italian herbs. 8. Mix until creamy and smooth. 9. Fold in 1 cup of fresh spinach and ½ cup of halved cherry tomatoes. 10. Season with salt and pepper to taste. 11. Serve hot, garnished with fresh basil leaves. Yes, you can use other pasta types. Here are some good options: - Arborio rice for a risotto-like texture. - Couscous for a light and fluffy dish. - Small pasta shapes like ditalini or acini di pepe. - Quinoa for a gluten-free twist. Keep in mind that cooking times may vary. Adjust the liquid as needed to ensure a creamy outcome. This dish pairs well with many sides. Here are some great options: - Grilled chicken or shrimp for protein. - A fresh garden salad for crunch. - Roasted vegetables like zucchini or bell peppers. - Crusty bread for dipping. These pairings enhance the meal and add variety to your plate. This dish combines simple ingredients to create rich flavors. You learned the main steps to prepare creamy garlic parmesan orzo with ease. Remember the tips for creaminess and flavor! Feel free to add your favorite veggies or proteins. Store leftovers properly for a quick meal later. With this recipe, you can impress anyone at the dinner table. Enjoy making this dish your own!

One Pot Creamy Garlic Parmesan Orzo Delicious Recipe

Looking for a quick and tasty dinner? This One Pot Creamy Garlic Parmesan Orzo is the answer! With just a

- 1 pound chicken tenderloins - 1/2 cup all-purpose flour - 1 large egg - 1/2 teaspoon garlic powder - 1/2 teaspoon paprika - 1/4 teaspoon salt - 1/4 teaspoon black pepper - 1 cup breadcrumbs (preferably panko) - 1/4 cup honey - 3 tablespoons Sriracha sauce - 1 tablespoon soy sauce - 1 tablespoon apple cider vinegar The ingredients for Spicy Honey Sriracha Chicken Tenders make this recipe simple yet bold. The tenderloins give you juicy bites. The flour, egg, and breadcrumbs create a crunchy coating. I recommend panko for extra crunch. The spices add flavor without being overwhelming. In the spicy honey sauce, honey brings sweetness. Sriracha adds heat, and soy sauce enhances umami. Apple cider vinegar gives a tangy kick. You control the spice by adjusting the Sriracha. This makes the recipe more personal and fun. Gather these ingredients first. It helps to have everything ready as you cook. Each step will be easier and faster. Trust me, this recipe is a crowd-pleaser. You’ll love how the flavors blend together! - Preheat the air fryer to 400°F (200°C). - Set up your breading station. This means you need three shallow bowls. - In one bowl, mix flour, garlic powder, paprika, salt, and black pepper. - Coat each chicken tender in the flour mix. Make sure it's covered well. - Next, dip the chicken in the whisked egg. This helps the breadcrumbs stick. - Then, coat the chicken in the panko breadcrumbs. Press gently to make sure they stick. - Place the breaded chicken tenders in the air fryer basket. - Air fry for 8-10 minutes. Flip them halfway through for even cooking. - Check that the internal temperature reaches 165°F (75°C). - Once done, toss the hot chicken tenders in the spicy honey sauce. This makes them tasty and sticky. To get that nice crunch on your chicken tenders, I recommend using panko breadcrumbs. They are light and airy, which gives your tenders a great texture. Before you cook them, lightly spray the chicken tenders with cooking oil. This helps them get crispy in the air fryer. If you want to change the heat, you can modify the Sriracha. Use less for milder tenders. You can also add more honey to balance the spice. For extra flavor, consider adding garlic powder or chili powder to the honey sauce. Always check the internal temperature of your chicken. It should reach 165°F (75°C) for safety. Use a meat thermometer to ensure it’s cooked through. This step keeps your meal safe and delicious. {{image_2}} You can try many sauces with chicken tenders. If you want a change, use barbecue sauce or sweet chili sauce. Both add different flavors while keeping it fun. You can also mix honey with mustard for a sweeter dip. Experiment with flavors to find what you like best. If you don’t have chicken tenderloins, chicken breasts work well too. Just slice them into strips. For gluten-free options, use almond flour or gluten-free breadcrumbs. These substitutes keep the dish tasty for all diets. Chicken tenders pair great with many sides. Try serving them with crispy fries or a fresh salad. Coleslaw adds a nice crunch too. You can even serve them with rice or steamed veggies. Choose sides that balance the heat and sweetness of the chicken. To store your cooked chicken tenders, let them cool first. Place the tenders in an airtight container. Refrigerate them within two hours of cooking. They last about three days in the fridge. If you want to keep them fresh, avoid stacking them too tightly. This helps prevent sogginess. When it’s time to reheat, use your air fryer. Preheat it to 350°F (175°C). Place the chicken tenders in a single layer. Heat them for about 5-7 minutes. This keeps them crispy and warm. You can also use a conventional oven at 375°F (190°C) if you prefer. For freezing, you can freeze both uncooked and cooked tenders. For uncooked tenders, bread them as usual and place them in a single layer on a baking sheet. Once frozen, transfer them to a freezer bag. They last up to three months. For cooked tenders, let them cool, then place them in an airtight container. They can be frozen for up to two months. Just remember to label your containers with dates! Yes, you can make this recipe in an oven. Preheat your oven to 400°F (200°C). Place the breaded chicken tenders on a baking sheet lined with parchment paper. Bake for about 15-20 minutes, flipping halfway through. Check that the internal temperature reaches 165°F (75°C) to ensure they are safe to eat. To make the chicken tenders spicier, add more Sriracha to the sauce. You can also mix in crushed red pepper flakes or diced fresh jalapeños. Adjust the heat level to suit your taste. Always start with a small amount and taste as you go. Serve these tenders hot for the best flavor. They pair well with rice, salad, or veggies. You can also add a side of ranch or blue cheese dressing for dipping. Garnish with chopped green onions and sesame seeds for extra flavor and crunch. This blog post covered how to make spicy honey Sriracha chicken tenders. I shared the key ingredients, step-by-step instructions, and tips to ensure the best crisp. We also explored variations and how to store leftovers effectively. Cooking these tenders can be fun and rewarding. Feel free to tweak the spice levels and sauces. Enjoy your tasty dish and impress friends and family with your cooking skills!

Spicy Honey Sriracha Chicken Tenders Air Fryer Recipe

Get ready to fire up your air fryer for a delicious treat! In this blog, I’ll share my Spicy Honey

- 1 ½ cups all-purpose flour - 1 teaspoon baking powder - ½ teaspoon baking soda - ¼ teaspoon salt To start, we need to mix our dry ingredients. Use all-purpose flour for a soft texture. The baking powder and baking soda help the loaf rise. Salt adds flavor and balances the sweetness. - ½ cup unsalted butter - 1 cup granulated sugar - 2 large eggs Next, we turn to the wet ingredients. Softened unsalted butter makes the loaf rich and moist. Granulated sugar gives it sweetness. The eggs help bind everything together. - 1 tablespoon lemon zest - ¼ cup fresh lemon juice - 1 teaspoon vanilla extract - 1 cup fresh blueberries - ¼ cup powdered sugar (for drizzle) Now, let’s add some zest! Lemon zest and fresh lemon juice bring a bright flavor. Vanilla extract adds warmth. Fresh blueberries add a burst of sweetness. Finally, we need powdered sugar for a lovely drizzle on top. Gather these ingredients, and you’re ready to bake a delicious lemon blueberry loaf! First, preheat your oven to 350°F (175°C). This step is key for even baking. Next, take a 9x5 inch loaf pan. Grease it with butter or line it with parchment paper. This makes it easy to remove the loaf later. In a medium bowl, whisk together the dry ingredients. You will need 1 ½ cups of all-purpose flour, 1 teaspoon of baking powder, ½ teaspoon of baking soda, and ¼ teaspoon of salt. Make sure they mix well. This creates a good base for your loaf. In a large bowl, cream together ½ cup of softened unsalted butter and 1 cup of granulated sugar. Use a hand mixer or stand mixer for this. Mix until the mixture is light and fluffy. This can take a few minutes. Then, add 2 large eggs, one at a time. Mix well after each addition. Next, add 1 tablespoon of lemon zest, ¼ cup of fresh lemon juice, and 1 teaspoon of vanilla extract. Mix until everything combines smoothly. Now, it's time to combine your mixtures. Gradually add the dry ingredients to the wet mixture. Stir gently until just combined. Be careful! Overmixing can make your loaf tough. Then, fold in 1 cup of fresh blueberries. Make sure they are evenly spread throughout the batter. Pour the batter into your prepared loaf pan. Smooth the top with a spatula. Place it in the oven and bake for 50-60 minutes. To check for doneness, insert a toothpick into the center. If it comes out clean, your loaf is ready. Once baked, let the loaf cool in the pan for about 10 minutes. Then move it to a wire rack to cool completely. For the drizzle, whisk together ¼ cup of powdered sugar and 1 tablespoon of lemon juice until smooth. Drizzle this over your cooled loaf. The glaze adds a nice touch and extra flavor! - Butter vs. oil: Butter adds rich flavor while oil keeps the loaf moist. You can use half butter and half oil for a great balance. This mix keeps your loaf tender and flavorful. - Egg room temperature tips: Always use eggs at room temperature. This helps them blend better with the butter and sugar. To warm them quickly, place the eggs in a bowl of warm water for about 10 minutes. - Fresh vs. frozen blueberries: Fresh blueberries give the best taste. Frozen blueberries can work, too, but they must be thawed first. If you use frozen, drain them to avoid extra liquid in your batter. - Preventing blueberries from sinking: Toss your blueberries in a bit of flour before adding them to the batter. This helps them stay suspended in the loaf as it bakes. - Adjusting lemon zest and juice for taste: You can add more lemon zest for a stronger flavor. If you like your loaf tangy, use more lemon juice. Just remember to taste as you go! - Alternative extracts: If you want a twist, try almond or coconut extract instead of vanilla. These can add a unique flavor profile that complements the lemon and blueberries beautifully. {{image_2}} You can easily change some ingredients in this recipe. If you're gluten-free, try using gluten-free flour blends. They work well and keep the loaf tasty. For those who want a dairy-free option, use coconut oil instead of butter. You can also use almond milk or oat milk in place of regular milk. These swaps keep the loaf moist and delicious. Add some nuts or seeds to the batter for a fun crunch. Chopped walnuts or sliced almonds add a great texture. You can also try sunflower seeds for a nut-free option. Spices can really enhance the flavor of your loaf. A pinch of cinnamon or nutmeg can add warmth. You might also enjoy adding a dash of ginger for a little zing. Feel free to switch up the fruit based on the season. Fresh raspberries or strawberries work great in the summer. In the fall, try adding chopped apples or pears for a cozy twist. For the holidays, you can add a sprinkle of dried cranberries or festive spices like allspice. This makes your loaf perfect for celebrations and gatherings. Store your lemon blueberry loaf at room temperature for up to three days. Keep it in an airtight container to keep it fresh. If you want it to last longer, refrigerate it for up to a week. Just wrap it tightly to avoid drying out. To freeze your loaf, let it cool completely. Then, wrap it in plastic wrap and foil. This helps prevent freezer burn. You can freeze it for up to three months. When ready to enjoy, thaw it in the fridge overnight or at room temperature for a few hours. You can top your loaf with whipped cream or a scoop of vanilla ice cream. It tastes great with fresh berries on the side. For drinks, try serving it with iced tea or lemonade. These pair well with the lemony flavor of the loaf. You can tell if your loaf is done by using a toothpick. Insert it into the center. If it comes out clean, your loaf is ready. If it has batter on it, bake for a few more minutes. The edges should also pull away from the pan slightly. Yes, you can make this loaf ahead of time. It tastes great after a day or two. Just store it in an airtight container. You can also freeze the loaf for up to three months. Just make sure it’s completely cool before wrapping it. If you don’t have lemon juice, you can use lime juice. It gives a nice tart flavor. You can also try vinegar, like apple cider vinegar, but use less. The flavor will be different, but it will still work. To keep your loaf moist, use fresh ingredients. Make sure your butter is soft when you mix it. Adding an extra egg can also help. Don’t overmix the batter when you combine wet and dry ingredients. Absolutely! You can double the recipe to make two loaves. Just use a larger mixing bowl to combine the ingredients. Make sure to check the baking time. It may take longer for two loaves to bake properly. You now have the recipe for a delicious blueberry lemon loaf. We covered ingredients, including dry and wet components, and flavor enhancers like lemon zest and blueberries. You learned step-by-step methods, tips to keep it moist, and ways to make it your own. In the end, enjoy this tasty treat. It's perfect for sharing or storing for later. Keep experimenting with flavors and variations to find your favorite. Happy baking!

One-Bowl Lemon Blueberry Loaf Simple and Tasty Recipe

Do you crave a bright, zesty treat? This One-Bowl Lemon Blueberry Loaf is both simple and delicious. With fresh lemon

To make veggie-packed egg muffins, gather these ingredients: - 6 large eggs - 1/2 cup bell peppers (any color), diced - 1/2 cup spinach, chopped - 1/4 cup red onion, finely chopped - 1/2 cup cherry tomatoes, halved - 1/4 cup shredded cheese (cheddar or feta) - 1/4 teaspoon garlic powder - 1/4 teaspoon paprika - Salt and pepper to taste - Cooking spray or olive oil for greasing Each ingredient adds flavor and nutrition. The eggs serve as the base, while the veggies boost the dish's health. Cheese adds creaminess, and spices give it a kick. You can easily swap out ingredients based on your taste. Here are some ideas: - Use egg whites instead of whole eggs for a lighter option. - Replace bell peppers with zucchini or mushrooms for a different flavor. - Try kale instead of spinach for a heartier green. - Use different cheeses, like mozzarella or goat cheese, for new tastes. These substitutions keep the recipe flexible. You can adjust it based on what you have at home. Want to enhance the taste? Here are some optional ingredients: - Fresh herbs like parsley or basil for added freshness. - A dash of hot sauce for a spicy kick. - Cooked bacon or sausage for a meaty version. Feel free to mix and match these options to find your favorite combo. These choices let you make the muffins unique to your taste. 1. Start by preheating your oven to 375°F (190°C). This helps cook the muffins evenly. 2. Lightly grease a muffin tin with cooking spray or olive oil. This keeps the muffins from sticking. 3. In a large mixing bowl, crack the 6 large eggs. Whisk them well until they blend fully. 4. Add 1/2 cup diced bell peppers, 1/2 cup chopped spinach, and 1/4 cup finely chopped red onion to the bowl. 5. Toss in 1/2 cup halved cherry tomatoes, 1/4 cup shredded cheese, 1/4 teaspoon garlic powder, and 1/4 teaspoon paprika. 6. Season with salt and pepper to taste. Stir everything until it mixes well. 7. Carefully pour the egg mix into the muffin tin. Fill each cup about 3/4 full. This allows space for the muffins to rise. 8. Place the muffin tin in the preheated oven. Bake for 18-20 minutes. Watch for a golden top and firm texture. 9. Once baked, take the muffin tin out of the oven. Let it cool for a few minutes. 10. Use a knife to gently loosen the muffins. Remove them from the tin. 11. Serve warm for a tasty treat or cool completely. Store in an airtight container in the fridge for up to 5 days. To make the best veggie-packed egg muffins, use fresh ingredients. Fresh veggies add more flavor and nutrients. Dice your bell peppers and chop the spinach small. This helps them cook evenly. Whisk the eggs well to mix the yolks and whites completely. This step adds fluffiness to your muffins. Fill each muffin cup about 3/4 full. This allows room for the muffins to rise. If you want a more intense flavor, add more garlic powder or paprika. Experiment with spices to find what you like best. After baking, let the muffins cool for a few minutes. This makes them easier to remove from the pan. Use a knife to gently loosen the edges. Store leftover muffins in an airtight container in the fridge. They will stay fresh for up to five days. For longer storage, freeze them. Place them in a freezer-safe bag. When you're ready to eat, reheat them in the microwave. Just a minute or two will warm them up nicely. If your muffins sink in the middle, you may have filled them too high. Next time, fill them only 3/4 full. If they are too dry, try adding a splash of milk to the egg mixture. This will make them moister. If they stick to the pan, ensure you grease it well before adding the mixture. You can also try using silicone muffin cups. They make removal easy and clean-up a breeze. {{image_2}} You can boost the nutrition of your egg muffins by adding more veggies. Here are some great options: - Zucchini: Grate it for a moist texture. - Mushrooms: Sauté them first for better flavor. - Broccoli: Chop it finely for a healthy crunch. - Carrots: Shred them for a touch of sweetness. These add-ins keep the muffins colorful and tasty. You can mix and match based on what you have. Use any vegetable you love! If you want to add some protein, consider these meat choices: - Cooked bacon: Crumble it for a salty bite. - Sausage: Cook and chop it for a hearty flavor. - Ham: Dice it up for a classic touch. - Turkey: Use lean turkey for a healthier option. These meats work well with the eggs and veggies. Choose what fits your taste for an extra boost! Cheese adds creaminess and flavor. Here are some great options to try: - Cheddar: A classic choice for its sharp taste. - Feta: Crumbly and tangy, it adds a Mediterranean flair. - Mozzarella: Use shredded for a gooey texture. - Goat cheese: Its tanginess makes the muffins special. Feel free to experiment with different cheeses. Each one brings a unique taste and texture to your muffins! After you cook your veggie-packed egg muffins, let them cool. Once cool, place muffins in an airtight container. Store them in the fridge for up to five days. This keeps them fresh and tasty. Make sure to keep them sealed well to avoid drying out. If you want to save some for later, freezing is easy. Wrap each muffin in plastic wrap. Then, place them in a freezer-safe bag. Label the bag with the date. They can stay in the freezer for up to three months. This way, you have a quick meal ready when you need one. To reheat, take out a muffin and remove the wrap. You can use a microwave or oven. For the microwave, heat for about 30 seconds. For the oven, preheat to 350°F (175°C) and bake for 10 minutes. This will make the muffins warm and delicious again! Yes, you can use egg substitutes. Common options include flax eggs or aquafaba. Flax eggs are made by mixing one tablespoon of ground flaxseed with three tablespoons of water. Let it sit for a few minutes to thicken. Aquafaba is the liquid from canned chickpeas. Use three tablespoons of aquafaba for each egg. Both options work well in this recipe. They add moisture and help bind the ingredients. The muffins stay fresh for up to five days. Store them in an airtight container in the fridge. If you want them to last longer, consider freezing them. They freeze well and can keep for up to three months. Just make sure to wrap them tightly to avoid freezer burn. Yes, you can easily make these muffins gluten-free. The main ingredient is eggs, which are naturally gluten-free. Use gluten-free cooking spray for the muffin tin. If you want extra texture, add gluten-free grains like quinoa or brown rice. These additions can enhance flavor while keeping the muffins gluten-free. This blog post covered all you need to know about baking muffins. We looked at ingredients, substitutions, and optional add-ins for extra flavor. I shared step-by-step instructions and offered tips to perfect your muffins. You also learned about storing and reheating them, plus answers to common questions. Now, you're ready to create the best muffins ever. Use this guide to experiment and enjoy delicious treats!

Veggie-Packed Egg Muffins Healthy and Easy Recipe

Looking for a quick, healthy meal? These veggie-packed egg muffins are your answer! They’re simple to make, fun to customize,

- 1 tablespoon olive oil - 1 onion, chopped - 3 garlic cloves, minced - 1 can (28 oz) crushed tomatoes - 4 cups vegetable broth - 1 teaspoon dried oregano - 1 teaspoon dried basil - 1/4 teaspoon red pepper flakes (optional) - 2 cups refrigerated cheese tortellini - 1 cup heavy cream - 1 cup fresh basil leaves, chopped - Salt and pepper to taste - Grated Parmesan cheese for serving The base of this creamy tomato basil tortellini soup starts with olive oil. You need just one tablespoon. It adds a nice richness. Next, chop one onion and mince three garlic cloves. These aromatics bring depth to your soup. You will also use one 28-ounce can of crushed tomatoes. This gives your soup a fresh and tangy flavor. For the liquid, four cups of vegetable broth add heartiness. Dried oregano and dried basil add classic Italian flavors. Use one teaspoon each. If you like a little heat, add a quarter teaspoon of red pepper flakes. For the main event, you will need two cups of refrigerated cheese tortellini. This makes the soup filling and fun. To finish it off, one cup of heavy cream adds creaminess. Don’t forget fresh basil! One cup, chopped, adds a burst of color and flavor. Use salt and pepper to taste. Finally, serve with grated Parmesan cheese for a savory twist. - 1/4 teaspoon red pepper flakes - Grated Parmesan cheese If you enjoy a little spice, consider adding red pepper flakes. It’s optional, but it can kick up the flavor! You can use grated Parmesan cheese as a topping. It makes your soup even more delicious. 1. Heating the olive oil In a large pot, pour in 1 tablespoon of olive oil. Heat it over medium heat. You want the oil hot but not smoking. 2. Sautéing onion and garlic Next, add 1 chopped onion to the pot. Cook it for about 5 minutes until it softens. Then, add 3 minced garlic cloves. Stir and cook for 1 more minute. The kitchen will smell great! 3. Adding tomatoes and broth Now, open a 28-ounce can of crushed tomatoes. Pour it into the pot. Add 4 cups of vegetable broth next. Stir in 1 teaspoon of dried oregano and 1 teaspoon of dried basil. If you like spice, add 1/4 teaspoon of red pepper flakes. 4. Seasoning the soup Bring the soup to a simmer. This means small bubbles will form on the surface. It should take about 15 minutes. Stir it occasionally to mix the flavors well. 5. Simmering for flavor blending Let the soup simmer and watch as the flavors blend together. This step is key for a rich taste. 6. Incorporating the tortellini Now, it’s time to add the fun part! Stir in 2 cups of refrigerated cheese tortellini. Cook it according to the package instructions. This usually takes about 3 to 5 minutes. 7. Mixing in the heavy cream Lower the heat once the tortellini is ready. Slowly pour in 1 cup of heavy cream. Stir gently to mix everything. 8. Final seasoning adjustments Lastly, add fresh basil leaves that you chopped. Season with salt and pepper to taste. Heat through but don’t let it boil. Your soup is ready to serve! - Ensuring the right pasta doneness: Cook the tortellini until just al dente. This means it should be firm but not hard. The pasta will continue to cook in the soup. - Avoiding boiling after adding cream: Lower the heat before adding heavy cream. Boiling can cause the cream to separate. Stir gently to blend it smoothly. - Garnishing options: Top with grated Parmesan cheese and fresh basil leaves. This adds flavor and a nice look. - Pairing with bread or salads: Serve with crusty bread or a fresh salad. This complements the soup and makes it a full meal. - Adjusting spice levels: Add more or less red pepper flakes based on your taste. Start small; you can always add more if needed. - Enhancing with fresh herbs: Fresh basil elevates the soup’s taste. Try adding other herbs like parsley or thyme for extra flavor. {{image_2}} You can easily change up the broth in this soup. If you want more flavor, try chicken broth. It adds a nice depth. You can also use beef broth for a heartier taste. For pasta, cheese tortellini is great, but you can swap it out. Use mini shells or fettuccine if you like. They will still taste good in the soup. If you need gluten-free options, choose gluten-free pasta. Many brands offer tasty choices. Just make sure to check the package. For a vegan soup, skip the cheese tortellini and heavy cream. Use a plant-based cream and pasta instead. The soup will still be creamy and delicious. In spring or summer, add fresh vegetables like zucchini or bell peppers. They will brighten the soup. Just toss them in when you add the tortellini. When it's cold, you can make it heartier. Add potatoes or carrots to warm you up. They cook well and add nutrition. Adjust the spices to match the season too! To store leftovers, let the soup cool first. Place it in airtight containers. Glass or plastic containers work well. Be sure to leave some space at the top for expansion. This helps keep the soup fresh. You can freeze the soup for later. First, let it cool completely. Then, pour it into freezer-safe containers. Leave some space at the top for expansion. To reheat, thaw in the fridge overnight. Heat it on the stove over low heat. Stir well to combine, and add some water if needed. In the refrigerator, the soup lasts about 3 to 4 days. If you see any mold, a sour smell, or changes in color, discard it. Always check before eating to ensure it is safe. Can I make this soup ahead of time? Yes, you can make this soup ahead of time. Just let it cool and store it in the fridge. Reheat it on the stove before serving. The flavors will blend even more as it sits. How do I thicken the soup? If you want a thicker soup, you can blend it. Use an immersion blender to puree a part of the soup. You can also add more tortellini or a bit of cornstarch mixed with water to thicken it. Is there a dairy-free substitute for heavy cream? Yes, coconut milk or cashew cream works great as a dairy-free substitute. They add creaminess without dairy. Just be aware that it may change the flavor slightly. Can I use frozen tortellini? Absolutely! Frozen tortellini is perfect for this recipe. Just add it to the soup directly, and cook according to the package time. It saves you a step and tastes great. What goes well with tomato basil tortellini soup? This soup pairs well with crusty bread or a fresh salad. Garlic bread is also a fantastic choice for dipping. You can even add a sprinkle of grated Parmesan on top. Can I prepare this soup in a slow cooker? Yes, you can! Start by sautéing the onion and garlic in a pan, then transfer everything to the slow cooker. Cook on low for 4 to 6 hours. Add the cream and tortellini near the end. This article covered how to make a tasty tomato basil tortellini soup. You learned about key ingredients, like olive oil, garlic, and heavy cream. We walked through preparation and cooking steps simply. Cooking tips helped ensure your soup turns out great. Serving suggestions added extra flair. You can also try fun variations and know how to store leftovers. Enjoy this soup with your favorite bread for a cozy meal!

Creamy Tomato Basil Tortellini Soup Simple Recipe

If you’re craving a warm, comforting meal, try this Creamy Tomato Basil Tortellini Soup. With just a few main ingredients,

- 1 lb flank steak, cut into bite-sized cubes - 4 tablespoons unsalted butter - 4 cloves garlic, minced - 1 teaspoon fresh rosemary, chopped - 1 teaspoon fresh thyme, chopped - Salt and pepper to taste - 2 tablespoons olive oil - Fresh parsley, chopped (for garnish) The star of this dish is the flank steak. It has a rich flavor and tender texture when cooked right. Cut it into bite-sized cubes to ensure quick cooking. This helps keep the steak juicy and flavorful. Next, you need unsalted butter. It adds a rich, creamy taste. Garlic is key here, too. Use four cloves, minced. This gives a strong garlic flavor that pairs perfectly with the beef. Fresh rosemary and thyme bring bright, earthy notes. They balance the richness of the butter and steak. Don't forget salt and pepper! They enhance the overall taste. You’ll also need olive oil. It helps to sear the steak, creating a nice crust. For a finishing touch, add chopped parsley. It adds color and freshness to the dish. All these ingredients work together to make garlic butter steak bites savory and simple. Feel free to modify the herbs based on your taste. You can use dried herbs in a pinch, but fresh herbs create the best flavor! To start, you need to season the steak cubes. Take 1 pound of flank steak and cut it into bite-sized pieces. Sprinkle salt and pepper on all sides. This step adds great flavor to the meat. Next, let's sear the steak bites in a skillet. Heat 2 tablespoons of olive oil in a large skillet over medium-high heat. When the oil shimmers, add the seasoned steak cubes. Make sure to spread them out in a single layer. Cook them for 2 to 3 minutes on each side. You want them browned and cooked to medium-rare. Once done, remove the steak bites from the skillet and set them aside. Now, let’s make the garlic butter sauce. In the same skillet, lower the heat to medium and add 4 tablespoons of unsalted butter. Let it melt slowly to avoid burning. Once melted, add 4 minced garlic cloves, 1 teaspoon of chopped rosemary, and 1 teaspoon of chopped thyme. Sauté this mixture for about 1 minute. The garlic should smell good but not brown. Now it’s time to combine the steak and the sauce. Return the cooked steak bites to the skillet. Toss them in the garlic butter mixture. Cook for another 1 to 2 minutes. This step heats everything through and helps the flavors blend. Finally, taste your dish and adjust the seasoning. Add more salt and pepper if needed. Remove the skillet from heat and garnish with fresh chopped parsley before serving. Enjoy your tasty garlic butter steak bites! To get the best doneness for your steak bites, remember these steps: - Choose the right cut: Flank steak is great for this dish. It cooks fast and stays tender. - Season well: Use salt and pepper on all sides before cooking. This enhances flavor. - Don't overcrowd the pan: Cook in batches if needed. This helps them sear nicely. - Aim for medium-rare: Cook for about 2-3 minutes per side. This keeps the meat juicy. - Use a meat thermometer: For best results, check the internal temp. Aim for 130°F for medium-rare. Adding more flavor can take your steak bites to the next level: - Herbs: Try adding fresh thyme or oregano. They add depth to the garlic butter. - Spices: A pinch of smoked paprika can bring a nice kick. - Sides: Serve with creamy mashed potatoes or roasted veggies. They balance the rich flavors well. How you serve your steak bites matters: - Stylish serving: Use a wooden board or rustic plate. It adds a cozy feel to your meal. - Garnishing: Drizzle the garlic butter over the steak bites. Scatter fresh parsley on top for color. - Plating: Arrange the bites in a circle with herbs in the center. This makes a beautiful display. {{image_2}} You can switch up the cut of meat for your steak bites. Sirloin offers a great flavor and is usually more tender. Ribeye is marbled well, providing a juicy bite. Both cuts cook similarly to flank steak. Just remember to adjust cooking times based on the thickness of the cubes. If you want a smoky flavor, grilling is a fun option. Skewer the steak bites and grill them over medium-high heat. Keep an eye on them so they don't overcook. For a more hands-off approach, consider oven-baking. Preheat your oven to 400°F (200°C). Spread the steak bites on a baking sheet and cook for about 10-15 minutes. This gives you a nice sear without needing to stand by the stove. To make this dish gluten-free, ensure your butter and seasonings are gluten-free. You can also use a dairy-free butter substitute if you want to avoid dairy. This way, everyone can enjoy these tasty steak bites without worry! To keep your garlic butter steak bites fresh, place them in an airtight container. This will help prevent moisture loss and keep the flavors intact. Store the container in the fridge. Properly stored, leftovers last up to three days. Make sure to let the steak bites cool to room temperature before sealing them. This helps reduce condensation inside the container. When you're ready to enjoy your leftovers, reheating them correctly is key. The best way is to use a skillet. Heat a little olive oil over medium heat and add the steak bites. Stir them gently until they are warmed through. This method keeps the meat tender and juicy. Avoid the microwave if you can, as it may make the steak chewy. To freeze garlic butter steak bites, start by cooling them completely. Then, place them in a freezer-safe bag or container. Be sure to remove as much air as possible to prevent freezer burn. They can be frozen for up to three months. When you’re ready to eat, thaw them in the fridge overnight. Reheat as mentioned above for the best taste and texture. The best steak for garlic butter steak bites is flank steak. It has great flavor and cooks quickly. You can also use sirloin or ribeye for a richer taste. These cuts are tender and perfect for this dish. Flank steak works well because it absorbs the garlic butter nicely. Garlic butter steak bites last about 3 to 4 days in the fridge. Make sure to store them in an airtight container. This keeps them fresh and safe to eat. If you notice any strange smell or color, throw them out. Safety is key when storing cooked meat. Yes, you can make garlic butter steak bites ahead of time. Cook the steak bites and store them in the fridge. Reheat them in a skillet before serving. This keeps them tasty and warm. If you want to save time, prep the steak cubes in advance. Just season them and store until you're ready to cook. In this post, we explored how to make delicious garlic butter steak bites. We discussed key ingredients like flank steak, butter, and fresh herbs. I shared step-by-step instructions, cooking tips, and variations to suit different tastes. Remember to store any leftovers properly for future meals. Whether grilling or baking, these bites are sure to impress. Experiment with flavors and enjoy this dish at your next gathering. You now have all the tools to create perfect steak bites. Happy cooking!

Garlic Butter Steak Bites Savory and Simple Recipe

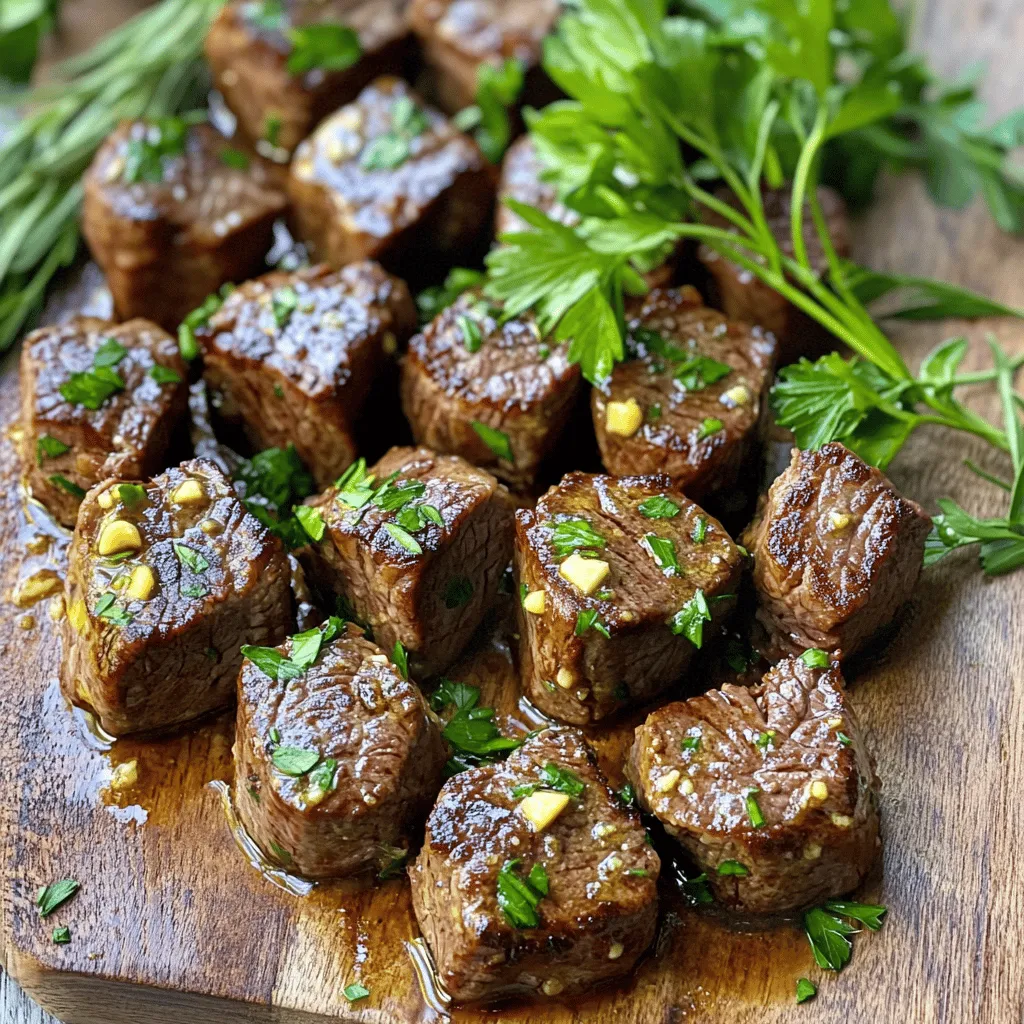
If you’re craving a quick and tasty meal, Garlic Butter Steak Bites are a must-try! This savory dish packs a

To make this tasty Mexican Street Corn Salad, gather these ingredients: - 4 cups corn kernels (fresh, frozen, or canned) - 1/2 cup crumbled cotija cheese - 1/4 cup mayonnaise - 2 tablespoons sour cream - 1 lime, juiced - 1-2 cloves garlic, minced - 1/2 teaspoon chili powder - 1/4 teaspoon smoked paprika - 1/4 cup chopped fresh cilantro - 1/4 cup red onion, finely chopped - Salt and pepper to taste These ingredients mix well to create a fresh and flavorful salad. You can swap some ingredients based on what you have. If you can't find cotija cheese, try feta cheese. It has a similar taste and texture. Instead of mayonnaise, you can use Greek yogurt for a tangy twist. If you prefer a vegan option, use plant-based mayo and skip the cotija cheese. You can customize this salad to fit your taste. Fresh corn gives the best flavor and texture. If you use fresh corn, grill it to enhance the taste. Frozen corn is a great alternative. It also has a nice crunch when cooked. Canned corn is quick and easy. Just drain and rinse it before use. Each type of corn has its perks, so choose what fits your schedule. First, gather all your ingredients. If you use fresh corn, you will grill it. Heat the grill to high. Place the corn on the grill for 8 to 10 minutes. Turn it often until it gets charred. This adds great flavor. When done, let it cool. Slice the kernels off the cob. If using frozen corn, you can sauté it. Heat a pan and cook until warm and a bit charred. For canned corn, just drain and rinse it. Grilling fresh corn gives it a smoky taste. You can also boil or steam it, but that won't add much flavor. Sautéing frozen corn in a hot pan adds some nice browning. This method also makes the corn sweet and tasty. No matter the method, the goal is to get that corn sweet and vibrant. In a large bowl, combine the corn, chopped red onion, and cilantro. Mix them well. In a smaller bowl, whisk together mayonnaise, sour cream, lime juice, minced garlic, chili powder, smoked paprika, salt, and pepper. Make sure it is smooth. Pour this dressing over the corn mix. Gently combine everything. Be careful not to mash the corn. Finally, fold in the cotija cheese, saving some for later. Taste your salad to see if it needs more salt or lime. Chill in the fridge for 30 minutes. This helps all the flavors blend. To boost the taste of your Mexican Street Corn Salad, focus on fresh ingredients. Use fresh lime juice for a zesty kick. Add more garlic if you love its bold flavor. Consider mixing in diced jalapeños for a spicy twist. The chili powder and smoked paprika give a unique depth. Taste your salad as you mix. Adjust the seasoning until it makes you smile. Serve your salad cold for the best experience. Chill it in the fridge for at least 30 minutes. This lets the flavors blend well. If you're in a hurry, even a quick 10-minute chill helps. Avoid serving it warm, as it changes the taste. Cold salads feel refreshing, especially on warm days. Make your salad look as good as it tastes. Use a large, colorful bowl to catch the eye. Sprinkle extra cotija cheese on top for a creamy touch. Add a dash of chili powder for a pop of color. Garnish with lime wedges, so guests can squeeze more juice. Individual cups can make serving fun and easy at parties. {{image_2}} You can easily give your Mexican street corn salad more kick. Add sliced jalapeños for fresh heat. If you like a smoky flavor, try chipotle peppers. They add a nice depth. You can also sprinkle more chili powder on top. This way, you can control the spice level based on your taste. Cotija cheese is a classic choice, but you can mix it up. Feta cheese works well if you can't find cotija. It still gives that salty taste. Or try queso fresco for a milder flavor. Each cheese brings a unique touch to the salad. You can even use a vegan cheese for a plant-based option. Making this salad vegan is simple and fun. Swap out the mayo and sour cream for vegan versions. Cashew cream is a great alternative for a creamy texture. Also, use nutritional yeast for a cheesy flavor without dairy. This way, everyone can enjoy a delicious salad. It's all about finding what works for you! To store leftovers, place the salad in an airtight container. Make sure to seal it well. Refrigerate the container right away. This keeps the corn salad fresh and tasty for later. I don't recommend freezing Mexican street corn salad. The texture changes when thawed. The corn may become mushy, and the flavors can fade. If you must freeze it, store in a freezer-safe container. Use within one month for the best taste. Mexican street corn salad lasts about 3 to 5 days in the fridge. To keep it fresh, check for any signs of spoilage. If it smells off or has an odd texture, throw it out. Always taste a small amount before serving leftovers. This ensures the flavor is still bright and enjoyable. Remember to stir the salad before serving. This mixes the ingredients again and brings back the fresh taste! Yes, you can use frozen corn. Just sauté it in a pan until it's hot and slightly charred. This helps to bring out the sweet flavor. Frozen corn works well and saves time. Cotija cheese is a crumbly cheese from Mexico. It has a salty and tangy taste. If you can't find cotija, you can use feta cheese as a substitute. Feta has a similar texture and flavor profile, making it a great choice. You can keep this salad in the fridge for about three days. Make sure to store it in an airtight container. The flavors will blend well, but the corn may lose some crunch. Enjoy it within this time for the best taste! You learned about key ingredients for making Mexican Street Corn Salad. Fresh and canned corn each have perks, and you can swap many ingredients. I shared tips for preparation, cooking, and mixing. Enhancing flavor and serving well can elevate your dish. If you want variety, don’t hesitate to spice things up or try vegan options. Remember to store leftovers properly for best taste. Now, you can enjoy making this dish with confidence and creativity.

Mexican Street Corn Salad Flavorful and Fresh Delight

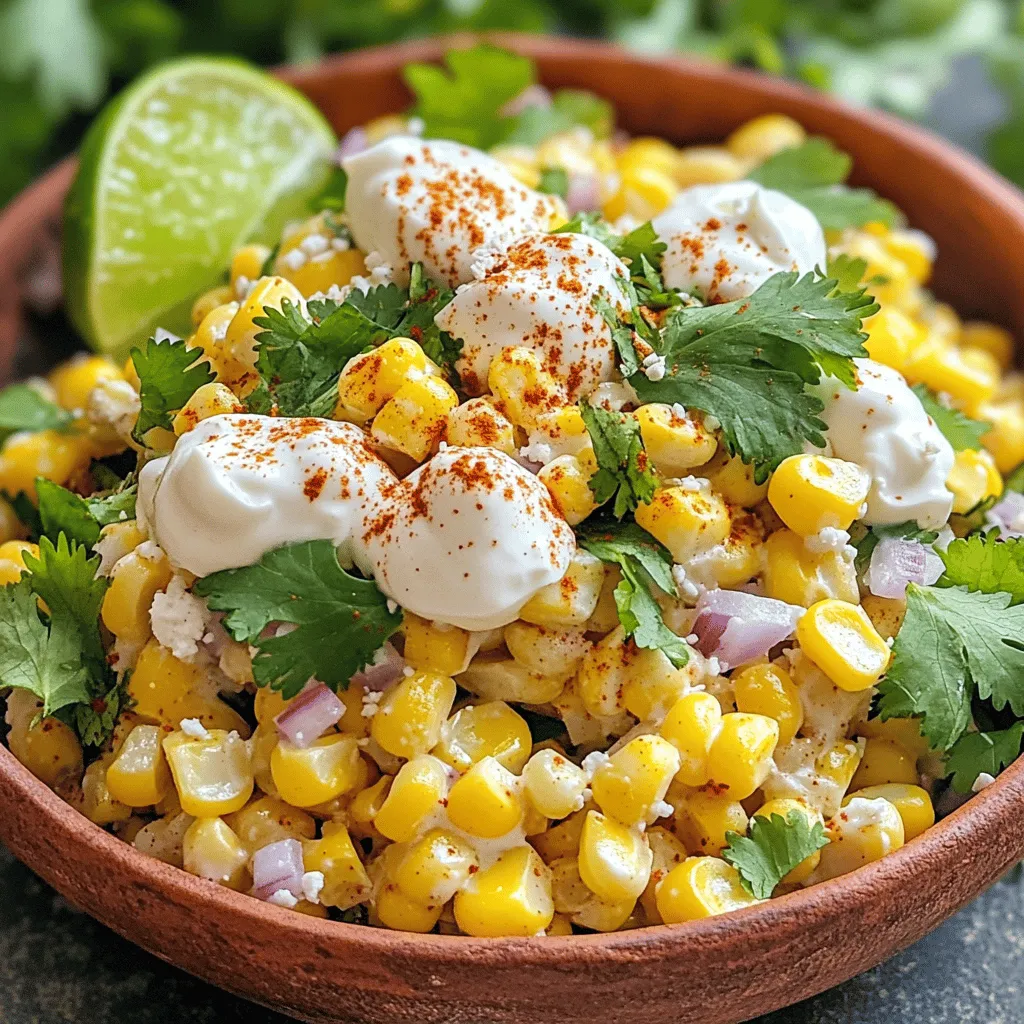
Are you ready to dive into a bowl of pure deliciousness? Mexican Street Corn Salad is a vibrant dish that

To make these tasty cinnamon sugar pretzel bites, you need: - 1 cup warm water (110°F to 115°F) - 2 tablespoons granulated sugar - 1 packet (2 ¼ teaspoons) active dry yeast - 2 ½ cups all-purpose flour - 1 teaspoon salt - ¼ cup baking soda - 1 large egg, beaten - ½ cup unsalted butter, melted - ½ cup granulated sugar (for coating) - 2 teaspoons ground cinnamon You can switch some ingredients if needed: - Use brown sugar instead of granulated sugar for a deeper flavor. - Swap all-purpose flour with whole wheat flour for more fiber. - If you want a vegan option, replace the egg with a flax egg or applesauce. - For a gluten-free version, use a gluten-free flour blend. Having the right tools makes this recipe easy: - Large mixing bowl - Slotted spoon - Baking sheets - Parchment paper - Small pot for boiling - Mixing spoon - Pastry brush These ingredients and tools ensure you create perfect cinnamon sugar pretzel bites every time. Enjoy the process! To start, grab a large mixing bowl. Combine 1 cup of warm water with 2 tablespoons of sugar. This warms up the water and helps the yeast. Sprinkle the packet of active dry yeast on top. Let it sit for about 5 minutes. You will see bubbles form, which means the yeast is active. Next, add 2 ½ cups of all-purpose flour and 1 teaspoon of salt to the bowl. Mix until it turns into a dough. Then, knead the dough for about 5 minutes. You want it smooth and elastic. After kneading, place the dough in a greased bowl. Cover it with a damp cloth and let it rise. Find a warm spot for about 1 hour or until it doubles in size. Once the dough has risen, it’s time to prepare for boiling. Start by preheating your oven to 425°F (220°C). Line two baking sheets with parchment paper to keep the bites from sticking. In a large pot, heat 10 cups of water. Add ¼ cup of baking soda to the water. Bring it to a gentle boil. While the water heats, punch down the risen dough. Divide it into small pieces, about 1 inch each. Roll each piece into a ball. When the water is ready, drop the pretzel bites in batches. Boil them for about 30 seconds. Use a slotted spoon to remove them and place them on the baking sheets. Now, brush the tops of the pretzel bites with a beaten egg. This gives them a nice golden color. Bake them in the oven for 10-12 minutes until they are golden brown. While they bake, mix ½ cup of granulated sugar with 2 teaspoons of ground cinnamon in a separate bowl. When the pretzel bites are out of the oven, toss them in the cinnamon sugar mixture. Make sure they are well coated. This adds a sweet touch to each bite. To shape pretzel bites, first, divide the dough into small pieces, about one inch each. Roll each piece into a ball using your palms. This step makes them fluffy and fun. When you roll, keep the pressure light. Too much pressure can make them tough. One mistake is using water that is too hot. The yeast needs warm water, not too hot. If it’s too hot, the yeast will die. Another mistake is not letting the dough rise enough. This step is key for soft bites. Be patient! You can add a dash of vanilla to the dough for extra flavor. Mixing in a pinch of nutmeg with the cinnamon also adds warmth. For a crunchy texture, sprinkle sea salt on top before baking. This gives a nice contrast to the sweet cinnamon sugar. {{image_2}} You can make your pretzel bites savory. Try adding cheese or herbs. Cheddar cheese gives a nice flavor. You can also use garlic powder or onion powder. Just mix these into the dough when you add the flour. These add-ins turn a sweet snack into a tasty treat. If you want something different, skip the cinnamon sugar. Try topping your bites with parmesan cheese. You can also use everything bagel seasoning for a fun twist. For a spicier kick, sprinkle chili powder or cayenne. Experiment with different flavors to find your favorite. To make gluten-free pretzel bites, use a gluten-free flour blend. Check that it contains xantham gum for the best texture. For vegan bites, replace the egg with a flaxseed mixture. Mix 1 tablespoon of flaxseed meal with 2.5 tablespoons of water for one egg. You can use vegan butter too. These changes make the pretzel bites fit many diets. To keep your cinnamon sugar pretzel bites fresh, place them in an airtight container. Make sure they cool down first. I like to line the container with paper towels to absorb any moisture. This helps keep them soft and tasty. Store them at room temperature for up to two days. If you want them to last longer, consider other storage options. When it's time to enjoy your pretzel bites again, reheating them is key. Preheat your oven to 350°F (175°C). Lay the pretzel bites on a baking sheet. Heat them for about 5-7 minutes. This warms them up and keeps them soft. You can also use the microwave for a quick fix. Just heat them for 10-15 seconds. This method works but might make them a bit chewy. If you want to freeze your pretzel bites, wrap them tightly in plastic wrap. Then, place them in a freezer bag. They can stay in the freezer for about a month. When you're ready to eat, take them out and let them thaw in the fridge overnight. For a quick option, you can thaw them at room temperature for a few hours. After thawing, reheat them in the oven to bring back that fresh-baked taste. Yes, you can use instant yeast. Instant yeast works faster than active dry yeast. You don’t need to proof it in water. Just mix it with the dry ingredients. However, the dough may rise quicker, so keep an eye on it. I love serving them warm in a basket. They taste great with melted chocolate or cream cheese dip. You can also serve them with a side of caramel sauce for a sweet treat. Homemade pretzel bites stay fresh for about 2-3 days. Store them in an airtight container at room temperature. For longer storage, you can freeze them. Just make sure they are fully cooled before freezing. Making pretzel bites is simple and fun. We covered the key ingredients, how to prepare and shape them, and some great tips. You learned about variations, like savory add-ins and gluten-free options. I shared storage tips to keep your bites fresh and tasty. With these steps, you can create tasty pretzel bites for any occasion. Enjoy the process and get creative with flavors!

Cinnamon Sugar Pretzel Bites Irresistible Sweet Snack

If you crave a sweet, warm snack, you need these Cinnamon Sugar Pretzel Bites! They are soft, chewy, and covered

To make a Classic Chicken Pot Pie Casserole, you will need: - 2 cups cooked chicken, shredded or diced - 1 cup frozen mixed vegetables (peas, carrots, corn) - 1 cup chicken broth - 1 cup heavy cream - 1 teaspoon dried thyme - 1 teaspoon garlic powder - 1 teaspoon onion powder - Salt and pepper to taste - 1 cup biscuit mix (like Bisquick) - ¾ cup milk - 1 large egg, beaten - Fresh parsley, chopped (for garnish) These ingredients create a rich and creamy filling, topped with a fluffy biscuit layer. The mix of chicken and veggies makes this dish hearty. You can make your casserole more unique by adding a few extras: - Cooked bacon or ham for a smoky flavor - Fresh herbs like rosemary or dill for more taste - Mushrooms for an earthy touch - Cheese, like cheddar, for a creamy twist These add-ins can change the flavor profile and make it even more tasty. If you want to swap some ingredients, here are some ideas: - Use leftover turkey instead of chicken for a festive twist. - Swap the heavy cream for half-and-half or whole milk if you want a lighter dish. - Use fresh vegetables instead of frozen, but cook them first. - For a gluten-free version, choose gluten-free biscuit mix. These substitutions help you tailor the dish to your needs while keeping it delicious. First, gather your ingredients. You need cooked chicken, frozen mixed veggies, chicken broth, and heavy cream. Add thyme, garlic powder, onion powder, salt, and pepper. These spices add great flavor. Make sure the chicken is shredded or diced. This helps it mix well. In a large bowl, combine the chicken, veggies, broth, and cream. Add the spices next. Mix everything until coated. This step is key for taste. Pour the mixture into a greased 9x13 inch casserole dish. Spread it evenly for best cooking results. Now, in another bowl, mix the biscuit mix, milk, and beaten egg. Stir until just combined. The mix should be lumpy, and that's okay. Spoon the biscuit batter over the chicken filling. Spread it out gently. Avoid mixing them. This keeps the layers nice. Bake in your preheated oven for 30-35 minutes. Look for a golden top. A toothpick should come out clean. Let it cool for a few minutes before you serve. Garnish with fresh parsley for a pop of color. To make your filling pop with flavor, use fresh herbs. Dried thyme works great, but fresh is even better. Mix the chicken with frozen veggies for a quick bite. Make sure to season well with salt and pepper. Use good quality broth for richer taste. I recommend using low-sodium broth to control the salt level. You can also add garlic powder and onion powder for more depth. These spices bring out the best in the chicken and veggies. For a perfect biscuit topping, don’t overmix your batter. Mix until just combined, even if it’s a bit lumpy. This keeps the biscuits fluffy. Use a good-quality biscuit mix, like Bisquick, for best results. The milk and egg add richness and help the biscuits rise. Spoon the batter gently over the filling. Spread it out without blending it in. This way, the topping stays nice and fluffy when baked. One common mistake is overcooking the filling. Bake just until the biscuits are golden brown. If you leave it too long, the filling may dry out. Another mistake is not letting the casserole cool briefly. Cooling helps the filling set up a bit. Also, don’t skip the garnish! Fresh parsley adds color and a fresh taste. Lastly, always taste your filling before baking. Adjust seasoning as needed for the best flavor. {{image_2}} You can easily make a vegetarian version of this dish. Swap the chicken for hearty veggies. Use mushrooms, zucchini, or chickpeas for protein. This mix gives a rich, savory taste. Don’t forget to add your favorite herbs like thyme or rosemary for flavor. The cream and broth can stay the same or use vegetable broth for a lighter touch. This version offers all the comfort without meat. If you want to switch up the meat, try turkey or beef. Shredded turkey works great, especially after a holiday feast. Ground beef can be a fun twist too. Just brown it before mixing with the veggies and sauce. Each meat adds a unique flavor. You can also use rotisserie chicken for quick prep. This way, you save time and still enjoy a delicious meal. Seasonal veggies add variety and freshness. In spring, use asparagus and peas. Summer brings zucchini and bell peppers. Fall lets you add sweet potatoes or squash. Winter is perfect for carrots and root veggies. These options keep your casserole vibrant and exciting. Seasonal ingredients also boost flavor and nutrition. Always choose what’s fresh for the best taste. Mixing up the veggies makes each meal special and fun to share. I love to keep my chicken pot pie casserole fresh for later. First, let it cool completely at room temperature. Then, transfer the leftovers into an airtight container. You can store this in the fridge for up to three days. Make sure to label the container with the date. This way, you’ll know when to eat it again! Reheating is simple and quick. Preheat your oven to 350°F (175°C). Place the casserole in an oven-safe dish. Cover it with foil to keep moisture in. Heat for about 20-25 minutes or until it is warm throughout. You can also use a microwave. Just put a single serving on a microwave-safe plate. Heat for about two minutes, checking every 30 seconds to avoid overheating. Freezing is a great way to save time for busy days. After the casserole cools, portion it into freezer-safe containers. Leave some space at the top, as it may expand. Seal the containers tightly and label them. It can stay frozen for up to three months. When you're ready to eat, thaw it in the fridge overnight before reheating. This keeps the flavors intact and makes it easy to enjoy later! This casserole lasts about 3 to 4 days in the fridge. Make sure to store it in an airtight container. To keep the flavors fresh, let it cool before sealing. If you want to enjoy it longer, consider freezing it instead. Yes, you can make this dish ahead of time. Prepare the filling and store it in the fridge. You can also mix the biscuit batter and keep it separate. When you're ready to bake, just combine them and pop it in the oven. This makes meal prep easy! You can serve a simple green salad on the side. A fresh garden salad adds crunch and balance to the meal. You might also enjoy some bread rolls or garlic bread. These sides complement the rich flavors of the casserole nicely. This blog post covered all you need to know about making a chicken pot pie casserole. I outlined the key ingredients, from essentials to alternatives. We went through step-by-step instructions on prepping and combining everything. I shared tips to enhance flavors and avoid common mistakes. You even learned about tasty variations and storage methods. Enjoy this dish knowing you can customize it to your liking! Cooking can be fun and easy with the right guidance. Happy cooking!

Classic Chicken Pot Pie Casserole Delightful Comfort Dish

Craving a dish that warms the heart and fills the belly? Look no further! My Classic Chicken Pot Pie Casserole

Older posts
Newer posts
← Previous Page1 … Page30 Page31 Page32 … Page124 Next →

dsad

© 2025 Southern Dishes • Built with GeneratePress

Our Policies

  • Copyright Policy
  • Cookie Policy
  • GDPR Policy
  • Privacy Policy
  • Disclaimer
  • Terms Of Use

More Information

  • Home
  • About
  • Contact
  • Appetizers
  • Dessert
  • Dinner
  • Drinks
©2025, Southern Dishes About Back To Top