No-Chop Sun-Dried Tomato Pasta Quick and Tasty Dish
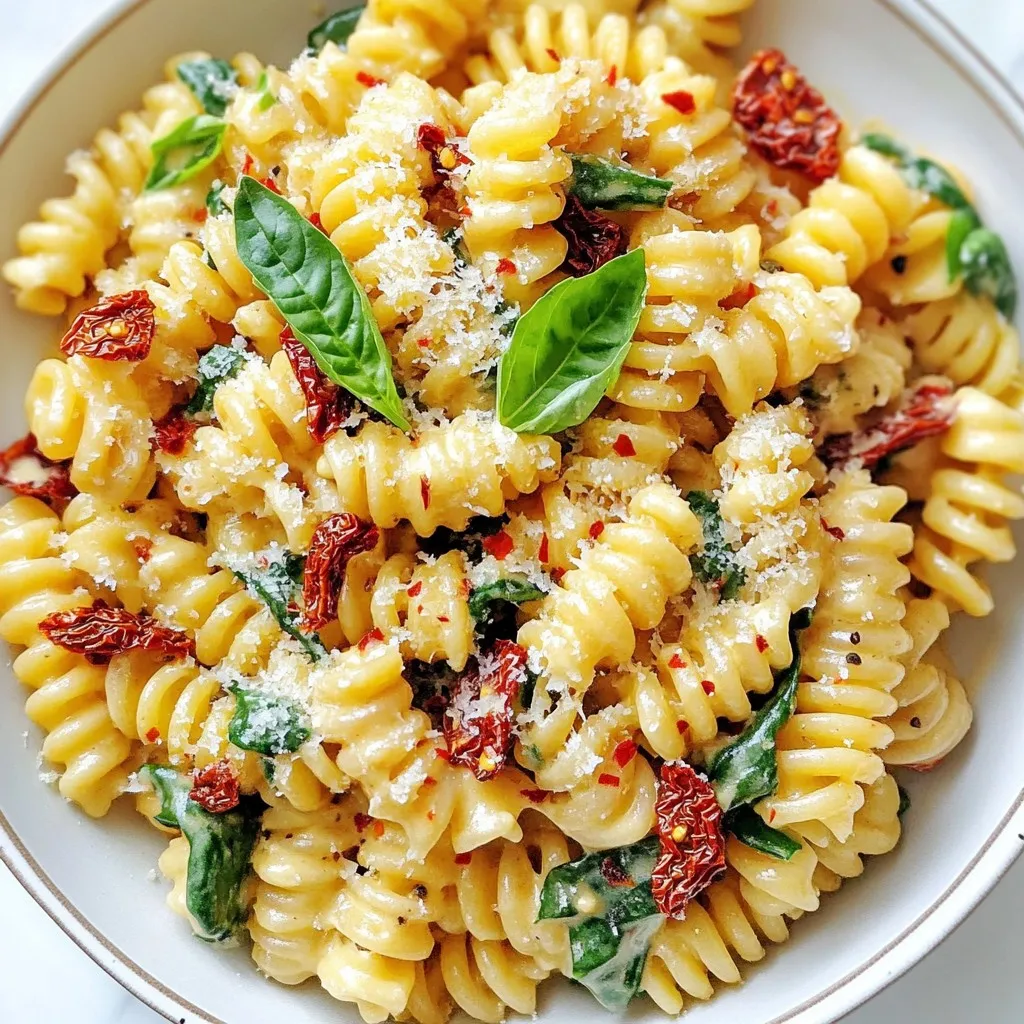
Looking for a quick and tasty meal? Try my No-Chop Sun-Dried Tomato Pasta! This dish packs bold flavors, creamy goodness,
Looking for a quick and tasty meal? Try my No-Chop Sun-Dried Tomato Pasta! This dish packs bold flavors, creamy goodness,

If you love comfort food, Scottish Tattie Scones are a must-try! This easy recipe guide will help you make these

Get ready to add a spark of joy to your holiday baking with my Peppermint Snowball Cookies! These delicious treats
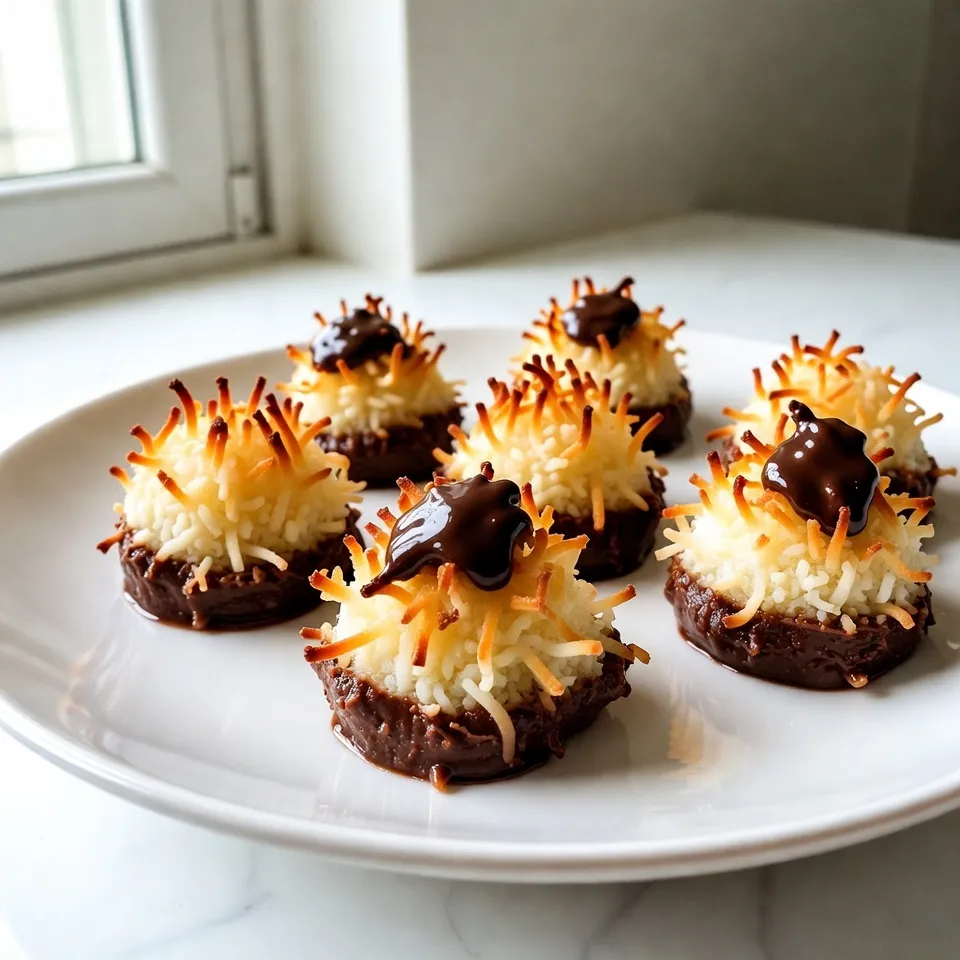
Are you ready to indulge in a sweet treat? Chocolate Dipped Coconut Macaroons are the perfect blend of chewy coconut
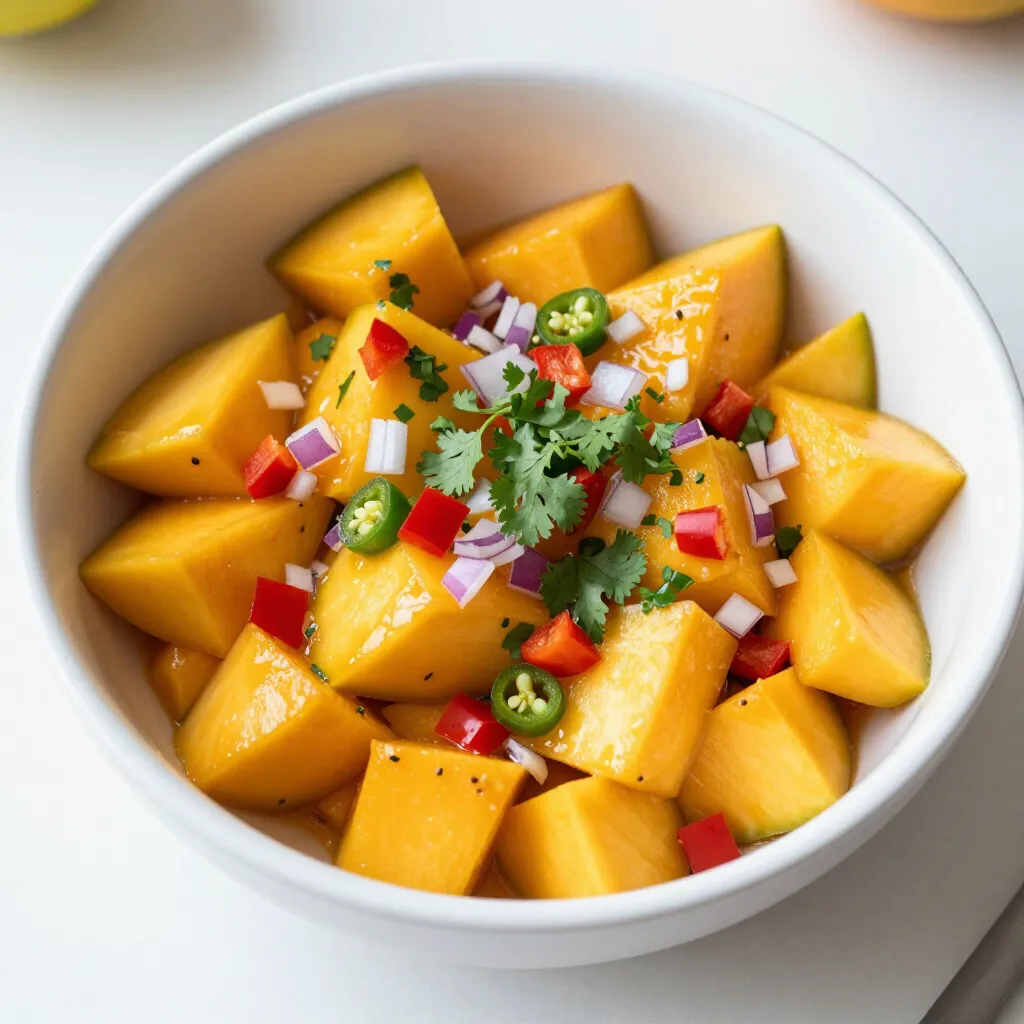
Looking for a delicious and easy way to spice up your meals? Fresh Mango Salsa is your answer! With just
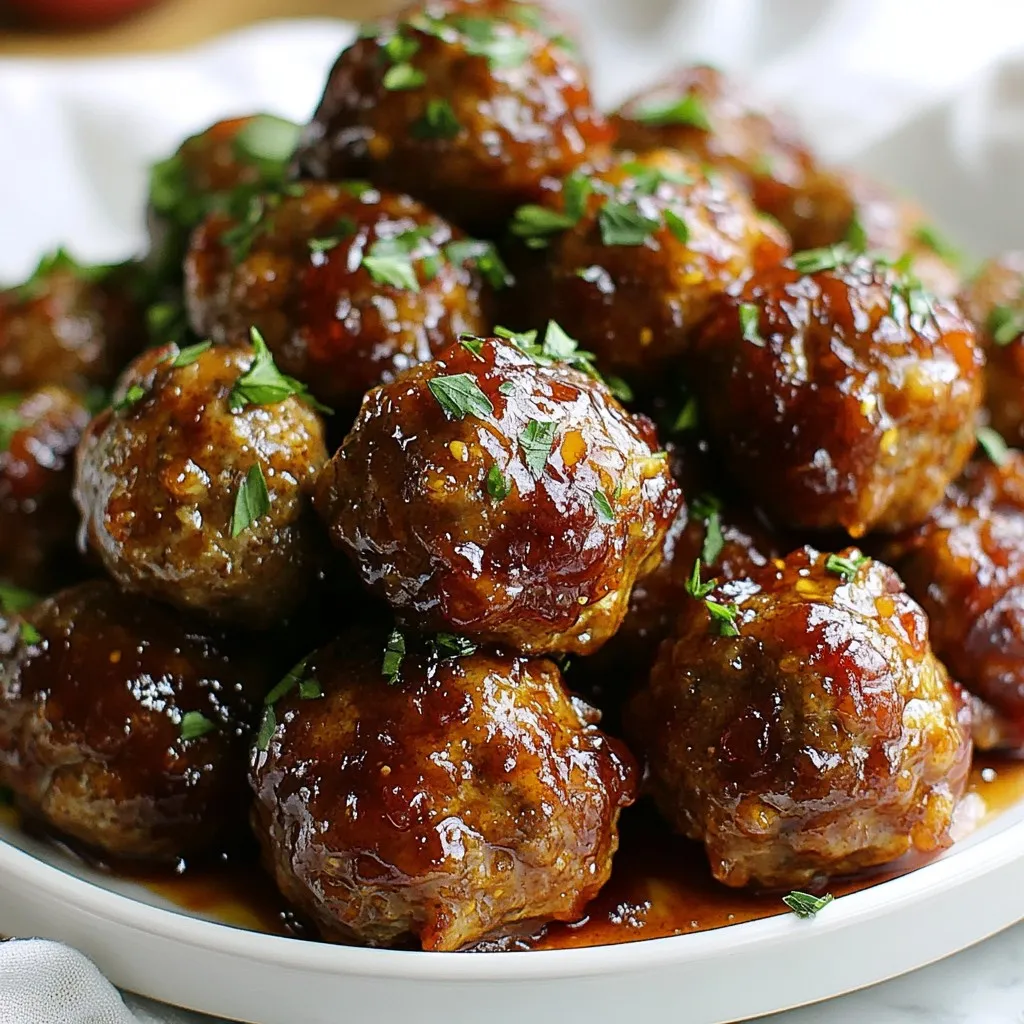
Looking for a snack that’s both quick and packed with flavor? Look no further! My Quick Cranberry Meatballs are easy

Crème Brûlée French Toast is the breakfast treat you didn’t know you needed in your life! Imagine the rich flavors

Welcome to the world of easy baking! Today, I’ll show you how to make One-Bowl Banana Chocolate Chip Muffins. These

Get ready to impress your family and friends with an easy and delicious No-Bake Peppermint Oreo Pie! This festive treat
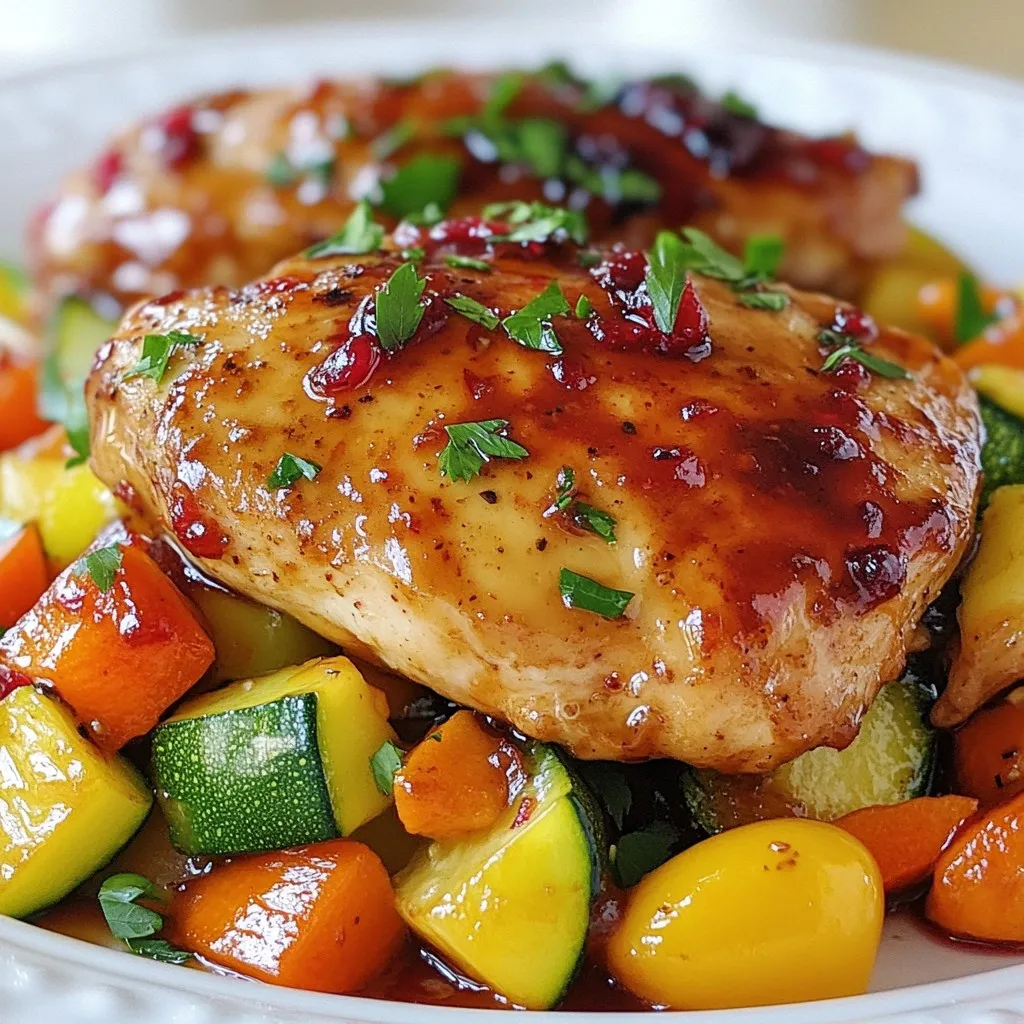
Welcome to Cranberry Glazed Chicken with Veggies Delight! If you’re looking for a meal that bursts with flavor and color,
