Skip to content
DisclaimerTerms Of UseGDPR PolicyCookie Policy

Southern Dishes

  • Home
  • Drinks
  • Appetizers
  • Dinner
  • Dessert
  • About
  • Contact
  • Privacy Policy
DisclaimerTerms Of UseGDPR PolicyCookie Policy

Isabella

- 1 cup rolled oats - 2 cups almond milk (or any milk of choice) - 2 tablespoons unsweetened cocoa powder - 2 tablespoons natural peanut butter - 2 tablespoons maple syrup (or honey for sweetness) - 1 teaspoon vanilla extract - A pinch of salt - Optional toppings: sliced bananas, shredded coconut, chocolate chips, or chopped nuts For this recipe, I love using rolled oats. They give the best texture. Almond milk works great, but you can choose any milk you like. Cocoa powder adds that rich chocolate flavor. Natural peanut butter gives it creaminess and a nutty taste. Sweeteners like maple syrup or honey bring the perfect touch of sweetness. A dash of vanilla extract makes everything taste even better. The salt may seem small, but it really enhances the flavors. You can get creative with toppings. Sliced bananas add freshness. Shredded coconut gives a tropical twist. Chocolate chips bring extra sweetness, and chopped nuts add crunch. Enjoy making this simple dish your own! First, take a large mixing bowl. Add 1 cup of rolled oats, 2 tablespoons of cocoa powder, and a pinch of salt. Mix well. This step makes sure the cocoa mixes evenly. You want every bite to be rich and chocolatey. Next, grab another bowl. Whisk together 2 cups of almond milk, 2 tablespoons of natural peanut butter, 2 tablespoons of maple syrup, and 1 teaspoon of vanilla extract. Make sure it is smooth. This mix gives your oats a creamy, sweet flavor. Now, pour the wet mix into the dry mix. Stir gently until everything blends well. It should look thick and chocolatey. Next, divide the mixture into two jars or airtight containers. Seal them tight to keep the flavors in. This part is key! Place the jars in the fridge overnight. This allows the oats to soak up all the yummy flavors. If you can't wait, give them at least 4 hours. The longer they sit, the creamier they become. Enjoy the anticipation! You can change the taste by using different nut butters. Almond butter or cashew butter works great too. Try other sweeteners like agave syrup or brown sugar. For a warm touch, add a sprinkle of cinnamon or a dash of nutmeg. These spices can really boost the flavor. To make your oats creamier, choose full-fat milk or add some yogurt. You can also mix in mashed bananas or applesauce. If you prefer a thinner consistency, add more milk. Start with a little, then add more until it feels just right. Top your oats with fresh fruit like berries or sliced apples. A sprinkle of shredded coconut adds a nice crunch. Chocolate chips are a fun treat, while chopped nuts give extra protein. You can also drizzle some honey or maple syrup on top for extra sweetness. {{image_2}} To add bananas, slice them and mix them in. You can also mash one banana and mix it into the oats for a creamy texture. Bananas bring natural sweetness and a soft taste that pairs well with chocolate. For a fun twist, top your oats with extra banana slices before serving. You can use mixed nuts or different nut butters. Almonds, walnuts, or pecans work great. Just chop them up and stir them into the oat mixture. You can also swirl in almond butter or cashew butter for a unique flavor. This adds crunch and healthy fats to your meal. To make this recipe vegan, use maple syrup for sweetness. Ensure your nut butter is also vegan. For gluten-free oats, use certified gluten-free rolled oats. This way, you can enjoy tasty oats while meeting your dietary needs. Adjust the milk to suit your taste, whether it's almond, soy, or oat milk. For the best storage of your chocolate peanut butter overnight oats, use airtight containers. Glass jars work well and let you see the oats. You can also use plastic containers with secure lids. This helps keep the oats fresh and tasty. These overnight oats stay good in the fridge for about 3 to 5 days. Make sure to check for any changes in smell or texture before eating. If it looks or smells off, it’s best to toss it. You can enjoy your oats cold or warm them up. To heat, place your oats in a microwave-safe bowl. Heat in short bursts of 30 seconds, stirring in between. Add a splash of milk to get the right texture. If you like them cold, just give them a good stir and enjoy! Yes, you can use quick oats. Quick oats cook faster and absorb liquid differently. They create a softer, mushier texture. Rolled oats, on the other hand, stay chewier. If you like a thicker texture, stick with rolled oats. For a creamier result, quick oats work well. Just remember, the soaking time may change. Quick oats may need less time in the fridge. To adjust sweetness, start with the recipe's maple syrup. If you want it sweeter, add more syrup or honey. Taste as you go. You can also use sweeteners like agave or stevia. For less sweet oats, reduce the syrup. Adding ripe bananas or applesauce can boost sweetness naturally. Each option changes the flavor, so choose what you like best. If you lack almond milk, use any milk you prefer. Options include cow's milk, oat milk, or coconut milk. Each type adds its own taste. Cow's milk makes the dish creamier, while coconut milk adds a hint of sweetness. Choose a milk that fits your diet or flavor wishes. Just keep the same amount as the recipe calls for. You can eat overnight oats warm! To warm them, transfer the oats to a microwave-safe bowl. Heat them in short bursts, about 30 seconds at a time. Stir in between to ensure even heating. If they seem too thick, add a splash of milk to loosen them. This gives you a cozy breakfast on chilly mornings. Enjoy your warm oats! This blog post showed you how to make tasty overnight oats. We explored the right ingredients and detailed each step. You learned helpful tips for flavor and texture. We also discussed variations for different diets and best storage practices. In my experience, overnight oats are quick, fun, and healthy. With these recipes, you can enjoy a tasty breakfast. Experiment with your favorite flavors and toppings to keep things exciting. You’ll love how easy it is to prepare these ahead of time!

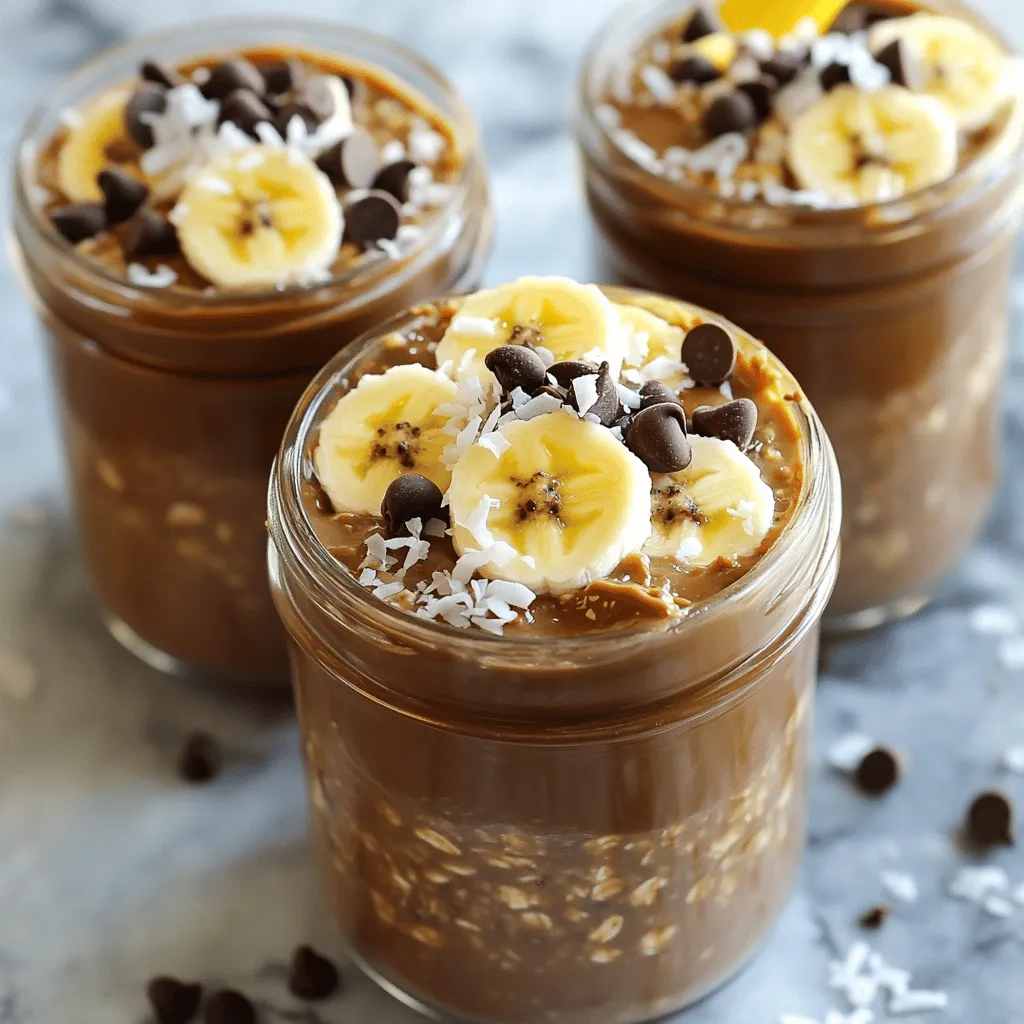
Chocolate Peanut Butter Overnight Oats Simple Recipe

Imagine waking up to a delicious, healthy breakfast that takes just minutes to prepare! Chocolate Peanut Butter Overnight Oats are

- 1 pound large shrimp, peeled and deveined - 1 pound smoked sausage (preferably andouille), sliced - 1 red bell pepper, diced - 1 green bell pepper, diced - 1 medium onion, chopped - 3 cloves garlic, minced - 1 cup uncooked quinoa - 2 cups chicken broth - 1 can (14.5 oz) diced tomatoes, drained - 2 tablespoons olive oil - 1 tablespoon Cajun seasoning - 1 teaspoon paprika - 1/2 teaspoon cayenne pepper (adjust to taste) - Salt and pepper to taste - Fresh parsley, chopped (for garnish) When I create this dish, I focus on fresh ingredients. The shrimp needs to be large, juicy, and peeled. I use smoked sausage, like andouille, for a deep flavor. The mix of red and green bell peppers adds sweetness and crunch. Chopped onion and minced garlic bring a strong, tasty base. Quinoa is my grain of choice here. It cooks well and soaks up the flavors. I use chicken broth for richness and canned diced tomatoes for a touch of acidity. Seasonings are key. I start with olive oil to cook the sausage and veggies. Cajun seasoning gives it the signature kick, while paprika adds color. Cayenne can be adjusted for heat, letting you control the spice. Lastly, salt and pepper enhance all the flavors. I always garnish with fresh parsley for a pop of color and freshness. These ingredients come together to make a simple, one-pan meal. Each bite bursts with flavor and texture, making it comforting and satisfying. - Preheat your oven to 400°F (200°C). - Heat olive oil in a large oven-safe skillet or baking dish. - Brown the sausage slices for 5-7 minutes. - Sauté onions and bell peppers until tender, about 5 minutes. - Stir in garlic and spices, cooking until fragrant for 1 minute. - Add drained tomatoes and quinoa, mix well. - Pour in chicken broth and bring to a simmer. - Gently fold in shrimp, ensuring an even distribution in the mixture. - Cover with foil and bake for 25-30 minutes. - Remove foil and bake for an additional 10 minutes. - Let sit for a few minutes. Garnish with fresh parsley before serving. - Adjust cayenne pepper to control spice level. Start small if you prefer less heat. - Use fresh herbs for better flavor. Parsley adds a bright touch, while thyme deepens taste. - Check shrimp for doneness – it should be opaque. This shows they are fully cooked. - Ensure quinoa is fully cooked and has absorbed liquid. It should be fluffy, not crunchy. - Use a large oven-safe skillet for easier preparation and serving. This makes cleanup simple too. {{image_2}} You can switch shrimp for chicken or tofu. Chicken gives a nice flavor and texture. Tofu is great for a plant-based option. Both changes keep the dish tasty. You can also try using chorizo instead of andouille sausage. Chorizo adds a spicy kick that enhances the dish. Mix in more vegetables like zucchini or corn. They add color and nutrition. You can also substitute quinoa with brown rice for a heartier texture. Brown rice has a nutty flavor that pairs well with the dish. Think about different seasoning blends like jerk seasoning. This gives a unique twist to the dish. A splash of lemon juice adds brightness and freshness. It lifts all the flavors and makes each bite exciting. Store leftovers in an airtight container for up to 3 days. This keeps your meal fresh. When you are ready to eat, simply open the container and enjoy the flavors again. Freeze the baked dish in portions for up to 2 months. This is great for meal prep. To freeze, let it cool first, then place it in freezer-safe bags. Label each bag with the date. Reheat in the oven at 350°F (175°C) until warmed through. This helps keep the texture nice. Microwaving is an option but may affect texture. If you choose to microwave, use a covered dish to trap moisture. Yes, you can prep it a day before and bake fresh on serving day. This saves time and lets the flavors meld together. Serve with crusty bread or a side salad for a complete meal. The bread soaks up the tasty juices, and the salad adds freshness. The spice level can be adjusted based on the amount of cayenne pepper used. Start with less if you prefer mild flavors. Yes, just ensure they are thawed and drained before use. This helps keep the dish from becoming watery. This recipe mixes shrimp, sausage, veggies, quinoa, and spices for a tasty dish. You learned how to bake it perfectly and adjust flavors to your liking. Remember, you can swap proteins and veggies to suit your taste or diet. Store leftovers well to enjoy them later. Give this dish a try, and you’ll impress your friends and family with your cooking skills. Enjoy your meal!

Cajun Shrimp Sausage Bake Flavorful One-Pan Meal

Looking for a delicious, easy meal? This Cajun Shrimp Sausage Bake is your answer. Packed with flavor from shrimp and

For this dish, you'll need a few key items. Gather these main ingredients: - 1 pound boneless, skinless chicken breast, cut into bite-sized pieces - 4 tablespoons unsalted butter - 4 cloves garlic, minced - 1 teaspoon paprika - 1 teaspoon dried Italian herbs (oregano, thyme, basil) These ingredients make the chicken rich and tasty. The butter adds a nice creaminess while the garlic gives it a bold flavor. Next, you need ingredients for the cauliflower rice. Choose one of the following options: - 1 head of cauliflower, riced (or 4 cups store-bought cauliflower rice) If you use a whole head of cauliflower, you'll need to rice it. This means you will turn it into small bits that look like rice. It’s a great low-carb choice! Lastly, you need some seasonings and garnishes: - Salt and pepper to taste - 2 tablespoons fresh parsley, chopped (for garnish) - 1 lemon, juiced The lemon juice brightens the dish and the parsley adds a fresh touch. These simple extras really make the meal pop! {{ingredient_image_1}} Start by breaking down the head of cauliflower. Remove the leaves and stem first. Cut the cauliflower into small florets. If you have a food processor, pulse the florets until they look like rice. This is your cauliflower rice. If you prefer, you can buy store-bought cauliflower rice. Set your riced cauliflower aside while you prepare the chicken. Grab a large skillet and heat it over medium-high heat. Add 2 tablespoons of unsalted butter. Let it melt and start to bubble. Next, add 4 minced garlic cloves. Sauté the garlic for about 30 seconds. You want the garlic to smell amazing but not brown. Now, toss in the bite-sized chicken pieces. Sprinkle in 1 teaspoon of paprika and 1 teaspoon of dried Italian herbs. Season with salt and pepper to taste. Cook the chicken for about 5 to 7 minutes. Stir the chicken occasionally. It should turn golden brown and be fully cooked. While the chicken cooks, prepare the cauliflower rice in another pan. Melt the remaining 2 tablespoons of butter over medium heat. Add the riced cauliflower and season with salt and pepper. Cook for about 5 to 6 minutes until tender. Once the chicken is done, drizzle the juice of 1 lemon over it. Stir well to coat the chicken. Add 2 tablespoons of chopped parsley for extra flavor. To serve, plate the cauliflower rice first. Top it with the garlic butter chicken. If you like, sprinkle more parsley on top for a nice touch. Enjoy your meal! To keep your chicken tender, use fresh chicken breasts. Cut them into small, even pieces. This helps them cook faster and evenly. Season the chicken well before cooking. Using enough salt brings out the flavor. Cook the chicken over medium-high heat. This method locks in the juices. Make sure not to overcook the chicken. Aim for a golden brown color. Use a meat thermometer to check for doneness; it should reach 165°F. Store leftover cauliflower rice in an airtight container. It will stay fresh for about 3 days in the fridge. When reheating, use a skillet or microwave. If using a skillet, add a splash of water to keep it moist. Heat on low until warm. If using a microwave, cover it with a damp paper towel. This helps steam the rice lightly. Avoid reheating it too many times to keep the texture nice. You can boost the flavor of your chicken with extra spices. Try adding chili flakes for some heat. For a unique twist, use lime juice instead of lemon. Fresh herbs like basil or cilantro can replace parsley. If you don’t have garlic, use garlic powder. You can also swap cauliflower rice with quinoa or brown rice for variety. These changes keep the dish fresh and exciting. Pro Tips Use Fresh Garlic: Freshly minced garlic will give a more vibrant flavor compared to pre-minced options. Chicken Cooking Tip: Ensure the chicken is cut into uniform pieces to promote even cooking and browning. Cauliflower Rice Texture: Do not overcook the cauliflower rice; it should be tender but still have a bit of bite to it. Add More Flavor: Experiment with different herbs or spices, such as chili flakes or lemon zest, for an extra kick! {{image_2}} Want to kick it up a notch? Add chili flakes to your garlic butter chicken. Start with a pinch. Taste it, then add more if you like heat. This spice brings a whole new flavor. It pairs well with the garlic and butter. You will enjoy the extra zing in every bite. Not a fan of cauliflower? No problem! You can use zucchini noodles or broccoli rice instead. Both options are low in carbs and full of flavor. Zucchini noodles have a nice crunch. Broccoli rice adds a fresh taste. You can make your meal feel light and bright with these swaps. Want to switch up the protein? Try shrimp or tofu. For shrimp, cook them for about 3-4 minutes until pink. Tofu needs a little more time. Sauté it until golden brown. Each protein brings its own flavor to the dish. Shrimp adds a sweet taste, while tofu soaks up the garlic butter well. Both options keep your meal exciting and new. To store leftovers, let the dish cool down first. Then, place the chicken and cauliflower rice in an airtight container. You can keep it in the fridge for up to three days. Make sure to seal it well to keep out air and moisture. Use glass or BPA-free plastic containers for the best results. Glass containers are great for reheating in the oven or microwave. They also do not stain or hold odors. Plastic containers are lightweight and easy to stack. Choose containers with tight-fitting lids to keep your food fresh. If you want to freeze the chicken, let it cool completely. Portion it into smaller containers or freezer bags. Remove as much air as possible to prevent freezer burn. You can freeze it for up to three months. When ready to eat, thaw it in the fridge overnight. Then, reheat it on the stove or in the microwave. It takes about 20 minutes to make this dish. The prep time is 10 minutes. Cooking time for the chicken and cauliflower rice is about 10 minutes. This quick recipe is perfect for busy days. Yes, you can use frozen cauliflower rice. It saves time and cooks quickly. Just heat it in the pan, and follow the same steps. This option makes the recipe even easier. You can serve garlic butter chicken with a fresh salad. A side of steamed veggies works well too. If you prefer carbs, try whole grain bread or quinoa. These choices add variety to your meal. This article showed you how to make Garlic Butter Chicken with Cauliflower Rice. You learned about the main ingredients, step-by-step cooking methods, and tips for the best results. Variations let you customize the dish to your taste. Try new flavors or proteins to keep meals exciting. Storing and reheating tips help you enjoy leftovers without waste. This dish is simple, tasty, and perfect for any day. Enjoy cooking and make it your own!

Minute Garlic Butter Chicken with Cauliflower Rice Delight

Looking for a quick, tasty dinner? You’ll love this Minute Garlic Butter Chicken with Cauliflower Rice recipe! This dish combines

- 2 tablespoons olive oil - 1 medium onion, diced - 3 cloves garlic, minced - 1 bell pepper, diced - 1 teaspoon ground cumin - 1 teaspoon chili powder - 1/2 teaspoon smoked paprika - 4 cups chicken broth - 2 cups cooked chicken, shredded - 1 can (15 oz) black beans, rinsed and drained - 1 can (15 oz) corn, drained - 1 can (10 oz) red enchilada sauce The base of Chicken Enchilada Soup starts with olive oil, onion, and garlic. I love using olive oil for its rich flavor. Next, I add diced onion and minced garlic to create a tasty aroma. I sauté these for a few minutes until the onion turns soft and clear. Next come the spices. I always use ground cumin, chili powder, and smoked paprika. These give the soup depth and warmth. The spices need a minute to toast in the pot. This step really brings out their flavors. Then, I add four cups of chicken broth. It makes the soup hearty and fills it with flavor. I also include shredded chicken. I prefer using cooked chicken for ease. Black beans and corn add protein and sweetness. Finally, I mix in red enchilada sauce for that classic taste. - 1 cup heavy cream - Fresh cilantro, chopped - Fresh avocado, diced - Monterey Jack or Cheddar cheese, shredded - Tortilla chips The soup is perfect on its own, but toppings make it even better. I stir in heavy cream for richness. It makes the soup creamy and smooth. Fresh cilantro adds a burst of color and flavor. I love the bright taste it brings. Diced avocado adds creaminess and texture. You can use Monterey Jack or Cheddar cheese for a cheesy finish. Both melt well and enhance the soup’s taste. For crunch, serve with tortilla chips. They offer a nice contrast to the soup's smoothness. I always keep extra chips on the side for dipping. {{ingredient_image_1}} First, heat 2 tablespoons of olive oil in a large pot over medium heat. Add 1 diced onion and sauté it for 3-5 minutes. The onion should become soft and clear. Next, add 3 minced garlic cloves and 1 diced bell pepper. Keep sautéing for another 2-3 minutes until you smell the garlic. This mix gives your soup a great start. Now, stir in 1 teaspoon of ground cumin, 1 teaspoon of chili powder, and 1/2 teaspoon of smoked paprika. Cook this for about 1 minute. This step toasts the spices and brings out their best flavors. Once your base is ready, pour in 4 cups of chicken broth. Then add 2 cups of shredded chicken, 1 can of black beans, 1 can of corn, and 1 can of red enchilada sauce. Stir well to mix all these ingredients together. Bring the soup to a gentle simmer. Let it cook for 15-20 minutes. This time allows all the flavors to blend and grow richer. After simmering, lower the heat and stir in 1 cup of heavy cream. This adds a creamy texture to the soup. Taste and add salt and pepper as needed. Warm the soup for another 5 minutes but do not let it boil. Serve the soup in bowls. Top it with diced avocado, shredded cheese, and fresh cilantro. Don’t forget a handful of tortilla chips on the side for a crunchy treat! To get the best taste, toasting spices is key. When you toast spices like cumin, chili powder, and smoked paprika, you unlock their full flavor. Heat them in the pot for a minute before adding other ingredients. This small step makes a big difference. Using homemade chicken broth gives richer flavor. If you don’t have time, store-bought broth works too. Look for low-sodium options to control salt levels. Either way, a good broth adds depth to your soup. You might want your soup thicker or thinner. To thicken it, mash some black beans with a fork. This adds creaminess without extra calories. For a thinner soup, add more chicken broth until you reach your desired consistency. Want more heat? You can add diced jalapeños or a pinch of cayenne pepper. Start with a little, then taste it. You can always add more, but it’s hard to take spice away! For a great look, serve the soup in rustic bowls. Use wide bowls so you can add plenty of toppings. A sprinkle of fresh cilantro on top adds color. Toppings make your dish pop! Add diced avocado and shredded cheese for creaminess. A handful of tortilla chips on the side gives a nice crunch. You could even serve lime wedges to squeeze on top. This adds a zesty kick that brightens the flavor. Pro Tips Use Homemade Chicken Broth: If you have the time, using homemade chicken broth will elevate the flavor of your soup significantly. Adjust Spice Level: Feel free to adjust the amount of chili powder and smoked paprika according to your heat preference. You can also add diced jalapeños for an extra kick! Make it a Meal: This soup can be served with a side salad or some crusty bread for a complete meal; it's hearty enough to satisfy! Garnish Creatively: In addition to avocado and cheese, try adding a dollop of sour cream or some sliced radishes for added texture and flavor. {{image_2}} You can make Chicken Enchilada Soup healthier by swapping some ingredients. One great change is to replace heavy cream with Greek yogurt or coconut milk. This keeps the soup creamy but cuts calories and adds more protein. Another way to boost nutrition is to add more vegetables. Consider tossing in diced zucchini, carrots, or spinach. These veggies add color and make the soup more filling without too many extra calories. If you want a different protein, try turkey instead of chicken. Ground turkey works well and keeps the soup light. For a plant-based option, use lentils or chickpeas. Both options offer good protein and a nice texture in the soup. To give your soup a unique twist, consider adding different spices or sauces. Try a splash of lime juice for brightness or a hint of chipotle for smokiness. Both will enhance the soup’s flavor profile. You can also switch up the beans. Instead of black beans, try pinto beans or white beans. Each type brings its own taste and texture, making the soup even more exciting. To keep your Chicken Enchilada Soup fresh, follow these easy steps: - Refrigerate: Allow the soup to cool to room temperature. Transfer it to an airtight container. Store it in the fridge for up to 3-4 days. - Freeze: For longer storage, pour the soup into a freezer-safe container. Leave some space at the top, as the soup will expand when frozen. It can last up to 3 months in the freezer. When it's time to enjoy your leftovers, here’s how to reheat without losing flavor: - Stovetop: Pour the soup into a pot and heat it over medium heat. Stir often to ensure even heating. - Microwave: Place the soup in a microwave-safe bowl. Cover it loosely and heat in short intervals, stirring in between. After storing, the soup may thicken. To adjust the consistency, add a splash of chicken broth or water while reheating. This keeps your soup creamy and delicious! Chicken enchilada soup is a warm, creamy dish packed with flavor. It blends chicken, beans, and corn in a rich broth. The soup gets its kick from spices like cumin and chili powder. Red enchilada sauce adds a bold taste, while heavy cream gives it a smooth texture. You can top it with fresh avocado, cheese, and crispy tortilla chips for extra crunch. Yes, you can make this soup ahead of time. Prepare the soup and let it cool down. Store it in an airtight container in the fridge for up to three days. When ready to eat, reheat it on the stove over low heat. You may need to add a splash of broth to regain its creamy texture. To add heat, use more chili powder or add diced jalapeños. You can also mix in hot sauce or crushed red pepper flakes. If you want a smoky flavor, try adding chipotle peppers in adobo sauce. Start with small amounts, and taste as you go to find your perfect spice level. Yes, this soup can be kid-friendly. To make it more appealing, reduce the spices or serve it without the toppings. Kids may enjoy it more with less heat. You can also let them add their own toppings, like cheese or avocado. This way, they can customize their bowl to their liking. This blog post shared all you need to make Chicken Enchilada Soup. We covered the key ingredients like olive oil, spices, chicken, and veggies. You learned step-by-step instructions for cooking the soup and tips to enhance its flavor. We also explored healthy alternatives and storage methods. In the end, this soup is versatile and easy to love. Get creative and adjust it to fit your taste. Enjoy making, sharing, and savoring this comforting dish!

Chicken Enchilada Soup Flavorful and Easy Recipe

Craving a warm, hearty bowl of Chicken Enchilada Soup? You’ve come to the right place! In this post, I’ll share

To make this One-Pot Creamy Tomato Basil Soup, you need the following: - 2 tablespoons olive oil - 1 medium onion, chopped - 4 cloves garlic, minced - 1 teaspoon ground black pepper - 1 teaspoon salt - 1 can (28 oz) crushed tomatoes - 2 cups vegetable broth - 1 tablespoon sugar - 1 cup heavy cream (or coconut cream for a vegan option) - 1 cup fresh basil leaves, chopped - 1 teaspoon dried oregano - Fresh basil leaves for garnish - Crusty bread for serving (optional) Fresh ingredients make a big difference in flavor. Using ripe tomatoes and fresh herbs elevates the soup. Fresh basil adds a lovely aroma and taste that dried herbs can’t match. I always recommend sourcing the best ingredients you can find. You can customize this soup to your liking. Here are some options: - Add a pinch of red pepper flakes for heat. - Incorporate a carrot or celery for extra flavor. - Use nutritional yeast for a cheesy flavor in vegan versions. If you want a vegan soup, swap heavy cream for coconut cream. You can also use vegetable broth instead of chicken broth. These choices keep the soup rich while meeting dietary needs. Feel free to get creative and make it your own! {{ingredient_image_1}} Start by gathering your ingredients. This makes cooking smooth and fun. Chop one medium onion into small pieces. Mince four cloves of garlic. Set these aside. Heat two tablespoons of olive oil in a large pot over medium heat. When the oil is ready, add the chopped onion. Sauté the onion for about 5 to 7 minutes until it becomes soft and clear. Then, stir in the minced garlic, one teaspoon of ground black pepper, and one teaspoon of salt. Cook this mix for one more minute until it smells great. Now it’s time to add the main ingredients. Pour in one 28-ounce can of crushed tomatoes and two cups of vegetable broth. Don’t forget to add one tablespoon of sugar to balance the acidity. Add one teaspoon of dried oregano, and stir everything well. Bring the mix to a gentle simmer. Cover the pot and let it cook for about 15 to 20 minutes. This allows all the flavors to come together nicely. After simmering, take the pot off the heat. Use an immersion blender to puree the soup until it is smooth. If you don’t have one, carefully pour the soup into a regular blender in batches. Blend until smooth, then return it to the pot. Stir in one cup of heavy cream or coconut cream for a vegan option. Add one cup of chopped fresh basil as well. Heat the soup gently until it’s warm. Taste it and adjust the salt or pepper if needed. When you serve the soup, garnish it with fresh basil leaves on top. This adds a nice touch! For a complete meal, enjoy the soup with crusty bread on the side. The bread is perfect for dipping into the creamy soup. To make your soup taste great, balance the acidity. Use a bit of sugar. It takes away the tartness from the tomatoes. Taste often. Adjust salt and pepper as needed. Fresh herbs like basil boost flavor too. When you add them, do it near the end. Fresh basil adds a bright taste. To get that perfect creamy texture, add your cream slowly. Stir it well into the hot soup. If you want a lighter option, try coconut cream. It's a great vegan alternative and still gives a nice creaminess. You can also use cashew cream or blended silken tofu for a different twist. These options keep your soup rich without dairy. Pro Tips Use Fresh Ingredients: Fresh basil and high-quality tomatoes will elevate the flavor of your soup significantly. Opt for organic tomatoes if possible for the best taste. Adjusting Creaminess: For a lighter version, you can replace heavy cream with half-and-half or a plant-based milk. Adjust the seasoning accordingly to maintain flavor. Make It Ahead: This soup can be made ahead of time and stored in the refrigerator for up to 3 days. Reheat gently before serving to preserve the creaminess. Garnish for Presentation: A drizzle of olive oil and a sprinkle of freshly cracked pepper on top before serving can add a beautiful finishing touch and enhance the flavors. {{image_2}} You can make this soup even better by adding more ingredients. Here are some ideas: - Vegetables: Try adding carrots, spinach, or bell peppers for extra color and nutrition. - Proteins: Cooked chicken or diced tofu can make the soup heartier. - Herbs and Spices: Fresh thyme or a pinch of red pepper flakes can add great flavor. These simple add-ins let you customize the soup to your taste. Feel free to experiment! Making this soup fit your diet is easy. Here are some options: - Low-Carb or Keto: Skip the sugar and use less broth to keep carbs low. Add cauliflower for texture instead of pasta or rice. - Dairy-Free Options: Use coconut cream instead of heavy cream for a vegan version. Almond milk works too. These changes help you enjoy the soup while sticking to your diet needs. Store your leftover soup in an airtight container. Let the soup cool first. It will stay fresh in the fridge for up to four days. Always label the container with the date. This helps you keep track of how long it’s been there. When you’re ready to eat, just reheat it on the stove. Stir often to heat evenly. If it thickens, add a splash of broth or water. To freeze your soup, let it cool completely. Pour the soup into freezer-safe bags or containers. Leave some space at the top for expansion. It can last up to three months in the freezer. When you want to eat it, transfer the soup to the fridge to thaw overnight. To reheat, gently warm it on the stove. Stir it often to keep the texture smooth. If the soup seems watery after freezing, you can blend it again. This helps restore its creamy texture. For the best flavor, add fresh basil just before serving. To make this soup vegan, swap out the heavy cream. Use coconut cream for a rich texture. You can also use any plant-based cream. For the broth, choose vegetable broth instead of chicken broth. This keeps the soup creamy and flavorful while fitting a vegan diet. Yes, you can use fresh tomatoes! Start with about 2 pounds of ripe tomatoes. First, blanch them in boiling water for 30 seconds, then transfer them to ice water. Peel off the skins and chop them. Add the fresh tomatoes to the pot after sautéing the onion and garlic. Cook them down until soft, then blend as usual. Fresh tomatoes will give a bright flavor. This soup lasts about 3 to 4 days in the fridge. Store it in an airtight container to keep it fresh. Always check for any signs of spoilage before eating. If you want to keep it longer, consider freezing it. Now you understand how to make delicious soup from scratch. We covered the key ingredients and their role in flavor. You learned step-by-step instructions for preparation, cooking, and serving. Plus, we explored tips for enhancing taste and achieving creamy textures. Variations let you customize to your diet. Finally, we shared storage advice for leftovers. With this knowledge, you can create a soup that suits your taste and needs. Enjoy your cooking journey!

One-Pot Creamy Tomato Basil Soup Simple and Flavorful

Looking for a warm, cozy dish that’s easy to make? My One-Pot Creamy Tomato Basil Soup is the answer! This

- 1.5 lbs chicken thighs, boneless and skinless, chopped into bite-sized pieces - 4 carrots, sliced - 3 potatoes, diced - 1 onion, chopped - 3 cloves garlic, minced - 4 cups chicken broth - 2 teaspoons dried thyme - 2 teaspoons dried rosemary - 1 teaspoon paprika - Salt and pepper to taste - 1 cup frozen peas - 2 tablespoons olive oil The main ingredients in this chicken stew create a warm and filling meal. I love using chicken thighs because they stay juicy and tender. Carrots and potatoes add sweetness and heartiness. Onions and garlic bring flavor that makes the whole dish shine. Don’t forget the herbs! Thyme and rosemary add depth, while paprika gives a slight kick. - 1 tablespoon cornstarch (optional, for thickening) - Fresh parsley, chopped (for garnish) If you want a thicker stew, you can use cornstarch. Mix it with water and add it in the last part of cooking. Fresh parsley not only adds color but also a fresh taste. It makes the stew look beautiful when you serve it. - Chicken alternatives: You can use chicken breasts if you prefer. - Vegetable variations: Swap in sweet potatoes, green beans, or celery for variety. If you don’t have chicken thighs, chicken breasts work just as well. For veggies, get creative! You can use whatever you have. Sweet potatoes add a nice twist, and green beans give a fresh crunch. These swaps keep the stew exciting while still tasting great. {{ingredient_image_1}} First, gather all your ingredients. You will need chicken, carrots, potatoes, onion, garlic, chicken broth, and spices. 1. Start by chopping the onion and mincing the garlic. 2. Heat olive oil in a skillet over medium heat. 3. Add the chopped onion and garlic. Sauté for about 3-4 minutes. The mix should smell great and look soft. 4. Next, layer these sautéed ingredients in the slow cooker. 5. Now, chop the chicken thighs into bite-sized pieces. Add them to the slow cooker. 6. Slice the carrots and dice the potatoes. Toss them in too. 7. Finally, pour in the chicken broth and sprinkle in the thyme, rosemary, and paprika. Don’t forget to add salt and pepper to taste. Now it is time to set the slow cooker. 1. Cover the slow cooker with its lid. 2. Set it to cook on low for 6-7 hours or high for 4-5 hours. 3. Check the chicken and veggies for tenderness after the cooking time. They should be soft and easy to eat. About 30 minutes before serving, it’s time to add some color and flavor. 1. Toss in the frozen peas. They will brighten up the stew. 2. If you want a thicker stew, mix cornstarch with 2 tablespoons of cold water. Stir this slurry into the stew. 3. Taste the stew and adjust the seasoning if needed. Your slow cooker chicken stew is almost ready to enjoy! Seasoning is key to a great stew. Salt and pepper enhance all flavors. I love using fresh herbs when I can. They add bright and vivid flavor. Dried herbs also work well; just use less. About half the amount is often best. Use the low setting for a longer cook time. It allows flavors to blend well. If short on time, the high setting works too. Always prep your ingredients in advance. Chopping veggies and chicken ahead saves time later. Pair your stew with crusty bread or rice. These sides soak up the tasty broth. For presentation, serve in deep bowls. A sprinkle of fresh parsley on top looks nice. It adds color and a hint of freshness to the dish. Pro Tips Use Bone-in Chicken for Flavor: Bone-in chicken thighs will add more depth and richness to your stew. If you prefer this method, just remove the bones after cooking before serving. Vegetable Variations: Feel free to add other seasonal vegetables such as parsnips, butternut squash, or green beans for added flavor and nutrition. Make it Ahead: This stew tastes even better the next day! Make it ahead of time and store in the refrigerator, allowing the flavors to meld beautifully overnight. Adjusting Thickness: If you prefer a thicker stew, try adding a mashed potato or pureed vegetable to the mixture during the last 30 minutes of cooking. {{image_2}} You can switch up the protein in this stew. Try beef or pork for a heartier taste. Both work well with the same spices. For a lighter option, use tofu or chickpeas. They soak up flavors well and add protein. You can also use beans for a meatless meal. Want some heat? Add red pepper flakes or a splash of hot sauce. This brings spice to your stew. You can also play with herbs. Try adding basil or oregano for a different twist. These herbs change the taste and make it unique. You can explore different cuisines with this recipe. For a Mediterranean twist, add olives and sun-dried tomatoes. These ingredients give it a fresh flavor. If you prefer Asian flavors, add soy sauce and ginger. This creates a whole new experience and aroma in your kitchen. You can store leftover chicken stew in the fridge. Make sure it cools down first. Put the stew in a container with a tight lid. This helps keep it fresh. I recommend using glass or plastic containers. They are easy to stack and store. Leftovers will last about three to four days. To freeze chicken stew, let it cool completely. Pour the stew into freezer-safe bags or containers. Leave some space at the top, as the stew will expand when frozen. Seal the bags tightly to avoid air. You can freeze the stew for up to three months. When you are ready to eat it, thaw it in the fridge overnight. This helps keep the flavor and texture nice. If you need it fast, you can also thaw it in the microwave. Just be careful to heat it slowly. When reheating your stew, use low heat to avoid burning. You can do this on the stove or in the microwave. Stir the stew often to heat it evenly. If it seems thick, you can add a splash of broth or water. This helps maintain its smooth texture. Make sure to taste your stew before serving. Adjust the seasoning if needed. This will keep the flavors bright and tasty. Yes, you can use frozen chicken. Cooking from frozen takes longer. If using frozen chicken, add an extra hour to the cook time. The chicken should reach a safe temperature of 165°F. Thawed chicken cooks faster and is easier to work with. I recommend thawing when possible for better texture. To thicken your stew, use cornstarch. Mix one tablespoon of cornstarch with two tablespoons of cold water. Stir this slurry into the stew about 30 minutes before serving. You can also mash some of the potatoes in the stew. This adds more body and texture to the dish. Chicken stew pairs well with many sides. I enjoy serving it with crusty bread for dipping. Rice also works nicely, soaking up the broth. A simple green salad adds freshness to the meal. You can even serve it with mashed potatoes for a hearty combo. In this blog post, we explored creating a delicious chicken stew. We reviewed key ingredients like chicken thighs, fresh vegetables, and spices. I shared handy tips to enhance flavor and offered cooking tricks for the best results. You also learned various protein options and flavor adjustments to suit your taste. To wrap it up, this stew is versatile and perfect for any occasion. I hope you try making it and enjoy every bite!

Slow Cooker Chicken Stew Hearty and Comforting Dish

If you’re craving a meal that warms your heart and fills your belly, look no further than my Slow Cooker

- 1 lb (450g) boneless chicken thighs, cut into bite-sized pieces - 1 cup bell peppers (red, yellow, and green), diced - 1 cup pineapple chunks (fresh or canned) - 1 medium onion, chopped - 2 cloves garlic, minced - 1 tablespoon ginger, grated - 1/4 cup soy sauce - 1/4 cup rice vinegar - 1/4 cup ketchup - 2 tablespoons brown sugar - 1 tablespoon cornstarch mixed with 2 tablespoons water (for thickening) - 2 tablespoons vegetable oil - Salt and pepper to taste - Cooked rice or quinoa, for serving You can swap chicken thighs for chicken breast if you prefer. For a lighter dish, use tofu instead of chicken. If you do not have bell peppers, use zucchini or snap peas. Canned pineapple works well, but fresh adds a great taste. For gluten-free options, choose tamari instead of soy sauce. To cut sugar, use honey or a sugar substitute. When choosing chicken, look for bright pink meat without any smell. Fresh bell peppers should feel firm and have shiny skin. For onions, pick ones that are dry and free from spots. In garlic, choose bulbs that are solid and plump. Pineapple should smell sweet and have a slight give to the touch. Start by heating the vegetable oil in a large skillet or wok over medium-high heat. When the oil is hot, add the bite-sized chicken pieces. Sprinkle with salt and pepper. Cook the chicken for about 5 to 7 minutes. It should turn golden brown and be cooked through. Once done, remove the chicken from the skillet and set it aside on a plate. In the same skillet, toss in the chopped onion, diced bell peppers, and minced garlic. Sauté these for about 3 to 4 minutes. You want them to soften a bit but still hold their shape. Next, stir in the grated ginger and pineapple chunks. Cook for another 2 minutes to blend the flavors well. Grab a small bowl and whisk together the soy sauce, rice vinegar, ketchup, and brown sugar. Make sure the ingredients mix well. Pour this sauce mixture into the skillet with your vegetables. Bring it to a slight boil. Once it starts to bubble, add the cornstarch mixed with water. Stir continuously for about 2 minutes until the sauce thickens. Now, return the cooked chicken to the skillet. Toss everything together to coat the chicken in the sweet and sour sauce. Let it cook for an additional 2 to 3 minutes. This ensures everything is heated through. Adjust the seasoning with more salt, pepper, or brown sugar if needed. Serve your Sweet and Sour Chicken Fakeout over fluffy rice or quinoa. Enjoy your flavorful delight! For the best texture in your Sweet and Sour Chicken Fakeout, use boneless chicken thighs. They stay juicy and tender during cooking. Cut them into even-sized pieces. This helps them cook uniformly. When you fry the chicken, let it brown well. This adds a nice crispiness. Don’t overcrowd the skillet. Cook in batches if needed to ensure even cooking. To boost the flavor, use fresh ingredients. Fresh pineapple gives a bright taste. You can also try adding a splash of orange juice. This adds a sweet twist. If you like heat, add a pinch of red pepper flakes or a dash of hot sauce. This gives your dish a spicy kick. Adjust the brown sugar based on your taste. You can always add more for a sweeter sauce. One common mistake is overcooking the chicken. This makes it dry and tough. Keep an eye on the cooking time. Another mistake is not tasting the sauce. Always taste and adjust the seasonings. You might need more salt or sugar. Lastly, don’t skip the cornstarch mixture. It thickens the sauce and makes it cling to the chicken and veggies. This creates a perfect bite every time. {{image_2}} You can easily make a vegetarian version of Sweet and Sour Chicken Fakeout. Swap the chicken with tofu or tempeh. Both options soak up the sauce well. Use firm tofu for the best texture. Cut it into bite-sized cubes and pan-fry until golden. This adds a nice crunch. You can also add more vegetables like broccoli or snap peas. They add great color and flavor. If you want to mix things up, try other proteins. Shrimp is a quick-cooking option. Just add it for the last few minutes of cooking. You can also use pork or beef. Cut them into small pieces. Cook them until they are browned. Then follow the rest of the recipe as usual. Each protein gives a unique taste. Feel free to play with the sauce. Instead of ketchup, try sweet chili sauce for an extra kick. You can also add some orange juice for a fruity twist. If you like heat, add some chili flakes or hot sauce. For a smoky flavor, a bit of smoked paprika works well. Adjust these flavors to suit your taste. To keep your Sweet and Sour Chicken Fakeout fresh, place leftovers in an airtight container. This helps prevent spills and keeps the flavors intact. Store the dish in the fridge for up to three days. Always let it cool down before sealing it up. This way, you avoid steam buildup, which can make your meal soggy. When you're ready to enjoy your leftovers, you can reheat them easily. You have two great options: the stovetop or the microwave. For the stovetop, heat a skillet over medium heat. Add a splash of water or broth to help steam the dish. Stir it gently until it's warm. If you prefer the microwave, place your portion in a microwave-safe bowl. Cover it with a damp paper towel. Heat it for one minute, then stir. Continue heating in 30-second bursts until hot. If you want to save your Sweet and Sour Chicken for later, freezing is a smart choice. First, let the dish cool completely. Then, transfer it to a freezer-safe container or bag. Remove as much air as possible to prevent freezer burn. You can freeze the meal for up to three months. When you're ready to eat, thaw it overnight in the fridge. Reheat using the stovetop or microwave as mentioned earlier. This way, you’ll always have a tasty meal on hand! Yes, you can easily make this recipe gluten-free. Simply swap regular soy sauce for gluten-free soy sauce. You can also use tamari, which is a gluten-free option. Ensure that all other ingredients, like rice vinegar and cornstarch, are gluten-free as well. With these simple changes, you can enjoy Sweet and Sour Chicken Fakeout without gluten. To adjust the sweetness level, you have a few options. If you want it sweeter, add more brown sugar or ketchup. Start with one extra tablespoon and taste it. If you find it too sweet, add a splash more rice vinegar. This will help balance the flavors. Always taste as you go to find your perfect mix. Sweet and Sour Chicken Fakeout goes well with many sides. Here are some great options: - Fluffy rice or quinoa - Steamed broccoli or snap peas - Fried rice with peas and carrots - A fresh salad with cucumbers and lettuce - Crispy spring rolls These sides add color and flavor, making your meal more delightful. Enjoy mixing and matching to find your favorite combo! This blog post covered key ingredients for Sweet and Sour Chicken Fakeout, including substitutions and tips for freshness. I shared step-by-step cooking methods, tricks for the best texture, and flavor tips to avoid common mistakes. We explored tasty variations and proper storage info for leftovers. In summary, cooking can be fun and easy. With these tips, you can create a dish everyone will love. Happy cooking!

Sweet and Sour Chicken Fakeout Flavorful Delight

Looking for a tasty meal that packs a punch? My Sweet and Sour Chicken Fakeout is the perfect option! It’s

To make these apple cider donuts, you'll need: - 2 cups apple cider - 1 cup all-purpose flour - 1 cup whole wheat flour - 3/4 cup granulated sugar - 1/2 cup brown sugar, packed - 1 teaspoon baking powder - 1 teaspoon baking soda - 1 teaspoon cinnamon - 1/2 teaspoon nutmeg - 1/2 teaspoon salt - 1/2 cup unsweetened applesauce - 2 large eggs - 1/4 cup vegetable oil - 1 teaspoon vanilla extract - Extra sugar and cinnamon for coating Each ingredient plays a key role: - Apple cider gives the donuts a rich apple flavor. Reducing it makes the taste stronger. - All-purpose and whole wheat flour create a nice texture. Whole wheat adds a bit more fiber. - Sugars sweeten the donuts and help them brown nicely. - Baking powder and baking soda are leavening agents. They help the donuts rise and stay soft. - Cinnamon and nutmeg add warmth and spice. They make the donuts taste like fall. - Unsweetened applesauce keeps the donuts moist and adds more apple flavor. - Vegetable oil keeps the donuts tender. It helps them stay soft after baking. - Vanilla extract adds a sweet note, balancing the spices. You can change some ingredients if needed: - Gluten-free flour can replace all-purpose and whole wheat flour for a gluten-free option. - Brown sugar can be swapped with coconut sugar for a different sweetness. - Oil can be replaced with melted butter for a richer flavor. - Eggs can be replaced with flax eggs or applesauce for a vegan option. - Spices like ginger or cardamom can be added for a unique twist. - Coatings can include chocolate or powdered sugar for different tastes. Feel free to get creative with these ingredients. Each change can bring a new flavor or texture to your donuts! First, take 2 cups of apple cider. Pour it into a small saucepan. Heat it over medium heat. Watch it closely as it cooks. Reduce the cider until it thickens. You want about 1 cup when finished. This may take around 15 minutes. Once thick, let it cool for a bit. Next, grab a large mixing bowl. In it, whisk together these dry ingredients: - 1 cup all-purpose flour - 1 cup whole wheat flour - 3/4 cup granulated sugar - 1/2 cup brown sugar, packed - 1 teaspoon baking powder - 1 teaspoon baking soda - 1 teaspoon cinnamon - 1/2 teaspoon nutmeg - 1/2 teaspoon salt Make sure everything is well mixed. This step blends the flavors and helps the donuts rise. Now, take a separate bowl. In this bowl, mix: - The cooled apple cider - 1/2 cup unsweetened applesauce - 2 large eggs - 1/4 cup vegetable oil - 1 teaspoon vanilla extract Stir until smooth. Once mixed, pour this blend into the dry ingredients. Mix until just combined. It’s okay if some lumps remain. Don’t overmix, or your donuts may be tough. Next, grease your donut pan with non-stick spray. Carefully spoon the batter into each cavity. Fill them about 2/3 full. Bake in a preheated oven at 350°F (175°C) for 10-12 minutes. The donuts should spring back when pressed lightly. Let them cool in the pan for 5 minutes. Then, move them to a wire rack. While they cool, mix some extra sugar and cinnamon in a shallow bowl. Once cool, roll each donut in this mixture for a sweet coating. Enjoy your tasty treats! Mixing the batter well is key. Start by whisking your dry ingredients in one bowl. This helps blend the flour, sugars, and spices evenly. In another bowl, mix your wet ingredients. Stir them until smooth. When you combine both bowls, mix just until you see no dry flour. Lumps are okay. Overmixing can make your donuts tough. To get that perfect donut shape, fill each cavity in your donut pan about two-thirds full. This allows the donuts to rise without spilling over. Bake them until they spring back when touched. This means they are done. Let them cool in the pan for a few minutes before moving them. This helps keep their shape intact. Store your apple cider donuts in an airtight container at room temperature. They stay fresh for about two days. If you want to keep them longer, freeze them. Wrap each donut in plastic wrap and place them in a freezer bag. To reheat, just pop them in the microwave for about 10-15 seconds. Enjoy them warm, just like fresh from the oven! {{image_2}} You can make these donuts healthier in a few ways. Swap out some of the all-purpose flour for almond or coconut flour. Use honey or maple syrup instead of sugar. Applesauce is a great ingredient; you can add more to keep them moist. You can also try using Greek yogurt instead of oil for a protein boost. To add more flavor, mix in spices like ginger or allspice. You can also add a pinch of clove for warmth. Try adding citrus zest, like orange or lemon, to brighten the taste. For toppings, consider using a glaze made from powdered sugar and apple cider. You can also drizzle caramel for a sweet finish. Making gluten-free donuts is easy. Use a gluten-free flour blend instead of regular flour. Look for blends that include xanthan gum, which helps with texture. You can also add ground oats if you want a heartier feel. Always check labels to ensure your ingredients are gluten-free. For a stunning serve, place your apple cider donuts on a lovely platter. You can dust them lightly with powdered sugar. Add some apple slices or mini pumpkins around them. This makes a festive display that brightens any table. These donuts pair well with warm drinks. Think of apple cider, hot chocolate, or spiced tea. Coffee also makes a great match. The rich flavors in these drinks bring out the best in the donuts. Apple cider donuts are perfect for many occasions. Serve them at fall gatherings or cozy family breakfasts. They also fit well at Halloween parties or Thanksgiving feasts. You can even enjoy them during a casual get-together with friends. Everyone loves a warm donut, and these will surely impress! Yes, you can use fresh apple juice. However, apple cider has a deeper flavor. To mimic cider, reduce the apple juice on the stove. Cook it until it thickens. This will give you a richer taste similar to cider. To make these donuts gluten-free, swap the all-purpose flour. Use a gluten-free flour blend instead. Check that your baking powder is also gluten-free. This way, you keep the texture but lose the gluten. Yes, you can freeze apple cider donuts. Cool them completely first. Place them in an airtight container. They will stay fresh for about three months. When ready, just thaw and enjoy! You learned how to make tasty apple cider donuts. I shared detailed steps for the ingredients and baking process. I also included tips for mixing, shaping, and storing your treats. You found options for variations and serving ideas. In the end, you can enjoy these donuts any time. Experiment with flavors and pair them with drinks. Don't hesitate to try healthier or gluten-free options. Happy baking!

Ingredient Apple Cider Donuts Simple and Delicious Recipe

Craving a sweet, spiced treat? Let me introduce you to apple cider donuts! This simple recipe uses fresh ingredients to

- 1 lb boneless, skinless chicken breasts, diced - 1 tablespoon olive oil - 1 medium onion, diced - 3 large carrots, sliced - 2 celery stalks, diced - 3 cloves garlic, minced - 4 cups chicken broth - 1 cup heavy cream - Salt and pepper to taste - 1 package (16 oz) potato gnocchi - 2 cups fresh spinach - Fresh parsley for garnish Gathering the right ingredients makes cooking fun and easy. For your One-Pot Chicken Gnocchi Soup, you need a mix of protein, veggies, and creamy goodness. First, grab the chicken. I love using boneless, skinless chicken breasts. They cook fast and stay tender. Dice them up into small pieces for quick cooking. Next, you'll need olive oil to sauté the chicken and add flavor. A medium onion gives a nice base flavor. Diced onion cooks down well, making your soup rich and tasty. For the veggies, I pick three large carrots, sliced, and two celery stalks, diced. These add crunch and color. Don’t forget the garlic! Three cloves, minced, give the soup a great aroma and taste. Now, for the broth, you’ll need four cups of chicken broth. It’s the heart of your soup. To make it creamy, add one cup of heavy cream. Finally, season with salt and pepper to taste. After you complete the base, add the final touches. Grab a package of potato gnocchi. It cooks quickly and adds a nice texture. Toss in two cups of fresh spinach for a pop of green. Finish with fresh parsley for garnish. It brightens up your dish and adds a beautiful look. - Heat olive oil in a large pot over medium heat. - Add the diced chicken. Sauté until browned, about 5 to 7 minutes. - Once done, remove the chicken and set it aside. - In the same pot, add the diced onion, minced garlic, sliced carrots, and diced celery. - Sauté these for about 5 minutes. You want the vegetables to soften. - Next, pour in the chicken broth and bring the mixture to a boil. - Once boiling, stir in the heavy cream, potato gnocchi, dried thyme, and dried oregano. - Reduce the heat to medium-low. Let it simmer for about 5 minutes. The gnocchi will cook and float to the top. - Add the cooked chicken back into the pot. Stir in the fresh spinach. - Cook for another 2 to 3 minutes until the spinach wilts. - Season with salt and pepper to taste before serving. To ensure your chicken is perfectly cooked, use a meat thermometer. The chicken should reach 165°F (75°C). This guarantees it is safe to eat and juicy. For better flavor in the soup, sauté the chicken until it is golden brown. This step adds a lovely depth to the dish. Also, don’t skip the garlic and onion. These ingredients build a tasty base for your soup. Serve your soup in vibrant bowls. Garnish it with fresh parsley for a pop of color. This not only looks great but also adds a fresh taste. You can also sprinkle grated Parmesan on top. This adds a creamy texture and a salty kick that pairs well with the soup. Using pre-diced vegetables can save you time in the kitchen. Look for packs of diced onions, carrots, and celery at your store. They make prep quick and easy. For storing leftover soup, let it cool first. Then, place it in an airtight container. Your soup will stay fresh in the fridge for about 3-4 days. Reheat on the stove or in the microwave for a quick meal. {{image_2}} You can switch out the chicken for rotisserie chicken. This saves time and adds flavor. Just shred the rotisserie chicken and stir it in at the end. You can also use turkey if you want a lighter option. For broth, you can choose low-sodium chicken broth. This helps control salt levels. You can also make homemade broth for a richer taste. Just simmer bones and veggies for a few hours. To make this soup gluten-free, use gluten-free gnocchi. Many brands offer this option. You can also check labels for gluten-free broth. If you want a dairy-free soup, try coconut cream instead of heavy cream. This gives a nice flavor. You can also use almond milk with a thickener to replace the cream. You can add spices like paprika or cayenne for heat. Fresh herbs like basil or dill can bring a bright taste. Just add them as you simmer the soup. Incorporating beans like white beans or chickpeas boosts protein. You can also add more vegetables, such as zucchini or bell peppers. This makes the soup heartier and adds more nutrients. After enjoying your One-Pot Chicken Gnocchi Soup, let it cool first. This helps prevent condensation in the container. Use airtight containers to keep the soup fresh. Glass containers work great. They do not stain and are easy to clean. If you use plastic, ensure it is BPA-free. Label containers with the date to track freshness. To freeze the soup, wait until it cools completely. Then, pour it into freezer-safe bags. Lay the bags flat for easy stacking. Remove as much air as possible to prevent freezer burn. For reheating, thaw in the fridge overnight. Heat gently on the stove or in the microwave. Stir often to ensure even warming. If the soup seems thick, add a bit of chicken broth or water. In the fridge, your soup lasts about 3 to 4 days. If frozen, it can stay good for 2 to 3 months. Always check for signs of spoilage before eating. Look for off smells or changes in color. If the soup appears separated or curdled, it’s best to discard it. Enjoy your soup fresh and tasty! You can serve this soup with many tasty sides. Here are my top picks: - Crusty bread: Freshly baked bread is perfect for dipping. - Side salad: A simple green salad adds a nice crunch. - Garlic bread: This pairs well and brings extra flavor. - Cheese toast: Melted cheese on toast makes a great addition. Yes, you can make this soup ahead of time. Here are some tips: - Cook and cool: Make the soup, then cool it quickly. - Store properly: Keep it in an airtight container in the fridge. - Reheat gently: Warm the soup on low heat when ready to serve. You can use frozen gnocchi in this recipe. Here’s how to adjust: - No need to thaw: Just add the frozen gnocchi directly to the soup. - Cooking time: They may need an extra minute to cook through. To add some heat, try these ideas: - Red pepper flakes: Add a pinch while cooking for a kick. - Hot sauce: Stir in your favorite hot sauce before serving. - Jalapeños: Add fresh or pickled jalapeños for extra spice. This blog post outlined a simple and tasty chicken gnocchi soup recipe. We covered the main ingredients, cooking steps, and tips to make your dish shine. With quick recipes and ingredient variations, you can easily adjust for your needs. This soup is warm, hearty, and perfect for any meal. You have the tools to create a dish that family and friends will love. Enjoy cooking and sharing this delightful soup!

One-Pot Chicken Gnocchi Soup Quick and Tasty Meal

Looking for a quick meal that delights? This One-Pot Chicken Gnocchi Soup fits the bill! You can prepare a rich,

- Vegetables - 2 medium carrots, peeled and cut into 1-inch pieces - 2 medium parsnips, peeled and cut into 1-inch pieces - 1 medium sweet potato, peeled and diced - 1 medium beet, peeled and cut into 1-inch cubes - 1 small red onion, cut into wedges - Roasting Ingredients - 3 tablespoons olive oil - 3 tablespoons pure maple syrup - Seasoning Ingredients - 1 teaspoon fresh thyme leaves (or ½ teaspoon dried thyme) - Salt and pepper to taste - ¼ teaspoon cinnamon (optional) These ingredients bring warmth and sweetness to your dish. The mix of root veggies gives a nice texture. The maple syrup adds a lovely glaze that makes everything taste special. Each bite will be a little sweet and very satisfying. Preheating the Oven First, set your oven to 425°F (220°C). This high heat helps make the veggies crispy. Preparing the Vegetables Next, gather your vegetables: - 2 medium carrots, peeled and cut into 1-inch pieces - 2 medium parsnips, peeled and cut into 1-inch pieces - 1 medium sweet potato, peeled and diced - 1 medium beet, peeled and cut into 1-inch cubes - 1 small red onion, cut into wedges Place these in a large mixing bowl. Mixing the Maple Glaze In another bowl, mix: - 3 tablespoons olive oil - 3 tablespoons pure maple syrup - 1 teaspoon fresh thyme leaves (or ½ teaspoon dried thyme) - Salt and pepper to taste - ¼ teaspoon cinnamon (optional) Whisk until combined. Coating the Vegetables Pour the maple glaze over the veggies. Toss well to coat each piece. This glaze gives a sweet flavor to the root vegetables. Spreading on Baking Sheet Now, line a large baking sheet with parchment paper. Spread the coated vegetables in a single layer. This helps them roast evenly. Roasting Time and Techniques Roast the vegetables in the oven for 30-35 minutes. Stir them halfway through to get that nice golden color. Checking for Doneness They are done when they are tender and caramelized at the edges. Check with a fork. If it goes in easily, they are ready! Even coating matters when roasting root vegetables. It helps them cook evenly. Use a large mixing bowl to coat all veggies well. Toss them with the maple glaze until each piece shines. This will give you great flavor. Stir the vegetables halfway through cooking. This helps them brown nicely on all sides. Use a spatula to turn them gently. It keeps them from sticking, too. Different vegetables cook at different times. Carrots and parsnips need about 30-35 minutes. Sweet potatoes may take a bit less time. Beets can take a little longer. Always check for tenderness with a fork. Serve your roasted veggies on a large platter. It looks inviting and colorful. You can also add a drizzle of extra maple syrup. This extra touch brings out the natural sweetness. Garnish with fresh thyme sprigs. It adds a pop of green and a fresh scent. You can even sprinkle some toasted nuts on top for crunch. This step makes your dish not only tasty but beautiful! {{image_2}} You can swap out root veggies based on what you have. Seasonal options include turnips, rutabagas, and even parsnips. These can add unique flavors and textures. If you have allergies, avoid beets or carrots. Try zucchini or bell peppers instead. They will still taste great with maple. You can boost the flavor with fresh herbs. Try rosemary or sage for a different taste. These herbs give a nice earthy touch. Adding spices can also change the dish. Cinnamon brings warmth, while a pinch of cayenne adds heat. You can adjust flavors to fit your mood! To store leftovers, let the vegetables cool first. Place them in an airtight container. This helps keep them fresh and tasty. Use a container that fits the amount you have. Store in the fridge right away. You can keep the roasted root vegetables in the fridge for up to four days. If you want to eat them later, make sure to check for any signs of spoilage. They should look good and smell nice. If you want to save some for future meals, freezing is a great option. First, let the vegetables cool completely. Then, place them in a freezer-safe bag or container. Remove as much air as you can before sealing. This step helps prevent freezer burn. You can freeze them for up to three months. When you are ready to eat them, thaw in the fridge overnight. To reheat, you can bake them in the oven at 350°F (175°C) until hot. This way, they stay crispy and delicious. What is the best temperature for roasting vegetables? The best temperature is 425°F (220°C). This heat caramelizes the vegetables well. It brings out their natural sweetness. At this temperature, the veggies cook evenly and get a nice golden color. Can I make this recipe vegan? Yes, this recipe is already vegan. It uses maple syrup instead of honey. You have a tasty dish that fits a vegan diet. Just ensure all your ingredients are plant-based. How can I adjust the sweetness of the dish? You can add more or less maple syrup. If you want it sweeter, pour in extra syrup. If you prefer less sweetness, cut back on the syrup. You can also add a pinch of salt to balance flavors. Are there any tips for cutting root vegetables? Use a sharp knife for easier cutting. Peel the veggies first for better texture. Cut them into uniform pieces. This helps them cook evenly. Aim for 1-inch pieces for the best results in roasting. Roasting vegetables is simple and fun. You need the right ingredients and steps to make it tasty. Start with your chosen veggies, mix a maple glaze, and roast them until perfect. Remember to stir and adjust cooking time as needed. Don't forget to explore variations for taste and storage tips for leftovers. With this guide, you can create delicious roasted veggies that impress. Enjoy the process and the flavors you unlock!

Maple Roasted Root Vegetables Simple and Tasty Dish

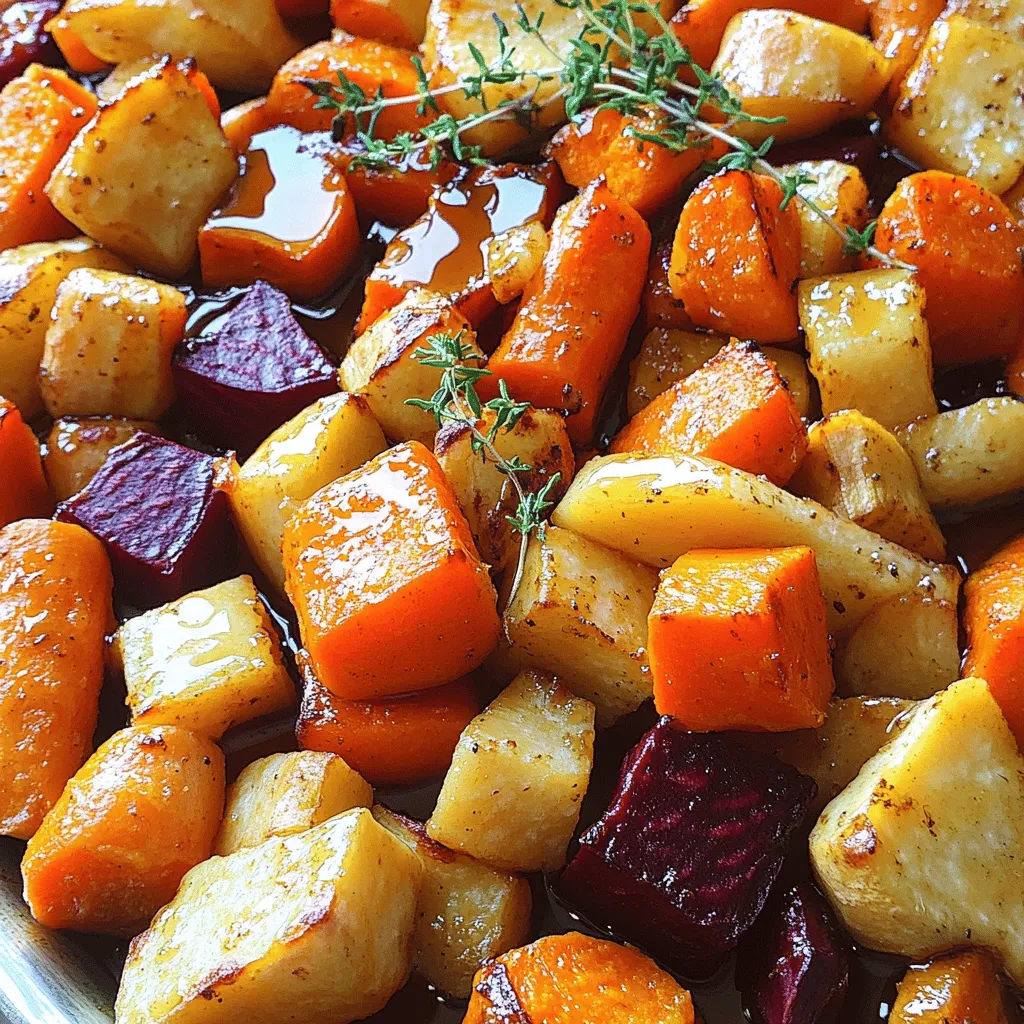
Do you want a simple and tasty dish that brightens any meal? Maple Roasted Root Vegetables are the answer! You

Older posts
Newer posts
← Previous Page1 … Page26 Page27 Page28 … Page143 Next →

dsad

© 2025 Southern Dishes • Built with GeneratePress

Our Policies

  • Copyright Policy
  • Cookie Policy
  • GDPR Policy
  • Privacy Policy
  • Disclaimer
  • Terms Of Use

More Information

  • Home
  • About
  • Contact
  • Appetizers
  • Dessert
  • Dinner
  • Drinks
©2025, Southern Dishes About Back To Top