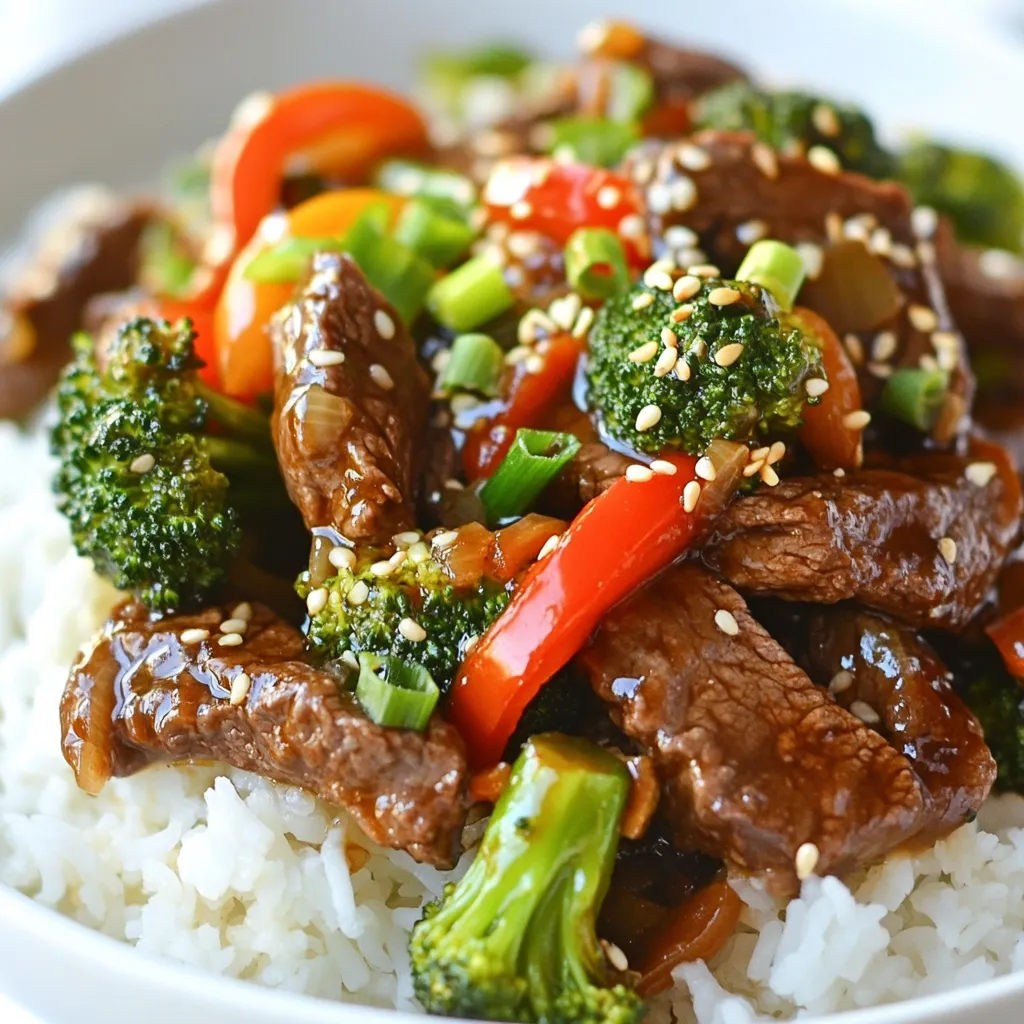
Honey Garlic Beef and Broccoli Stir Fry Delight
Get ready to spice up your dinner routine with my Honey Garlic Beef and Broccoli Stir Fry! This easy-to-make recipe
Get ready to spice up your dinner routine with my Honey Garlic Beef and Broccoli Stir Fry! This easy-to-make recipe
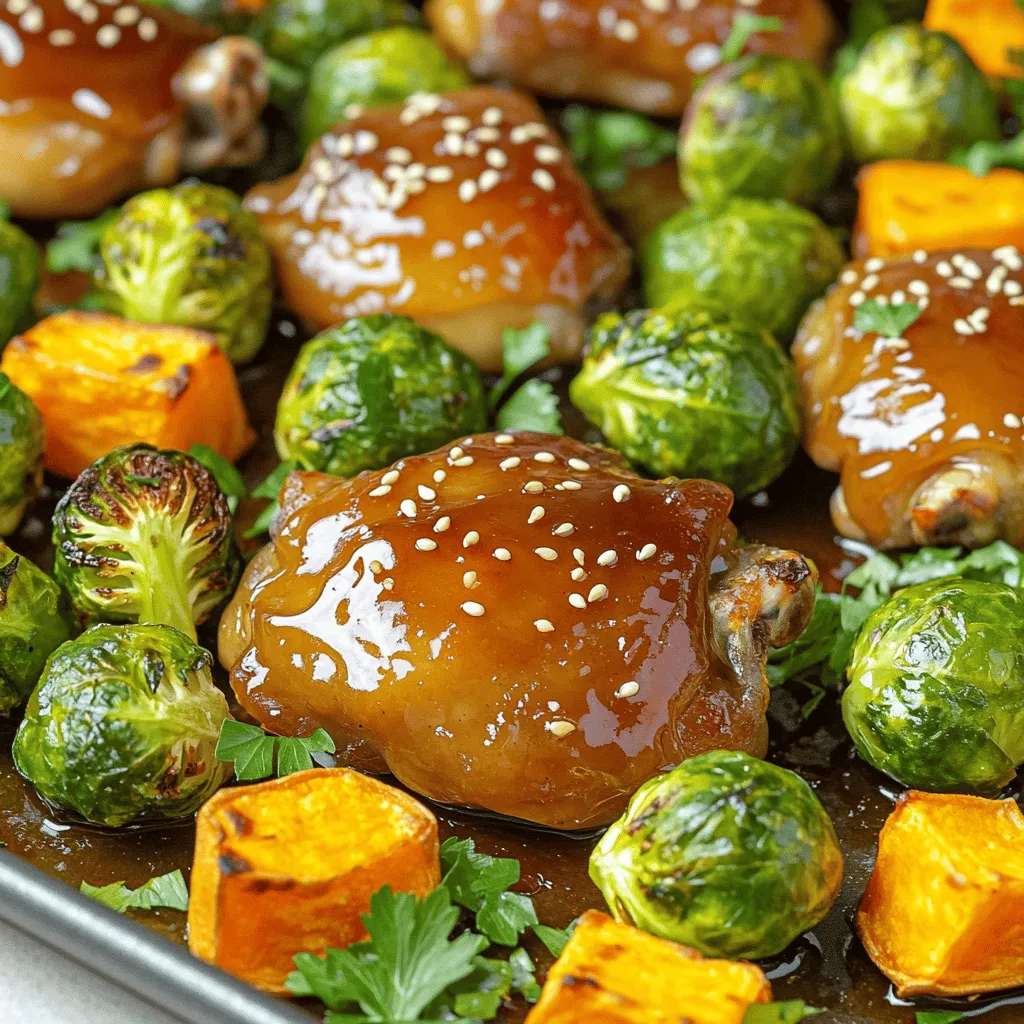
Looking for a tasty, easy meal? You’re in the right spot! My Sheet-Pan Honey Garlic Chicken & Sprouts Delight combines
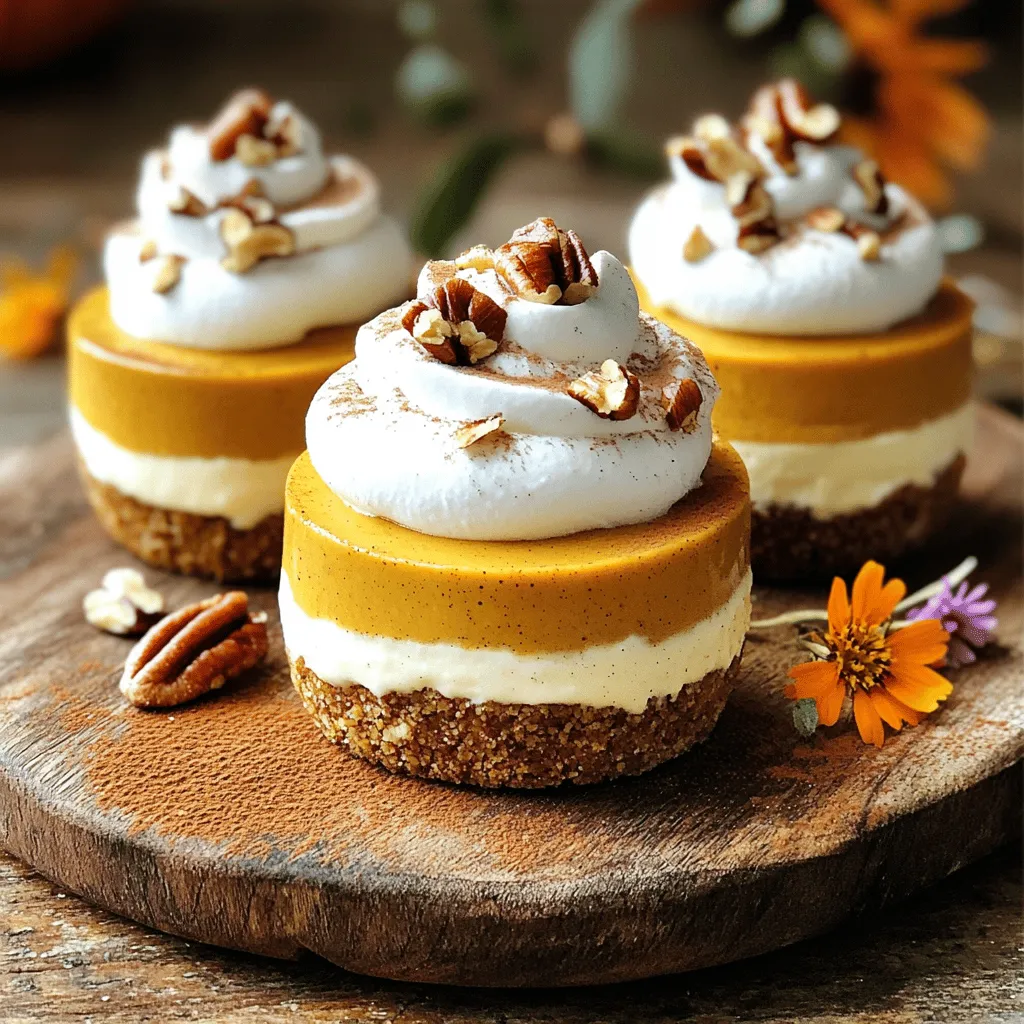
Get ready for a dessert that screams fall! My No-Bake Pumpkin Cheesecake Mousse Cups are creamy, light, and packed with
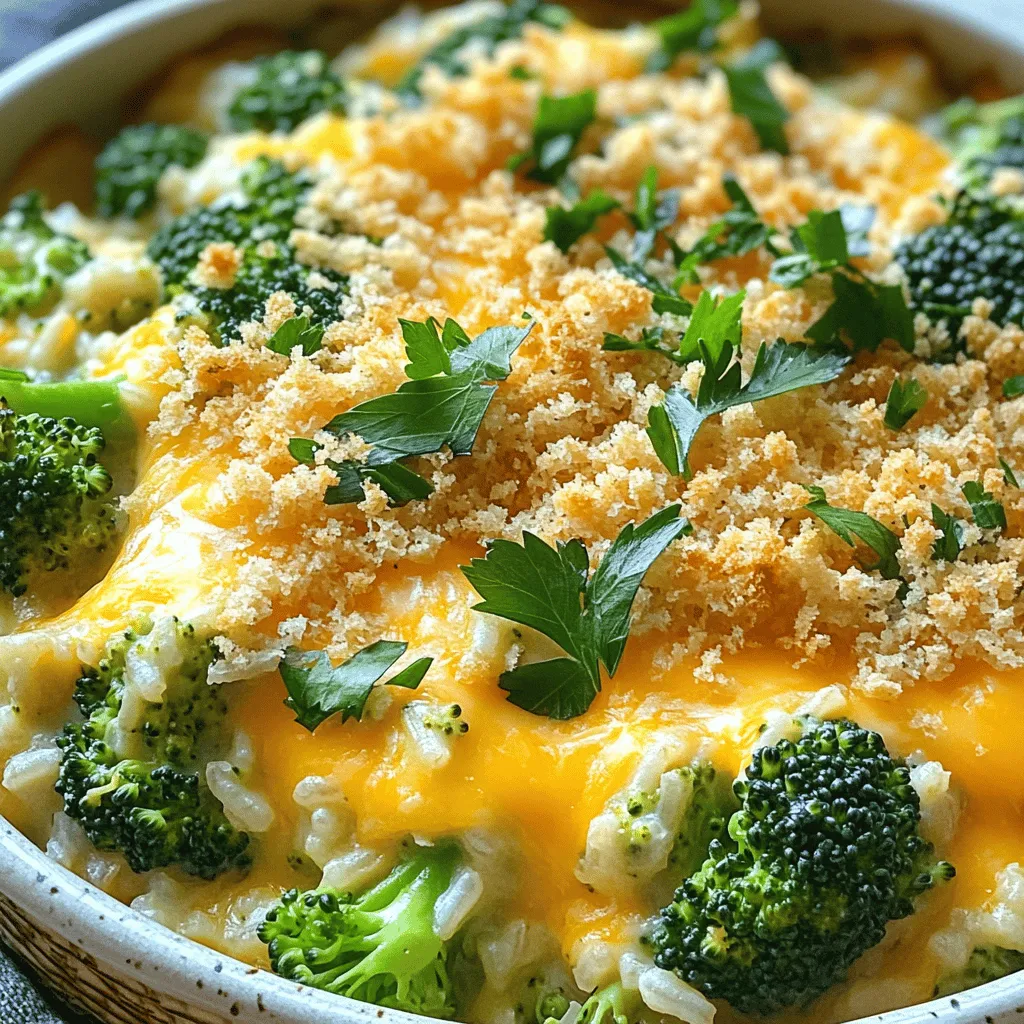
Are you ready to whip up a dish that’s both easy and delicious? My One-Pot Cheesy Broccoli Rice Casserole is
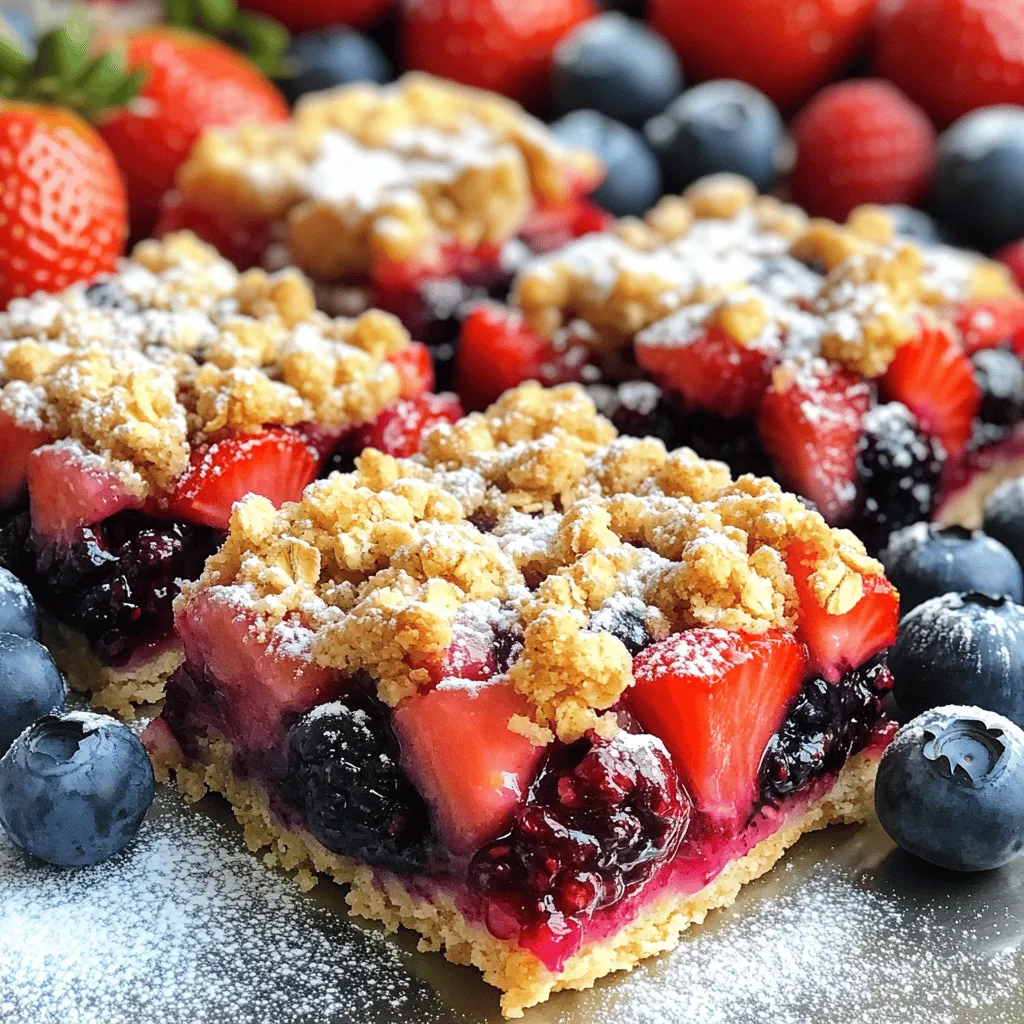
Are you ready to indulge in a sweet and tasty treat? These Triple Berry Crumble Bars are the perfect dessert
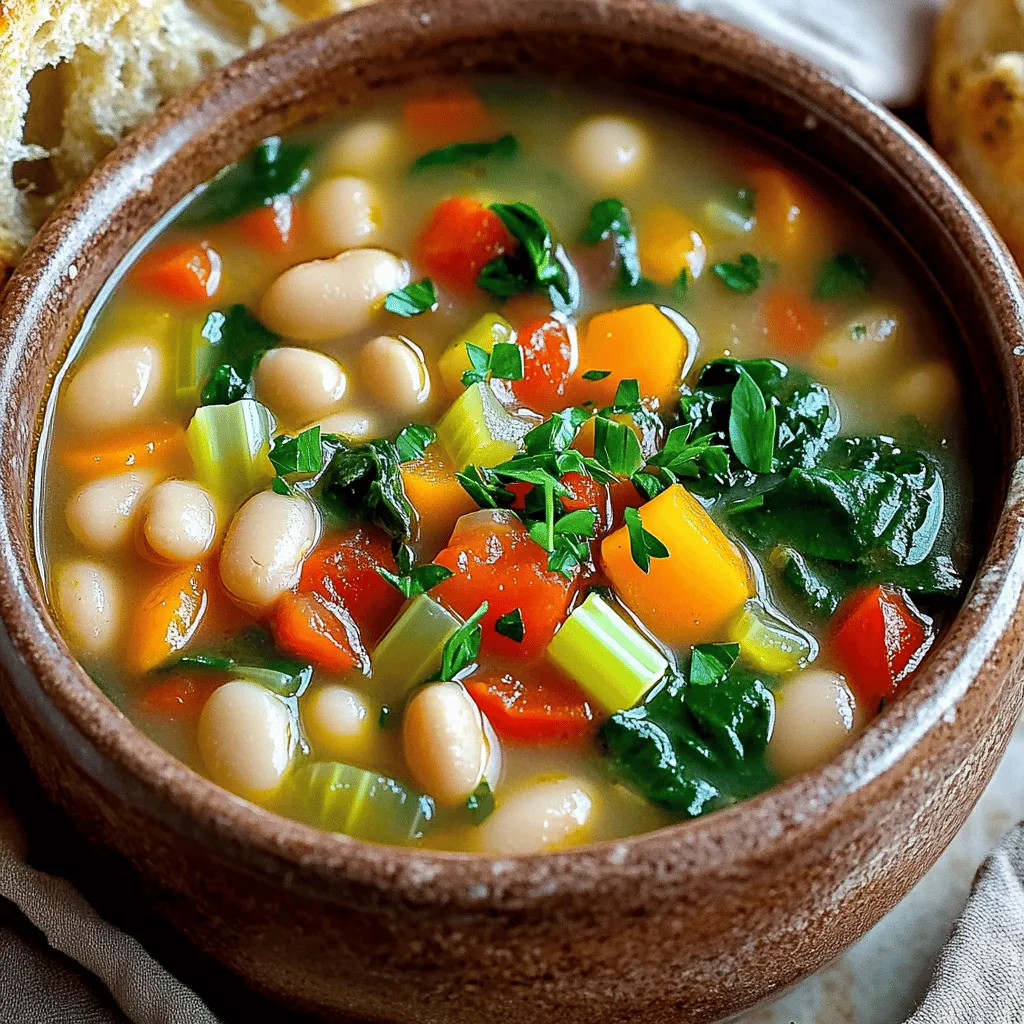
Looking for a warm, cozy dish to brighten your day? This Slow Cooker Tuscan White Bean Soup Comfort Recipe is
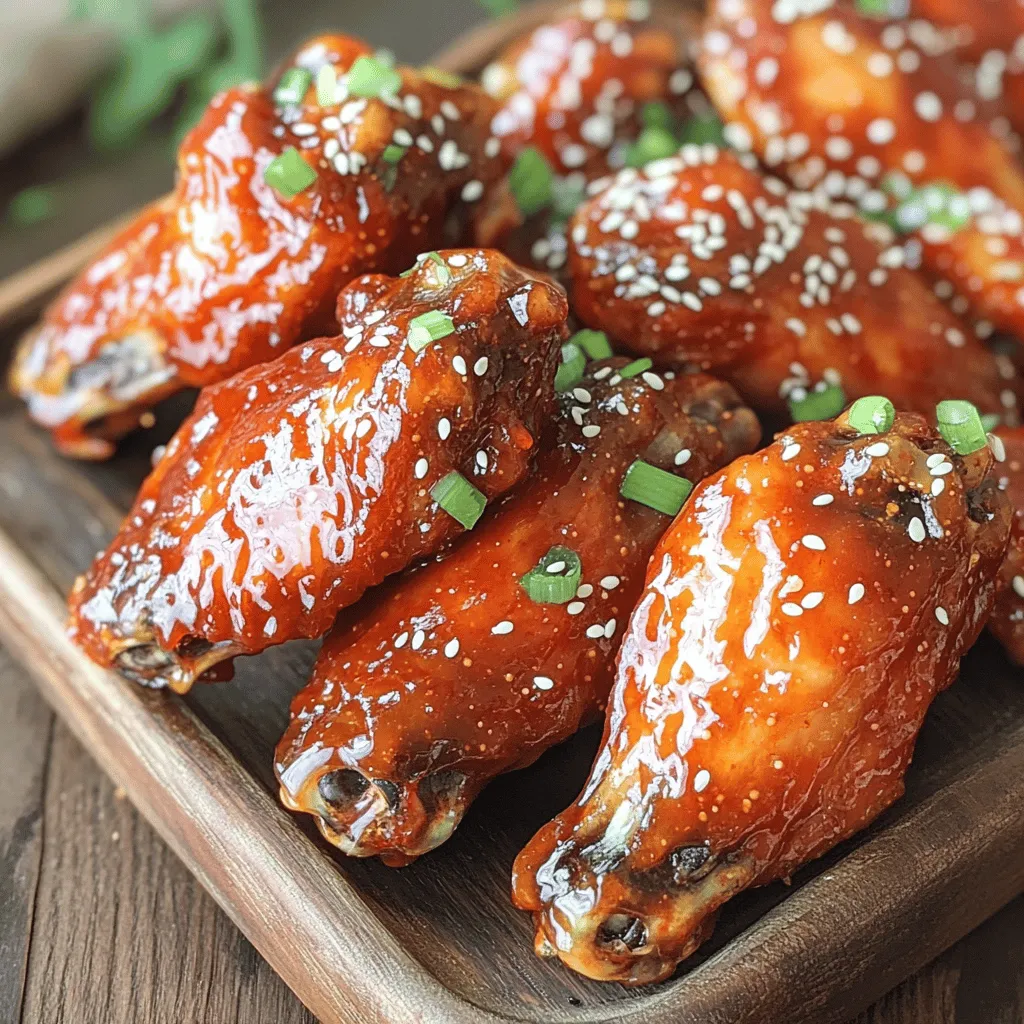
Are you ready to enjoy a tasty twist on a classic? Air Fryer Korean BBQ chicken wings are the perfect

If you crave a bowl of warm comfort, you’ll love this Slow Cooker Chicken Enchilada Soup. Packed with vibrant flavors

Craving a sweet treat but don’t want to bake? I’ve got you covered! My No Bake Chocolate Chip Cookie Dough

Welcome to my kitchen, where we’re cooking up a cozy bowl of Butternut Squash Soup with Crispy Sage Delight! This
