Skip to content
DisclaimerTerms Of UseGDPR PolicyCookie Policy

Southern Dishes

  • Home
  • Drinks
  • Appetizers
  • Dinner
  • Dessert
  • About
  • Contact
  • Privacy Policy
DisclaimerTerms Of UseGDPR PolicyCookie Policy

Isabella

- 2 cans of chickpeas - Fresh vegetables: onion, garlic, carrots, zucchini, bell pepper - Diced tomatoes and vegetable broth - Olive oil and spices - Dried apricots - Cayenne pepper for heat - Fresh herbs for garnish - Slow cooker - Dicing knife and cutting board - Measuring cups and spoons Using quality ingredients is key. Chickpeas provide protein and fiber. Fresh vegetables add color and crunch. Diced tomatoes bring sweetness and acidity. Vegetable broth offers depth. Olive oil ensures a rich flavor base. If you want some sweetness, add dried apricots. They balance the spices well. For heat, cayenne pepper works great. Just a little bit can make a big difference. Fresh herbs like cilantro or parsley brighten every bowl. Ensure you have the right tools. A slow cooker makes this easy. A good knife and cutting board help with prep. Measuring cups and spoons keep your flavors balanced. With these ingredients and tools, you're ready for a flavorful stew. Enjoy the process of creating this dish! First, you will need to chop your vegetables. Start by dicing one large onion and three cloves of garlic. Next, dice two medium carrots and one zucchini. Then, chop one bell pepper, either red or yellow. Make sure your pieces are small and even for a nice cook. After that, rinse and drain two cans of chickpeas. This helps remove excess salt and starch. Now it's time to add your veggies and chickpeas to the slow cooker. Place all the diced onion, garlic, carrots, zucchini, and bell pepper inside. Then, pour in one can of diced tomatoes with its juice. Add one cup of vegetable broth to the pot. This will give your stew moisture and depth. In a small bowl, mix together two tablespoons of olive oil with one tablespoon of ground cumin, one tablespoon of ground coriander, one teaspoon of smoked paprika, one teaspoon of cinnamon, and half a teaspoon of cayenne pepper if you want heat. Add salt and black pepper to taste. Pour this spice mixture over the veggies in the slow cooker. This adds a big flavor boost! Cover the slow cooker and choose your cooking time. You can cook on low for six to seven hours. If you’re in a hurry, cook on high for three to four hours. To check if it’s done, poke a piece of vegetable with a fork. It should be soft but not mushy. Always taste and adjust the seasoning before serving to make sure it’s just right. To make your stew even tastier, consider adding extra spices. Try these: - Ground ginger for warmth - Turmeric for color and health benefits - Cumin seeds for a fresh flavor You can also boost the flavors with acidity. A splash of lemon juice or vinegar can brighten your stew. Add it just before serving for the best effect. Different slow cookers may cook at different speeds. If yours runs hot, check the stew after 5 hours on low. You want the veggies soft but not mushy. To achieve the best texture, cut your veggies into even pieces. This helps them cook evenly. How you serve your stew can make it pop. Try placing it over fluffy couscous. This adds a nice base and texture. Crusty bread on the side is another great option. It soaks up the stew and adds crunch. For garnish, sprinkle fresh cilantro or parsley on top. This adds color and freshness, making your dish look inviting. {{image_2}} You can change up the stew by using different vegetables. Try adding sweet potatoes or spinach for a new taste. You can also use green beans or butternut squash. These swaps add color and flavor. If you want a vegan option, the stew is already plant-based! For gluten-free, just check your broth label. Most vegetable broth is gluten-free, so you should be safe. Do you like your stew mild or spicy? If you prefer it mild, skip the cayenne pepper. You can also use less cumin and coriander for a lighter flavor. For a spicy kick, add more cayenne or some chili flakes. You can also play with herbs. Add fresh thyme or oregano to give it a twist. These herbs can change the stew’s flavor and make it more unique. This stew pairs well with many sides. Serve it over fluffy couscous for a hearty meal. Crusty bread is also great for dipping. You can serve the stew at cozy family dinners or casual gatherings. It’s also a perfect choice for meal prep. Just make a big batch, and you have lunch ready for the week! To store your Moroccan chickpea stew, let it cool first. Use an airtight container. This keeps the flavors fresh. You can store it in the fridge for up to five days. If you want to enjoy it later, place it in a smaller container for easy use. Freezing stew is easy. First, cool it completely. Then, pour it into freezer-safe bags or containers. Make sure to leave some space for expansion. This stew can stay fresh for up to three months. When you’re ready to eat, move it to the fridge overnight to thaw. Reheat in a pot on low heat until hot. Stir often to keep it smooth. You can prep the ingredients ahead of time. Chop the vegetables and store them in the fridge. This makes cooking on a busy day quick and easy. You can also use the stew in different meals. Serve it over rice, or add it to tacos. The options are endless! You can serve this stew with several tasty sides. Here are some ideas: - Fluffy couscous for a light base - Crusty bread to soak up the stew - A fresh green salad for crunch - Steamed rice for a filling option Each of these sides will balance the rich flavors of the stew and make your meal more enjoyable. Yes, you can use dried chickpeas. To prepare them, follow these steps: 1. Soak the chickpeas overnight in water. 2. Drain and rinse them the next day. 3. Cook them in a pot of boiling water for 1 to 2 hours or until soft. 4. Drain again and add them to the slow cooker. This method gives you fresh chickpeas that can enhance the stew's texture. Absolutely! This stew is perfect for meal prep. Here are some tips: - Store leftovers in airtight containers in the fridge. - It stays fresh for about 4-5 days. - You can freeze it for up to three months. When you want to eat, just reheat in the microwave or on the stove. You can customize the spice profile with these additions: - Ginger for a warm kick - Turmeric for color and health benefits - Cardamom for a unique taste - Fresh herbs like mint for brightness These spices will add depth and make your stew even more exciting! This blog post guides you through making a tasty Slow Cooker Moroccan Chickpea Stew. We explored key ingredients, such as chickpeas, fresh veggies, and spices. I shared tips for cooking and enhancing flavors and suggested ways to serve the stew. Remember, the recipe is flexible! You can swap veggies and adjust spices. This stew is perfect for meal prep or cozy dinners. Enjoy the journey of cooking this dish, and let your taste buds experience its rich flavors.

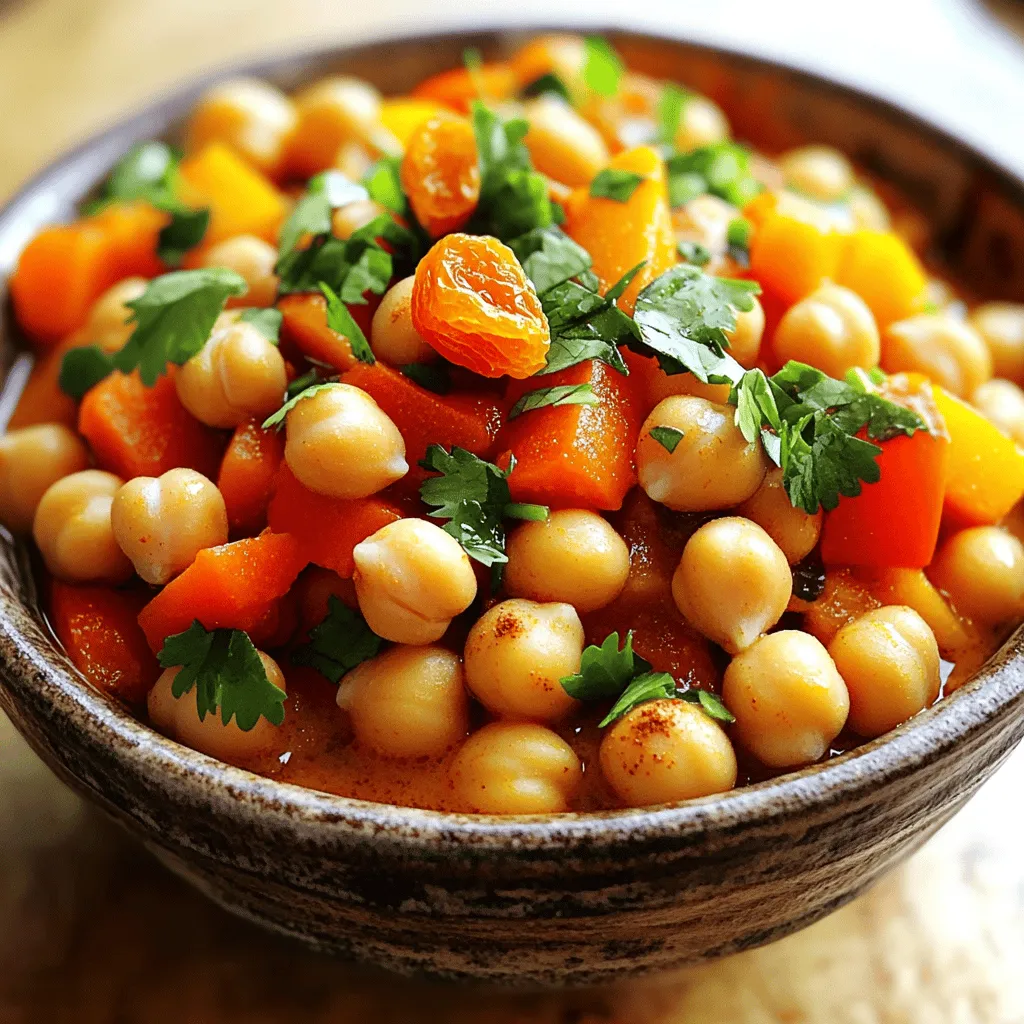
Slow Cooker Moroccan Chickpea Stew Flavor Boost

Looking for a hearty dish that packs a punch in flavor? Try my Slow Cooker Moroccan Chickpea Stew! With just

- 1 cup cottage cheese, well-drained - 1/2 cup unsweetened cocoa powder - 1/4 cup honey or maple syrup (adjust to taste) - 1/2 cup almond milk (or any milk of choice) - 1 teaspoon vanilla extract - 1/4 cup dark chocolate chips (optional, for extra richness) - A pinch of sea salt - Fresh berries or mint leaves for garnish (optional) Cottage cheese is high in protein. It helps build and repair muscles. Cocoa powder is rich in antioxidants. It adds a deep chocolate flavor. Honey or maple syrup gives sweetness. They also provide minerals. Almond milk is low in calories and dairy-free. It adds creaminess without excess fat. Vanilla extract enhances flavor. Dark chocolate chips add richness and extra antioxidants. Sea salt balances sweetness and enhances taste. Fresh berries or mint can boost vitamins and add a pop of color. You can add peanut butter for a nutty twist. This will also add more protein. A dash of espresso powder can deepen the chocolate flavor. You might consider cinnamon for warmth. For a fruity touch, blend in mashed bananas. Each of these add-ins can change the mousse's flavor profile, making it your own. First, gather your ingredients. You need 1 cup of cottage cheese, 1/2 cup of cocoa powder, and 1/4 cup of honey or maple syrup. You will also need 1/2 cup of almond milk, 1 teaspoon of vanilla extract, and a pinch of sea salt. If you want richer flavor, add 1/4 cup of dark chocolate chips. Fresh berries or mint leaves can garnish the dish. Next, combine all the ingredients in a blender or food processor. Blend until smooth. This should take about 1 to 2 minutes. If you want a chunkier mousse, add the chocolate chips at the end of blending. After blending, taste it. Adjust the sweetness by adding more honey or syrup if you like. To get the best texture, make sure your cottage cheese is well-drained. This helps avoid lumps. Use a high-speed blender or food processor for a creamy finish. Start on low speed and increase to high. Stop blending if you see any lumps. Scrape down the sides of the blender as needed. Add the almond milk to help blend the mixture smoothly. This also makes the mousse lighter. If you see it's too thick, add a little more milk. Blend until you achieve a silky, rich texture that is free of lumps. Timing is key when blending. Blend for just enough time to avoid over-mixing. Over-mixing can make the mousse airy instead of creamy. If your mousse is too thick, add more almond milk slowly. You want it to be rich but not runny. After transferring it to serving cups, chill it for at least 30 minutes. This allows the mousse to set and flavors to develop. If you want to serve it later, the mousse can stay in the fridge for up to three days. Enjoy your delicious and healthy treat! When making Protein Cottage Cheese Chocolate Mousse, keep an eye on a few key points. First, ensure your cottage cheese is well-drained. Extra liquid can make the mousse runny. Second, blend the ingredients thoroughly. This step is vital to avoid lumps. If you skip this, your mousse will not have a smooth texture. Lastly, don't rush the chilling time. Allowing it to set in the fridge for at least 30 minutes makes a big difference. Sweetness can vary based on taste. Start with 1/4 cup of honey or maple syrup. Blend the mixture and taste it. If you want it sweeter, add more syrup a little at a time. Blend again to mix. Remember, you can also use natural sweeteners like agave or stevia if you prefer. Adjusting sweetness is easy and lets you make it just right for you. Presentation matters, even for mousse. Use clear cups or small bowls to show off the rich color. Garnish with fresh berries or a sprig of mint for a pop of color. You can also sprinkle some dark chocolate chips on top for added flair. For a fun twist, serve it in chocolate cups. This adds a yummy surprise when you dig in! {{image_2}} You can make this mousse vegan or dairy-free easily. Swap the cottage cheese for silken tofu. Tofu gives a smooth texture. Use maple syrup instead of honey for sweetness. Choose plant-based milk, like coconut or soy. This keeps the flavor rich and creamy without dairy. You can customize the mousse flavors to suit your taste. For a nutty twist, add 2 tablespoons of peanut butter. Blend it in with the other ingredients. If you enjoy coffee, mix in 1 tablespoon of espresso powder. This adds a deep, rich flavor. Try adding spices like cinnamon for warmth. Each addition gives a fun twist. Toppings can elevate your mousse. Fresh berries add color and flavor. Use strawberries, raspberries, or blueberries. They bring a nice tartness. You can also use a sprinkle of crushed nuts for crunch. Dark chocolate shavings add extra richness and elegance. A sprig of mint gives a fresh finish. These toppings make it look and taste amazing. To store your Protein Cottage Cheese Chocolate Mousse, cover it tightly with plastic wrap. You can also use an airtight container. This keeps the mousse fresh and prevents it from absorbing odors from other foods. Make sure the mousse is cool before you store it. When stored properly, the mousse lasts about 3 to 5 days in the fridge. Always check for any off smells or changes in texture before eating. If the mousse looks or smells bad, it is best to throw it away. You do not need to reheat this mousse, as it is best served cold. If your mousse seems a bit stiff after chilling, you can stir in a splash of almond milk. This will help make it creamy again. Enjoy it fresh with a touch of sweetness! Yes, you can use flavored cottage cheese. It adds a fun twist to your mousse. If you choose a fruity flavor, like peach or strawberry, adjust your sweetener. This way, the mousse stays balanced and tasty. To lower calories, swap honey or maple syrup for a low-calorie sweetener. You can also use skim or low-fat cottage cheese. Another option is to reduce the amount of chocolate chips or skip them entirely. These small changes keep the flavor while cutting calories. Yes, it is safe to eat cottage cheese in mousse. Cottage cheese is a healthy protein source. Just ensure it’s fresh and well-drained. This gives your mousse the best texture and taste. Enjoy it without worry! We explored the key ingredients, their benefits, and tasty add-ins for your mousse. I outlined easy steps to blend and achieve the smooth texture you want. Common mistakes can ruin your recipe, but tips are provided to help. You can also find fun variations and how to store your mousse for later enjoyment. With these insights, you're ready to make a delicious protein cottage cheese chocolate mousse. Enjoy creating and sharing this treat!

Protein Cottage Cheese Chocolate Mousse Delightful Dish

Are you looking for a tasty treat that’s also good for you? Try my Protein Cottage Cheese Chocolate Mousse! This

- 1 cup pumpkin puree - 1 cup all-purpose flour - 1 cup shredded sharp cheddar cheese - 1 tablespoon fresh sage, finely chopped (or 1 teaspoon dried sage) - 1 tablespoon baking powder - 1/2 teaspoon salt - 1/4 teaspoon black pepper - 1/4 cup unsalted butter, cold and cubed - 1/2 cup milk - 1 egg, beaten (for egg wash) I love using fresh ingredients in my scones. Pumpkin puree gives a rich flavor and moist texture. You can use canned pumpkin or make your own. If you go for fresh, roast the pumpkin until soft and blend it smooth. All-purpose flour is my go-to for scones. It gives them the right structure. You can substitute with whole wheat flour for a nutty taste, but the texture may change. Next, I add sharp cheddar cheese. It melts beautifully and adds a nice salty touch. If you want a milder flavor, use mild cheddar. Sage brings an earthy note. Fresh sage tastes best, but dried sage works if fresh isn’t available. Use less if using dried; it's more potent. Baking powder is key for fluffiness. Make sure it's fresh for the best rise. Salt and black pepper enhance the flavors, balancing the sweetness of pumpkin. For richness, cold unsalted butter is essential. It creates flaky layers. Cut it into the flour until crumbs form. Milk adds moisture. You can try buttermilk for a tangy twist. Lastly, an egg wash gives a golden finish. Brush it on before baking for a lovely color. Gather these ingredients, and you’re ready to make delicious, savory pumpkin sage cheese scones. First, set your oven to 425°F (220°C). This high heat helps the scones rise well. Next, line a baking sheet with parchment paper. This keeps the scones from sticking. It also makes cleanup easy. In a large bowl, sift together the flour, baking powder, salt, and black pepper. Sifting makes the flour light and fluffy. This step helps the scones to be soft and airy. Take cold, cubed butter and add it to the dry mix. Use a pastry cutter or your fingers to break the butter into small pieces. You want it to look like coarse crumbs. Once mixed, fold in the shredded cheddar cheese. Make sure it’s well mixed with the flour. In another bowl, whisk the pumpkin puree and milk together. This mixture should be smooth and creamy. Then, slowly add it to the dry mix. Stir gently until just combined. Be careful not to overmix; this keeps the scones light. Next, turn the dough onto a floured surface. Knead it gently a few times to bring it together. Pat the dough into a circle, around 1-inch thick. You can cut this circle into wedges or use a round cutter to make scones. Place the scones on the prepared baking sheet. Brush the tops with beaten egg for a golden color. Bake for 15-18 minutes. The scones should puff up and be lightly golden when done. Let them cool slightly on a wire rack before serving. To make your scones flaky, use cold butter. Cut the butter into small cubes before adding it to the flour. Work it in gently. You want the mixture to look like crumbs, not paste. Avoid overmixing when adding wet ingredients. This keeps air pockets, which help the scones rise. Serve the scones warm for the best taste. A dollop of cream cheese complements the flavors nicely. You can also drizzle honey on top for added sweetness. Garnish with fresh sage for a beautiful and tasty touch. One common mistake is overworking the dough. This leads to tough scones instead of flaky ones. Another mistake is using warm butter. Always ensure the butter is cold. Lastly, don't skip the egg wash. It gives the scones a nice golden color. Store leftover pumpkin puree in an airtight container in the fridge. Use it within a week. For flour, keep it in a cool, dry place. Seal it well to keep pests out. Cheese should be wrapped tightly and stored in the fridge. Enjoy your scones fresh for the best flavor! {{image_2}} You can change the cheese for new flavors. Try using feta or goat cheese. They add a nice tang. Mozzarella can give a nice melt. Parmesan adds a sharp bite. Mixing cheeses can create a tasty blend. Aim for a total of one cup of cheese. Add more depth to your scones with herbs. Rosemary or thyme pairs well with pumpkin. You can also try adding garlic powder for a savory twist. Chopped green onions bring a fresh taste. For a bit of heat, add red pepper flakes sparingly. Each add-in can make your scones unique. You can make these scones gluten-free. Use a gluten-free flour blend instead of all-purpose flour. For a vegan version, swap the butter for coconut oil or vegan butter. Use plant-based milk, like almond or oat milk. Replace the egg wash with a splash of plant milk for shine. These swaps allow everyone to enjoy these tasty scones. To keep your scones fresh, place them in an airtight container. This helps prevent them from drying out. Store at room temperature for up to two days. If you want them to last longer, refrigerate them. They can stay fresh in the fridge for up to a week. You can freeze these scones for later! First, let them cool completely. Then, wrap each scone in plastic wrap. Place the wrapped scones in a freezer-safe bag or container. They can last in the freezer for up to three months. When you're ready to enjoy them, just thaw them in the fridge overnight. To reheat, preheat your oven to 350°F (175°C). Place the scones on a baking sheet. Heat them for about 10 minutes or until warm. You can also microwave them for about 15-20 seconds, but the oven keeps them crispier. Enjoy your scones warm for the best flavor! Yes, you can use fresh pumpkin. You need to cook it first. Peel and cube the pumpkin. Boil or roast it until soft. Then, mash it until smooth. This will create a great flavor for your scones. Check the scones after 15 minutes. They should look puffed and golden. A toothpick inserted in the center should come out clean. If it has wet dough on it, give them a few more minutes. These scones pair well with cream cheese. You can also drizzle honey on top. A side of apple butter adds a nice sweetness. Fresh sage as a garnish looks great and adds flavor. These scones last about 2 days at room temperature. Keep them in an airtight container. For longer storage, freeze them for up to a month. Just make sure they cool completely first. Yes, you can make the dough ahead of time. Wrap it in plastic wrap and chill it. Use it within 24 hours for the best results. This saves time when you're ready to bake. You now know how to make tasty savory pumpkin sage cheese scones. We covered the key ingredients, from pumpkin puree to cheese. I shared easy steps to mix and bake your scones perfectly. Remember my tips for flaky results and how to store leftovers. Feel free to adapt the recipe to suit your taste. Enjoy experimenting with flavors or making it gluten-free. I hope these scones bring warmth and joy to your kitchen!

Savory Pumpkin Sage Cheese Scones Perfect for Fall

As the leaves turn and the air cools, there’s nothing better than warm, flaky scones. These Savory Pumpkin Sage Cheese

- 2 large apples (Granny Smith or Honeycrisp) - 1 cup caramel sauce (store-bought or homemade) - 1 cup cream cheese (softened) - 1/2 cup powdered sugar - 1 teaspoon vanilla extract - 1/2 cup toffee bits (like Heath or Skor) - Optional: chopped nuts (for added crunch: pecans or walnuts) When I make this dip, I love using Granny Smith apples. They are tart and balance the sweet dip well. Honeycrisp apples are also great if you prefer a sweeter bite. For the caramel sauce, you can use store-bought if you are short on time. Homemade caramel adds a special touch, though. It gives a rich flavor that store-bought cannot match. The cream cheese must be softened to mix well. This makes the dip smooth and creamy. Use a good quality cream cheese for the best taste. The powdered sugar sweetens the dip just right. It adds a nice texture too. The vanilla extract enhances the flavors and gives a warm taste. Toffee bits add crunch and a sweet, buttery flavor. Brands like Heath or Skor work perfectly. If you want to add more texture, sprinkle in some chopped nuts. Pecans or walnuts are my favorites. Gather these ingredients to create your own Caramel Apple Toffee Dip. It is a fun and tasty treat for any fall gathering! Start by taking your softened cream cheese. Place it in a mixing bowl. Add the powdered sugar and vanilla extract. Use an electric mixer or a whisk to blend everything. Mix until the texture is smooth and creamy. This base will give your dip a rich flavor. Now, it's time for the caramel sauce. Gradually pour it into the cream cheese mixture. Stir as you add the sauce. Make sure every bit is mixed in well. You want a nice, smooth dip that is infused with caramel flavor. Next, gently fold in the toffee bits. This adds a sweet crunch to your dip. If you want more texture, you can mix in some chopped nuts. Pecans or walnuts work great here. Ensure everything is evenly distributed. This step makes your dip even more delightful. Make your dip look amazing! Arrange apple slices in a circle around the dip. This makes it inviting. Drizzle extra caramel sauce on top to add shine. You can also sprinkle toffee bits for a nice touch. This dip is great for parties or snacks. You can serve it with a variety of fruits like pears or strawberries. Try it with pretzels or graham crackers too! This dip pleases many taste buds. Want to make your own caramel sauce? It is easy! You need sugar, butter, and heavy cream. Heat the sugar until it melts and turns golden. Then add butter and cream slowly. Stir until it is smooth. To get the right consistency, watch it closely. If it is too thick, add a bit more cream. If it is too thin, cook it a little longer. Homemade caramel adds a special touch to your dip! {{image_2}} You can easily switch up the flavor of your dip. A pinch of sea salt adds a nice contrast to the sweet caramel. It creates a balance that makes each bite even more delightful. You can also mix in different candies. Try adding chocolate chips for a rich taste. These small changes can make your dip feel new and exciting. While apple slices are great, you have other fun options for dipping. Pretzels add a salty crunch that pairs well with the sweet dip. Graham crackers also work nicely, offering a different texture. You can even use other fruits. Sliced pears and strawberries taste amazing with this dip. Each option offers a unique twist. Make your dip special for the fall season. Add pumpkin spice flavor for a warm, cozy taste. You can also give it a holiday twist. Mixing in eggnog-flavored cream cheese brings a festive vibe. These seasonal changes make the dip perfect for gatherings and celebrations. To store leftover caramel apple toffee dip, place it in an airtight container. This keeps it fresh and prevents it from absorbing other smells in the fridge. When stored correctly, the dip lasts for up to five days. Just be sure to keep it covered. Can you freeze this dip? No, it’s best fresh. Freezing changes the texture of the cream cheese. If you must freeze it, put it in a freezer-safe container. Thaw it in the fridge before using. However, I recommend enjoying it straight away for the best flavor. If you’ve had it in the fridge, you may find the dip thick. To restore texture, let it sit at room temperature for about 30 minutes. You can also mix in a little more caramel sauce to loosen it up. Serve it chilled or at room temperature for the best taste. Remember, the dip is best when fresh and creamy! You can use low-fat cream cheese, but it may change the dip's texture. Low-fat cream cheese is thinner. It may not hold the dip together as well as regular cream cheese. The flavor might also be less rich. If you want a lighter option, consider mixing half low-fat and half regular cream cheese. This keeps the dip creamy and tasty. Granny Smith and Honeycrisp apples work best. Granny Smith adds a tart flavor that contrasts well with the sweet dip. Honeycrisp apples are crisp and sweet, offering a nice balance. Both apples hold their shape well, making them great for dipping. You can even mix both types for variety! You can prepare the dip a few hours in advance. Mix all the ingredients and store it in the fridge. Cover the bowl tightly to keep it fresh. Add extra toffee bits and caramel sauce just before serving. This keeps the dip looking fresh and appealing. We explored a tasty apple dip with simple steps. You learned about key ingredients, like cream cheese and caramel. I shared tips for perfect presentation and fun variations. Remember, the right apple changes the taste. This dip is great for snacking or parties. Store leftovers carefully to enjoy later. Now it’s time to gather your ingredients and have fun making this treat. Enjoy every bite!

Caramel Apple Toffee Dip Irresistible Fall Delight

Fall is the perfect time for cozy flavors, and what could be better than a Caramel Apple Toffee Dip? This

- 4 boneless, skinless chicken thighs - 1 cup teriyaki sauce - 1 cup fresh pineapple, diced - 2 bell peppers (red and yellow), sliced - 1 red onion, sliced - 2 tablespoons olive oil - 1 teaspoon garlic powder - 1 teaspoon ginger powder - Salt and pepper to taste - Green onions, sliced (for garnish) - Sesame seeds (optional, for garnish) Gathering the right ingredients is key to making this dish shine. The boneless, skinless chicken thighs are juicy and tender. They soak up the teriyaki sauce perfectly, making each bite flavorful. The fresh pineapple adds a sweet twist that balances the savory chicken. I love using bright bell peppers and red onion for color and taste. They roast beautifully and add a nice crunch to the dish. Don't forget to reserve some pineapple for garnish! It not only looks great but enhances the flavor too. You will need olive oil to toss the vegetables. Garlic and ginger powders bring depth to the sauce and chicken. Salt and pepper help to enhance all the other flavors. For a lovely finish, slice up some green onions and sprinkle sesame seeds on top. They add texture and a pop of flavor. With these ingredients, you set the stage for a quick and tasty meal that everyone will love! - Preheat your oven to 400°F (200°C). Line a large sheet pan with parchment paper. This makes cleanup easy. - In a mixing bowl, combine 1 cup of teriyaki sauce, 1 teaspoon of garlic powder, and 1 teaspoon of ginger powder. Add salt and pepper to taste. Mix well. - Take 4 boneless, skinless chicken thighs and add them to the bowl. Coat them well in the teriyaki marinade. - Let the chicken marinate for at least 15 minutes. If time allows, refrigerate for up to an hour for better flavor. - After marinating, place the chicken thighs in the center of the sheet pan. - Surround the chicken with 2 sliced bell peppers and 1 sliced red onion. Add 1 cup of diced pineapple too. - Drizzle any leftover teriyaki sauce over everything on the sheet pan. - Bake in the preheated oven for 25 to 30 minutes. Check that the chicken reaches an internal temperature of 165°F (74°C). It should look caramelized. - Once done, take it out and let it rest for a few minutes. This helps keep the chicken juicy. - Achieving perfect caramelization: To get that nice golden color, make sure your oven is hot. Bake the chicken and veggies at 400°F. This high heat helps caramelize the sugars in the teriyaki sauce and the pineapple. Check the chicken at 25 minutes. If it looks golden, it's time to take it out. - Ensuring chicken stays juicy: Marinating the chicken makes a big difference. Use the teriyaki sauce and let it sit for at least 15 minutes. You can also refrigerate it for an hour for extra flavor. This keeps the chicken moist while cooking. - Creative plating ideas: You can serve right from the sheet pan for a rustic feel. For a fancier look, plate the chicken on a nice dish. Arrange the colorful veggies and pineapple around the chicken. This makes a great visual treat. - Best sides to pair with teriyaki chicken: Rice is a classic choice. White or brown rice complements the dish well. You could also serve it with a simple green salad. This adds freshness to your meal and balances the sweet flavors. - Adding heat with spices: If you enjoy a bit of spice, add red pepper flakes to the teriyaki sauce. Just a pinch can make a big difference. You can also try chili powder for a different heat level. - Incorporating different vegetables: Feel free to mix in other veggies! Zucchini or snap peas work great. They cook quickly and add more color. Seasonal veggies are also a fun option to keep things fresh and interesting. {{image_2}} You can easily swap chicken for tofu. Use firm tofu for the best results. Press it to remove extra water. Then, cut it into cubes. Marinate the tofu just like the chicken. Bake it until golden. Shrimp is another great choice. It cooks quickly and adds a seafood twist. Use large shrimp for this recipe. Toss them in the marinade for a short time. Bake them until they turn pink and opaque. If you do not have bell peppers, try zucchini or carrots. They add crunch and color. You can also use broccoli or snap peas for a fresh taste. Seasonal vegetables like asparagus or green beans work well too. They bring a different flavor to the dish. Choose what's fresh at your local market for the best taste. You can make your own teriyaki sauce. Combine soy sauce, honey, garlic, and ginger in a pot. Heat until it thickens. Adjust the sweetness to your liking. If you're short on time, store-bought sauce is fine. Look for one with no artificial ingredients. But making it at home gives a fresher taste. Plus, you can customize it to your personal preference. To keep your teriyaki chicken and pineapple fresh, store leftovers in the fridge. Use an airtight container for best results. This helps keep out air and moisture. Make sure to cool the dish before sealing it. It helps maintain flavor and texture. If you want to freeze this dish, wait until it cools completely. Place it in a freezer-safe bag or container. Squeeze out any extra air to prevent freezer burn. When ready to eat, thaw the dish overnight in the fridge. Reheat in the oven or microwave until hot. In the fridge, teriyaki chicken lasts about 3 to 4 days. In the freezer, it can stay good for up to 3 months. Always check for signs of spoilage before eating. If it smells bad or looks off, it's best to throw it away. You can use soy sauce mixed with honey or brown sugar. This mix gives a sweet and salty flavor. You can also try hoisin sauce for a similar taste. If you want a kick, add some red pepper flakes. Yes, you can prep this dish in advance. Marinate the chicken and chop the veggies. Store them in the fridge for up to 24 hours. Just bake it when you are ready to eat. It saves time on busy nights. While it is not required, marinating adds great flavor. If you have time, let the chicken sit in the sauce for at least 15 minutes. For deeper flavor, marinate for an hour or more. Teriyaki chicken pairs well with rice or quinoa. You can also serve it with steamed veggies. A simple salad can add freshness and crunch. For a fun twist, try it in lettuce wraps. To make this dish gluten-free, choose a gluten-free teriyaki sauce. Many brands offer this option now. Check the label to be sure. You can also use tamari sauce, which is a gluten-free soy sauce alternative. This recipe showcases tender chicken thighs paired with colorful veggies and vibrant teriyaki sauce. You’ve learned easy steps for marinating, baking, and serving. I shared tips to keep your chicken juicy and flavorful. Plus, I covered variations for proteins, sauces, and veggies. With simple storage instructions, your leftovers stay fresh. Now, you can enjoy a tasty meal that suits your style. Explore alternatives and make this dish your own. Cooking can be fun and easy with the right ingredients!

Teriyaki Chicken Pineapple Sheet Pan Quick and Tasty

Are you ready to impress friends and family with a quick and tasty dinner? This Teriyaki Chicken Pineapple Sheet Pan

- 2 cups all-purpose flour - 1 cup granulated sugar - 1/2 cup brown sugar, packed - 1 teaspoon baking powder - 1 teaspoon baking soda - 1 teaspoon ground cinnamon - 1/2 teaspoon ground nutmeg - 1/2 teaspoon salt - 1 cup canned pumpkin puree - 1/2 cup vegetable oil - 2 large eggs - 1 teaspoon vanilla extract - 1/2 cup all-purpose flour - 1/2 cup rolled oats - 1/4 cup brown sugar, packed - 1/2 teaspoon ground cinnamon - 1/4 cup unsalted butter, melted To make my Pumpkin Streusel Coffee Cake, I start with simple ingredients. First, I gather the dry ingredients. I use all-purpose flour, granulated sugar, brown sugar, baking powder, baking soda, cinnamon, nutmeg, and salt. These create a nice base for the cake. Next, I move on to the wet ingredients. Canned pumpkin puree is key. It gives moisture and flavor. I mix in vegetable oil, eggs, and vanilla extract. This mix brings everything together. Now, let’s talk about the streusel topping. It adds a crunchy layer. I use more flour, rolled oats, brown sugar, and cinnamon. I finish it with melted butter. This creates a crumbly texture that pairs perfectly with the soft cake. These ingredients come together to make a delightful treat. Each bite is filled with warmth and spice. I love how simple it is to prepare. It’s a great recipe for any occasion! - Preheat your oven to 350°F (175°C). - In a large bowl, mix 2 cups of flour, 1 cup of granulated sugar, and 1/2 cup of brown sugar. Add 1 teaspoon of baking powder, 1 teaspoon of baking soda, 1 teaspoon of ground cinnamon, 1/2 teaspoon of ground nutmeg, and 1/2 teaspoon of salt. Stir well. - In another bowl, combine 1 cup of canned pumpkin puree, 1/2 cup of vegetable oil, 2 large eggs, and 1 teaspoon of vanilla extract. Mix until it looks smooth. - Pour the wet mixture into the dry mix. - Stir gently until just combined. Don't overmix; it's okay if there are a few lumps. - Transfer the batter to a greased 9x13 inch baking pan. - For the streusel topping, mix 1/2 cup of flour, 1/2 cup of rolled oats, 1/4 cup of brown sugar, and 1/2 teaspoon of cinnamon in a bowl. - Stir in 1/4 cup of melted unsalted butter. Mix until it looks like coarse crumbs. - Sprinkle the streusel evenly over the batter in the pan. - Bake for 30-35 minutes. Use a toothpick to check if it comes out clean. - Avoid overmixing the batter. Mix just until you see no dry flour. - Use a toothpick to check if fully baked. Insert it into the center of the cake. If it comes out clean, your cake is done! - Serve warm with powdered sugar. This makes a lovely topping. - Pair with coffee or tea for an ideal treat. The flavors mix well and create warmth. - Store leftovers in an airtight container. This keeps them fresh longer. - Best enjoyed within 3 days. After that, it may lose flavor and texture. {{image_2}} You can make this cake even better with some fun add-ins. Try adding nuts like walnuts or pecans to the streusel. They add a nice crunch and flavor. You can also mix in chocolate chips or dried fruits. These extras bring new tastes and textures. The chocolate chips melt and give a sweet surprise. Dried fruits, like raisins or cranberries, add a chewy bite. If you need a gluten-free cake, you can easily adapt this recipe. Just replace the all-purpose flour with a gluten-free blend. Make sure to choose a blend that works well in baking. This keeps the cake moist and fluffy. You won’t even notice the difference in taste! For those who follow a vegan diet, you can also make this cake without eggs and butter. Use flax eggs instead of regular eggs. Mix one tablespoon of ground flaxseed with three tablespoons of water. Let it sit for five minutes to thicken. For butter, you can use coconut oil or a vegan butter substitute. These swaps keep the cake delicious and friendly for all diets. You can make this cake healthier with a few easy swaps: - Use whole wheat flour instead of all-purpose flour. - Replace granulated sugar with coconut sugar or honey. - Swap vegetable oil for unsweetened applesauce. - Use flax eggs instead of regular eggs for a vegan option. These changes keep the taste while adding nutrients. Yes, you can freeze this coffee cake! To freeze it: - Allow the cake to cool completely. - Wrap it tightly in plastic wrap or foil. - Place it in a freezer-safe bag. To thaw, take it out and let it sit in the fridge overnight. You can also thaw it at room temperature for a few hours. Reheating is simple and quick: - Preheat your oven to 350°F (175°C). - Place slices on a baking sheet. - Heat for about 10-15 minutes until warm. You can also use a microwave: heat on medium for 15-20 seconds. Enjoy your slice warm! Each serving of Pumpkin Streusel Coffee Cake has about 250 calories. The cake includes: - Fats: Approximately 10 grams - Carbohydrates: Roughly 38 grams - Proteins: About 3 grams This cake brings together flavors and nutrition. The fats come from oil and butter. The carbs mainly come from flour and sugar, giving you energy. Pumpkin is a star in this cake. It is rich in fiber, which helps digestion. Plus, it has vitamins A, C, and E. These vitamins boost your immune system and keep your skin healthy. The spices like cinnamon and nutmeg add warmth and flavor. Cinnamon can help lower blood sugar. Nutmeg has antioxidants that fight free radicals. The oats in the streusel topping provide a good source of fiber. They help you feel full longer. Oats also support heart health by lowering cholesterol levels. This cake is not just tasty; it also has some great health perks! This blog post covered everything you need to make a delicious Pumpkin Streusel Coffee Cake. You learned the key ingredients, step-by-step baking instructions, and helpful tips for success. Don't forget the variations to suit your taste and diet. Consider adding nuts or trying gluten-free flour. Remember to enjoy your cake warm, with a dusting of sugar and a nice cup of coffee or tea. With practice, you’ll impress your friends and family with this treat! Happy baking!

Pumpkin Streusel Coffee Cake Delightful and Simple Recipe

Welcome to the cozy world of pumpkin delights! This Pumpkin Streusel Coffee Cake is not just a treat; it’s an

- 1 lb boneless, skinless chicken breasts, cut into bite-sized pieces - 1 cup breadcrumbs (preferably Italian-seasoned) - ½ cup grated Parmesan cheese - 1 large egg - 1 teaspoon garlic powder - 1 teaspoon dried oregano - 1 teaspoon dried basil - Salt and pepper to taste - ½ cup marinara sauce (for dipping) - Fresh basil leaves (for garnish) To make Air Fryer Chicken Parmesan Bites, start with the chicken. You need boneless and skinless chicken breasts. Cut them into small, bite-sized pieces. This makes them easy to eat and fun for snacks. Next, gather your coating ingredients. You'll need breadcrumbs, and I suggest using Italian-seasoned ones. They give a nice flavor. Grated Parmesan cheese adds a cheesy taste. For binding, a large egg works best. Now, let’s talk about seasonings. Garlic powder, oregano, and basil add great flavor. Don’t forget salt and pepper to enhance everything! Finally, you’ll need a dipping sauce. Marinara sauce is perfect for this dish. It adds a nice tang. A few fresh basil leaves on top make it look pretty. With these simple ingredients, you'll create a tasty snack that everyone will love! First, set your air fryer to 400°F (200°C). Preheat it for about 5 minutes. This step helps cook the chicken evenly. A hot air fryer gives you that nice, crispy texture. In a large bowl, mix together the breadcrumbs, Parmesan cheese, garlic powder, oregano, basil, salt, and pepper. Stir it well to combine all the flavors. In another bowl, beat the egg until it looks frothy. Take a piece of chicken and dip it in the egg. Let any extra egg drip off. Then, coat the chicken in the breadcrumb mix. Press down gently to make sure the crumbs stick well. Keep doing this until all the chicken is coated. Now it’s time to cook! Place the coated chicken bites in a single layer in the air fryer basket. Make sure they don’t touch each other. This will help them cook evenly. If you have a lot of chicken, do it in batches. Cook the bites for 10-12 minutes at 400°F (200°C). Flip them halfway through for even browning. When they are golden brown and reach an internal temperature of 165°F (75°C), they are done. Carefully take them out and serve warm with marinara sauce for dipping. Top with fresh basil leaves for a lovely touch! To get that ideal crisp on your chicken bites, follow these steps. First, make sure your air fryer is hot. Preheating it to 400°F (200°C) is key. Use Italian-seasoned breadcrumbs for extra flavor and crunch. You can also spray a little oil on the bites before cooking. This helps them turn golden brown and crispy. Don't overcrowd the basket. Leave space for air to circulate. Want to kick up the flavor? Try adding more spices to your breadcrumb mix. A dash of paprika or crushed red pepper can add a nice kick. You can also mix in some grated Parmesan directly into the coating for added cheesiness. If you love herbs, fresh parsley or thyme can elevate the taste even more. Don’t skip the marinara sauce; it’s the perfect dip for these bites! Avoid these common errors to make your chicken bites shine. First, don’t skip the egg wash; it helps the breadcrumbs stick. If the coating falls off, your bites may end up bland. Make sure your chicken pieces are uniform in size. This ensures even cooking. Lastly, resist the urge to flip too early. Wait until they are golden brown before turning them over for the best results. {{image_2}} You can switch up the breading for fun. Instead of Italian-seasoned breadcrumbs, try panko for extra crunch. You can also use crushed cornflakes for a unique texture. If you want a gluten-free version, use gluten-free breadcrumbs. Mix in some spices like paprika or cayenne for extra flavor. Want to make these bites even better? Add some veggies or cheese. You can mix in finely chopped spinach or zucchini into the chicken. This adds nutrition and flavor. For cheese lovers, try mixing mozzarella cheese into the breadcrumbs. You can also stuff the chicken with a small piece of cheese for a melty surprise. Marinara sauce is great, but there are other tasty dips. You can try ranch dressing or garlic aioli for a creamy twist. A spicy salsa or pesto also works well. If you like a sweet touch, serve them with honey mustard. Each dip brings a new flavor to your chicken bites. To store your Air Fryer Chicken Parmesan Bites, let them cool first. Use an airtight container. Place a piece of parchment paper between layers if stacking. They will stay fresh in the fridge for up to three days. For reheating, I recommend using the air fryer again. Preheat it to 350°F (175°C). Place the bites in a single layer. Heat for about 5-7 minutes until they are warm and crispy. This keeps them tasty, just like when they were fresh. If you want to freeze the bites, let them cool completely. Place them in a freezer-safe bag or container. They can last up to three months in the freezer. When you're ready to eat, thaw them in the fridge overnight before reheating. Yes, you can use frozen chicken. Just remember to thaw it first. Thawing helps the chicken cook evenly. You can safely thaw it in the fridge overnight or in cold water for a quicker option. After thawing, cut the chicken into bite-sized pieces as the recipe states. To check if the chicken is cooked, use a meat thermometer. The internal temperature should reach 165°F (75°C). If you don’t have a thermometer, cut a piece open. The meat should be white and no longer pink. Cooking times may vary based on your air fryer. Flipping the bites halfway helps them cook evenly. These bites pair well with marinara sauce for dipping. You can also serve them with a fresh salad or garlic bread. They make a great snack or appetizer for parties. Feel free to explore different sides like roasted veggies or pasta. We covered how to make Air Fryer Chicken Parmesan Bites from scratch. You learned about the key ingredients, step-by-step cooking, and tips for great results. Also, we explored fun variations and how to store leftovers properly. These bites are easy and tasty. You can impress your friends and family with them. Remember, practice makes perfect to avoid mistakes. Go ahead and enjoy your cooking adventure!

Air Fryer Chicken Parmesan Bites Tasty Snack Idea

Craving a tasty snack that’s quick and easy? You’ll love these Air Fryer Chicken Parmesan Bites! They’re crispy on the

To make Chicken Tortilla Soup, gather these ingredients: - 2 tablespoons olive oil - 1 onion, chopped - 3 cloves garlic, minced - 1 jalapeño, diced (seeds removed for less heat) - 1 red bell pepper, diced - 1 teaspoon ground cumin - 1 teaspoon smoked paprika - 1 teaspoon chili powder - 6 cups chicken broth - 2 cups cooked shredded chicken (rotisserie works great) - 1 can (14 oz) diced tomatoes with green chilies - 1 can (15 oz) black beans, rinsed and drained - Salt and pepper to taste - 1 cup corn (fresh, frozen, or canned) - Juice of 1 lime - 1/4 cup fresh cilantro, chopped - Tortilla chips, for serving - Avocado, diced, for garnish - Sour cream, for serving (optional) - Grated cheese, for garnish (optional) You can swap ingredients to suit your taste or needs. - Use vegetable broth for a vegetarian option. - Swap black beans with pinto or kidney beans. - Replace chicken with tofu for a vegan twist. - Use fresh tomatoes instead of canned for a seasonal flavor. - If you dislike spice, skip the jalapeño or use bell peppers only. Choosing fresh ingredients is key to a tasty soup. - Select firm, vibrant vegetables. Look for shiny skin on peppers and smooth onions. - Choose garlic that feels firm and has a strong scent. - Check canned goods for dents or rust, as they may affect quality. - For herbs, pick bright green cilantro with no brown spots. - If using chicken, look for fresh, high-quality meat or a good rotisserie option. {{ingredient_image_1}} First, gather your ingredients. You will need olive oil, onion, garlic, jalapeño, and red bell pepper. Start by heating the olive oil in a large pot over medium heat. Next, chop the onion and add it to the pot. Cook it until it is soft and clear, about 5 minutes. Then, mince the garlic and add it. Dice the jalapeño and red bell pepper, and stir them in. Cook for another 3 to 4 minutes until the veggies soften. Now, it’s time to add flavor. Sprinkle in ground cumin, smoked paprika, and chili powder. Stir well to coat all the veggies. Let them cook for 1 to 2 minutes so the spices release their aromas. You will notice a warm, inviting scent. This step is key for a tasty soup. Pour in the chicken broth next. Add the shredded chicken, diced tomatoes with green chilies, and black beans. Make sure to rinse and drain the beans before adding. Stir everything together to combine. This mix of ingredients creates a hearty base for your soup. Bring the soup to a gentle boil. Once it bubbles, reduce the heat to low and let it simmer. Set a timer for about 20 minutes. This allows all the flavors to blend together. You will want to stir occasionally to keep things moving. After 20 minutes, add the corn and squeeze in the juice of one lime. Season your soup with salt and pepper to taste. Let it simmer for another 5 minutes. Now, it’s time to serve! Ladle the hot soup into bowls. Top with diced avocado, chopped cilantro, and a dollop of sour cream if you like. Don’t forget the tortilla chips on the side for extra crunch! To make your chicken tortilla soup shine, focus on fresh ingredients. Use ripe tomatoes and vibrant peppers. Fresh herbs, like cilantro, add a burst of flavor. Always sauté your spices with the vegetables. This helps release their oils and deepen their taste. A splash of lime juice at the end brightens the entire dish. Don’t skip the tortilla chips; they add both crunch and flavor. Want more heat? Keep the seeds in the jalapeño. For less spice, you can skip the jalapeño entirely. You can also add a pinch of cayenne pepper for a kick. If the soup is too spicy, balance it with a dollop of sour cream. This creamy addition helps cool the heat while enhancing the flavor. You can make this soup on the stovetop or in a slow cooker. The stovetop method is quicker. It takes about 40 minutes total. Heat the olive oil and sauté your veggies in a pot. For the slow cooker, add all ingredients and set it on low for 6 to 8 hours. This method melds the flavors beautifully. Either way, the result is a tasty and comforting soup. Pro Tips Use Fresh Ingredients: Fresh vegetables and herbs will elevate the flavor of your soup, making it more vibrant and delicious. Adjust Spice Level: If you prefer a milder soup, be sure to remove all the seeds from the jalapeño and consider using less chili powder. Make It Ahead: This soup tastes even better the next day as the flavors continue to meld. Consider making a batch in advance! Customize Your Toppings: Feel free to add your favorite toppings such as sliced radishes, lime wedges, or different types of cheese for extra flavor. {{image_2}} You can easily make this soup vegetarian or vegan. Just skip the chicken. Use vegetable broth instead of chicken broth. For protein, add diced tofu or chickpeas. You can also add more beans like pinto or kidney beans. Extra veggies like zucchini or spinach work well too. This keeps the soup hearty and flavorful. To spice things up, add more jalapeños or a few dashes of hot sauce. You might also try adding chipotle peppers in adobo sauce for a smoky heat. If you like it really hot, keep some seeds in the jalapeño. This makes a big difference in the soup's heat level. Just remember to taste as you go! Toppings can make your soup more fun. Add slices of radish for crunch or pickled onions for zest. Fresh lime juice brightens the flavors. You can also top it with sliced black olives, diced green onions, or a sprinkle of queso fresco. Don’t forget the tortilla chips for that great crunch! They add texture and soak up the soup's flavors. After you enjoy your Chicken Tortilla Soup, let it cool. Then, pour it into airtight containers. This keeps the soup fresh for later. Store it in the fridge for up to three days. Make sure to label the containers with the date. If you want to save some soup for later, freezing works great. Use freezer-safe containers or bags. Leave some space at the top. The soup will expand as it freezes. You can freeze it for up to three months. When you're ready to eat, just thaw it in the fridge overnight. To reheat the soup, you can use the stove or microwave. For the stove, pour the soup into a pot. Heat it on low, stirring often. For the microwave, place the soup in a bowl. Cover it loosely and heat in short bursts, stirring in between. Make sure it's hot all the way through before serving. Enjoy those delicious flavors again! You can use beans or tofu. Both options add protein and flavor. For a meat-like taste, try shredded jackfruit or tempeh. These choices work well in this soup. They soak up the broth and spices nicely. Chicken Tortilla Soup lasts about 3 to 4 days in the fridge. Store it in an airtight container for best results. Always check for signs of spoilage before eating. If it smells off or looks strange, do not eat it. Yes, you can make this soup ahead of time. It tastes even better the next day! The flavors blend nicely while sitting in the fridge. Just reheat it on the stove or in the microwave when you’re ready to enjoy. Here are some great side dishes to pair with your soup: - Cornbread for a sweet touch - A fresh salad for crunch - Rice for a filling option - Avocado slices for creaminess - Extra tortilla chips for dipping These sides enhance your meal and add variety. Enjoy mixing and matching! In this blog post, we covered the ingredients needed for a delicious Chicken Tortilla Soup. I gave you tips on choosing fresh ingredients and offered substitutions, too. We walked through each cooking step, from preparing veggies to serving your soup. You learned helpful tricks for flavor and how to adjust spice levels. Now you can enjoy variations, whether vegan or spicy. Remember to store leftovers properly to keep the soup fresh. With this knowledge, you can make the best Chicken Tortilla Soup, satisfying both your taste buds and those you serve. Happy cooking!

Chicken Tortilla Soup Flavorful and Easy Recipe

Are you ready to spice up your weeknight meals? My Chicken Tortilla Soup is bursting with flavor and super easy

- 1 lb ground turkey - 1/4 cup soy sauce (low sodium) - 2 tablespoons honey - 1 tablespoon rice vinegar - 2 teaspoons sesame oil - 1 tablespoon fresh ginger, minced - 2 garlic cloves, minced - 1 cup broccoli florets - 1 red bell pepper, thinly sliced - 1 carrot, julienned - 1 cup cooked brown rice or quinoa The base of this dish is the ground turkey. It cooks fast and absorbs flavors well. The soy sauce, honey, rice vinegar, and sesame oil create the sweet and savory teriyaki taste. Fresh ginger and garlic add a nice kick to the dish. For the veggies, broccoli, red bell pepper, and carrot add color and crunch. - 2 green onions, chopped - 1 tablespoon sesame seeds Adding green onions gives a fresh flavor. Sesame seeds add a nice crunch and look great on top. These garnishes elevate your bowl and make it more appealing. - Brown rice or quinoa - Additional vegetables I suggest pairing this dish with brown rice or quinoa. They provide a healthy base. You can also add more veggies on the side, like snap peas or bok choy, for extra nutrition. This makes your meal balanced and filling. {{ingredient_image_1}} First, grab a small bowl. In this bowl, whisk together the following ingredients: - 1/4 cup low sodium soy sauce - 2 tablespoons honey - 1 tablespoon rice vinegar - 2 teaspoons sesame oil - 1 tablespoon minced fresh ginger - 2 minced garlic cloves Make sure everything mixes well. Once it’s smooth, set this teriyaki sauce aside for later use. It will add great flavor to your dish. Now, heat a large skillet on medium heat. Add 1 pound of ground turkey to the skillet. Season the turkey with salt and pepper. Use a spatula to break the turkey apart. Cook it until it turns brown and is fully cooked. This should take about 5 to 7 minutes. The turkey should be nice and crumbly. Once the turkey is browned, pour the teriyaki sauce over it. Stir well to coat the turkey evenly. Let it simmer for about 3 to 4 minutes. This helps the sauce thicken slightly and soak into the turkey. Next, add in 1 cup of broccoli florets, 1 thinly sliced red bell pepper, and 1 julienned carrot. Stir often and cook for an additional 5 minutes. You want the veggies to be tender-crisp, not mushy. Now you are ready to serve. Divide 1 cup of cooked brown rice or quinoa among bowls. Top each bowl with the teriyaki ground turkey mixture. Finally, garnish with chopped green onions and a sprinkle of sesame seeds. Enjoy your meal! - Best practices for browning ground turkey: Start with a hot skillet. This helps the turkey brown nicely. Break the meat into small pieces with a spatula. Cook until it's no longer pink, about 5-7 minutes. This gives it a good texture and flavor. Always season with salt and pepper while cooking. - How to achieve tender-crisp vegetables: Add your veggies at the right time. For this bowl, add them after the turkey is cooked. Stir often to avoid burning. Cook for about 5 minutes. This keeps them bright and crunchy, giving your bowl great texture. - Adding spice or heat: Want a kick? Try adding red pepper flakes or sriracha. You can mix these into the teriyaki sauce for extra heat. Start with a little; you can always add more! - Substituting ingredients: Don't have ground turkey? Use chicken or beef instead. You can even try tofu for a vegetarian twist. Also, swap honey for maple syrup if you're looking for a different sweetness. - Creative serving suggestions: Serve your teriyaki bowl in colorful dishes. Try layering the rice at the bottom, then topping with turkey and veggies. This looks appealing and keeps everything neat. - Bowl decorating tips: Add a sprinkle of sesame seeds on top for crunch. Chopped green onions add color and a fresh taste. You can also drizzle a little extra teriyaki sauce for a shiny finish. Make your bowl as pretty as it is tasty! Pro Tips Use Fresh Ingredients: Fresh ginger and garlic will enhance the flavor of your teriyaki sauce significantly compared to dried versions. Customize Your Veggies: Feel free to swap in your favorite vegetables or whatever you have on hand, like snap peas or zucchini, to keep the dish exciting. Rice Cooking Tip: Cook your brown rice or quinoa ahead of time and store it in the fridge for quick meal prep during the week. Garnishing for Flavor: Don't skip the green onions and sesame seeds; they add a delightful crunch and additional flavor to your bowl. {{image_2}} You can swap ground turkey for other proteins. Chicken works great for a lighter taste. Beef adds a richer flavor, while tofu is perfect for a vegetarian meal. Each option brings its unique twist to the bowl. Feel free to mix and match your vegetables. Seasonal veggies like zucchini or asparagus add freshness. Mushrooms add umami, while snap peas give a nice crunch. These swaps keep the dish exciting and colorful. Adjust the sweetness to your taste. If you like it sweeter, add more honey. For a lighter version, use low-sodium soy sauce. You can also find gluten-free soy sauce for those with dietary needs. These changes help you personalize your bowl. To keep your Teriyaki Ground Turkey Bowl fresh, let it cool down first. Place it in a container with a tight lid. This helps prevent spills. You can store it in the fridge for up to three days. This way, you can enjoy it later! When you are ready to eat your leftovers, you can use a microwave or stovetop. For the microwave, heat in short bursts. Stir after each minute to keep it even. On the stovetop, warm it over low heat. Add a splash of water if it seems dry. This keeps the turkey tender and tasty. If you want to freeze your bowl, use an airtight container. Leave some space at the top. Food expands when it freezes. For the best quality, eat it within three months. When you're ready to eat, thaw it in the fridge overnight. Avoid thawing at room temperature to keep it safe. Yes, you can make this dish in advance. To meal prep, cook the turkey and veggies. Store them in airtight containers. Keep the rice or quinoa in a separate container. This way, the grains stay fresh. When you're ready to eat, combine everything in a bowl. You can microwave it for a quick meal. To make a low-carb version, swap the rice or quinoa. Use cauliflower rice instead. It’s light and absorbs flavors well. You can also use zucchini noodles or even lettuce wraps. These options keep the dish tasty and low in carbs. You can serve many sides with this bowl. Steamed edamame adds protein and flavor. A crisp salad with sesame dressing adds freshness. Roasted sweet potatoes also pair well. They add a sweet note to balance the savory turkey. These sides complete the meal nicely. We explored how to make a Teriyaki Ground Turkey bowl using easy steps. From selecting fresh ingredients to cooking techniques, this meal is simple and tasty. I shared tips for storing leftovers and reheating them while keeping flavor intact. Remember, you can switch proteins or veggies for variety. This dish is fun, flexible, and perfect for any appetite. Enjoy creating your own version and impressing family or friends with your skills!

Teriyaki Ground Turkey Bowl Flavorful and Quick Meal

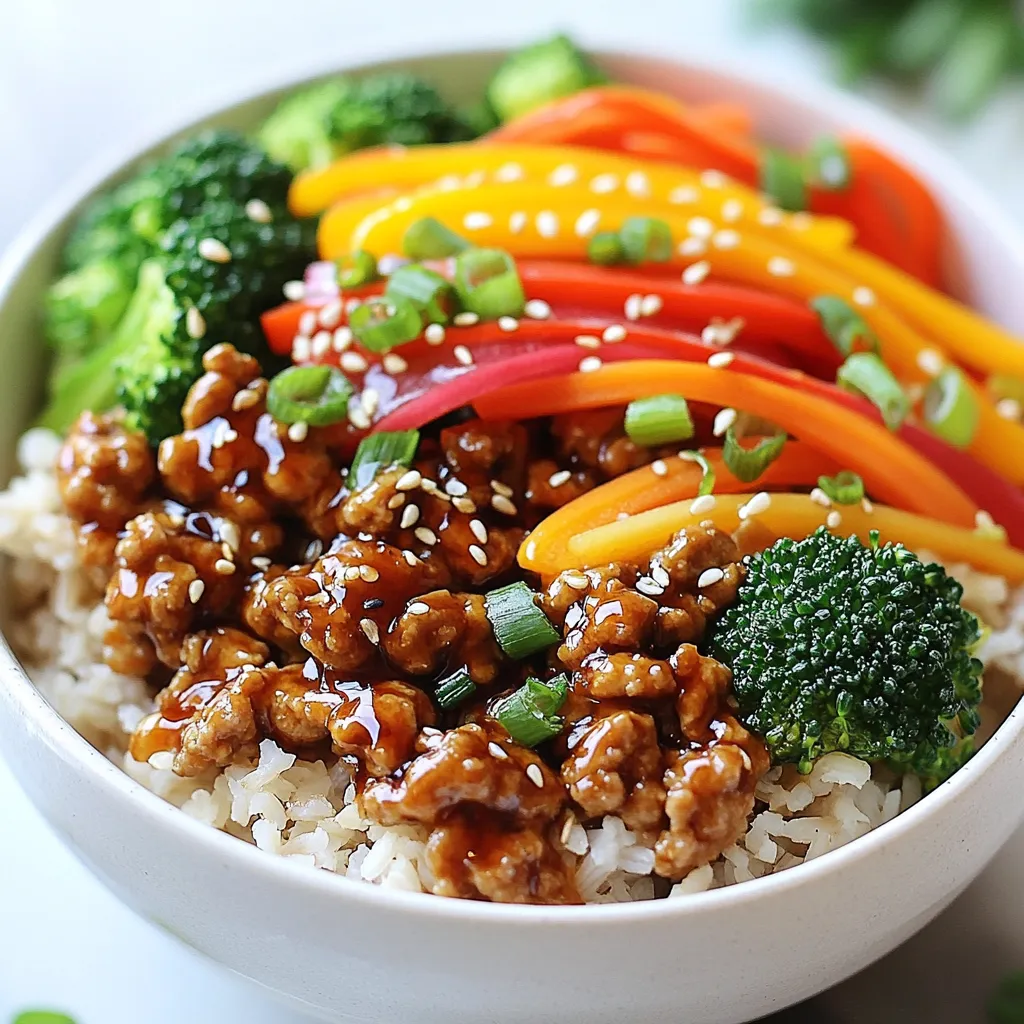
Are you looking for a quick and tasty meal? The Teriyaki Ground Turkey Bowl is perfect! It’s simple, packed with

- 4 boneless, skinless chicken breasts - 4 medium-sized potatoes, diced into 1-inch cubes - 6 cloves garlic, minced - 1 cup grated Parmesan cheese - 1/2 cup plain breadcrumbs - 1/4 cup olive oil - 1 tablespoon fresh rosemary, chopped (or 1 teaspoon dried) - 1 teaspoon dried thyme - 1 teaspoon paprika - Salt and pepper to taste - Fresh parsley for garnish (optional) To create this delightful dish, gather these fresh ingredients. The chicken and potatoes are the stars here. The garlic adds great flavor, while Parmesan gives a rich taste. Breadcrumbs help create a crispy coat. Fresh herbs like rosemary and thyme bring a nice aroma. Don't forget salt and pepper for seasoning. Before starting, wash your potatoes and chicken. Dice the potatoes into even cubes for uniform cooking. Mince the garlic finely to spread that wonderful taste. With these ingredients ready, you’ll set the stage for a delicious meal that everyone will love. {{ingredient_image_1}} First, set your oven to 400°F (200°C). This temperature helps the chicken cook through and brown nicely. An even heat is key. Make sure the oven is fully heated before you bake. In a bowl, mix minced garlic, olive oil, rosemary, thyme, paprika, salt, and pepper. This blend adds great flavor to the chicken. Place the chicken breasts in the bowl, and coat them well with the mixture. Make sure each piece is covered. Take another bowl and toss diced potatoes with olive oil, salt, and pepper. Add half of the Parmesan cheese here. This helps the potatoes get a tasty crust. Stir until all pieces are well-coated for even flavor. In a shallow dish, mix the remaining Parmesan cheese with breadcrumbs. Now, take each coated chicken breast and press it into the breadcrumb mix. Ensure you cover each piece evenly. This step gives the chicken a nice, crispy texture. Grab a large baking dish. Place the chicken breasts in the center. Surround them with the seasoned potatoes. Keep some space between the chicken and potatoes for even cooking. This layout helps everything cook well. Now, place the baking dish in the hot oven. Bake for 25-30 minutes. Check the chicken and potatoes. They should be golden and cooked through. A meat thermometer can help. Chicken should reach 165°F (75°C). - Ideal cooking temperatures: Cook chicken at 400°F (200°C). This keeps it juicy and tender. - How to prevent overcooking: Use a meat thermometer. Aim for an internal temperature of 165°F (74°C). Remove it from the oven once it reaches this point. - Additional spices and herbs to try: You can add garlic powder, onion powder, or even a dash of cayenne for heat. Fresh basil or parsley also works great. - Suggestions for marinades: A mix of lemon juice, olive oil, and herbs adds a lovely zing. Marinade for at least 30 minutes for the best flavor. - Tips for crispy vs. soft potatoes: For crispy potatoes, cut them smaller and add more oil. For softer potatoes, keep them larger and reduce oil. - Choosing the right type of potato: Use Yukon Gold or red potatoes for a creamy texture. Russet potatoes are great for crispiness. Pro Tips Choose the Right Chicken: Use fresh, high-quality chicken breasts for the best flavor and texture. Even Potato Sizes: Cut your potatoes into uniform 1-inch cubes to ensure they cook evenly alongside the chicken. Breadcrumb Coating: For extra crunch, consider using panko breadcrumbs instead of regular breadcrumbs. Rest Before Serving: Allow the dish to rest for a few minutes after baking; this helps lock in flavors and moisture. {{image_2}} You can make this dish even better by adding vegetables. Try using: - Carrots, diced - Broccoli florets - Bell peppers, sliced - Green beans These veggies add color and nutrients. Cook them for about 15-20 minutes. Keep an eye on them. You want them tender but not mushy. Add them to the baking dish at the same time as the potatoes. If you want to switch things up, use other proteins. You can try: - Turkey cutlets - Pork chops - Firm tofu for a vegetarian option Adjust cooking times based on the protein you choose. Turkey may take a bit longer, while tofu cooks faster. Always check that your protein is cooked fully before serving. There are also ways to modify this dish for special diets. For gluten-free options, use gluten-free breadcrumbs. If you want a vegan version, replace the chicken and cheese with chickpeas and nutritional yeast. Both adjustments keep the flavors nice and tasty while meeting dietary needs. Store any leftovers in an airtight container. This keeps them fresh and safe. The dish lasts up to three days in the fridge. Always cool it down before sealing the container. To freeze, place the cooled dish in a freezer-safe bag. Remove as much air as possible to prevent freezer burn. You can store it for up to three months. When ready to eat, thaw it overnight in the fridge. To maintain flavor and texture, reheat in the oven at 350°F (175°C). This helps keep the chicken moist and the potatoes crispy. You can also microwave it, but be cautious not to overcook. Always check the dish is hot all the way through. It takes about 40 minutes to cook Garlic Parmesan Chicken and Potatoes. Here’s the breakdown: - Prep Time: 15 minutes - Cooking Time: 25-30 minutes You can prepare the chicken and potatoes while the oven heats. This way, you save time. Yes, you can use frozen chicken. However, it requires extra cooking time. Make sure to check the internal temperature. Chicken should reach 165°F (75°C). If you cook from frozen, add about 10-15 minutes to the total cooking time. Here are some great side dishes to serve: - Steamed broccoli - Mixed green salad - Roasted carrots - Garlic bread These dishes balance the flavors and add more colors to your plate. You can prep Garlic Parmesan Chicken and Potatoes ahead of time. Here are some tips: - Marinate the chicken: Coat it with the garlic mixture and store in the fridge. - Prep the potatoes: Toss them with oil and seasoning, then cover and chill. You can cook it the next day. Just remember to let it sit at room temperature for about 15 minutes before baking. You now have a great recipe for Garlic Parmesan Chicken and Potatoes. We covered the best ingredients, from chicken to garlic. I shared easy steps for cooking and gave tips for juiciness and flavor. You can even switch up the dish with veggies or different meats. Remember, good storage helps keep your leftovers fresh. This recipe is simple, tasty, and perfect for any meal. Enjoy making it, and don’t hesitate to experiment with your own ideas!

Garlic Parmesan Chicken and Potatoes Delight

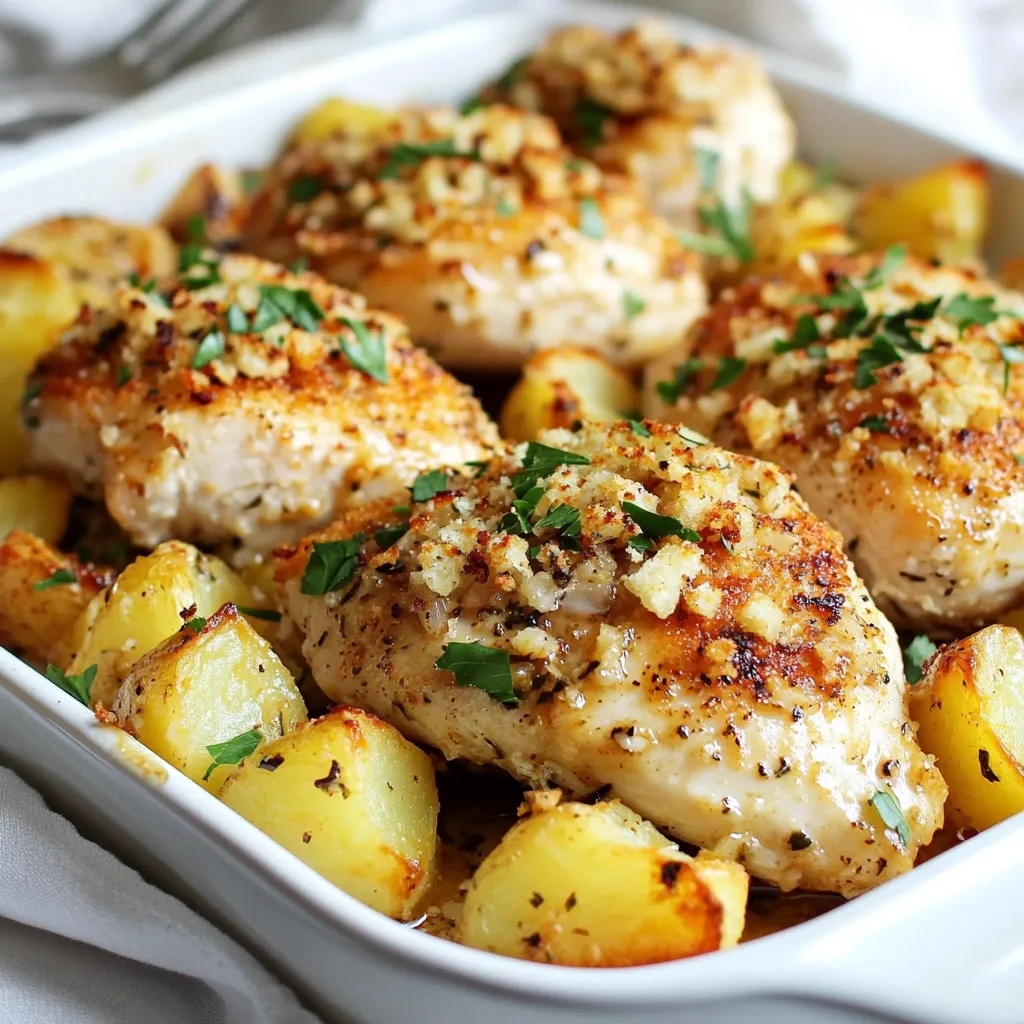
Want a simple yet tasty meal? Look no further than Garlic Parmesan Chicken and Potatoes Delight! This dish combines juicy

Older posts
Newer posts
← Previous Page1 … Page21 Page22 Page23 … Page143 Next →

dsad

© 2025 Southern Dishes • Built with GeneratePress

Our Policies

  • Copyright Policy
  • Cookie Policy
  • GDPR Policy
  • Privacy Policy
  • Disclaimer
  • Terms Of Use

More Information

  • Home
  • About
  • Contact
  • Appetizers
  • Dessert
  • Dinner
  • Drinks
©2025, Southern Dishes About Back To Top