
One Pot Creamy Pesto Chicken Orzo Simple Recipe
Are you looking for a quick meal that packs a punch? You’ve come to the right place! In this post,
Are you looking for a quick meal that packs a punch? You’ve come to the right place! In this post,

Are you ready to transform your dinner menu with a dish that’s both tasty and easy? These Air Fryer Garlic
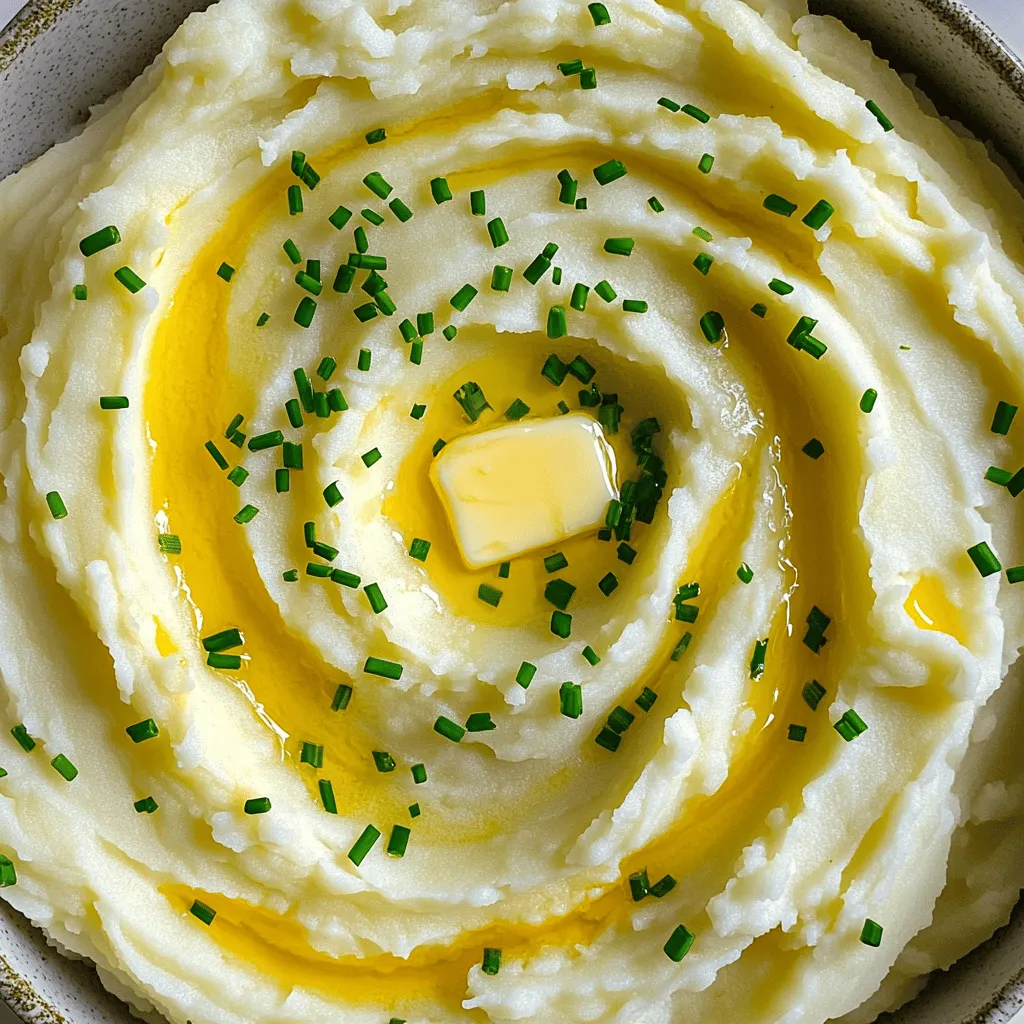
Are you ready to elevate dinner with creamy garlic butter mashed potatoes? These rich, indulgent potatoes make any meal feel
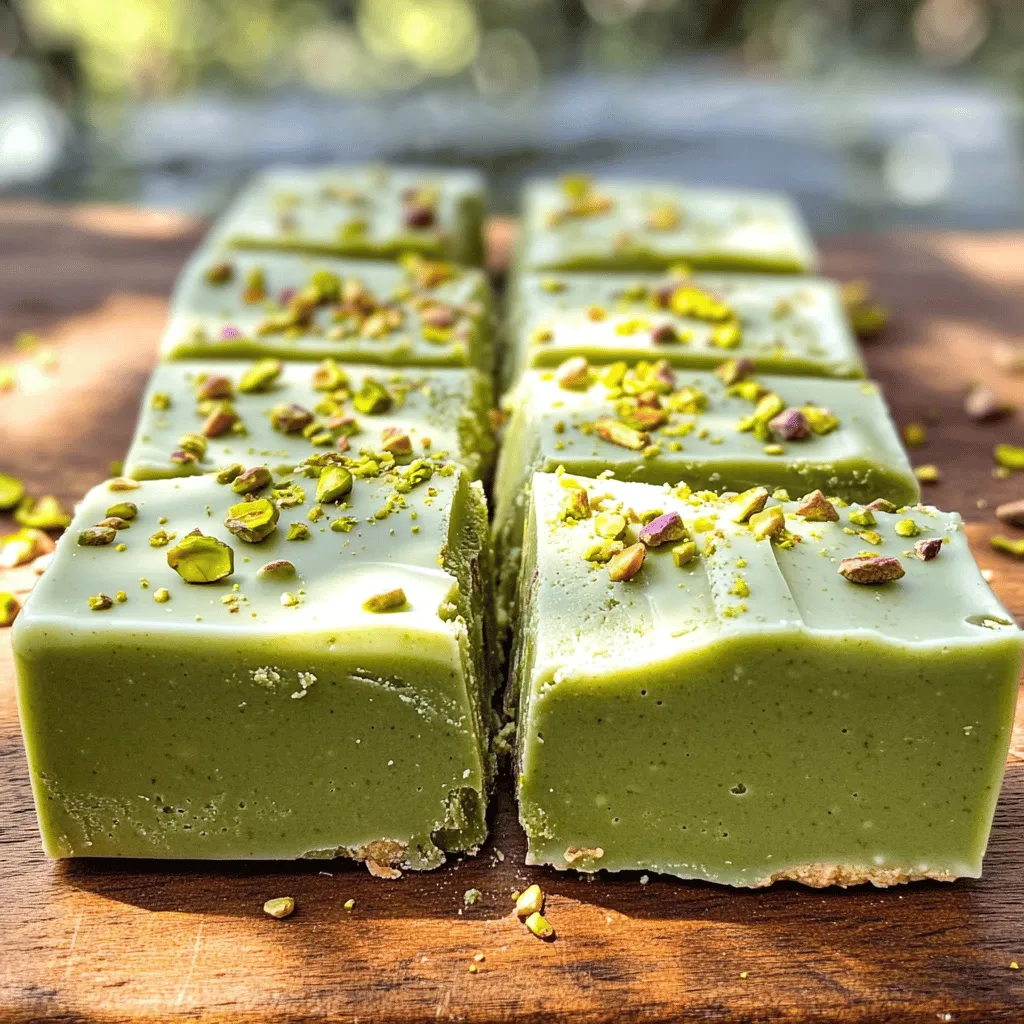
Are you ready to indulge in a sweet treat that combines the rich flavors of white chocolate with the unique

Are you ready for a meal that’s both simple and delicious? Cheesy One-Pot Chili Mac is your answer! This dish
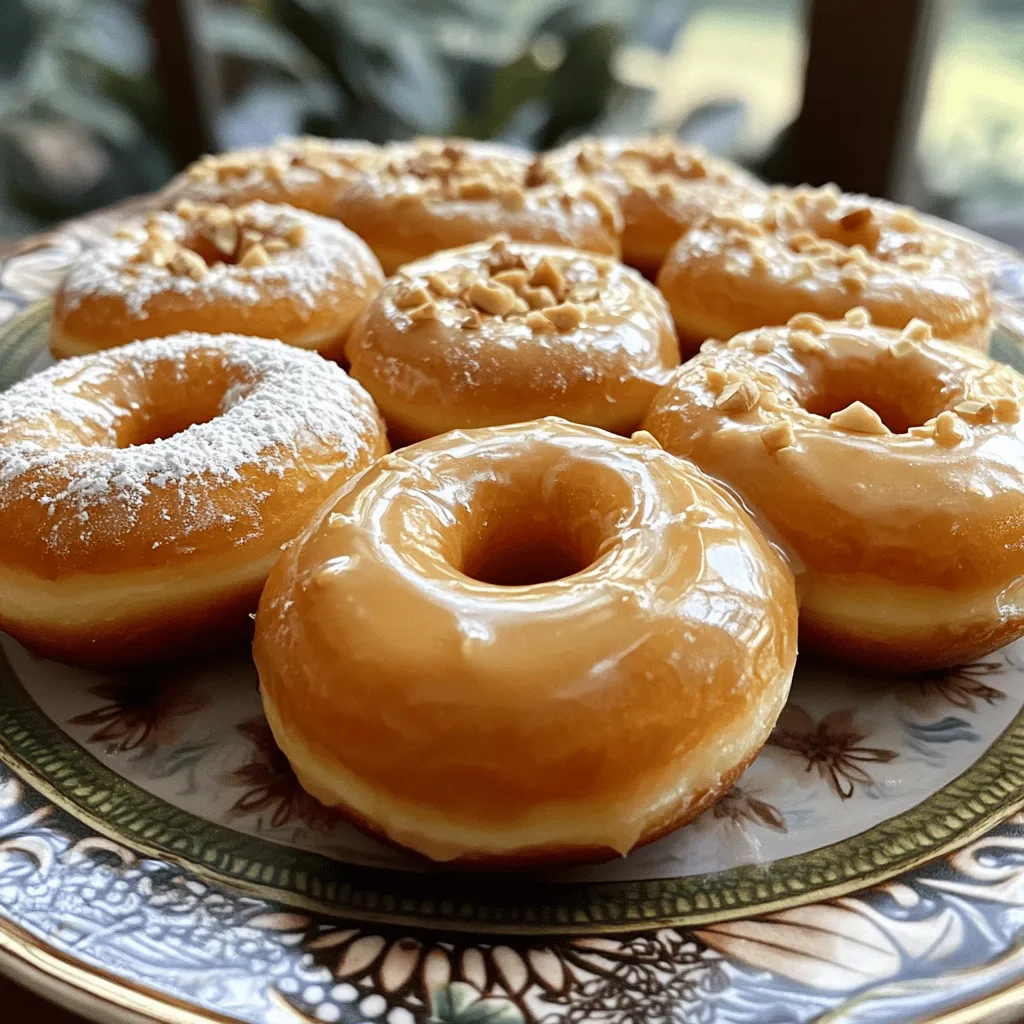
Looking for a sweet treat that delights your taste buds? You’ll love these Maple Glazed Donuts! This recipe is simple
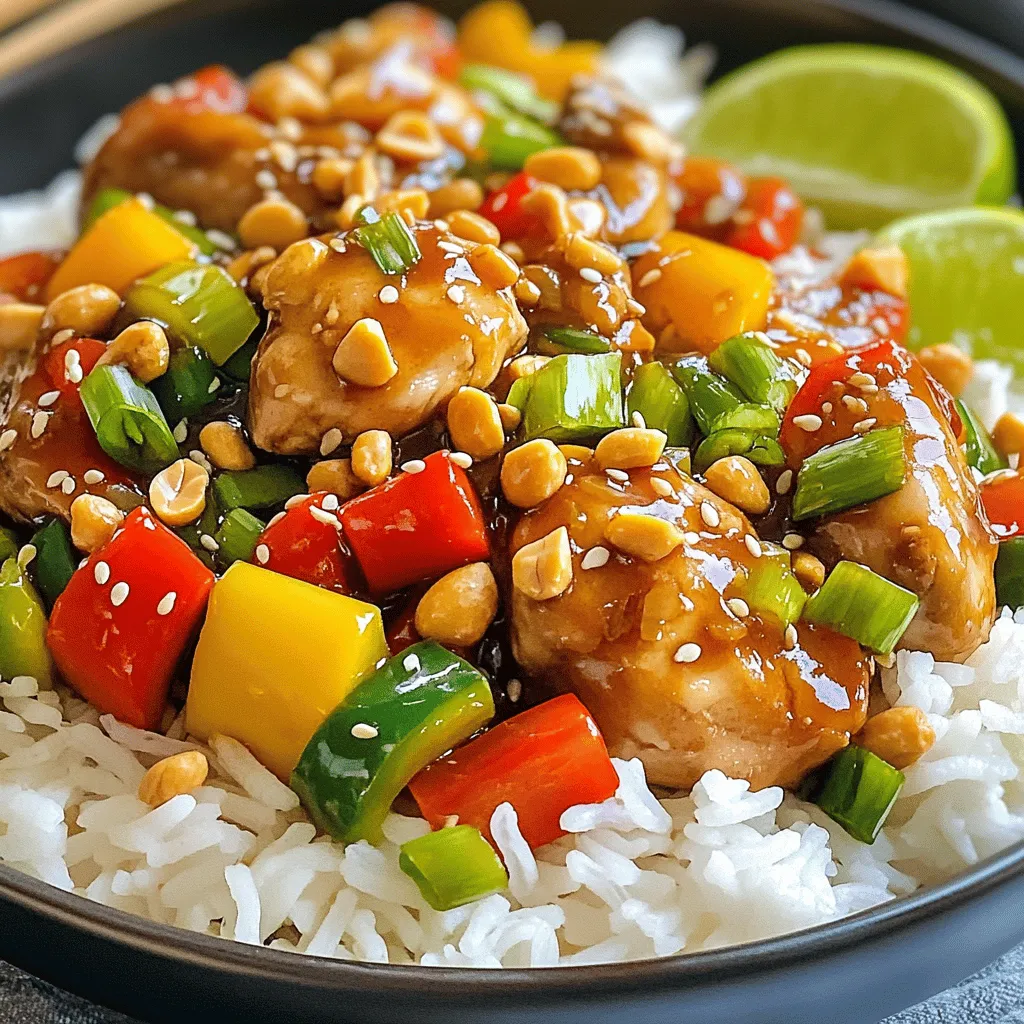
If you’re craving a tasty, quick dinner, you’ve come to the right place! Min Kung Pao Chicken is a flavorful

Are you ready to enjoy a crispy and flavorful treat with Air Fryer Sweet Potato Fries? These golden delights are
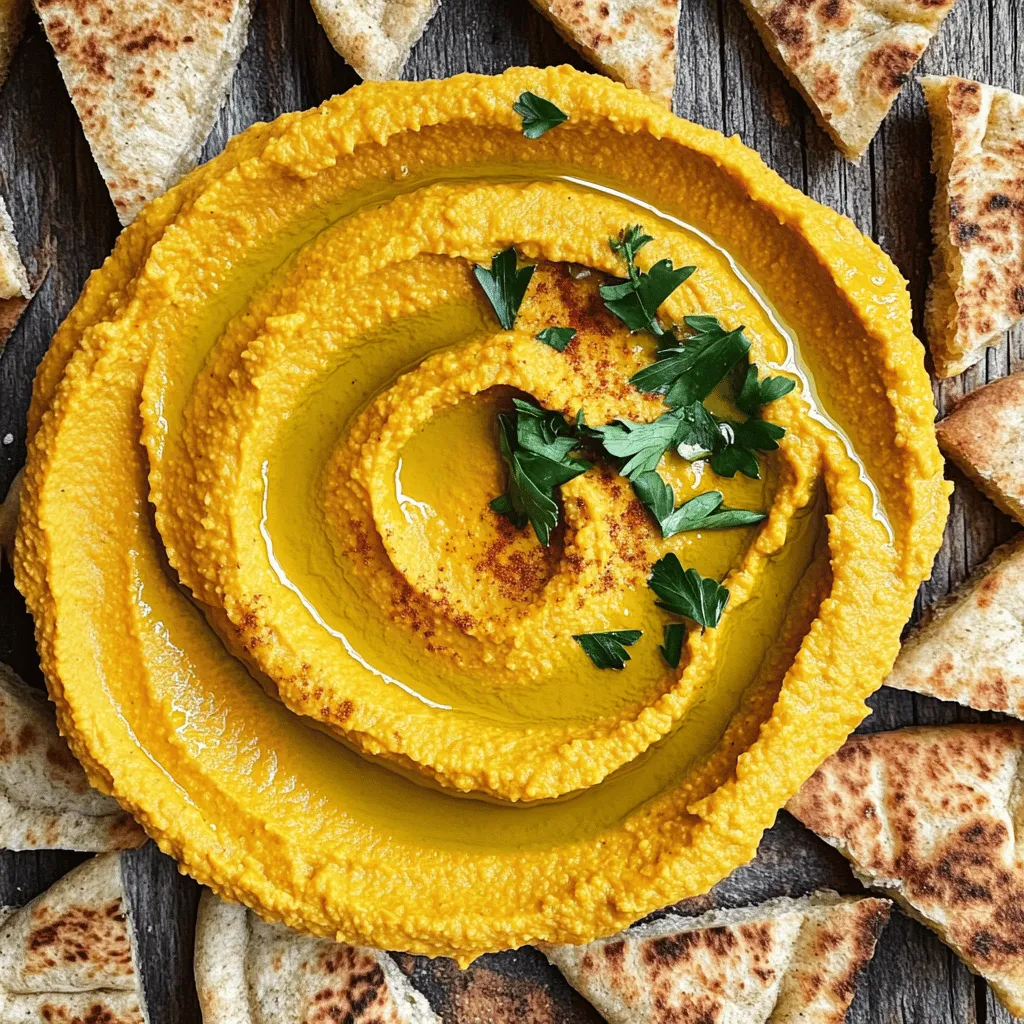
If you want a dip that wows at any gathering, look no further! My savory pumpkin hummus pairs perfectly with
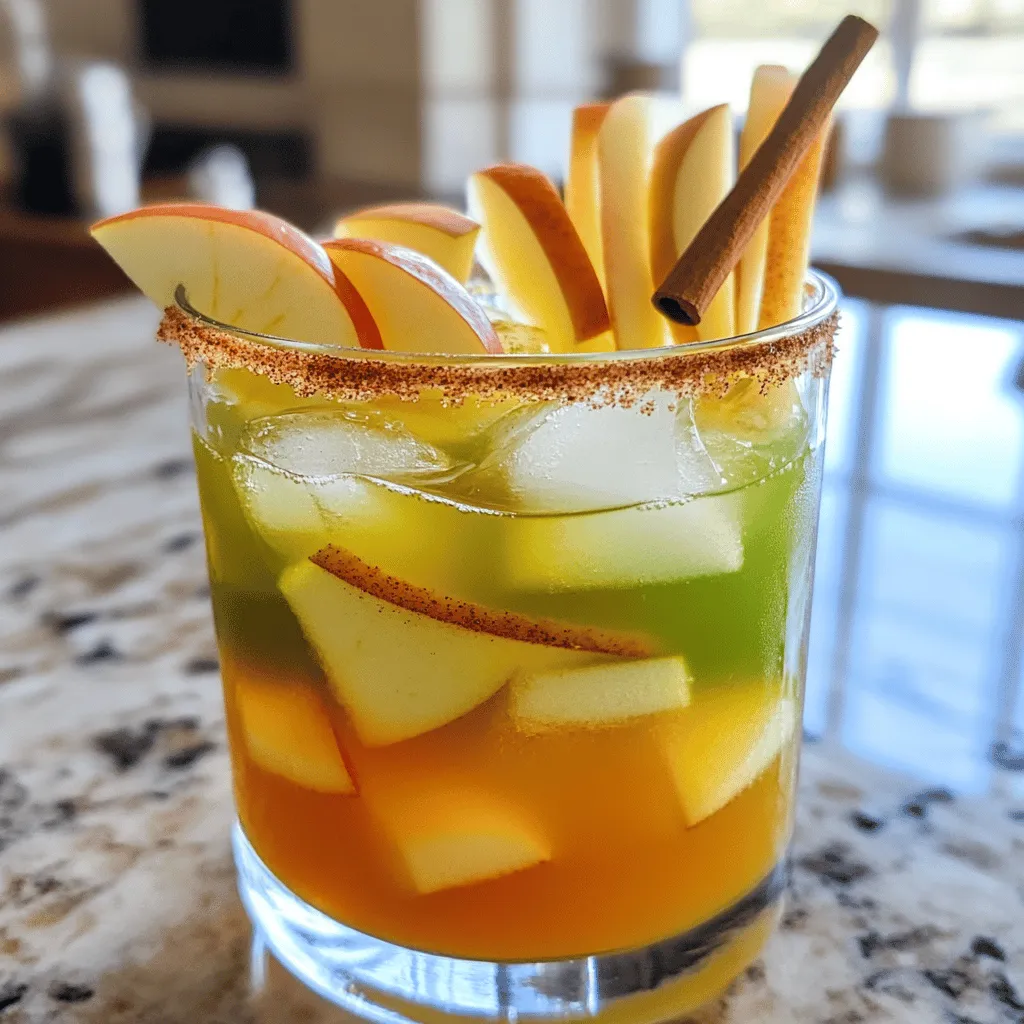
Ready to sip on the flavors of fall? The Apple Cider Margarita is a fun twist on the classic cocktail
