
No-Bake S’mores Cheesecake Bars Simple and Sweet Delight
Craving a sweet treat that’s easy to make? No-bake s’mores cheesecake bars are your answer! These bars combine creamy cheesecake
Craving a sweet treat that’s easy to make? No-bake s’mores cheesecake bars are your answer! These bars combine creamy cheesecake

Are you craving a quick and tasty dinner? Try these Air Fryer Garlic Butter Steak Bites! They’re easy to make
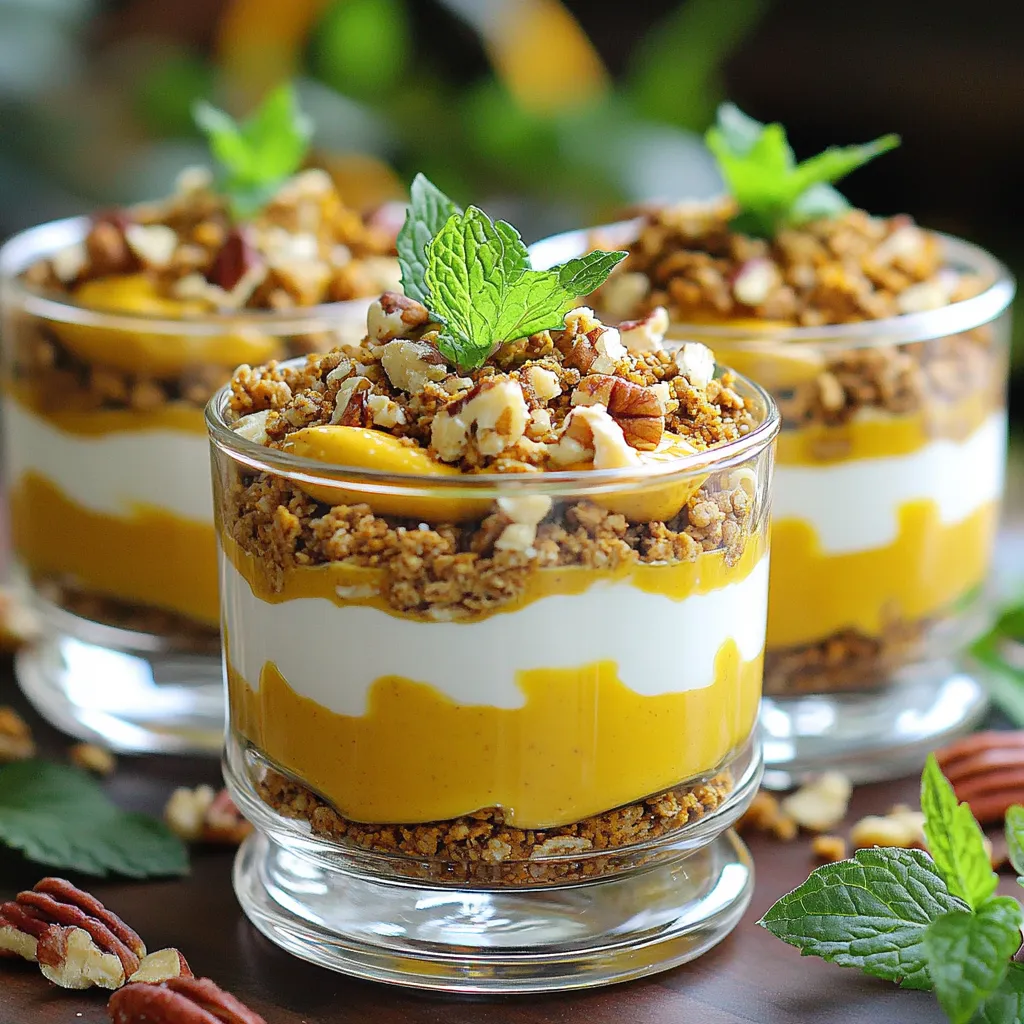
Fall is here, and it’s time for a tasty treat! Join me as we whip up Greek Yogurt Pumpkin Parfaits.

Are you ready for a treat that blends rich chocolate and cozy pumpkin? This Chocolate Pumpkin Marble Loaf is not
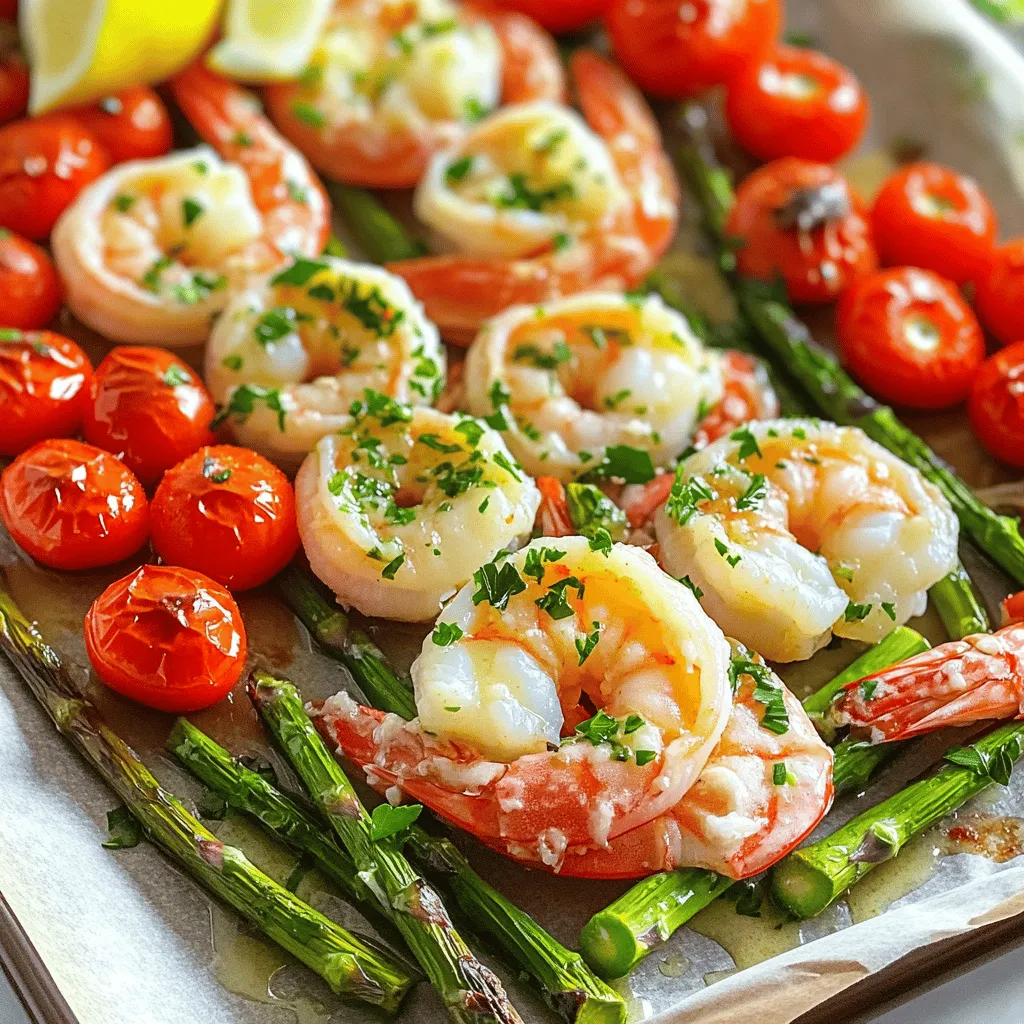
Are you ready to impress your family with a quick and tasty meal? This Sheet Pan Garlic Butter Shrimp dish
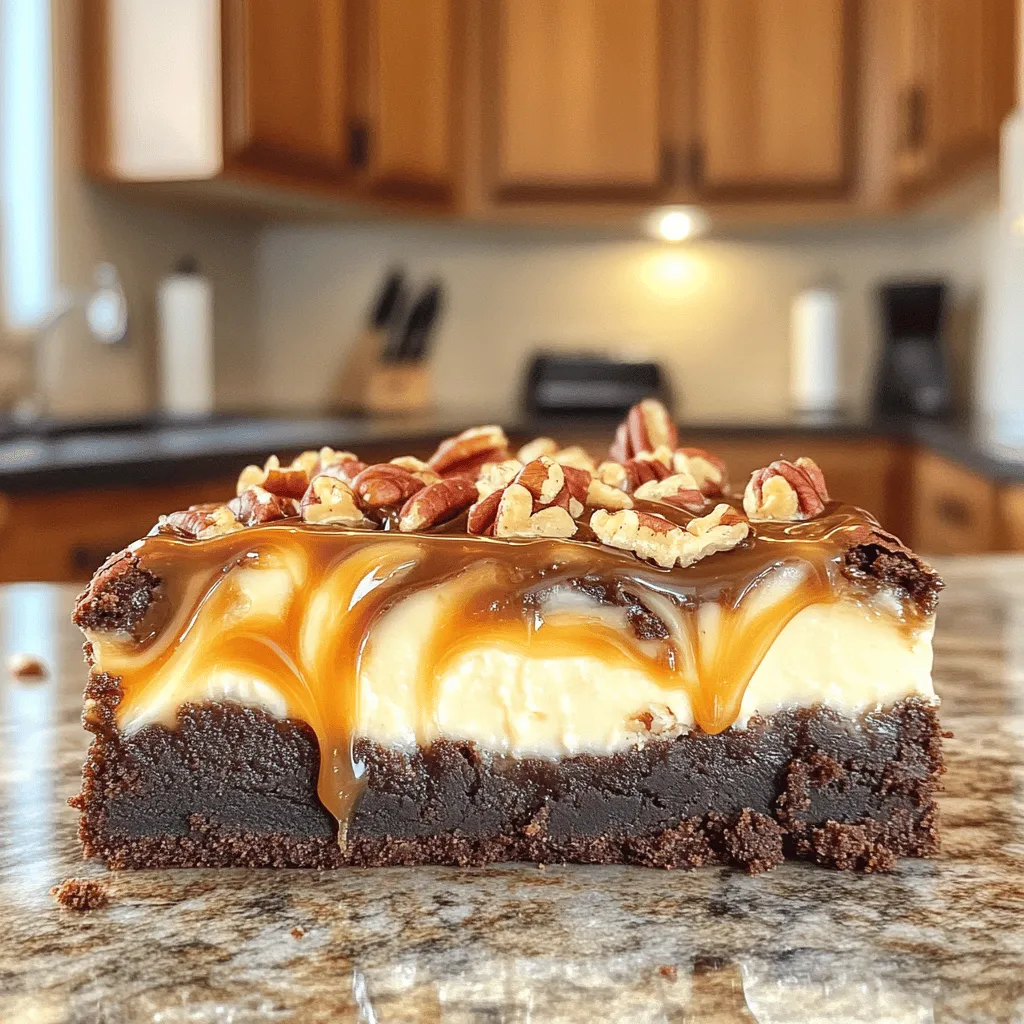
Are you ready to indulge in a sweet treat that combines rich brownies, creamy cheesecake, and crunchy pecans? Caramel Pecan
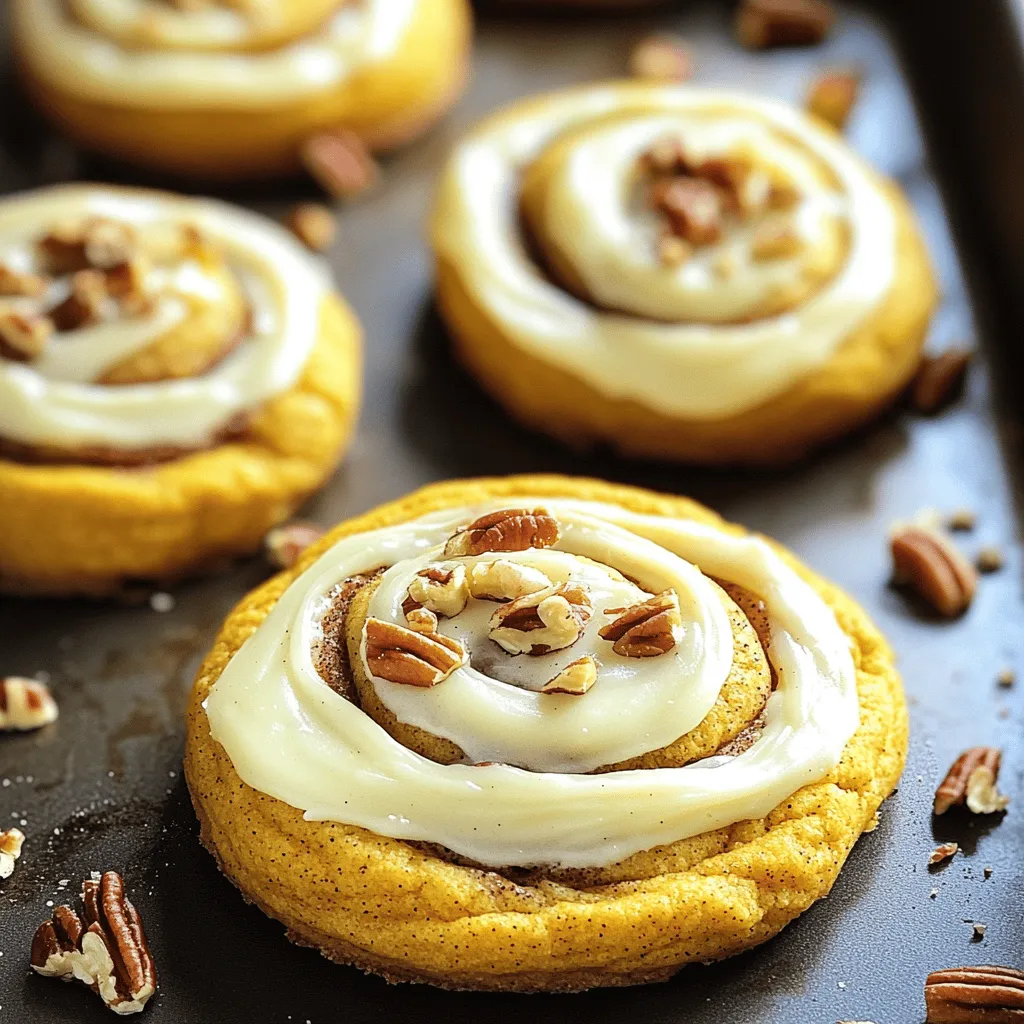
Get ready to dive into amazing flavor with Pumpkin Spice Cinnamon Roll Cookies! If you love fall treats, these cookies

If you crave a tasty dish that brings fun to the table, Pad Thai noodles are your answer! This recipe

Do you crave the warm, sweet aroma of fresh-baked muffins? Look no further! My Bakery Style Apple Crumble Muffins are
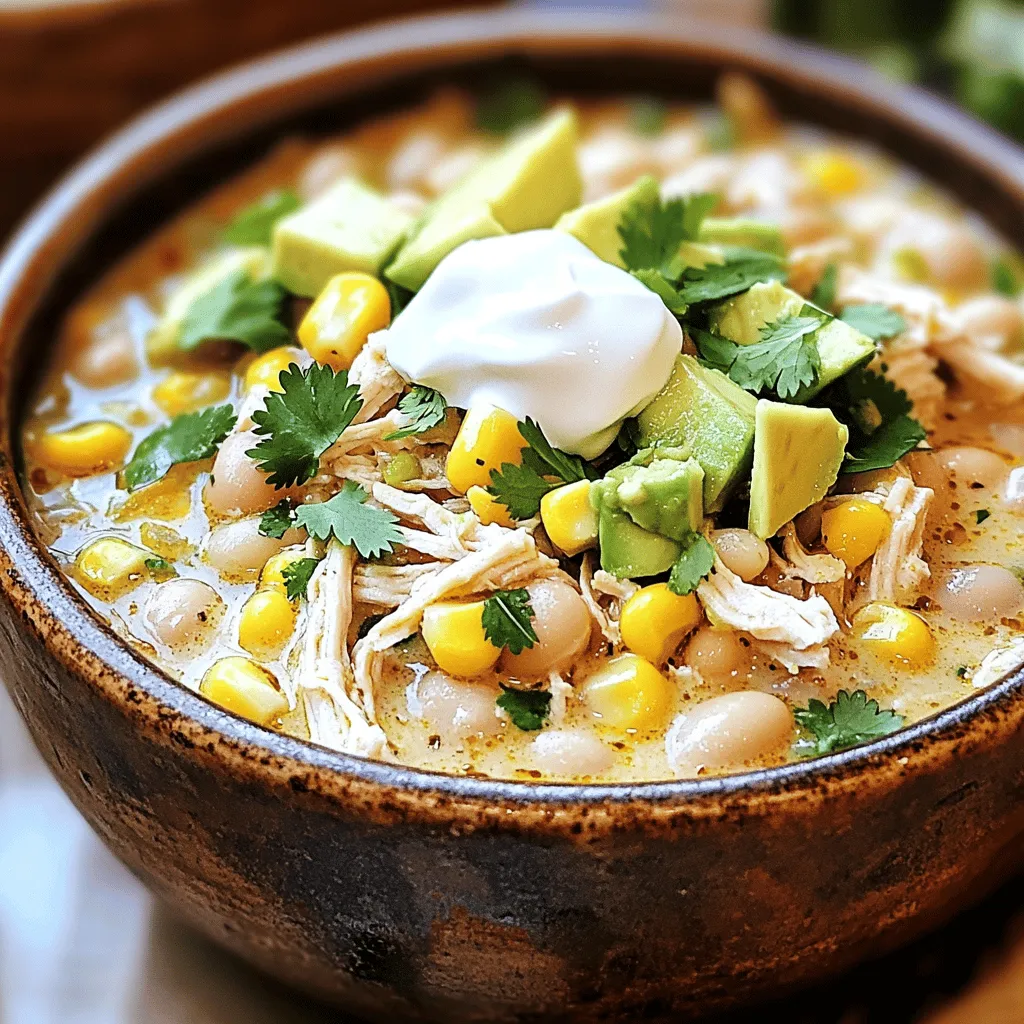
Are you ready to indulge in a warm bowl of Slow Cooker White Chicken Chili? This easy and flavorful dish
