Skip to content
DisclaimerTerms Of UseGDPR PolicyCookie Policy

Southern Dishes

  • Home
  • Drinks
  • Appetizers
  • Dinner
  • Dessert
  • About
  • Contact
  • Privacy Policy
DisclaimerTerms Of UseGDPR PolicyCookie Policy

Isabella

To make a great baked ziti, you need a few key items: - 12 oz ziti pasta - 2 cups marinara sauce - 1 cup ricotta cheese - 2 cups shredded mozzarella cheese - 1 cup grated Parmesan cheese - 1 large egg - 1 tablespoon olive oil - 1 teaspoon garlic powder - 1 teaspoon dried oregano - Salt and pepper to taste These ingredients come together to create a rich and creamy dish that warms the heart. You can easily change baked ziti to fit your tastes. Here are some fun options: - 1/2 teaspoon crushed red pepper flakes for a spicy kick - Extra veggies like spinach or mushrooms for added nutrition - Ground beef, turkey, or sausage for a meatier dish - A dash of Italian seasoning for more flavor These choices let you make baked ziti just how you like it. The right cheese makes baked ziti shine. I suggest: - Whole milk mozzarella for the best melt - Fontina cheese for a creamy texture - Pecorino Romano for a salty bite Mix and match cheese to make your baked ziti truly special. Each cheese adds its own flavor and richness. {{ingredient_image_1}} Start by preheating your oven to 375°F (190°C). This step is key. It ensures your ziti bakes evenly. While the oven heats, gather your ingredients. You will need ziti pasta, marinara sauce, ricotta cheese, mozzarella cheese, Parmesan cheese, an egg, olive oil, garlic powder, oregano, and seasonings. Make sure everything is ready before cooking. Now, cook 12 oz of ziti pasta. Follow the package instructions closely. Aim for al dente texture, which means firm but not hard. This helps keep the pasta from becoming mushy in the oven. Once done, drain the pasta and set it aside. In a large bowl, mix together 1 cup of ricotta cheese, half of the mozzarella cheese, 1 large egg, and 1 tablespoon of olive oil. Add 1 teaspoon of garlic powder, 1 teaspoon of dried oregano, and salt and pepper to taste. Stir until everything blends well. The mixture will be creamy and cheesy. Now, gently fold in the cooked ziti. This step helps coat every piece with cheesy goodness. Grab a 9x13-inch baking dish. Start by spreading half of the marinara sauce at the bottom. This sauce keeps the ziti moist while baking. Next, pour the ziti and cheese mixture on top. Spread it evenly. Pour the rest of the marinara sauce over the ziti. Sprinkle the remaining mozzarella cheese and 1 cup of grated Parmesan cheese on top. For an extra kick, add crushed red pepper flakes if you like a bit of heat. Cover the dish with aluminum foil and place it in the oven. Bake for 25 minutes. After that, remove the foil and bake for another 15 minutes. This step allows the cheese to become bubbly and golden. Once it’s ready, let it cool for a few minutes before serving. Don’t forget to garnish with fresh basil leaves for a nice touch. To get that dreamy cheese melt, use a mix of mozzarella and Parmesan. Mozzarella gives you stretch, while Parmesan adds flavor. Make sure you layer the cheese well. Add half during mixing and the rest on top. This method helps it melt evenly. Bake covered for the first 25 minutes. Then, uncover it to let the cheese brown. To keep your baked ziti moist, use enough sauce. The marinara sauce needs to coat the pasta well. If it seems dry, add a splash of water to the baking dish. Covering the dish with foil for part of the bake also helps. It traps steam and keeps the dish juicy. Letting it rest after baking keeps the moisture in, too. Serve your baked ziti hot from the oven. Garnish with fresh basil for color and taste. A sprinkle of extra Parmesan can elevate the dish. Pair it with a simple salad or garlic bread for a full meal. For a fun twist, add a drizzle of olive oil or a splash of balsamic vinegar before serving. Enjoy your delicious creation! Pro Tips Cook Pasta Al Dente: Ensure you cook the ziti pasta just until al dente, as it will continue to cook while baking and absorb some of the sauce. Mix Cheeses for Flavor: For a richer flavor, consider mixing different types of cheeses, such as adding provolone or mozzarella di bufala to the mix. Layering Technique: Layer your dish carefully; ensure sauce is at the bottom and top to prevent the pasta from drying out during baking. Rest Before Serving: Allow the baked ziti to rest for about 10 minutes after baking. This helps it set up and makes for cleaner slices. {{image_2}} You can make baked ziti without meat. Use more veggies instead. Spinach, mushrooms, and zucchini work well. Just chop them up and add to your cheese mix. This adds flavor and nutrients. You can also use a mix of fresh herbs. Basil and parsley give a lovely taste. This option is great for family dinners or potlucks. Want to add some meat? Ground beef, turkey, or sausage are great choices. Cook the meat in a skillet first. Drain any fat before adding it to your cheese and ziti mix. This makes the dish heartier and adds protein. For a spicy kick, use Italian sausage. It pairs well with marinara sauce. If you need a gluten-free option, there are choices. Look for gluten-free ziti pasta made from rice or corn. They cook similarly to regular pasta. Follow the package instructions to get the right texture. You can also use spiralized vegetables, like zucchini or sweet potato, as a base. This makes the dish lighter but still tasty. To keep your baked ziti fresh, let it cool first. Place leftovers in an airtight container. You can store them in the fridge for up to four days. Make sure to cover the dish well if you keep it in the baking dish. This helps prevent drying out. Label your container with the date for easy reference. When you are ready to enjoy leftovers, preheat your oven to 350°F (175°C). Place the ziti in an oven-safe dish. Cover it with foil to keep moisture in. Bake for about 20 minutes or until hot. You can also reheat individual servings in the microwave. Just heat on medium power for 2-3 minutes, stirring halfway through for even warming. If you want to freeze baked ziti, it’s best to do this before baking. Assemble the dish but do not bake it. Cover it tightly with foil or plastic wrap, then freeze. It can last up to three months. When you're ready to enjoy it, thaw it in the fridge overnight. Bake it at 375°F (190°C) for about 45 minutes, covered, then remove the foil and bake until bubbly. The best way to reheat baked ziti is in the oven. Preheat the oven to 350°F (175°C). Place the ziti in a baking dish. Add a splash of marinara sauce to keep it moist. Cover with foil to avoid drying out. Heat for about 20 minutes or until warm. You can also use the microwave. Just heat in a safe dish for 2-3 minutes. Stir halfway to heat evenly. Yes, you can make baked ziti in advance. Prepare the dish as usual. Instead of baking it, cover it tightly with foil. Store it in the fridge for up to two days. When ready to bake, preheat the oven to 375°F (190°C). Bake for 25-30 minutes. If it’s frozen, let it thaw overnight before baking. To prevent watery baked ziti, use less marinara sauce. Drain the pasta well after cooking. You can also add the cheese mixture before mixing in the sauce. This helps absorb some moisture. If you notice excess liquid, you can bake it a bit longer. This helps to evaporate any extra water. This article covered how to make baked ziti, from selecting ingredients to baking it. We explored essential and optional ingredients, recommended cheese, and detailed step-by-step instructions. I shared tips for perfect cheese melt and ways to avoid dryness. Plus, we discussed variations like vegetarian and gluten-free options. In the end, you can create a delicious dish tailored to your tastes. Enjoy your baked ziti, and remember to store leftovers properly for future meals!

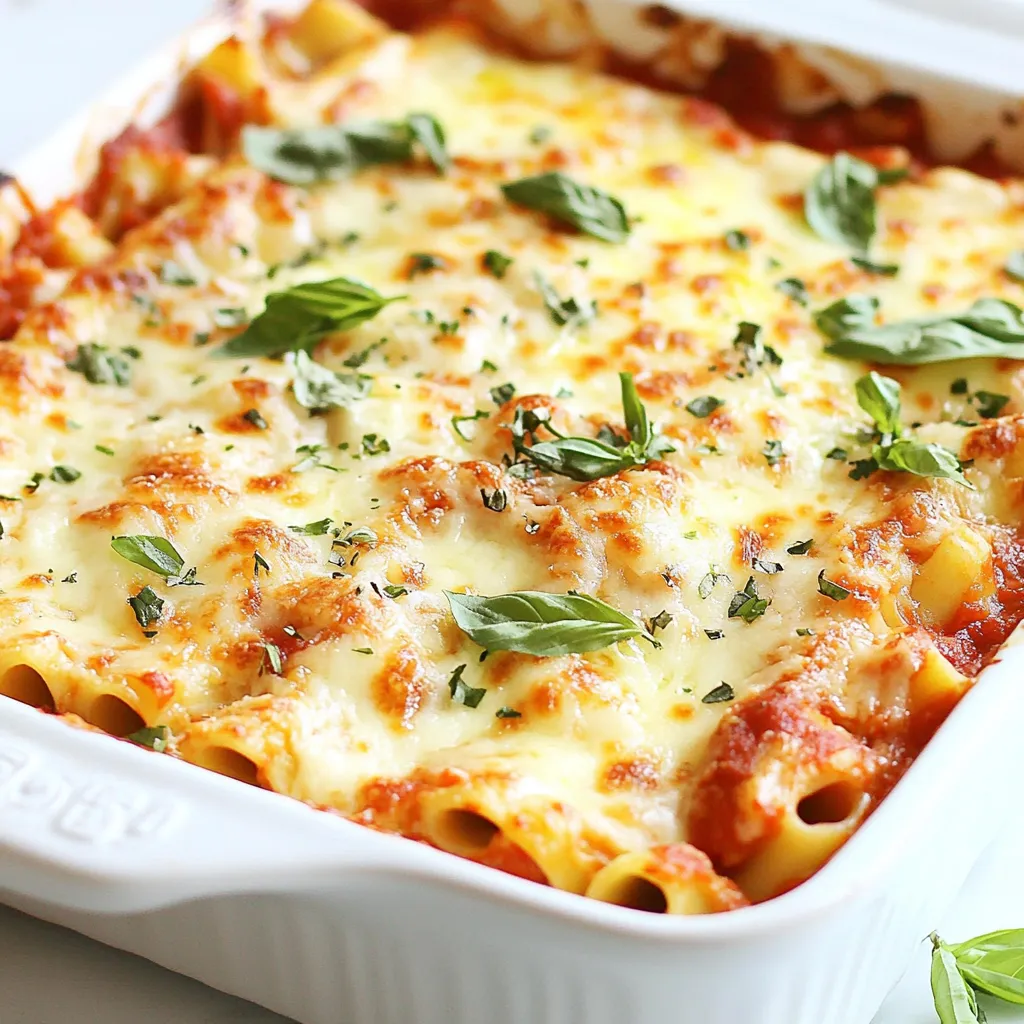
Baked Ziti Dinner Delight Simple and Satisfying Meal

When you crave a hearty meal that everyone loves, baked ziti is the answer. This dish is simple to make

- 4 salmon fillets - 1/2 cup Greek yogurt - 3 tablespoons sweet chili sauce - 1 tablespoon sriracha - 1 tablespoon lime juice - 1 teaspoon garlic powder - 1 teaspoon onion powder - Salt and pepper to taste - 2 green onions, chopped - Sesame seeds For this Air Fryer Bang Bang Salmon, you need some key ingredients. First, gather four salmon fillets. Salmon is rich in omega-3s and tastes great. Next, grab half a cup of Greek yogurt. This will make the sauce creamy and tangy. You'll also need three tablespoons of sweet chili sauce. This adds a nice sweetness. For heat, use one tablespoon of sriracha. You can adjust this based on how spicy you like it. Don't forget one tablespoon of lime juice for brightness in flavor. For seasoning, you need one teaspoon each of garlic powder and onion powder. These spices enhance the taste of the salmon. Add salt and pepper to suit your taste. To finish the dish, chop two green onions and have some sesame seeds ready for garnish. These add color and a nice crunch. With these ingredients, you're set to create a delicious meal! {{ingredient_image_1}} To make the bang bang sauce, start by mixing Greek yogurt and sweet chili sauce in a bowl. This base is creamy and sweet. Next, add sriracha for some heat. If you like it spicy, feel free to add more. Squeeze in lime juice for freshness. Then, sprinkle in garlic powder and onion powder. These add depth to the flavor. Finally, season with salt and pepper to taste. Set aside a couple tablespoons for drizzling later. Set your air fryer to 380°F (193°C). Preheating is key for even cooking. Let it preheat for about 5 minutes. This step helps the salmon cook just right. First, dry the salmon fillets with paper towels. Remove excess moisture for better browning. Next, generously coat each fillet with the bang bang sauce. Make sure every part is well-covered. This will help the salmon soak in all those tasty flavors. Now, let it marinate for about 10 minutes. This step makes the dish even more delicious. Place the coated salmon fillets in the air fryer basket. Make sure they are in a single layer and not overlapping. Cook them at 380°F (193°C) for 10-12 minutes. Check them for doneness at 145°F (63°C). The salmon should flake easily with a fork when it’s ready. Carefully remove the salmon from the air fryer. Drizzle it with the reserved bang bang sauce for extra flavor. Then, garnish with chopped green onions and sesame seeds. This adds a nice crunch and a pop of color to your dish. Enjoy your meal! Check the internal temperature of your salmon. Use a meat thermometer to ensure it reaches 145°F (63°C). This ensures the fish is safe to eat and perfectly cooked. Cooking time may vary based on the thickness of your fillets. For thicker pieces, add a few extra minutes. For thinner fillets, reduce the time slightly. You can adjust the spice level of the bang bang sauce. If you want less heat, add less sriracha. Start with a small amount and taste as you go. You can also swap Greek yogurt for other options. Try sour cream or a plant-based yogurt for a different flavor. Marinate the salmon in the bang bang sauce for at least 10 minutes. This helps the flavors soak into the fish. Make sure to coat each fillet well with the sauce. The more sauce on the fish, the better the taste. Use a brush or spoon to ensure a thick layer. Pro Tips Marinate for Maximum Flavor: Let the salmon marinate in the bang bang sauce for at least 10 minutes to enhance the flavors. For an even bolder taste, consider marinating for up to 30 minutes in the refrigerator. Check for Freshness: Always opt for fresh salmon fillets when possible. Look for vibrant color and a clean, ocean-like smell. Fresh fish will yield the best taste and texture. Adjust the Spice Level: If you prefer a milder dish, reduce the amount of sriracha in the sauce. Conversely, for more heat, feel free to add extra sriracha or a pinch of red pepper flakes. Perfect Air Fryer Cooking: To ensure even cooking, arrange the salmon fillets in a single layer in the air fryer basket without overlapping. This allows for optimal air circulation and perfect crispness. {{image_2}} You can switch out the salmon for shrimp or chicken. These proteins work well with the bang bang sauce. If you use shrimp, the cooking time is shorter. Cook for about 8-10 minutes at 380°F (193°C). For chicken, ensure it's fully cooked to 165°F (74°C). Chicken breast may take around 12-15 minutes, depending on thickness. Always check the doneness of the protein you choose. Feel free to experiment with different sauces. A spicy aioli or a mango salsa can add a fun twist. You can also try a tangy peanut sauce for a different flavor. If you're looking for dairy-free options, use coconut yogurt instead of Greek yogurt. This keeps the dish creamy while meeting dietary needs. Adjust the heat level by adding more or less sriracha to suit your taste. When it comes to serving, consider pairing this dish with rice or a fresh salad. Jasmine rice adds a nice touch, while a crisp cucumber salad cools the palate. For plating, try stacking the salmon on a bed of greens. Drizzle your reserved bang bang sauce on top for a beautiful finish. Adding sesame seeds and chopped green onions gives a nice crunch and color. To store cooked salmon, let it cool to room temperature. Place it in an airtight container. This keeps it fresh and safe. You can store it in the fridge for up to three days. The best ways to reheat salmon are in the oven or the air fryer. Set your oven to 350°F (175°C) and heat it for about 10 minutes. If using the air fryer, set it to 350°F (175°C) for 5-7 minutes. These methods help keep the salmon moist. Avoid using the microwave; it can dry out the fish. To freeze cooked salmon, wrap each fillet tightly in plastic wrap. Then, place it in a freezer bag. Remove as much air as possible. You can freeze it for up to three months. When ready to eat, thaw it in the fridge overnight for the best results. Bang Bang sauce is a creamy, spicy sauce. It has a sweet and tangy flavor. The main ingredients are Greek yogurt and sweet chili sauce. I also add sriracha for heat, lime juice for zing, and garlic and onion powder for depth. This sauce is perfect for drizzling over salmon or tossing with veggies. Yes, you can use frozen salmon fillets. Cook them straight from the freezer. Just add a few extra minutes to the cooking time. Check for doneness when the fish flakes easily. This method is great if you forget to thaw your fish. To make the dish spicier, add more sriracha. You can also use red pepper flakes. Another option is to add a dash of cayenne pepper to the sauce. Taste as you go to find your perfect heat level. This recipe is quite healthy. Salmon is rich in omega-3 fatty acids, which are good for your heart. Greek yogurt adds protein and probiotics for gut health. Using fresh ingredients helps keep it light and nutritious. Just watch the amount of sweet chili sauce for added sugar. Yes, you can make this dish without an air fryer. Bake the salmon in the oven at 400°F (204°C) for about 15-20 minutes. You can also grill the salmon on medium heat. Just keep an eye on it to avoid overcooking. Adjust the cooking time based on the thickness of the fillets. This recipe shows you how to make tasty air-fried salmon with bang bang sauce. Using fresh ingredients like Greek yogurt, sweet chili sauce, and lime juice makes it delicious. You can switch proteins or sauces to suit your taste. Remember to check the salmon's doneness and store leftovers correctly. Enjoy crafting this easy dish for a quick meal! It's healthy and satisfies your craving for flavor.

Air Fryer Bang Bang Salmon Flavorful and Simple Dish

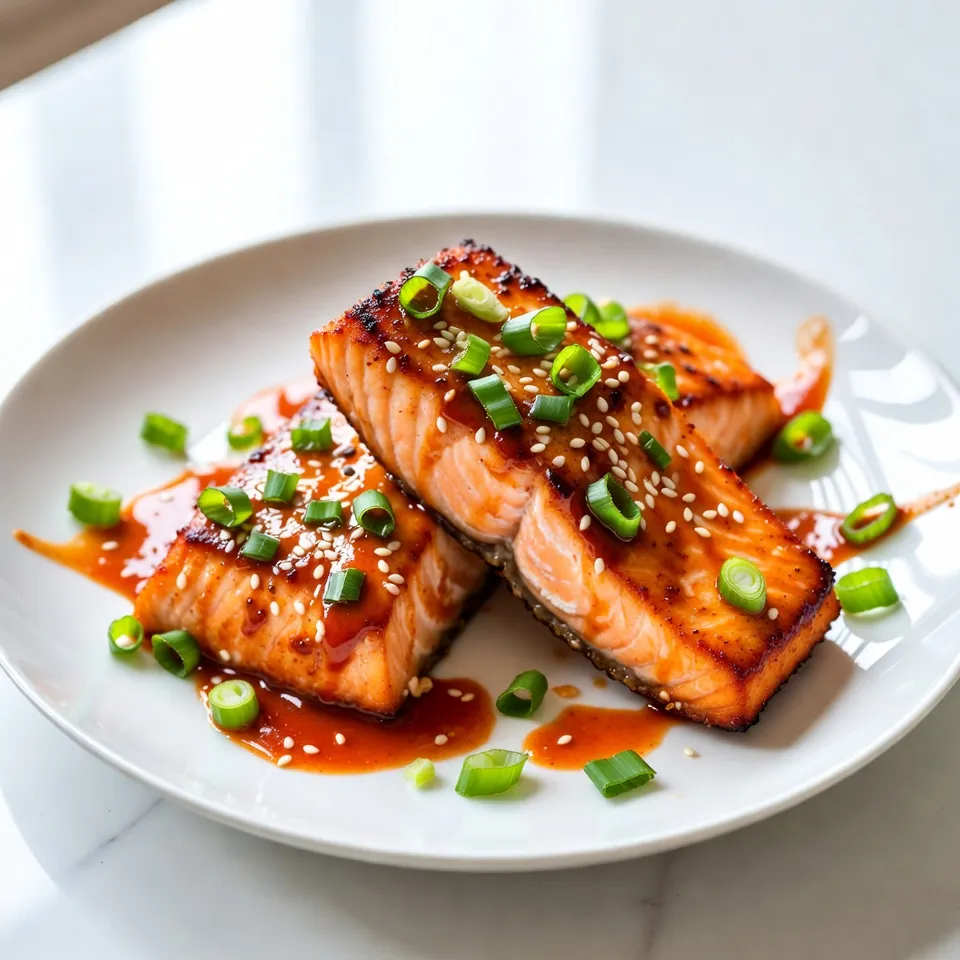
Welcome to a tasty adventure with Air Fryer Bang Bang Salmon! If you love quick and flavorful meals, this dish

To make Cajun Chicken Alfredo, you need the following ingredients: - 2 boneless, skinless chicken breasts - 2 tablespoons Cajun seasoning - 12 ounces fettuccine pasta - 2 tablespoons olive oil - 4 cloves garlic, minced - 1 cup heavy cream - 1 cup grated Parmesan cheese - 1 teaspoon black pepper - Salt to taste - Fresh parsley, chopped (for garnish) These ingredients blend to create a rich and flavorful meal. Each ingredient in this dish adds unique benefits: - Chicken: A great source of lean protein, it helps build muscles and keeps you full. - Cajun seasoning: It often contains herbs and spices that may boost your metabolism. - Fettuccine: While it’s a carb, whole grain options can provide fiber and energy. - Olive oil: This heart-healthy fat is rich in antioxidants and good for your heart. - Garlic: Known for its immune-boosting properties, garlic adds flavor and health benefits. - Heavy cream: While rich, it provides calcium, which is essential for bone health. - Parmesan cheese: This adds protein and calcium, plus a delicious savory flavor. If you lack an ingredient, here are some easy swaps: - Chicken: Use shrimp or tofu for a different protein. - Cajun seasoning: Mix paprika, cayenne, and garlic powder for a homemade version. - Fettuccine: Any pasta, like penne or spaghetti, works fine if you don’t have fettuccine. - Heavy cream: Substitute with half-and-half or a non-dairy cream for a lighter option. - Parmesan cheese: Nutritional yeast can offer a cheesy flavor for a vegan option. These substitutes keep the dish flavorful while meeting your needs. {{ingredient_image_1}} Start with two boneless, skinless chicken breasts. Rub Cajun seasoning all over the chicken. Make sure every part is coated well. Let the chicken sit for 20 minutes. This helps the spice mix soak in. Next, boil a large pot of salted water. Add 12 ounces of fettuccine pasta. Cook according to the package until it is al dente. This usually takes about 10 to 12 minutes. Save ½ cup of the pasta water before draining it. This water will help the sauce later. In a large skillet, heat two tablespoons of olive oil over medium-high heat. Add the seasoned chicken breasts and cook for 6 to 7 minutes on each side. You want them golden brown and fully cooked. Once done, take the chicken out and let it rest. In the same skillet, lower the heat. Add four minced garlic cloves and sauté for about one minute until fragrant. Pour in one cup of heavy cream and mix well. Gradually stir in one cup of grated Parmesan cheese. If the sauce seems thick, add a bit of the reserved pasta water until smooth. Slice the rested chicken into strips. Add the chicken back to the skillet with the pasta. Toss everything together so the fettuccine gets coated in the creamy sauce. Season with one teaspoon of black pepper and salt to taste. Serve hot, garnished with fresh chopped parsley for a nice touch. To get the best flavor in Cajun Chicken Alfredo, marinate the chicken well. Use Cajun seasoning generously. Let it sit for at least 20 minutes. This step helps the spices soak into the meat. When you cook the chicken, sear it until it’s golden brown. This creates a nice crust. It adds depth to the dish. When cooking chicken breasts, use medium-high heat. This helps to cook the chicken quickly and keeps it juicy. Flip the chicken only once during cooking. This prevents it from drying out. Always check the internal temperature. It should reach 165°F to ensure it’s safe to eat. Let the chicken rest after cooking. This helps the juices settle back in. One common mistake is overcooking the pasta. Always cook it al dente. This keeps the pasta firm and prevents mushiness. Another mistake is not using enough salt in the pasta water. Salt enhances flavor, so don’t skip it. Lastly, avoid thickening the sauce too much. If it gets too thick, add some reserved pasta water to loosen it up. Pro Tips Marinate for Maximum Flavor: Allow the chicken to marinate for at least 20 minutes, or even overnight, to enhance the Cajun seasoning's depth and flavor. Perfect Pasta Cooking: Ensure the pasta is cooked al dente for the best texture. This means it should be firm when bitten, providing a better contrast to the creamy sauce. Save Pasta Water: Always reserve some pasta water before draining. This starchy water can be used to adjust the sauce's consistency if it becomes too thick. Fresh Herbs for Garnish: Use freshly chopped parsley as a garnish not only for a pop of color but also to add a fresh flavor that balances the richness of the Alfredo sauce. {{image_2}} You can boost the flavor and nutrition by adding vegetables. Bell peppers, spinach, or broccoli work great. Slice the bell peppers and add them to the skillet with the garlic. Cook until they are soft. For spinach, add it right before mixing the pasta. It wilts quickly and adds color. Broccoli can be steamed and tossed in at the end. This adds crunch and fiber. If you want a different protein, shrimp or tofu are fantastic choices. For shrimp, simply sauté them in olive oil until they turn pink. This takes about three to four minutes. Tofu is a great option for a plant-based meal. Use firm tofu and cube it. Sauté it until golden brown. Both options pair well with the creamy sauce. Adjusting the spice level is easy. If you want more heat, add cayenne pepper or extra Cajun seasoning. For a richer sauce, use more heavy cream and Parmesan cheese. If you prefer a lighter dish, substitute half of the cream with low-fat milk or chicken broth. This keeps the flavor but reduces calories. Each version gives you a unique taste. Enjoy experimenting! To keep your Cajun Chicken Alfredo fresh, let it cool first. Place the leftovers in an airtight container. Refrigerate them. They will last for up to three days. Avoid leaving them out at room temperature for too long. When you are ready to enjoy your leftovers, reheat them gently. Use the microwave or a skillet over low heat. If the sauce seems thick, add a splash of cream or pasta water. Stir often to heat evenly. You can freeze Cajun Chicken Alfredo for later. Allow it to cool completely before freezing. Use a freezer-safe container and label it with the date. It will stay fresh for up to three months. To reheat, thaw in the fridge overnight, then warm it up on the stove. You can pair Cajun Chicken Alfredo with a simple green salad. A fresh Caesar salad adds crispness. Garlic bread makes a great side too. You might also enjoy steamed veggies. They balance the meal and add color. Yes, you can make Cajun Chicken Alfredo ahead of time. Cook the chicken and pasta, then store them separately. Keep the sauce in a container. When ready to eat, heat everything together. Just be careful not to overcook the pasta. Cajun Chicken Alfredo can be spicy. The level of spice depends on the Cajun seasoning you use. If you prefer it less spicy, use a milder blend. You can also add less seasoning to suit your taste. To adjust the creaminess, add more heavy cream. If it's too thick, add some reserved pasta water. Stir well to mix. For a lighter sauce, try using half-and-half instead of heavy cream. This keeps it creamy but lighter. Cajun Chicken Alfredo is a tasty dish that blends creamy sauce, tender chicken, and pasta. I shared essential ingredients and their health perks, plus great substitutes. You now have step-by-step cooking tips for the best results. Remember to avoid common mistakes for top flavor. For variations, explore adding veggies or using shrimp or tofu. Lastly, I covered storage tips for leftovers and reheating. Enjoy cooking your new favorite meal and make it your own!

Cajun Chicken Alfredo Creamy and Flavorful Dish

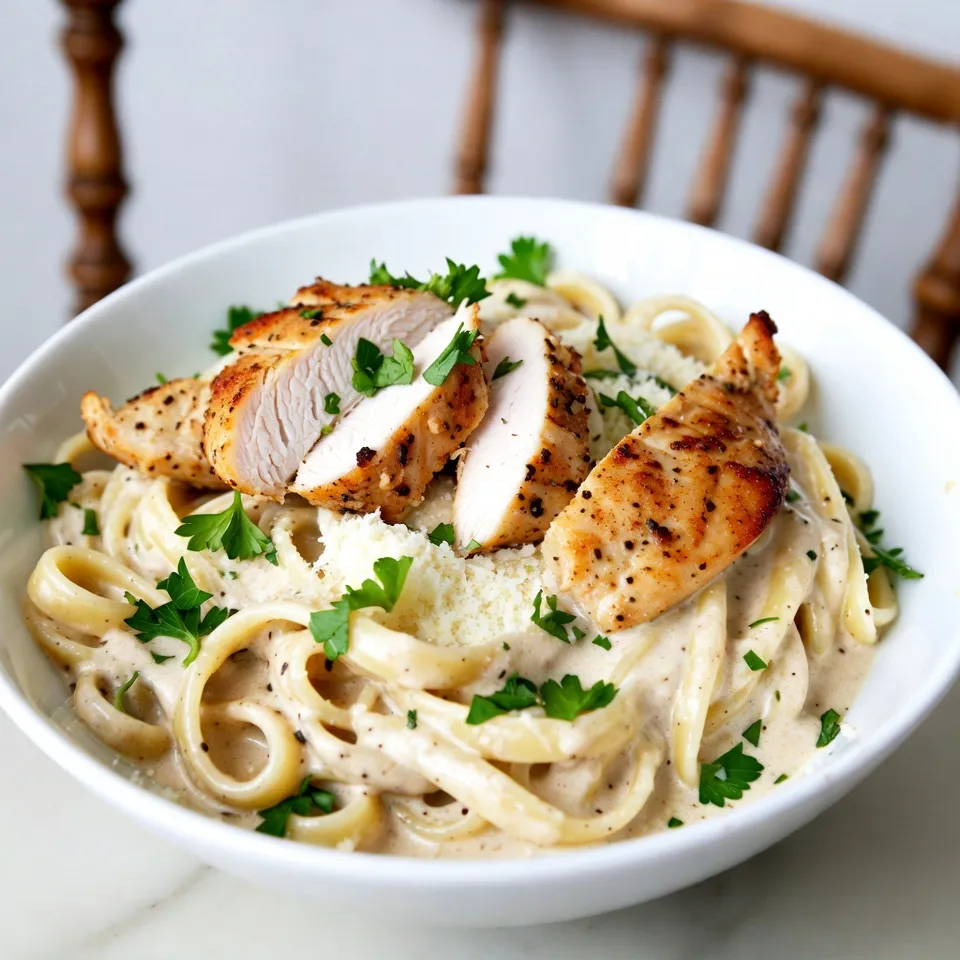
Craving a dish that bursts with flavor? Let’s dive into Cajun Chicken Alfredo! This creamy, spicy meal blends tender chicken

To make red velvet cake mix cookies, you'll need a few key ingredients: - 1 box red velvet cake mix - 1/2 cup vegetable oil - 2 large eggs - 1/2 teaspoon vanilla extract - 1/2 cup white chocolate chips These ingredients create a soft and chewy cookie. The cake mix gives it a rich color and flavor. The vegetable oil adds moisture, while eggs help bind everything together. The vanilla extract brings out the sweetness. You can boost the flavor and texture with some optional add-ins: - 1/2 cup chopped pecans Adding pecans gives the cookies a nice crunch. You can mix in other things too, like chocolate chips or nuts, to create your favorite version. Just remember to keep the amounts balanced. Before you start, gather some essential tools: - Mixing bowl - Baking sheets - Parchment paper - Spoon or cookie scoop - Wire rack Having the right equipment makes the process easier. The mixing bowl helps combine your ingredients well. The parchment paper keeps your cookies from sticking. A wire rack helps cool them down evenly, so they stay soft. {{ingredient_image_1}} First, gather all your ingredients. You need one box of red velvet cake mix, half a cup of vegetable oil, two large eggs, and half a teaspoon of vanilla extract. If you want, add white chocolate chips and chopped pecans. In a large mixing bowl, combine the cake mix, oil, eggs, and vanilla. Mix them until you have a soft dough. This dough is fun to make! If you added the chocolate chips and nuts, gently fold them in now. Be sure they spread evenly in the dough. Preheat your oven to 350°F (175°C). While the oven heats, line two baking sheets with parchment paper. This makes clean-up easy later. Scoop tablespoon-sized balls of dough and place them on the sheets. Leave about two inches between each ball. Now it’s time to bake! Place the sheets in the oven and bake for 10 to 12 minutes. Watch for the edges to set and the tops to crack slightly. This means they are almost ready. After baking, remove the cookies from the oven. Let them cool on the baking sheets for about five minutes. This step helps them firm up. Then, move them to a wire rack to cool completely. For a lovely finish, sift powdered sugar over the top of the cookies once they are cool. This adds sweetness and makes them look extra special. Enjoy your red velvet cake mix cookies! To get soft and chewy cookies, follow a few simple steps. First, make sure not to overmix the dough. Mix just until combined. Overmixing can make the cookies tough. Second, use room temperature eggs. This helps the dough blend better and keeps the cookies light. Lastly, bake the cookies only until the edges are set. They may look underbaked, but they will firm up as they cool. Common mistakes can ruin your red velvet cake mix cookies. One big mistake is not measuring the cake mix correctly. Use a spoon to fluff it up, then scoop it into the measuring cup. This helps avoid packed cake mix. Another mistake is skipping the parchment paper. It keeps cookies from sticking and helps them bake evenly. Lastly, don't skip the chilling step if you choose to chill the dough. It helps the flavors meld and improves the texture. To ensure even baking, space the cookie dough balls well on the baking sheets. Leave about 2 inches between each ball. This allows hot air to circulate. Also, rotate the baking sheets halfway through baking. This helps the cookies bake evenly. If you have multiple sheets in the oven, switch their positions too. This way, all cookies come out perfect every time. Pro Tips Chill the Dough: For thicker cookies, refrigerate the dough for 30 minutes before baking. This helps the cookies retain their shape and prevents spreading. Use Quality Chocolate Chips: Opt for high-quality white chocolate chips for a richer flavor that complements the red velvet perfectly. Don’t Overbake: Keep an eye on the cookies; they should be soft in the center when you take them out. They will continue to cook slightly on the baking sheet. Experiment with Add-ins: Feel free to customize your cookies by adding other mix-ins like crushed Oreos or mini marshmallows for a fun twist! {{image_2}} You can make gluten-free red velvet cookies easily. Start with a gluten-free cake mix. Many brands offer this option today. Follow the same steps as the original recipe. Just swap the regular cake mix for the gluten-free type. The taste and texture will still be soft and chewy. You might need to adjust baking time slightly. Always keep an eye on your cookies as they bake. If you want a vegan version, it's simple. Replace the eggs with flaxseed meal. Mix one tablespoon of flaxseed meal with three tablespoons of water. Let this sit for a few minutes until it thickens. Use this mix in place of eggs. For the oil, you can use coconut oil or applesauce instead of vegetable oil. These swaps keep the cookies moist and tasty. You can add fun flavors to your red velvet cookies. Try mixing in chocolate chips or white chocolate chips for extra sweetness. Add nuts like pecans or walnuts for a nice crunch. Want a twist? Add a splash of almond extract or mint for a new flavor. You can even mix in some dried fruit like cherries or cranberries. These small changes can make a big difference in taste. To keep your red velvet cake mix cookies fresh, store them in a tight container. I prefer using a plastic or glass container with a lid. Place a piece of bread inside the container. The bread keeps the cookies soft and chewy. Avoid stacking the cookies too high. This prevents them from getting crushed. You can freeze these cookies for later enjoyment. Let the cookies cool completely first. Then, place them in a single layer on a baking sheet. Freeze them for about an hour. Once frozen, transfer the cookies to a freezer bag. Squeeze out the air before sealing. These cookies can last up to three months in the freezer. These cookies stay fresh for about a week at room temperature. If you want them to last longer, freeze them. Always check for any signs of spoilage before eating. If they smell strange or look off, it’s best to throw them out. You can tell your cookies are done when the edges are set. The tops should have small cracks. They should look slightly firm but still soft in the center. Bake them for 10-12 minutes. If they look too wet, give them a minute more. Remember, they will continue to cook after you take them out. Yes, you can use other cake mixes! Try chocolate, lemon, or even vanilla. Each mix will give your cookies a unique taste. Just follow the same steps in the recipe. The texture may change, so keep an eye on baking time. You can use melted butter instead of vegetable oil. It will add a rich flavor. You can also use coconut oil for a different taste. Applesauce is another option, but it will make the cookies softer. Just remember to keep the amount the same as the oil in the recipe. Red velvet cake mix cookies are easy and fun to make. We covered key ingredients, equipment, and how to prepare and bake the dough. Tips and tricks will help you avoid mistakes and ensure your cookies turn out great. You can also try gluten-free or vegan versions for different tastes. Finally, proper storage keeps your cookies fresh longer. Enjoy baking and sharing these delicious treats!

Red Velvet Cake Mix Cookies Soft and Chewy Treat

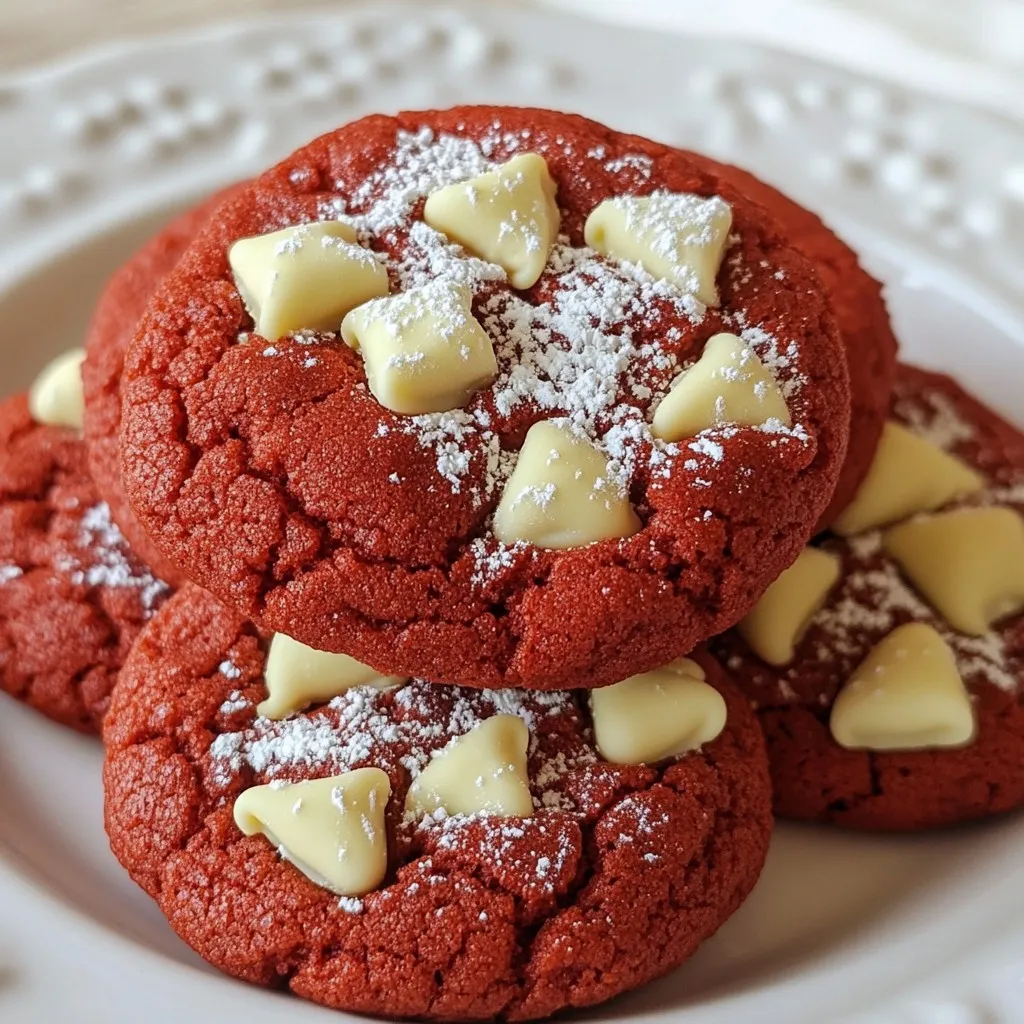
Craving a soft and chewy treat that’s both fun and easy to make? Look no further than red velvet cake

To make Classic Christmas Fudge, you need these simple ingredients: - 2 cups granulated sugar - 1/2 cup unsweetened cocoa powder - 1 cup whole milk - 1/4 cup unsalted butter - 1 teaspoon vanilla extract - 1 cup semi-sweet chocolate chips - 1/2 cup chopped pecans or walnuts (optional) - A pinch of salt The classic flavor of fudge comes from a few key ingredients: - Sugar gives the fudge its sweet base. - Cocoa powder adds a rich chocolate taste. - Whole milk creates a creamy texture. - Butter enhances the smoothness and adds richness. - Chocolate chips deepen the chocolate flavor. - Vanilla extract rounds out the taste with warmth. These components work together to create a smooth, rich, and decadent fudge that melts in your mouth. You can tweak the fudge to fit your taste by adding extras: - Chopped nuts like pecans or walnuts add crunch. - Marshmallows can give a chewy texture. - Dried fruit like cranberries or cherries can add a fruity note. - Different chocolate types, such as dark or white chocolate, can change the flavor. Feel free to experiment with these add-ins to make your fudge unique! {{ingredient_image_1}} First, gather your ingredients. You will need: - 2 cups granulated sugar - 1/2 cup unsweetened cocoa powder - 1 cup whole milk - 1/4 cup unsalted butter - 1 teaspoon vanilla extract - 1 cup semi-sweet chocolate chips - 1/2 cup chopped pecans or walnuts (optional) - A pinch of salt Make sure you have a medium saucepan ready. A greased 8x8-inch baking dish will help us later. Next, mix the sugar, cocoa, and salt in your saucepan. Stir them well to combine. Now, slowly whisk in the whole milk. Mix until it looks smooth. Turn on the heat to medium. Stir the mix constantly. This helps prevent burning. Wait until the mixture starts to boil gently. Let it boil without stirring for about 4 to 5 minutes. It should reach the soft-ball stage. This is around 234°F or 112°C. After boiling, remove the pan from heat. Add the butter, vanilla extract, and chocolate chips. Stir until melted and smooth. If you want extra crunch, fold in the chopped nuts now. Pour the fudge mixture into your greased baking dish. Spread it evenly. Let it cool at room temperature. This takes about 2 hours. You want it to set firm. Once set, cut the fudge into squares. Serve them on a nice platter. Enjoy this sweet treat during the holiday season! To get that smooth, creamy fudge, you need to watch the heat. When you boil the mixture, do not stir. This lets the sugar reach the right stage. Use a candy thermometer to check the soft-ball stage at 234°F or 112°C. If you miss this point, your fudge can turn out too hard or too soft. One big mistake is not mixing the sugar and cocoa well. If you skip this, you might get lumps in your fudge. Always mix the dry ingredients first. Another error is not cooling the fudge enough before cutting. If you cut too soon, it can crumble. Patience is key here! Want more flavor? Try adding a pinch of cinnamon or espresso powder. These will give your fudge a warm twist. For a festive look, sprinkle powdered sugar on top or add edible glitter. You can also use colorful wrappers. This makes great gifts, adding a personal touch to your holiday treats. Pro Tips Use a Candy Thermometer: Ensuring the fudge reaches the soft-ball stage temperature is crucial for the perfect texture. A candy thermometer will help you achieve this with accuracy. Let it Cool Completely: Allow the fudge to cool at room temperature before cutting. This will help it set properly and make it easier to cut into neat squares. Mix in Flavor Variations: Experiment with different extracts, like almond or peppermint, in addition to vanilla for a unique twist on the classic fudge flavor. Storing Fudge: Store the fudge in an airtight container at room temperature for up to two weeks, or refrigerate for longer freshness. {{image_2}} You can mix things up with your fudge flavors. Try adding peppermint extract for a minty twist. Just one teaspoon will do! You can also mix in crushed candy canes for a fun crunch. Another great idea is to use caramel swirls. This adds a sweet, buttery flavor. For a nutty touch, try using almond extract with almond slivers. Making fudge gluten-free is easy! Just ensure all your ingredients are gluten-free. You can use coconut milk instead of whole milk for a dairy-free option. Replace the butter with coconut oil. This keeps the fudge creamy and rich. You can also use dairy-free chocolate chips to maintain that delicious chocolate flavor without dairy. Get creative with your fudge by adding unique ingredients. Try mixing in dried fruits like cranberries or cherries for a fruity flavor. You can also add a swirl of peanut butter for a rich taste. For a festive look, use colored sprinkles on top. Another fun idea is to make layered fudge. You can create layers of different flavors for a beautiful presentation. To keep your classic Christmas fudge fresh, store it in an airtight container. Use a container that seals well. You can layer the fudge squares with parchment paper. This keeps them from sticking together. If you have leftovers, avoid exposing them to air. This helps prevent drying out. When stored properly, the fudge lasts about two weeks at room temperature. If you want to save it longer, consider freezing it. Wrap each square in plastic wrap and then in aluminum foil. Place them in a freezer-safe bag. Frozen fudge can last up to three months. When you want to enjoy it, let it thaw in the fridge overnight. To keep your fudge tasting great, always check for signs of spoilage. Look for changes in texture or smell. If you see any crystals forming, that’s a sign it might not be fresh. Store it in a cool, dark place, away from heat sources. This helps maintain its rich flavor and creamy texture. Enjoy your holiday treat! You can tell fudge is ready when it reaches the soft-ball stage. This happens at about 234°F or 112°C. If you do not have a thermometer, you can test it using a spoon. Drop a small amount of fudge into cold water. After a few seconds, take it out. If it forms a soft ball, it’s ready. Another sign is that the fudge will look shiny and smooth. Yes, you can use different types of chocolate in your fudge. Dark chocolate gives a rich taste. Milk chocolate makes it sweeter and creamier. You can also mix chocolates for a unique flavor. Just make sure to keep the same total amount of chocolate. This way, the fudge sets well and tastes great. To cut fudge neatly, first, let it cool completely. Use a sharp knife for clean cuts. You can warm the knife slightly under hot water for smoother slicing. Wipe the knife with a cloth between cuts. This keeps the edges clean and helps avoid mess. For even squares, score the top before cutting all the way through. In this article, we explored fudge from ingredients to storage. We listed all key components for classic fudge and offered optional add-ins for your own twist. I shared easy steps to prepare and cook, plus cooling tips for the best texture. We also covered common mistakes to avoid and variations for every taste, including gluten-free options. Finally, I provided storage tips to keep your fudge fresh. Make your fudge journey enjoyable and delicious!

Classic Christmas Fudge Easy Treat for the Holidays

Christmas is just around the corner, and there’s no better treat than classic Christmas fudge. This easy recipe brings sweet

- 1 cup pure pumpkin puree Pumpkin is rich in vitamins A and C. It helps boost your immune system. Its fiber content supports digestion and keeps you full. - 1 cup chilled coconut cream Coconut cream adds creaminess and healthy fats. It can help improve heart health and offers a dairy-free option. - 1/4 cup maple syrup or honey Both sweeteners provide natural sugars. They add flavor and some nutrients, like antioxidants. - 1 teaspoon vanilla extract Vanilla enhances the flavor. It also has calming effects that can help reduce stress. - 1 teaspoon pumpkin spice This spice mix adds warmth and depth. It brings out the pumpkin flavor beautifully. - 1 tablespoon chia seeds Chia seeds add texture and nutrients. They offer fiber, omega-3s, and protein. - Whipped coconut cream for topping This topping adds extra creaminess. It makes your dessert more indulgent and delicious. - Crushed graham crackers or nuts for garnish These add crunch and texture. They make the mousse more fun to eat. {{ingredient_image_1}} In a bowl, combine the following ingredients: - 1 cup pure pumpkin puree - 1/4 cup maple syrup (or honey) - 1 teaspoon vanilla extract - 1 teaspoon pumpkin spice - 1/4 teaspoon sea salt Mix these well. Blend until smooth and creamy. You want a nice texture for the mousse. Chill 1 cup of coconut cream before using it. This step helps it whip better. Use a hand mixer or a whisk. Whip it until soft peaks form. This should take a few minutes. The cream should be light and fluffy. Gently fold the whipped coconut cream into the pumpkin mixture. Do this carefully to keep the cream airy. If you want, stir in 1 tablespoon of chia seeds for texture. Spoon the mousse into individual serving glasses or a big bowl. Refrigerate for at least 1 hour. This helps the flavors blend and the mousse to firm up. Enjoy it topped with whipped coconut cream and a sprinkle of crushed graham crackers or nuts! To get the right texture for your mousse, you need to blend well. Start with smooth pumpkin puree. Mix it with maple syrup, vanilla, pumpkin spice, and sea salt. Use a whisk or mixer for a creamy base. Next, whip the chilled coconut cream in a separate bowl. Whip until soft peaks form. This step is key for a light and fluffy mousse. Gently fold the whipped cream into the pumpkin mix. Be careful not to deflate the cream. If you want a bit more texture, add chia seeds. To adjust sweetness, taste the mousse as you go. If it needs more sweetness, slowly add maple syrup. Mix it in and taste again until it’s just right. Serving your mousse in elegant glassware adds a special touch. The bright orange color looks stunning in clear cups. You can also use a large bowl for a family-style serving. For garnish, add whipped coconut cream on top. Then sprinkle crushed graham crackers or nuts for crunch. A cinnamon stick makes a fun stirrer and adds a warm aroma. These small details make your dessert look extra inviting. Pro Tips Chill Your Coconut Cream: For the best texture, make sure your coconut cream is chilled before whipping. This will help it achieve soft peaks and a fluffy consistency. Adjust Sweetness to Taste: Everyone’s palate is different, so feel free to taste your pumpkin mixture and adjust the sweetness by adding more maple syrup or honey as needed. Experiment with Flavors: If you love spices, consider adding a pinch of nutmeg or ginger to the pumpkin mixture for an extra flavor kick. Garnish Creatively: Besides crushed graham crackers or nuts, try topping the mousse with toasted coconut flakes or a sprinkle of cinnamon for a delightful finishing touch. {{image_2}} You can swap maple syrup or honey for stevia or agave syrup. These options have fewer calories. Stevia is a plant-based sweetener. Agave syrup has a lower glycemic index. Both can add sweetness without extra sugars. Just use them in smaller amounts. Taste as you go to get it right. Want to change the taste? Try adding dark chocolate or nutmeg. Dark chocolate gives a rich twist. You can mix in cocoa powder or chocolate chips. Nutmeg adds warmth and spice. Just a pinch can elevate the flavor. Experiment to find your favorite mix! If you want a non-dairy topping, try almond cream or cashew cream. Both provide a rich, creamy texture. You can whip them like coconut cream. This makes a great topping too. For extra crunch, try using crushed nuts or seeds on top. Enjoy your creamy pumpkin mousse in a new way! To store your pumpkin mousse, use airtight containers. Glass containers work best because they help keep the flavor fresh. Make sure the mousse is cool before you seal it. You can also cover the mousse with plastic wrap if you do not have a lid. Keep it in the fridge to maintain its creamy texture. The mousse lasts about 3 to 5 days in the refrigerator. Keep an eye on it, though. If you see any changes in color or smell, it is best to toss it. Always check for freshness before serving leftovers. If you want to freeze the mousse, first store it in a freezer-safe container. Leave some space at the top for expansion. To keep it creamy, defrost it in the fridge, not at room temperature. This helps maintain its texture. Stir it well after thawing to bring back its fluffiness. Enjoy your healthy treat later! For a creamy texture, you can use a few great options. Full-fat Greek yogurt works well if you want a tangy taste. Silken tofu is another good choice for a vegan option. You can also try cashew cream, which is smooth and rich. All these substitutes give a nice texture to your mousse. Yes, you can make this mousse vegan! Just use maple syrup instead of honey. For the coconut cream, you can stick with it or try silken tofu. Both options will keep your mousse plant-based and yummy. To check if your pumpkin puree is fresh, look for a bright orange color. Fresh puree should smell sweet and earthy. If you use canned puree, check the expiration date. Homemade puree should have a smooth texture without lumps. This blog post covers how to make a healthy pumpkin mousse. You learned about key ingredients like pumpkin puree and coconut cream. I shared tips on mixing and refrigerating for the best texture. Plus, I included ideas for presentation and variations to enhance flavor. In conclusion, this mousse is simple, tasty, and good for you. Enjoy making it your own with different flavors and toppings!

Healthy Pumpkin Mousse Delightful and Simple Recipe

Looking for a sweet treat that won’t derail your healthy eating goals? Try my Healthy Pumpkin Mousse! This delightful recipe

To make Cajun Dirty Rice with Shrimp and Sausage, gather these ingredients: - 1 cup long-grain rice - 2 cups chicken broth - 1/2 pound andouille sausage, sliced - 1/2 pound shrimp, peeled and deveined - 1 bell pepper, diced (red or green) - 1 small onion, diced - 2 cloves garlic, minced - 2 stalks celery, diced - 2 tablespoons Cajun seasoning - 1 tablespoon olive oil - Salt and black pepper to taste - 2 green onions, sliced (for garnish) - 1 tablespoon fresh parsley, chopped (for garnish) If you can't find andouille sausage, you can use kielbasa or chorizo. For shrimp, you can swap it with chicken if you prefer. You can also use vegetable broth instead of chicken broth for a vegetarian option. Don’t worry if you don’t have a bell pepper; any color will do, or you can skip it altogether. When picking your shrimp, look for ones that smell fresh and have a firm texture. The shells should be clean and shiny. For the sausage, choose one that feels firm and has a bright color. Fresh vegetables should be crisp. Check for any soft spots or discoloration. When buying rice, long-grain is key for the best texture. Always check the expiration date to make sure it’s fresh. {{ingredient_image_1}} Start by rinsing the long-grain rice under cold water. Rinse until the water runs clear. This step removes extra starch and helps keep the rice fluffy. Next, bring 2 cups of chicken broth to a boil in a medium saucepan. Add in the rinsed rice. Lower the heat to low, cover, and let it simmer for 18-20 minutes. The rice should be tender and absorb the broth completely. While the rice cooks, heat 1 tablespoon of olive oil in a large skillet over medium heat. Add 1/2 pound of sliced andouille sausage. Sauté for about 5 minutes until it gets a nice brown color. Next, toss in 1 diced onion, 1 diced bell pepper, and 2 diced celery stalks. Cook these for another 5 minutes until they soften. Stir in 2 minced garlic cloves and 2 tablespoons of Cajun seasoning. Cook for 1 minute to let the flavors mix well. Now, add 1/2 pound of peeled and deveined shrimp to the skillet. Cook them for about 3-4 minutes until they turn pink and opaque. Once your rice is ready, fluff it with a fork. Then, add the rice to the skillet with the sausage and shrimp. Stir everything to mix well and heat it through. Season with salt and black pepper to taste. Serve hot, garnished with sliced green onions and chopped parsley. Enjoy your delicious Cajun dirty rice! To make your dirty rice truly Cajun, use bold spices. Cajun seasoning is key. It usually has paprika, garlic powder, and cayenne. You can find it at most stores. Feel free to add more or less based on your taste. If you like heat, sprinkle in some extra cayenne. Fresh herbs can also boost flavor. Try adding thyme or bay leaves while cooking. For perfect rice, rinse it well. This removes extra starch and keeps it fluffy. Use long-grain rice for the best texture. Cook it in chicken broth for added flavor. Once the rice is done, fluff it with a fork. This step helps separate the grains. Letting it sit for a few minutes after cooking also improves texture. Garnishes make your dish pop. Green onions add a nice crunch and color. Chopped parsley brings a fresh taste. You can sprinkle these on top right before serving. For extra flair, serve with lemon wedges. A squeeze of lemon brightens the dish. This adds a nice touch to your Cajun dirty rice. Pro Tips Rinse Your Rice: Rinsing the rice before cooking helps to remove excess starch, resulting in fluffier and less sticky rice. Perfectly Cooked Shrimp: Be careful not to overcook the shrimp; they should only take about 3-4 minutes until they turn pink and opaque. Adjust the Spice Level: If you prefer a milder dish, reduce the Cajun seasoning or serve with a side of hot sauce for those who like it spicy. Garnish for Freshness: Fresh herbs like parsley and green onions not only add color but also enhance the flavors of the dish. {{image_2}} You can make dirty rice without meat. Use mushrooms instead of sausage. They add great flavor. For shrimp, try using tofu or tempeh. Both soak up spices well. Add more veggies like zucchini or carrots for extra nutrition. Use vegetable broth instead of chicken broth. This keeps the dish tasty and plant-based. If you want a different protein, chicken works great. Use diced chicken breast or thighs. Cook them until brown, then add veggies. Crawfish is another fun choice. Toss in cooked crawfish when you add the shrimp. It brings a unique Cajun taste. Both options give the dish a new twist. To spice things up, add hot sauce while cooking. This gives a nice kick. You can also mix in fresh herbs. Chopped thyme or bay leaves add depth. Consider topping your dish with fresh cilantro for a fresh taste. These simple changes enhance the flavors and make each bite exciting. After enjoying your Cajun dirty rice, let it cool. Place leftovers in an airtight container. This keeps the dish fresh. Store it in the fridge. It will last for about 3 to 4 days. If you have more than one serving, divide it into smaller portions. This makes it easier to reheat later. To reheat, use the microwave or stove. For the microwave, place the rice in a bowl. Add a splash of chicken broth or water to keep it moist. Cover the bowl with a lid or plastic wrap. Heat for 1-2 minutes, stirring halfway through. On the stove, add the rice to a skillet. Heat over medium-low heat, stirring often. Add a little broth or water if it seems dry. You can freeze Cajun dirty rice too. Place cooled rice in a freezer-safe container. Make sure to seal it tightly. It will last for up to 3 months in the freezer. When ready to eat, thaw it overnight in the fridge. Reheat it using the methods above. This way, you can enjoy that tasty dish anytime! Cooking Cajun Dirty Rice takes about 40 minutes. This includes 15 minutes to prep and 25 minutes to cook. You start by rinsing the rice. Then, cook the rice in chicken broth for about 18-20 minutes. While the rice cooks, prepare the sausage, shrimp, and veggies. Yes, you can make Cajun Dirty Rice ahead of time. It stores well in the fridge for up to 3 days. Just let it cool before storing it in an airtight container. This makes it easy for meal prep. You can simply reheat it when you are ready to eat. The best way to reheat Cajun Dirty Rice is on the stove. Place it in a skillet over low heat. Add a splash of chicken broth or water to keep it moist. Stir it often until heated through. You can also use the microwave if you prefer. Just cover it to keep the moisture in. This blog post covered how to make tasty Cajun Dirty Rice. We explored the important ingredients and helpful substitutions. I shared step-by-step instructions to prepare and combine the rice with sausage and shrimp. We discussed tips for perfect cooking and even ways to adapt the dish. Lastly, we looked at storage and reheating methods. Enjoy your cooking adventure! Cajun Dirty Rice is fun and brings so much flavor to your table.

Cajun Dirty Rice with Shrimp and Sausage Delight

Welcome to my kitchen! Today, we’re diving into the mouth-watering world of Cajun Dirty Rice with Shrimp and Sausage. This

To make the best Nutella brownies, you need simple ingredients. Each one adds to the rich flavor and gooey texture. Here’s what you will need: - 1 cup Nutella - 1/2 cup unsalted butter, melted - 2 large eggs - 1 teaspoon vanilla extract - 1/2 cup granulated sugar - 1/2 cup all-purpose flour - 1/4 teaspoon salt - 1/4 teaspoon baking powder - 1/2 cup chocolate chips (optional) Gather these items before you start. Using fresh ingredients helps your brownies taste their best. Each element plays a role. The Nutella gives that creamy, chocolatey taste. Butter adds richness. Eggs help bind everything together. Vanilla brings out all the flavors. Sugar sweetens the mix, while flour gives it structure. Salt enhances the taste, and baking powder helps the brownies rise. If you love extra chocolate, toss in chocolate chips! Now that you have your ingredients ready, you can create a sweet treat that everyone will love. {{ingredient_image_1}} - Set your oven to 350°F (175°C). - Line an 8x8-inch baking pan with parchment paper. Leave some paper hanging for easy removal. - In a large bowl, combine 1 cup of Nutella and 1/2 cup of melted unsalted butter. Mix until smooth. - Add 2 large eggs, one at a time. Stir well after each egg. Then, mix in 1 teaspoon of vanilla extract. - In another bowl, whisk together 1/2 cup of granulated sugar, 1/2 cup of all-purpose flour, 1/4 teaspoon of salt, and 1/4 teaspoon of baking powder. Make sure everything is mixed well. - Gradually mix the dry ingredients into the Nutella mixture. Stir gently until just combined. - If you want, fold in 1/2 cup of chocolate chips for extra gooeyness. - Pour the brownie batter into the lined baking pan. Spread it out evenly. - For a fun swirl, drop spoonfuls of extra Nutella on top. Use a knife to swirl it into the batter. - Bake in the oven for 20-25 minutes. Use a toothpick to check. It should come out with a few moist crumbs. - Let the brownies cool in the pan for about 15 minutes. Then, lift them out using the parchment paper. Cool completely on a wire rack before slicing into squares. To make the best Nutella brownies, avoid overmixing. Mix the wet and dry ingredients just until they blend. This keeps the brownies soft and fudgy. Baking time is key. Bake for 20 to 25 minutes. When a toothpick comes out with a few moist crumbs, they are ready. Overbaking can lead to dry brownies, which is not what you want. Serve your brownies dusted with powdered sugar. This makes them look fancy and inviting. For a rich treat, add a scoop of vanilla ice cream on the side. The cold ice cream pairs well with the warm brownies. Do not overbake your brownies. They should still be soft in the center. Check them a few minutes before the time is up. Using cold ingredients can also ruin your brownies. Make sure your butter and eggs are at room temperature. This helps them mix well and creates a smoother batter. Pro Tips Use Room Temperature Ingredients: Allow your eggs and butter to come to room temperature before mixing. This helps create a smoother batter and ensures even baking. Don't Overmix: Once you combine the dry and wet ingredients, mix just until incorporated. Overmixing can lead to tough brownies. Check for Doneness Early: Ovens can vary, so start checking your brownies a few minutes before the recommended baking time to avoid overbaking. Let Them Cool Completely: Allowing the brownies to cool completely before slicing helps them set and makes for cleaner cuts. {{image_2}} You can add peanut butter to your Nutella brownies for a twist. To do this, use: - 1 cup Nutella - 1/2 cup unsalted butter, melted - 2 large eggs - 1 teaspoon vanilla extract - 1/2 cup granulated sugar - 1/2 cup all-purpose flour - 1/4 teaspoon salt - 1/4 teaspoon baking powder - 1/2 cup chocolate chips (optional) - 1/2 cup peanut butter When mixing, add the peanut butter after the Nutella and butter. Swirl it in gently. This gives your brownies a rich flavor and a creamy texture. Adding nuts makes these brownies even better. I suggest using: - Walnuts - Pecans To include nuts, chop them into small pieces. Mix them into the batter before you spread it in the pan. This adds a great crunch and flavor to each bite. If you need a gluten-free version, you can swap the all-purpose flour. Use: - 1/2 cup almond flour - 1/2 cup coconut flour Check the texture of the batter. If it seems too thick, add a bit more melted butter. Baking time may change slightly. Keep an eye on them to ensure they bake just right. To keep your Nutella brownies fresh, use airtight containers. This helps keep moisture in and prevents them from drying out. If you have leftovers, place them in one of these containers. You can also store them in the fridge for a richer taste. Just make sure to wrap them tightly with plastic wrap first. This prevents them from absorbing any other fridge smells. You can freeze your brownies to enjoy later. To freeze them, first let them cool completely. Next, cut the brownies into squares. Wrap each square in plastic wrap. Then place them in a freezer bag or a container. Make sure to remove as much air as possible. For thawing, take them out of the freezer. Leave them in the fridge overnight or let them sit at room temperature for a few hours. This keeps them soft and gooey. When stored at room temperature, Nutella brownies last about three days. Just keep them in an airtight container. If you store them in the fridge, they can last up to a week. Always check for any signs of spoilage before eating. If they look or smell off, it’s best to toss them. You can make Nutella brownies without flour by using almond flour or cocoa powder. Almond flour gives a nice texture. Use one cup of almond flour in place of all-purpose flour. Cocoa powder can also work. Just mix it with Nutella and eggs until smooth. These options keep the brownies rich and tasty. Yes, you can use other nut butters. Peanut butter or almond butter can work well. They each add their own flavor. Keep in mind that the brownies will taste different. Always choose a creamy nut butter for the best texture. To reheat brownies, use the microwave. Heat them for 10 to 15 seconds. This keeps them soft and gooey. You can also use an oven. Preheat it to 350°F (175°C) and warm for about 5 minutes. This method helps keep the edges crisp. Absolutely! Adding espresso gives a rich coffee flavor. Just mix in one teaspoon of espresso powder. If you want mint, add 1/2 teaspoon of mint extract. Both flavors can enhance the taste of your Nutella brownies and make them unique. These Nutella brownies are easy to make and taste amazing. You’ve learned about the key ingredients, step-by-step instructions, and helpful tips. I shared fun variations to try, like adding peanut butter or nuts. Remember, storing your brownies correctly keeps them fresh. Avoid common mistakes to ensure perfect results. Now, you can enjoy brownies that everyone will love! Happy baking, and enjoy your sweet treats!

Nutella Brownies Irresistibly Rich and Gooey Treat

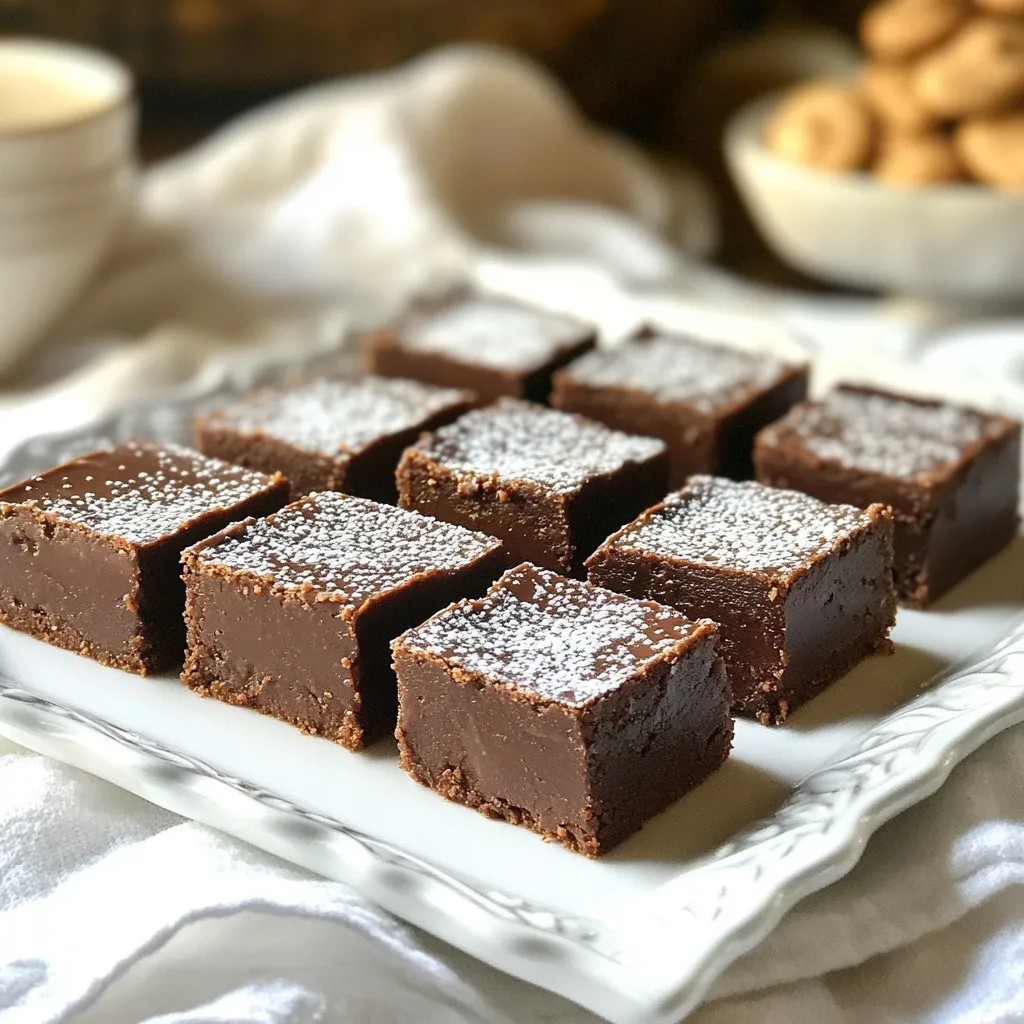
If you’re craving something sweet, Nutella brownies are a must-try! These brownies are rich, gooey, and packed with delicious Nutella.

To make this zesty Greek yogurt lemon loaf, gather these key ingredients: - 1 ½ cups all-purpose flour - 1 cup Greek yogurt (plain, full-fat) - 1 cup granulated sugar - 3 large eggs - 1/3 cup vegetable oil - Zest of 2 lemons - 1/4 cup fresh lemon juice - 1 teaspoon baking soda - 1 teaspoon baking powder - 1/2 teaspoon salt - Optional: 1/2 cup poppy seeds You can make some swaps if needed. Use whole wheat flour for more fiber. If you need a dairy-free option, try coconut yogurt instead of Greek yogurt. For a lower sugar option, use a sugar substitute that measures like sugar. If you have allergies, make sure to avoid any ingredient that may cause a reaction. Check labels for allergens in your ingredients. Greek yogurt adds moisture and a rich texture to your loaf. It also boosts protein, making the loaf more filling. The tangy flavor from the yogurt pairs perfectly with lemon, enhancing the taste. Plus, Greek yogurt can help keep your loaf fresh for longer. {{ingredient_image_1}} First, you need to preheat your oven to 350°F (175°C). This step warms the oven for even baking. While it heats, grab a loaf pan. Grease it well to prevent sticking. I like to line the bottom with parchment paper as an extra measure. This step makes it easy to remove the loaf later. In a medium bowl, add the all-purpose flour, baking soda, baking powder, and salt. Use a whisk to mix them together well. If you want some fun texture, add poppy seeds at this point. This mixture is the base for your loaf, so ensure it is well combined. Next, take a large bowl. Beat together the granulated sugar and Greek yogurt until smooth. Slowly add one egg at a time, mixing well after each. Then, stir in the vegetable oil, lemon zest, and lemon juice. The zest and juice give your loaf its zesty flavor. Mix until everything is evenly blended. Now, it’s time to bring everything together. Gradually add the dry mixture to the wet ingredients. Stir gently until just combined. It’s okay if there are a few lumps; don’t overmix. Overmixing can make your loaf dense, and we want it light and airy. Pour the batter into your prepared loaf pan. Smooth the top with a spatula. Slide the pan into the oven and bake for 50 to 60 minutes. You can check for doneness by inserting a toothpick into the center. If it comes out clean, your loaf is ready. After baking, let it cool in the pan for about 10 minutes. Then, move it to a wire rack to cool completely. This cooling step helps set the loaf and makes it easier to slice. To keep the loaf moist, use full-fat Greek yogurt. It holds more moisture than low-fat options. Avoid overmixing the batter when combining wet and dry ingredients. A few lumps are okay! Also, check the oven temperature with a thermometer. A hot oven can dry out the loaf. For a strong lemon taste, use fresh lemons. The zest adds a bright flavor. The juice gives a good tartness. If you want more lemon zing, add more zest. You can also add a bit of lemon extract for extra depth. Just a little will do! Do not skip the greasing step for the loaf pan. This can cause the loaf to stick. Make sure to measure the flour correctly. Too much flour can make the loaf dense and dry. Lastly, remember to cool it properly. Cooling it for too long in the pan can make it soggy. Pro Tips Use Room Temperature Ingredients: Ensure your eggs and yogurt are at room temperature before mixing. This helps create a smoother batter and a more even bake. Fresh Lemon Juice is Key: For the best flavor, use freshly squeezed lemon juice instead of bottled. It enhances the zesty profile of the loaf. Check for Doneness: Ovens can vary in temperature, so start checking the loaf for doneness a few minutes early. A toothpick should come out clean when inserted into the center. Cool Completely: Allow the loaf to cool completely on a wire rack before slicing. This ensures the texture remains light and fluffy. {{image_2}} You can add poppy seeds to the batter for a fun twist. Poppy seeds give a nice crunch and a slight nutty taste. Use about half a cup when mixing the dry ingredients. They add texture and make your loaf look beautiful. You can change the flavor of your lemon loaf easily. Try adding a teaspoon of vanilla for warmth. Lavender is another great choice. Just add a teaspoon of dried lavender to the mix. Both options pair well with the lemon and give a unique taste. If you need a gluten-free loaf, swap the all-purpose flour. Use a gluten-free flour blend instead. Make sure it has xanthan gum to keep the loaf from crumbling. This simple switch lets everyone enjoy this tasty treat, no matter their diet. After you enjoy your Greek yogurt lemon loaf, store leftovers in an airtight container. This keeps the loaf moist. You can keep it at room temperature for up to three days. If you want it fresh longer, store it in the fridge. It stays good in the fridge for about a week. Freezing is a great option if you want to save some loaf for later. First, let the loaf cool completely. Then, slice it into pieces. Wrap each slice in plastic wrap. Place the wrapped slices in a freezer-safe bag. You can freeze the loaf for up to three months. When you’re ready to eat, just thaw it in the fridge overnight. To enjoy your Greek yogurt lemon loaf warm, you have a few easy options. You can use a microwave. Heat each slice for about 10 to 15 seconds. If you prefer a crispy edge, use an oven. Preheat it to 350°F (175°C) and bake for about 5 to 10 minutes. Enjoy your loaf warm, and it will taste fresh! Yes, you can use low-fat Greek yogurt. It will change the texture a bit. The loaf may be less rich and creamy, but it will still taste great. Low-fat yogurt helps keep the loaf lighter while still adding moisture. Just make sure to choose plain low-fat yogurt for the best flavor. To make this loaf vegan, you can replace the eggs. Use flax eggs instead. Mix one tablespoon of ground flaxseed with three tablespoons of water. Let it sit for five minutes until it thickens. You can also swap the granulated sugar for coconut sugar. This keeps the loaf sweet and tasty without animal products. I love serving this loaf with fresh berries on the side. Strawberries, blueberries, or raspberries add a nice touch. You can also dust the top with powdered sugar for a pretty finish. For extra flavor, serve with a dollop of Greek yogurt or a scoop of vanilla ice cream. Enjoying it warm or at room temperature works best! In this blog post, we explored key ingredients for a delightful Greek yogurt lemon loaf. We discussed substitutions for allergies and highlighted the benefits of Greek yogurt. You learned step-by-step instructions for making the loaf, along with tips for keeping it moist and flavorful. We also shared fun variations, storage methods, and answered common questions. Now, you can create a delicious and unique lemon loaf. Enjoy experimenting and sharing your tasty results!

Greek Yogurt Lemon Loaf Easy and Healthy Recipe

Are you ready to bake something delicious? With this Greek Yogurt Lemon Loaf recipe, you can enjoy a moist, zesty

- 1 package (16 oz) potato gnocchi - 1 cup sun-dried tomatoes, packed in oil, drained and chopped - 1 cup heavy cream - 1 cup vegetable broth - 1 teaspoon garlic, minced - 1 teaspoon onion powder - 1 teaspoon dried basil - ½ teaspoon red pepper flakes (optional, for heat) - 1 cup spinach, fresh - ½ cup grated Parmesan cheese - Salt and pepper to taste - Olive oil for cooking - Fresh basil leaves for garnish When you pick ingredients, look for fresh and high-quality products. For gnocchi, choose a brand that feels light and fluffy. Check sun-dried tomatoes; they should be vibrant and packed in oil for best flavor. Heavy cream needs to be fresh, so check the date. Fresh spinach should be bright green and crisp. Parmesan cheese should be finely grated for easy melting. If you can't find gnocchi, you can use other pasta like penne or fettuccine. For a lighter option, swap heavy cream with coconut milk or cashew cream. If you want less salt, use low-sodium vegetable broth. You can replace Parmesan with nutritional yeast for a vegan twist. If you don’t like spinach, try kale or arugula for a different taste. {{ingredient_image_1}} Start by filling a large pot with salted water. Bring it to a boil. Once boiling, add the potato gnocchi. Cook them as per the package instructions. When they float to the top, they are ready. This usually takes about 2-3 minutes. After that, drain the gnocchi and set them aside. Make sure they are dry and not sticking together. In a large skillet, heat a tablespoon of olive oil over medium heat. Add one teaspoon of minced garlic and sauté it for one minute. This step releases a nice aroma. Next, add one cup of chopped sun-dried tomatoes, one teaspoon of onion powder, and one teaspoon of dried basil. Cook this mixture for 2-3 minutes. This helps the flavors blend well. Now, pour in one cup of heavy cream and one cup of vegetable broth. Stir everything together. Bring this sauce to a gentle simmer for about five minutes. It should thicken slightly. Now it’s time to add the cooked gnocchi to the skillet. Toss them well in the creamy sauce so they are covered. Add one cup of fresh spinach. Let it cook for about two minutes, just until it wilts. Then, stir in half a cup of grated Parmesan cheese. Season with salt, pepper, and red pepper flakes if you like some heat. Cook for another minute until the cheese melts and the sauce becomes creamy. Finally, remove the skillet from heat. Serve the dish hot. Garnish with fresh basil leaves and extra Parmesan if you wish. Enjoy your creamy sun-dried tomato gnocchi! To cook gnocchi, start with a big pot of salted water. Bring it to a boil. Add the gnocchi and watch them closely. They float when they are done. This usually takes about 2-3 minutes. Drain them gently, and set them aside. This helps keep them soft. For extra flavor, use fresh garlic and herbs. Mince the garlic finely to release its strong taste. Add onion powder and dried basil for depth. If you like heat, sprinkle in red pepper flakes. This gives a nice kick to the dish. Don’t forget to season with salt and pepper. Taste as you go to get it just right. If your sauce is too thick, add more vegetable broth. This will lighten it up. If it’s too thin, let it simmer longer. It will thicken as it cooks. For clumpy sauce, whisk it well before adding cheese. Always stir well after adding ingredients to keep it smooth. If your gnocchi stick together, toss them with a bit of olive oil. This keeps them separate. Pro Tips Use Fresh Gnocchi: For the best texture and flavor, opt for freshly made gnocchi if possible. It absorbs the sauce beautifully and makes for a delightful meal. Customize the Creaminess: Adjust the creaminess of the sauce by adding more or less heavy cream. For a lighter option, you can substitute half-and-half or cashew cream. Add Protein: To make this dish more filling, consider adding grilled chicken, shrimp, or chickpeas. They complement the creamy sauce well and add nutritional value. Save Some Pasta Water: If the sauce is too thick, reserve a bit of the pasta cooking water and stir it in. This will help achieve the perfect creamy consistency. {{image_2}} You can up the protein in your creamy sun-dried tomato gnocchi by adding chicken or shrimp. For chicken, use boneless, skinless breasts. Cut them into small pieces and cook them in the skillet before adding garlic. For shrimp, toss them in right after the sauce starts to simmer. Cook until the shrimp turn pink. Both options will make your dish heartier and more satisfying. If you want a vegan version, swap the heavy cream with coconut cream or cashew cream. You can also use a plant-based broth. For the cheese, try a dairy-free Parmesan or nutritional yeast. These swaps keep the dish creamy while making it plant-based. Mix up the veggies in your gnocchi for added flavor and nutrition. Try adding mushrooms, bell peppers, or zucchini. Sauté them with the garlic for best results. You can also toss in some frozen peas or asparagus during the last few minutes of cooking. This not only enhances the taste but also adds beautiful colors to your dish. After you enjoy your creamy sun-dried tomato gnocchi, store any leftovers in an airtight container. Keep it in the fridge for up to three days. Make sure it cools down to room temperature before sealing it. This helps keep the flavors fresh. To reheat, place the gnocchi in a skillet over low heat. Add a splash of vegetable broth or cream to keep it moist. Stir gently until it heats through. You can also microwave it in short bursts. Cover it with a damp paper towel to avoid drying out. If you want to freeze it, place the cooled gnocchi in a freezer-safe container. It can last for up to three months. When ready to eat, thaw it overnight in the fridge. Reheat it on the stove with a little extra cream or broth to bring back its creamy texture. Yes, you can make creamy sun-dried tomato gnocchi in advance. Cook the gnocchi and sauce separately. Store them in airtight containers in the fridge. When you are ready to eat, reheat them in a pan. Add a splash of cream or broth to help the sauce blend smoothly. Creamy sun-dried tomato gnocchi pairs well with many sides. Try a simple green salad with lemon dressing. Garlic bread is another great choice for a cozy meal. You can also serve it with grilled vegetables or roasted asparagus for a healthy touch. To make this dish lighter, swap heavy cream for half-and-half or a plant-based milk. Use less cheese or omit it entirely for reduced calories. Adding more fresh spinach or other veggies boosts nutrition without adding many calories. Consider whole wheat gnocchi for added fiber. This post explored all you need for a creamy sun-dried tomato gnocchi dish. You learned about selecting quality ingredients, step-by-step cooking, and useful tips for success. We also covered tasty variations and storage methods to keep your meal fresh. You can create a delicious, satisfying dish for any occasion. Enjoy the cooking and the flavors! Now, it’s time to gather your ingredients and delight in your culinary skills. Happy cooking!

Creamy Sun-Dried Tomato Gnocchi Delightful Recipe

If you love rich flavors and filling meals, you’ll enjoy my Creamy Sun-Dried Tomato Gnocchi. This dish offers a perfect

Older posts
Newer posts
← Previous Page1 … Page162 Page163 Page164 … Page166 Next →

dsad

© 2026 Southern Dishes • Built with GeneratePress

Our Policies

  • Copyright Policy
  • Cookie Policy
  • GDPR Policy
  • Privacy Policy
  • Disclaimer
  • Terms Of Use

More Information

  • Home
  • About
  • Contact
  • Appetizers
  • Dessert
  • Dinner
  • Drinks
©2026, Southern Dishes About Back To Top