Skip to content
DisclaimerTerms Of UseGDPR PolicyCookie Policy

Southern Dishes

  • Home
  • Drinks
  • Appetizers
  • Dinner
  • Dessert
  • About
  • Contact
  • Privacy Policy
DisclaimerTerms Of UseGDPR PolicyCookie Policy

Isabella

- 12 oz penne pasta - 1 lb smoked sausage, sliced - 1 medium onion, diced - 1 bell pepper (red or green), diced - 3 cloves garlic, minced In this recipe, I use penne pasta for its great texture. It holds sauce well and cooks quickly. The smoked sausage adds a rich flavor. You can choose any type you like. Diced onion and bell pepper bring sweetness and crunch. Garlic gives a nice aroma that makes you hungry. - 4 cups chicken broth - 1 cup heavy cream - 1 can (14.5 oz) diced tomatoes, undrained Chicken broth forms the base of the sauce. It adds depth and flavor to the dish. Heavy cream makes the sauce rich and creamy. Diced tomatoes add acidity and sweetness, balancing the flavors. - 2 tablespoons Cajun seasoning - 2 tablespoons olive oil - Salt and pepper to taste - Fresh parsley, chopped (for garnish) Cajun seasoning gives this dish its bold and spicy flavor. Olive oil helps to sauté the sausage and veggies. Salt and pepper enhance the flavors, bringing everything together. Fresh parsley adds a pop of color and freshness when served. {{ingredient_image_1}} 1. Sautéing the sausage Heat 2 tablespoons of olive oil in a large pot over medium heat. Add 1 pound of sliced smoked sausage. Cook until it’s browned, about 5 minutes. This adds great flavor to the dish. 2. Cooking vegetables Add 1 medium diced onion and 1 diced bell pepper to the pot. Cook for 3-4 minutes until they soften. Then, stir in 3 cloves of minced garlic. Cook for 1 more minute until you smell that lovely garlic aroma. 3. Adding liquids and seasonings Pour in 1 can of undrained diced tomatoes and 4 cups of chicken broth. Add 2 tablespoons of Cajun seasoning. Stir everything well to mix. 1. Boiling and simmering pasta Bring the mixture to a boil. Next, add 12 ounces of penne pasta. Reduce the heat to a simmer and cover the pot. 2. Stirring and monitoring Cook for 12-15 minutes. Stir occasionally to keep the pasta from sticking. Check if the pasta is al dente and most of the liquid is absorbed. 1. Adding cream and corn Stir in 1 cup of heavy cream and 1 cup of frozen corn. Mix until everything is well combined and heated through. 2. Seasoning and garnishing Season with salt and pepper to taste. Let it sit for a few minutes to thicken. Serve hot, garnished with fresh chopped parsley. - Selecting the right sausage: I love using smoked sausage for this dish. It adds great flavor. You can also choose spicy sausage for more heat if you like. - Adjusting spice levels: Use Cajun seasoning to give your pasta a kick. Start with one tablespoon, then taste. Add more if you want it spicier. - Preventing pasta from sticking: Stir the pasta every few minutes while it cooks. This helps keep it from sticking together. - Using a Dutch oven vs. large pot: A Dutch oven heats evenly and helps the dish cook well. If you don’t have one, a large pot works too. Just make sure it's deep enough. - Best practices for cream incorporation: Add the cream at the end. This keeps it rich and creamy. Stir it in slowly for the best texture. - Ideal sides to pair: Serve this pasta with a simple salad or some crusty bread. Both add freshness and balance to the meal. - Recommended wine or beverage: A chilled white wine, like Sauvignon Blanc, goes well with this dish. If you prefer something non-alcoholic, try sparkling water with lemon. Pro Tips Use Fresh Ingredients: Fresh vegetables and high-quality sausage will elevate the flavor of your dish significantly. Adjust Spice Level: If you prefer a milder dish, reduce the amount of Cajun seasoning or use a mild sausage. Let it Rest: Allowing the pasta to sit for a few minutes after cooking will help thicken the sauce and improve the texture. Garnish for Freshness: A sprinkle of fresh parsley not only adds color but also a fresh flavor that complements the dish beautifully. {{image_2}} You can use many types of pasta for this dish. Penne works great, but you can try rotini or even spaghetti. Each type changes the texture a bit, making it fun to experiment. If you want a vegetarian version, swap the smoked sausage for plant-based sausage. You can also use chickpeas for protein. This keeps the dish hearty without meat. Adding more vegetables boosts flavor and nutrition. Spinach wilts nicely into the sauce. You can also throw in sliced mushrooms or zucchini for extra taste. Want more spice? Try adding cayenne pepper or red pepper flakes. This amps up the Cajun flavor and makes the dish even more exciting. For a quick version, use an Instant Pot. Cook the sausage and veggies on sauté mode. Then, add the rest of the ingredients. Seal and cook on high for just 4 minutes. You can also bake this dish in the oven. After sautéing the sausage and veggies, transfer everything to a baking dish. Cover and bake at 350°F for about 20 minutes. It’s a different method but still delicious! To keep your One-Pot Cajun Sausage Pasta fresh, use airtight containers. Glass or plastic containers with tight lids work best. Let the pasta cool at room temperature before sealing. This prevents moisture buildup. Aim to store it within two hours of cooking. Refrigerate leftovers for up to three days. You can reheat your pasta in a few ways. The best method is on the stove. Use a pot over low heat. Add a splash of chicken broth or cream to keep it moist. Stir often to prevent sticking. You can also use a microwave. Heat in short bursts, stirring in between. This helps keep the pasta's texture and flavor intact. If you want to freeze this dish, let it cool completely first. Portion it into freezer-safe bags or containers. Remove as much air as possible before sealing. Label each bag with the date. You can freeze it for up to three months. To thaw, move it to the fridge overnight. Reheat it on the stove or in the microwave. Add a bit of liquid to restore creaminess. Can I make this dish gluten-free? Yes, you can use gluten-free penne pasta. Look for brands made from rice or corn. They work well in this recipe. Just remember to check the cooking time, as it may differ from regular pasta. How long does it take to cook? From start to finish, this dish takes about 30 minutes. You will spend 10 minutes prepping and 20 minutes cooking. It’s a quick meal for busy nights. What can I substitute for Cajun seasoning? If you don't have Cajun seasoning, try a mix of paprika, cayenne pepper, and garlic powder. You can also use Italian seasoning for a milder flavor. Just adjust to your taste. What are the calorie counts for this recipe? This recipe serves about 4-6 people and has roughly 500 calories per serving. The calories may change based on the sausage and cream used. Check the labels for exact numbers. How can I make it healthier? To make this dish healthier, use turkey sausage instead of smoked sausage. You can also add more vegetables like spinach or zucchini. This adds nutrients and fiber without many calories. Can I prepare this meal ahead of time? You can prep some parts ahead. Chop the veggies and slice the sausage the night before. Store them in the fridge. Just cook the pasta fresh for the best taste. How do I prevent the pasta from overcooking? To prevent overcooking, stir the pasta often while it simmers. Set a timer for 12 minutes and check for doneness. The pasta should be firm but not hard when you bite it. This blog post covered making One-Pot Cajun Sausage Pasta. We explored crucial ingredients like penne, smoked sausage, and seasonal veggies. I shared easy steps to prepare and cook this dish, plus tips for perfecting it. Remember, small swaps can enhance flavor, and leftovers are easy to store and reheat. This dish is flexible and fun to make. I hope you feel inspired to create your own version! Enjoy the cooking journey!

One-Pot Cajun Sausage Pasta Quick and Easy Meal

Are you looking for a quick and easy meal that packs plenty of flavor? One-Pot Cajun Sausage Pasta is the

- 1.5 lbs chicken breast, boneless and skinless, diced - 3 cups mixed vegetables (carrots, peas, corn, green beans) - 1 medium onion, chopped - 2 cloves garlic, minced - 4 cups chicken broth - 1 cup heavy cream - 1 teaspoon dried thyme - 1 teaspoon dried rosemary - Salt and pepper to taste - 1 refrigerated pie crust (or 2 if you want a top & bottom crust) - 2 tablespoons cornstarch mixed with 2 tablespoons cold water (optional, for thickening) - Fresh parsley, chopped (for garnish) When I measure ingredients, I always use a kitchen scale for meat. It ensures the chicken is just right. For vegetables, I prefer measuring by volume. This makes it easy to get the right mix. A cup or two of each is perfect for balance. When you add broth and cream, use liquid measuring cups for accuracy. This helps in getting the right texture. It’s also important not to skip the herbs. They add a lot of flavor. Choose chicken that feels firm and looks pink. Avoid any with a gray hue. For vegetables, look for bright colors and no spots. Fresh onions should feel heavy and dry. Garlic should be firm, not soft. When picking herbs, look for vibrant green leaves without wilting. Fresh parsley should smell strong; this means it is fresh. Quality matters, as fresh ingredients lead to a better pot pie. {{ingredient_image_1}} Start by gathering all your ingredients. You will need: - 1.5 lbs chicken breast, boneless and skinless, diced - 3 cups mixed vegetables (carrots, peas, corn, green beans) - 1 medium onion, chopped - 2 cloves garlic, minced - 4 cups chicken broth - 1 cup heavy cream - 1 teaspoon dried thyme - 1 teaspoon dried rosemary - Salt and pepper to taste - 1 refrigerated pie crust (or 2 if you want a top & bottom crust) - 2 tablespoons cornstarch mixed with 2 tablespoons cold water (optional, for thickening) - Fresh parsley, chopped (for garnish) Chop the onion and garlic first. Then, dice the chicken. You can use fresh or frozen vegetables, but fresh gives the best taste. In your slow cooker, add the diced chicken breast, mixed vegetables, chopped onion, and minced garlic. Pour in the chicken broth and heavy cream. Season with thyme, rosemary, salt, and pepper. Stir this mixture gently until all the ingredients combine well. Cover the slow cooker. Cook on low for 6-7 hours or on high for 3-4 hours. Your dish is ready when the chicken is tender. If you like a thicker filling, mix cornstarch with cold water. Stir this into the pot during the last 30 minutes. This step is optional but adds nice thickness. Preheat your oven to 425°F (220°C). Once the chicken mixture cooks, pour it into a 9-inch pie dish. Now, roll out your refrigerated pie crust. Lay it over the chicken mixture. If you want a top and bottom crust, use a second pie crust on the bottom. Trim any excess crust. Make a few slits in the top with a knife. This helps steam escape while baking. Bake in the preheated oven for 15-20 minutes. Look for the crust to turn golden brown. After baking, let it cool for a few minutes. This helps the filling set. Garnish with chopped fresh parsley before serving. Enjoy your comforting chicken pot pie! To get tender chicken, use boneless, skinless pieces. Dice them into small chunks. This helps the chicken cook evenly. Add chicken to the slow cooker with the veggies and broth. Cook on low for 6 to 7 hours or high for 3 to 4 hours. Check the chicken before serving; it should shred easily with a fork. If you like your filling thick, add cornstarch. Mix 2 tablespoons of cornstarch with 2 tablespoons of cold water. Stir this mix into the pot 30 minutes before the end. This will give your filling a nice, hearty texture. You can also add mashed potatoes for extra thickness. Seasoning is key to a great pot pie. Besides thyme and rosemary, try adding some garlic powder or onion powder. A dash of hot sauce can give it a nice kick. Fresh herbs like parsley can brighten the dish. Always taste your mix before serving. Adjust the salt and pepper to your liking. Pro Tips Use Leftover Chicken: If you have leftover rotisserie chicken, feel free to use it in this recipe instead of raw chicken breast for a quicker prep time. Add Your Favorite Vegetables: You can customize the mixed vegetables to include your favorites, such as bell peppers or mushrooms, for added flavor and nutrition. Experiment with Herbs: Try adding fresh herbs like parsley or thyme right before serving for a burst of freshness and enhanced flavor. Make it Ahead: This pot pie filling can be made ahead of time and stored in the refrigerator for up to 2 days before baking, making it a great option for meal prep. {{image_2}} You can change up the mixed vegetables to fit your taste. Instead of carrots, peas, corn, and green beans, try: - Broccoli - Cauliflower - Zucchini - Bell peppers Feel free to use frozen veggies if fresh ones are not available. Just add them toward the end of cooking. This way, they stay bright and crisp. If you want to switch proteins, there are great options. Instead of chicken, you can use: - Turkey - Cooked rotisserie chicken - Tofu for a vegetarian option Make sure to adjust the cooking time if you use a different protein. For example, use pre-cooked chicken to save time. Want to keep it light? You can skip the pie crust or try these alternatives: - Use a phyllo dough for a flaky, lighter feel. - Top with mashed potatoes instead of a crust. - Use a biscuit topping for a fun twist. These options let you enjoy the filling without the heaviness of a traditional pie crust. After you enjoy your slow cooker chicken pot pie, let it cool down. Place any leftovers in an airtight container. Store it in your fridge for up to three days. Make sure to cover it well. This keeps it fresh and tasty. You can freeze leftovers for later. Divide the pot pie into portions. Use freezer-safe containers or bags. Label them with the date. You can freeze them for up to three months. When you are ready to eat, thaw it in the fridge overnight. To reheat, you have a few options. The best way is to use the oven. Preheat your oven to 350°F (175°C). Place the pie in an oven-safe dish. Cover it with foil to keep it moist. Heat for about 20-25 minutes. You can also use the microwave for quick reheating. Just be careful, as it may not heat evenly. Always check that it's hot all the way through before serving. Yes, you can make chicken pot pie without a slow cooker. You can use a stovetop method. Start by cooking the chicken in a large pot until it is fully cooked. Then, add the vegetables, chicken broth, and cream. Let it simmer until the veggies are tender. Finally, pour the mixture into a pie dish and top with the crust. Bake as directed in the recipe. Chicken pot pie is filling, so you want light sides. Here are some great options: - A small green salad with mixed greens. - Steamed broccoli or green beans. - Mashed potatoes or roasted sweet potatoes. - A light soup, like tomato or vegetable. These sides add freshness and balance to your meal. Leftovers will last about three to four days in the fridge. Make sure to store them in an airtight container. To enjoy the pie again, simply reheat in the oven or microwave until warm. If you want to keep it longer, consider freezing it. Properly stored, it can last for up to three months in the freezer. This article provided a clear guide on making a tasty Chicken Pot Pie. We discussed key ingredients, cooking steps, and useful tips. You now know how to choose fresh ingredients and the best ways to cook your chicken. Don't forget the fun variations and storage tips to enjoy leftovers. Remember, with some practice, you can make this dish a family favorite. Enjoy the cooking process and your delicious results!

Slow Cooker Chicken Pot Pie Comforting Family Meal

Are you ready to savor a warm bowl of comfort? My Slow Cooker Chicken Pot Pie is the answer! Imagine

- 1 cup long-grain rice - 2 cups beef broth - 1 tablespoon olive oil - 1 pound flank steak, sliced thinly - 1 teaspoon garlic powder - 1 teaspoon cumin - 1 teaspoon smoked paprika - 1 cup diced bell peppers (red, green, and yellow) - 1 small onion, diced - Salt and pepper to taste - 1 cup queso cheese sauce (store-bought or homemade) - Fresh cilantro, for garnish - Lime wedges, for serving When I cook Queso Rice with Steak Strips, I always start with the main ingredients. The long-grain rice is crucial. It absorbs the beef broth, giving the dish great flavor. The flank steak adds protein and a nice texture. I slice it thin to ensure it cooks quickly and evenly. Next, I move to the seasonings and vegetables. Garlic powder gives a tasty kick. Cumin and smoked paprika add depth. I love using a mix of colorful bell peppers. They bring sweetness and crunch. The diced onion adds sweetness when cooked. Don’t forget to season with salt and pepper! For toppings, the queso cheese sauce is a must. I often use store-bought sauce for ease, but making it homemade is fun too. Fresh cilantro brightens everything up, and lime wedges add a zesty finish. This dish is not just about taste; it’s about how it looks on the plate too! {{ingredient_image_1}} First, rinse the rice under cold water. This removes extra starch. Keep rinsing until the water runs clear. Drain the rice once done. Next, heat the beef broth in a medium pot until it simmers. Add the rinsed rice to the pot. Cover it and let it cook on low heat. After about 15-18 minutes, the rice should be tender and all the liquid absorbed. When finished, remove from heat and let it sit for 5 minutes. Fluff with a fork before serving. While the rice cooks, heat olive oil in a large skillet over medium-high heat. Take your thinly sliced flank steak and add it to the skillet. Sprinkle in garlic powder, cumin, and smoked paprika. Season with salt and pepper to taste. Sear the steak for about 3-4 minutes on each side. You want it browned and cooked to your liking. Once done, take it out of the skillet and let it rest on a plate. In the same skillet, add the diced onion and bell peppers. Sauté these for about 5-6 minutes until they soften. Then, pour in the queso cheese sauce over the sautéed veggies. Stir well to coat everything in the cheesy goodness. Now, slice the rested steak into strips and gently fold them into the cheesy mixture. Serve this delicious mixture over the fluffy rice. Garnish with fresh cilantro and add lime wedges on the side for a zesty touch. To achieve perfectly fluffy rice, rinse it under cold water first. This step removes excess starch. Use beef broth for cooking, as it adds more flavor. Let the rice sit covered after cooking. Fluff it gently with a fork before serving. For cooking steak to your liking, choose flank steak for its tenderness. Sear it over medium-high heat to lock in the juices. Cook each side for 3-4 minutes for medium-rare. Use a meat thermometer for best results. Aim for 130°F for medium-rare and 160°F for medium. For store-bought queso cheese options, look for brands with real cheese. Some popular choices are Velveeta and Tostitos. They melt well and have great flavor. Check the ingredient list for a good balance of spices. To make homemade queso cheese sauce, melt butter in a pot. Add flour to create a roux. Gradually whisk in milk until smooth. Stir in shredded cheese until melted. Add spices like cumin and garlic powder for extra taste. Arranging the dish can enhance its appeal. Serve the rice first, then layer the queso mixture on top. This creates a beautiful contrast. Use a large bowl for a family-style presentation. For garnishing, sprinkle fresh cilantro over the dish. Add lime wedges on the side for a zesty touch. The bright colors will make your dish pop and look inviting. Pro Tips Rest the Steak: Allowing the steak to rest after cooking helps retain its juices, ensuring a more flavorful and tender bite. Customize the Queso: Feel free to add your favorite spices or additional ingredients like diced jalapeños or black beans to the queso for an extra flavor kick. Use Fresh Ingredients: Using fresh vegetables and herbs enhances the overall flavor and presentation of your dish, making it more vibrant. Perfect Rice: Ensure the rice is rinsed thoroughly to remove excess starch, resulting in fluffier and less sticky rice when cooked. {{image_2}} If you want a change from steak, try chicken or shrimp. Chicken breast cooks fast and soaks up flavors well. Just season it like you would the steak. Shrimp cooks quickly too. Sauté it for just a few minutes until it turns pink. For a vegetarian twist, use tofu or mushrooms. Tofu soaks up the queso sauce nicely. Press it first to remove excess water. Slice it and cook until golden. Mushrooms add a great meaty texture. Sauté them until they are soft and flavorful. You can switch up the rice for brown rice or cauliflower rice. Brown rice adds a nutty flavor and is more filling. It may take longer to cook, about 30-40 minutes. Adjust the broth to 2.5 cups for best results. Cauliflower rice is a low-carb option. It cooks in just a few minutes. Simply sauté it until tender, then mix it with the queso sauce. Want more heat? Add sliced jalapeños to the mix. They bring a nice spicy kick. You can toss them in while cooking the veggies. You might also want to mix in extra spices or herbs. Try some chili powder for warmth or fresh cilantro for brightness. These small tweaks can really boost the flavor of your dish. To keep your Queso Rice with Steak Strips fresh, store it in airtight containers. This keeps out air and moisture. Let the dish cool to room temperature before sealing it. In the fridge, this meal lasts about 3 to 4 days. Be sure to label the container with the date. To freeze, start by letting the dish cool completely. Portion it into freezer-safe bags or containers. Remove as much air as possible to avoid freezer burn. You can freeze the dish for up to 3 months. When ready to eat, thaw it overnight in the fridge. For reheating, the best method is to use the stovetop. Add a splash of beef broth or water to keep it moist. Heat over medium-low, stirring gently. You can also use the microwave. Cover the dish and heat in short bursts, stirring in between. This prevents hot spots and keeps the dish tasty. Cooking Queso Rice with Steak Strips takes about 40 minutes in total. - Prep Time: 15 minutes - Cooking Time: 25 minutes First, rinse the rice and cook it in beef broth. This takes about 15-18 minutes. While the rice cooks, you can sear the steak. That usually takes around 8-10 minutes. Sautéing the veggies and mixing everything together will take about 5-7 minutes. Yes, you can make this dish ahead of time. Meal prep is easy with this recipe. - Cook the rice and steak ahead: Store them in separate containers in the fridge. - Reheat the rice: Add a splash of broth to keep it moist. - Warm the steak: Heat in a skillet or microwave. - Mix in the queso sauce and veggies: Do this right before serving for the best taste. This way, you can enjoy a quick, delicious meal later. You can pair Queso Rice and Steak Strips with several tasty sides. - Black beans: They add protein and flavor. - Corn salad: A fresh mix of corn, lime, and cilantro works well. - Guacamole and chips: This adds a creamy, crunchy element. - Grilled vegetables: They provide a nice color contrast and flavor. These sides enhance the meal and make it even more enjoyable. In this blog post, we covered how to make delicious Queso Rice with Steak Strips. You learned about the key ingredients, step-by-step cooking instructions, and tips to perfect the dish. We also explored variations and storage info to help you enjoy leftovers. This meal is easy to customize and full of flavor. Experiment with spices, proteins, or sides to match your taste. Enjoy your cooking and share this tasty dish with friends!

Queso Rice with Steak Strips Flavorful Dinner Delight

Are you ready for a dinner that packs a punch? My Queso Rice with Steak Strips is a flavorful delight

To make the Family Favorite Taco Casserole, you need the following ingredients: - 1 lb ground beef or turkey - 1 can (15 oz) black beans, drained and rinsed - 1 can (15 oz) corn, drained - 1 can (10 oz) diced tomatoes with green chilies - 1 packet taco seasoning - 1 cup salsa - 2 cups tortilla chips, lightly crushed - 2 cups shredded cheddar cheese - 1 cup sour cream - 2 green onions, chopped - Fresh cilantro, for garnish (optional) These ingredients come together to create a warm, hearty dish. The ground meat gives it protein, while the black beans and corn add fiber. The diced tomatoes with green chilies bring a nice kick of flavor. Taco seasoning gives the whole dish its classic taste. Don't forget the salsa—it adds a fresh touch. The crushed tortilla chips provide a fun crunch. Finally, the cheddar cheese melts into gooey perfection. Topping it with sour cream and green onions makes it even better. Fresh cilantro can add a nice pop of color and flavor, too. {{ingredient_image_1}} First, you need to preheat your oven to 350°F (175°C). This step ensures that your casserole cooks evenly. In a large skillet, cook 1 pound of ground beef or turkey over medium heat. Use a spatula to break the meat into small pieces. Cook it until it’s fully brown. Drain any excess fat. Next, add in 1 can of black beans, 1 can of corn, and 1 can of diced tomatoes with green chilies. Sprinkle in 1 packet of taco seasoning and 1 cup of salsa. Stir the mix well. Let it simmer for about 5 minutes. This helps all the flavors blend nicely. Grab a greased 9x13 inch baking dish. Start by adding half of the crushed tortilla chips to the bottom of the dish. Then, spread half of the meat mixture over the chips. Next, sprinkle half of the shredded cheddar cheese on top. Repeat this layering with the remaining chips, meat, and cheese. Cover the baking dish with aluminum foil. Place it in the preheated oven and bake for 25 minutes. After that, remove the foil and bake for another 10 to 15 minutes. This step makes the cheese bubbly and golden. Once baked, let the casserole cool for about 5 minutes. Serve it with dollops of sour cream on top. You can also add chopped green onions and fresh cilantro if you like. Enjoy your delicious taco casserole! I love using ground beef for its rich taste. Ground turkey is a lighter choice. Both work well in taco casserole. Use lean meat to cut down on grease. Cook the meat fully before mixing it with other ingredients. It helps blend flavors better. Taco seasoning is key for good flavor. You can add more spices if you like. Consider cumin, paprika, or garlic powder. Fresh herbs also boost taste. Try adding chopped cilantro or parsley for freshness. A squeeze of lime juice brightens the dish. Don't skip the salsa; it adds moisture and zest. Let the casserole cool for five minutes before serving. This helps it set and makes it easier to slice. Top each serving with sour cream for creaminess. Add chopped green onions for crunch and color. Garnish with fresh cilantro for a pop of green. Serve with extra tortilla chips on the side for crunch. Pro Tips Use Fresh Ingredients: For the best flavor, opt for fresh produce like tomatoes and cilantro instead of canned or frozen options. Customize Your Spice Level: Adjust the amount of taco seasoning or add sliced jalapeños to enhance the heat according to your preference. Make Ahead: Prepare the casserole in advance and store it in the fridge. Just bake it when you're ready to serve for a quick meal. Garnish Creatively: Add toppings like avocado slices, diced tomatoes, or olives for extra flavor and texture. {{image_2}} You can easily make a vegetarian taco casserole. Instead of meat, use more black beans or lentils. These options add protein and fiber. You can also add veggies like bell peppers, zucchini, or mushrooms. Just sauté them with the spices before layering. This keeps the flavor strong and fresh! Cheddar cheese is great, but you can switch it up. Try Monterey Jack for a milder taste. Or go for pepper jack if you want some heat. You can also mix two types of cheese for a richer flavor. Just remember, the cheese should melt well for that gooey texture. If you like heat, add jalapeños or hot sauce to the meat mixture. You can also sprinkle some chili powder for extra spice. Want it even spicier? Try using spicy salsa. Just make sure to balance the heat with sour cream or avocado on top. This way, you get a kick without overwhelming your taste buds. After you make your taco casserole, let it cool to room temp. Then, cover it tightly with plastic wrap or aluminum foil. You can keep it in the fridge for up to three days. This way, the flavors will stay fresh. To freeze, first let the casserole cool completely. Cut it into portions for easy use later. Wrap each portion in plastic wrap, then place them in a freezer-safe bag. You can freeze it for up to three months. Just remember to label the bags with the date. When you are ready to eat, remove a portion from the freezer. Thaw it in the fridge overnight. If you need it faster, you can use the microwave. Heat it at medium power for 2-3 minutes. For oven reheating, preheat to 350°F (175°C). Bake for 20 minutes, until it is hot and the cheese is melted. Enjoy it with your favorite toppings! Yes, you can use different beans. Pinto beans and kidney beans work well. They add good taste and texture. You could even use chickpeas for a twist. Just make sure to rinse them well before adding. To make this dish gluten-free, choose gluten-free tortilla chips. Also, check your taco seasoning for any hidden gluten. Many brands offer gluten-free options. This way, everyone can enjoy the casserole without worry. Some great toppings for taco casserole include sour cream, chopped green onions, and fresh cilantro. You can also add sliced jalapeños for heat. Avocado or guacamole add creaminess. Let your family pick their favorite toppings! Leftovers can be stored in the fridge for about three to four days. Make sure to cover the casserole well. You can also freeze leftovers for up to three months. Just thaw in the fridge before reheating. Enjoy the tasty meal again! This blog post shared a tasty taco casserole recipe. You learned about the key ingredients and how to make it step by step. I also provided tips for perfecting the dish and variations to suit your taste. Remember, you can customize flavors, adjust serving ideas, and store leftovers easily. Cooking should be fun, so get creative with your ingredients. Enjoy making this casserole for friends and family, and share your delicious results!

Family Favorite Taco Casserole Easy Weeknight Meal

Looking for a quick, tasty meal your whole family will love? I’ve got the perfect recipe for you: Family Favorite

- 2 cups cooked jasmine rice - 1 pound boneless, skinless chicken thighs, diced - 1 cup corn kernels (fresh or frozen) - 1 red bell pepper, diced - 1/2 red onion, finely chopped - 2 cloves garlic, minced - 1 teaspoon smoked paprika - 1 teaspoon cumin - 1 tablespoon olive oil - 1 lime, juiced - 1/2 cup crumbled feta cheese - Fresh cilantro, chopped, for garnish - Salt and pepper to taste When choosing produce, look for bright colors. This means the veggies are fresh and full of flavor. For corn, choose ears that feel firm and heavy. Look for kernels that are plump and milky. Bell peppers should be smooth and firm. Avoid any that are wrinkled or have dark spots. Red onions should be firm with no soft spots. Fresh garlic should feel hard and dry. You can easily swap ingredients to fit your diet. If you want a vegetarian option, use chickpeas instead of chicken. For a vegan dish, skip the feta cheese or use a plant-based version. If you cannot find jasmine rice, try brown rice or quinoa. If you dislike cumin, you can use chili powder for a different taste. {{ingredient_image_1}} Start by heating olive oil in a large skillet over medium heat. Dice the chicken thighs into bite-sized pieces. Season the chicken with salt, pepper, smoked paprika, and cumin. Add the chicken to the hot skillet. Cook it for about 7 to 10 minutes, stirring often. You want it to be golden brown and fully cooked. Once done, remove the chicken from the skillet and set it aside. In the same skillet, add the diced red onion, minced garlic, and diced red bell pepper. Sauté them for about 3 to 4 minutes until the onion looks clear and the peppers soften. Then, stir in the corn kernels, whether fresh or frozen. Cook everything for an additional 2 to 3 minutes until the corn is hot. Now, return the cooked chicken to the skillet with the veggies. Squeeze fresh lime juice over the mixture. Stir everything to combine well. Let it cook for another 2 minutes for the flavors to mix. For serving, layer cooked jasmine rice in bowls. Top each bowl with the chicken and corn mixture. Finish by sprinkling crumbled feta cheese and fresh cilantro on top. Serve lime wedges on the side for an extra burst of flavor. To get juicy chicken thighs, use boneless and skinless pieces. They cook well and stay moist. First, season the chicken with salt and pepper. Add smoked paprika and cumin for extra flavor. Heat olive oil in a skillet over medium heat. Cook the chicken for 7-10 minutes. It should be golden brown and no longer pink inside. Always check the chicken with a fork to make sure it’s done. Seasoning makes a big difference in taste. Start with salt and pepper; they are key. Try smoked paprika for a smoky touch. Cumin adds warmth and depth. You can also squeeze fresh lime juice over the chicken and veggies. This brightens the flavors and adds a fresh zing. Feel free to adjust the spices to match your taste. Make your dish eye-catching. Start with a base of jasmine rice in a bowl. Next, add the chicken and corn mixture on top. Sprinkle crumbled feta cheese over the dish. It adds a nice contrast with its creamy texture. Finish with a sprinkle of fresh cilantro for color. Serve lime wedges on the side for extra flavor. A well-presented bowl makes every meal feel special. Pro Tips Use Fresh Corn: If available, use fresh corn for a sweeter, crunchier texture that enhances the dish's flavor. Marinate the Chicken: For more flavor, marinate the chicken in lime juice, smoked paprika, and cumin for at least 30 minutes before cooking. Customize the Toppings: Feel free to add your favorite toppings like avocado, jalapeños, or a drizzle of hot sauce for extra zest. Make it Vegan: Substitute chicken with chickpeas or tofu for a delicious plant-based version of this rice bowl. {{image_2}} You can easily make this dish vegetarian or vegan. For a vegetarian version, replace chicken with black beans or chickpeas. This adds protein and fiber. For vegan options, use the same beans and skip the feta. You can use avocado for a creamy texture. The lime juice and spices will still give you a great flavor. While jasmine rice is the base of this bowl, you have many choices. Brown rice adds a nutty flavor and is more filling. Quinoa is another great option. It is gluten-free and packs in protein. Cauliflower rice is perfect if you want a low-carb choice. Each grain brings its own taste and texture. Toppings can make your meal more exciting! Consider adding fresh avocado slices for creaminess. Jalapeños will give it a spicy kick. You can also sprinkle on some lime zest for an extra burst of flavor. If you love crunch, try crushed tortilla chips or pumpkin seeds. Each topping can change the dish in a fun way. To store leftovers, let the dish cool down first. Place the chicken rice bowl in an airtight container. You can keep it in the fridge for up to three days. If you want to store it longer, freeze it for up to three months. Just remember to label the container with the date. Reheat the leftovers in the microwave. Use a microwave-safe bowl and cover it with a lid. Heat for about two to three minutes, stirring halfway. If frozen, let it thaw in the fridge overnight. Then, reheat as stated. You can also heat it on the stovetop. Just add a splash of water in a pan and warm it over medium heat. Stir often until hot. Meal prep is easy with this recipe. You can cook the chicken and veggies ahead of time. Store them separately from the rice. This way, they stay fresh longer. Portion the rice, chicken, and veggies into single servings. This helps you grab a meal quickly. You can also prep the sauce with lime juice and feta in advance. Just mix it in when you’re ready to eat. Yes, you can use frozen corn. It is just as good as fresh corn. When you cook it, make sure to heat it well. Add it to the skillet with the other veggies. This way, it warms up and mixes well with the flavors. If you don't have feta cheese, try using goat cheese or queso fresco. Both add a nice tang. You can also use shredded cheddar for a different taste. Each choice will change the flavor a bit, so pick what you like best. To spice up your bowl, add some chopped jalapeños or a dash of hot sauce. You can also use spicy salsa or sprinkle cayenne pepper. Start with a little, then add more if you want. Taste as you go to find your perfect heat level. Now you have a clear path to create a tasty dish. We covered the best fresh ingredients, how to prep chicken, and cook veggies. I shared tips for better flavor and presentation. You can also explore fun variations, like vegan options. Storing leftovers and reheating them properly will save time. Remember, cooking is about joy and creativity. Use these tips to make your meals more enjoyable and efficient.

Street Corn Chicken Rice Bowl Flavorful and Easy Meal

Are you looking for a quick and tasty meal? The Street Corn Chicken Rice Bowl is flavorful and easy to

- 4 boneless, skinless chicken breasts - 1 cup fresh cranberries - 1/2 cup chicken broth - 1/4 cup honey - 2 tablespoons soy sauce - 1 tablespoon apple cider vinegar - 1 teaspoon garlic powder - 1 teaspoon onion powder - Salt and pepper to taste - 2 tablespoons olive oil - Fresh thyme for garnish - If you want to switch honey, use maple syrup or agave nectar. - For broth, low-sodium chicken broth works well. You can also use vegetable broth. - If fresh cranberries are hard to find, dried cranberries can work in a pinch. Just soak them in warm water for a few minutes. Using these substitutions can help you make this dish suit your taste. Adjusting ingredients keeps your cooking fresh and fun! {{ingredient_image_1}} 1. Preheat your oven to 375°F (190°C). This step is key for even cooking. 2. Gather your ingredients. You will need: - 4 boneless, skinless chicken breasts - 1 cup fresh cranberries - 1/2 cup chicken broth - 1/4 cup honey - 2 tablespoons soy sauce - 1 tablespoon apple cider vinegar - 1 teaspoon garlic powder - 1 teaspoon onion powder - Salt and pepper to taste - 2 tablespoons olive oil - Fresh thyme for garnish 3. Make the cranberry glaze. In a small saucepan, mix the cranberries, chicken broth, honey, soy sauce, apple cider vinegar, garlic powder, onion powder, salt, and pepper. 4. Bring the mix to a boil over medium heat. Stir often. After it boils, lower the heat and let it simmer for about 10 minutes. The cranberries will burst, and the sauce will thicken. 1. Sear the chicken. Heat the olive oil in a large oven-safe skillet over medium-high heat. Season the chicken with salt and pepper. 2. Place the chicken in the skillet. Sear each side for 3-4 minutes. You want a nice brown color. 3. Add the glaze. Once both sides are browned, pour the cranberry glaze over the chicken. Make sure each piece is well coated. 4. Bake the chicken. Move the skillet to the preheated oven. Bake for 25-30 minutes. Check that the chicken reaches an internal temperature of 165°F (75°C). 1. Let the chicken rest. After baking, take it out of the oven. Let it sit for a few minutes before slicing. This helps keep the chicken juicy. 2. Serve the chicken. Drizzle more cranberry glaze from the skillet over each piece. Garnish with fresh thyme for a beautiful finish. - To ensure perfectly cooked chicken, use a meat thermometer. It should read 165°F (75°C). - Avoid burning the glaze by simmering on low heat. Stir often to keep it from sticking. - For extra warmth, add a pinch of cayenne pepper or smoked paprika. This will give your dish a nice kick. - Pair your chicken with fresh herbs like rosemary or sage. These herbs add depth to the flavor. - Garnish the chicken with fresh thyme. It adds color and a lovely aroma. - For visual appeal, plate the chicken with some of the cranberry glaze drizzled on top. Use a white plate for contrast. Pro Tips Use Fresh Cranberries: Fresh cranberries provide a vibrant flavor and texture compared to dried ones, enhancing the sauce's overall taste. Let the Sauce Thicken: Allowing the sauce to simmer until it thickens will intensify the flavors and create a delicious glaze for the chicken. Rest the Chicken: Letting the chicken rest after baking helps the juices redistribute, resulting in a juicier and more flavorful dish. Garnish for Presentation: Adding fresh thyme not only garnishes the dish but also enhances the aroma, making it visually appealing and appetizing. {{image_2}} You can easily switch up the protein in this dish. Instead of chicken, try turkey or pork. Both work well with the cranberry glaze. Turkey breast offers a lean option. Pork chops add a savory, juicy touch that pairs nicely with cranberries. Want a vegetarian dish? Use tofu as an alternative. Firm tofu absorbs flavors well. It becomes crispy when you pan-sear it. This option makes the meal tasty and filling. For those who enjoy a kick, try adding spices to the glaze. A pinch of red pepper flakes can bring heat. You can also experiment with fresh herbs like rosemary or sage. They add depth to the sweet and tart flavor. Seasonal fruits are another way to change the glaze. Try adding diced apples or pears. They blend beautifully with cranberries. This twist offers a fresh, fruity taste that excites your palate. If you prefer a slow cooker, this recipe adapts easily. Combine all the ingredients in the slow cooker. Cook on low for 4 to 6 hours. The chicken will soak up all the flavors and stay tender. Grilling is another great option. You can grill the chicken breasts for a smoky flavor. Just brush on the glaze in the last few minutes of cooking. This method gives you a nice char while keeping the meat juicy. To keep your savory cranberry glazed chicken fresh, use airtight containers. Glass or plastic containers work great. Make sure to cool the chicken before sealing it. This helps prevent moisture buildup. You can reheat your chicken in two ways: the microwave or the oven. - Microwave: Place the chicken on a microwave-safe plate. Cover it loosely with a damp paper towel. Heat in 30-second bursts until warm. - Oven: Preheat your oven to 350°F (175°C). Place the chicken in a baking dish. Cover it with foil to keep moisture in. Heat for about 15-20 minutes or until warm. To keep the chicken juicy, add a splash of chicken broth before reheating. If you want to freeze your chicken, here’s how to do it right. First, let the chicken cool completely. Wrap it tightly in plastic wrap. Then place it in a freezer bag. Remove as much air as possible. - Thawing process: When ready to eat, move the chicken to the fridge for several hours or overnight. You can also thaw it in cold water for quicker results. Never thaw chicken at room temperature. Can I use frozen cranberries? Yes, you can use frozen cranberries. Just add them to the pan without thawing. They will cook down well in the glaze. The flavor remains rich and tart, making a great sauce. How do I know when the chicken is done? Check the chicken's internal temperature. It should reach 165°F (75°C). Use a meat thermometer for the best results. The chicken should also look golden brown and juicy. What should I serve with savory cranberry glazed chicken? Pair your chicken with rice or mashed potatoes. Roasted vegetables also work well. A fresh salad can add a nice crunch and balance the meal. What to do if the glaze is too thick? If your glaze is too thick, add a splash of chicken broth. Stir it well and heat gently until it reaches your desired consistency. This will help you keep that great flavor. How to fix overcooked chicken? To fix overcooked chicken, slice it and add it to the glaze. Simmer gently to soak up moisture. This can help bring back some juiciness and flavor. Is this recipe gluten-free? This recipe can be gluten-free if you use gluten-free soy sauce. Many brands offer gluten-free options. Check the label to ensure it meets your needs. Low-carb alternatives for the recipe For low-carb options, replace honey with a sugar-free sweetener. You can also serve it with cauliflower rice instead of regular rice. This keeps the meal low in carbs but still tasty. This recipe for savory cranberry glazed chicken is both simple and delicious. We covered the key ingredients, preparation steps, and cooking methods to ensure success. You learned how to adapt flavors, store leftovers, and answer common questions. Experiment with different proteins and spices to make it your own. Enjoy the tasty results! Your cooking skills can grow with each recipe, leading to flavorful meals. Take this knowledge to create something special tonight.

Savory Cranberry Glazed Chicken Easy and Flavorful Meal

Looking for an easy and tasty meal? You’re in the right spot! Savory Cranberry Glazed Chicken brings a burst of

- 1 lb ground beef - 1/2 cup breadcrumbs - 1/4 cup finely chopped onion - 1/4 cup chopped green bell pepper - 1 egg - 1 tsp garlic powder - 1 tsp Worcestershire sauce - Salt and pepper to taste - 1 can (10.5 oz) cream of mushroom soup - 1 cup beef broth - 1 cup frozen mixed vegetables (carrots, peas, corn) - 4 medium potatoes, thinly sliced - 1 cup shredded cheddar cheese Gathering the right ingredients is key to making Amish Hamburger Steak Bake. Start with one pound of ground beef. This meat gives the dish a rich flavor. Next, grab half a cup of breadcrumbs. They help bind the beef mixture. You also need a quarter cup of finely chopped onion and a quarter cup of chopped green bell pepper. These add taste and texture. You’ll need one egg to hold everything together and one teaspoon of garlic powder for some extra zing. Don’t forget one teaspoon of Worcestershire sauce, along with salt and pepper to taste. For the sauce, use one can of cream of mushroom soup and one cup of beef broth. These ingredients create a creamy base. Add one cup of frozen mixed vegetables. A mix of carrots, peas, and corn works well. Finally, you will need four medium potatoes, thinly sliced. They will bake nicely on top. Finish with one cup of shredded cheddar cheese for a delicious topping. With these ingredients, you set the stage for a comforting meal that warms the heart and the belly. {{ingredient_image_1}} 1. Preheating the oven First, preheat your oven to 350°F (175°C). This step ensures even cooking. 2. Combining the beef mixture In a large bowl, mix 1 pound of ground beef with 1/2 cup of breadcrumbs. Add 1/4 cup of finely chopped onion and 1/4 cup of chopped green bell pepper. Crack in 1 egg and season with 1 teaspoon of garlic powder and 1 teaspoon of Worcestershire sauce. Sprinkle in salt and pepper to taste. Mix it well until all ingredients blend together. 3. Shaping the patties Now, shape the beef mixture into 4 patties. Make them even and flat for better cooking. Set these aside for later. 1. Browning the patties Heat a large skillet over medium heat. Add the patties and brown them for about 3-4 minutes on each side. This step adds great flavor. Once browned, transfer the patties to a 9x13 inch baking dish. 2. Preparing the soup mixture In the same skillet, pour in 1 can (10.5 oz) of cream of mushroom soup and 1 cup of beef broth. Stir it well and bring it to a simmer. This mixture will keep the bake moist and tasty. 3. Layering the bake Pour the soup mixture evenly over the patties in the baking dish. Next, sprinkle 1 cup of frozen mixed vegetables on top. Finally, arrange 4 medium potatoes, thinly sliced, over the mixture. Overlap the slices slightly for even coverage. Sprinkle 1 cup of shredded cheddar cheese on top of the potatoes. 1. Covering and baking Cover the baking dish with aluminum foil. Place it in the preheated oven and bake for 45 minutes. This step helps the flavors meld together. 2. Final touches and serving After 45 minutes, remove the foil. Bake for another 15-20 minutes, or until the potatoes are tender and the cheese is bubbly and lightly golden. Let it cool for a few minutes before serving. Enjoy this comforting meal with family or friends! To make your Amish Hamburger Steak Bake even better, follow these tips: - Cooking Tips for Better Flavor: Start by browning the patties well. This step adds a nice crust and deep flavor. Use a mix of butter and oil in the skillet for added richness. - Alternative Ingredients to Enhance Taste: You can swap ground beef for ground turkey or chicken for a leaner option. Add spices like paprika or smoked paprika for extra flavor. Fresh herbs like thyme or parsley can brighten the dish. Garnishing and serving can make your meal feel special: - Garnishing Ideas: After baking, sprinkle fresh parsley on top for color and taste. It makes the dish look fresh and inviting. You can also add sliced green onions for a bit of crunch. - Serving Suggestions for a Complete Meal: Serve the bake hot from the oven with crusty bread. A side salad with mixed greens and a light dressing pairs well. This adds freshness to the hearty bake and makes for a complete meal. Pro Tips Use Lean Meat: Opt for lean ground beef to reduce excess grease in the dish while still keeping it juicy and flavorful. Customize Vegetables: Feel free to swap out the frozen mixed vegetables for your favorites, such as green beans or broccoli, to suit your taste. Cheese Variations: Experiment with different types of cheese, like mozzarella or pepper jack, for a unique flavor twist. Make Ahead: Prepare the dish a day in advance and refrigerate it. Just bake it when you're ready to serve for a quick and easy meal. {{image_2}} You can swap ground beef for ground turkey or chicken. This change makes the dish lighter but just as tasty. Use the same amount of meat for best results. You can also add flavor by using herbs and spices. For a vegan version, replace the meat with lentils or mushrooms. Use breadcrumbs made from whole grains. Substitute the cream of mushroom soup with a vegan cream sauce or coconut milk. This keeps the texture creamy while being plant-based. Amish cooking has many hearty bakes. You might find variations that include other meats or veggies. Some people like to add corn or green beans for extra flavor and color. Feel free to make it your own! Add spices, herbs, or even a different cheese. You could use Swiss cheese instead of cheddar for a unique twist. To keep your Amish Hamburger Steak Bake fresh, use airtight containers. This helps prevent moisture loss. If you put it in the fridge, it will last for about three to four days. You can also freeze it for longer storage. In the freezer, it stays good for up to three months. When you reheat leftovers, use the oven if you can. Set it to 350°F (175°C) and cover the dish with foil. This keeps the bake moist. Heat for about 20 to 25 minutes. If you prefer the microwave, use a microwave-safe dish. Heat it in short bursts, stirring in between, to keep flavor and texture. You can serve this dish with a few simple sides. Fresh crusty bread adds a nice touch. A side salad brings some crunch. You might also enjoy steamed green beans or corn. These sides pair well with the rich flavors of the bake. Yes, you can prepare Amish Hamburger Steak Bake ahead of time. Simply follow the steps and assemble the dish. Cover it well and refrigerate. When you’re ready to eat, bake it straight from the fridge. Just add a little extra time to the cooking. You can make this dish healthier with a few swaps. Use lean ground turkey instead of beef. Swap the cream of mushroom soup for a low-fat option. You can also add more veggies. Try adding spinach, zucchini, or even mushrooms for added nutrition. To make Amish Hamburger Steak Bake, you'll need a few simple items. Here is what you should gather: - 1 lb ground beef - 1/2 cup breadcrumbs - 1/4 cup finely chopped onion - 1/4 cup chopped green bell pepper - 1 egg - 1 tsp garlic powder - 1 tsp Worcestershire sauce - Salt and pepper to taste - 1 can (10.5 oz) cream of mushroom soup - 1 cup beef broth - 1 cup frozen mixed vegetables (carrots, peas, corn) - 4 medium potatoes, thinly sliced - 1 cup shredded cheddar cheese These ingredients come together to create a hearty meal that warms the soul. You can find most of them at your local grocery store. If you want to add a personal touch, feel free to swap in your favorite veggies or herbs. This dish is all about comfort and ease. The ground beef and veggies blend well with the creamy mushroom soup. The layers of potatoes and cheese add a delightful crunch and richness. It’s a meal that is sure to please everyone at the table. We covered the essentials for making a tasty Amish Hamburger Steak Bake. You learned about key ingredients, step-by-step cooking, and tips for perfecting your dish. Remember, you can swap ingredients and adjust for your taste. Store leftovers properly to enjoy them later. This meal warms hearts and is easy to share with loved ones. Now, gather your ingredients and start cooking. You'll impress everyone with this hearty dish!

Amish Hamburger Steak Bake Comforting Family Meal

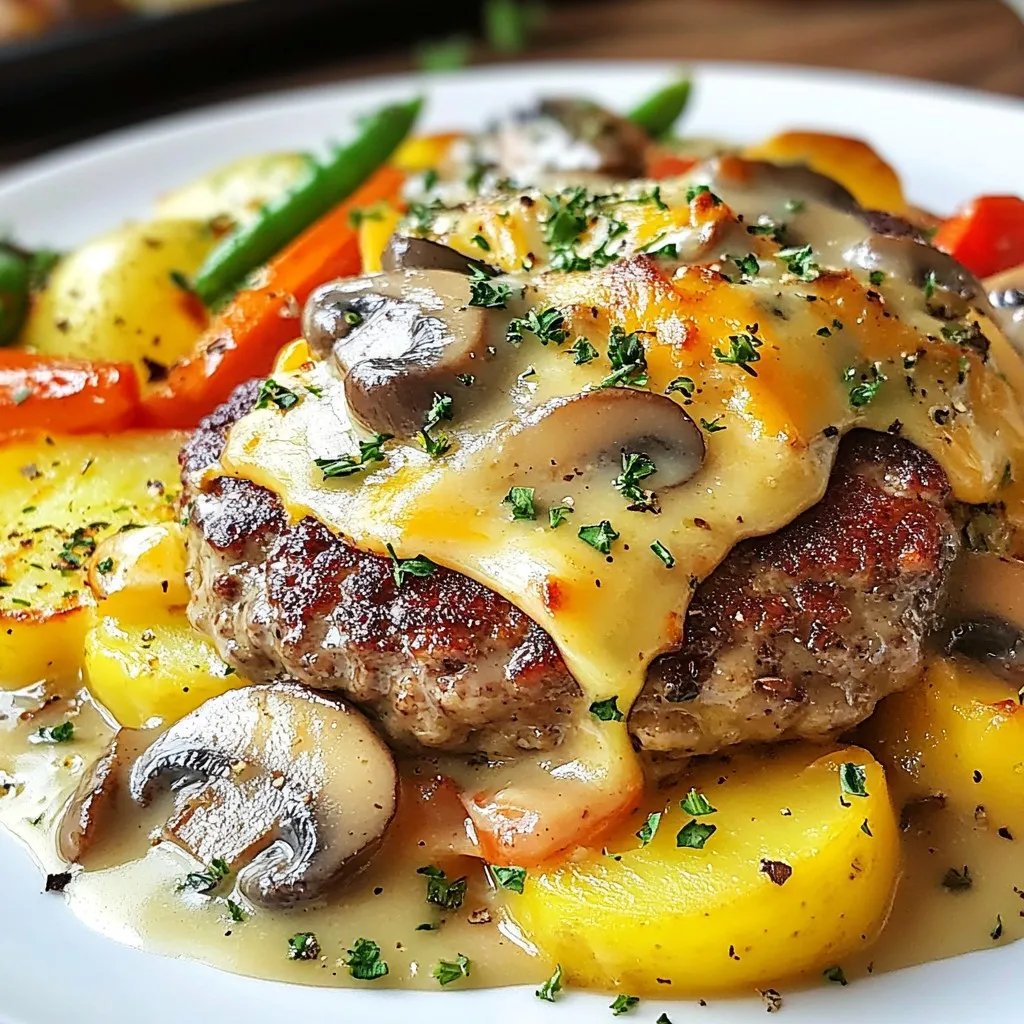
Are you ready to enjoy a warm and hearty meal? The Amish Hamburger Steak Bake is a simple dish that

For the Cinnamon Roll French Toast Roll-Ups, you will need: - 1 loaf of white bread (about 10-12 slices) - 4 large eggs - 1 cup milk (whole or almond) - 1 teaspoon vanilla extract - 2 teaspoons ground cinnamon - 1/4 cup granulated sugar - 1/4 cup cream cheese, softened - 1/4 cup brown sugar - 1/2 cup powdered sugar (for drizzling) - A pinch of salt - Butter or cooking spray (for frying) You can swap some ingredients to match your taste or needs: - Bread: Use whole wheat or brioche for a twist. - Milk: Almond milk works well if you want a dairy-free option. - Sweeteners: Agave or honey can replace sugar for a different flavor. - Cream Cheese: Try Greek yogurt or a dairy-free cream cheese. Choosing fresh ingredients makes all the difference. Here’s what to look for: - Bread: Choose soft, fresh bread. Stale bread can ruin the roll-ups. - Eggs: Look for eggs that are clean and uncracked. Check the date on the carton. - Milk: Make sure the milk is within the expiration date. A fresh smell is key. - Cream Cheese: Pick a brand you trust. It should be smooth with no lumps. - Spices: Ground cinnamon should be fragrant. Check the date for freshness. With these tips, your Cinnamon Roll French Toast Roll-Ups will be delicious! {{ingredient_image_1}} Start by removing the crusts from each slice of bread. Use a sharp knife for this. Next, flatten each slice with a rolling pin. This makes it easier to roll them up later. Aim for a nice, thin layer. Grab a small bowl. In it, mix the softened cream cheese, brown sugar, and a pinch of cinnamon. Stir until smooth. This filling will add a sweet taste to your roll-ups. Take one slice of the flattened bread. Spread about 1 tablespoon of the cream cheese mixture on one side. Roll it tightly, starting from the cream cheese side. Make sure to roll it firmly to keep it together. Repeat this for all slices. In a shallow bowl, whisk together the eggs, milk, vanilla extract, and remaining ground cinnamon. Add a pinch of salt for flavor. Heat a large skillet over medium heat. Add a tablespoon of butter or spray with cooking spray. Take each roll-up and dip it into the egg mixture. Ensure it is well coated. Place the roll-up seam-side down in the skillet. Cook for about 2-3 minutes on each side. Look for a golden brown color before removing them. While the roll-ups cool slightly, prepare the icing. In a small bowl, mix the powdered sugar with a bit of water or milk. Stir until it reaches a drizzling consistency. This will add a sweet finish to your roll-ups. Serve these warm and fresh off the skillet. Place them on a decorative plate for a nice touch. You can sprinkle with extra cinnamon or add fresh berries on the side. A dusting of powdered sugar also looks great! To make perfect Cinnamon Roll French Toast Roll-Ups, follow these tips: - Flatten the Bread: Use a rolling pin to flatten each slice. This helps them roll easily. - Mix Well: Blend the cream cheese and sugars until smooth. This ensures even filling. - Coat Well: Dip each roll-up in the egg mixture fully. This gives a nice, rich flavor. - Medium Heat: Cook on medium heat for the best golden color. Too high heat can burn them. - Don’t Crowd the Pan: Give each roll-up space in the skillet. This helps them cook evenly. Here are some common pitfalls to watch for: - Skipping Crust Removal: Leaving crusts can make rolling hard. Always cut them off. - Overfilling: Using too much filling can cause leaks. Stick to about a tablespoon. - Not Draining: Failing to drain excess oil can make them soggy. Place on a paper towel after cooking. - Not Waiting to Drizzle: Drizzling icing too soon can make it runny. Wait until they cool a bit. Elevate your roll-ups with these ideas: - Experiment with Spices: Add nutmeg or cardamom to the egg mixture for more depth. - Use Different Sugars: Swap granulated sugar for coconut sugar for a different taste. - Add Zest: Grate a little lemon or orange zest into the egg mix for a fresh twist. - Toppings Galore: Top with nuts, chocolate chips, or fresh fruits for extra flavor. These tips can help you create a delightful treat. Enjoy your cooking! Pro Tips Use Stale Bread: For the best texture, use slightly stale bread. It absorbs the egg mixture better without becoming too soggy. Customize the Filling: Experiment with different fillings like Nutella or fruit preserves for a unique twist on the classic flavor. Control the Heat: Cook on medium-low heat to ensure the roll-ups cook evenly and don’t brown too quickly before the inside is set. Serve Immediately: These roll-ups are best served fresh and warm. Keep them in a warm oven if you need to prepare them in batches. {{image_2}} You can make these roll-ups even better. Add fun flavors to the cream cheese filling. Try mixing in chocolate chips for a sweet twist. You can also use fresh fruit like sliced strawberries or bananas. This adds a nice touch of freshness. For a spiced kick, consider adding a pinch of nutmeg or even pumpkin spice. All these options make the roll-ups more fun and tasty. While white bread works great, you can switch it up. Try using whole wheat or sourdough for a different taste. Brioche or challah adds a rich flavor, making your roll-ups extra special. Gluten-free bread is also an option if you want to avoid gluten. Each bread type gives a unique texture and taste, so feel free to experiment. If you need a gluten-free version, it’s easy to adapt. Use gluten-free bread instead of regular bread. Check the labels to ensure it fits your diet. The rest of the recipe stays the same. You won’t lose any taste or fun from the original. This way, everyone can enjoy these sweet treats! To store leftover Cinnamon Roll French Toast Roll-Ups, let them cool first. Place them in an airtight container. They will stay fresh for up to three days in the fridge. Avoid stacking them to keep their shape intact. To reheat, use a skillet over medium heat. Add a little butter to the pan. Place the roll-ups seam-side down. Cook for about 2-3 minutes per side until warm and crispy. You can also use a microwave. Heat them for about 20-30 seconds. This method is quick but may make them soft. If you want to freeze the roll-ups, wrap each one in plastic wrap. Then, place them in a freezer bag. They can last up to two months in the freezer. When you’re ready to eat, thaw them overnight in the fridge. Reheat as described above for the best texture. Yes, you can use many types of bread! White bread is soft and easy to roll. Whole wheat or brioche adds flavor and texture. Sourdough gives a nice tang. Just make sure the bread is thick enough to hold the filling. To make the filling dairy-free, swap cream cheese for a dairy-free option. Use cashew cream or almond cream cheese. You can also use a mix of maple syrup and nut butter. This keeps the sweet taste while being dairy-free. Serve these roll-ups warm for the best taste. Drizzle them with icing right before eating. You can add fresh berries or sliced bananas on top. A sprinkle of cinnamon or powdered sugar makes it look nice too. Yes, you can prepare some parts in advance. You can make the filling and roll them up the night before. Just store them in the fridge. When you are ready, dip and cook them fresh for the best taste. This article covered all the key steps for making delicious Cinnamon Roll French Toast Roll-Ups. We discussed choosing good ingredients, preparing the filling, and cooking the roll-ups. I shared tips to avoid common mistakes and enhance flavors. Also, we explored variations you can try and important storage info. Remember, cooking is fun! Experiment and find what you love. Enjoy your tasty creations!

Cinnamon Roll French Toast Roll-Ups Easy and Fun Treat

Get ready for a treat that’s both fun and easy! Cinnamon Roll French Toast Roll-Ups combine warm, gooey cinnamon roll

- 4 large russet potatoes - 1 lb ground beef (or turkey) - 1 packet taco seasoning - 1 cup black beans (drained and rinsed) - 1 cup corn kernels (fresh or canned) - 1 cup shredded cheddar cheese - 1 cup sour cream - 1 medium tomato (diced) - 1/4 cup green onions (finely chopped) - 1/4 cup fresh cilantro (chopped) - Salt and pepper to taste - Olive oil for brushing Gathering the right ingredients is key for Cheesy Taco Potatoes. Start with russet potatoes. They have the perfect texture for baking. You need four large ones to make sure everyone gets a hearty serving. Next, choose between ground beef or turkey. Both work well with taco seasoning. The taco seasoning adds a burst of flavor. One packet is all you need. Don't forget the black beans. They add protein and fiber. Rinse and drain one cup before using. Corn kernels bring sweetness and crunch. You can use fresh corn or canned. Cheddar cheese is essential for that gooey, cheesy topping. You want one cup of shredded cheese. Sour cream brings creaminess and balances the spice. For a fresh touch, add diced tomatoes, green onions, and cilantro. They add color and flavor to your dish. Lastly, season with salt and pepper. A light brush of olive oil on the potatoes helps them bake perfectly. With these ingredients ready, you can create a flavorful and filling meal. {{ingredient_image_1}} - Preheat oven to 400°F (200°C). - Wash and scrub the russet potatoes. - Pierce each potato several times with a fork. - Brush potatoes lightly with olive oil. - Sprinkle salt over the potatoes for flavor. - Place the potatoes directly on the oven rack or on a baking tray. - Bake for about 45–60 minutes. - Check if they are tender by piercing with a fork. - Heat a skillet over medium-high heat. - Add ground beef and taco seasoning to the skillet. - Cook until the beef is browned, about 5–7 minutes. - Stir in black beans and corn, heat until warm. - Season the mixture with salt and pepper to taste. - Once baked, remove potatoes from the oven. - Let them cool slightly before handling. - Cut each potato lengthwise to create a pocket. - Use a fork to fluff the insides of the potatoes. - Fill each potato generously with the taco meat mixture. - Top with shredded cheddar cheese. - Return to the oven for 5–10 minutes until the cheese melts. - Remove and drizzle with sour cream, then add toppings like diced tomatoes, green onions, and cilantro. How to know when potatoes are done To check if your potatoes are ready, poke them with a fork. If the fork goes in easily, they are done. It usually takes 45–60 minutes at 400°F. You can also squeeze the potato gently; it should feel soft. Best practices for filling the potatoes After baking, cut the potatoes lengthwise. Use a fork to fluff the insides, making space for the filling. Be generous with the taco meat mix. It helps if you slightly mash the insides for a creamy texture. Presentation ideas for serving Serve your Cheesy Taco Potatoes on a large platter. Line the platter with fresh lettuce leaves. This adds color and a crisp touch. You can also place lime wedges around for zest. Garnishing options for added flavor Finish with a drizzle of sour cream on top. Add fresh diced tomatoes, green onions, and cilantro. These toppings bring freshness and a pop of color. A sprinkle of cheese on top makes it even better! Recommended side dishes Pair your Cheesy Taco Potatoes with a simple salad. A side of Mexican rice also works well. You can serve some chips and salsa for extra crunch. Beverage pairings to complement the meal Enjoy your potatoes with iced tea or lemonade. A light beer or a margarita can also enhance the meal. Choose what you love for a fun dining experience! Pro Tips Choose the Right Potatoes: For the best texture, opt for russet potatoes as they are fluffy and ideal for baking. Customize Your Filling: Feel free to add other ingredients like jalapeños or avocado for extra flavor and texture. Let Them Cool: After baking, let the potatoes cool for a few minutes before cutting to prevent burns and make handling easier. Make Ahead: You can prepare the filling in advance and store it in the fridge, making assembly quick and easy at mealtime. {{image_2}} You can swap the ground beef for other meats. Ground turkey or chicken works well. If you prefer plants, try lentils or crumbled tofu. For cheese, cheddar is great, but Monterey Jack adds a nice touch. Pepper Jack boosts the heat, so choose what you love. Spices can elevate your taco potatoes. Add cumin for warmth or chili powder for kick. Chopped bell peppers add sweetness while jalapeños bring the heat. These little tweaks can make a big difference. Think about what flavors you enjoy. To make this dish vegetarian, skip the meat. Use beans, lentils, or veggies to fill the potatoes. For a vegan option, replace sour cream with dairy-free yogurt. If you're watching carbs, try using cauliflower or zucchini instead of potatoes. You can still enjoy all that cheesy goodness! To store leftover Cheesy Taco Potatoes, let them cool first. Place them in an airtight container. This keeps the potatoes fresh. You can also wrap them in plastic wrap. Make sure they are sealed tight to prevent air from getting in. For best results, store them in the fridge. For reheating, the oven works best. Heat your oven to 350°F (175°C). Place the potatoes on a baking sheet. Cover them with foil to keep them moist. Bake for about 15-20 minutes, or until heated through. You can also use a microwave. Just put them on a microwave-safe plate. Heat for 1-2 minutes, checking to avoid overheating. Yes, you can freeze Cheesy Taco Potatoes. Start by letting them cool completely. This helps prevent ice crystals. Wrap each potato in plastic wrap, then in aluminum foil. This double layer protects them from freezer burn. Place the wrapped potatoes in a freezer bag. Squeeze out extra air before sealing. To thaw, place the potatoes in the fridge overnight. This keeps them safe. You can also use the microwave. Set it to defrost mode and check often. Once thawed, reheat as mentioned above for the best taste. Cheesy Taco Potatoes last about 3-5 days in the refrigerator. Store them in an airtight container. If you notice any mold, throw them away. Signs that the dish has gone bad include a sour smell or a change in color. If the potatoes feel mushy or slimy, do not eat them. Always trust your senses to keep meals safe and tasty. What can I use instead of sour cream? You can use Greek yogurt for a similar taste. It adds creaminess and tang. Another option is cottage cheese. Just blend it until smooth for a nice texture. Can I prepare this recipe in advance? Yes, you can. Bake the potatoes and prepare the taco mix ahead of time. Store them separately in the fridge. When ready, stuff the potatoes and bake to heat through. What do I do if the potatoes are hard after baking? If potatoes are hard, they may need more time. Bake them longer until they are soft when pierced. You can wrap them in foil to help cook them evenly. How to avoid soggy potatoes? To avoid soggy potatoes, make sure to pierce them before baking. This allows steam to escape. Also, avoid adding too much liquid to the filling. Can I make this recipe spicy? Yes! You can add diced jalapeños or a pinch of cayenne pepper to the meat mix. This will give it a nice kick that spicy food lovers will enjoy. What are some kid-friendly adaptations? For kids, you can leave out the spices or use mild taco seasoning. You can also add more cheese and omit the green onions or cilantro if they prefer simpler flavors. Cheesy Taco Potatoes are a fun and tasty dish that combines flavor and comfort. You gather simple ingredients like potatoes, meat, and cheese. I shared steps to prepare, bake, and serve them perfectly. Remember, you can swap ingredients for personal taste or dietary needs. These potatoes can be stored and even frozen for later meals. Enjoy making and sharing this dish with friends and family! You will impress everyone with your tasty creation.

Cheesy Taco Potatoes Loaded Flavorful Delight

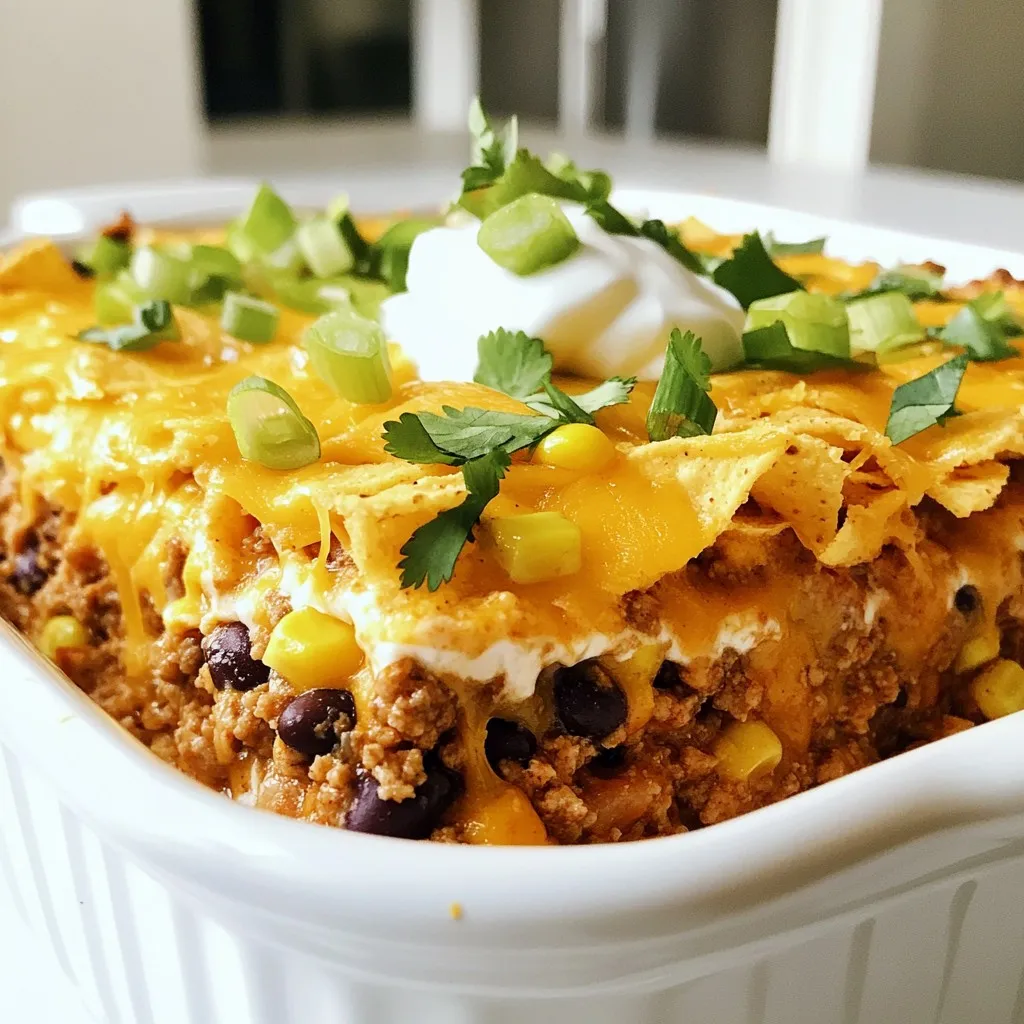
Get ready to treat your taste buds! Cheesy Taco Potatoes are a fun and yummy way to enjoy a classic

To make these easy chicken rice meal prep bowls, gather the following ingredients: - 2 cups cooked brown rice - 1 lb chicken breast, diced - 2 tablespoons olive oil - 1 teaspoon garlic powder - 1 teaspoon paprika - 1 teaspoon dried thyme - Salt and pepper to taste - 2 cups broccoli florets (fresh or frozen) - 1 cup cherry tomatoes, halved - 1/4 cup low-sodium soy sauce These ingredients create a balanced meal that is full of flavor and nutrition. The brown rice serves as a healthy base, while the chicken provides lean protein. Broccoli adds fiber and vitamins, making these bowls wholesome. You can customize these bowls with optional ingredients for extra taste: - 2 tablespoons sesame seeds (optional) - 1 tablespoon honey (optional) - Fresh parsley for garnish Adding sesame seeds gives a nice crunch. A drizzle of honey can enhance the sauce's sweetness. Fresh parsley adds a pop of color and freshness to each bowl. This meal is packed with nutrients. Here’s a simple breakdown: - Brown rice is rich in fiber and helps keep you full. - Chicken breast is a great source of protein, supporting muscle health. - Broccoli is low in calories but high in vitamins C and K. - Cherry tomatoes add antioxidants and flavor. These ingredients together create a meal that supports energy, health, and satisfaction. Enjoy this easy chicken rice meal prep bowl, knowing you are fueling your body right. {{ingredient_image_1}} Start by taking 1 pound of diced chicken breast. Place it in a large bowl. Add 2 tablespoons of olive oil, 1 teaspoon of garlic powder, 1 teaspoon of paprika, and 1 teaspoon of dried thyme. Sprinkle with salt and pepper to taste. Mix the chicken well until every piece is coated evenly. This step adds great flavor to your chicken. Grab a non-stick skillet and heat it over medium heat. Once hot, add your seasoned chicken. Cook the chicken for 6 to 8 minutes. Stir it often to ensure even cooking. You want the chicken to turn a nice golden brown and be no longer pink in the center. Once done, remove the skillet from the heat and set the chicken aside. Now, let’s steam the broccoli. Fill a pot with water and bring it to a boil. Use a steaming basket and place 2 cups of broccoli florets in it. Steam the broccoli for about 4 to 5 minutes. It should be tender but still bright green. After steaming, drain the broccoli and set it aside. To assemble your meal prep bowls, start with a base of 2 cups of cooked brown rice in each container. Next, add the cooked chicken and the steamed broccoli on top. Evenly distribute 1 cup of halved cherry tomatoes over each bowl. For added flavor, mix 1/4 cup of low-sodium soy sauce with 1 tablespoon of honey, if you like. Drizzle this sauce over each bowl. Finish with a sprinkle of sesame seeds and some fresh parsley for a nice touch. Your meal prep bowls are now ready to enjoy! To save time, cook chicken and rice in one go. Use leftover rice if you have it. You can also slice chicken ahead of time. Marinate it overnight for better flavor. Cook in bulk and make extra servings. Store your meal prep bowls in the fridge. They make great lunches for the week. Make your bowls look great by layering. Start with rice, then add chicken and broccoli. Place cherry tomatoes on top for a pop of color. Drizzle sauce last to keep rice dry. Use clear containers to show off the layers. Garnish with sesame seeds and parsley for a nice finish. Don’t be afraid to mix it up! Change spices based on what you like. Swap garlic powder for fresh garlic for a stronger taste. Add more or less soy sauce to adjust saltiness. Use different veggies like bell peppers or carrots. Try adding a squeeze of lime for a fresh twist. Pro Tips Marinate for More Flavor: Allow the chicken to marinate in the olive oil and spices for at least 30 minutes before cooking. This enhances the flavor and tenderness of the chicken. Use Fresh Ingredients: Whenever possible, opt for fresh broccoli and cherry tomatoes. They not only taste better but also provide more nutrients compared to frozen options. Customize Your Veggies: Feel free to swap out the broccoli and tomatoes for your favorite vegetables. Bell peppers, snap peas, or zucchini work great in this recipe. Meal Prep Storage: Make sure to store your meal prep bowls in airtight containers in the fridge. They can last up to 4 days for a quick and easy meal throughout the week. {{image_2}} You can swap chicken for other proteins. Try diced turkey or lean beef. Shrimp is also a great option. If you want something different, use tofu or tempeh. Just season them like the chicken. Cook them until they are done. These swaps keep the meal fresh and exciting. For vegetarian or vegan bowls, swap the chicken with chickpeas or black beans. They add protein and fiber. You can also use lentils for a hearty option. Mix in extra veggies like bell peppers or zucchini. This change makes your meal colorful and tasty. Change up the flavors with different sauces. Try teriyaki sauce for a sweet twist. A spicy sauce can add heat and excitement. For herbs, use basil or cilantro instead of thyme. Experimenting with these swaps can make each meal unique, keeping your taste buds happy. To keep your Easy Chicken Rice Meal Prep Bowls fresh, use airtight containers. Glass or BPA-free plastic works well. Let the bowls cool before sealing. If you add sauce, store it separately. This keeps the rice from getting soggy. Label each container with the date. Store these in the fridge for easy access. When stored correctly, these meal prep bowls last about 4 days in the fridge. After this time, the chicken may lose its flavor and texture. If you see any signs of spoilage, toss the bowl. Always trust your senses. If it smells off or looks strange, don’t eat it. Reheat your meal prep bowls in the microwave. Place a bowl in for about 2-3 minutes. Stir halfway through for even heating. If using the oven, preheat to 350°F (175°C). Heat for about 10-15 minutes until warmed through. Add a splash of water to keep the rice moist. Enjoy your meal warm and fresh! Yes, you can use white rice. It cooks faster than brown rice. White rice has a softer texture. It also absorbs flavors well. Just be mindful of the cooking time. Follow the package directions for best results. This swap makes the meal quick and easy. You can add many veggies to your bowls. Try carrots, bell peppers, or snap peas. Spinach or kale adds color and nutrition. You can also use frozen mixed vegetables for ease. Just steam or sauté them before adding. Feel free to get creative with your choices! To make these bowls gluten-free, swap low-sodium soy sauce for tamari. Tamari is a gluten-free soy sauce. You can also use coconut aminos. This sauce gives a similar taste without gluten. Always check labels on other ingredients for hidden gluten. Enjoy your meal prep worry-free! This guide covers everything you need for easy chicken rice meal prep bowls. You explored key ingredients, step-by-step cooking, and smart tips for saving time. Variations let you mix flavors and protein types. I discussed storage tips to keep meals fresh and answered common questions. With these tools, you can create delicious bowls that fit your taste. Enjoy simple, healthy meals that save you time during the week. Prepare these bowls and make meal prep fun and easy!

Easy Chicken Rice Meal Prep Bowls Fast and Simple Recipe

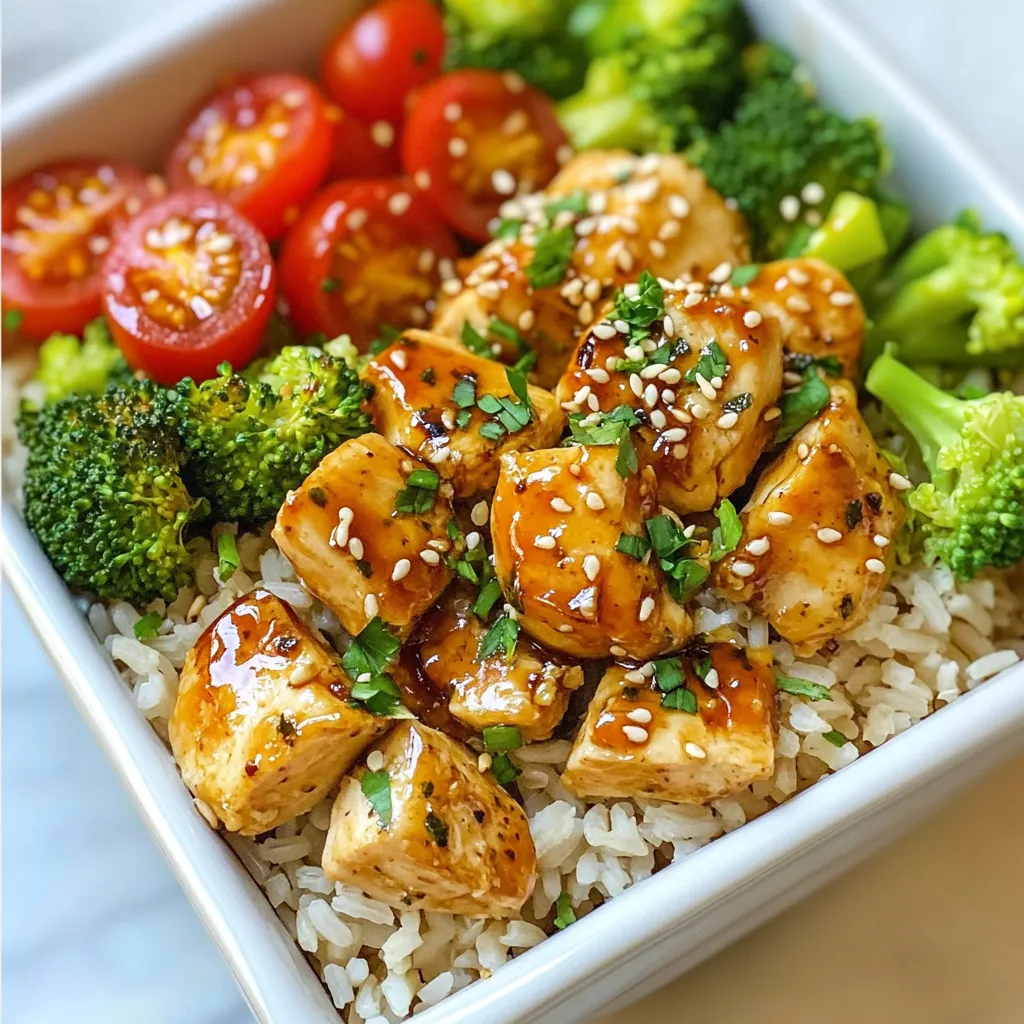
Are you ready to simplify your weeknight dinners? My Easy Chicken Rice Meal Prep Bowls are your key to fast,

Older posts
Newer posts
← Previous Page1 … Page134 Page135 Page136 … Page143 Next →

dsad

© 2025 Southern Dishes • Built with GeneratePress

Our Policies

  • Copyright Policy
  • Cookie Policy
  • GDPR Policy
  • Privacy Policy
  • Disclaimer
  • Terms Of Use

More Information

  • Home
  • About
  • Contact
  • Appetizers
  • Dessert
  • Dinner
  • Drinks
©2025, Southern Dishes About Back To Top