Skip to content
DisclaimerTerms Of UseGDPR PolicyCookie Policy

Southern Dishes

  • Home
  • Drinks
  • Appetizers
  • Dinner
  • Dessert
  • About
  • Contact
  • Privacy Policy
DisclaimerTerms Of UseGDPR PolicyCookie Policy

Isabella

To make Peanut Butter Banana Bites, you’ll need: - 2 ripe bananas - 1/2 cup natural peanut butter - 1/4 cup honey - 1/4 tsp cinnamon - 1/2 cup granola - Dark chocolate chips (optional, for drizzling) If you don’t have ripe bananas, you can use fresh ones. Just make sure they are firm. For peanut butter, use any natural brand. If you want a nut-free option, try sunflower seed butter. Honey adds sweetness, but maple syrup works too. You can skip cinnamon or use nutmeg if you like a different flavor. Granola gives a nice crunch; you can use crushed nuts if you prefer. Choose ripe bananas for the best flavor and creaminess. Look for natural peanut butter with no added sugar or oils. This keeps the taste clean and healthy. When selecting honey, go for raw honey for more nutrients. For granola, pick one that’s low in sugar. If you include dark chocolate, choose high-quality chocolate for a rich taste. Good ingredients make the bites even more special! Start by peeling the bananas. Use ripe bananas for the best taste. Slice them into 1/2 inch thick rounds. You should have about 16-20 rounds. Make sure the slices are even for good stacking. In a medium bowl, combine the peanut butter, honey, and cinnamon. Stir until the mix is smooth. This mixture will be the star of your bites. The honey adds sweetness, while cinnamon gives a warm flavor. Take one banana slice and spread a generous teaspoon of the peanut butter mix on top. Place another banana slice on top to create a sandwich. Press down gently to hold it together. Repeat this until you use all the banana slices. Next, roll each banana sandwich in granola. Make sure to coat all sides well. This step will add a nice crunch to your bites. Plus, it gives them a fun look! If you want to add chocolate, melt dark chocolate chips. You can do this in the microwave or over a double boiler. Once melted, drizzle the chocolate over the banana bites for extra sweetness. This step is optional but highly recommended! Place the bites on a baking sheet lined with parchment paper. Refrigerate them for at least 30 minutes. This helps the bites set and makes them easier to eat. Serve them cold or at room temperature for a tasty snack! To keep your Peanut Butter Banana Bites fresh, store them in an airtight container. Place parchment paper between layers to avoid sticking. They last well in the fridge for about 3 to 5 days. If you want to store them longer, consider freezing them. Just freeze them on a baking sheet first, then transfer to a container. They can stay frozen for up to 3 months. These bites are perfect for a quick snack or a fun treat. Serve them cold for a refreshing bite. You can also pair them with yogurt for a tasty breakfast. If you want to impress guests, arrange them on a platter with fresh fruit. They make a great addition to parties or picnics. You can easily adapt this recipe to fit different diets. If you're nut-free, try sun butter instead of peanut butter. For a vegan option, swap honey for maple syrup or agave nectar. If you need gluten-free bites, make sure your granola is certified gluten-free. Feel free to play with flavors, too! Add vanilla or a pinch of nutmeg to the mix for a fun twist. {{image_2}} You can swap peanut butter for other nut butters. Almond butter adds a nice twist. Cashew butter brings a creamy texture. Sunflower seed butter is a great nut-free option. Each nut butter has a unique flavor and can change the whole taste. Honey is sweet, but you can try other sweeteners too. Maple syrup offers a rich sweetness. Agave syrup is a lighter option. If you want no sugar, use mashed dates. Each sweetener adds a different taste and texture to your bites. You can enhance the flavor of your bites easily. A splash of vanilla gives a warm, sweet note. A pinch of nutmeg adds warmth and spice. You can also try cocoa powder for a chocolatey touch. These flavors can make your bites more exciting and unique. Each serving of Peanut Butter Banana Bites has around 200 calories. This snack gives you energy without weighing you down. You get about 10 grams of fat, mostly from the peanut butter. These bites also have 30 grams of carbs and 4 grams of protein. This mix of macros makes them a filling snack. - Bananas: Rich in potassium, bananas help your heart and muscles. They also provide quick energy. - Peanut Butter: This nutty spread is packed with healthy fats. It can help lower bad cholesterol and keep you full longer. - Honey: A natural sweetener, honey adds vitamins and minerals. It can also help fight allergies. - Cinnamon: This spice is not only tasty but may also help control blood sugar levels. - Granola: Often made from oats, granola is a great source of fiber. It supports digestion and keeps you satisfied. Peanut Butter Banana Bites are easy to adapt. They are naturally gluten-free. Just check your granola to ensure it meets that need. For a vegan option, use maple syrup instead of honey. You can also pick a vegan granola. With these swaps, everyone can enjoy this tasty treat! Peanut Butter Banana Bites stay fresh in the fridge for about three days. Store them in an airtight container. This keeps them safe from air and moisture. If you notice the bananas browning, it's time to toss them. Yes, you can freeze Peanut Butter Banana Bites! To do this, place them in a single layer on a baking sheet. Freeze them for about an hour, then transfer to a freezer bag. They can last up to two months in the freezer. Just thaw them in the fridge before eating. If you need an alternative to honey, try maple syrup or agave nectar. Both add sweetness and keep the texture smooth. You can also use a sugar substitute if you want fewer calories. Just remember to adjust the amount based on the sweetness level. Yes, these snacks are great for kids! They are easy to make and full of flavor. The combination of banana and peanut butter gives them energy. Just watch for allergies to peanuts or honey. Always check with parents if serving to young children. You learned about making tasty Peanut Butter Banana Bites. We covered the right ingredients, measured them correctly, and gave tips for quality. I shared simple steps to prepare and assemble these bites. You also found helpful storage advice and fun ways to customize these snacks. These bites not only taste good but also offer health benefits. You can easily change ingredients to fit your diet. Now, go ahead and make your own delicious bites!

Peanut Butter Banana Bites Easy and Tasty Snack

Looking for an easy and tasty snack that satisfies both your sweet tooth and hunger? You’ll love these Peanut Butter

- 1 large head of cauliflower, cut into florets - 1 cup cornstarch - 2 tablespoons vegetable oil - 1 tablespoon ginger, minced - 2 cloves garlic, minced - 1/4 cup soy sauce - 1/4 cup hoisin sauce - 2 tablespoons rice vinegar - 1 tablespoon sesame oil - 1 tablespoon Sriracha (adjust for spice preference) - 2 green onions, sliced - Sesame seeds To create General Tso’s Cauliflower, gather these fresh ingredients. Start with a head of cauliflower. Cut it into bite-sized florets. The cornstarch gives them a great crunch. Use vegetable oil for baking. For the sauce, minced ginger and garlic add flavor. Soy sauce and hoisin sauce create a rich base. Rice vinegar adds tanginess, while sesame oil gives depth. Sriracha brings the heat, so adjust it based on your taste. Finally, use green onions and sesame seeds as garnishes. They add color and crunch. Gather all these ingredients to start your cooking adventure! First, I preheat my oven to 425°F (220°C). This step is key for crispiness. Next, I take a large head of cauliflower and cut it into bite-sized florets. In a big bowl, I toss the florets with 1 cup of cornstarch. This coating makes the cauliflower super crunchy. I want to ensure each piece gets covered well. Now, I arrange the coated cauliflower florets on a baking sheet lined with parchment paper. I drizzle 2 tablespoons of vegetable oil over them. This helps them crisp up nicely. I bake the cauliflower for about 25-30 minutes. Halfway through, I flip the florets to get even browning. They should turn golden brown and crunchy. While the cauliflower bakes, I prepare the sauce. First, I heat a medium saucepan over medium heat. I add 1 tablespoon of minced ginger and 2 cloves of minced garlic. I sauté these for about 1 minute until they smell great. Then, I pour in 1/4 cup of soy sauce, 1/4 cup of hoisin sauce, 2 tablespoons of rice vinegar, 1 tablespoon of sesame oil, and 1 tablespoon of Sriracha. I stir everything together and let it simmer for 5 minutes. This thickens the sauce and brings all the flavors together. Once the cauliflower is baked, I take it out of the oven. I carefully transfer the hot cauliflower to the saucepan with the sauce. I toss everything well to coat the florets evenly. Next, I return the coated cauliflower to the baking sheet. I bake it again for an extra 5 minutes to seal in that amazing flavor. After this, I let it cool a bit. For some extra heat, I drizzle more Sriracha on top. Finally, I serve it warm, garnished with sliced green onions and sesame seeds. Enjoy! The key to a great crunch is the cornstarch coating. It locks in moisture and creates a crispy layer. Make sure every floret is coated well. This step is essential for that satisfying bite. Set your oven to 425°F (220°C). This high heat helps achieve the perfect crisp. Bake the cauliflower for 25-30 minutes. Flip them halfway to ensure an even golden brown. Want to control the heat? Sriracha is your friend. You can add more or less, depending on your taste. Start with one tablespoon for a mild kick. If you like it spicy, add more. Just remember to taste as you go! Get creative by adding more veggies. Broccoli, bell peppers, or snap peas work well. You can also toss in some protein like tofu or chicken for extra substance. If you're feeling adventurous, try different sauces. Teriyaki or sweet chili sauce could give a fun twist. Just mix and match to find your favorite flavor combo! {{image_2}} You can make General Tso's cauliflower in a few healthier ways. One option is to bake instead of fry it. Baking gives you a nice crunch without extra oil. You can also make it gluten-free. Just use gluten-free soy sauce and cornstarch. This way, everyone can enjoy this dish! Want to mix it up? Try sweet and sour flavors. Add some pineapple or bell peppers for a fruity twist. If you like heat, go for spicy options. Increase the Sriracha or add chili flakes. You can even create your own sauce to suit your taste! General Tso's cauliflower pairs well with rice or noodles. These sides soak up the sauce and add fullness to your meal. You can also toss it into salads for a crunchy bite. This adds texture and flavor, making a delightful dish. To store your leftover General Tso’s Cauliflower, let it cool first. Place it in an airtight container. This keeps it fresh. You can enjoy it again within three days. For reheating, use an oven or an air fryer. Heat it at 350°F (175°C) for about 10 minutes. This method keeps the cauliflower crispy. You can also use a microwave, but it may not stay crunchy. If you want to keep General Tso’s Cauliflower longer, freezing is a great option. First, let the dish cool completely. Transfer it to a freezer-safe container. You can also wrap it tightly in plastic wrap. Make sure to remove as much air as possible. When you’re ready to eat, thaw it in the fridge overnight. Reheat it in the oven for the best texture. In the fridge, General Tso’s Cauliflower lasts about three days. If you freeze it, it can last up to three months. Just remember to check for any freezer burn before cooking. Enjoy your flavorful dish at its best! You can use soy sauce mixed with a bit of sugar. This mix gives a sweet and salty taste. Another option is to use plum sauce or barbecue sauce. Both add nice flavors to the dish. Yes, you can prepare the cauliflower and sauce ahead. Store them separately in the fridge for up to two days. When ready to eat, just bake the cauliflower and toss it with the sauce. Yes, General Tso’s Cauliflower is vegan. It uses plant-based ingredients like cauliflower and soy sauce. No animal products are in this dish, making it perfect for vegan diets. Add more Sriracha to the sauce for extra heat. You can also sprinkle in red pepper flakes. Adjust these spices to fit your heat preference. You can use frozen cauliflower, but it may not get as crispy. Make sure to thaw and drain it before coating with cornstarch. This helps keep the texture nice and crunchy. In this article, we explored how to make delicious General Tso's Cauliflower. We covered the main ingredients, sauce components, and garnishes that bring this dish to life. I shared step-by-step instructions for preparing and baking the cauliflower while giving tips for the perfect crisp. We also discussed variations, healthier options, and storage information for leftovers. Now you can enjoy a tasty dish that suits your taste and diet. This recipe is easy to follow and great for any meal. Enjoy your cooking!

General Tso’s Cauliflower A Crunchy Delight

Are you ready to enjoy a tasty twist on your favorite dish? In this post, I’ll show you how to

- 4 boneless, skinless chicken breasts - 2 lemons (1 for juice, 1 sliced) - 1 cup cherry tomatoes, halved - 1 bell pepper (any color), sliced - 1 red onion, cut into wedges For this dish, we use chicken breasts because they cook quickly. The lemons add bright flavor. The cherry tomatoes, bell pepper, and onion give color and taste. - 2 teaspoons dried oregano - 2 teaspoons dried thyme - 1 teaspoon paprika - Salt and pepper to taste Oregano and thyme bring a nice herb taste. Paprika adds warmth. Adjust salt and pepper to your liking. - 3 tablespoons olive oil - 4 cloves garlic, minced - Fresh parsley for garnish Olive oil keeps the chicken moist. Garlic adds depth. Fresh parsley makes the dish look bright and fresh. Prepping the marinade Start by gathering your ingredients. In a large bowl, mix together olive oil, juice from one lemon, minced garlic, oregano, thyme, paprika, salt, and pepper. This mix gives the chicken its zesty flavor. Marinating the chicken Add the chicken breasts to the bowl. Turn them to coat each piece well in the marinade. Let the chicken sit for at least 15 minutes. If you have time, marinate it for up to an hour. This extra time lets the flavors soak in more deeply. Arranging on the sheet pan While the chicken marinates, prepare your vegetables. In another bowl, toss cherry tomatoes, bell pepper slices, and red onion with olive oil, salt, and pepper. On a large sheet pan, place the marinated chicken in the center. Lay lemon slices around the chicken. Spread the vegetable mix evenly around the chicken. Roasting time and temperature Preheat your oven to 425°F (220°C). Roast the chicken and vegetables for about 25 to 30 minutes. The chicken is done when it reaches an internal temperature of 165°F (75°C) and the vegetables are tender. Resting the chicken Once you take the sheet pan out of the oven, let the chicken rest for about 5 minutes. This helps keep the juices inside the meat. Garnishing before serving Before serving, sprinkle freshly chopped parsley over the chicken and vegetables. You can also add more lemon slices for a bright, fresh look. Enjoy this colorful and tasty dish! For the best flavor, marinate your chicken for at least 15 minutes. If you have more time, let it sit for up to 1 hour in the fridge. This allows the chicken to soak up all the zesty goodness. You can also add fresh herbs like basil or rosemary for more flavor. Mixing in a bit of honey can give a sweet twist too. Set your oven to 425°F (220°C) for a perfect roast. This high heat helps the chicken cook quickly and keeps it juicy. To ensure even cooking, spread the vegetables out well on the pan. This way, each piece gets nice heat and browning. Stir them around halfway through cooking for even better results. For a beautiful presentation, serve directly from the sheet pan. This adds a rustic touch. You can also transfer everything to a large platter. Garnish with extra lemon slices and fresh parsley. This makes the dish look bright and inviting. Pair it with a light salad or crusty bread for a complete meal. A chilled white wine complements the dish nicely, enhancing the lemony flavors. {{image_2}} You can change up the veggies in your sheet pan meal. Try adding: - Zucchini, sliced - Carrots, cut into sticks - Broccoli florets These swaps give you new flavors and textures. You can also mix up the marinade. Use different herbs like basil or cilantro. Try a splash of soy sauce for a twist. If you need gluten-free options, this meal is perfect. All the ingredients listed are gluten-free. To make it low-carb, skip the potatoes and add more low-carb veggies. You can prepare this meal ahead. Store marinated chicken in the fridge for up to 24 hours. Freeze the cooked meal for easy dinners later. Boost the flavor by adding more citrus. Try orange slices or limes. Fresh herbs like dill or rosemary can also work well. If you like heat, add red pepper flakes or a dash of hot sauce. Adjust the spice level to fit your taste. Experimenting with flavors makes this dish your own. After enjoying your delicious sheet-pan lemon herb chicken, you may have leftovers. To keep them fresh, store the chicken and veggies in an airtight container. This way, they stay moist and flavorful. Place the container in the fridge right after the meal. If you want to save them for later, freezing is a great option. Wrap the chicken and veggies tightly in plastic wrap or aluminum foil before placing them in a freezer bag. This helps prevent freezer burn. When it’s time to heat your leftovers, you have two choices: the oven or the microwave. I recommend using the oven for the best results. Preheat it to 350°F (175°C) and place the chicken on a baking sheet. Heat for about 15-20 minutes until warmed through. The microwave is faster, but it can dry out the chicken. If you use it, heat in short bursts of 30 seconds, checking often. To keep the chicken moist, add a small splash of water before microwaving. Store your leftovers in the fridge for up to 3 days. If you freeze them, they’re good for about 2-3 months. Always check for signs of spoilage before eating. Look for any off smells or changes in color. If the chicken feels slimy or the veggies look wilted, it’s best to toss them. Keeping an eye on your food helps ensure you enjoy safe and tasty meals. You should marinate the chicken for at least 15 minutes. This time allows the flavors to soak in. If you have more time, marinate for up to 1 hour in the fridge. The longer it sits, the more flavor it gets. Yes, you can use bone-in chicken. Just know it may take longer to cook. Make sure to adjust the cooking time to ensure it reaches 165°F (75°C) inside. If you don't have fresh herbs, dried herbs work well. Use one teaspoon of dried oregano or thyme for each tablespoon of fresh herbs. The flavor may not be as bright, but it will still taste great. Absolutely! This dish is perfect for meal prep. You can cook it all at once and divide it into portions. Store in airtight containers in the fridge for up to four days. Check the chicken's internal temperature with a meat thermometer. It should reach 165°F (75°C). If you don’t have a thermometer, cut into the thickest part. The juices should run clear, not pink. Yes, you can prepare it ahead of time. Marinate the chicken and chop the veggies. Keep everything in the fridge until you're ready to cook. Just remember to cook it the same day for the best taste. This recipe covers everything you need. It starts with fresh chicken, herbs, and veggies. You learn about spices, marinating, and roasting. Tips help enhance your meal. You can adjust flavors and storage methods for leftovers. Cooking is fun and rewarding. With a few changes, you make this dish your own. Now, you have the tools for a tasty dinner. Enjoy your cooking adventure!

Sheet-Pan Lemon Herb Chicken Quick and Flavorful Meal

Looking for a quick and tasty dinner? Try my Sheet-Pan Lemon Herb Chicken! This simple recipe brings fresh flavors together

To make Easy Butter Chicken, gather these key ingredients: - 500g boneless chicken thighs, cut into bite-sized pieces - 2 tablespoons ghee or unsalted butter - 1 large onion, finely chopped - 3 cloves garlic, minced - 1 inch ginger, grated - 2 teaspoons garam masala - 1 teaspoon ground cumin - 1 teaspoon ground coriander - 1 teaspoon cayenne pepper (adjust to taste) - 400g canned crushed tomatoes - 250ml heavy cream - Salt to taste - Fresh cilantro, chopped (for garnish) You can swap some ingredients if needed. Use chicken breast instead of thighs for a leaner option. Light cream can replace heavy cream for a lower-fat version. If you lack ghee, unsalted butter works well. For a milder dish, reduce cayenne pepper. You can also use fresh tomatoes instead of canned ones. Just chop them finely, and add more cooking time. Garnishes add a nice touch to your butter chicken. Here are some ideas: - Chopped fresh cilantro for a burst of color and flavor - A drizzle of cream to make it look fancy - Serve with fluffy basmati rice or warm naan bread - Lime wedges for a zesty kick These garnishes enhance both taste and presentation, making your meal more enjoyable. {{ingredient_image_1}} First, gather all your ingredients. You need 500g of boneless chicken thighs. Cut them into small pieces. Chop one large onion finely. Mince three cloves of garlic and grate one inch of ginger. Get your spices ready. You will need garam masala, ground cumin, ground coriander, and cayenne pepper. Measure two teaspoons of garam masala, one teaspoon each of cumin and coriander, and one teaspoon of cayenne. If you prefer less heat, use less cayenne. Open a can of crushed tomatoes and measure 250ml of heavy cream. This makes a rich sauce. Lastly, have some salt and fresh cilantro for garnish. Heat two tablespoons of ghee or unsalted butter in a large skillet over medium heat. Once the butter melts, add the chopped onion. Sauté it for about 5 to 7 minutes until it turns golden brown. Next, mix in the minced garlic and grated ginger. Cook them for 1 to 2 minutes until they smell great. Add the garam masala, cumin, coriander, and cayenne pepper. Stir well and cook for one more minute. This toasts the spices and brings out their flavor. Now, add the chicken pieces. Stir them to coat with the spice mix. Cook for about 5 minutes. The chicken should no longer be pink. Pour in the crushed tomatoes and stir. Bring this mixture to a simmer. After that, lower the heat and cover the skillet. Let it cook for 15 minutes. This step allows the chicken to soak up all the flavors. After 15 minutes, check the chicken. It should be cooked through. Now, stir in the heavy cream. This makes the sauce creamy and smooth. Let it simmer for another 5 minutes. Taste the sauce and add salt to your liking. For the final touch, chop some fresh cilantro and sprinkle it on top. This adds color and freshness. Serve your butter chicken hot over basmati rice or with warm naan. Enjoy your delicious meal! To make great butter chicken, pay attention to your heat. Use medium heat for sautéing. If it's too high, your spices may burn. This can make your dish taste bitter. Also, don't skip the marination step. Marinating the chicken helps it soak up flavors. If you rush this step, you lose taste. Always use boneless chicken thighs. They stay tender and juicy while cooking. Cut the chicken into even pieces. This helps them cook at the same rate. When you add chicken to the pan, don’t overcrowd it. Give each piece space to brown. This adds more flavor to your dish. For a richer taste, use ghee instead of butter. Ghee adds depth and a hint of nuttiness. You can also play with spices. Try adding cardamom or cinnamon for warmth. If you want more texture, add peas or bell peppers. They will add color and crunch. Don't forget to garnish with fresh cilantro. It brightens up the dish and adds freshness. Pro Tips Use Fresh Spices: Freshly ground spices can elevate the flavors significantly compared to pre-ground ones. Consider grinding whole spices just before use for a more aromatic dish. Adjusting Spice Levels: If you prefer a milder butter chicken, reduce the cayenne pepper or omit it altogether. You can always add more spice later, but it’s hard to tone it down once added. Marinate the Chicken: For even more flavor, marinate the chicken in yogurt and spices for a few hours or overnight before cooking. This not only adds taste but also tenderizes the meat. Serve with Accompaniments: Butter chicken pairs beautifully with fluffy basmati rice or warm naan. Consider adding a side of cucumber raita for a refreshing balance to the rich dish. {{image_2}} To turn up the heat, add more cayenne pepper. Start with 1 teaspoon. If you crave extra spice, mix in diced green chilies. You can also use chili powder for a different flavor. Adjust the spices to fit your taste. For a smoky kick, add a bit of smoked paprika. The key is to taste as you go and find your perfect spice level. If you want a meatless option, try paneer cheese. Cut 400g of paneer into cubes. Cook it in the same way as chicken. Or swap chicken for chickpeas. Use one can of drained chickpeas instead. These options keep the dish rich and creamy, making it a fun twist. Serve it with rice or naan for a filling meal. To make a lighter version of butter chicken, use skinless chicken breasts. They have less fat than thighs. You can also replace heavy cream with coconut milk. This keeps the sauce creamy but reduces calories. Another tip is to use low-fat yogurt instead of cream. It adds a tangy flavor without the extra fat. Pair these changes with lots of veggies for a nutritious boost. Once your butter chicken is cool, store it in an airtight container. Refrigerate it within two hours of cooking. It will stay fresh for three to four days. When you want to reheat it, just add a little water if it seems thick. This keeps the sauce creamy. To freeze butter chicken, let it cool completely. Transfer it to a freezer-safe container. It can last up to three months in the freezer. Make sure to leave some space in the container for the sauce to expand. For best results, thaw it in the fridge overnight before reheating. You can reheat butter chicken in several ways. The best method is on the stove over low heat. Stir it often to warm it evenly. You can also use the microwave. Heat it in short bursts, stirring in between, to avoid hot spots. Adding a splash of cream can restore its rich flavor. Butter chicken is rich and creamy. It goes well with fluffy basmati rice. You can also serve it with warm naan bread. Other good sides include steamed vegetables or a fresh salad. These options balance the flavors and add variety to your meal. Yes, you can make butter chicken ahead of time. Prepare it and let it cool completely. Store it in an airtight container in the fridge. It will stay fresh for up to three days. When ready to eat, just reheat it gently on the stove. This will help the flavors deepen. To adjust the spice level, start with less cayenne pepper. You can add more as it cooks. Taste it before serving. If it’s too spicy, stir in more cream or yogurt. This will help tone it down. Enjoy your butter chicken just the way you like it! This blog post covered all you need for making perfect Butter Chicken. We detailed essential ingredients, offered tips for cooking, and shared tasty variations. Remember to adjust flavors and follow storage tips for the best results. Cooking can be fun and rewarding. With these steps, you can impress your friends and family. Enjoy your cooking journey and experiment with different styles. Every dish tells a story, and your Butter Chicken can be the next great tale. Happy cooking!

Easy Butter Chicken Simple and Flavorful Recipe

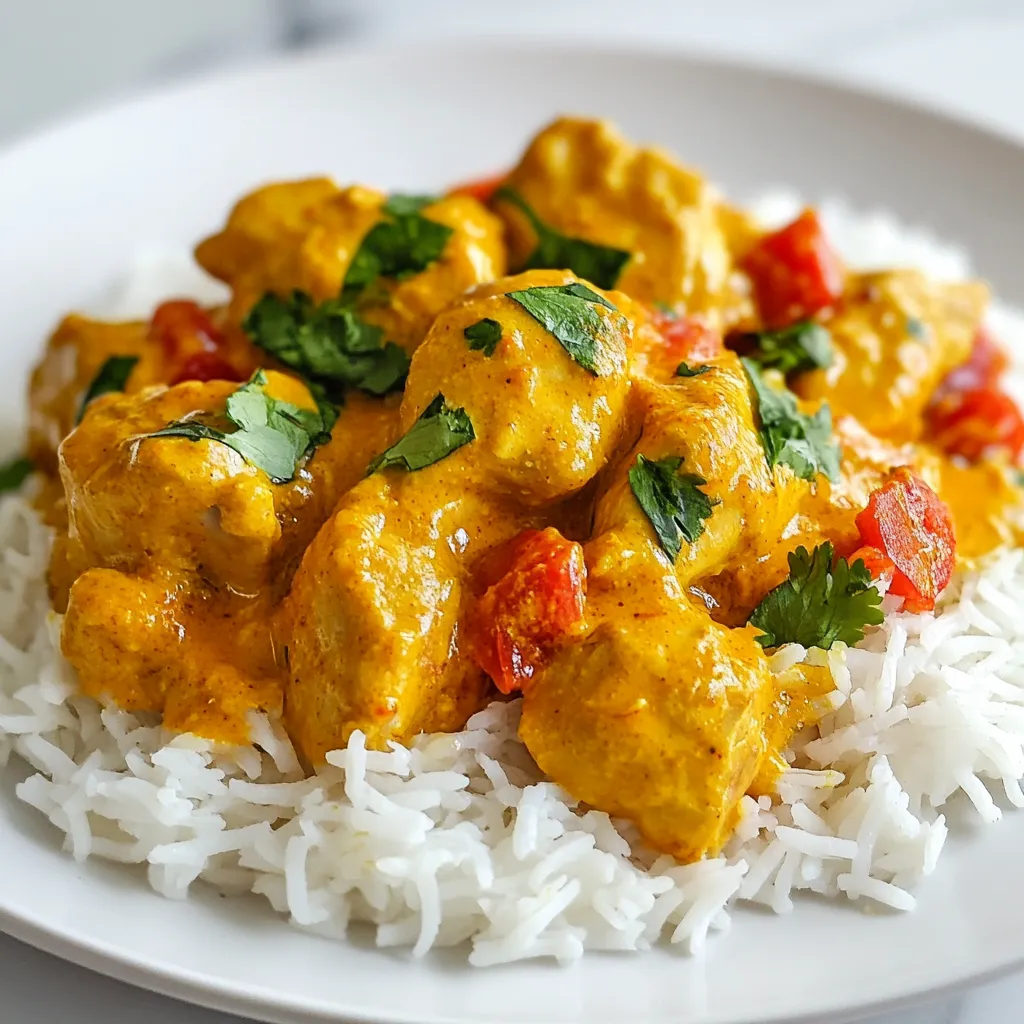
If you crave a rich, creamy dish that’s easy to make, you’re in the right place! This Easy Butter Chicken

Here are the key ingredients for making Brown Butter Pecan Cookies. Each one plays a vital role in creating their delicious taste and texture. - 1 cup unsalted butter - 1 cup brown sugar, packed - 1/2 cup granulated sugar - 1 large egg - 1 teaspoon vanilla extract - 2 cups all-purpose flour - 1 teaspoon baking soda - 1/2 teaspoon salt - 1 cup pecans, chopped - 1/2 cup chocolate chips (optional) Using unsalted butter is important. It lets you control the salt in your cookies. Brown sugar gives these cookies a rich, caramel taste. Granulated sugar adds sweetness and helps with the cookie's crisp edges. The egg binds everything together and adds moisture. Vanilla extract adds warmth and depth. All-purpose flour is the base of the dough. Baking soda helps the cookies rise, while salt brings out the flavors. Chopped pecans add a lovely crunch and nutty flavor, while chocolate chips can add a sweet touch if you choose to include them. Gather these ingredients before you start. This will make the process smooth and fun! To start, place your butter in a medium saucepan over medium heat. Stir it gently as it melts. Soon, you will see it foam a bit. Keep cooking, stirring all the time. After about 5 to 7 minutes, the butter will turn a lovely golden brown. Look for a nutty scent and small brown bits at the bottom. This is the moment to take it off the heat. Let it cool slightly before using. In a large bowl, combine the browned butter with brown sugar and granulated sugar. Use a sturdy spatula or whisk to mix until it is well blended. The mixture should feel smooth and creamy. This step is key for rich flavor in your cookies. Now, it’s time to add the wet ingredients. Beat in one large egg and a teaspoon of vanilla extract. Stir until the mixture is smooth and well combined. The egg adds moisture and helps bind everything together. In a separate bowl, whisk together the flour, baking soda, and salt. Mixing dry ingredients separately helps ensure even distribution of the baking soda and salt. Once mixed, slowly add this to your wet mixture. Stir gently until just combined. Do not overmix; a few lumps are fine. Next, take your chopped pecans and optional chocolate chips. Gently fold them into the dough using a spatula. Be careful not to smash the nuts or chips. The folding technique helps keep the mixture light and airy. Cover your dough with plastic wrap and place it in the fridge. Chilling the dough for at least 30 minutes is important. This helps the cookies hold their shape while baking. It also enhances the flavors. While the dough chills, preheat your oven to 350°F (175°C). This ensures that your cookies bake evenly. A hot oven is key to getting those perfect edges. Once chilled, line a baking sheet with parchment paper. Scoop tablespoons of dough and place them about 2 inches apart on the sheet. This spacing allows the cookies to spread without sticking together. Slide your baking sheet into the preheated oven. Bake for 10 to 12 minutes. Look for the edges to turn lightly golden brown. The centers may look a bit soft, but they will firm up as they cool. After baking, let the cookies cool on the baking sheet for about 5 minutes. This step helps them set. Then, transfer them to a wire rack to cool completely. Enjoy your warm, delicious cookies! To make brown butter, watch it closely. Heat it over medium heat and stir often. This helps avoid burnt butter. Look for a golden color and a nutty scent. Once you notice these signs, remove it from the heat. To boost the flavor, use high-quality unsalted butter. This adds richness. You can also add a pinch of salt for balance. Try mixing in spices like cinnamon for a warm, cozy touch. Do you want soft cookies? Chill the dough longer before baking. This helps them stay thick. For crisp cookies, bake them a bit longer. Keep an eye on color; golden edges mean they’re done. For soft and chewy cookies, take them out when they look slightly underbaked. They will firm up as they cool. Measuring ingredients correctly is key. Use a kitchen scale for precision. For flour, spoon it into the measuring cup, then level it off. This prevents packing too much flour. Incorrect amounts can change cookie texture. Too much flour makes them dry. Too little leads to flat cookies. Always double-check your measurements for the best results. {{image_2}} You can still enjoy these cookies without pecans. Try using sunflower seeds or pumpkin seeds instead. Both add a nice crunch and flavor. If you want a different texture, chop up some dried fruit like cranberries or apricots. This not only gives a chewy bite but also adds a natural sweetness. Just remember to adjust baking time if you add more moisture with these fruits. If you love chocolate, think about adding more chips. Use a mix of dark, milk, or white chocolate for depth. You can also melt some chocolate and swirl it into the dough for a marbled effect. This will make each cookie a chocolate lover's dream. For a fun twist, try adding chocolate chunks for a gooey center. Want to spice things up? Add a teaspoon of cinnamon or nutmeg to the dry mix. These spices will give a warm, cozy flavor to your cookies. You can also try mixing in a pinch of ginger for a zesty kick. This is perfect for chilly days or holiday baking. Experiment with the amounts to find your perfect blend. Store your cookies in an airtight container or a cookie jar. This keeps them fresh longer. If you use a cookie jar, choose one with a tight lid. This method helps maintain the cookies' soft texture. You can also line the container with parchment paper for extra protection. Freezing cookies is easy and keeps them tasty. To freeze baked cookies, let them cool completely. Then, place them in a single layer in a freezer bag. Press out any air before sealing. If you want to freeze cookie dough, scoop the dough into balls. Place them on a baking sheet to freeze for a few hours. Once frozen, transfer them to a freezer bag. This way, you can bake fresh cookies anytime! Brown butter pecan cookies stay fresh for about one week at room temperature. If stored properly, they can last up to three months in the freezer. You can enjoy their rich flavor and crispy edges even after freezing. Just remember to thaw them slowly at room temperature. Yes, you can use salted butter, but it will change the flavor. The extra salt can make your cookies taste different. If you do use salted butter, skip the added salt in the recipe. This helps keep the balance of flavors just right. You can use gluten-free flour blends to replace all-purpose flour. Look for blends that include a mix of rice flour, almond flour, or tapioca flour. These options work well in cookies and can give you a nice texture. If you don't have pecans, try walnuts, almonds, or hazelnuts. You can even use seeds like sunflower or pumpkin seeds if you want a nut-free option. Each nut brings its own flavor, so choose what you like best. Skipping the chilling step isn't advised. Chilling helps the dough firm up, which leads to thicker cookies. If you skip this, your cookies may spread too much when baking. This can make them flat and uneven. Cookies can spread too much for a few reasons. If the dough is too warm, they spread more. Also, not using enough flour can cause this. Make sure to measure your flour correctly. Always chill the dough to help prevent spreading. Absolutely! You can add dried fruit like cranberries or raisins. You might also try coconut flakes or different types of chocolate like white or dark chocolate. The options are endless, so feel free to get creative! In this blog post, I shared a simple cookie recipe that uses brown butter and pecans. You learned step-by-step instructions, tips for perfect texture, and smart storage methods. The add-ins and variations let you customize these cookies to your taste. Remember, each step matters for the best cookie results. With practice, you’ll master this recipe and create delights you'll love to share. Happy baking!

Brown Butter Pecan Cookies Irresistible Flavor Treat

If you love cookies that melt in your mouth, you’re in for a treat! Brown butter pecan cookies combine rich,

- 2 medium zucchinis, cut into fries - 1 cup breadcrumbs (preferably panko) - 1/2 cup grated Parmesan cheese - 1 teaspoon garlic powder - 1 teaspoon onion powder - 1/2 teaspoon paprika - 1/2 teaspoon salt - 1/4 teaspoon black pepper - 2 large eggs - Cooking spray (preferably olive oil) - Each serving has about 150 calories. - Macronutrient breakdown: 8g protein, 10g carbs, 8g fat. - Prep time: 15 minutes - Total time: 25 minutes - Servings: 4 These air fryer zucchini fries are a great snack. You can make them in no time. The ingredients are simple and healthy. Using panko makes them extra crunchy. The mix of garlic, onion, and paprika gives them a nice flavor. You can dip them in your favorite sauce. Enjoy them as a side or a snack! To make zucchini fries, start with two medium zucchinis. First, wash them well. Then, cut each zucchini into fries, about half an inch thick. This size helps them cook evenly. Uniform sizes ensure all fries will be crispy. If some are bigger, they may not cook through. Aim for consistent shapes. Next, you need to prepare the coating. In a bowl, mix one cup of panko breadcrumbs, half a cup of grated Parmesan cheese, one teaspoon of garlic powder, one teaspoon of onion powder, half a teaspoon of paprika, half a teaspoon of salt, and a quarter teaspoon of black pepper. Stir until it is all combined. In another bowl, beat two large eggs to create the egg wash. This wash helps the coating stick well to the zucchini. Now, it’s time to air fry! Preheat your air fryer to 400°F (200°C) for about five minutes. This step is key to achieving the best crunch. Dip each zucchini fry into the egg wash first. Let any excess egg drip off. Then coat each fry in the breadcrumb mixture. Press gently to help the crumbs stick. Lightly spray the air fryer basket with cooking spray to prevent sticking. Place the fries in a single layer, ensuring they aren’t overcrowded. This allows hot air to circulate and crisp them up. Air fry at 400°F (200°C) for 10-12 minutes. Shake the basket halfway through for even cooking. When they are golden and crispy, they are ready to eat! To make your zucchini fries extra crispy, use panko breadcrumbs instead of regular ones. Panko is lighter and crunchier. It gives a great texture that you will love. Regular breadcrumbs can make the fries softer. Cooking spray also plays a key role. A light spray helps the fries crisp up nicely. Use olive oil spray for a tasty touch. It adds flavor while keeping the fries from sticking. One big mistake is overcrowding the air fryer. If you pack too many fries in, they won't cook well. Leave space between them. This allows hot air to circulate and crisp every fry. Another mistake is not letting excess egg drip off. If you dip the fries in the egg wash, shake off the extra. This helps the breadcrumbs stick better. If the egg is too thick, the coating will be soggy. Zucchini fries taste great with dipping sauces. Marinara and ranch are popular choices. You can also try a spicy aioli for some heat. For sides, consider a fresh salad or a bowl of soup. A light dip in ranch pairs well with a hearty meal. Enjoy your fries as a tasty snack or a side dish! {{image_2}} You can change the flavor of your zucchini fries easily. Try adding herbs like Italian seasoning or basil. A pinch of cayenne pepper adds a nice kick if you like heat. You can also switch up the cheese. Instead of Parmesan, try mozzarella or cheddar for a different taste. If you need a gluten-free option, choose gluten-free breadcrumbs. These are easy to find in stores. You can also use chickpea flour as a coating. It gives a nice crunch and adds protein. You can bake zucchini fries if you don’t have an air fryer. Preheat your oven to 425°F (220°C). Place the coated fries on a baking sheet. Bake for about 20-25 minutes, flipping halfway through. This gives you crispy fries without the air fryer. Adjust the time based on how crispy you like them. To keep your zucchini fries fresh, store them in the fridge. Place them in an airtight container. This helps keep them crispy and tasty. You can also use a resealable plastic bag. Just make sure to remove as much air as you can. Leftovers stay good for about 2-3 days. To reheat zucchini fries in an air fryer, set it to 375°F (190°C). Place the fries in a single layer and heat for about 5-7 minutes. This makes them crispy again. If you prefer the oven, preheat it to 400°F (200°C). Spread the fries on a baking sheet and bake for 10-12 minutes. This method also helps restore their crunch. Yes, you can freeze zucchini fries! First, let them cool completely. Then, lay them out in a single layer on a baking sheet. Freeze them for about 1-2 hours until firm. Once frozen, transfer them to a freezer bag. Be sure to label the bag with the date. When you want to eat them, just cook them straight from the freezer. No need to thaw! Air fryer zucchini fries last about 3 to 4 days in the fridge. To keep them fresh: - Store them in an airtight container. - Place a paper towel inside to absorb moisture. - Avoid stacking them to prevent sogginess. If you want longer shelf life, freeze them. Frozen zucchini fries can last up to 3 months. Just make sure to wrap them tightly. Yes, you can use other vegetables! Here are some great options: - Carrots: Cut into thin sticks for a sweet crunch. - Sweet potatoes: These add a nice sweetness and color. - Eggplant: A unique option with a different texture. - Bell peppers: Cut into strips for a colorful twist. Feel free to experiment with your favorite veggies. Just adjust the cooking time if needed. Zucchini fries taste great with many dips. Here are some popular choices: - Marinara sauce: A classic that adds a rich tomato flavor. - Ranch dressing: Creamy and herby, it compliments the fries well. - Garlic aioli: Adds a nice garlic flavor. - Spicy ketchup: For those who love a kick! Try different dips to find your favorite combo. Enjoy exploring new flavors! Air fryer zucchini fries are easy and fun to make. You just need simple ingredients, quick prep, and some helpful tips to get them crispy. Remember to cut zucchini evenly and mix the right seasonings. Avoid common mistakes like overcrowding the fryer. You can try different herbs or even use other veggies. Whether you serve them as a snack or side, they bring delicious flavor. With proper storage and reheating, your leftovers will taste great, too. Enjoy your cooking journey with these tasty fries!

Air Fryer Zucchini Fries Crunchy and Flavorful Snack

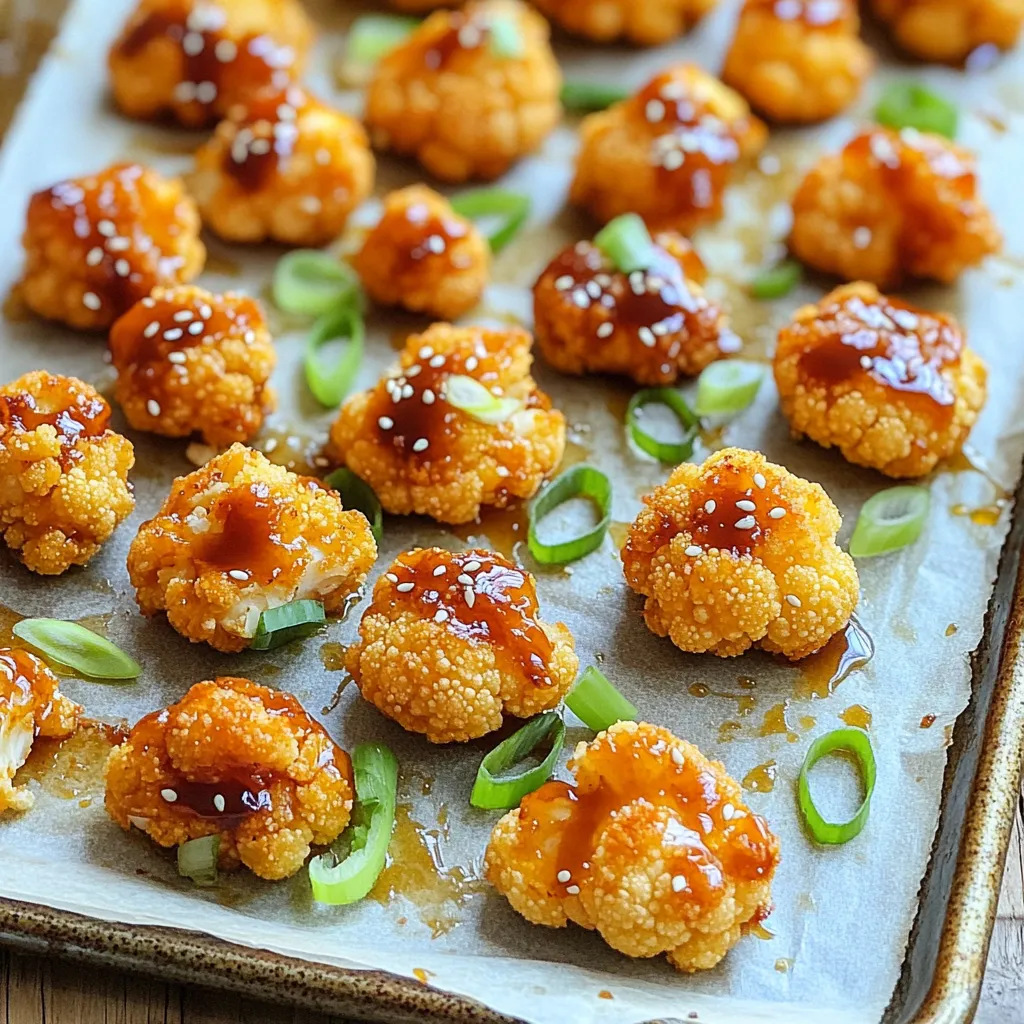
If you’re looking for a fun, crunchy snack that’s both healthy and delicious, you’ve hit the jackpot with air fryer

To make a warm cup of slow cooker spiced apple cider, you need a few simple ingredients. Here’s what you’ll need: - 8 cups apple cider - 1 cup water - 2 cinnamon sticks - 1 tablespoon whole cloves - 1 tablespoon allspice berries - 1 orange, sliced into rounds - 1 apple, sliced - 1 tablespoon maple syrup (optional) - A pinch of salt Each ingredient adds its own unique flavor. The apple cider serves as the base, giving the drink its sweet and fruity taste. Water helps to balance the strong flavors. Cinnamon sticks, whole cloves, and allspice berries bring warmth and spice to the mix. Sliced orange and apple add a fresh, fruity twist. If you enjoy a sweeter cider, maple syrup is a nice touch. Finally, a pinch of salt enhances all the flavors. Gather these ingredients, and you’re ready to create a delightful drink! - First, combine 8 cups apple cider and 1 cup water in your slow cooker. - Next, add 2 cinnamon sticks, 1 tablespoon whole cloves, and 1 tablespoon allspice berries. Stir gently to mix everything. - Toss in 1 sliced orange and 1 sliced apple for extra flavor. - If you like your cider sweet, add 1 tablespoon maple syrup and a pinch of salt. Mix well to combine. - Cover the slow cooker with its lid. Set the cooker to low for 3 to 4 hours or high for about 2 hours. This allows the spices to blend well with the cider. - As it cooks, your kitchen will fill with warm, inviting scents. - Once the cooking time is complete, stir the cider. Taste it and adjust the sweetness if needed. - If you prefer, strain out the spices and fruit slices before serving. This step can enhance the drink's smoothness. - Serve the warm cider in mugs and enjoy the cozy flavors! To enhance spiciness, I recommend adding more cinnamon sticks or whole cloves. You can also try a pinch of nutmeg for warmth. Adjusting the spice mix lets you create your unique flavor. Balancing sweetness and acidity is key. The natural sweetness of the apple cider shines, but you might want to add maple syrup. This adds depth without making it too sweet. If it tastes too sweet, a squeeze of lemon juice can help brighten the drink. When using your slow cooker, choose low for a longer cook. This option allows flavors to develop fully. High cooking works well too, but check at the one-hour mark. You want to serve the cider hot, ideally after three hours on low. This is when the spices blend perfectly, giving you a rich taste. For serving, use clear mugs to show off the drink's rich color. Add a slice of orange or apple on the rim for a fun touch. Sprinkling a bit of cinnamon on top can elevate the look. If you want to impress guests, consider using a cinnamon stick as a stirrer. This adds a nice visual element and extra flavor. {{image_2}} You can change the fruit in your cider. Try adding pear slices for a sweet twist. Cranberries add a nice tartness, too. Just think about what flavors you enjoy. You can also swap spices. Instead of cloves, try star anise for a different taste. Nutmeg can give warmth, while cardamom adds a unique flair. Get creative with what you have on hand. Want to make your cider a bit more festive? You can add alcohol! A splash of rum or bourbon warms the drink and adds depth. For a lighter option, try adding apple brandy. Pair your spiced cider with these spirits. They enhance the flavors and make it a cozy treat. Just remember to sip responsibly. If you want a sweeter drink but need to watch sugar, try honey. It blends well and adds a floral taste. Agave syrup is another good option. It’s sweet and won’t change the cider's taste much. If you want to skip the sweeteners altogether, focus on the natural sweetness of the apples and oranges. This way, you can enjoy a sugar-free version that still tastes great. To store spiced apple cider, first let it cool to room temperature. Pour the cider into an airtight container. Glass jars work well for this. Seal the container tightly. You can keep it in the fridge for up to a week. A clean, dry pitcher is also a good choice. To reheat your cider, use the stove or a slow cooker. Heat it on low to keep the flavors. If using the microwave, warm it in short bursts. Stir often to avoid hot spots. This keeps the taste just right. Avoid boiling, as it can change the flavor. Yes, you can freeze spiced apple cider. Pour it into freezer-safe bags or containers, leaving some space at the top. The cider will expand as it freezes. When you’re ready to enjoy it, thaw it in the fridge overnight. Reheat it gently on the stove once thawed. This way, your cider stays tasty and warm. You can keep spiced apple cider in the fridge for about 5 to 7 days. Store it in an airtight container to keep it fresh. If you want to enjoy it later, consider freezing it. When frozen, it lasts for up to 3 months. Just thaw it in the fridge overnight when you are ready to drink it again. Yes, you can use store-bought apple juice. However, the taste will differ. Apple cider has a richer flavor, while juice is sweeter and less complex. If you use juice, you might want to add more spices to mimic the cider's depth. You can also adjust the sweetness to find the right balance for your taste. Yes, it is safe to leave the slow cooker on overnight if you follow some tips. Make sure your slow cooker is in good condition and placed on a stable surface. Use the low setting for longer cooking times. Always check the manual for specific guidelines. This way, you can wake up to a warm and cozy drink! This blog post explored making delicious spiced apple cider in a slow cooker. We covered the essential ingredients, detailed step-by-step instructions, and offered tips for perfecting flavor. You learned about variations, storage options, and frequently asked questions. Spiced apple cider is not just a drink; it brings warmth and comfort. Enjoy crafting your unique version, and don’t be afraid to experiment with flavors. Your kitchen can be a hub of holiday cheer and joy with just a few simple steps!

Slow Cooker Spiced Apple Cider Flavorful Drink Delight

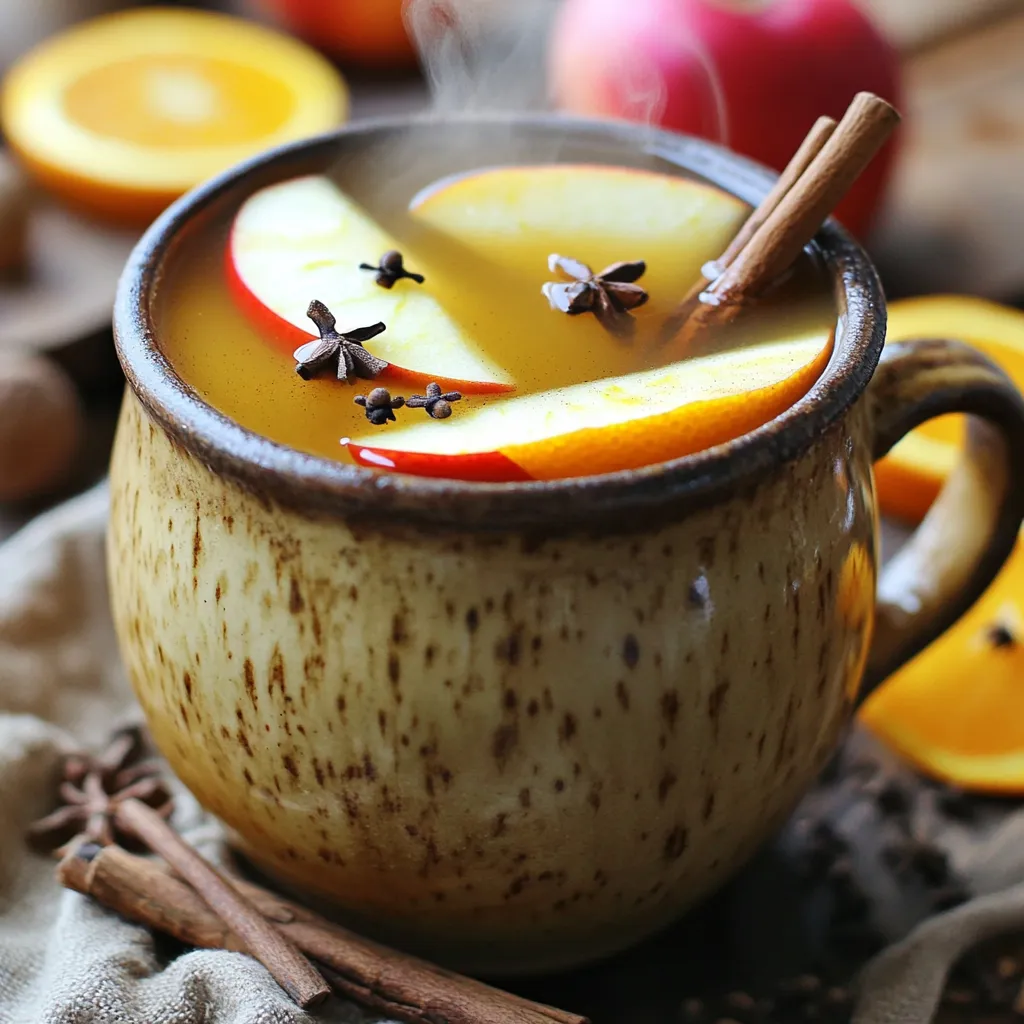
Warm up your kitchen with my easy Slow Cooker Spiced Apple Cider. This delightful drink combines apple cider, spices, and

- 2 cups plain Greek yogurt - 2 tablespoons honey or maple syrup - 1 teaspoon vanilla extract - 1 cup mixed fresh berries (strawberries, blueberries, raspberries) - 1/2 cup shredded coconut (sweetened or unsweetened) - 1/4 cup granola or nuts (almonds or walnuts) - A pinch of sea salt To make Greek Yogurt Breakfast Bark, gather these fresh and tasty items. Start with 2 cups of plain Greek yogurt. This creamy base gives your bark a lovely texture and loads of protein. Next, choose your sweetener: honey or maple syrup. You need 2 tablespoons for a hint of sweetness. Add 1 teaspoon of vanilla extract for a warm flavor boost. Fresh mixed berries are a must! Use 1 cup of strawberries, blueberries, and raspberries. They add color and flavor. For extra crunch, grab 1/2 cup of shredded coconut. You can pick sweetened or unsweetened based on your taste. Then, choose 1/4 cup of granola or nuts like almonds or walnuts. They will add a nice crunch. Lastly, don't forget a pinch of sea salt. It enhances all the flavors. With these ingredients, you are set to create a delicious and healthy treat! First, get a mixing bowl. Add 2 cups of plain Greek yogurt. Then, add 2 tablespoons of honey or maple syrup. Next, pour in 1 teaspoon of vanilla extract. Finally, sprinkle in a pinch of sea salt. Mix all these together. Keep mixing until you have a smooth and creamy texture. Grab a baking sheet and line it with parchment paper. You can make a rectangle or square shape. Once lined, pour the yogurt mixture onto the sheet. Use a spatula to spread it evenly. Aim for about a 1/2 inch thickness. Now it’s time to add toppings. Start by sprinkling 1 cup of mixed fresh berries over the yogurt. Use strawberries, blueberries, and raspberries. Next, add 1/2 cup of shredded coconut. You can use sweetened or unsweetened based on what you like. Then, sprinkle in 1/4 cup of granola or nuts, like almonds or walnuts. Gently press the toppings into the yogurt to help them stick. Place your baking sheet in the freezer. Let it freeze for at least 4 hours. This allows the yogurt to set and become firm. Check it after a few hours to see if it has hardened enough. Once frozen solid, take the bark out of the freezer. Remove it from the baking sheet. Break it into pieces. You can serve it right away or store it in an airtight container in the freezer. Enjoy it for breakfast or as a tasty snack! To make your Greek yogurt breakfast bark smooth, focus on mixing. Combine the yogurt, sweetener, and vanilla well. This step helps avoid ice crystals. Ice crystals can ruin the smooth bite you want. For that creamy consistency, stick to full-fat Greek yogurt. Full-fat yogurt freezes better than low-fat. When you spread it thinly, it sets up nicely. Aim for about half an inch thick. Taste is key when it comes to sweetness. Start with the recipe's two tablespoons of honey or maple syrup. If it's not sweet enough, add a bit more. Always mix well after adding. If you prefer a sugar-free option, use stevia or monk fruit sweetener. Both give a nice sweetness without the extra calories. Serving your bark can be fun and creative. Break it into different shapes—squares or fun triangles. This makes it look more appealing. Add some fresh mint leaves on top for color. You can also drizzle a bit of honey or melted dark chocolate over it. These garnishes add not just taste, but also a pop of color. {{image_2}} You can mix things up by using different fruits. Try seasonal fruits like peaches in summer or apples in fall. Each fruit adds its own taste. Berries are great, but don't stop there! Experiment with flavor extracts too. Almond or coconut extract adds a nice twist. Just a drop changes the whole bark. Want to boost your nutrition? Add protein powder to your yogurt mix. It makes the bark more filling. You can use any flavor you like. Also, try incorporating seeds like chia or flaxseed. They add crunch and are full of good fats. These small changes make your treat even better. If you need dairy-free options, use coconut yogurt instead of Greek yogurt. It works well and tastes great. For a vegan version, swap honey for maple syrup. You can also make it gluten-free. Just choose gluten-free granola or nuts for toppings. These swaps keep everyone happy at the table. To keep your Greek Yogurt Breakfast Bark fresh, use an airtight container. This helps prevent freezer burn. I recommend wrapping each piece in plastic wrap before placing it in the container. This extra step keeps it safe and tasty. For long-term storage, you can freeze the bark for up to three months. Just remember to label your container with the date. To thaw your yogurt bark safely, move it from the freezer to the fridge. Let it sit there for about 30 minutes. This method keeps it cool and safe. If you need it quickly, you can leave it out for 10-15 minutes at room temperature. For serving, cut the bark into pieces while still slightly frozen. This makes it easier to handle and enjoy. In the freezer, Greek Yogurt Breakfast Bark lasts about three months. After this, it may lose flavor and texture. Always check for signs of spoilage. If you see ice crystals or a strange smell, it’s best to toss it out. Freshness is key to enjoying this treat! Greek Yogurt Breakfast Bark stays fresh in the freezer for about three months. To keep it at its best, store it in an airtight container. This way, it won’t get freezer burn. Yes, you can customize the toppings. Use any fruit you like, such as bananas, peaches, or even kiwi. You can also swap granola for nuts or seeds. This gives you a chance to create your favorite mix! Greek Yogurt Breakfast Bark is a healthy choice. It provides protein from the yogurt, fiber from the fruit, and healthy fats from nuts. The natural sweetness from honey or maple syrup keeps it tasty without added sugars. Absolutely! You can make Greek Yogurt Breakfast Bark ahead of time. Just freeze it for at least four hours. This makes it easy to grab a piece when you need a quick breakfast or snack. The best fruits for Greek Yogurt Breakfast Bark are mixed fresh berries. Strawberries, blueberries, and raspberries work great. You can also try seasonal fruits like peaches or cherries. They add color and flavor! Greek yogurt breakfast bark is easy to make and great for snacks or breakfast. In this post, we covered the main ingredients, step-by-step instructions, and ways to customize your bark. You can use different fruits and sweeteners for variety. Storing it correctly keeps it fresh, and knowing how to thaw it helps when you're ready to enjoy. Experiment with flavors and toppings to make it your own. This fun treat can fit into any diet or lifestyle, so give it a try!

Greek Yogurt Breakfast Bark Simple and Healthy Treat

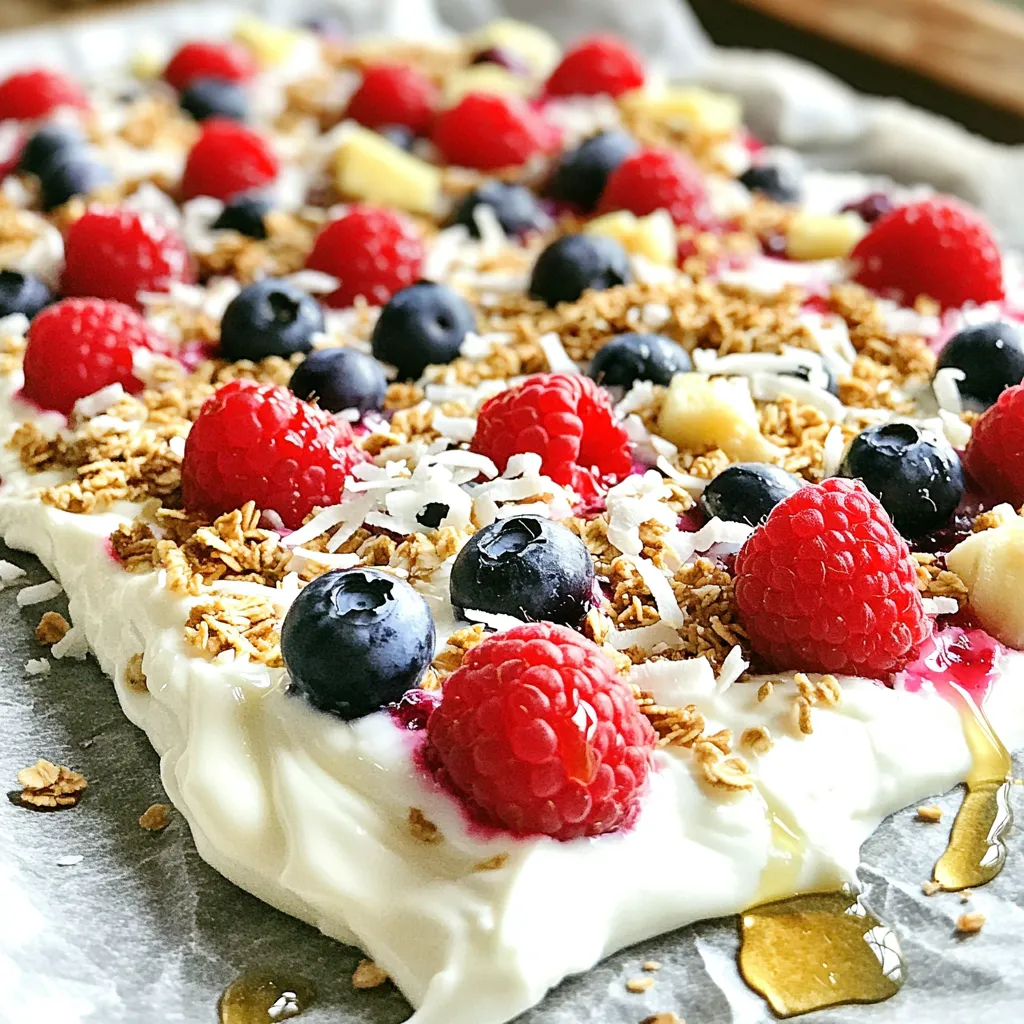
Looking for a quick, healthy breakfast? Let me introduce you to Greek Yogurt Breakfast Bark! This simple treat combines creamy

Older posts
Newer posts
← Previous Page1 … Page10 Page11 Page12 … Page143 Next →

dsad

© 2025 Southern Dishes • Built with GeneratePress

Our Policies

  • Copyright Policy
  • Cookie Policy
  • GDPR Policy
  • Privacy Policy
  • Disclaimer
  • Terms Of Use

More Information

  • Home
  • About
  • Contact
  • Appetizers
  • Dessert
  • Dinner
  • Drinks
©2025, Southern Dishes About Back To Top