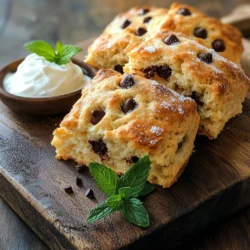
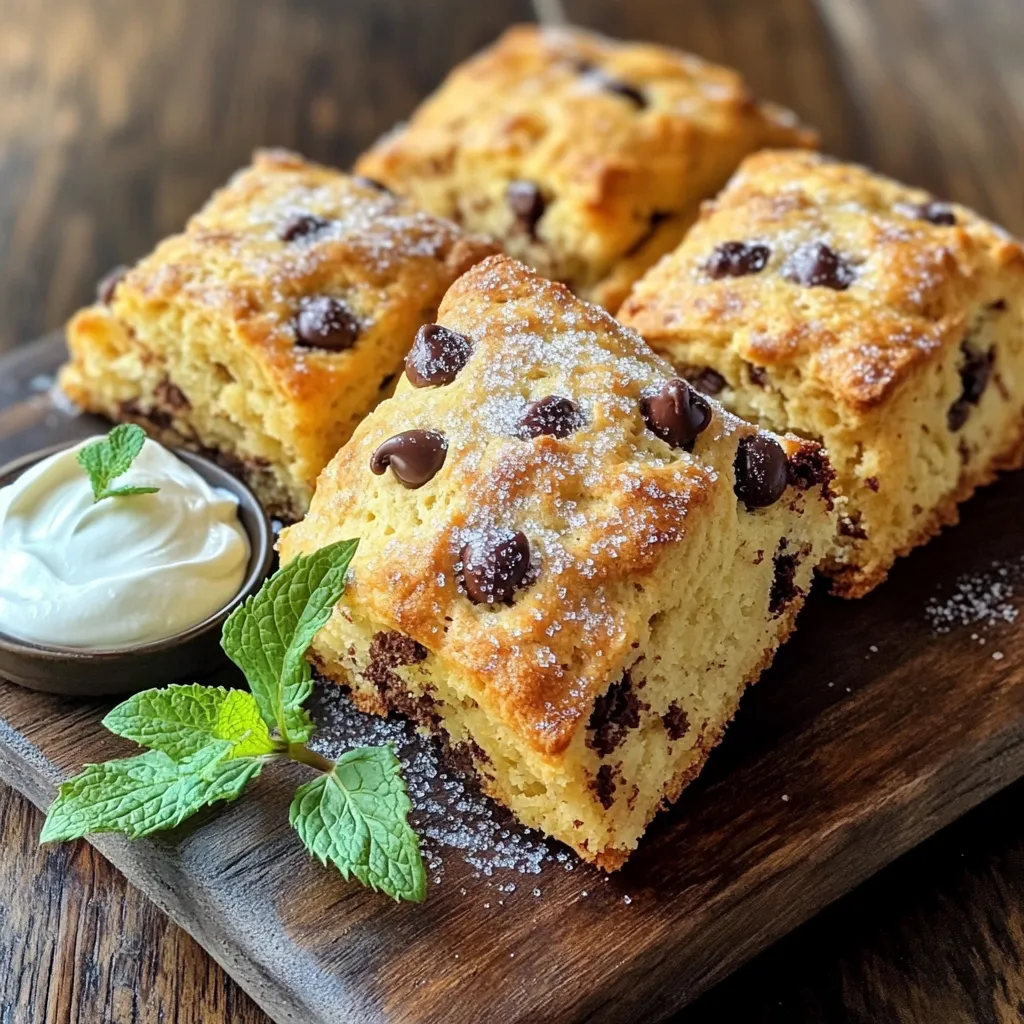
Do you crave those light, fluffy scones from your favorite bakery? You’re in the right place! In this easy recipe, I’ll show you how to create bakery-style chocolate chip scones that are bursting with flavor. With simple ingredients and clear steps, you’ll be enjoying warm scones in no time. Get ready to impress your taste buds and friends with this quick and satisfying treat!
Ingredients
Primary Ingredients for Bakery-Style Scones
To make bakery-style chocolate chip scones, gather these key ingredients:
– 2 cups all-purpose flour
– 1/4 cup granulated sugar
– 1 tablespoon baking powder
– 1/2 teaspoon salt
– 1/2 cup unsalted butter, chilled and cubed
– 3/4 cup heavy cream
– 1 teaspoon vanilla extract
– 1/2 cup semi-sweet chocolate chips
– 1 egg (for egg wash)
– Turbinado sugar for sprinkling
These ingredients work together to create a soft and fluffy texture. The cold butter keeps the scones tender while the baking powder helps them rise.
Optional Ingredients for Customization
You can add your twist to these scones with optional ingredients:
– Nuts, like walnuts or pecans
– Dried fruits, such as cranberries or apricots
– Citrus zest for a fresh flavor
– Different types of chocolate, like dark or white chocolate
Each addition can change the flavor and texture. Feel free to mix and match based on what you like!
Suggested Alternatives for Key Components
If you need substitutes, here are some alternatives:
– For all-purpose flour, try a gluten-free blend.
– Swap heavy cream with whole milk or a non-dairy milk.
– Use coconut oil instead of unsalted butter for a dairy-free option.
These alternatives can help you adapt the recipe to your dietary needs without losing the scone’s charm.
Step-by-Step Instructions
Prepping the Oven and Baking Sheet
Start by preheating your oven to 400°F (200°C). This step is key for fluffy scones. While the oven heats, line a baking sheet with parchment paper. This prevents sticking and makes cleanup easy.
Mixing Dry Ingredients and Butter
In a large bowl, add 2 cups of all-purpose flour, 1/4 cup of granulated sugar, 1 tablespoon of baking powder, and 1/2 teaspoon of salt. Whisk these together until they blend well. Next, add in 1/2 cup of chilled, cubed unsalted butter. Use your fingers or a pastry cutter to work the butter into the flour. Stop when the mixture looks like coarse crumbs. This keeps the scones light.
Incorporating Wet Ingredients and Chocolate Chips
In a different bowl, mix 3/4 cup of heavy cream with 1 teaspoon of vanilla extract. Gradually pour this cream mixture into the dry ingredients. Stir gently until the dough comes together. Be careful not to overmix! Finally, fold in 1/2 cup of semi-sweet chocolate chips. This adds rich flavor and sweetness.
Shaping and Cutting the Scones
Turn the dough onto a lightly floured surface. Shape it into a round disc about 1 inch thick. Use a knife to cut the disc into wedges or a round cutter for individual scones. This step is fun and gives each scone its shape!
Baking and Achieving Golden Perfection
Place the shaped scones on your lined baking sheet. Whisk 1 egg and brush it on top of the scones for a shiny finish. Sprinkle turbinado sugar on top for extra crunch. Bake for 15-20 minutes until they turn golden brown. Let them cool for a few minutes on the sheet, then move them to a wire rack to finish cooling. Enjoy the aroma as they bake!
Tips & Tricks
Achieving the Perfect Texture
To get soft and fluffy scones, follow these simple tips. First, use cold butter. It helps create flaky layers. Cut the butter into small cubes before mixing it with the dry ingredients. This step is key. Next, mix gently. Overworking the dough makes scones tough. When you add the cream, stir until just combined.
Common Mistakes to Avoid
Watch out for these common mistakes. One big mistake is using warm butter. It can ruin the texture. Another error is rolling the dough too thin. Aim for a thickness of about one inch. If you cut the scones unevenly, they may bake at different rates. Finally, avoid skipping the egg wash. It gives the scones a nice shine and crunch.
How to Ensure Even Baking
For even baking, follow a few simple steps. First, preheat the oven properly. An oven that’s too cool will lead to soggy scones. Use parchment paper on your baking sheet. This prevents sticking and helps with even heat. Space the scones apart on the sheet, so air can flow around them. Lastly, rotate the baking sheet halfway through baking. This helps all scones bake evenly.
Variations
Flavor Additions (e.g., nuts, dried fruit)
You can make scones even better by adding flavors. Try mixing in nuts like walnuts or pecans. They add a nice crunch. Dried fruits like cranberries or cherries also work well. They give a sweet bite. Just be sure to chop larger pieces into smaller bits. This way, they mix in evenly and don’t clump together.
Gluten-Free Adaptations
Want to make gluten-free scones? Swap all-purpose flour for gluten-free flour. Look for a blend that has xanthan gum in it. This helps mimic the texture of regular flour. You may need to add a bit more liquid. Check the dough’s consistency. It should be soft but not sticky. This way, you can still enjoy fluffy scones without gluten.
Chocolate Chip Alternatives
If you want a twist, try different types of chocolate chips. Dark chocolate or milk chocolate can change the flavor. You can even use white chocolate chips for a sweeter taste. If you want something fruity, use mini chocolate chips with orange zest. This adds a fresh and bright flavor. Feel free to mix and match to find your favorite combo!
Storage Info
Best Ways to Store Leftover Scones
To keep your scones fresh, place them in an airtight container. This helps maintain their fluffy texture. You can also wrap them in plastic wrap before placing them in the container. Store them at room temperature for up to two days. If you want to keep them longer, refrigeration is an option, but it may change their texture.
How to Reheat for Freshness
When you’re ready to enjoy your scones again, reheating is easy. Preheat your oven to 350°F (175°C). Place the scones on a baking sheet. Cover them loosely with foil to prevent over-browning. Heat for about 5 to 10 minutes, or until warm. This brings back the delightful taste and texture. You can also use a microwave if you’re in a hurry. Just heat them for 10 to 15 seconds, but they won’t be as crispy.
Freezing Tips for Long-Term Storage
If you want to store scones for a longer time, freezing is a great choice. First, let the scones cool completely. Then, wrap each scone in plastic wrap. Place the wrapped scones in a freezer bag or container. They can last up to three months in the freezer. To enjoy, just follow the reheating steps mentioned earlier. This way, you’ll have delicious scones ready whenever you want!
FAQs
How can I make scones more flaky?
To make scones flaky, keep your butter very cold. Use chilled butter and work it into the flour until it looks like crumbs. This method creates layers. Don’t overwork the dough once you add the wet ingredients. Mix just until combined for the best texture.
What can I use instead of heavy cream?
If you need a substitute for heavy cream, try using milk mixed with butter. Combine 1/4 cup of melted butter with 3/4 cup of milk. You can also use half-and-half, or even yogurt for a tangy twist. Each option changes the taste a little but still works well in scones.
How long do bakery-style scones stay fresh?
Bakery-style scones can stay fresh for about 2 days at room temperature. Store them in an airtight container to keep them soft. If you want to keep them longer, place them in the fridge for about a week. For the best taste, eat them within the first two days.
Can I make the dough ahead of time?
Yes, you can make the dough ahead of time! Wrap it tightly in plastic wrap and store it in the fridge for up to 24 hours. This helps the flavors meld and makes for a nice, easy bake. Just remember to shape and cut the scones before baking.
In this article, we explored the key ingredients and steps for making bakery-style scones. We covered how to customize flavors, avoid common mistakes, and even store leftovers. Remember, the right mix of ingredients and careful baking make all the difference. With practice, you will master the art of scone-making. Enjoy your scones fresh, and share them with friends! Happy baking!