No-Bake Salted Caramel Chocolate Bars Delightful Treat

WANT TO SAVE THIS RECIPE?

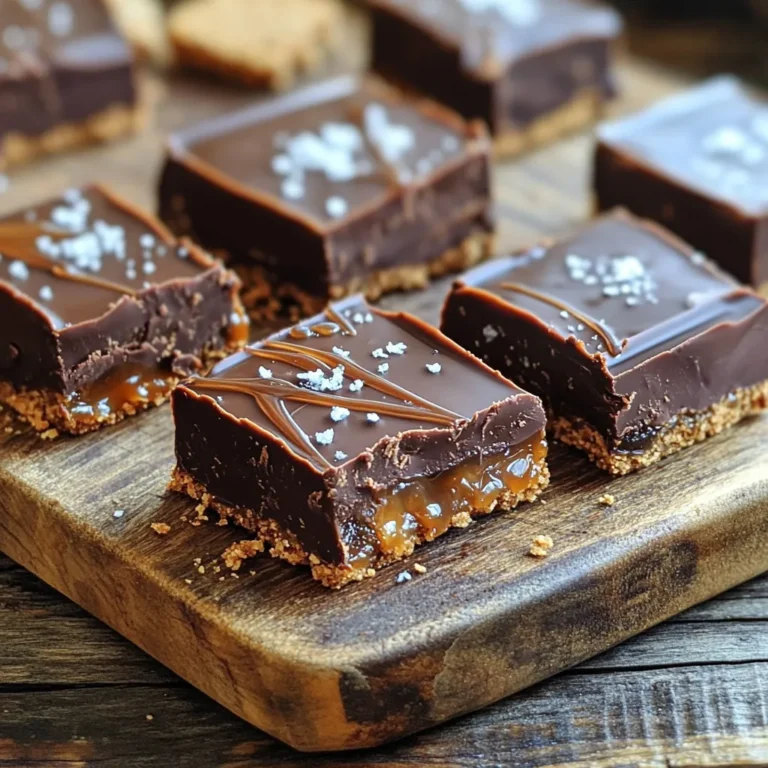
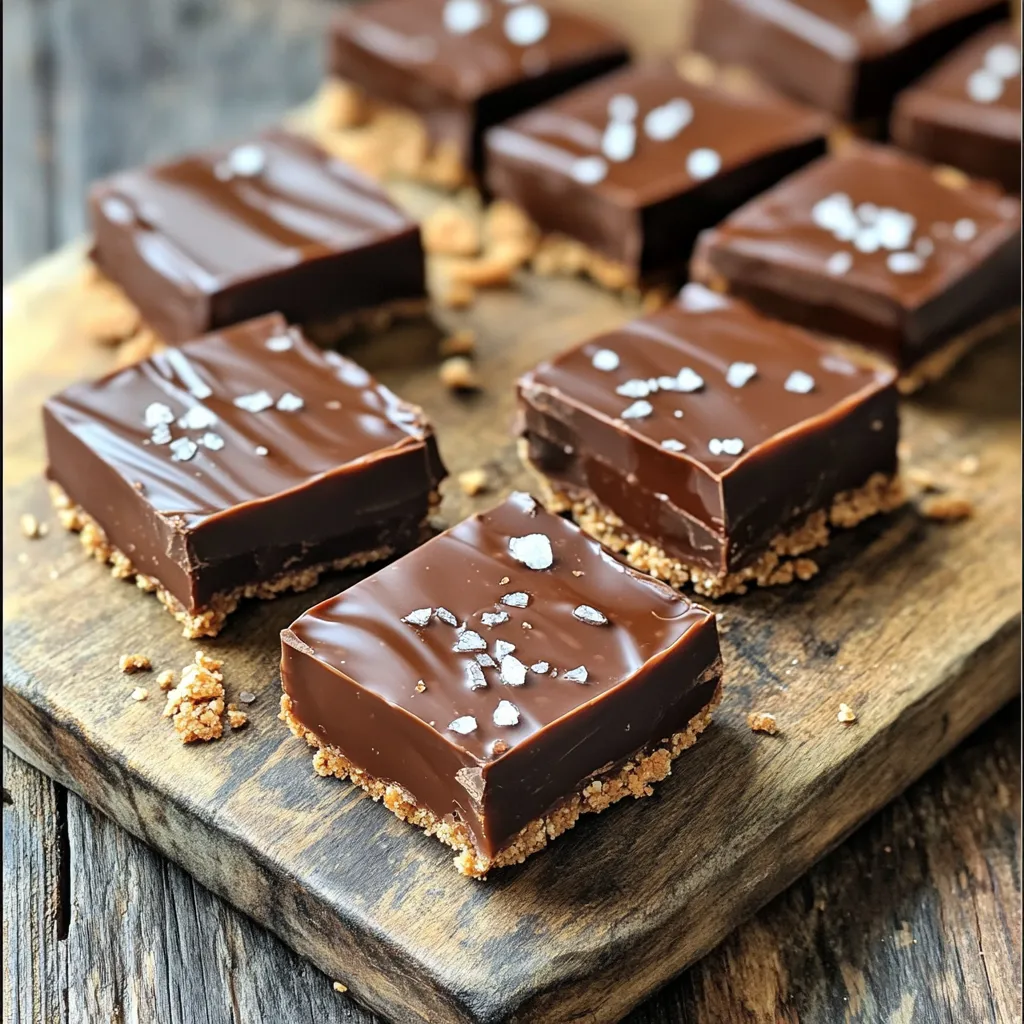
Looking for a quick and tasty dessert? Try my No-Bake Salted Caramel Chocolate Bars! These bars combine rich chocolate and sweet caramel with a pinch of salt. You won’t believe how simple they are to make! I’ll walk you through the ingredients, step-by-step instructions, and some handy tips. Whether you’re a kitchen pro or a novice, you’ll impress everyone with this delightful treat!

Ingredients

Main Ingredients for the Bars

To make these no-bake salted caramel chocolate bars, gather the following key ingredients:

– 1 cup graham cracker crumbs

– 1/2 cup unsweetened cocoa powder

– 1/2 cup unsweetened peanut butter (or almond butter)

– 1/4 cup honey or maple syrup

– 1/4 cup unsweetened coconut oil, melted

– 1/2 cup chopped dates (or your choice of dried fruit)

– 1 cup dark chocolate chips (dairy-free if needed)

– 1/4 teaspoon sea salt

– Additional sea salt for topping

These ingredients blend to create a rich, sweet base with a lovely chocolate flavor.

Optional Ingredients for Customization

You can customize your bars to suit your taste. Here are some optional ingredients:

– Nuts (like almonds or walnuts) for crunch

– Seeds (such as chia or flaxseed) for added nutrition

– Coconut flakes to enhance flavor

– A splash of vanilla extract for a lovely aroma

Feel free to mix and match these extras to make the bars your own.

Recommended Brands

Choosing the right brands can make a big difference in flavor and quality. Here are my top picks:

Graham Crackers: Honey Maid or Nabisco for a classic taste.

Cocoa Powder: Ghirardelli or Hershey’s for rich chocolate flavor.

Peanut Butter: Smucker’s Natural or Justin’s for creamy texture.

Chocolate Chips: Enjoy Life or Ghirardelli for a dairy-free option.

These brands deliver consistent quality and taste, helping you create the best no-bake bars possible.

Step-by-Step Instructions

How to Prepare the Base Mixture

To start, grab a large mixing bowl. In this bowl, combine 1 cup of graham cracker crumbs and 1/2 cup of unsweetened cocoa powder. Next, add 1/2 cup of peanut butter or almond butter to the mix. Then, pour in 1/4 cup of honey or maple syrup and 1/4 cup of melted coconut oil. Use a sturdy spoon to stir everything together. Mix until it looks like a dough. This base provides a rich and chocolatey foundation for your bars.

Now, it’s time to add some sweetness. Fold in 1/2 cup of chopped dates. These dates give a chewy texture and natural sweetness. Make sure the dates spread evenly throughout the mixture.

Melting and Adding the Chocolate

Now, we need to melt the chocolate. In a microwave-safe bowl, add 1 cup of dark chocolate chips. Heat them in the microwave in 30-second intervals. Stir the chocolate between each interval. Keep heating until the chocolate is fully melted and smooth. This step is key for that glossy finish on top of your bars.

Once the chocolate is ready, drizzle it over the pressed base layer. Use a spatula to spread it evenly across the top. For that perfect salty-sweet bite, sprinkle a pinch of sea salt over the melted chocolate. This contrast enhances the flavor.

Chilling and Serving the Bars

Next, place the dish in the refrigerator. Let it chill for at least 2 hours. This helps the bars firm up nicely. After they set, lift them out using the parchment paper. Place the bars on a cutting board. Slice them into squares or rectangles, depending on your preference.

Before serving, don’t forget to add a little extra sea salt on top. This tiny touch makes a big difference. For a fun presentation, serve the bars on a rustic wooden board. You can drizzle more melted chocolate over them for a beautiful finish. Enjoy your sweet creation!

Tips & Tricks

Best Practices for Mixing and Pressing

Mixing the base is key to great bars. Start by combining graham cracker crumbs and cocoa powder. Add peanut butter, honey, and melted coconut oil. Use a strong spoon to mix. You want a dough-like texture. If it feels too dry, add a bit more honey. Fold in the chopped dates last. They should be spread evenly.

When pressing the mixture into your pan, use a spatula. This helps smooth the top. Press down firmly to avoid air pockets. An even layer ensures nice, uniform bars.

How to Achieve the Perfect Chocolate Layer

Melt the chocolate chips carefully. Heat in short bursts of 30 seconds. Stir in between until smooth. This prevents the chocolate from burning. Drizzle the melted chocolate over the pressed base. Use a spatula to spread it evenly. A thin layer works best for a nice finish.

Sprinkling sea salt on top adds a nice touch. It enhances the sweet and salty flavor. Let the chocolate set in the fridge along with the bars.

Common Mistakes to Avoid

One common mistake is not mixing well enough. If your base is uneven, the bars won’t hold together. Another mistake is skipping the chilling time. The bars need time to firm up. Cutting them too early makes them fall apart.

Avoid using too much chocolate. A thin layer is better for balance. Lastly, don’t forget the sea salt. It brings out the flavors and makes them pop!

Variations

Substitutions for Nut Butters

You can easily swap nut butters in this recipe. If you don’t like peanut butter, try almond butter. You can also use sunflower seed butter for a nut-free option. Each nut butter adds a unique flavor and creaminess. This way, you can cater to your taste or any allergies.

Alternative Sweeteners

If you want to change up the sweetness, consider using agave syrup instead of honey. You can also try brown rice syrup for a different taste. Each sweetener brings its own flavor and texture, making the bars even more fun. Adjust the amount to suit your sweetness preference.

Flavor Add-ins (e.g., nuts, seeds, or spices)

Add your favorite mix-ins to boost flavor. Chopped nuts like almonds or walnuts add crunch. Seeds like chia or flax seeds can provide extra nutrition. You can even try a pinch of cinnamon or ginger for a warm spice note. These little touches can make your bars special and uniquely yours.

Storage Info

Best Practices for Storing Leftover Bars

To keep your no-bake salted caramel chocolate bars fresh, store them in an airtight container. This helps maintain their texture and flavor. Place a layer of parchment paper between the bars if you stack them. This prevents sticking. Keep the container in the fridge for up to one week. The cool temperature helps the bars stay firm and tasty.

How to Freeze for Longer Shelf Life

Freezing is great for extending the life of your bars. Cut them into squares or rectangles first. Wrap each piece tightly in plastic wrap. Then, place them in a freezer-safe bag or container. This way, they stay fresh for up to three months. When you’re ready to enjoy, just thaw them in the fridge overnight.

Serving Suggestions for Freshness

For the best taste, serve the bars cold. Take them out of the fridge just before serving. You can also add a sprinkle of extra sea salt on top for a burst of flavor. Pair them with a glass of almond milk or a cup of coffee. This enhances the sweet and salty notes of the bars, making each bite a treat!

FAQs

Can I make these bars vegan?

Yes, you can easily make these bars vegan. Use almond butter instead of peanut butter. Swap honey for maple syrup. Choose dairy-free dark chocolate chips. This way, you get a tasty treat that everyone can enjoy.

How long do the bars last in the fridge?

These bars stay fresh in the fridge for up to a week. Just store them in an airtight container. If you want to keep them longer, you can freeze them. They will last for about three months in the freezer.

Can I use different toppings for the bars?

Absolutely! You can get creative with the toppings. Try using chopped nuts, shredded coconut, or even a drizzle of nut butter. Just remember to add a pinch of sea salt. It enhances the flavor and gives a nice salty-sweet balance.

You learned about the key ingredients for making delicious bars and how to customize them. I shared step-by-step instructions to prepare, chill, and serve these treats. We also discussed tips for mixing, pressing, and avoiding common mistakes.

In the variations section, I provided options for substitutions and add-ins. Finally, I covered the best ways to store your bars to maintain freshness. With these insights, you can create and enjoy tasty bars that fit your taste and needs. Happy making!

To make these no-bake salted caramel chocolate bars, gather the following key ingredients: - 1 cup graham cracker crumbs - 1/2 cup unsweetened cocoa powder - 1/2 cup unsweetened peanut butter (or almond butter) - 1/4 cup honey or maple syrup - 1/4 cup unsweetened coconut oil, melted - 1/2 cup chopped dates (or your choice of dried fruit) - 1 cup dark chocolate chips (dairy-free if needed) - 1/4 teaspoon sea salt - Additional sea salt for topping These ingredients blend to create a rich, sweet base with a lovely chocolate flavor. You can customize your bars to suit your taste. Here are some optional ingredients: - Nuts (like almonds or walnuts) for crunch - Seeds (such as chia or flaxseed) for added nutrition - Coconut flakes to enhance flavor - A splash of vanilla extract for a lovely aroma Feel free to mix and match these extras to make the bars your own. Choosing the right brands can make a big difference in flavor and quality. Here are my top picks: - Graham Crackers: Honey Maid or Nabisco for a classic taste. - Cocoa Powder: Ghirardelli or Hershey’s for rich chocolate flavor. - Peanut Butter: Smucker's Natural or Justin's for creamy texture. - Chocolate Chips: Enjoy Life or Ghirardelli for a dairy-free option. These brands deliver consistent quality and taste, helping you create the best no-bake bars possible. To start, grab a large mixing bowl. In this bowl, combine 1 cup of graham cracker crumbs and 1/2 cup of unsweetened cocoa powder. Next, add 1/2 cup of peanut butter or almond butter to the mix. Then, pour in 1/4 cup of honey or maple syrup and 1/4 cup of melted coconut oil. Use a sturdy spoon to stir everything together. Mix until it looks like a dough. This base provides a rich and chocolatey foundation for your bars. Now, it’s time to add some sweetness. Fold in 1/2 cup of chopped dates. These dates give a chewy texture and natural sweetness. Make sure the dates spread evenly throughout the mixture. Now, we need to melt the chocolate. In a microwave-safe bowl, add 1 cup of dark chocolate chips. Heat them in the microwave in 30-second intervals. Stir the chocolate between each interval. Keep heating until the chocolate is fully melted and smooth. This step is key for that glossy finish on top of your bars. Once the chocolate is ready, drizzle it over the pressed base layer. Use a spatula to spread it evenly across the top. For that perfect salty-sweet bite, sprinkle a pinch of sea salt over the melted chocolate. This contrast enhances the flavor. Next, place the dish in the refrigerator. Let it chill for at least 2 hours. This helps the bars firm up nicely. After they set, lift them out using the parchment paper. Place the bars on a cutting board. Slice them into squares or rectangles, depending on your preference. Before serving, don’t forget to add a little extra sea salt on top. This tiny touch makes a big difference. For a fun presentation, serve the bars on a rustic wooden board. You can drizzle more melted chocolate over them for a beautiful finish. Enjoy your sweet creation! Mixing the base is key to great bars. Start by combining graham cracker crumbs and cocoa powder. Add peanut butter, honey, and melted coconut oil. Use a strong spoon to mix. You want a dough-like texture. If it feels too dry, add a bit more honey. Fold in the chopped dates last. They should be spread evenly. When pressing the mixture into your pan, use a spatula. This helps smooth the top. Press down firmly to avoid air pockets. An even layer ensures nice, uniform bars. Melt the chocolate chips carefully. Heat in short bursts of 30 seconds. Stir in between until smooth. This prevents the chocolate from burning. Drizzle the melted chocolate over the pressed base. Use a spatula to spread it evenly. A thin layer works best for a nice finish. Sprinkling sea salt on top adds a nice touch. It enhances the sweet and salty flavor. Let the chocolate set in the fridge along with the bars. One common mistake is not mixing well enough. If your base is uneven, the bars won’t hold together. Another mistake is skipping the chilling time. The bars need time to firm up. Cutting them too early makes them fall apart. Avoid using too much chocolate. A thin layer is better for balance. Lastly, don’t forget the sea salt. It brings out the flavors and makes them pop! {{image_2}} You can easily swap nut butters in this recipe. If you don't like peanut butter, try almond butter. You can also use sunflower seed butter for a nut-free option. Each nut butter adds a unique flavor and creaminess. This way, you can cater to your taste or any allergies. If you want to change up the sweetness, consider using agave syrup instead of honey. You can also try brown rice syrup for a different taste. Each sweetener brings its own flavor and texture, making the bars even more fun. Adjust the amount to suit your sweetness preference. Add your favorite mix-ins to boost flavor. Chopped nuts like almonds or walnuts add crunch. Seeds like chia or flax seeds can provide extra nutrition. You can even try a pinch of cinnamon or ginger for a warm spice note. These little touches can make your bars special and uniquely yours. To keep your no-bake salted caramel chocolate bars fresh, store them in an airtight container. This helps maintain their texture and flavor. Place a layer of parchment paper between the bars if you stack them. This prevents sticking. Keep the container in the fridge for up to one week. The cool temperature helps the bars stay firm and tasty. Freezing is great for extending the life of your bars. Cut them into squares or rectangles first. Wrap each piece tightly in plastic wrap. Then, place them in a freezer-safe bag or container. This way, they stay fresh for up to three months. When you're ready to enjoy, just thaw them in the fridge overnight. For the best taste, serve the bars cold. Take them out of the fridge just before serving. You can also add a sprinkle of extra sea salt on top for a burst of flavor. Pair them with a glass of almond milk or a cup of coffee. This enhances the sweet and salty notes of the bars, making each bite a treat! Yes, you can easily make these bars vegan. Use almond butter instead of peanut butter. Swap honey for maple syrup. Choose dairy-free dark chocolate chips. This way, you get a tasty treat that everyone can enjoy. These bars stay fresh in the fridge for up to a week. Just store them in an airtight container. If you want to keep them longer, you can freeze them. They will last for about three months in the freezer. Absolutely! You can get creative with the toppings. Try using chopped nuts, shredded coconut, or even a drizzle of nut butter. Just remember to add a pinch of sea salt. It enhances the flavor and gives a nice salty-sweet balance. You learned about the key ingredients for making delicious bars and how to customize them. I shared step-by-step instructions to prepare, chill, and serve these treats. We also discussed tips for mixing, pressing, and avoiding common mistakes. In the variations section, I provided options for substitutions and add-ins. Finally, I covered the best ways to store your bars to maintain freshness. With these insights, you can create and enjoy tasty bars that fit your taste and needs. Happy making!

No-Bake Salted Caramel Chocolate Bars

Indulge your sweet tooth with these irresistible no-bake salted caramel chocolate bars! Discover how to make this easy and delicious treat using simple ingredients like graham cracker crumbs, cocoa powder, and creamy nut butter. Perfect for satisfying your chocolate cravings, they’re not only quick to prepare but also nutritious! Click through for the full recipe and enjoy a delightful dessert that everyone will love!

Ingredients
  

1 cup graham cracker crumbs

1/2 cup unsweetened cocoa powder

1/2 cup unsweetened peanut butter (or almond butter)

1/4 cup honey or maple syrup

1/4 cup unsweetened coconut oil, melted

1/2 cup chopped dates (or your choice of dried fruit)

1 cup dark chocolate chips (dairy-free if needed)

1/4 teaspoon sea salt

Additional sea salt for topping

Instructions
 

Prepare the Base Mix: In a large mixing bowl, combine the graham cracker crumbs, unsweetened cocoa powder, peanut butter, honey, and melted coconut oil. Stir vigorously until the mixture is well combined and forms a dough-like consistency.

    Add Dates: Fold in the chopped dates, ensuring they are evenly distributed throughout the mixture. The dates will add natural sweetness and a chewy texture to the bars.

      Press into Pan: Line an 8x8 inch square baking dish with parchment paper. Transfer the mixture to the dish and press down firmly into an even layer. Use a spatula to smooth the top for an even finish.

        Melt Chocolate: In a microwave-safe bowl, melt the dark chocolate chips in 30-second intervals, stirring in between, until fully melted and smooth.

          Add Caramel: Drizzle the melted chocolate over the pressed base layer. Use a spatula to help spread it evenly. Sprinkle a pinch of sea salt over the top for that delicious salty-sweet contrast.

            Chill: Place the dish in the refrigerator for at least 2 hours, or until the bars are firm to the touch.

              Slice and Serve: Once set, lift the bars out of the pan using the parchment paper. Place on a cutting board and slice into squares or rectangles.

                Garnish: Before serving, you can sprinkle more sea salt on top of the bars for extra flavor enhancement!

                  - Prep Time: 15 minutes | Total Time: 2 hours 15 minutes | Servings: 12 bars

                    - Presentation Tips: Serve the bars on a rustic wooden board, topped with a light drizzle of melted chocolate and a sprinkle of sea salt for a visually appealing dessert.

                      WANT TO SAVE THIS RECIPE?

                      Leave a Comment

                      Recipe Rating