No-Bake Oreo Cheesecake Easy Dessert Treat Idea

Are you craving a sweet treat that requires no oven? I’ve got just the recipe for you: No-Bake Oreo Cheesecake! This easy dessert combines creamy cheese with crunchy Oreos for a perfect balance. In just a few simple steps, you’ll impress everyone at your next gathering. So grab your ingredients and tools, and let’s dive into making this delicious cheesecake that everyone will love!

Ingredients

Required Ingredients for No-Bake Oreo Cheesecake

To make this easy treat, you need just a few key ingredients:

– 24 Oreo cookies (plus extra for topping)

– 1/4 cup unsalted butter, melted

– 16 oz cream cheese, softened

– 1/2 cup granulated sugar

– 1 teaspoon vanilla extract

– 1 cup heavy whipping cream

– 1/2 cup powdered sugar

These ingredients work together to create a rich and creamy cheesecake. The Oreos add a delightful crunch and flavor.

Optional Ingredients for Variation

You can play with the recipe by adding some optional ingredients:

– Mint extract for a fresh twist

– Cocoa powder for a deeper chocolate flavor

– Crushed nuts for added texture

These additions can change the flavor and keep things fun. Feel free to experiment!

Recommended Tools and Equipment

To make your cheesecake, you will need the following tools:

– Food processor for crushing Oreos

– Mixing bowls for combining ingredients

– Electric mixer to whip the cream

– 9-inch springform pan for easy removal

Having these tools handy will make the process smooth and enjoyable. With the right setup, you will create a stunning no-bake cheesecake.

Step-by-Step Instructions

Preparing the Oreo Crust

To start, gather your 24 Oreo cookies. Place them in a food processor. Pulse the cookies until they turn into fine crumbs. Next, scoop the crumbs into a mixing bowl. Add 1/4 cup of melted butter and stir well. The crumbs should be well coated. Now, grab a 9-inch springform pan. Press the mixture firmly into the bottom of the pan. Use the back of a measuring cup or your fingers to pack it tightly. This crust needs to be sturdy. Once done, place the pan in the fridge. Let it chill while you make the filling.

Making the Cream Cheese Filling

In a large mixing bowl, add 16 oz of softened cream cheese. Using an electric mixer, beat the cream cheese until smooth. It should be creamy and free of lumps. Then, mix in 1/2 cup of granulated sugar and 1 teaspoon of vanilla extract. Blend until well combined. In another bowl, pour 1 cup of heavy whipping cream and add 1/2 cup of powdered sugar. Beat this mixture until stiff peaks form. Now, gently fold the whipped cream into the cream cheese mixture. Be careful not to deflate the whipped cream. For added texture, fold in 10 crushed Oreos. This adds fun bits of chocolate.

Assembling and Chilling the Cheesecake

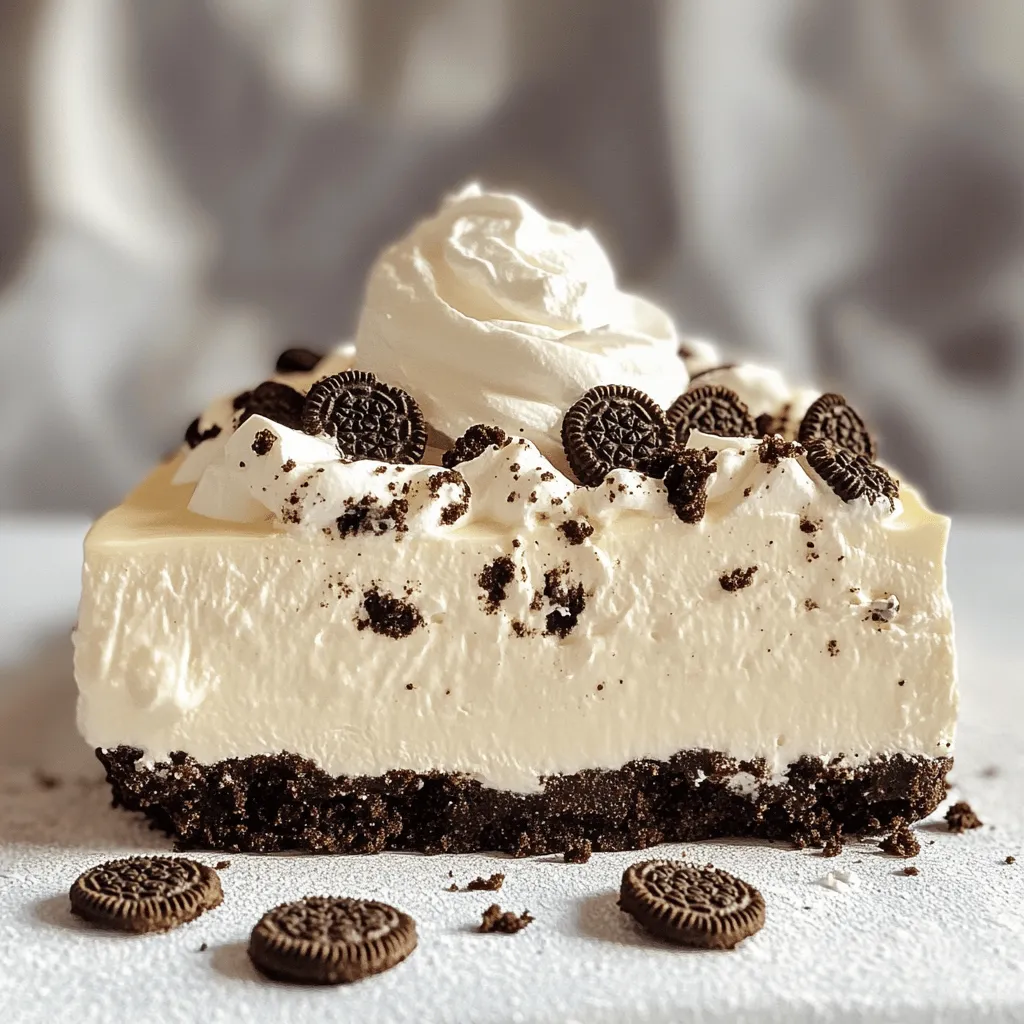
Now, it’s time to assemble your cheesecake. Pour the cream cheese filling over the prepared crust in the springform pan. Use a spatula to smooth the top. Once it looks good, cover the cheesecake with plastic wrap. Place it in the fridge for at least 4 hours, or better yet, overnight. This waiting time lets the cheesecake set perfectly. When you’re ready to serve, run a knife around the edge of the pan. This makes it easier to release the cheesecake. Top it with crushed Oreos for a nice finish. Enjoy your delicious no-bake Oreo cheesecake!

Tips & Tricks

Common Mistakes to Avoid

When making your no-bake Oreo cheesecake, avoid overmixing your filling. This can cause a runny texture. Make sure to fold the whipped cream gently. Also, don’t skip chilling time. If you do, the cheesecake may not set properly. Lastly, use room temperature cream cheese. Cold cream cheese can lead to lumps.

How to Achieve the Perfect Whipped Cream

To get great whipped cream, start with cold tools. Chill your mixing bowl and beaters before you begin. Use heavy whipping cream for the best results. Beat the cream until stiff peaks form. This means the cream holds its shape well. Don’t overbeat, or you’ll make butter! Fold the whipped cream into your filling softly to keep it airy.

Presentation Tips for Serving

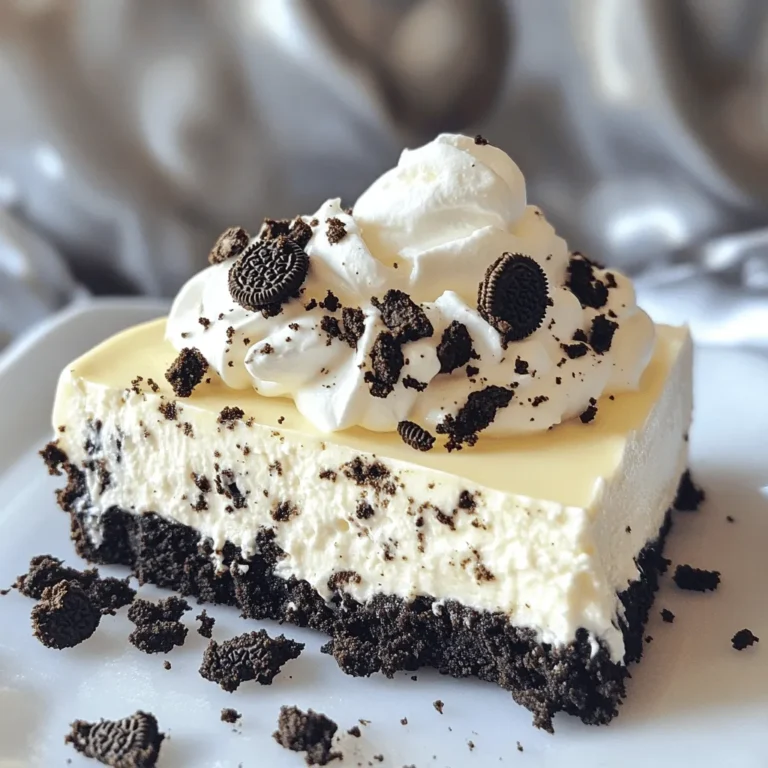
To serve your cheesecake beautifully, remove it from the springform pan carefully. Use a hot knife to slice clean edges. You can decorate the top with crushed Oreos or even chocolate shavings. Adding a dollop of whipped cream can elevate the look. A sprinkle of cocoa powder can also add a nice touch. For an extra treat, serve with fresh berries on the side.
Variations

Flavor Variations (Mint, Pumpkin, etc.)

You can easily change the flavor of your cheesecake. For a mint version, add 1 teaspoon of mint extract to the filling. Mix in crushed mint Oreos for extra fun. If you love pumpkin, replace some cream cheese with pumpkin puree. Add 1 teaspoon of pumpkin spice for a cozy taste. These flavors give your cheesecake a new twist.

Incorporating Fruit or Other Add-Ins

Adding fruit can make your cheesecake even better. Fresh berries, like strawberries or raspberries, work great. Fold in 1 cup of chopped fruit into the cream cheese mix. You can also add crushed cookies or candy bars for more crunch. Try mixing in mini chocolate chips for a sweet surprise. These add-ins create fun textures and tastes.

Gluten-Free or Dairy-Free Alternatives

If you need gluten-free options, use gluten-free Oreos for the crust. For a dairy-free version, swap cream cheese with vegan cream cheese. Coconut cream makes a great substitute for heavy cream. Just whip it like you would with dairy cream. These changes let anyone enjoy this tasty treat without worry.

Check out the Full Recipe for more details on making this delightful dessert.

Storage Info

Best Way to Store Leftovers

To keep your No-Bake Oreo Cheesecake fresh, cover it well. Use plastic wrap or a lid to seal it tightly. This prevents air from getting in and keeps moisture out. I recommend storing it in the refrigerator. It helps maintain the creamy texture and flavor.

How Long Does It Last?

Your cheesecake will stay good in the fridge for about 3 to 5 days. This is if it remains properly stored. After that, it may lose its freshness and taste a bit off. Trust me; you want to enjoy every bite of this treat while it’s still at its best.

Freezing Instructions for Long-Term Storage

If you want to save your cheesecake for later, you can freeze it! First, cut it into slices. Wrap each slice in plastic wrap, then place them in an airtight container. This protects the cheesecake from freezer burn. It can last up to 2 months in the freezer. When you’re ready to eat, let it thaw in the fridge overnight before serving. Enjoy this sweet treat again, even after some time! Don’t forget to check the Full Recipe for more details.

FAQs

Can I use different cookies for the crust?

Yes, you can use different cookies! For a unique twist, try using graham crackers or chocolate cookies. Each type gives a different flavor and texture. Just crush them the same way you do with Oreos. It’s fun to play with flavors. Experiment and find what you like best!

How do I know when the cheesecake is set?

You’ll know the cheesecake is set when it feels firm to the touch. It should not jiggle much in the center. Chill it for at least four hours. For best results, let it sit overnight. This helps the cheesecake to fully firm up and develop flavor.

Can I make this recipe ahead of time?

Absolutely! This cheesecake is perfect for making ahead of time. Prepare it a day or two before your event. Just store it in the fridge. This way, you save time on the day you serve it. Plus, the flavors will be even better after chilling! For the full recipe, check out the earlier sections.

You learned how to make a no-bake Oreo cheesecake. We discussed all the key ingredients, tools, and steps. I shared tips to avoid mistakes and make it look great. You can even try fun flavor twists and learn how to store leftovers.

Now, I hope you feel ready to create this delicious treat. With these steps, you can’t go wrong. Enjoy making and sharing your cheesecake with friends and family!
To make this easy treat, you need just a few key ingredients: - 24 Oreo cookies (plus extra for topping) - 1/4 cup unsalted butter, melted - 16 oz cream cheese, softened - 1/2 cup granulated sugar - 1 teaspoon vanilla extract - 1 cup heavy whipping cream - 1/2 cup powdered sugar These ingredients work together to create a rich and creamy cheesecake. The Oreos add a delightful crunch and flavor. You can play with the recipe by adding some optional ingredients: - Mint extract for a fresh twist - Cocoa powder for a deeper chocolate flavor - Crushed nuts for added texture These additions can change the flavor and keep things fun. Feel free to experiment! To make your cheesecake, you will need the following tools: - Food processor for crushing Oreos - Mixing bowls for combining ingredients - Electric mixer to whip the cream - 9-inch springform pan for easy removal Having these tools handy will make the process smooth and enjoyable. With the right setup, you will create a stunning no-bake cheesecake. To start, gather your 24 Oreo cookies. Place them in a food processor. Pulse the cookies until they turn into fine crumbs. Next, scoop the crumbs into a mixing bowl. Add 1/4 cup of melted butter and stir well. The crumbs should be well coated. Now, grab a 9-inch springform pan. Press the mixture firmly into the bottom of the pan. Use the back of a measuring cup or your fingers to pack it tightly. This crust needs to be sturdy. Once done, place the pan in the fridge. Let it chill while you make the filling. In a large mixing bowl, add 16 oz of softened cream cheese. Using an electric mixer, beat the cream cheese until smooth. It should be creamy and free of lumps. Then, mix in 1/2 cup of granulated sugar and 1 teaspoon of vanilla extract. Blend until well combined. In another bowl, pour 1 cup of heavy whipping cream and add 1/2 cup of powdered sugar. Beat this mixture until stiff peaks form. Now, gently fold the whipped cream into the cream cheese mixture. Be careful not to deflate the whipped cream. For added texture, fold in 10 crushed Oreos. This adds fun bits of chocolate. Now, it’s time to assemble your cheesecake. Pour the cream cheese filling over the prepared crust in the springform pan. Use a spatula to smooth the top. Once it looks good, cover the cheesecake with plastic wrap. Place it in the fridge for at least 4 hours, or better yet, overnight. This waiting time lets the cheesecake set perfectly. When you're ready to serve, run a knife around the edge of the pan. This makes it easier to release the cheesecake. Top it with crushed Oreos for a nice finish. Enjoy your delicious no-bake Oreo cheesecake! When making your no-bake Oreo cheesecake, avoid overmixing your filling. This can cause a runny texture. Make sure to fold the whipped cream gently. Also, don't skip chilling time. If you do, the cheesecake may not set properly. Lastly, use room temperature cream cheese. Cold cream cheese can lead to lumps. To get great whipped cream, start with cold tools. Chill your mixing bowl and beaters before you begin. Use heavy whipping cream for the best results. Beat the cream until stiff peaks form. This means the cream holds its shape well. Don't overbeat, or you'll make butter! Fold the whipped cream into your filling softly to keep it airy. To serve your cheesecake beautifully, remove it from the springform pan carefully. Use a hot knife to slice clean edges. You can decorate the top with crushed Oreos or even chocolate shavings. Adding a dollop of whipped cream can elevate the look. A sprinkle of cocoa powder can also add a nice touch. For an extra treat, serve with fresh berries on the side. {{image_2}} You can easily change the flavor of your cheesecake. For a mint version, add 1 teaspoon of mint extract to the filling. Mix in crushed mint Oreos for extra fun. If you love pumpkin, replace some cream cheese with pumpkin puree. Add 1 teaspoon of pumpkin spice for a cozy taste. These flavors give your cheesecake a new twist. Adding fruit can make your cheesecake even better. Fresh berries, like strawberries or raspberries, work great. Fold in 1 cup of chopped fruit into the cream cheese mix. You can also add crushed cookies or candy bars for more crunch. Try mixing in mini chocolate chips for a sweet surprise. These add-ins create fun textures and tastes. If you need gluten-free options, use gluten-free Oreos for the crust. For a dairy-free version, swap cream cheese with vegan cream cheese. Coconut cream makes a great substitute for heavy cream. Just whip it like you would with dairy cream. These changes let anyone enjoy this tasty treat without worry. Check out the Full Recipe for more details on making this delightful dessert. To keep your No-Bake Oreo Cheesecake fresh, cover it well. Use plastic wrap or a lid to seal it tightly. This prevents air from getting in and keeps moisture out. I recommend storing it in the refrigerator. It helps maintain the creamy texture and flavor. Your cheesecake will stay good in the fridge for about 3 to 5 days. This is if it remains properly stored. After that, it may lose its freshness and taste a bit off. Trust me; you want to enjoy every bite of this treat while it's still at its best. If you want to save your cheesecake for later, you can freeze it! First, cut it into slices. Wrap each slice in plastic wrap, then place them in an airtight container. This protects the cheesecake from freezer burn. It can last up to 2 months in the freezer. When you're ready to eat, let it thaw in the fridge overnight before serving. Enjoy this sweet treat again, even after some time! Don't forget to check the Full Recipe for more details. Yes, you can use different cookies! For a unique twist, try using graham crackers or chocolate cookies. Each type gives a different flavor and texture. Just crush them the same way you do with Oreos. It’s fun to play with flavors. Experiment and find what you like best! You’ll know the cheesecake is set when it feels firm to the touch. It should not jiggle much in the center. Chill it for at least four hours. For best results, let it sit overnight. This helps the cheesecake to fully firm up and develop flavor. Absolutely! This cheesecake is perfect for making ahead of time. Prepare it a day or two before your event. Just store it in the fridge. This way, you save time on the day you serve it. Plus, the flavors will be even better after chilling! For the full recipe, check out the earlier sections. You learned how to make a no-bake Oreo cheesecake. We discussed all the key ingredients, tools, and steps. I shared tips to avoid mistakes and make it look great. You can even try fun flavor twists and learn how to store leftovers. Now, I hope you feel ready to create this delicious treat. With these steps, you can't go wrong. Enjoy making and sharing your cheesecake with friends and family!

No-Bake Oreo Cheesecake

Indulge in the ultimate dessert with this Decadent No-Bake Oreo Cheesecake! Perfect for any occasion, this quick and easy recipe features a rich cream cheese filling and a crunchy Oreo crust. With simple ingredients and straightforward steps, you can whip up this delightful treat in just 30 minutes. Ready to impress your guests? Click through to explore the full recipe and discover a delicious way to satisfy your sweet tooth!

Ingredients
  

24 Oreo cookies (plus extra for topping)

1/4 cup unsalted butter, melted

16 oz cream cheese, softened

1/2 cup granulated sugar

1 teaspoon vanilla extract

1 cup heavy whipping cream

1/2 cup powdered sugar

Instructions
 

Prepare the Crust: In a food processor, crush the 24 Oreo cookies into fine crumbs. In a mixing bowl, combine the crumbs with melted butter and stir until well coated.

    Form the Base: Press the mixture into the bottom of a 9-inch springform pan evenly to form the crust. Use the back of a measuring cup or your fingers to pack it tightly. Place the crust in the refrigerator to set while preparing the filling.

      Make the Filling: In a large mixing bowl, use an electric mixer to beat the softened cream cheese until smooth and creamy. Add granulated sugar and vanilla extract, and mix until fully combined.

        Whip the Cream: In another bowl, whip the heavy cream and powdered sugar together until stiff peaks form. Gently fold the whipped cream into the cream cheese mixture until well combined, being careful not to deflate the whipped cream.

          Combine the Mixtures: Fold in 10 crushed Oreos into the cream cheese filling for added texture and flavor.

            Assemble the Cheesecake: Pour the cream cheese filling over the prepared crust in the springform pan, smoothing the top with a spatula.

              Chill: Cover the cheesecake with plastic wrap or a lid and refrigerate for at least 4 hours or overnight until fully set.

                Serve: Once set, run a knife around the edge of the springform pan before releasing it. Garnish the top with crushed Oreos and maybe even some whipped cream for an elegant touch.

                  Prep Time: 30 minutes | Total Time: 4 hours | Servings: 8

                    Leave a Comment

                    Recipe Rating