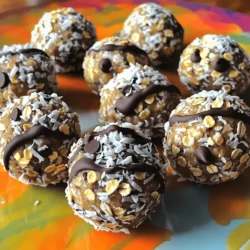
Looking for a quick, tasty snack that satisfies your sweet tooth? These Peanut Butter Bliss Balls are your answer! Packed with flavor and easy to make, they’re perfect for any time of day. I’ll guide you through all the steps, share tips for success, and even show you how to personalize them. Get ready to whip up this simple and fun treat that everyone will love!
Ingredients
Complete List of Ingredients
To make Peanut Butter Bliss Balls, you will need the following ingredients:
– 1 cup natural peanut butter (creamy or crunchy)
– 1/2 cup rolled oats
– 1/4 cup honey or maple syrup
– 1/4 cup ground flaxseed
– 1/2 cup dark chocolate chips or cacao nibs
– 1/4 teaspoon sea salt
– 1 teaspoon vanilla extract
– Optional: 1/4 cup shredded coconut for rolling
These ingredients come together to create a snack that is not only tasty but also satisfying.
Optional Add-Ins for Enhanced Flavor
You can add fun flavors to your bliss balls. Consider these options:
– Chopped nuts: walnuts or almonds add crunch.
– Dried fruits: raisins or cranberries bring sweetness.
– Spices: a dash of cinnamon or nutmeg adds warmth.
Feel free to mix and match these add-ins based on your taste.
Nutritional Benefits of Key Ingredients
Each ingredient has its own health perks:
– Peanut butter: Provides protein and healthy fats for energy.
– Rolled oats: They add fiber, which helps digestion.
– Flaxseed: This superfood is rich in omega-3 fatty acids.
– Dark chocolate: It offers antioxidants and improves mood.
Using these ingredients makes your bliss balls not only delicious but also nutritious.
Step-by-Step Instructions
Preparation Steps for Peanut Butter Bliss Balls
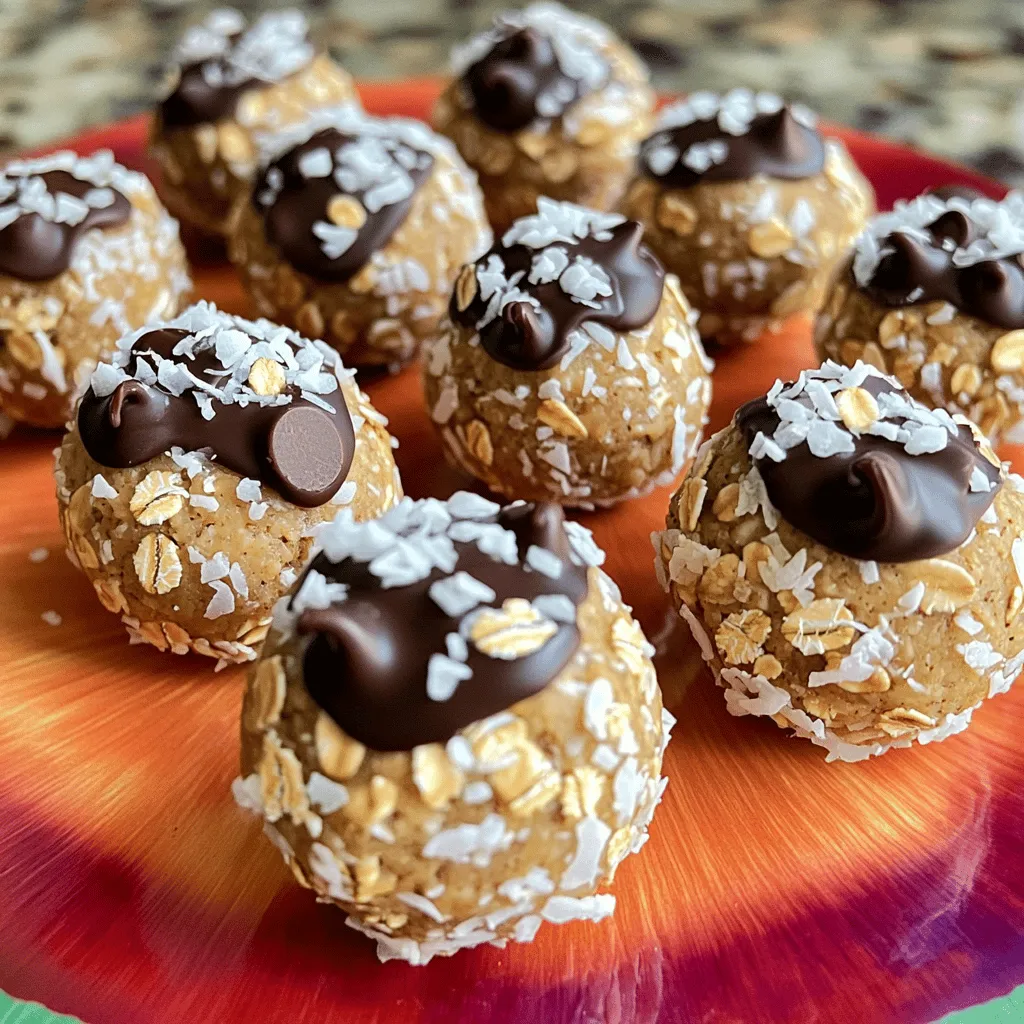
To make these tasty Peanut Butter Bliss Balls, start with simple steps. First, grab a large mixing bowl. Add 1 cup of natural peanut butter and 1/4 cup of honey or maple syrup. Mix these until they blend well. Next, add 1/2 cup of rolled oats, 1/4 cup of ground flaxseed, and 1/4 teaspoon of sea salt. Don’t forget 1 teaspoon of vanilla extract! Stir everything until it forms a thick mix. Now, gently fold in 1/2 cup of dark chocolate chips or cacao nibs. Using your hands, scoop out about 1 tablespoon of this mix and roll it into a ball. Do this until you use all the mix. If you like, roll each ball in shredded coconut for extra flavor. Place them on a parchment-lined baking sheet or plate. Refrigerate these bliss balls for at least 30 minutes. This helps the flavors mix and the texture firm up.
Tips for Achieving the Perfect Texture
For the best texture, don’t rush the mixing. Make sure every ingredient blends well. If the mix feels too sticky, add a bit more rolled oats. If it’s too dry, a splash of honey or maple syrup can help. Properly chilling the balls is key. This step helps them hold their shape when you serve them. Always roll the balls tightly to keep them from falling apart.
Visual Aids: Video Demonstrations and Images
I find that watching someone make these bliss balls can be very helpful. Look for videos online that show the process. Images can guide you, too. They help you see what each step should look like. Having these visuals can make cooking more fun and less stressful. Enjoy your cooking journey!
Tips & Tricks
How to Make Peanut Butter Bliss Balls Easier
Making Peanut Butter Bliss Balls is simple. Use a large bowl to mix all your ingredients. To save time, measure everything first. You can even use a cookie scoop to shape the balls. This tool helps keep them uniform in size. If the mixture feels sticky, wet your hands a bit. This makes rolling easier.
Perfecting the Flavor Profile
For the best taste, choose natural peanut butter. The creaminess adds a rich texture. If you like a crunch, go for crunchy peanut butter. Adding a pinch of sea salt enhances the sweetness. Try different sweeteners too. Honey brings a floral note, while maple syrup adds a warm flavor. You can also add spices like cinnamon for a twist.
Common Mistakes to Avoid
Avoid using old ingredients. Fresh oats and nut butter make a big difference. Don’t skip the refrigeration step. Chilling helps the balls firm up and taste better. If they fall apart, your mix may be too dry. Add a bit more peanut butter or honey. Lastly, don’t rush the rolling process. Take your time to ensure each ball is well-formed.
These tips will help you create Peanut Butter Bliss Balls that are easy to make and packed with flavor.
Variations
Chocolate Peanut Butter Bliss Balls Recipe
To make chocolate peanut butter bliss balls, simply add cocoa powder. Use 1/4 cup of cocoa powder in place of some oats. This gives a rich chocolate flavor. You can also mix in dark chocolate chips. They add sweetness and texture.Roll them into balls and enjoy a chocolate treat!
Healthy Alternatives: Nut-Free and Vegan Options
For nut-free bliss balls, use sunbutter or soy nut butter. Both are great substitutes. You can keep the rest of the recipe the same. If you want vegan options, swap honey for maple syrup. This keeps it plant-based and sweet. Just make sure to check the chocolate chips. Some may not be dairy-free, so look for vegan options!
Seasonal Variations: Adding Flavors for Different Occasions
You can change flavors based on the season. In fall, add pumpkin spice for a warm taste. Use 1 teaspoon of pumpkin spice in the mix. For summer, try adding dried fruit, like cranberries or apricots. They give a fruity burst and keep things fresh. Experiment with different spices and ingredients to fit your mood or holiday.
Storage Info
How to Store Peanut Butter Bliss Balls for Freshness
To keep your Peanut Butter Bliss Balls fresh, store them in an airtight container. Place a piece of parchment paper between layers. This helps prevent them from sticking together. Store the container in the fridge. This keeps the bliss balls cool and tasty. They will stay fresh for about one week.
Freezing Bliss Balls: Best Practices
You can also freeze these bliss balls for later. First, arrange them in a single layer on a baking sheet. Freeze them for an hour until they are firm. Then, transfer the frozen balls to an airtight container or freezer bag. Label the container with the date. Frozen bliss balls can last up to three months. When you want to enjoy them, just take out how many you need and let them thaw in the fridge.
Shelf Life and Use It or Lose It Tips
Peanut Butter Bliss Balls taste best when fresh, but they last a while. In the fridge, they stay good for about a week. If you see any signs of spoilage, like a strange smell or mold, throw them away. To enjoy them at their best, eat them within one week. You can also use the freezing method to keep them for longer. This way, you can have a tasty snack ready whenever you want!
FAQs
Can I use different nut butters for this recipe?
Yes, you can use other nut butters. Almond butter or cashew butter work well. Each nut butter brings its own flavor. Peanuts have a strong taste, while almonds are milder. Use what you like best! Just keep the same amount as the peanut butter in the recipe. This will help keep the texture right.
How do I make Peanut Butter Bliss Balls gluten-free?
To make these bliss balls gluten-free, choose gluten-free oats. Most rolled oats are fine, but check the label. This small change makes a big difference. Also, ensure that any sweeteners you use are gluten-free. Honey and maple syrup are good options. You can enjoy these treats without worry!
What is the best way to serve these snacks?
These bliss balls are great for sharing. You can serve them on a colorful platter. Try adding a drizzle of melted chocolate for flair. They also make a perfect post-workout snack. You can enjoy them on the go or at home. For extra fun, place them in small cups or liners. Don’t forget to enjoy them with friends!
This post covered how to make delicious Peanut Butter Bliss Balls. You learned about the ingredients, including add-ins and their health benefits. I shared step-by-step instructions, tips for texture, and lots of variations for everyone. Remember to store your bliss balls properly for the best taste. Don’t hesitate to experiment with different flavors or nut butters. Enjoy your tasty snacks and make them your own!